Home

Recent Posts

A Guide to Choosing the Best Tap and Die Sets


Best Tap and Die Sets

Having the best tap and die sets is helpful and beneficial to people working in the repair or garage businesses. Having this set will also be a good inclusion to your home tool kit. It is important that you know which one to buy, even if you’re just using it for household repairs. It has to possess outstanding quality and should be built to endure a long period of use.

In this article, we will discuss everything you need to know about tap and die sets. You will be informed of what it is and its advantages. We will also provide you with some of its types and the essential factors to look for. With so many models in the market today, how do you choose the best one? Don’t worry; we have pulled together the five best tap-and-die sets, along with their features, pros, and cons.


What is a Tap and Die Set?

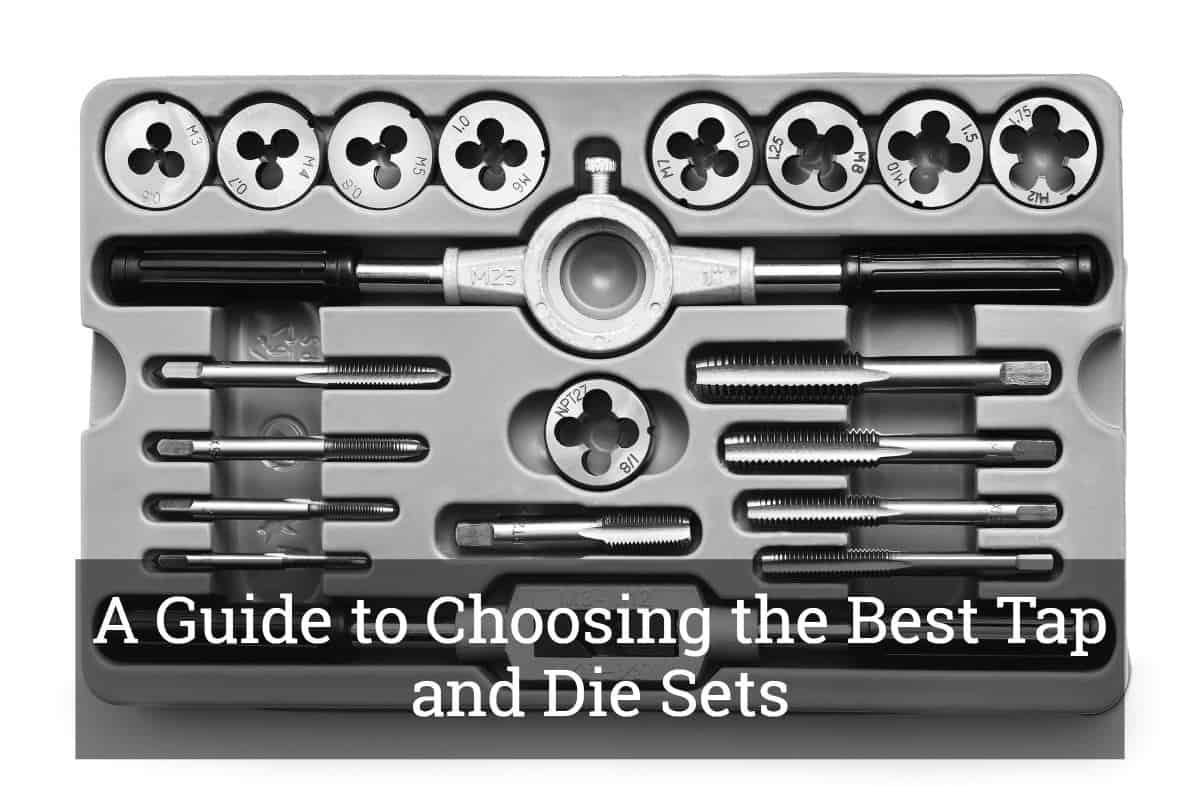
Before we move on with the discussions, let us first define what a tap-and-die set is. Basically, taps and dies are tools that you use to chop thread around a hole and into a rod. We will be having a more in-depth discussion about this below. This kit is very important, especially for DIY enthusiasts. It’s more likely that you won’t realize how significant they are until you own one.

To further discuss, taps are used for cutting threads on the holes wherein threaded fasteners are positioned. On the other hand, dies are used for cutting threads on rods made of steel. They are considered as an extra tool for creating new threads upon newly formed bolts. In addition, dies are used to repair existing threads on dilapidated screws or bolts.

The best set should come with assorted taps and dies, allowing you to use different bolt sizes easily. One more thing: the set should be able to cover both SAE and metric sizes for versatility. It is also very important to buy the correct set for your needs. Choosing the best tap and die sets will prevent you from making an expensive mistake.


Types of Tap and Die Sets

After discussing the top five picks for the best tap and die sets, we will talk about some of their types. It is also important to read this section as it will help you narrow down your choices. In fact, you have to know which type you need so you can make a better decision.

  • Taper Tap: This type of tap is usually utilized for initiating a cut or thread. They are generally tapered, coming from the bottom up to the sixth thread on the top.
  • Second Tap: These are generally used to deepen the threads cut by the taper tap. The angles are somehow similar to the taper tap, but only until the sixth thread.
  • Plug Tap: These are very different from the taper and second tap. Plug taps are primarily used for producing neat outcomes at the ends of the holes.
  • Circular Dies – The purpose of circular dies is to produce complete threads in a single operation. Threads are tapered only on a side to allow comfortable initiations.
  • Two-piece Adjustable Dies – These are regularly used for making longer threads. The procedure involves numerous cutting operations, which require the die to be closed after every thread.

Essential Factors to Consider in Choosing the Best Tap and Die Set

AD

In this section, we will discuss the important factors to consider in choosing the best tap and die sets. This section is very significant, as it will also be a defining factor in order for you to choose wisely. We hope you can make a better decision if you are having a difficult time picking the right one.

  • Build Quality: This might be the most important factor you have to consider in choosing the right tap and die set. As there is a correlation between the price and quality, you have to ensure that the build quality is excellent. It is advisable not to buy cheaper ones as they are guaranteed to not last longer than expensive ones.
  • Type of Steel: Build quality is directly connected to the type of steel used in crafting the tool. Low-quality steel will not be as sturdy as the ones constructed by a master craftsman.
  • Handle: If you use a handle that is awkward and uncomfortable, there is a possibility of you making mistakes. It is important that the one you buy is also very easy to use. Exerting too much force will result in stripping threads and having your taps and dies broken.
  • Size: The size of taps and dies is also very important. These are measured as SAE and metric sizes. Ideally, the perfect tap-and-die set should cover both sizes for versatility.
  • Case: Strong plastic storage cases will make sure that the taps, dies, and all other components are safely kept in place. You will save a lot of time if you have your set organized in a sturdy case.

Top Five Recommendations for the Best Tap and Die Sets

Product (Amazon Links)Brand  

IRWIN HANSON Machine Screw/Fractional/Metric Tap and Hex Die and Drill Bit Deluxe Set, 117 Piece 26377

IRWIN

Review

GearWrench 82812 114 Piece Large Combination Tap and Die Set

GearWrench

Review

TEKTON 7561 Tap and Die Set, Metric, 45-Piece

TEKTON

Review

Craftsman 75 pc Inch & Metric tap and die Set

Craftsman

Review

Neiko 00908A SAE and Metric Tap and Hexagon Die Set, Alloy Steel | 76-Piece Set

Neiko

Review

In this section, we will discuss the top five choices for the best tap and die sets. Along with their key features, advantages, and disadvantages, a detailed review will be provided for every product. Be sure to pay attention, as we will be helping you narrow down your choices. We hope you can make a more meaningful decision if you are having a difficult time choosing.


1. IRWIN HANSON Machine Screw/Fractional/Metric Tap and Hex Die and Drill Bit Deluxe Set, 117 Piece 26377

AD

The Irwin Hanson Deluxe Set has almost every drill bit, hex die, and tap that every user will need. The product can be used in every automotive repair work, as well as maintenance. This set offers tools that are specifically crafted for hand-threading various kinds of materials. They are crafted with high-carbon steel, and they offer excellent accuracy even professionals rely on.

For its specifications, the die type is a hexagon, and the tap type is a plug. The Irwin Hanson Deluxe is a 117-piece set that is perfectly organized in a rugged plastic storage case. The deluxe set includes a machine screw, metric and fractional taps and dies, screw extractors, and high-speed steel drill bits. Having a set as complete as this, you will never have to worry about not getting your job done.

Pros:

  • Features a massive 117-piece tap-and-die set
  • Includes a machine screw, fractional and metric taps and dies, screw extractors, and steel drill bits
  • Made of high-carbon steel
  • Organized in a rugged plastic storage case

Cons:

  • There were missing pieces upon delivery, according to some buyers
  • Quality is not as good if made with superior-grade steel

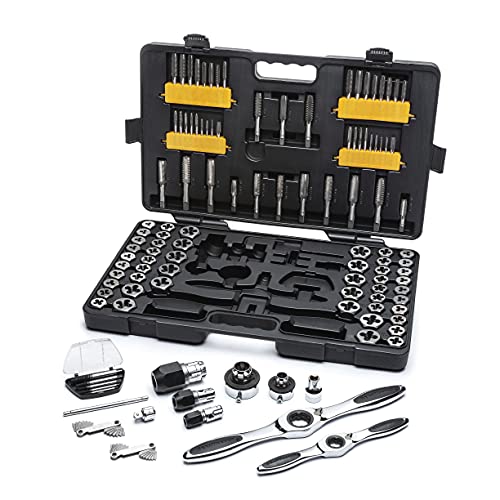
2. GearWrench 82812 114 Piece Large Combination Tap and Die Set

AD

The GearWrench Set has 114 pieces of tools and is ideally used for confined and tight areas. It also features the Twist Lock Guide System that ensures the dies stay at the center, especially while the threads are cut. This set offers a ratcheting T-handle system that allows a 5-degree ratcheting arc. To add, the handle system has a reversible lever that allows changes from reverse to forward and vice versa.

Included in the box are 48 taps and 48 dies, along with an SAE and metric thread gauge. Also included are 82800 medium and large ratcheting T wrench and an 82801 large locking tap adapter. It has an 82802 large hex die adapter and a small and medium-sized tap adapter. To add, included are male and female extension adapters and a sliding T for adapters.

Pros:

  • Features a comprehensive tap and die set
  • Material is made of quality carbon tool steel
  • Sturdy and well designed
  • Includes 114 pieces of taps and dies, along with a T-handle system

Cons:

  • Some users had issues regarding slight damages of components upon delivery
  • The case does not hold the dies in its organized position

3. TEKTON 7561 Tap and Die Set, Metric, 45-Piece

AD

The Tekton brand is among the most reliable names when it comes to industrial tools. Needless to say, the 7561 is one of their most reliable and popular products. The components are made of hardened tungsten alloy that can cut new material or get rid of damaged threads. This is perfect if you wish to invest on something durable, sturdy and definitely for long term use.

For its specifications, this box set includes 20 taps and 20 dies, a screwdriver, and a quarter inch T-handle wrench. Also, included in the set is an a-quarter-to-an-inch T-handle wrench and a 2-inch T-handle die stock. Lastly, this comes with a storage case and a 1 to half an inch die stock adapter. You just need the proper technique and the right lubricant, so you can get your job easily done.

Pros:

  • Material is made of hardened tungsten alloy
  • Durable, sturdy and long lasting
  • Storage case keeps your tools neat and organized
  • Perfect for hand threading applications

Cons:

  • The die stock may not be of high quality
  • Some users had issues about the set’s overall poor quality

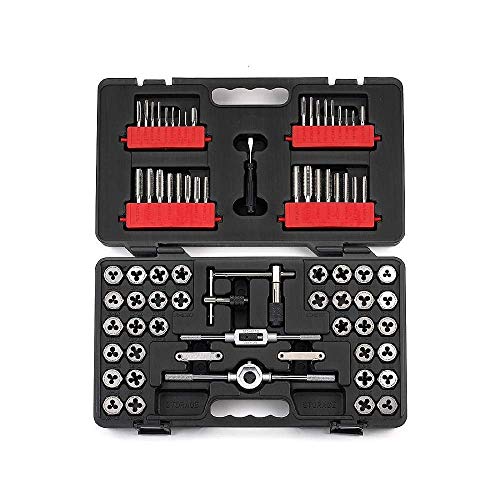
4. Craftsman 75 pc Inch & Metric tap and die Set

AD

The Craftsman is another well-known brand when it comes to industrial-grade tools. This is very popular as it combines both metric and SAE sizes in one storage container. This set will help you get rid of damaged nuts, threads, and bolts. To add, this tap-and-die set will make it very easy for you to remove imperfections in the threads. The set includes 7 drive tools, 17 SAE plug taps, and hex dies, and 17 metric plug taps and hex dies.

The material is made of hardened and polished carbon steel, which makes chip removal very easy for you. In addition, the hex-shaped dies allow the use of wrenches, sockets, and die stocks. This set is perfect for household jobs but will not last long for big product plant use. It may not be for big-time use, but it will surely get the job done from light to medium usage.

Pros:

  • Includes 75 pieces of taps and dies
  • Material is made from hardened and polished carbon steel
  • Hex-shaped dies allow the usage of wrenches, sockets, and die stocks
  • The set includes both SAE and metric sizes

Cons:

  • There are warranty issues, according to some buyers
  • Not meant for big production plant jobs

5. Neiko 00908A SAE and Metric Tap and Hexagon Die Set, Alloy Steel | 76-Piece Set

AD

Inside the Neiko tap and die set, you will find 20 assorted taps and dies used for cutting threads. An adjustable T-handle wrench can also be found inside, together with an adapter, a stock handle and a screwdriver. The components are made of quality alloy steel that makes it brittle-resistant. To add, with its coating, the taps and dies are guaranteed stronger than the usual steel crafting.

The sizes are already imprinted on the taps and dies that allow you to organize and select with ease. Holding these tools is a sturdy and strong case made from hard plastic. In addition, thread cleaning is easier because of the professional-grade tap and die set. Like the product above, this may not be suitable for heavy use. This is perfect for household and casual fixing jobs.

Pros:

  • Inexpensive
  • Made of quality alloy steel
  • SAE and metric sizes are imprinted on the taps and dies
  • Perfect for casual fixing jobs and home use

Cons:

  • Not suitable for heavy usage
  • Users had issues about its poor quality

Conclusion

We know it’s difficult to choose the best tap and die sets, but we hope this guide can help you. You need to review each product’s features, pros, and cons so you can narrow down your choices. If you have the best tap and die set, it is guaranteed that you can get your job done easily.

Looking for other similar products that you can buy? Click here to learn more about other options that are available in the market right now.

How To keep Mice Away Of Your Car Engine?


Maintaining your car is the topmost priority of any car owner. You should always keep your car maintenance tips book handy and follow them with utmost care. This will not only make your car look brand new but also increase its life span.

A common problem we all face in every arena is the problem of rodents. They destroy our house, basement, and even our cars. Many people have reported the problem of mice in their car engines which have caused mayhem by destroying vital parts of an engine.


How do Mice Get in Cars?

When you feel secure after locking your car in the parking lot and going off to work, that’s the time your car is unsafe and can be easily attacked by rodents. They have a way of getting into any type of vehicles due to their small size without setting off any alarm. The common entry points are:

  • Engine: they can crawl up in tiny spaces of the engine and enter the car. They also chew the wires and other parts, causing considerable damage.
  • Vents: rodents have easy access to the vents of the car and squeeze right through them. They travel from vents to other parts destroying each of them and also leaving that dirty smell.
  • Holes around cables: as there are tiny gaps which are present in the cables which seem harmless as they are so small, this isn’t a problem for a mouse as they can easily get around them and also chew the cables.
  • Pedal shafts: there are small shafts enclosed within the pedals for easy movement. This is an easily accessible entry point for a mouse and can be a nuisance to adjoining parts of the car.
  • Steering columns: there is a little space between the steering column which provides a grip for our hands on the steering wheel and it is also a great entry point for a mouse. It then attacks the seats, dashboard, gear etc.
  • Windows: if you have a habit of leaving your windows cracked, then your car is a hot target for mice to destroy. Never leave any space open in your car even the tiny ones to provide access to mice.

How to Prevent Mice from Entering your Car?

You don’t need to get an extensive treatment to keep away mice and you can do this very easily by following some tips regularly to stop this infestation once and for all.

1. Cleanliness

Cleanliness

The most important and easy tip is to keep your car clean at all times. Many people have the habit of loading their car with junk such as tissues, wrappers, cups, takeaway bags, etc. These things have some food residue in them, which is like a magnet to a mouse. Always dispose of the used wrappers and materials not only to keep away the mice but also to maintain good personal hygiene.


2. Avoid Moisture

Avoid Moisture

Mice are most attracted to moist areas like the engine and can completely destroy it once they are in. Moisture can be caused by a leak in the heater, damp clothing, and blocked pollen. Regularly inspect your engine for these problems and take action right away.


3. Use Copper Wire Screens

Use Copper Wire Screens

Mice and rats are not big fans of the taste of copper and are repelled by it. The most easily accessible openings of the engine compartment are the air ventilation system and the evaporation drain tubes. Cover these entry points with copper screens as mice will never gnaw on copper.

You should take the help of a mechanic before sealing off the openings of the engine compartment.


4. Use Rodent Repellent Tactics

Use Rodent Repellent Tactics

If your car has been infested by rodents, then keep rat poison in your car overnight to help get rid of it. You can get this poison at any market or you can make it at home. Homemade mouse poison works as effectively as market-bought one and is relatively easy to make.

You can also use peppermint oil as mice despise the smell of that. One of the most effective methods is to use ultrasonic devices. Install two or three devices near your car and, most importantly, in the engine bay itself. You can also make a pouch filled with five to ten mothballs and keep it in the engine bay in a place which is relatively cooled.


5. Keep the Hood Open when Parked

Keep the Hood Open when Parked

This only works if you have parked in an area where the engine can receive sunlight. Don’t keep the hood open if you have parked in a dark basement, as a dark, dry, and warm place is attractive to mice and rats. Mice won’t attack your car where the light is shining brightly on your car as they usually repel light.

The damage caused by mice and rats may seem minor at first but once they start to destroy the electrical systems and other important mechanical parts, you will have a long bill due in order to replace it. A car engine is a hot target for mice to enter and feed, as there are many entry points available in it.

An Engine consists of very important components of a car so you should take utmost care of the engine and seal these entry points as soon as possible. Just follow the above-mentioned easy tips, and you can keep these rodents at bay.

How To Remove Acrylic Paint From Your Car Surface?


how to remove acrylic paint

If you are looking for a change of car color and if you find it difficult to remove the Acrylic paint from the car surface, this DIY guide is for you to understand how to remove Acrylic paint from car surface.

Most of us have a strong feeling that it is practically impossible to remove acrylic paints from cars all by ourselves, which is not exactly true. Without much effort, it can be done by using cleaners or solvents. We will dig deep into it. Acrylic car paints, as you know, come in Lacquer, Enamel and Urethane variants.

  • You can choose the variants according to the look and style you want for your car.
  • Acrylic lacquers are easy to paint and are inexpensive. It gives a nice glossy finish to your car.
  • Acrylic enamel paint, on the other hand, forms a hard shell when it dries and often lasts for longer periods. This type of paint is applied by professionals only.
  • Acrylic urethane paint, the third type and the newest one, has both the properties of Lacquer and Enamel. It’s easy to apply and forms a thick enamel layer on drying. Acrylic paints can be applied in single coat systems or multi-stage systems.

The most commonly used one is the two-stage system with the Acrylic paint layer and the clear coat over it to get a waxy finish and to protect against any damage by exposure to contaminants. When you do touch-up paint with Acrylics, you need to choose the best clear coats for your car along with it to get that glossy classy finish for your car.

Acrylic paints are made up of color pigments, which are suspended in acrylic polymer emulsions, and they are fast drying paints. Acrylic paints are water soluble when they are wet, but they become water resistant when they dry. That’s when the Solvents come into play to dissolve the pigments.

acrylic paint in car

Photo Credit: http://adobijank.blogspot.in/2011/11/i-finally-found-car-at-sema-with-see.html

When you want to go for a repainting when your car looks dingy, the very thought that “Acrylic paints cannot be removed” by yourself should not hold you back. Yes, the Acrylic paint can be easily removed by following the steps mentioned in the guide.

Making it short, Acrylic paints, on drying, becomes water insoluble and so it cannot be removed from your car surface by using water. Obviously, a solvent, which is capable of dissolving the acrylic resin, should be used for taking the paint layer off your car surface.

There are a lot of solvents available, which can dissolve the Acrylic paints, and they are called Cleaners. Cleaners will do the job for us. Let’s now follow these instructions step by step.


Procedure to Remove Acrylic Paints from your Car Surface

Procedure to Remove Acrylic Paints from your Car Surface

Materials Required

Steps by Step Guidance

To start removing the Acrylic paint from your car, select a small area of your car and then:

  • Scrape off Acrylic paint: By using a small putty knife or sandpaper, carefully scrape off most of the acrylic paint of a particular area of your car’s surface without damaging the metal.
  • Soak the Acrylic paint with Rubbing Alcohol: Rubbing alcohol is one of the readily available and cheap solvents that can be efficiently used to remove Acrylic paint from your car. Rubbing Alcohol is 90% to 70% Isopropyl Alcohol, which has a strong action on the Acrylic binder, thereby loosening the paint film. Soak the surface of the Acrylic paint with Rubbing Alcohol till the solvent becomes completely saturated. Leave the paint as such for few hours for Alcohol to dissolve the paint.
  • Rub with painting Brush: After a few hours, slowly rub onto the surface of the Acrylic paint with a painting brush, and you can see that the paint gets dissolved in the solvent and slowly comes off the surface along with the solvent.
  • Wipe with Clean fabric: Remove the Acrylic paint by slowly wiping off the surface using a clean fabric. You can even immerse the fabric in soapy solutions to make the surface look clean and to remove the Rubbing Alcohol content completely.

Repeat the above steps till you remove the paint from the whole car surface.

That’s it. Next time you want to remove acrylic paint from your car’s surface, don’t worry; you have an easy option. This is less time-consuming and does not require much physical effort. Neither the materials used are very rare or expensive. The steps to be followed are also simple. So why don’t you try it out? The only thing to keep in mind is that we should choose the solvent carefully.


Solvents for Cleaning the Acrylic Paint

Solvents for Cleaning the Acrylic Paint

We used Isopropyl Alcohol as the solvent in above steps, but there are other Solvents also, which can help us remove Acrylic paints. Let’s talk about those Cleaners.

  • Ammonia Solution: Ammonia solution is also effective in removing Acrylic paints from your cars. It helps in balancing Acrylic emulsions by raising its PH.
  • Lacquer Thinner: This is another strong solvent used to remove Acrylic paints. Lacquer Thinner is not advised for beginners because it contains Methanol and toluene, which are highly poisonous in nature.
  • Acetone: Acetone solvents can also be used as a substitute for Rubbing Alcohol. But it’s rather powerful as a solvent and highly flammable. So we should be careful while using Acetone solution for removing your Acrylic car paints.

Considerations for Risk and Safety

acrylic paint in car

Photo Credit: http://www.wisegeek.org/what-are-the-different-types-of-auto-paint.htm

Imagine the fact that these solvents are used to dissolve the thick coat of Acrylic paints and remove the layer of your car surface. The Solvents, obviously, should be powerful to do that role. Therefore, when you are dealing with Chemicals, extreme care should be taken to be on the safer side. Any negligence can cause serious problems, and the risk involved in the process is high.

Most of the solvents mentioned above are moderate to highly flammable in nature. So avoid using these solvents anywhere near flame or heating elements. Even the fumes of the solvents are less dense and can probably travel long distances to an ignition source, which can cause serious disasters.

Most of the solvents are toxic in nature. Be careful and strictly avoid inhaling and ingestion of these solvents even by accident. Store these solvents safely and away from children’s reach. Always use open space with proper ventilation when using these solvents to remove the Acrylic paint. Any direct contact with your skin and the solvents should be completely avoided, as they will penetrate and get absorbed, which can cause serious health problems or even death.

Next time you have an idea to refinish your car paint, don’t hesitate; have patience and try out these simple steps. Don’t be in a hurry to complete the process, which can reduce the efficiency of the entire process. In case you find it difficult to do it yourself always approach a professional to do it for you.

These steps are so simple and found to be highly effective. Try doing this in a small area of your car and see the result, then extend it to other areas of your car. Please share your feedback after trying these simple steps.

What Does A Car Amplifier Really Do?


Car Amplifier

Car stereos have inbuilt amplifiers, and their function is to boost the sound signals from various audio sources such as CD players and radios – for powering the speakers. Factory-mounted amplifiers are high-quality, but there are times when an external amplifier unit is needed.

This is because dashboards have limited space, so only small-sized units are mounted; they offer around 10 watts for every station. Stereo systems are upgraded by installing car amplifiers and subwoofers to produce clearer and louder sounds.

We have seen that the function of a car amplifier is to heighten the strength of the sound signals from audio connections by powering the speakers. If you wish to purchase the systems, you should visit electronic stores or audio centers.

You can also buy them online or in the marketplaces. They are available in various configurations: mono-channel varieties are sufficient for subwoofers or single speakers; the five-channel range caters to the advanced models.

Amplifiers are a technological gear, and they can be cumbersome to sort through its various specifications. Additionally, mounting an external amp is not an easy task; incorrect wiring can cause damage to the other car parts or result in overloading the current power units.

However, they serve a variety of purposes and are discussed in the following aspects.


1. Features

Old car stereos may not have as advanced features as the modern models. In such cases, mounting an amplifier with signal processors and equalizers would offset the need to fix a new one. It can prove to be a cost-saving exercise.


2. Increase Volume

Blaring engines, loud air conditioning sounds, and honking traffic are factors that could result in the audio not being heard effectively. Here, the installation of a car amplifier would be helpful to amplify the stereo volumes.


3. Enhancing Sound Output

car amplifiers

Photo Credit: http://www.wirerealm.com/guides/top-10-best-car-amplifiers

Setting up an amplifier is beneficial for improving the sound emitted by your car’s music system. These kinds of equipment use many output channels with a number of watts differing according to brand choice. If there is any interference from electrical parts, it could result in distortion and unnecessary sounds; external amps are effective for overcoming such problems. Moreover, to enhance the quality of sound produced from the stereos, the bass should be increased; the amps are also useful for these purposes.

You must also try to look for a high-quality amp because a low-quality one can reduce the potential of the other related components. The ones containing a low deviation and broad frequency spectrum would be advisable to procure. The distortion of the amps is also listed, the lower this figure is, the more superior is its quality.

You are also recommended to approach reputed dealers to get the best bargain; they supply the best quality electrical-based components that contribute towards improving the sound output.


4. Flexibility

flexibility amplifier

Via: http://blog.sonicelectronix.com/wp-content/uploads/2012/09/trunk-mount-amplifier.jpg

You may also find it interesting to learn that amplifiers are classified according to the number of channels that they can power. The one-channel ones are needed when adding a subwoofer or for powering one speaker. You can choose two-channel or four-channel varieties to power two speakers and four speakers, respectively.

Here, it becomes necessary to know the number of channels needed before making your choice. For example, the requirement of a system having four speakers along with a subwoofer would be a 5-channel amp or higher.

Availing the option of multichannel amplifiers provides more flexibility. An amp with numerous channels can pave the way for adding upgrades and additional accessories. Some car amplifiers are also designed so that they can combine different channels to produce an impactful sound; this is similar to the way subwoofers function.


5. Efficiency

Efficiency amplier

Increasing the level of sound quality requires the use of the additional power. If you are keen on saving energy resources, fitting a car amplifier is a suitable option because they are energy-efficient. It is advisable to opt for the best car amplifier for maximum benefit.

Amps are classified into various categories; the higher the class, the greater the efficiency. Additionally, a well-fitted amplifier system will be able to keep the sound concentrated within the car interiors and prevent the noise from being heard outside the vehicle.

The power output of an amplifier is measured in watts. In some amps, the information about this measurement is provided on a per-channel basis, and others give the total of all. The power output of the amp should match the requirements of the speaker for producing sounds without distortion or other disturbances. Amps can produce power ranging from lower than 250 watts to several thousand; nonetheless, 500 watts is sufficient for most speakers.

RMS or root measures the uninterrupted power generated by the amplifiers or its total power output or the amount that the speakers require mean squares. Sometimes, two channels are combined for powering large-sized speakers or subwoofers.

The bridging of 2 channels of 150 watts is adequate for providing power to a 300-watt subwoofer. It is important to learn about the RMS, which is the power rating of the amp, to gain knowledge about its ability to provide power on a continual basis.


6. Powering Upgraded Speakers

working of car amplifier

Photo Credit: https://www.youtube.com/watch?v=eQwJ4e3DPJk

The factory-mounted amps can power the car speakers, but a significant number of patrons are available to upgrade their speakers. The after-sale speaker systems produce louder noises than the ones in the display; furthermore, they require additional power and a greater amp.

Factory-installed systems are upgraded by adding a subwoofer to bring about an increase in bass output and more clarity at lower frequencies. The installation of a subwoofer requires an external amplifier unit to meet their power needs, which are higher than the amount that standard amps can supply.

You must take steps to choose the ideal external car amplifier for enhancing the entire music-listening experience when cruising through busy roads. Whether you plan to add subwoofers or upgrade the speakers, these resources can supply the required power output for producing greater sound clarity without any distortion.

You may need to conduct research to make the right choice, but the effort is surely worth the rewards that are enjoyed. It is also important for patrons to know the wattage that is needed; additionally, they must also consider aspects such as the filters.

Best Compression Testers: A Must-Read Before you Buy


Best Compression Testers

Your engine, without a doubt, is one of the most important parts of your vehicle. It can be considered as the heart that makes your car or truck function, giving life to the latter. With this, it is important to maintain it in its tip-top condition, not only to save on costly repairs but also to be assured of your safety.

With too many options for the best compression testers, however, which one should you buy? If you have no idea how to proceed, keep on reading the rest of this post and learn more about compression testers, including how they work. More importantly, we will give you a quick look at five of the best products that you might want to take into consideration.


What is a Compression Tester?

The obvious is perhaps already stated – it is a device that is used to test compression in an engine. However, it is not as simple as that. The mechanism at which it works can be more complicated, especially for someone who lacks technical knowledge about cars.

Regardless of whether you have a gasoline or diesel engine in your car, compression is necessary for it to operate. Your engine will basically function in a similar way to a pump that is self-powered. The absence of compression, therefore, will hinder it from functioning. This is where the importance of a compression tester would enter the picture. It is a handy device that will help in assessing the condition of the different parts of the engine, especially the valves. If the engine is in its tip-top condition, the test would reveal that the compression is more than 100 PSI in every cylinder. Doing the test can be accomplished in as quickly as just 20 minutes and with the use of a few tools.

When is it necessary to use a compression tester to check the condition of your engine? You can do so if you notice that the power produced is lesser than normal or when it seems to be functioning roughly. Also, every time that a tune-up is performed by a pro, it is also likely that an engine compression test will be done, which is considered a sort of preventive measure. After the compression test, it is also necessary to identify the root cause of the problem, which can be attributed to broken valves, too much build-up of carbon, and deterioration of the piston rings, among others.


How Compression Tester Works

Here, we will talk about how a compression tester will work. The good news is that you do not need to be a pro to use it. There is no technical expertise required, as using it can be done in a manner that is pretty much straightforward.

To start, take out the spark plug that is found in your engine. Detach the fuel pump as well. This will be a necessary safety precaution. When the spark plugs are removed, there will be no ignition.

Once you have removed the spark plug, the next thing to do is to crank the engine of your car by as many as four times, which will lead to compression. Crank the engine more, even by as many as ten times or until you are able to achieve equal readings.

Also, after reading the compression, it will be a good idea to take down notes. You do not need a pen and paper to do this. You can simply use chalk and write outside the engine.

If your engine is in a healthy condition, the PSI should be more than 100. There are also some instances where it can be higher, which is basically because of the type of the engine.


Choosing the Best Compression Testers

If you are finding it hard to decide which one to purchase, the following are some of the considerations that can help you:

  • Reviews: One of the most important things is to consult with the opinions of other people. Their feedback will be helpful in evaluating the pros and cons of the possibilities. Through the experiences of other people, you can narrow down the choices.
  • Case: There are some models that are already inclusive of a hard case, which can be an excellent way to stay organized. This means that all of the parts will be kept in a single bag, making it also easy to bring it wherever the compression test needs to be done.
  • Tools: In most cases, there is only a hose and a gauge. However, in the case of some models, you will have more. Especially if there is a case included, chances are, there are different types of hoses and fittings, which will allow you to use the compression tester in more ways than one.
  • Ease of Use: The good thing about compression testing is that it can be done even on your own. There is no need to approach a neighborhood mechanic to ask for the test to be done. You can do it alone, provided that you find one that is user-friendly. The manufacturer must also provide detailed instructions on how to use it.
  • Construction: It is also important that you look for a compression tester that is built to withstand the test of time. It must be durable enough to make it last through the years. From the hose to the fittings, it should be made from premium materials that could resist external damage.
  • Gauge: The gauge is perhaps one of the most important parts of a compression tester. In case you are not aware of it, this is the part that will show you how much the compression is in the engine. It should be large enough so that you can easily see the display. Most importantly, it must deliver accurate readings.
  • Warranty: If the manufacturer believes in the quality of their product, they will not hesitate to offer extensive warranty coverage. Within the duration of the warranty, the manufacturer can offer a free repair if in case there are defects experienced.

Top Picks for the Best Compression Testers

Product (Amazon Links)Brand  

OTC 5606 Compression Tester Kit

OTC

Review

Innova 3615 OHC Compression Tester Plus – 7-piece Kit

Innova

Review

8milelake Professional Petrol Gas Engine Cylinder Compression Tester Gauge Kit Auto Tool

8milelake

Review

Lisle 20250 Compression Tester

Lisle

Review

Mityvac MV5532 Digital Compression Test Kit

Mityvac 

Review

In this section, we will identify five of the best compression testers that are currently available in the market, as well as a few of the reasons why they are unmatched.


1. OTC 5606 Compression Tester Kit

AD

Among other things, one thing that we love the most about this product is how it comes as a complete kit, providing you with everything that will be needed to perform compression testing. It has different adapters and rings, which will also make it versatile.

The carrying bag that is included is also a plus. This makes it easy to keep every item organized, and hence, increases the tendency that you will love them. If you are working as an engine mechanic or technician, this will be an excellent investment.

While there are some who noted that the quality of the hose is not the most exceptional, it is well-loved by many because it comes with a nickel plate finish, which is known for its ability to resist corrosion. Because of this, you can expect that it will deliver superior functionality even through the years.

Pros:

  • Available in a complete kit
  • Has different fittings and rings for versatile applications
  • Has a durable enclosure

Cons:

  • Hose seems to have not been pressure-tested
  • Gauge quality could be better

2. Innova 3615 OHC Compression Tester Plus – 7-piece Kit

AD

In many instances, compression tests are not simply conducted in areas of the engine that you can always see. The good thing is that with the innovative design of this product, it can do compression testing even in the parts of the engine that may seem to be difficult to access.

Another exceptional feature that you can find in this product is the side release valve. With the latter, it can be used for repetitive testing in the absence of the need to disconnect the hose.

There are some who reported that there is a possibility that the hose will be stuck on the head. Other than this, however, the hose is exceptional, especially when it comes to its construction. It is 15 inches long and comes with a stainless steel housing, which effectively protects it from external damage.

Lastly, it is integrated with a dual-face dial that has a diameter of 2.5 inches. The latter also comes with dual-calibrated scales, which can be helpful in making sure that the readings will be accurate.

Pros:

  • Adapters have solid construction
  • Has an easy-to-read dial
  • Excellent rubber seals

Cons:

  • Will need a bit of modification
  • The hose can get stuck in the head

3. 8milelake Professional Petrol Gas Engine Cylinder Compression Tester Gauge Kit Auto Tool

AD

This is another kit that has flexibility for your compression testing needs, which is even made better by the fact that the product can deliver decent functionality.

It is amazing how it is already inclusive of everything that you will need to conduct diagnostic testing of the engine. It has adapters that can deliver versatility, as they will be compatible with different vehicles. There are also rubber cone ends.

Meanwhile, to make sure that you will easily see the compression measured by the device, it comes with a 3-inch gauge, which also has a dual color scale.

Lastly, it also comes with a hard case, which will make it easy for you to organize all the parts when they are stored.

Pros:

  • Comes with a sturdy case
  • User-friendly

Cons:

  • Connector between the hose and the gauge can be problematic
  • Not durable

4. Lisle 20250 Compression Tester

AD

Simplicity – this is one thing that you can expect from this product. It comes with a one-piece construction, which will make it easy to use, even with the beginners.

The oversized gauge that is integrated into the product can also be seen as another impressive feature. It provides accurate measurements that are also easy to read.

Lastly, the brass fittings are also exceptional. They hold the different parts together, and best of all, they can remain strong despite frequent and long-term use.

Pros:

  • High-quality brass fittings
  • Has a simple configuration

Cons:

  • May not be long lasting
  • Adapter can be prone to always coming off

5. Mityvac MV5532 Digital Compression Test Kit

AD

This can be a great kit for you because it comes with a complete kit with all the attachments you might need to get the job done. It can provide the flexibility you might need when checking for compression in your car.

All of the components that are included in the kit has exceptional quality, especially if we talk about durability. All of its parts are meant to last, guaranteeing its usefulness for an extended period.

Lastly, and perhaps most importantly, it seems like this product comes with a mind of its own. It has the ability to store in its memory the peak compression value of the cylinder that has been detected.

Pros:

  • Comes as a complete kit
  • Has a storage box
  • High-quality components

Cons:

  • Not as popular as the models mentioned above

Conclusion

In sum, with the best compression testers, it will be easy to evaluate the condition of your engine, and in the end, be sure that it will deliver optimal performance. Be sure to find the one that has high-quality construction and that can deliver accurate results. You should consult with the opinions of other people to narrow down the possibilities. If you do not know what would make the perfect choice, go back to the five products that we have recommended above.

Are you looking for other diagnostic tools? Searching for other products that can be used for your car? Click here and learn more about the choices that you will have.

Top 20 DIY Car Repairs That Can Save You Lot of Time And Money


car repair

Your car is a complete assembly of many parts and components. Each contributes to the overall performance of your car. Even the slightest disorder of any part can bring your car to a complete halt, causing you a lot of hassle.

If, for every disorder, you take your car to a mechanic for repair, you incur a lot of money and time. If you can do car repairs by yourself, why should you spend money and time? Here are the Top 20 DIY tips.


1. Changing a Flat Tire

Your task is to take the flat tire off your car and replace it with an air-filled spare tire. First, pull your car to a safe place where no other vehicle can enter. Get the emergency jack and keep the lug wrench or the toolkit by your side. Turn the engine off and apply your parking brake.

Loosen the lug nuts and then use the jack to raise your car high enough to remove the tire. Remove the lug nuts by reverse-winding and take out the flat tire. Raise the spare tire and set it onto the studs. First, thread it by hand, and then by lug wrench, tighten one nut, then the farthest one. Lower the vehicle slowly.


2. Changing the Fuel Filter

You need open-end wrenches, a new fuel filter, new washers for the fuel line, protection to the eye, and rags. You need to spend $20 and 30 minutes.

  • Start with releasing the pressure of the fuel system. You can find the fuel pump on the fuse box. If not, find the relay that operates the fuel pump.
  • Start the engine of your car and pull the relay or fuse. If the engine stops, your job is ok.
  • The next step is disconnecting the fuel lines from the filter.
  • With two open-end wrenches, hold the actual filter with one wrench and turn the other wrench anti-clockwise to take out the bolt.
  • After sliding the fuel line off the bolt, repeat the same process for the side of the filter.
  • Change the old filter and replace it with the new one.

3. Changing a Dead Battery

reasons-why-car-batteries-wont-hold-charge

You need wrenches, wire brushes, corrosion removal fluid, and rags to change a dead battery. Wear hand gloves, safety glasses, and disposable clothing before taking up battery work. First, loosen the negative terminal, which is marked (-) and colored black or green. Twist it well for breaking any corrosive hold on its post. Then remove the positive terminal, mark (+), and color red.

Properly clean the posts and terminals by applying your cleanser made of baking soda and rubbing vigorously with a wire brush. After removing the caps, add distilled water to fill the hole. Remove the battery hold-downs. Remove and clean the battery and the battery tray with baking soda and water, then dry.

You can install a second car battery for your car audio amplifier. You can connect the negative and positive terminals of the battery to the respective terminals of your amplifier.


4. Replacing the Hose

After disconnecting the negative battery post, allow the engine to cool down, turn the radiator valve to drain the engine coolant to a container, and close the valve. Loosen the hose clamps of the radiator and move them towards the center of the hose.

You can remove the hose by using a utility knife. Use the lithium grease to install the new hose. Finally, put the clamps on the hose to hold it tightly.


5. Replacing a Broken Drive Belt

Replacing a Broken Drive Belt

Via: https://www.youtube.com/watch?v=AdHN5iPo-9w

In the case of your car squealing on starting, tighten the drive belt if you find it loose or replace it if it is worn or broken. A drive belt loops around the pulleys on the engine. You can find it at the front of the engine. In some car, in place of the drive belt, the serpentine belt is used that wraps several components of your car.


6. Replacing Spark Plugs

Most-Common-and-Visible-Issues

The spark plug is a heat exchanger and transfers heat from the combustion chamber. If you are using a copper core spark plug, you should replace it after every 30 000 miles. To start with, cool the engine and disconnect the battery.

Remove one plug boot without pulling the wire by using a socket, a ratchet, and an extension. Newer vehicles have an ignition coil pack, off the plug, with rubber sockets. Replace the new spark plug back into the socket; it is neither too tight nor too loose.


7. Fixing a Chipped Windshield

Get a windshield for $10 to $15. Dig out a loose glass with the pin provided with the kits. Clean it, along with its surrounding areas, and stick a small device onto the windshield, which makes a seal around the rock chip. To apply the resin to the crack, use a vacuum contraption. Do not allow the crack to spread. The whole process takes about an hour.


8. Changing Bulbs of Head Lights & Tail Lights

If any of these lights are not working, you must change the bulbs of the wrong ones to avoid any possible accident or traffic booking. While you need to spend $100 to get a bulb in a garage, you can do it yourself for only $25 to $50.

While buying a new bulb from an auto store, take the old one with you to get the exact replacement. While changing the bulb, don’t touch it, as the touch of grease on your hand may cause the bulb to get fused early.


9. Replacement of Windshield Wipers

While a new set of wipers may cost you $20 to $40, a garage may charge you $100 for replacing them. You can do it within minutes if you follow the wiper replacement manual. But get the right size to fit correctly. Just take out the old ones and put the new ones in their places. How much money and time you will save?


10. Changing Oil

How-Much-Transmission-Fluid-Should-You-Add

The lube you use for changing may cost you $30 to $70 for usual cars and $90 to $100 for expensive cars. Use a good grade of oil and use the correct amount of oil that is required. For changing of oil, you require a jack and few jack stands, an oil filter wrench and a drain pan.

Drain out the old oil and pour the new oil. Check for oil changes after every 10, 000 miles of running. Otherwise, its adverse effect will increase the running and maintenance costs.


11. Changing the Brake Pads

Brake Pads

Via: https://en.wikipedia.org/wiki/Brake_pad

You need a tool such as pliers, a lug wrench, a jack, and a set of jack stands. After raising your car by a jack, put a few jack stands so that you are safe, even if the jack fails. A set of new brake pads may cost you only 20 to $40, whereas an axle may cost $250.

The sequential operations of doing this job yourself are the removal of the hardware, pulling out of the damaged brake pads, pushing it into the caliper piston, installation of the new pads and re-installation of the hardware. Although the new pads last for thirty to fifty thousand miles, check it every 10, 000 miles.


12. Radiator Flushing

You need a wrench or screwdriver, radiator flushing solution, a funnel, and coolant and used coolant receptacle. You need to spend only $25 and 30 minutes. Your car radiator builds deposits of dirt that may make your cooling system inoperative. Hence, flushing is essential.

Make your car cool before you start flushing. Go through the diagram of your car manual to locate your car’s drain plug. After putting your used coolant receptacle in the proper place, unscrew the drain plug and allow the old coolant to drain out completely.

Then, replace the drain plug and take out the radiator cap. Add the flush cleaning solution by using the funnel and fill the water into the balanced portion of the radiator. Run your car engine to bring it to normal operating temperature. Turn on your heater and allow your car to run for 10 minutes. Then turn the engine off and allow it to cool down completely. After draining the content of the radiator, fill it with fresh coolant.


13. Changing Air Filter

Air filter

Via: https://en.wikipedia.org/wiki/Air_filter

After every 12 months or 12, 000 miles of running, you must change your air filter. You need to spend only $10 and 10 minutes of your time. Open the hood of your car and locate the air filter, which is a rectangular box with metal clips on its side.

Open the casing and find out which way it faces. After removing the air filter, put the new one, to sit exactly in its place. Lastly, close the metal clips exactly as they were there.


14. Wash & Wax

remove-car-wax

Regular washing and waxing keep the clear coat of your car paint shining and prevent it from tarnishing and fading. You need a shady spot, a bucket of soapy water, good-quality wax, a soft towel, and a good squeegee. Rinse your car in a shady plot with forceful water by using a hose. Then, wash it with plenty of water and remove the dirt and grime with a soft towel or a piece of sponge.

Once again, rinse it from top to bottom to remove any trace of detergent. Allow it to dry thoroughly by using chamois or a terry cloth towel. You can use compressed air if available and blow out water from crevices. Finally, put a layer of wax to haze and dry. Rub it with a soft cloth by a rotating motion, and remove any excess wax.


15. Fixing of Exterior Coolant Leaks

You need a wrench and pliers. You can be sure of a coolant leak if you find yellow or orange liquid on the ground when you park your car. It may be leaking from an exterior hose. Open the hood of your car and find the colored liquid coming out from a plastic piece or hose.

To fix the leakage, take out the clamp fastened on the leaking hose and replace it with a new one. After that, fasten the loosened clamp on it. In case you cannot find the source of the leakage, it must be inside the radiator. Instead of handling it yourself, your best option will be to take your car to a mechanic.


16. Inspecting Hose Failure

Inspecting Hose Failure

In case your car comes to a sudden halt, it may be due to the coolant seeping out from the hose that looks bulged out at some portion. You can also spot the problem by holding a cold radiator or heater hose and by squeezing it well.

If you have a feeling of brittleness, cracking, or spongy, the hose needs immediate replacement. You can pull out the worn one and put a new one in its place. Inspect your radiator hoses frequently in cold weather.


17. Dangling Exhaust Pipes

Rubber is used to hold the exhaust pipes. In case you hear noisy sounds coming from the back of your car, the pipe holders must have been damaged. Stop your car immediately and have a look under your car. If you find any broken exhaust pipe or other structure hanging, change them accordingly.


18. Blown Fuse

blown fuse car

Via: https://carfromjapan.com/article/car-maintenance/replace-blown-fuse-in-car/

In case your headlights go out, it may be due to a blown fuse. Open the fuse box of your car and find out which fuse is blown. Fuses may be ceramic, glass tube or blade. You should refer to the owner’s manual to find the location of fuse boxes and the types of fuses to be replaced.


19. Replacement of Distributor Cap and Rotor

The distributor cap distributes the voltage from a coil to the right cylinder. As a result, it makes the ignition happen, and your car starts. In case you find a problem in starting your car, check the distributor of your car. You can replace it with a new one, just in the way you replace the spark plug.


20. Problems in Your Car Muffler

You can know problems in car muffler if your car engine makes loud rumbling noise or gives lower MPG. If you get a bad smell while driving, it is carbon monoxide coming out due to the hole in the muffler. Instead of DIY, take it to a mechanic. Any feeling of vibration in the steering wheel is also a sign of a problematic muffler. Rusting and bottoming over bumps are the main reasons for muffler problems. If you don’t set it right, it may damage a catalytic converter costing $1000.

These ‘Do It Yourself’ repair hacks will let you fix your car just like a pro! Follow it and enjoy great savings.