Home

Recent Posts

How To Apply Wax On A Black Car?


How To Wax A Black Car

Maintaining your car is a top priority of every car owner, to improve the life of their car and make it look brand new even after extensive use. The exterior look always exhibits the first impression of the car. The paint should be smooth without any scratches.

Even if you use your car carefully, the exterior look is bound to degrade due to the external elements such as sunlight, UV rays, etc. and you cannot save your car from scratches, dents, and dings. The reason we have specifically mentioned black cars is that the dark color makes the scratches more visible. For this purpose, we have provided a perfect guide on how to wax a black car.


What are the Benefits of Waxing Your Car?

Clean-the-Surface
  • The most major benefit of waxing your car is the prevention of scratches. Even the most minor scratches, dents, dings, etc., do appear even after taking extreme care of your car. Waxing provides an extra layer of coating to your paint, which will reduce the number of scratches and give your car a fresh look all the time.
  • It is very cost-effective, as it saves you from many further repairs. Repainting and refinishing your car again and again can prove to be tiresome and also cut deep into your pockets. By waxing, you can save a lot of money and avoid much damage.
  • It also provides a new look to your car, even if it is years old. The age of your car is not a number but the way you maintain it. By waxing, you provide an extra preventive layer to your car, making it look fresh and brand new all the time.
  • It also saves the car from the damage of the external environment. Dust. Oil, sand, and many unwanted particles accumulate and destroy the paint of your car. Waxing can solve this problem and save you a lot of hassle.

What are the Things or Equipment you will need for Waxing your Car?

wax for black cars

Photo Credit: http://store.chemicalguyscanada.ca/Black_Paint_Maintenance_Kit_6_Items_p/hol_201.htm

  • Car wax: To give your car the best wax, you will need to find the perfect type of wax for your car. There are two types of car wax, which are available in the market, and you may choose the one that suits your car the best. The types are:
  • Natural car wax: This type of car wax gives a glossier finish to your car and is considered the best choice for many. They offer excellent protection to the exterior of your car and are made from the components of carnauba, which is often mixed with oils and other petroleum products. The quality of this type of wax is very high. They last from 1-2 months, and the only downside is that they are very expensive, and only a few people can afford them.
  • Synthetic car wax: They are the most commonly used car wax, and they are easily available. They are made up of synthetic elements and have no percentage of natural wax in them. They are very easy to apply and are cheap. This type of wax can last for the whole season without being renewed.
  • Wax applicator: You do need an applicator to apply wax to your car easily. This is available in the form of foam and should be used for application, as it reduces a lot of effort. You can also use it again and again, as it is reusable, so you don’t need to purchase it every time you need it.
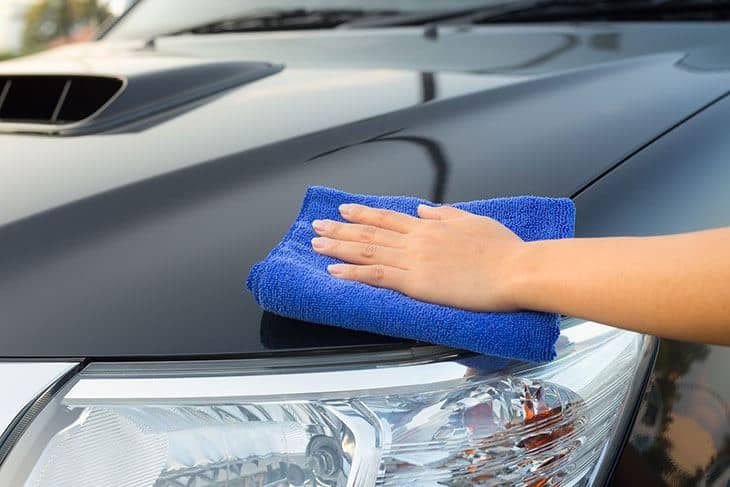
  • Microfiber towel: This is a multi-purpose towel, and it provides a greater finish and polish to your car. You can simply clean your car with this and also apply it during the wax process. It requires a little finesse, but if you learn this, you will find a different dimension of your car, which is very attractive.
  • Cleaner wax: This is used as a preventive measure to erase any streaks the car wax may leave behind. It not only removes the old wax but also helps protect the finish of your car after you have applied the new wax.

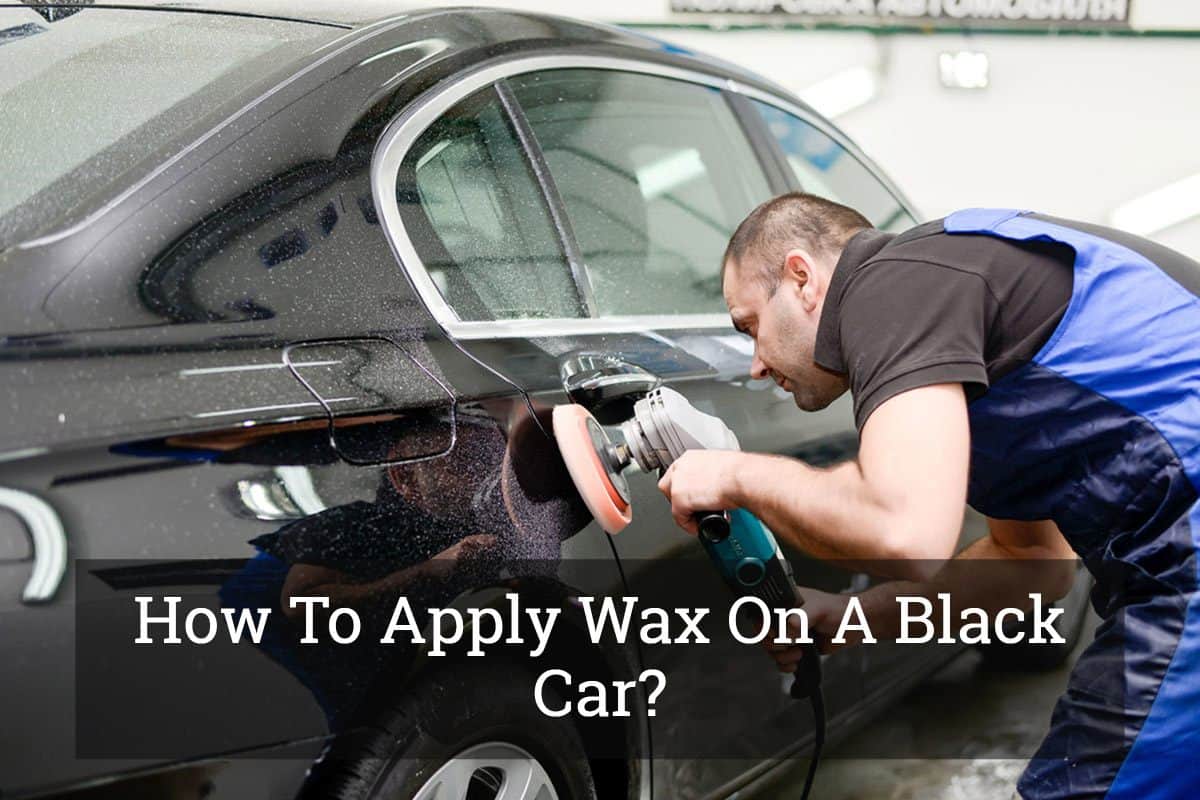
Step-by-step Guide on Applying Wax to your Black Car

black car wax

Photo Credit: http://bestcarwaxinfo.com/best-wax-for-black-cars/

  • Washing your car: The first and the most important step for waxing your car are to clean it thoroughly. By washing the car, you can get rid of the impurities, and the wax can be applied
  • Apply the first coat of wax: Remember to apply wax in a shaded area for best results as if you wax in sunlight it can potentially damage your car and make the procedure difficult. Sunlight can make the wax to dry too quickly and make it difficult to buff off later. Apply the wax gently without forming any streaks.
  • Apply the second coat of wax: Make the second coat as thin as possible as the thick coat will lead to unwanted streaks and make it difficult to remove. Make sure that the coating is thin so that buffing can be done. For best results, you can use a poly foam wax applicator, which will make the task effortless.
  • Buffing: With the help of a microfiber towel buff the finish, which will give you a stunning shine, it will also help you in removing the previous waxy residue and provide a polished look to your car giving it a brand new look. The fibers present in the towel are excellent in grabbing the residue from the wax. You don’t need to worry about the towel leaving any lint on the wax as it is lint-free. Always keep extra towels with you so that you don’t run out of them.
  • Removing unwanted streaks: Even if you apply the wax with the best wax applicator, there are chances of formation of streaks. These streaks may cause uneven shine, which will spoil the look of your new wax. You can remove these streaks by applying the cleaner to the exterior panel and can remove the streaks by buffing it with medium pressure. Do not apply extra pressure as it may result in wiping the whole wax off. Buffing also serves as the best rust remover and can make your car look stylish.
  • Rinsing: Keep a time gap between the first layer of coat and the second one. As the process of curing may take up to 12-18 hours, it is best advised to apply the coating fresh in the morning. After you have applied the second coat and buff it carefully, rinse the car again so that the wax may settle in.

A black color gives a very stylish and polished look to your car, and it is equally important to maintain that standard. The downside of having a black color car is that any discoloration of deformity is recognizable, so you need to take extra care of your black car.

Waxing is the best way to renew the look of your car and give it touch-up paint. The steps mentioned above are very easy to follow, and you can do it in the comfort of your garage. You don’t need to go outside for this service and spend a lot of money as you can easily ‘do it yourself.’

Best 110v Air Compressor: A Must-Read Before Buying


Best 110v Air Compressor

Are you looking for the best 110v air compressor available right now? In this article, you will find everything you need to know to help you decide which one to buy. We will be discussing what it is, some of its types, and the things to look for in a good air compressor. We’ll also provide you with the top four picks for the best 110v air compressor, along with their pros and cons.


What is a 100v Air Compressor?

Before proceeding with the rest of the discussion, let’s first define what an air compressor is. An air compressor lets you carry out various tasks, including staple and nail gun usage, airbrushing, and tire inflation. They are also considered a valuable asset for DIY enthusiasts and professionals. The reason is that it lets them perform spraypainting, woodworking, crafting, and cleaning functions.

Choosing the best 110v air compressor will mostly and should solely depend on the job you need to perform. Inflation of tires, equipment, and toys will not require an air compressor with high PSI or CFM. For jobs requiring high PSI, such as high-powered tools like nail and staple guns, you’ll need a 100v air compressor. Luckily, we are here to discuss the best 100v air compressor in the following section.

An air compressor is a tool that will convert power into energy that is stored in pressurized air. It forces air into the tank, thus increasing the pressure. In the event the tank reaches its limit, the air compressor will automatically shut off. The air compressed in the tank will be held in its place until it’s needed. To sum, the energy collected in the air compressor will be used to perform a variety of applications.


Top Four Choices for the Best 100v Air Compressor

Product (Amazon Links) PSI  

EPAuto Compressor Pump

70

Review

Kensun Model J Tire Inflator

35

Review

Kensun Performance Portable Air Compressor

120 

Review

Seborio Portable Mini Air Compressor 

150

Review

In this section, we will be discussing the top four picks to help you make a better decision. Watch out for each product’s features, as it will be of great help in choosing the best 110v air compressor.


1. EPAuto Compressor Pump

AD

The EPAuto Portable Air Compressor is one of the best air compressors on the market right now. It has additional improvements in terms of quality and functionality as it is easy to operate and very reliable. The power supply can come from any 12 V DC outlet. 

For its specifications, the maximum pressure is set at 70 PSI, and the output current is set at 10A – 15A. It comes with three adapters for inflatables. To add, you won’t need to worry about transporting the air compressor, as a carry bag is already included.

Pros:

  • Auto shut off
  • Includes carrying case
  • Versatile and can be used for many applications
  • Comes with a light for nighttime use
  • Can accommodate 70 PSI inflation output

Cons:

  • May not work for trucks
  • May be slow

2. Kensun Model J Tire Inflator

AD

The Kensun Air Compressor is a multi-function device that permits you to inflate tires, sports balls, camping equipment and toys. It can be used for heavy-duty tasks, as with its 120W motor. This model will be able to generate a powerful flow and is set to 35 PSI out of the box to inflate tires. When the set PSI is met it has auto shut off.

The digital gauge is easy to read. The 110V home plug help you when your at home and want to inflate an object. The Kensun features a built-in flashlight that allow you to utilize it during every possible emergency situation.

Pros:

  • Multi-functional, suitable to use for cars, among others
  • Can accommodate cars, balls, and beach inflatables
  • Can be used for both 12V car and 120V wall outlets
  • Compact design

Cons:

  • May not last long 
  • May not perform tire inflation as accurately as wanted 

3. Kensun Performance Portable Air Compressor

AD

The brand is very particular about the benefits one can have from buying a Kensun Air Compressor. It is reliable, portable and very easy to operate. It has an advanced functionality that you won’t need to worry about looking for the nearest gas station. The Kensun brand is one of the best and most trusted names when it comes to automotive accessories. You will never be disappointed if you have this in your trunk.

It is also versatile because you can operate it for home use, as well as for cars. Another great feature of this model is the AC/DC adaptability. To add, it offers an analogue pressure gauge and measure is up to 120 PSI. Cable length is up to 10 feet, which is very convenient if you are working outdoors. Lastly, 3 attachment nozzles are included in the package that allows you to perform a variety of task.

Pros:

  • Versatile, suitable for home and car use
  • Features 3 nozzles that you can use for a wide range of inflating tasks
  • Easy to use and transport
  • Maximum air pressure is up to 120 PSI

Cons:

  • Some users had issues with its low quality and performance.
  • The air chuck should be screwed on in order to operate.

4. Seborio Portable Mini Air Compressor

AD

Last but not the least, we have here the Seborio Portable Air Compressor. This model, like the other entries in the list, can be used for a variety of uses. You can inflate bike tires, sports balls, camping equipment, as well as air mattresses. It is also very easy to use, as you can just plug it into a wall outlet or a car cigarette lighter. It features a 12-volt power that will be of help during emergencies.

For its specifications, gauge range is set at 150-PSI maximum and has a 120V motor. It comes with different adapters with needles, suitable for all kinds of tire inflation. You can set a tire pressure and it will shut off when finished. 

Pros:

  • The package includes various adapters with needles for all kinds of inflation use.
  • Easy to use
  • Can set pressure, and it will shut off when finished
  • Maximum air pressure is set at 150-PSI

Cons:

  • Doesn’t have wall plug

Types of Air Compressors

In order to help you make a more informed decision, we shall discuss the three types of air compressors. This section may help you narrow down your choices to choose the best 110v air compressor.

  • Reciprocating Air Compressors: They are categorized under positive displacement machines that let air pressure increase by reducing its volume. They take and confine successive volumes of air and elevate it to higher pressure. This task is done through the use of a piston within a cylinder that acts as the displacing and compressing factor.
  • Rotary Screw Compressors: This type of air compressor is also categorized under positive displacement machines. It consists of two rotors inside a casing wherein the rotors internally compress the air. It does not feature valves, and units are air-cooled.
  • Centrifugal Compressors: Categorized under dynamic displacement machines, it generate high-pressure discharge through converting angular momentum separated by the impeller. To do this task effectively, it rotates at quicker speeds compared to other air compressors..

Essential Factors to Consider in Choosing the Best 110v Air Compressor

What makes a good 110v air compressor? In this section, we will talk about what to look out for in searching for the best 110v air compressor.

AD

  • PSI Rating: This refers to the maximum air pressure the air compressor will be able to inflate. The PSI rating is considered as an important factor to look for because it allows you to do various tasks.
  • Features: The products presented above have different attributes that you can weigh individually. May it be long cables, crafting material, carrying bag, among others. You have to choose the one in which you can most benefit from.
  • Versatility: This means that you can either use them on 110V and 120V wall outlets. Being versatile should also mean it can be plugged in a car cigarette lighter for car applications.
  • Ease of Use: Operating an air compressor is very easy and should not need extra amount of effort. You have to choose one that you will be able to operate with ease. This also means that having a compact one is convenient for storage and transportation.

Conclusion

Now that we’ve discussed the essentials about 110v air compressors, you’ll now be able to make a sound decision. Choosing one may be tricky but with our help, picking the best should be very easy. You just have to weigh the features, pros and cons of each product and you’re on your way. We hope we are of great help in your search for the best 110v air compressor.

Are you also looking for similar products to purchase for your vehicle? Click here to check out other products that are available in the market right now.

Important Things That You Should Know About Jumper Cables


Jumper Cables

Sometimes your car doesn’t start when you need to go somewhere, and you need it most. This may be the worst feeling for every car owner. Sometimes you get late for meetings due to this problem.

It becomes worse when you don’t even have jumper cable to restart your vehicle. Many drivers and car owners face these kinds of issues every day. Many people try to avoid this issue associated with their cars.

Everyone wants his/her car to work properly, but without jumper cables, it would not be possible. It is very important for every driver or car owner. It is an essential tool that any driver or car owner should possess.

Those people who are not sure about the car battery’s performance, they should carry jumper cables in their car when traveling somewhere. It comes with two attached wires and four clamps (2 + clamps and 2 – clamps). Many people think these cables are available in one specific dimension, but it can be wrong.

Their different Jumper cables are designed in different ways for different cars. You should understand what type of cable you need for your vehicle and how to use jumper cables. You should know some important things about jumper cables. If you are going to buy jumper cables, you should know how to look for best jumper cables.

We have mentioned important factors that you should consider while buying a jumper cable, including cable length, gauge, clamps and many more.


Important Things to Know about Jumper Cables

jumper cables uses

Photo Credit: http://www.caroutfitter.com/best-jumper-cable-reviews/

1. Width and Gauge of the Jumper Cables

Every buyer looks for the best value of money. Sometimes, people get tempted towards the discounted offers and items marked as savings. You might be cheated by some sellers, so you should be careful while buying jumper cables. You should not be tempted by its heavy-duty title, but you should look for the best gauge of cables.

A gauge with a higher number doesn’t decide its performance. If you select the lower gauge number, you will get faster and jump-start your car. Lower gauge cables usually offer more power flows. For example, A 10 gauge will not be as good as six-gauge cables to jump your car at all. So, choose the lower gauge cables in order to start your vehicle in a better way.


2. Length of Cable and Clamp

Length of Cable and Clamp

You should consider the length of jumper cables before buying it. The good length should not be less than 12 inches. Too short cable may sometimes create problems in jump-start your vehicle. The longer the length of the cable, the better it works. You should look for a jumper cable with a minimum length of 12. However, you can also look for longer cables.

More length helps you jump-start your battery at the crazy location. You may find it easy to follow the starting up process with proper and lengthy wire. Therefore, you should choose the length of cable very carefully.


3. Cable Clamps

tips to use jumper cables

Photo Credit: http://www.safebee.com/travel/how-use-jumper-cables

Clamps are another important factor that you should look into. You should buy quality clamps with solid teeth. It would not slip off the battery’s terminals of your vehicle. You should also look for the best materials, including aluminum and copper.

You should find the jumper cables with coated handles of rubber, as it helps protect you from the shock that might come from car’s battery. A nice, perfect, rubber-coated handle helps assure that you will not be getting sparks or shock while following the procedure to start up your car.

4. Condition of the Jumper Cable

Having only a good quality cable is not enough; you need to take better care of it. You should not fold up the cables as it can destroy the inside wire. You can coil jumper cables and store them in bags. If you see any tear or cut in the cable wire, take action immediately.

You can paste black tape on the damaged part or change it if there is any major damage. Sometimes, you may get shocked due to a tear in the wire. You should be careful while touching the damaged areas of the wire so that you can avoid huge accidents or any small or major damage.

Having the right cable is the only hurdle, so you should know how to find out the best or proper jumper cable. You should also know how to use it without any ruinous consequences.


How to Use the Jumper Cable?

how-to-successfully-use-jumper-cables-on-batteries

There are many techniques for using jumper cables. You need to read the manual of the vehicle carefully before using it. You should follow the steps mentioned in your car manuals. It helps jump-start the dead battery of your car immediately and perfectly.

There are some important steps that you must consider while starting your vehicle with the help of jumper cables. You should ensure that two vehicles don’t touch each other while standing in front of each other. Both vehicles should be in parking brake mode.

  • Connect cable to both vehicles.
  • Attach a colored positive clamp to the +ve terminal of the active vehicle battery.
  • Attach another positive clamp to a dead battery
  • Connect the black colored – clamp to – terminal of the active battery
  • Connect another negative clamp to the screw over the engine of a dead battery
  • Wait for some time to start the car with a dead battery

Let it run for some time, and you will be able to start the dead car easily by following the above steps. It is very simple to follow the procedure; you just need to be careful while starting up your dead car battery.

Finishing Up

Once you find a dead battery running, you should remove the jumper cables safely. You should follow the reverse procedure to remove it. You should remove black clamps first from the battery of a dead car and then another boosted car.

The second step you can follow is removing red clamps from the battery of a dead car and then removing them from the boost car. You can store or pack your jumper cables.


Step by Step Procedure

Step by Step Procedure
  • You need to remove the jumper cables after your car starts.
  • Follow the reverse method to remove jumper cables safely.
  • Remove negative clamps first and then positive clamps.

Note: Once you attach cables with cars, you should stay away from the clamps and cables, and it may hurt you. Sometimes clamps slip off and produce sparks.

Many people think jump starting a vehicle is an easy task, but it may be very daunting for them. It becomes a complicated task for them when they face any accident. A right jumper cable can be used to jump start your vehicle. If proper methods and jumper cables are not used, you may destroy your vehicle badly. Therefore, these are some important things that you should know before using them efficiently and properly.

In this guide, we have mentioned all important steps to follow to jump start your dead battery. You can follow this safe procedure. Hope you find this post useful and informative. Do comment if you have any query regarding jumper cables and its uses.

A Guide to Choosing the Best Tuners for 6.0 Powerstroke


Best Tuners for 6 Powerstroke

Having a tuner will allow your vehicle to perform better and run more efficiently. That’s why it is important that you have the best tuners for 6.0 Powerstroke installed in your car. To get the best one, we will provide you with all the information you will need. We also have here the top three choices for the best tuners for 6.0 Powerstroke that are available in the market right now.


What Is a Tuner?

For you to understand better, let us define first what a tuner is. Simply put, tuners are designed to make the best out of your engine’s power output with quick plug-and-play installation. They will deliver big boosts in terms of torque and horsepower and let your engine run more efficiently. So, if you want to save gas money or switch levels of horsepower, have a tuner installed in your vehicle.

Tuners permit you to put control into your hands. They also allow you to work on your vehicle without the help of a mechanic from the dealership. As stated in the introduction, you will find in the following section the top three recommendations for the best ones. These tuners will help you enhance your engine’s power, as well as its performance. To add, they can make your engine more versatile.

Tuners provide upgrades to your engine’s power by communicating with the computer of your vehicle. To add, the tuner’s job is to maximize your vehicle’s overall performance. Tuning your vehicle may also seem like a way to customize properties according to your preferences. Users alter these characteristics for better fuel economy, better handling, and improved power production.


Top Picks for the Best Tuners for 6.0 Powerstroke

Product (Amazon Links)Brand 

SCT 7015 X4 Power Flash Programmer

SCT

Review

Bully Dog 40420-GT Performance Tuner

Bully Dog

Review

Edge Products 15002 Evolution for FORD Powerstroke 6.0L

Edge Products

Review

In this section, we will talk about the top three choices for the best tuners for 6.0 Powerstroke. You will also be provided each product’s key features, pros and cons so you can evaluate better.

1. SCT 7015 X4 Power Flash Programmer

AD

First up is the SCT Power Flash Programmer. This model is guaranteed to improve your vehicle’s torque, horsepower and throttle response through PCM optimization. Not only that, it also provides maximum fuel economy. It features high horsepower add-ons, which consist of nitrous oxide and superchargers. To add, it offers high-speed data monitoring and logging and clears or reads DTC trouble codes.

One interesting feature of this model is the cloud-based tune delivery system that makes restoration very easy. As this tuner specializes in maximum customization, it works on a wide range of Ford trucks and cars. The SCT power flash programmer is also suitable for use with both diesel and gas vehicles. While it improves horsepower and torque, it also allows you to choose how much increase it is you need.

Pros:

  • Improves your vehicle’s horsepower, throttle response, and torque
  • Offers outstanding fuel economy
  • Features nitrous oxide and superchargers
  • Has high-speed data monitoring capabilities

Cons:

  • May not last long
  • Some users commented about its poor quality

2. Bully Dog 40410-GT

AD

The H&S Performance is among the brand leaders when it comes to diesel performance. Having the H&S Performance Mini Maxx Tuner will surely improve your vehicle’s overall performance while being priced reasonably. This model will precisely tune up your engine HP level up to 250HP, which will depend on your application. In addition, it also allows the removal of the entire EGR system that comes with a cooler.

One great feature of the H&S Mini Maxx is that it comes preloaded with DPF Present and Removed tuning. It will also allow you to read and clear diagnostic trouble codes. For its specifications, the size is approximately 3.5 inches by 2 with a 2 by 1.5 inches colored screen. Lastly, instructions are very easy to follow, and the tuner, at the same time, is very easy to install.

Pros:

  • A brand leader in terms of diesel performance
  • Can tune up your engine up to 250HP
  • Permits EGR system removal
  • Preloaded with DPF Removed and Presents capable tuning

Cons:

  • Some users had issues with its lifespan.
  • Seeking technical support might be difficult

3. Edge Products 15002 Evolution for FORD Powerstroke 6.0L

AD

The Edge 15002 is a really great device for vehicle owners who want a tuner that is also easy to use. The brand is well-known for making quality gear that is straightforward and easy to manipulate. This model will help your engine beef up and improve your vehicle’s overall performance. This tuner will allow you to add an additional 100 horsepower, as well as 200 pounds per foot of torque.

This product features numerous power levels, which you can simply cycle through. You just have to scroll through the settings until you find one that suits your preferences. Another great feature of this model is the wide array of various scan tools that allow you to look for codes. If you want one offering outstanding performance without going through the hassle of mastering the skill, this is for you.

Pros:

  • Easy to use
  • Allows you to add an extra 100 horsepower and 200 pounds per foot of torque
  • Features multiple power levels
  • Has different scan tools for code searching

Cons:

  • No warranty information is available

Tuners vs. Programmers

Contrary to belief, tuners and programmers are slightly different. While being almost the same, tuners are always compared against programmers. So, in this section, we are going to differentiate them. This might be of help if you really want to have a better understanding of programmers and tuners.

  • Programmers: Programmers define the vehicle’s computer to perform, especially at peak levels. Instead of being permanently installed, programmers are plug-and-play devices. They are also very easy to use, as you just have to plug this into your OBD-II port, and you’re good to go. One of the best features of having a programmer is that it permits you to control your system’s tuning.
  • Tuners: Unlike programmers, you have the option to install the tuners permanently into your vehicle’s electrical system. They are also very easy to use while giving your engine the ability to unlock its full power potential. It is also very similar to programmers as it can boost your engine’s horsepower, torque, throttle response, and fuel economy.

Investing in either of the two might bring out your vehicle’s full engine potential. They are also essential, especially if you want to upgrade your vehicle’s electrical system.


Essential Factors to Consider in Choosing the Best Tuners for 6.0 Powerstroke

Before we conclude, we will provide you with some of the things to look out for in tuners. In order to make the right decision, be sure to review this list carefully.

  • Price: If you want to invest on something long lasting, go for the more expensive ones. Just make sure that you review the products’ features so you can evaluate which one makes greater value for money. Since we are dealing with electronics, buying a cheaper model might mean it has poor quality.
  • Features: Every single feature should be examined, as they will be of great help to narrow down your choices. Several products almost offer the same properties but some stand out from the rest. You should look out for features such as improvement in horsepower, torque and fuel economy.
  • Enhancements: The sole purpose of tuners is to improve your vehicle’s overall performance. With this, it is vital that you consider which model will bring out your vehicle’s full power potential. It is also important to note differences in your vehicle’s performance to see if the product made an impact.
  • Data Monitoring Capabilities: Aside from vehicle improvements, some tuners also allow you to track and record the data collected. Some models feature cloud based restoration capabilities, which is considered very modern and will save you a lot of time.
  • Easy Installation: Tuners also come in plug and play models, which may be synonymous to easy installation. You just have to plug the device into the electrical system to make it work. These tuners come with manuals so you have to carefully follow the instructions so that you won’t make a mistake.
  • Easy to Use: As we are talking about an electronic device, the display should not be difficult to read and comprehend. To add, you should choose one that can operate with ease.

Conclusion

We have provided you with valuable information regarding tuners for 6.0 Powerstroke, as well as its benefits. We hope you now have a better understanding of the subject that’ll improve your decision-making skills in terms of tuners. You just have to evaluate each product’s key features, pros and cons in order to choose the best tuners for 6.0 Powerstroke.

Are you looking for other products to further enhance or improve your vehicle? Click here to learn about some of the products that are available in the market right now.

A Quick Guide to Choosing the Best Motorcycle Chains


Best Motorcycle Chains

Choosing the best motorcycle chains is critical to ensure a safe riding experience. In this article, you will find all there is to know about motorcycle chains. We will provide you with the top four choices available in the market right now, as well as their features. In addition, you will be informed about the essential factors to consider when choosing the best motorcycle chains.


What is a Motorcycle Chain?

For you to have a better understanding, let’s talk about what a motorcycle chain is first. A motorcycle chain is basically the metallic chain installed on your bike. As almost all motorcycles are powered by a chain drive, the power originating from the engine passes through the motorcycle chain. Simply put, this device is aimed at retaining power transmission.

It should be noted that the chains must have correct inspection, maintenance, replacement, and repair. That will ensure that your motorcycle rides safely and steadily. You have to keep the chains in good shape until it becomes defective or damaged. When that happens, replace it immediately with one of the top four recommendations in the following section.

Motorcycle chains are considered the simplest part of your bike’s engine. A sprocket that is connected to the transmission drives the motorcycle chain. Another sprocket linked to the rear tire places the power on the road. Its task is fairly simple, but it can obviously take a beating. In order to take care of it, the chains must be lubricated regularly. Beware of using weak chains as it can do possible damage to your sprockets.


Top Four Picks for the Best Motorcycle Chains

Product (Amazon Links)Size  

RK Racing Chain GB520XSO-120 120-Links Gold X-Ring Chain with Connecting Link

120Links

Review

DID 520VX2-120 X-Ring Chain with Connecting Link

120Links

Review

Renthal C294 R3-2 O-Ring 520-Pitch 120-Links Chain

120Links 

Review

Unibear® O-Ring 530 120Links Motorcycle Chain,GOLD, With 1 Connecting Link, Japan Technology

120Links 

Review

In this section, we will give you a rundown of the top four picks for the best motorcycle chains. We will provide you with their key features, pros and cons. It is vital that you pay attention, as this will greatly help you in making a better decision.

1. RK Racing Chain GB520XSO-120 120-Links Gold X-Ring Chain with Connecting Link

AD

The RK Racing Chain is one of the best chains available in the market right now. It features an X-Ring chain that lasts for a long period of time and does not require as much maintenance. It also features an O-Ring that has two places for lubrication that ensures rollers operate even under a hefty load. This would be a great choice if you already have a bike that requires upgrading.

Another great thing about this racing chain is its fantastic performance. It works and fits perfectly, as well as looks good in gold. In addition, this chain is suitable for on-road or off-road use. It is also suited to accommodate all the hard riding you may throw at it. Lastly, the RK brand is among the biggest names that have a strong reputation when it comes to quality chains.

Pros:

  • Offers 8,500 pounds per foot tensile strength
  • X-Ring provides two lubrication and seal points
  • Strong, durable and will not stretch easily
  • Pre-stretched and pre-stressed for inspection

Cons:

  • Questionable durability compared to O-Ring versions

2. DID 520VX2-120 X-Ring Chain with Connecting Link

AD

Another great recommendation for the best motorcycle chains is the DID 520VX2 X-Ring Chain. It features great rigidity, allowing smoother handling, power loss reduction, and quicker response. It can accommodate up to 8,210 pounds per foot tensile strength and maximum engine displacement is set at 750cc. In addition, it won’t wear easily as it has been projected to last 35 times longer than regular motorcycle chains.

The DID X-Ring chain is best known for providing the same performance as other brands. With the brand’s upgrade, the VX2 series showcases improvements over the previous models. It is also guaranteed that noise is kept to a minimum while riding. Lastly, you can never go wrong with this chain, as it is also very easy to install.

Pros:

  • Offers smoother handling and quicker response
  • Tensile strength can lift 8,210 pounds per foot
  • Can last 35 times longer against standard chains

Cons:

  • Lower tensile strength compared to other brands
  • Some users complained about not receiving 120 links

3. Renthal C294 R3-2 O-Ring 520-Pitch 120-Links Chain

AD

The Renthal C294 O-Ring can also be considered a contender when it comes to great quality motorcycle chains. It features a Nitrile O-Ring that improves chain life by keeping the vacuum-injected grease inside the joint. This chain will not wear fast because of the equipped high-carbon alloy steel-bearing pins. To add, the side plates are gold-coated which provides corrosion prevention.

Alongside RK chains, Renthal is among the biggest brands that offer premium motorcycle chains. An interesting addition to the kit is the gloves that come with it. You are going to use it because of the heavy application of the factory lubrication that may be very sticky. On the downside, the Renthal is considered a more premium model but its features will never disappoint you.

Pros:

  • Designed for off-road use and is tested for rigidity
  • Pre-stretched chains increase lifespan
  • Features Nitrile O-Ring with vacuum-injected lubricant
  • Easy installation

Cons:

  • Quality may be the same compared to other brands

4. Unibear® O-Ring 530 120Links Motorcycle Chain, GOLD, With 1 Connecting Link, Japan Technology

AD

If you want a motorcycle chain, the Unibear O-Ring Chain might be perfect for you. This is surprisingly a good model. The chain features a tensile strength of 9,400 pounds per foot. It is also very durable, something that should be expected of any 530 chains. To add, it might be the heaviest chain in this list, as it weighs almost 6 pounds.

Unibear can offer many great features to its buyers. Among them is the advanced heat treatment process. Another great feature is the strong resistance to impact, as you they have been tested for rigidity. It offers good wear resistance and is made of high-technology heat-treated alloy steel.

Pros:

  • Does not cost much as the other brands
  • Tensile strength is set at 9,400 pounds
  • Durable
  • The material is made of alloy steel

Cons:

  • A little heavy than other brands

Types of Motorcycle Chains

In this section, we will further discuss the three types of motorcycle chains: standard, O-Ring and X-Ring. This may help you choose the best motorcycle chains, so you have to pay attention.

  • Standard Chains: These chains do not have a ring in between the outer and inner side plate of the chain. Considered an older style, they are normally lightweight and cheap to manufacture. You won’t see these chains on a modern bike today but if you did, it might be only for off-road use.
  • O-Ring Chains: The O-Rings are placed between the side plates of the chain to produce lesser friction than metal on metal. Pooling lubrication right next to the inner plate makes this possible. On a well-maintained O-Ring motorcycle chain, you can expect twelve to eighteen thousand miles of riding.
  • X-Ring Chains: This chain uses an ‘X’ shaped rubber to be placed in between the side plates. They are also considered the newer versions of the O-Ring chains. Per bike manufacturers, these chains can hold lubrication better and can increase the chain’s lifespan by up to 40%.

Essential Factors to Consider in Choosing the Best Motorcycle Chains

Before we conclude, we shall talk about the factors to look for in a good motorcycle chain. Enumerated below, you will find the things to consider, which will increase the likelihood of choosing a product that provides the best bang for the buck.

AD

  • Price – You should look out for models that offer great quality and performance and do not cost much. It does not necessarily mean that cheaper ones do not perform well. It also does not mean that expensive one offer superior quality. You should be able to evaluate the pros and cons of each product so you can relate their prices individually.
  • Ease of Installation – Replacing your old motorcycle chain is a very easy task. You should pick the one that is easy to install. This may save you lot of time so you can enjoy more of your time riding.
  • Tensile Strength – This might be considered as the most important factor as this will determine the weight the chains will accommodate. There are several chains presented above that will carry the weight required, may it be 8,000 pounds or more. It is vital that you choose one that will not break if you place a heavy load on it.
  • Features – You have to carefully review the advantages and disadvantages of each product. By doing this, you can evaluate effectively which model gives you more value for the price you pay. Several models presented above offer different features and it’s up to you to determine which would benefit you the most.
  • Durable – An ideal motorcycle chain is strong and durable, as well as lasts for a long period of time. It should be noted that motorcycle chains will require regular maintenance. If you don’t have the time, there are models that already offer self-lubrication resulting in lesser friction between the metals.
  • Number of rings – It is also important to know first how many rings you need. You can do this by disassembling the chain and checking the number of rings on the old one. A chain breaking device might be required if you purchase a chain that has more than what you need.

Conclusion

Now that we laid down the things to know about motorcycle chains, we hope you can now make a decision. Choosing the best motorcycle chains may be a tedious task, especially if you don’t know what you are looking for. With this guide, we are confident that you can narrow down your choices to picking the best. You just have to weigh the pros and cons of each product and you’re good to go.

Are you also looking for similar products that you can buy for your vehicle? Click here to find out about products that are available in the market right now.

How To Test The Amplifier Of The Car?


How To Test The Amplifier Of The Car

Cars are the dreams of everyone. Yes, when you listen to music while driving your car, there you can feel the paradise inside it. We know that music is the soul-puller of every living creature. The melody can be in any genre. Every living creature loves music.

For good, pleasant, and mind-relaxing music, all we need is good sound quality. Of course, you might interrogate that, what are the needs of a good sound quality? For a crisp sound quality, all you need is a good amplifier and pulsive speakers.

Sometimes, we might fall into confusion about how to give a sound check with this electronic equipment. Don’t worry. We will encourage you to test the amps of the car, the benefits of car amps, and the best car amplifiers.


How to Test the Amplifier of the Car?

The fact is that many people have no idea how to test the amplifiers of the car. If you’re one among them, then you are right on the course. Here, we are going to see the simplest and the finest ways to test the car amplifiers. Moreover, you can soon try these tests with your car.

Just read the guidelines carefully and follow the procedures given. However, you might think that testing an amplifier is a kind of rocket science. It is absolutely a wrong thought. Just stick to the instructions. After reading this, obviously, you would like a sound engineer.

Only some basic consumption needs to be kept in mind. It is obvious that when working with the electrical parts of a car, you need to be more careful. Working with electricity may turn violent in the case of carelessness. It can also spoil your car’s condition and the circuits present.

More importantly, if you can see any melted components or burn marks, then you ought to remove the amplifier from your car. Or else your car will be at risk if you are testing with the amplifier fixed in the car.


Check List to Test your Amplifier

To give a test with your car amplifier, first of all, you must need some preliminary accessories. Otherwise, you cannot test the amplifier.

test car amplifier

Photo Credit: https://www.youtube.com/watch?v=7379TI5hxyI

The components mentioned above are more than enough to test your car amplifier. Then after that, you can move your car with a pulsive groove.

Phase: ONE

The ultimate purpose of testing the car amplifier is to check its working condition. To check the amplifier’s working condition, you have to put everything in the right way.

When you surf the amplifier, you can find two wires connected to the amplifier, one with red color and the other with a white color. The red color symbolizes the power cable or the positive wire. The black is the negative wire or the ground wire. Connect the red wire to the power source (the positive side) and the black to the other side (the negative side).

To check the amplifier, indeed, you need a power source. Thus, you can utilize the car battery for the power to check your amplifier. For a sound check, you need a 12-volt of the power source. If the power falls below 12-volt, then your speakers surely won’t work.

When your battery is set, connect the wires from the amplifier to the battery. The connection should be made in such a way that the red wire is connected to the positive side of the battery, and the black wire is connected to the other side, which is the negative side of the battery (grounding side).

If your connection is perfect, the light of the amplifier will turn on. This indicates that the amplifier is in a working condition.

This is one method to check your amplifier. Of course, it’s a very simple method.

Phase: TWO

Now, we are ready to test the amplifier quality to work on with the sound. Since we have already connected the wires of the amplifier to the speakers, testing the sound quality is easy.

Now, you will turn on the amplifier to invigilate the sound. Though the amplifier is on and the speakers don’t go on with the sound, then obviously, the amplifier has trouble in it. If the sound comes in a good decibel, then the amplifier is in good condition.

You might get confused with the speaker connections. Because some of the amplifiers are given with red and black cables, and some are given with RCA cables. Know the type of cables and then connect them accordingly.

Yes, this technique in testing the amplifier is a piece of cake, not rocket science. You are invigorating yourself into a sound engineer.

Phase: THREE

If nothing is working, then go for the next analysis of the amplifier. Every amp has a fuse inside it while it is manufactured. This is attached to disconnect the connection between the amp and the power source when high voltage occurs.

test car amplifier

Photo Credit: https://www.youtube.com/watch?v=NIOpocpbXSM

If your amp is not working, then you must check the fuse inside the amp. If you can find the problem in the fuse, then an immediate replacement of the fuse can give you the best solution. It makes your amplifier back into form.

In some cases, we have to check the inline fuse of the amplifier. The damage in the inline fuse cannot make the amp work.

Phase: FOUR

If you can see no problem inside and outside of the amp, then you have to check the above-said guidelines once again. The moment you check if you can come across any flaws, especially in the connection of wires and the fuse. Try to make the thing right.

Still, that you can find no flaws certainly means the circuit board in the amp has some serious problems. If not, then you can replace your amplifier with a good one instead of correcting the flaws in the amp.

However, before replacing the amplifier, recheck the power connection, the cables, and the voltage.

Finally, when everything is finished, replace everything where it has to be. Give the perfect connection without any interruption with other connections in the car. Screw up the battery which you took from your car and fix the new amp in the place of the old one.

Give a fine screw to the new one along with perfect wirings. Then you can have your world of music in the car.


Additional Tips and Precautions

test car amplifier

Photo Credit: http://www.soundbuggy.com/Eric/Car%20Audio/zuki/eleets_four_channel/

  • Before starting your work, make sure that you wear a glass
  • Remove the amp to test it properly
  • Never test it in a narrow area; choose a wide area to test the amp.
  • Have a knowledge of the connection with regards to the electricity
  • If you don’t know the connection, never make an unknown attempt
  • To avoid short circuits, never join the cables together.
  • Stand on a rubber sheet to avoid catching electricity.

Always read the instructions carefully. We have shown you the easy ways to test your amplifier. In the case of any misconduct, try to sort out the problem with the provided methods. The only major case is replacing the circuit board of the amplifier.

When everything is corrected, what else do you need? Start your drive with good music.