Home

Recent Posts

How To Polish Your Motorcycle Chrome-Like A Pro?


How To Polish Motorcycle Chrome

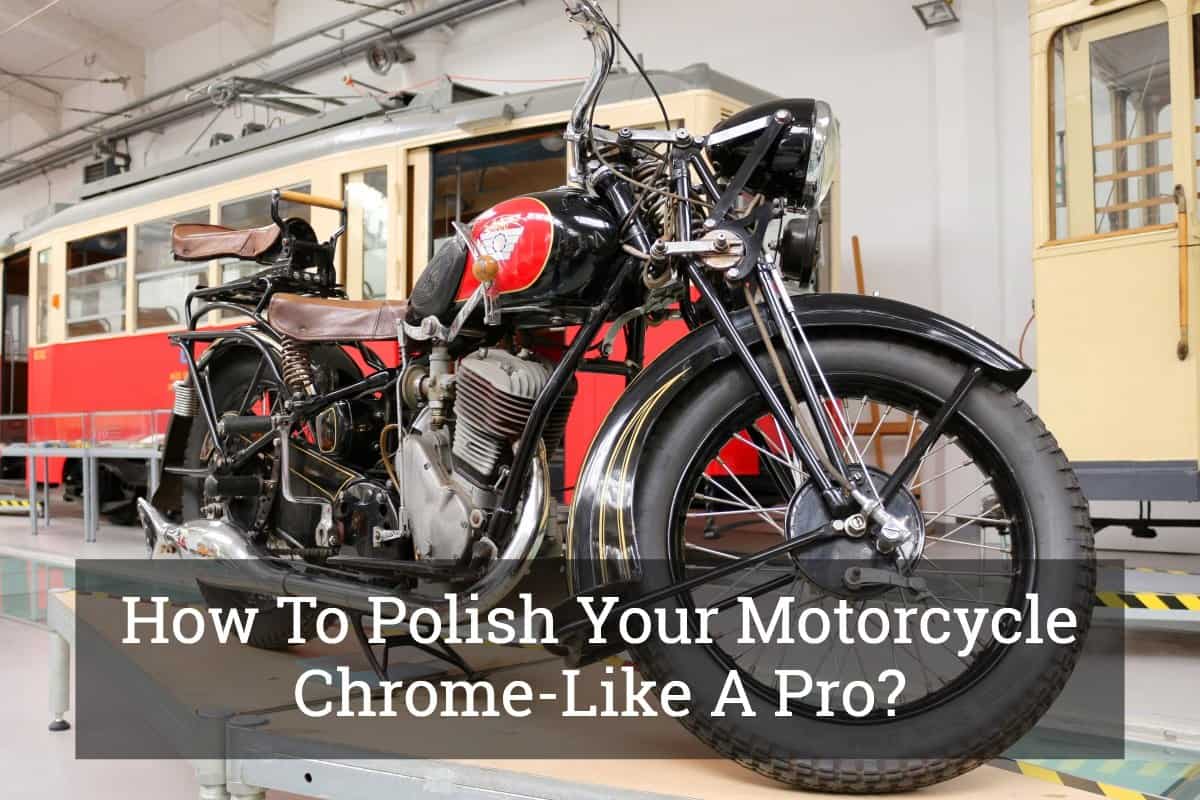
You may be amazed to know that the chromed parts of your motorcycle have the utmost sacrificing characteristics.

  • Firstly, the chromed parts give shining and glittering look to your motorcycle, which job no other parts do.
  • Secondly, they provide protection from corrosion to the materials beneath it.
  • Thirdly, while protecting others, they get damaged by scratches and other mechanical forces.

Are they not enigmatic?


Need for Chrome Polish

The first need arises because you want your motorcycle to look brightening, and the chromed parts contribute majorly in this aspect. Secondly, if there is the slightest damage to the chrome surface, the iron materials beneath it come in contact with the atmospheric oxygen and start rusting.

If left unrepaired, that particular part will be fully corroded, needing replacement. That is the reason why you must know how to chrome polish motorcycle.


Chrome and Bare Metal

Chrome and Corrosion are arch rivals because chrome protects bare materials from corrosion. If there is light corrosion, you can scour it away by chrome polishes or cleaners that are abrasive.

They can remove a small amount of metal and enhance the sheen of the base materials. However, you cannot remove the deeper scratches because the chrome layer is too thin. Therefore, you can remove the scratches by polishing down the base materials.


Wire Spokes & Plastic Chrome

For polishing wire spokes, soak a tough cloth with polish and wrap it around the spokes. Instead of polishing, clean and wax the surface. If the screw heads are damaged, you can paint them with chrome or chrome-finished paints, with a cotton swab or fine brush.


Coated Materials

There are certain parts of your Motorcycle that look like metal but have a plastic coating. Your wheels and fork slicers have such a finish. If you use a harsh cleanser meant for bare metal, it will strip the coatings off.

If you find a plastic coating damaged, remove it completely and polish or chrome the underneath part.


Steps for Chrome Polish

Before taking up the chrome polishing work, take out your rings or any jewelry. Don’t wear a motorcycle jacket and see that you have closed your zip. Otherwise, any of these may cause a scratch on the metal portion of your motorcycle. Avoid taking up the work when it is too hot or under direct sunlight. Otherwise, you may burn yourself by the rocker cover.

motorcycle chrome polish

Photo Credit: http://www.chemicalguys.com/Moto_Metal_Polish_Cleaner_for_Motorcycles_p/mto10616.htm

1st Step: Keep All Materials at Your Nearest Reach

The following materials are the materials required for chrome polishing

  • Motorcycle Cleaner and Degreaser
  • Shampoo
  • Chrome and Aluminum Polish
  • Polishing Wax
  • Ultrafine Brush and a toothbrush
  • A bucket of clean and warm water, along with a hose and sponge.
  • Fine Polishing cloths with microfiber

2nd Step: Preparing for the Work

Position the bike properly so that you can reach to every nook and corner of your bike, and the possibility of making any scratch is fully avoided. Start with spraying the bike cleaners onto the wheel and the compartment holding the engine, so as to remove any dirt or loose debris. You should agitate the soiled and oily parts using a soft brush or toothbrush

Before the drying off the cleaner, hose your bike down. Add a good amount of shampoo to the bucket of warm water. Wash it down using a clean and soft sponge. Remove every trace of shampoo with clean water. By using chamois leather, dry off the water from the parts that are exposed.

3rd Step: Polishing the Metal Parts

To protect your eyes, put on your sunglasses. Start with polishing the aluminum parts because this usually takes a longer time. Take a small amount of aluminum with a polishing cloth and start polishing.

First polish the aluminum portion by moving your hand circularly, followed by a straight movement. Finally, by using a fine cloth, polish the surface till it gives the maximum shining, to your satisfaction. Next, take up the chromed portion and use chrome polish.

motorcycle polishing

Photo Credit: http://autosolblog.blogspot.in/2013/05/autosol-for-motorcycles.html


Choose the Best Motorcycle Batteries

1. Brand Options

You have a wide range of brands of batteries to choose from. The following are your options. Each claims to be the best. Therefore, don’t take a hurried decision and never compromise on quality. Saving in price may lead you to regret later. Consider that you are buying a battery as a long term investment. Of course, the brand is one of the criteria for selecting the best motorcycle batteries.

The most well-known among these include Aprilia, Buell, Benelli, Ducati, BSA, Big Dog, CCM, ATK, Derbi, Kasea, Excelsior-Henderson, Gas Gas, Harley-Davidson, Gilera, Husaberg, Honda; Hyosung; Husqvarna; Indian; KTM; and Cagiva.

The other brands that may be included are Kawasaki, MuZ; Cannondale, Can-Am, OzBike; Panda Motor Sports; BMW; Polaris Victory, Piaggio; Triumph, Puch; Moto Guzzimaha, Bimota; YaKymco, Norton; MV Agusta; Kymco; Moto GuzziKymco; Moto Guzzi; Royal Enfield; Suzuki; and Titan.

2. The Need for a Good Motorcycle Battery

The following are the three basic reasons for having a good Motorcycle battery.

  • It ignites the fuel and starts the engine of your Motorcycle
  • It supplies power to your headlights and backlights
  • It absorbs high electric surges and becomes functional when the surges in electricity are high

3. Types of Motorcycle Battery

Types of Motorcycle Battery

The Absorbed Glass Mat (AGM) comes with a special mat that has the chief functionality of being able to wick the electrolytes coming from the battery. The second type is Gel Cell battery. It is built with a silica-like gel that is responsible for the suspension of the electrolytes.

It enables the electrons to flow freely in the plate. It can also provide a guarantee for non-leakage, even if the battery breaks.

4. Technical Specifications

While buying a battery for your Motorcycle, never forget to look at its technical specifications. Look for the cold cranking amps that indicate that the battery can start even in a cold environment. Pick up one with higher CCA if you live in a cold place.

Also, check the reserve capacity of the battery which indicates the number of minutes, during which it can be discharged at a particular temperature. The longer the reserve capacity,the better the quality.

5. Other Considerations

  • Seek for opinions of others, who have used a particular type and brand of the battery; you may look at the online reviews too.
  • Look for extensive warranty
  • Minimal maintenance

Synthetic Motorcycle Oil

Synthetic Motorcycle Oil

Since the lubrication plays an important role in the performance as well as longevity of your Motorcycle engine, you must go in for the best Synthetic Motorcycle oil. You should opt for the one that cleans and protects the engine parts of your Motorcycle. At the same time, it should reduce the volatility, facilitate smoother shifting and ensure the best overall performance of your Motorcycle.

Other feature for considerations is that the oil boosts the horsepower of your bike, improves the shear stability and adds to the life of the engine. The oil should inhibit corrosion and protect the clutch of your Motorcycle from slipping.


Oil Changing

Although being a very important aspect of maintaining your Motorcycle, this may too often be overlooked. If you don’t put ‘one’ stitch at the right time, you may have to put ‘nine’ stitches later. But, as a prudent Motorcycle owner, follow the guidelines given above, in respect of chrome polish, battery, and synthetic oil.

How to Choose the Best Epoxy Primer – A Guide to Making the Right Choice


Best Epoxy Primer

There is a lot of epoxy primers available, which makes it complicated to decide which one to buy. Aside from all the brands, there are also a number of different types, and each one’s purpose is specific. There are primers whose materials are made of lacquer, urethane, or acrylic, and they also come in different colors.

In this article, we will discuss everything you need to know about epoxy primers. What it is, its benefits, some of its types, as well as the important factors to consider will be discussed. We will also have a section wherein we will discuss the top four recommendations for the best epoxy primer. With each one’s features, pros, and cons, we hope you will be well-informed after reading this article.


What is an Epoxy Primer

An epoxy primer is a sealer whose finish is non-porous. Most of the time, it is used to ready the bare metal for coating or painting. It is also recommended as the initial coat on top of the bare steel. It is often used to paint over plastic, iron phosphate coating, or even fiberglass.

Though it is not recommended to use to fill imperfections, it can be used on dents, as well as on cracks. It has an excellent bonding capacity that makes a great finish on the surface of the metal. It provides outstanding adhesion to metals, and it also serves as the correct base paint for additional undercoat products. To sum up, it is the perfect choice to repair portions wherein there is exposed metal.

Using epoxy primers provides the user with a lot of advantages aside from maximum protection and adhesion. The main advantage of epoxy primers is that they don’t soak up moisture because they are non-porous. Since it’s waterproof, it is an excellent choice for its corrosion-resistant characteristics. Another thing is that they can be used for tank exteriors, power plants, water treatment, power plants, and marine applications.

Another benefit of epoxy primers is that they can be used to waterproof surfaces that are usually exposed to oxidation. They are also used on steel coatings for high-build extra layers of paint. Lastly, they are fitted to use on prepared concrete and steel.


Types of Epoxy Primers

In this section, we will be discussing the types of epoxy primers. This section is also very important since it can help you narrow down your choices. Pick one that is perfect for your specific needs and intended applications.

AD

  • Aerosol Can Epoxy Primer: If you want the convenience that a spray nozzle can offer, this would be perfect for you. With spray gun results, you can ensure that the application is even on the surfaces of metals. The only downside of this can be the limited content. You may be working on a project, and before you know it, the can is empty. That’s why buying spare cans is advisable if you want this type of epoxy primer.
  • Large Bottle or Bucket Epoxy Primer: This is the more common type of epoxy primer. It comes in two parts: the epoxy primer and the hardener. The two components should be mixed thoroughly before application. The advantage of this type of primer is that you can calculate the amount you will be using. Another great feature is that you can store it for extended periods of time.

Essential Factors to Consider in Choosing the Best Epoxy Primer

Before we end our discussion of the best epoxy primer, we should lastly talk about what to look for. There are great epoxy primers available in the market right now, that’s why choosing the best one can be frustrating. If you take a look at this list, we’ll be giving you the factors you have to take into consideration.

  • Easy to Use: You might want an epoxy primer that is very easy to use. You don’t want any complications or complex instructions when the job is very easy. Some products in the list provided above need to have their contents mixed, and some come in sprays. The one you should buy should be dependent on the purpose you are using it for.
  • Corrosion Resistance: The one you should buy must have this capability. As epoxy primers are applied for superior adhesion, corrosion resistance should also be considered.
  • Application: Some products cannot be applied to every surface. Buy an epoxy primer that can be applied to a variety of surfaces, such as fiberglass, plastic, and steel.
  • Price: In searching for the best epoxy primer, price should also be considered as a defining factor. There are a lot of expensive ones that do not deliver outstanding results. That’s why it is very important that you review which one is more valuable for your money than the others.

Top Four Recommendations for the Best Epoxy Primer

Product (Amazon Links)

Brand


Custom Shop Black Epoxy Prime/Sealer 2.1 VOC (1 Quart Kit)

Custom Shop

Review

Epoxy Fast Dry 2.1 low voc DTM Primer & Sealer Gray Gallon Kit, SMR-260G/261

Speedokote

Review

Raptor 4:1 Anti-Corrosive Epoxy Primer Kit UP4831 Gray 1L

Raptor

Review

USC 2K Spray Max Epoxy Primer Paint Aerosol

UCS

Review

In this section, we will be discussing the top four choices for the best epoxy primer. We will talk about some of their features, as well as their pros and cons. This section is considered as one of the most important, so you have to pay attention.


1. Custom Shop Black Epoxy Prime/Sealer 2.1 VOC (1 Quart Kit)

AD

The Black (available in grey and white) Epoxy Primer Kit includes 1 Pint of epoxy primer and 1 pint of epoxy hardener. It is stated in the instructions that the components must be mixed thoroughly. In addition, you should not mix material more than you will need. One great feature of this product is that you don’t have to wait for an induction time.

This product is an outstanding corrosion resisting epoxy primer that provides superior adhesion to metals. The direct to metal seal is very easy to sand and topcoat. Also, it can be applied to materials made up of aluminum, fiberglass, plastic and steel. It will provide superior hide and protection on the surfaces of your metals. Lastly, this product is chromate-free and the item weight is 3 pounds.

Pros:

  • Direct to metal
  • Kit already includes 1-quart epoxy primer and 1-pint hardener
  • No induction time is required
  • Offers corrosion-resistant material
  • Provides superior adhesion and hide
  • It can be used for aluminum, fiberglass, steel, and plastic

Cons:

  • No warranty information available
  • You have to clean the paint gun immediately after use

2. Epoxy Fast Dry 2.1 low VOC DTM Primer & Sealer Gray Gallon Kit, SMR-260G/261

AD

The Epoxy Fast Dry kit includes 2.1 pounds of epoxy primer (SMR-260G) and 1 quart of epoxy catalyst (SMR-261). The SMR-260 is an easy sanding and fast dry epoxy primer that comes in great colors and gloss holdout. The kit has an easy 4:1 mix epoxy primer that has an optional 5 to 10% reduction with 0 voc reducer. One great feature of this product is that it can be used both as a sealer and as a primer.

This type of epoxy primer offers maximum adhesion to aluminum, fiberglass, steel, as well as on top of existing finishes. To add, it also provides superior corrosion resistance and adhesion like the other products on this list. Another great thing about the epoxy fast dry is that is it relatively thicker than other commercial type primers. Lastly, it offers super smooth finish on the surface of the metal.

Pros:

  • Dual use: as a primer and as a sealer
  • Comes in great colors
  • Offers superior gloss holdout
  • Provides corrosion resistance and adhesion
  • Thicker than other brands

Cons:

  • A reducer should always be used
  • Thickness may also be considered as a disadvantage

3. Raptor 4:1 Anti-Corrosive Epoxy Primer Kit UP4831 Gray 1L

AD

The Gray epoxy primer kit consists of 1-liter primer when both containers are mixed. This can cover 60 sq feet at 3 MIL. 

This epoxy has some great features, such as excellent salt spray resistance, it can be applied directly over rusty surfaces, and it can also be applied wet on wet.

This epoxy work, in conjunction with Raptor coating, will protect from corrosion and resist salt damage. 

Pros:

  • Kit already includes 1-Liter of epoxy when mixed
  • Provides corrosion resistance
  • Offers outstanding adhesion

Cons:

  • May not be exactly a grey color
  • No warranty information is available

4. USC 2K Spray Max Epoxy Primer Paint Aerosol

AD

The USC 2K Spray Max Epoxy Primer is a product that will offer you excellent adhesion and corrosion resistance. It will also provide your metal with superior build and fill. Not only that, this epoxy primer is also very easy to use. You just have to activate, shake, and spray. Like all the other products on this list, it can provide adhesion to almost all surfaces, not only metal.

One great feature of this product is that the nozzle can deliver spray gun results. This product will offer you more convenience than the others. To use this epoxy primer, you first have to apply it to the prime. After that, you can now fill metal surfaces prior to painting or polyester product application.

Pros:

  • Provides excellent adhesion and corrosion resistance
  • Offers outstanding fill and build
  • Easy to use
  • Has a one kind of nozzle that delivers a spray gun finish
  • It can be applied to all metal surfaces

Cons:

  • No warranty information is available
  • Cleaning the spray gun immediately after use is a must

Conclusion

Now that we have discussed all you need to know about epoxy primers, we hope we have given you some enlightenment. Choosing the best epoxy primer may be tricky, but with this guide, it should be an easier task. With the product reviews and their pros and cons, you will be able to narrow down your choices and pick the best one.

Looking for other products that you can buy and use for your vehicle? Click here to learn more about other options that you can consider.

How To Shim Your Car Starter Like A Pro?


Do you sometimes find it hard to start your car, or does it make a noise when you start it? What would be more frustrating than a worn-out and old starter that just would not turn over? Do you think about the brand-new starter that will not crank over?

If yes, then you should look for the one that engages properly and fit correctly. But remember, a starter is not also responsible for noise; shims may be the main reason behind this. If you start your car without a shim, your car may sound like starter cranks and loud sound.

You need to use a shim to avoid noises that the starter emits. There may be many reasons for the starter noise, including the starter being too far or too close to flywheel teeth, loose mounting bolts, and much more.

Many people prefer not to use a shim, but they need to check the clearance of the gear with a wire gauge. You can move gear easily to meet the flywheel by removing the solenoid. You should also use the right starter mounting bolt with knurling that facilitates alignment. But sometimes, the starters require shims to keep the drive gear away from the flex tape gear.

Do you know how to install or use a starter shim? When you buy a car and get its engine, you are not informed of whether your starter has a shim or not.

You can take the cover off to examine the starter and the flex tape. Sometimes it seems impossible to see how gears would line up. You should know how to engage the driver to see the distance. You can avoid loud clunking noise by using a starter with a shim.

If you don’t have a shim with your car starters, then you should buy a prestigious starter with shims as it can be very helpful in reducing loud clunking sound and getting a smooth sound when you start your car.

Some starters required shims to provide clearance between the flywheel and the pinion gear. Some people also use flat washers in place of shims. To know about the shimming procedure, you need to know how to remove and install a starter. Here, we have mentioned some steps to remove and install it. Let’s have a look below:


Starter Removal and Installation

Starter Removal and Installation

How to Remove Starter?

  • First of all, you need to disconnect the negative battery cable and raise the vehicle.
  • Now disconnect solenoid wiring and replace each nut. You can tag the wiring position for starter installation purposes.
  • Now remove the bracket from the starter, the starter mounting bolts, and an upper bolt of the front bracket from the solenoid shield.
  • You can see the projected starter shim tab between the surfaces of the starter and block. You need to remove this outer bolt and lose an inner. Lower the front end of the starter first and remove the unit. Sometimes, you may find it with an inner loosened bolt and an outer removed bolt; the shim may grasp and pull from the starter’s top, so be careful.
  • If you cannot see the shim tab or shims fall from the starter as it was being removed from the car, then you can use flat washers. You need not try to determine the locations of shims. You can collect the shim for reuse during installation. Shim without tab may be positioned on a starter before its installation, but bolt may hold through starter installation for holding the washers or shims in position.

How to Install Starter?

shim your car starter

Photo Credit: http://www.superchevy.com/how-to/additional-tech/sucp-0107-chevy-starter-tuning/

  • If you have found shims or washers without tabs on starter removal, you should position these shims on the top position of the starter. You can use the mounting holes to hold them in the correct
  • Now, you need to fix and position the starter to the engine block
  • Install the mounting bolts loosely
  • You should position the shims before lining the outer mounting bolt
  • Once the shims and starter are positioned properly, you can tighten two mounting bolts.
  • Install the front bracket of the starter too
  • You can attach the starter wiring to the solenoid
  • Remove the jack stand, lower the car, and reconnect the battery cable.

This is all about the removal and installation of the starter. You need to follow all the steps carefully to avoid any inconvenience in the further procedure.

In this guide, we have mentioned the shimming process below: You can follow the tips below to preserve the life of the starter and flywheel in your engine.

  • First of all, you need to disconnect the negative battery cable.
  • Now, raise and support the car with the help of jack stands. Be very careful while doing this.
  • You can remove the flywheel inspection cover on the bell housing
  • Turn the flywheel with the help of turning tools and inspect the flywheel teeth. If you find any damage, you need to replace it.
  • Find out the hole in the bottom of the car starter and insert a screwdriver into it. You need to move the clutch assembly and starter pinion to fit the flywheel teeth and pinion together. You can rotate the flywheel if required.
  • Now use a 020-inch wire gauge to check for the pinion to flywheel clearance. You can use your wire gauge or use a spark plug wire gauge to check it. Center the pinion between the gauge and the flywheel teeth. Sometimes, people place it in corners, and it shows a false reading. If you want to see correct readings, then you should center it. You need to shim the starter of your vehicle away from the flywheel by adding shims one at a time to the starter mount if the clearance is found under this minimum. You must also check out the clearance after adding shims one by one.
  • If you find the good clearance dealt in the vicinity or over 0.20 in., then you need to shim the starter toward the flywheel. Severely damaged and broken flywheel teeth are also a good indicator of good clearance. You can shim the starter towards the flywheel by just adding a shim to the outboard starter mounting pad. Again, you need to check the clearance after adding each time. A 0.015-inhim may decrease the clearance by about 0.010 in.
shim your car starter

Photo Credit: https://www.youtube.com/watch?v=r5a8kVUKht4

You can follow the above tips to shim your car starter. You can also find this information in a guide you get with the starter when you buy a brand-new starter with prestigious shims. You can also learn all about the shimming process from this guide. You can do it in a simple and easy way. Shim is great for drivers who want a good driving experience always.

Every car owner knows the starter is responsible for cranking the engine. The starter is used to engage the flywheel teeth when you start the car or insert the key in the ignition in the crank position. Sometimes, you feel noisy and loud sounds; it may be due to several factors. Choosing the best engine oil for your car will be the perfect option. You need to know how to shim your car starter to avoid this problem.

Here in this guide, we have mentioned some steps that help you find out the main causes of the problem and the fixing procedure. The old starter may be the cause of noise and loud sound; sometimes, shims may be the main cause of this problem. You can stop this noise while starting your car by following the tips mentioned in this guide.

A Guide to Choosing the Best Weight Distribution Hitch


Best Weight Distribution Hitch

Towing a hefty load is a real pain, especially if you don’t have a weight distribution hitch. You won’t ever have to worry about the occasional swaying if you have one of these. If you have this installed in your vehicle, hauling heavy loads will be more efficient. Weight distribution hitches are fitting for SUVs and trucks as long as they have the required towing ability.

If you are looking for the best weight distribution hitch, then you are in luck. In this article, we will be discussing all there is to know about this very useful device. We will be talking about its uses, its types, and things to look for in choosing the best one. Not only that, but we also have the top five recommendations for the best weight distribution hitch, along with their features.


What is a Weight Distribution Hitch?

Before we have the discussions, let us first talk about what a weight distribution hitch is. A hitch is basically a towing device you use to temporarily attach a trailer to the towing vehicle. Its main purpose is to keep the attached trailer in a flawless balance. To add, it is also used to ensure that the heaviness of the load you are moving is equally distributed.

The weight distribution hitch balances the load at the front part of the trailer up to the axle. It also balances the total weight, including everything that’s inside your trailer. If you opt not to have them installed, you will end up having a hard time. Thus, the importance of the hitch is to avoid swaying of your trailer. In addition, you should also consider the type of load you are towing.

One of the major benefits of having this device is that it enables the operator to brake and turn smoothly. It also prevents the driver from losing control of the trailer while driving. With this, the hitch gets rid of the irregular weight distribution. Driving with an unevenly distributed trailer weight can be dangerous, especially when driving at high speeds.


Top Five Choices for the Best Weight Distribution Hitch

Product (Amazon Links)Gross Trailer Weight  

Eaz-Lift 48069 Elite Weight Distributing Hitch Kit – 1,200 lb. Capacity

12,000 lbs

Review

Equal-i-zer 90001000 Equalizer Hitch

10,000 lbs

Review

Pro Series 49903 Complete Weight Distribution Kit

10,000 lbs

Review

Husky 32218 Center Line TS with Spring Bars – 800 lb. to 1,200 lb. Tongue Weight Capacity (2-5/16″ Ball)

12,000 lbs

Review

Fastway (94-00-1061) e2 Round Bar 2-Point Sway Hitch with Shank and Hitch Ball, 10,000 lb. Load Capacity

10000 lbs

Review

In this section, we will discuss the top five picks for the best weight distribution hitch. If you were having a hard time choosing, read the following section to have a better understanding of each product. We will talk about some of their features, advantages and disadvantages. We hope you will learn a lot about the products so you can evaluate your choices better.


1. Eaz-Lift 48069 Elite Weight Distributing Hitch Kit – 1,200 lb. Capacity

AD

The Eaz-Lift Hitch kit provides timesaving convenience as it comes with pre-installed components. The kit already includes a hitch ball, a sway control ball, and a round bar weight distribution hitch. Both the hitch and sway control balls are pre-installed and torqued in relation to the hitch head. The U-bolts and chain package are already installed on the spring bars, and hardware for mounting is already included.

Regarding its specifications, the item weight is 97 pounds, and it has a 1,200-pound weight distribution feature. Not only that, this product will be able to accommodate up to 12,000 pounds of load weight. Also, it is important to note that the brand is one of the first manufacturers in weight distribution technology. Based on the technical specifications above, this product delivers superior performance.

Pros:

  • Already comes with pre-installed components
  • Hitch and sway control balls are pre-installed
  • Can tow 12,000 pounds of load weight
  • Mounting hardware is already included in the kit

Cons:

  • Drilling may be required to attach the sway control ball to the trailer’s frame
  • Some users had issues regarding the delivery of the product

2. Equal-i-zer 90001000 Equalizer Hitch

AD

The Equalizer hitch is modeled with the incorporation of the sway control and weight distribution systems. This type of hitch works on almost all types of trailers for your vehicle. Having this system allows the swaying to be minimized, as the weight moves to the axle of the towing car. Thus, leading to an evenly distributed load weight. To add, this product is very easy to hook up with your trailer.

Another great feature of this product is the flexible sway control bracket. It is highly convenient as it fits a trailer frame on up to 6 inches high. For its specifications, it has 1,000-pound weight distribution feature and it can carry trailer weight of up to 10,000 pounds.

Pros:

  • Combination of the sway control and weight distribution systems
  • Easy to install and works on any type of trailer
  • Comes with a flexible sway control bracket
  • Can tow 10,000 pounds of load weight

Cons:

  • Hitch ball is not included in the kit
  • The product may need grease fitting

3. Pro Series 49903 Complete Weight Distribution Kit

AD

The Pro Series brand is already a trusted one and an industry leader. One of the best features of this product is that it already includes all you need while providing outstanding results. As the Pro Series is a reputable manufacturer, it is with assurance that the product quality is very good. The kit comes with all the necessary parts, which also makes it a great value for your money.

For its specifications, it has a 1,000-tongue weight and can carry 10,000-pound maximum load weight. The product features equal distribution of the axles and the tongue weight, which adds stability and control. In order to reduce the swaying of your trailer, it utilizes a friction sway control mechanism. Not only that, it includes an adjustable tension that allows better resistance and control.

Pros:

  • Kit includes all the necessary parts
  • Can tow 10,000 pounds of load weight
  • Features a friction sway control system
  • Comes with an adjustable tension for enhanced control
  • The material is made of solid steel

Cons:

  • Equipped with a 2-inch ball that will most likely wear out the tongue
  • Anti-sway mechanism will not work with surge breakers

4. Husky 32218 Center Line TS with Spring Bars – 800 lb. to 1,200 lb. Tongue Weight Capacity (2-5/16″ Ball)

AD

Like the previous models presented above, the Husky Hitch is among the best ones you can purchase right now. It provides efficiency and is guaranteed a great value for your money. This model features a combination of weight distribution and sway control systems in one single product. This means that you will not have to buy additional parts, which makes it very efficient.

Another great feature is that the manufacturer found a way to reduce the noise generated by other models. In addition, components are made of steel that adds extra stability and durability. The Husky hitch is less heavy compared to other products. It has a tongue weight of 1,200 pounds and can accommodate up to 12,000 pounds of gross trailer weight.

Pros:

  • The components are made of high-quality steel
  • Instructions in the manual are easy to understand and very helpful
  • Generates minimum noise
  • It features new technology
  • Can tow 12,000 pounds of trailer weight

Cons:

  • The spring bars can be a bit challenging to insert in the brackets
  • Areas of friction may rust easily and may require regular maintenance

5. Fastway (94-00-1061) e2 Round Bar 2-Point Sway Hitch with Shank and Hitch Ball, 10,000 lb. Load Capacity

AD

The Fastway hitch is also a high-end model and might be one of the best out in the market today. It can support 10,000 pounds of trailer weight and the way it was constructed is very durable. It provides weight distribution like no other while lowering the pressure on your vehicle. It is outstanding in terms of the range of products it can tow and is also a rewarding value for your money.

The product already comes with a hitch ball and a shank. Item weight is 94 pounds and warranty is granted for parts, which you can request through customer service. Not only that, the instructions are easy to implement that allows you to save time in assembling. Lastly, it can be easily hooked on and off from your towed vehicle.

Pros:

  • Can tow 10,000 pounds of trailer weight
  • Instruction manual is easy to comprehend and implement
  • Easy to hook up and remove from your towing vehicle
  • Warranty for parts can be requested from customer service

Cons:

  • Installing the round bars may be challenging for some
  • Hitch is a bit large and is visible from the rear backup sensors

Types of Weight Distribution Hitch

After discussing the top five picks for the best weight distribution hitch, we will now tackle about its types. Knowing two of its most popular kinds can help you make a more informed decision.

  • Trunnion Bars – With trunnion spring bars, square spring bars are attached in the center of the ball mount. This type of hitch is best for increasing the system load weight rating. One great feature of trunnion bars is that they balance the ride during windy weather or on unsteady terrain.
  • Round Bars – With this type, round spring bars are glided into the bottom part of the ball mount. To add, they are kept in position using clips. This offers more clearance room to attach the trailer to your vehicle.

Factors to Consider in Choosing the Best Weight Distribution Hitch

Before we conclude this article, we will first talk about what to look for in a weight distribution hitch. All of the models presented may be great but to be sure, let’s talk about what makes a good hitch.

AD

  • Weight Capacity: This might be one of the most important factors when choosing the best weight distribution hitch. You should buy a hitch that offers at least 50% higher GTW (gross trailer weight) compared to its TW (tongue capacity). This rating will make sure that driving controls are proper and distribution is enhanced for both the trailer and the towing vehicle.
  • Sway Control: Your hitch should be able to minimize unpredicted, as well as endangering, sway of the trailer and towing vehicle. The system should prevent your trailer from falling over during hard turns. To enhance your control, you have to build a resistance that only a weight distribution hitch can effortlessly provide you.
  • Ease of Installation: Choose a model that will only require you a short while to install. It’s acceptable to assemble a hitch for 30 minutes to an hour but anything longer than that is inconvenient.
  • Capacity of the Hitch: Tongue weight may range from 1,000 to 1,200 pounds while gross trailer weight can range from 10,000 to 12,000 pounds. You have to check the manual from the vehicle’s manufacturer to know for sure what type you need.
  • Price: If you want to invest on something sturdier, you should consider purchasing one of the more expensive ones. These kinds usually offer outstanding quality and warranty on parts. You should never have to worry about malfunctioning if you invest on a more pricey weight distribution hitch.
  • Pre-installed Components: Some models offer hitches that are already complete and do not require you to buy additional hardware. You should look for one that has all the complete parts for ease of installation.

Conclusion

Now that we have discussed the things to learn about weight distribution hitch, we hope we gave you valuable information. It is never easy to find the best one out there but it should be easier with this guide. Finding the best weight distribution hitch can be a little frustrating if you don’t know what you’re looking for.

In this article, we discussed about what a weight distribution hitch is, its benefits and two of its types. We also talked about the essential factors you have to take into consideration in finding the best one. Lastly, we hope we are of very big help with the top five recommendations. You just have to weigh their features, pros and cons to make your decision making a lot easier.

Are you looking for other car-related products? Click here to find out about the options that are available in the market.

How To Install A Second Battery For Your Car’s Audio System?


How To Install A Second Battery For Your Car’s Audio System

We do love to travel a long distance. By car, we would have covered a far distance with our family. Of course, a long journey aches without any fun. However, we have a healer to relieve us from those aching.

Yeah, it is the music. “Music is the universal language of mankind – Henry Wordsworth Longfellow.” It is the only remedy for the ache in your soul. To hear good music, we need some equipment. Speakers alone will help us to hear the divine music.

A car with speakers along with music can make anyone travel any distance. Now, we are going to see how to install a second battery for the car.


Guidelines to Install a Second Battery for Your Car’s Audio System

  • To install a secondary battery, you must first upgrade your alternator. The secondary battery stands as a backup for your car to start. In some cases, the battery might drain off and won’t start your car engine.
  • A secondary battery will increase your storage capacity, the perfect power storage for your car. Before installing the second battery, we must know the preliminaries in a battery. A good understanding of the battery can keep you far from accidents.
  • First, in that battery label, see the label present. When you observe the label, it is given some voltage from the battery. The batteries are of four types: AAA, AA, C, and finally, D. Each battery varies with the power discharge with respect to time.
  • The battery has a voltage of 1.5 volts. Normally, you will select the D type of battery because it is bigger in size than the AAA type of battery. Here comes the point you may not know.
  • The size is not the matter. The main function that must be noted is the power discharge with respect to time and the sustaining capacity of the battery. We have two types in connecting a battery.
  • Yeah, we have learned it in the lower grades. One is the parallel connection. The other connection is the series connection. In a series connection, the resistance in the first battery is more than that in the second battery. This series connection may end up causing heat in the first battery.
  • Moreover, the power won’t distribute equally. There will be a variation in distributing the power. So it is advisable to connect the battery in parallel connection.
  • In a parallel connection, you have equal power distribution. The power from the batteries holds some backup power in a parallel connection. To setup a car audio system with a second battery, you must need the components for car audio system.
  • The components include two blue four-gauge wires and two red four-gauge wires. Of course, two batteries, an amplifier, and some normal wires to connect the amplifier and the speakers. Finally, 6 x 9 speakers for your car a pair.
  • First of all, fix the speakers in your car. Some people fix it in the front doors of the car. Some people will fix the speaker behind the back seat of the car. After that, you fix your speakers use the normal wires to connect your speakers and the amplifiers.
  • The positive side to the positive and the negative to the negative side of the amplifier. After connecting the speakers to your amplifier, now it’s time to work on with the connection of your battery.
  • One safe way to fix these two batteries is with the battery isolator. The battery isolator will combine the two powers of the battery and make the car ignite with a stable power. It is the primary duty of the battery isolator.
  • This won’t affect any system in your car. A perfect starter and a power backup device. You need not worry about the weather. It will leave a charge left behind for the car to start again without any interruption.

Since we use a greater power discharge in a car, we use a four gauge wire. In addition to these wires, we are adding fuses for a safety precaution. The fuses will prevent any shortage inside the car and safeguard your battery from the shortage.


Connecting all the Wires and the Instruments

First, keep the primary battery at the front part of the car, which is beside the car engine. You can also place the batter behind the car back seat. But you obviously need a partition to separate the primary and the secondary battery.

Connect the battery to the alternator of the car to the positive nodes. Then, ground the negative nodes of the battery. From the primary battery, connect a parallel connection to the secondary battery.

The secondary battery may be in either front or at the back of the seat in a car. However, there won’t be enough space for the secondary battery on the front side of the car. Take a red wire of four gauges. Then connect it to the positive end of the primary battery.

Then, from the primary battery, connect the red wire to a fuse. From the fuse, connect another red wire with same four gauges, then direct the red wire to the secondary battery in your car.

After that, when you connect the battery, don’t forget to close the ends of the positive side in a battery with a cap or a cover. This is a safety precaution to stop any sparkles or shortages that come from the battery.

Now, connect to the amplifier from the secondary battery.

car audio system battery

Photo Credit: http://www.ford-trucks.com/forums/76654-isolator-or-relay-for-dual-battery-system-2.html

To connect the amplifier from the second battery, connect the red wire of four gauges to the positive end of the secondary battery. Then, from the positive end of the secondary battery, route the wire to a fuse.

After routing the wire to the fuse, from the fuse, connect another and direct the wire to the amplifier in the car. Of course, you must cover the positive end with a plastic cap or a plastic cover.

The chemical reaction of the anode and the cathode inside a battery produces electricity from the battery. Then the power from the battery ignites the car to move start its engine.

After connecting the positive sides of the primary and the secondary batteries, the negative side of the batteries must be grounded from the battery.

Make a final check of whether all the connections are made correctly. In the case of any wrong connection, it will lead to a shortage, or the car won’t start. So, double-check your power connection from the batteries.

Finally, once your speaker and amplifier are fit into their position, check the wires from the amplifier to the speakers. Go for a sound check in your car.

Start your car with a pulsive rhythm, and drive your car with an increase in speed.

The above-instructed guidelines are a keen and observed procedure to install your second battery to your car. The 6×9 speaker is a 6-inch high and 9-inch wide speaker that gives you an oval shape.

This speaker gives you a crisp and clear sound in your car. Enjoy music without any interruption and live your life with music because music is the only medicine for your soul at any point that matters.

How to Clean Fuel Injectors That Are Clogged?


How to Clean Fuel Injectors That Are Clogged

Before going into the details of how to clean fuel injectors, let’s get familiarized with the fuel injection system first. Fuel injection in your car engine is the introduction of fuel to an internal combustion engine using an injector. For the smooth function of an automotive engine, this injection of fuel should happen in a continuous fashion.

Fuel injection systems can be of two types: direct injection and indirect Injection. In direct injection, fuel is directly injected into the engine cylinder, which is filled with compressed air. This happens precisely in diesel engines. In indirect injection, the fuel is injected into a pre-combustion chamber, and this commonly happens in Petrol Engines.

When your internal combustion engine is stopped, the combustion chamber will have a leftover fuel-gas mixture, which hangs around for some time. When the engine cools, the mixture settles on the surface of the chamber and in the fuel injector, too. This sticky residue will remain on the injector in the long run. Apart from fumes and fuel, the injectors can be clogged by debris from the gas or fuel system. The higher the temperature, the more waxy sediment there is, and the more the tendency to clog.

Obviously, when the fuel injectors are clogged, the amount of fuel injected into the combustion engine will be lesser, and this will affect the combustion rate. This affects the engine performance on the whole.


Symptoms

cleaning clogged fuel injectors

Photo Credit: http://www.peachparts.com/shopforum/vintage-mercedes/156473-can-i-clean-fuel-injectors.html

Even though it’s not possible to be 100% sure about injectors getting clogged, whenever you experience a lesser fuel efficiency, a rough idle or when your car takes the time to start, be careful, it could be due to your clogged injector.

It’s difficult to detect the problem in the early stages, as technology has developed to such an extent that the emission of fuel to the engine can be adjusted to compensate for minor errors. This is made possible by internal sensors available in modern engines. All thanks to technology!

Most of the engine problems that you face, like hesitation and rough idling, can be due to fuel injection issues. This clogging can be avoided by your routine engine tune-up and maintenance. It’s very crucial that your fuel injector be clean and be working all healthily to have peak engine performance.

Now, let’s get into the details of how to clean fuel injectors, step by step. Ideally, fuel injectors should be checked for clogging every 15000 miles in the absence of any other indicators above.


Fuel Injection Cleaning

Fuel injector cleaning solvents are widely available on the market to remove the deposits from the fuel injector. We can make use of this solvent, which will dissolve the sediments in the fuel injector and thus clean the injectors. You can even use the best fuel additive available in the market to clean the fuel injection system. One among the best diesel fuel additives available is the red line 85 plus.

For car users who are not willing to spend money on getting professional help to clean your injectors, you can even go for the following option:

1. Manual Cleaning

For car users who are experts and have a fair understanding of the engine layout and components of the engine, manual cleaning of fuel injectors is advisable. The engine needs to be disassembled; the fuel injectors need to be taken out and cleaned manually by using solvents to remove the sediments. After that, the engine components can be reassembled again as per the layout.

Novices – don’t even think of attempting this. This is highly risky because you might end up messing around with the engine parts and assembly and might end up creating more issues than what you are trying to solve.

The pain will be aggravated if you require cleaning the entire fuel system rather than the fuel injector alone. Trust me; assembling engine parts is not going to be a piece of cake.

2. Using Fuel Injector Cleaning Kit

This method has proved to be highly effective and less time-consuming. This can easily be performed, and there are fewer chances of failure.

However, to do the cleaning on your own, you can get a fuel injector cleaning kit, which contains a cleaning agent. This is essentially made of solvents, detergents, and additives, which can be run through the engine system, of course, under high pressure to clean the sediments. Please follow the steps with utmost care.

fuel injectors cleaning

Photo Credit: http://www.optimizersystems.com/

  • Get the right fuel injector cleaner kit: In most cases, the fuel injector cleaner kit is common for all vehicles. But don’t take chances; check your car manual to get a cleaner kit suitable for your engine. The cleaning kit contains a canister of the fuel injector, a hose, and a gauge to determine the air pressure.
  • Locate the Fuel Injector: Take a look at your car manual to locate the fuel injector and have an idea of the position of the fuel pump and the components. The instructions in the cleaning kit will also be helpful.
  • Disconnect the pump: The next step is to disconnect the fuel pump or close it in such a way that the fuel returns to the tank when you are attempting to clean the pump.
  • Disconnect the Pressure regulator vacuum line: The pressure regulator vacuum line should also be disconnected as the next step.
  • Connecting the Cleaning Kit: The cleaning kit should be connected to the fuel pressure test port after referring to the instructions in the cleaner. It’s very important that the injectors are not exposed to fuel, as the cleaner is flammable.
  • Open the cap of the fuel tank: The cleaning process happens by injecting the solvent under high pressure to the fuel injectors. The fuel cap is opened to reduce the pressure and to prevent combustion.
  • Turn on the engine: Before you go ahead with this step, check once again to see whether the fuel pump is off. It takes merely 5 to 10 minutes for the cleaner to pass through the injectors to get consumed. The engine will automatically turn off completely on using up the cleaner.
  • Remove the cleaner and reattach the fuel pump and pressure regular hose: Now that we are done with the cleaning process, the next step is to remove the cleaner and to realign the fuel pump and pressure regular hose. Now, you can turn on the vehicle and test whether the fuel injectors are working fine.

If you have followed all the instructions in the right manner, be assured that your engine will run smoothly without any problems after the cleaning process. Remember if there are any unusual noises, immediately approach a professional.

3. Seek Professional Support

The next method after cleaning your clogged fuel injector is to visit a professional, which is the most effective and safest method of cleaning. The only drawback is that it’s a bit expensive.

If you are looking to reduce the maintenance expense of your cars, the safest way is to clean your fuel injection system every 15000 to 30000 miles. This will save money and bring in efficiency.

Next time you have a clogged injector, try this out and share your comments.