Home

Recent Posts

How To Do Spray Painting In Cold Weather?


How To Do Spray Painting In Cold Weather

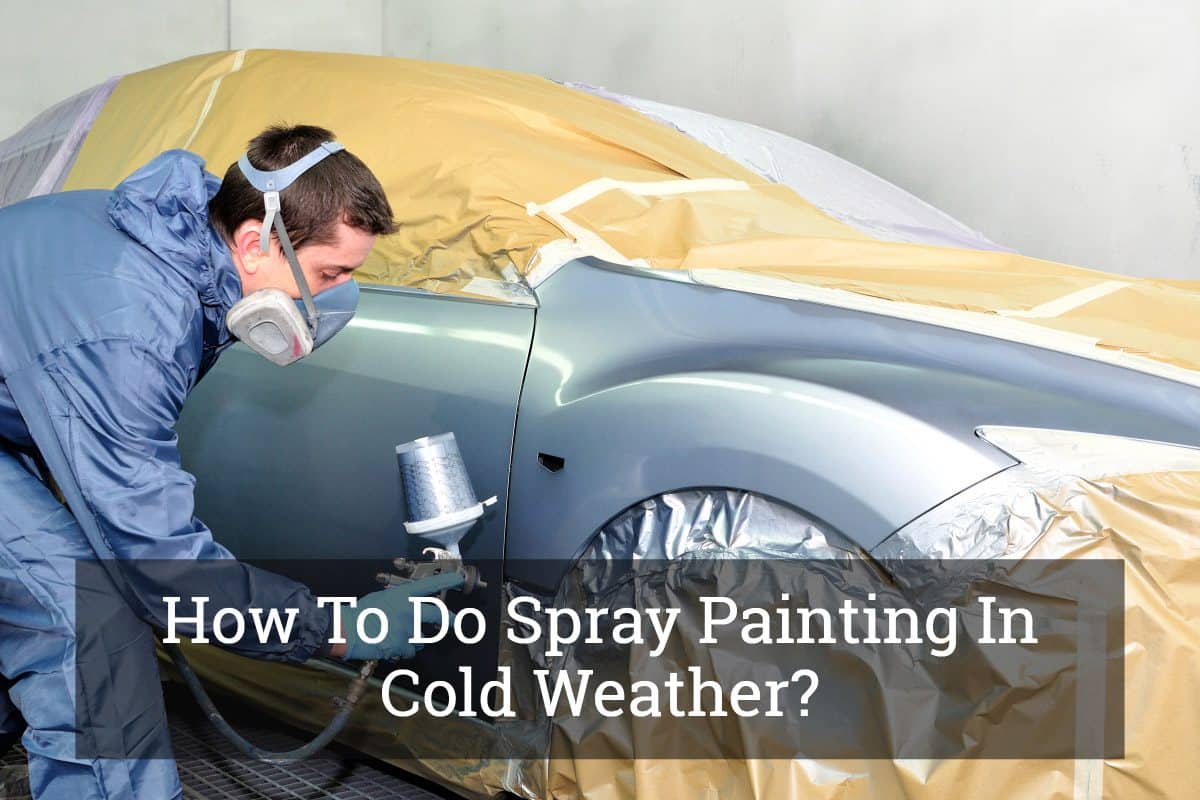
(Revising) How To Do Spray Painting In Cold Weather?

Many people are learning to spray paint nowadays. For some, it’s a hobby, while for others, it’s a way of saving some money.

Spray painting isn’t a hard job, but spray painting in cold weather might turn into a disaster, especially when you’re painting the interior of the kitchen cabinet or a car.

To spray paint in the cold, you will need to:

  • Try to stay inside an enclosed area with good ventilation. If you are outside in an enclosed tent, make sure that particles don’t come in contact with the drying paint and that the weather is warm enough for the paint for several days.  
  • Get a cold-rated paint or add an additive to help the paint work properly in the cold.
  • Make sure you have a good environment to paint in.
  • Check the temperature and weather when painting.
  • Plan for the paint to take longer to dry.
  • Practice painting in the cold before painting your car.
  • Check and prepare the paint surface.
  • Check the paint for fluidity.
  • Take your time and get it right. 

Painting during the winter or in cold weather may be unavoidable. House remodelers try not to work outside in the cold if they can.

Temperature ranges for the cold weather spray painting is usually considered from 35 to 50 degrees Fahrenheit. So, lets find out how to spray paint in this type of weather, the right way?


How to Spray Paint in the Cold Weather?

It’s necessary to understand that how the paint application is affected by low temperatures and how the performance, characteristics, and drying pattern of paint changes.

Painting is affected by cold weather because oil and alkyd based paints have resins and natural oils in them. These paints get more vicious under low temperatures.

Therefore, some paints at the subzero temperatures or in the cold weather become semi-solid or very thick, which might need excessive thinning.

Although, the latex paints do get frozen at the low temperatures, some additives can help thaw them or improve freeze resistance in latex paints.

You can even use the same additives in hot weather to do a painting to make the rolling and brushing process easier.

Latex paints get affected by volatile additives and slower evaporation water rate under low temperatures.

cold weather paint

So, if you are considering painting in cold weather check the label of your paint to see if it shows the minimum temperature rating (patch.com). You may not have to add any additives, but if you do, that’s an option as well.

  • Start by using a good primer. This helps the paint bond better, or use paint with primer.
  • Check the paint temperature rating.
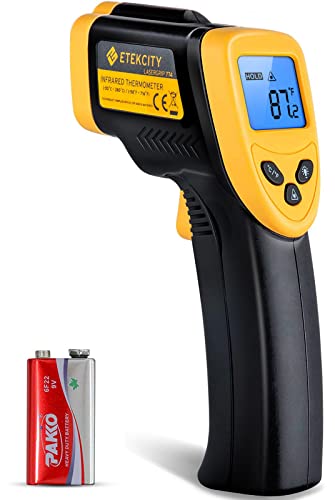
  • Check the temperature surface that you’re painting on to be sure it’s the right temperature to paint on. An infrared thermometer gun can work well.  

AD

If your painting surface is warm enough, you can paint when it’s cold. It all depends on the paint tempature rating. 

  • Make sure the surface is free of moisture.
  • Use a stiffer paintbrush. Nylon and polyester can work well.
  • Remember to take into account weather patterns including: sun, cloud, wind, and rain.
  • Determine how many coats you need and how long it will take for the paint to dry in the cold. If the paint is rated 50° and the temperature gets colder the next few day, wait until you have a few day of above 50° weather.

(Credit bullit points: mccormickpaints.com)


Will Your Spray Painting Paint Work Or Not?

Latex and oil-based Paints

As I explained earlier, latex paints might thicken and freeze, if not treated with an additive. 

If your paint has frozen and them thawed out what should you do? Well, in that case if you still need to use this latex paint, you must first check if to see if it has lumps in or not.

If you observe lumps and the paint isn’t smooth, then it’s the sign that the paint is not usable anymore and you must discard it. Manufacturing of latex paints is done in such a way that it can undergo several thaw/freeze cycles, but the moment you find lumps in it, you must discard it.

Compared to latex-based paints, oil-based paints are more resistant, and they usually freeze at lower temperatures.

Do your research and find a paint that is good quality and can work in the weather condition for your area.


Problems While Spray Painting In the Cold Weather

Getting the right paint and the painting in the right temperature are critical to your overall outcome. Painting in the cold weather may bring some of these problems to be aware of:

  • Drying period might slow down because of the heavy paint layer
  • Color uniformity may be quite poor
  • Paints will need more time for mixing
  • Water spots, especially in latex paints
  • Improper formation of paint layer causes powdery film
  • Base coat might look darker than the touch-up coat
  • Paint coverage reduced due to excessive building of paint layer
  • If the temperature goes below 40 degrees, avoid many oil-based paints
  • Paint layer will get thick, and it will cause issues like bubbles/bumps when applied
  • Spray gun may not work the way it was supposed to and gets clogged easily
  • Runs and drips on the painted surface may be common if you paint in cold weather

Tips for Painting in the Cold Weather

If you’re left with no other option, but to paint in the cold weather, then follow the tips I have mentioned below:

Painting in the Cold Weather
  • Make certain that spray gun that you’re going to use is clear because chances are ice might get struck into the gun during the cold weather. Cleaning the gun before will help you avoid problems like jamming or clogging later.
  • Make sure the surface of the object you’re going to paint is clean. Any moisture left on the surface will cause problems.
  • Scrap away the frost which might be formed on the surface and wipe clean. Look for the moisture. Make certain you look very good. Otherwise, you’ll end up having poor paintwork.
  • Don’t forget to follow instructions mentioned in the manual. Many manuals include some guide to painting in the rough weather. So it’s better to check before you start as not every spray paints react same at such low temperatures.
  • Protect the object’s surface during coating. While the paint gets dried, you need to make sure that the painted surface is protected till it gets dried completely.
  • Keep your eye on the temperature. You must be aware of what you’re dealing with before you begin to paint your car or wall or anything. So it’s better to start with checking the temperature first.
  • Don’t forget to inspect your paint before you start. Don’t forget to do the test patch first somewhere.

Possible Bleak Results of Painting in Cold Weather

It may be a good idea to practice painting in cold weather before starting. A bad paint job can be very frustrating a lead you to stop trying. Practicing will give you a chance to get it right under cold conditions.

Here are some of the outcomes which you may get if painting in the cold weather and don’t practice or prepare properly:

  • Paint layer is cracking
  • Insufficient stain resistance
  • Unequal color uniformity
  • Poor quality touch up

More Tips for Spray Painting in Cold Weather!

If your car needs to be repainted or you’re planning to add some style to the car, then painting your car wheels can add the stlye you want. You can get it done in a shop, but you can also do it yourself too. 

How to Spray Paint in the Cold Weather

Photo Credit: http://lostworldshow.com/use-car-spray-paint/car-spray-paint-colors/

Before beginning the painting, make certain to:

  • Verify that the paint recommended by the paint manufacturer is suitable for your particular temperature.
  • Check air temperature as well as the temperature of the car with a non-contact infrared thermometer.
  • Turn up the heat to help the paint dry faster.
  • Select the right paint and sprayer for a professional job.
  • Start painting when the temperature are getting warmer, not colder.
  • Set up any scaffolding needed, wrap up everything not to be painted and heat the garage or area if possible.
  • Use coatings that are suitable for cold weather and if the temperature goes below 35° F, you may need to wait about two days.
  • Use a nice bonding primer before you apply the paint.

Moisture and temperature are the most important part of any paint application. Spray cans are better options to paint compared to the spray guns. The very first thing to keep in mind when doing spray painting at the lower temperatures is that excess moisture, any ice or snow in the air means paint will take more time to get dried.

So, before you start doing spray paint make sure you keep all the above-mentioned aspects in mind, as they will make your painting easier and safer.

How To Drive An Automatic Car Like A Pro?


How To Drive An Automatic Car Like A Pro

Cars with AMT have become very popular as these are simpler to operate than a manual transmission. A car with automatic transmission can be very comfortable for long trips. Here in this guide, we have mentioned some tips that help you learn how to drive an automatic car.


Identify the Controls

You should unlock the car with your keys and get into the car. You should adjust the seat as per your needs. You should set the right direction and position so that you can easily reach the steering. You need to move mirrors to make everything visible clearly.

You should identify every control to avoid any further driving inconvenience. It is very important for beginners to learn about the brake pedals, accelerator, gear selector lever, steering wheel, defroster, light controls, windshield wipers, and much more.

You can find an accelerator and brake pedal at the bottom front of your car. The accelerator is on the right, and the brake pedal is on the left side. The steering wheel is a center larger wheel that is located in the center of the console. You have to turn the steering wheel right and left to turn the car’s wheels.

Identify the Controls

Photo Credit: https://www.youtube.com/watch?v=G4Sz7lhcRjA

Just behind the steering wheel (on its right), there is a small lever with symbols of light printed on it. It is the control to switch on or off the lights and turn indicators. It can be moved vertically in three positions viz. center, upwards and downwards. By default, it is at center. When shifted upwards, it switches on the left turn indicator, and when shifted downwards it switches on the right turn indicator. In addition to it, this lever has a rotating knob attached to it. If that knob is rotated clockwise from its default position, it will switch on the headlights of the car.

Similarly, there is another lever on the left of steering that also when shifted vertically downwards, starts the movement of vipers. Vipers are fitted at the front view glass and help in removing water from the glass during rains, thus helping in increasing visibility.

The gear shift lever in automatic cars is quite simple to use. It is either located in between the driver’s and passenger’s seat (in the form of the lever) or to the right of steering (in the form of rotating knob). It has four options or modes to switch. These are “D,” “N,” “R” and “P.” Here, “N” stands for Neutral, “D” stands for Drive, “R” stands for Reverse and “P” stands for Parking. We will talk about them in detail as we move further with the tips on driving an automatic car.

Behind the gear shift lever, there is handbrake lever. It is applied by pulling it upwards and released by pushing it downwards. It is used when we park the car, especially on an incline.

Now after identifying all the controls, you need to fasten your seatbelt.


Driving Your Automatic Transmission Car

Once you are well versed about the controls of your car, here is a step by step guide on how to drive your automatic car.

Driving Your Automatic Transmission Car

Photo Credit: https://www.rac.co.uk/drive/advice/driving-advice/how-to-drive-an-automatic/

1. Get inside your car

You need to unlock your car using the smart keys or normal door lock keys.

2. Adjust all the controls as per your needs

Once you are in your car, you need to adjust all the settings as per your requirement. Adjust steering wheel for rack and reach. Adjust the height and distance as per your height. Now, it is time to adjust rear view mirrors and ensure that you can view left, right and back of your car very easily and clearly. Last but not least, do not forget to fasten your seatbelt.

3. Start engine

Now, you need to switch on the engine of your car using the car keys or push button. Make sure you have pressed the brake lever, and your car is in the Neutral mode before you start your car.

4. Get going

You should ensure that brake pedal is still pressed. You have to operate brake and accelerator both with right foot only. The left foot should not be utilized at all. Now release the handbrake (situated between driver’s and passenger’s seat) by pushing it downwards. Now with the brake pedal pressed to shift the mode to Drive, by moving gear lever to “D.”

Now slowly release the brake pedal. Your car will start moving at a slow speed. Start pressing accelerator gradually to attain desired speed. Make sure that you always drive within the allowed speed limits.

Make sure that there is no moving object nearby your car when you start moving. Make use of left or right turn indicators to get into the appropriate lane and continue driving in that lane. As it is an automatic car, you need not shift gears while driving. All you have to do is to use steering to get into the desired direction and use accelerator and brake to move and stop the car respectively.

5. Move backward (reverse)

While taking the reverse, you must ensure that no moving object is approaching you from behind. Take a proper look all around your car and then shift the gear lever to “R.” Ensure that you have applied the brakes while shifting to “R.” Now release the brakes gradually, and your car will move. If you have reverse parking sensors or reverse camera in your car, make the best use of them to increase safety while moving backward.

6. Things to be taken care when you need to stop the car

Things to be taken care when you need to stop the car

Photo Credit: https://motor.onehowto.com/article/how-to-drive-an-automatic-car-291.html

In many cases, when a car is made to stop suddenly on a moderately busy road, there are chances that it may get hit by a vehicle that is moving just behind the car. So, it is always advisable to stop your car gradually unless it is an emergency situation. When you slowly lower the speed of your car and then stop it, the person behind your car gets enough time to slow down his/her vehicle as well. This avoids collision between two vehicles.

Also, whenever your car is at a halt (such as at traffic signals or a long traffic jam), ensure that it is in Neutral mode. So, in case, if you press the accelerator by mistake or release the brake, your car will not move.


Burnout in an Automatic Car

Most motor adventure enthusiasts might look for a tip to perform a burnout in an automatic car, so here you go. All you need to do is to press the brake pedal as hard as you can. Now shift the gear lever to “D” and press hard on the throttle (make sure that the brake pedal is still pressed hard). This is how you can perform a burnout in an automatic car.

Hope these tips may be useful for you if you are learning to drive an automatic car. Have a happy and safe driving.

Best Tire Racks: An Essential Investment for Keeping the Garage Organized


Best Tire Racks

If you are a car enthusiast, then you are most probably spending a lot of your time in the garage. As a personal space, it is important to keep it organized. It is hard to work if it is messy and if everything does not seem to fall in the right place. From things that are as small as a screwdriver to those as large as a tire, you need to keep everything in order.

One of the best investments to have in your garage would be the best tire racks. They will be helpful in keeping tires organized so that they won’t make your place chaotic. As a safe storage space for your wheels, you can also be sure that they will offer protection from external elements that could otherwise contribute to deterioration.

Are you looking for a tire rack to purchase? If you want a decision that will not bring regrets in the future, read this buying guide, and we’ll help you figure out which rack can provide the best bang for the buck. We will also briefly tackle the essential considerations and types of bike racks that are available, which will make it easier for you to come up with an intelligent choice.

Essential Factors to Consider

Given the fact that there is a long list of alternatives, below are some of the most important factors that will help you out to narrow down the possibilities:

AD

  • Ease of Installation: You do not need to hire a pro to install the tire rack for you. Look for one that is user-friendly in terms of assembly. The manufacturer must provide comprehensive instructions, as well as everything that you will need to put the pieces together.
  • Size: To determine the right size of the rack to buy, there are two things that you have to think about – the size of the garage and the size of your tires. If space is not an issue and if you have a lot of tires to keep, a bigger one is always the best option.
  • Adjustability: If you want a tire rack that will offer versatility, look for one that will allow you to make the necessary adjustments. This means that you will be able to keep several tires of different sizes.
  • Weight Capacity: Think about the number of tires that you will keep in the rack, as well as their weight. If you intend to keep a lot, make sure that the tire rack will be able to handle such a weight. Otherwise, it can pose serious danger, especially in the case of a hanging or wall-mounted tire rack.
  • Material: Steel is perhaps the most popular from all the materials that are commonly used for a tire rack. It is important to pick a material that will be strong enough to support the weight of the tire and to withstand wear. As much as possible, it must resist rust and corrosion, among other problems.
  • Warranty: This is important if you want to have peace of mind. Standard warranty from most manufacturers is one year. If they are really confident about the quality of their product, they will not hesitate to offer warranty for a lifetime. Within the warranty period, the manufacturer can offer free repair if there are defects experienced.
  • Reviews: If you still find it hard to decide which tire rack to buy, one good thing to do is to consult with the opinions of other people. Go online and search for reviews from real users. This will be a good way to see the good and the bad about the options that you are already considering.

Top Choices for the Best Tire Racks

Product (Amazon Link)

Brand


HyLoft Multi-tire Rack (400-lb)

HyLoft

Review

Hyloft Folding Storage TireLoft (300-lb)  

Hyloft

Review

MaxxHaul Tire Rack (300-lb) 

MaxxHaul 

Review

To narrow down the options that will confront you, below are three of the products that you might find interesting.


1. HyLoft Multi-tire Rack

AD

If you are thinking of how to organize the tires that you have in the garage, this is one product that you might want to consider having. The width can be easily adjusted, which you can set from 34 to 58 inches, making it possible to accommodate tires with different sizes. It comes with telescopic chrome tube that allows the adjustments to be easily made, depending on the tires that you will keep in the rack. It is also a winner when it comes to durability. With its strength, it can support heavy weight and can withstand many years of use.

Main Product Features:

  • Maximum weight capacity – 400 pounds
  • Warranty – Limited Lifetime Warranty
  • Dimensions – 35.8 x 31.5 x 4.3 inches
  • Weight – 49.1 pounds

Pros:

  • Easy to assemble
  • Comes with all the components that you will need for assembly
  • Sturdy construction for long-term functionality
  • Adjustments can be easily made to suit different sizes of tires
  • Can support even heavy tires

Cons:

  • Has a lousy packaging
  • Some parts can be missing upon receiving the item

2. Hyloft Folding Storage TireLoft

AD

If you want to install a permanent tire rack in the garage, this is one product that you might want to consider having. It is wall-mounted and offers adjustments, making it possible to accommodate different number of tires. It has also been tested to hold 300lbs, which allows it hold a number of tires. Folding joints are also included to make it easy to fold when not in use.

Main Product Features:

  • Adjustable width: 32″ – 48″ wide
  • Folding ability
  • Weight capacity – 300 lbs
  • Silver powder finish

Pros:

  • Steel construction
  • Hardware included
  • Adjustable
  • Folds when not in use

Cons:

  • Installation may be  tricky
  • Misaligned Parts may occur

3. MaxxHaul Tire Rack

AD

Simplicity – this is one of the main reasons why we have included this in our list of the top picks for a tire rack. You can easily accomplish its installation within a few minutes. To add, it also comes with a simple design, which makes it unique compared to the two other products that we have mentioned above. When there are no tires in the rack, you can fold it and it will open up additional space in the garage.

Main Product Features:

  • Weight capacity – 300 lbs
  • Adjustable width: 32″ – 48″ wide
  • Holds up to 4 tires
  • Folding Design

Pros:

  • Can be folded
  • Solid construction for long-term functionality
  • Installation can be easily accomplished

Cons:

  • May not fit tall tires
  • Wall fittings may be weak

What are the Different Types of Tire Racks?

As you decide on which product to buy, it is important to be familiar with the different tire racks that are available. In this case, the following are the options that you will have:

1. Standing Floor Style Tire Rack

  • This is the most popular style that is available
  • Some models have lockable wheels, making it easier to change the position
  • They normally have one to two levels

2. Wall-Mounted Tire Rack

  • This is a good choice if you want a rack to be permanently installed
  • It comes with screws and bolts that will be needed to attach the rack on the wall
  • The capacity is often lesser compared to a rack that stands on the floor

3. Foldable Tire Rack

  • This is a type of tire rack that falls under the wall-mounted
  • Perfect for a small garage as it promotes space efficiency
  • When tires are not stored in the rack, you can have it folded so that it will not get on the way

Quick Tips in Using Tire Racks and Organizing Tires

To make the most out of your tire rack and to ensure that your tires will remain in their tip-top condition while they are stored, below are some of the most important things that you have to remember:

  • One of the most important is to choose where to position the tire racks in the garage. If they are wall-mounted, be sure to place them somewhere you do not walk a lot. Keep it on the side where there is not much foot traffic so that it won’t have to obstruct your movement.
  • Place the tire racks somewhere that is away from direct sunlight. Too much heat can damage the tires, especially if you intend to keep them for a long time. Rubber, the main material used in tires, can easily deteriorate if it is directly exposed to sunlight.
  • When storing tires in the rack, position them vertically and not horizontally. This will lessen the stress on the tires. There will be no burden of weight from the top, and hence, prevents distortion.
  • Clean the tires before putting them on the rack. Any dirt or debris can harden, and hence, will be more difficult to remove in the future. Soap and water will be more than enough to get rid of dirt and grime that are present in the tires.
  • Inspect the tire every now and then if they have not been removed from the rack. Performing occasional turns will be good to minimize stress, especially if you stack tires on top of each other.

Conclusion

From the five products that we have briefly mentioned earlier, if there is one that I can personally recommend, it would be HyLoft 01000 Multi-tire Rack. From versatility to durability, this is an investment that is worth having. There are adjustments that you can make to accommodate different tire sizes. It is also strong enough to withstand many years of tough use.

Is there any other product that you need for your garage? Click here and you will be directed to our buying guides, which will help you decide on which ones can provide the best bang for the buck.

What Are the Different Types Of 2004 Chevy Silverado Brake Problems?


What Are the Different Types Of 2004 Chevy Silverado Brake Problems

Chevy’s Silverado 2004 is a heavy-duty pickup truck that is powered by a 6.6-L turbo diesel V-8 engine providing 367 horsepower. However, this beauty is being reported to have various brake-related problems. Let’s review common 2004 Chevy Silverado brake problems reported by its consumers so far and what options you have to get them repaired.

This article will help you to understand better why, at a certain age or earlier, your car has started to malfunction. You will be able to relate to the problem and will be informed enough to judge whether your mechanic is doing his job right or not.


Intermittent brake failure problems

Even a well-kept car can sometimes face intermittent brake failure. This is nothing unique to the Chevy Silverado 2004. Here are the things you must check when you experience this problem for the first time. This is also a part of the common Chevy suburban problem.

Check for the loss of brake fluid pressure. The braking system in your car works with hydraulic pressure, and in case there is any leak in the broken line, caliper, or wheel cylinder, it could cause insufficient pressure in the brake line for the brakes to work properly. This may be the first-line indication of loss of fluid pressure in the brake system. You must not drive the car until you are sure that this is the case.

Intermittent brake failure problems.

Photo Credit: http://www.trucktrend.com/how-to/paint-body/0901tr-2004-chevy-silverado-reflexxion-hood-installation/photo-gallery/#photo-01

When your car has become quite old, then a rusty steel brake line is formed due to extended exposure to moisture and road salt. This can cause the car’s steel brake lines to corrode in some cases. This may lead to leakage of brake fluids, which can again cause brake failure.

Check your ABS Modulator. This could be faulty and can cause break pressure to leak internally, which may result in not enough amount of routing pressure to be built to stop the car when you step on the brake pedal. This may be due to dust or rust entering your car’s ABS modulator.

Check the water in brake fluids. The rise in temperature of brake fluid causes the water to vaporize, which causes steam to be compressed. This lack of water will not allow the braking motion to be transmitted to the vehicle’s wheels. Hence, your car will not be able to break.


Low brake pedal

When you press the brake pedal, and it goes down to the floor, then air pressure in the brake line could be the problem. When you press your car’s foot brake, the air is used, which must be built up quickly. When pressure drops to very low while you drive, then you must take it to the car mechanic before driving it further. This could be hazardous to your life and other pedestrians on the road. This is also a common Chevrolet Traverse problem.

Check your power brake booster. Faulty power brake boosters may cause the brake pedals to be pressed to the floor for it to work. The car may even drive to some distance before stopping after application of brakes. These vacuum-controlled power brake boosters need to be checked by a professional mechanic to measure the vacuum being built by them.

Check your master cylinder. The master cylinder is the heart of the brake system and holds the brake fluid to be fed into the front and rear brakes. If the master cylinder is worn out, it may result in the leaking of brake fluid, which will result in the dropping of hydraulic pressure to the brakes and result in a soft brake pedal.


Problems with pads and rotors

Problems with pads and rotors.

Photo Credit: https://www.cars.com/research/chevrolet-silverado_1500-2004/

If you hear any un-friendly noise coming out of your car, you must start inspecting it before it damages other healthy parts of your car due to the metal-on-metal grinding. Screeching, grinding, rubbing, and other piercing noises are common indicators that your brake pads and shoes have worn out and require a health check.

If you drive a lot in city traffic, then there are more chances of your earlier wear and tear of your car’s brake pads due to more stop-and-go driving conditions. So, avoid tailgating as much as possible and try to drive at the pace of the traffic. If you install these healthy habits, then obviously, your car parts will live for a longer duration, giving you fewer problems.


Leaking Brake Fluid

If you have a soft brake pedal, then it may be an indication of leaking brake fluid from the master cylinder or elsewhere from the broken system. You must visit your nearest mechanic to get your car inspected before you take it on the road. This could be an indication of a failing master cylinder and would require a repair or replacement, depending on the case.


Brake Light is On

Brake Light is On

Photo Credit: http://www.conceptcarz.com/vehicle/z7620/Chevrolet-Silverado.aspx

When you see that break-light indicator on your dashboard, then your car smart metering indicator is signifying a need for inspection. That there is something not right with the function of your car and you must rush to a mechanic before driving it further. It can be hazardous for people driving the car and threat to the life of pedestrians on the road.

Your car tells you way ahead of its malfunctioning before any disaster takes place. If you see any un-friendly noise, or your car running towards one side while breaking, you must get it inspected. This inspection should preferably be done by certified mechanics as they have all the tools and gadgets to ensure your safe drive on the road.

If you feel a slight bump when you start or stop your car or any burning smell when you are in your car, then it could be an indication of some wear and tear on your car. If you ignore this in the first instance, it can lead to even expensive repairs. As these small wear and tear can also impact other healthy parts of your car.

If your car is still under warranty, you can check with the customer care about the cover before visiting your local mechanic to have a better understanding.

Guarantee Your Safety With The Best Strut Compressors


Best Strut Compressors

Having the best strut compressors is vital when you are changing the struts on your vehicle. The strut compressor is specifically designed for the replacement of strut cartridges and assembly parts. It will safely compress the vehicle’s door springs that will make it easy for you to remove it and install the replacement. Depending on the compressor, pins will allow you to securely lock the springs for your safety.

In this post, we are going to discuss everything you will need to know before you buy a strut compressor. We will talk about the factors you might want to consider, with the top 5 recommendations for the best ones in the market, some of its types, and lastly, tips in using a strut compressor. We hope that after you read this post, you will be able to make a more informed decision and prevent yourself from making an expensive mistake.

What Factors Should You Consider When Choosing The Best Strut Compressors

Before you start searching for a product that will provide you great value for your money, below are some of the considerations you might find helpful:

AD

  • User reviews and ratings: These are very important because they reflect the opinions of the actual buyers. Make sure you read each review carefully to know how the product has worked out for its buyers. Ratings, on the other hand, will give you a summary of what the buyers think of the product as a whole.
  • Compatibility: Because struts come in varying sizes, not all compressors will guarantee that you may use on multiple sizes. Our recommendation is that you buy the strut compressor that will be able to accommodate as many spring sizes as possible.
  • Sturdiness: Given the fatal threat of changing the struts in your vehicle, it is imperative that you buy the sturdiest and strongest out of all the products. In addition, strut compressors are used for heavy-duty applications and that’s why they need be strong.
  • Replacement parts: Just like any other toolbox, some or many of the parts may need replacement over time. You should go for the product that offers warranty, or even easily available replacement parts so that you won’t have to worry about buying a new set in case you only need replacement for just one part.
  • Ease of use and transport: This is also a very important factor, given how delicate changing struts are. The one you should buy must be easy to operate and must have the option of proper storage. If you have your tools stored, it is less likely that parts will go missing; and it will be easy to transport.
  • Safety: This might be the most important factor you have to consider. Handling struts may be a hazard, which can happen especially if you do not have the correct tools. You should buy the one, which can offer the safety you will need.
  • Price: You should buy the one that has the best features, instead of the cheapest and low quality ones. There should never be a price for your safety. One way to do this is to evaluate all the features, pros, and cons carefully for you to be able to come up with an informed decision.

Top Picks For The Best Strut Compressors

Product (Amazon Link)Brand 

ABN MacPherson Strut Spring Compressor

ABN

Review

Performance Tool Professional Strut Spring Compressor

Performance Tool

Review

OTC Clamshell Strut Spring Compressor

OTC

Review

Branick Strut Spring Compressor

Branick

Review

Goplus MacPherson Fork Strut Coil Spring Compressor

Goplus

Review

If you still don’t have a strut compressor in mind, in this section, we will provide you a run down of the 5 best options that are available in the market.

1. ABN MacPherson Strut Spring Compressor

The ABN MacPherson strut spring compressor will be able to take tension off that will allow you to safely remove both spring and strut assemblies. It features a forged construction, built-in detent pins, and acme threaded rod. These pins will securely lock the spring in place for safer compression while the rod allows for smooth and durable compression.

Major Features:

  • Allows easy repairs on damaged struts
  • Features forged construction
  • Has built-in detent pins for safety
  • Comes with a threaded rod
  • Offers hardened hooks and center screw
  • Item weight is 8 pounds and product dimensions are 1.2 x 1.2 x 0.3 inches.

Pros:

  • Easy to use and set up
  • Durable and strong construction
  • Offers convenient storage and transport
  • Lubricating will extend the product’s lifespan
  • Safe for use of DIYer and professional mechanic

Cons:

  • Some buyers found the product very difficult and unsafe to use
  • Might break on first use

2. Performance Tool Professional Strut Spring Compressor

The Performance Tool strut spring compressor is another great option for the best strut compressors. This product can be used on most light truck and automotive applications. It has a sturdy steel construction that will guarantee its users a long period of outstanding service. In addition, there is no need to worry about replacement parts because it is readily available and can be bought from the manufacturer.

Major Features:

  • Comes with locking pins for increased safety
  • Constructed with forged steel
  • Allows easy operation and use
  • Can be used for automotive and light truck operations
  • Item weight is 2.9 kg and dimensions are 34.5 x 20.8 x 6.9 cm
  • Manufacturer has replacement parts

Pros:

  • Easy to use and set up
  • Locking pins ensure outstanding safety while using it
  • Constructed with durable steel
  • Parts are easy to replace

Cons:

  • Manufacturer does not offer warranty on parts
  • Might not be suitable for full size light truck applications

3. OTC Clamshell Strut Spring Compressor

The OTC Clamshell is a well-known brand that provides quality automotive products to the customers. This time around, the brand offers an outstanding strut spring compressor. What makes this product excellent is that the locking pins would be able to keep the compressor jaws in its position. To add, it only weights 19 pounds and is built to withstand pressure when you are using it.

Major Features:

  • Product dimensions are 10.7 x 5.7 x 16.8 inches
  • Item weight is only 18.3 pounds
  • It can compress springs of 4 to 9 inches outer diameter
  • Should be used with an impact wrench
  • Lock pins will securely hold the compressor jaws in its place
  • Fits a wide range of struts
  • Does not require special adapter shoes

Pros:

  • Durable and strong
  • Lightweight
  • Suitable for use on a wide range of struts
  • Features locking pins for safety
  • Long lasting

Cons:

  • Incomplete packages were received by some customers
  • Might not fit on latest BMW models

4. Branick Strut Spring Compressor

The Branick brand has a reputation for being the standard in the automotive industry. This is because this product will be able to handle the heaviest coil-over-shocks without ever requiring extra adapters. It can also be used for most SUVs and light trucks applications. Not only that, it can withstand extra torque because of the longer handles. Lastly, it offers flexibility due to the multi-positioned upper spring hooks.

Major Features:

  • Constructed with sturdy steel
  • Can be used for light truck operations
  • Features multi-position hooks
  • Can be used to compress different sizes of struts and springs
  • Item weight is 44kg and dimensions are 110 x 49.5 x 46.2 cm

Pros:

  • Versatile
  • Durable and strong
  • Safe to use and prevents spillage
  • Hooks can firmly compress the springs
  • Manufacturer offers warranty on parts

Cons:

  • Might require you to mount it too high on the wall
  • Will be inconvenient for both tall and short people

5. Goplus MacPherson Fork Strut Coil Spring Compressor

AD

You would never go wrong when you buy the Goplus MacPherson strut coil spring compressor. It is considered the safest way to replace your coil springs. It features a safety lock that securely holds the spring in place during compression. This tool is essential when you want to make reparation on your vehicle. What makes this product one of the best is that it comes with a molded case for easy storage and transport.

Major Features:

  • Features jaws with safety locks
  • Maximum jaw opening is at 12-1/2 inches
  • Constructed with #45 carbon steel
  • Complete package includes a coil spring compressor set and a storage case
  • Comes with 3 pairs of different sized interchangeable yokes

Pros:

  • Crafted with sturdy carbon steel
  • Easy and safe to use
  • Comes with a storage case for easy transport and storage
  • Versatile
  • Long lasting

Cons:

  • The product will only be able to grab one side of the spring
  • The snap ring might break or get distorted during heavy applications

Different Types Of Strut Compressors

If you are a first-time buyer, you might be a bit overwhelmed with the list presented above. In order for you to make a decision on what to buy, it is also important that you are familiar with the different types of strut compressors.

1. External Strut Compressor

  • Normally used in a strut-type situation wherein there is a shaft that runs through the center of the spring.
  • Comes with 2 devices that look like C-clamps
  • Can be hooked on the spring from the outside
  • Should be tightened down through the use of wrench
  • Clamps should be placed evenly around the coil
  • Manufacturer’s recommendations on lubrication and proper storage should always be followed.

2. Internal Strut Compressor

  • Opposite of external strut compressor, as it is used even without obstructions at the center of the spring
  • Can easily be installed and removed
  • Consists of shaft with 2 threaded arms that will take hold of the spring
  • Similar to external strut compressor in terms of even spacing around the coil
  • To avoid damages, the manufacturer’s tips on storage and proper care should be followed

3. Klann-type Strut Compressor

  • Involves a telescoping jack shaft and plates
  • Suitable for many high-tension spring operations
  • Extremely strong and straight
  • Easy and convenient to use

Quick Tips In Using Strut Compressor

Once you have the best strut compressor, you might want to consider the below tips to enjoy its maximum functionality:

How to remove old struts:

  • You have to replace the entire strut if you do it without using a compressor tool. If the only thing that is not damaged is your shock absorber, it might be better to replace the whole thing. It is deemed a lot easier to do but will cost more. This is the reason why if there is nothing wrong with your vehicle’s strut spring, you can just keep on using it.
  • Jack up your vehicle if you wish to replace a strut unit. Turn the wheel after you jacked it up. This will allow you to access the parts of the strut easier. Disconnect the ABS line and then do the same to the brake line that is linked to the strut. You might want to use a flathead screwdriver to take the clip of. A breaker bar would also be essential to remove the bolt attached to the base of the strut.
  • Put a wrench around the sway bar end link to remove the bolt. You might need to jack up your car in varying quantities just until the bolt straightens. Remove the bolts from the strut tower and this would separate your old strut from your car entirely.

How to install new struts:

  • Safety should be of utmost priority when using the strut compressor. Did you know that the spring has the force that can be fatal and dangerous for its user, especially if something goes wrong? You have to remember to pay close attention, as well as follow instructions and practice safety all time.
  • Place one clamp on either side evenly and then push the pins in. You may now tighten the nuts on each side. Remove the nut found at the top and slide the shock absorber out. Slide in a new one then screw it back on.

Conclusion

To summarize, the best strut compressors will be able to deliver you a safe and strong handling of changing the struts of your vehicle. As mentioned earlier, safety is very important, as this application can be fatal if you do not have the right tools. Even if you have the best strut compressors, you must seek professional help if you are not comfortable handling the task by yourself.

Are you also looking for other products for your vehicle? Click here to find more products that are available in the market right now.

How To Deal With 2008 Toyota Sienna Air Conditioning Problems?


How To Deal With 2008 Toyota Sienna Air Conditioning Problems?

The invention of air conditioners has proven to be a boom in the field of electronic inventions. Air conditioners have become the biggest weapon to fight against hot and boiling summers. This electronic air purifier has become a must-have device in spite of many disadvantages like global warming, electricity consumption, health issues, and much more.

Malls, houses, theatres, and even cars now consist of air conditioners. This cool air intake machine has become not only a symbol of status but has also become a necessity.

For so many years, every car has had the facility of an air conditioner. Despite keeping it with great caution, it is very obvious that problems may arise with every electronic machine. The same is the case with the air conditioner in the Toyota Sienna 2008 cars air conditioners.

There is surely no doubt about the fact that Toyota Sienna manufacturers must have fitted the best car air purifier, but it will surely create problems after a period of usage.

Now, the question arises as to how you should deal with the air conditioner problems in your luxurious Toyota Sienna. Here is the jot down of some problems that you might face and the technique to deal with them:


1. After working for hours smoothly, your AC might blow hot air randomly

This is the exact problem that I have faced it once. My air conditioner normally starts with great cooling effect. Unusual to its nature, it starts emitting warm air after some time. Tolerating it in such humid summer season was tough. But let’s tell you.

This might be the situation of damping changing its position. You should immediately consult your mechanic to confirm whether the situation is a bad controller or not. In this case, I don’t know from where but the air-mix damper may get signals to change the temperature automatically. Another situation could have also arisen.

Sometimes, after some time damping might be hunting for a position to settle. So the immediate step should be to check the damper of your Toyota.


2. Awarding burning air at one side and cooling air at another side

This is quite a funny situation. In this case, the driver gets a punishment by receiving oven like air, while the passengers will be getting cool and fresh air. This fault is true, and my friend has faced his horrible situation with her four years old Toyota Sienna. In this kind of stage, feeling irritated is a natural process but being intelligent you should get it solved.

This situation may arise due to the corroded lines of your air conditioner. You should ask your mechanic to check whether the lines of your AC are ruined and if it so you should get it immediately replaced with new ones. However, this replacement will cost you much, you can say nearly about in thousands but rather than spending on the checking of other parts you can have your lines checked.


3. Air conditioners not working at all

In almost all 2008 Toyota Sienna air lines, the fault of getting your air conditioner lines cracked in a short period of usage has been very common. In this kind of case, you will experience that your AC is not working at all. Horrible situation! Yes, it is.

Without getting panicked or irritated just get the possible areas checked where fault can take place. There are three places due to which your air conditioner might have stopped working. These are

  • O-ring
  • Carter line
  • Center line

These are the exact possible places which might be faulty and has made your air conditioner stopped working. So get it checked and replace it, if it finds out to be cracked.


4. Sound at its highest volume

Sound at its highest volume

Via: https://www.consumerreports.org/cars-driving/tips-to-get-most-cool-from-car-air-conditioning/

Air conditioners seem to be a wonderful invention when it gives you a feeling of relaxing from the boiling temperature outside without producing noise pollution. But the problem arises when it starts creating cranky noise. I know this situation some of the might have faced, but if this happens in future for that, I want to share my experience with you all.

This might be due to old and depreciated clutch that is being continued to render its services. Clutch failure will not make your air purifier stop working at all, but will create a rattling sound which becomes very irritating and difficult to handle. The relay is present under the hood in the fuse box which is next to the battery.

You should get your magnetic clutch relay checked instantly and if found ruined you should get it immediately replaced with a new part.


5. Hot air all around

You always install cold air intake to get rid of the burning temperature outside your car. When you open up your air conditioners, you want it to cool your car temperature instantly. But what will happen when you run your air conditioner, and instead of converting your car temperature from hot to cold, it adds up the heat by blowing the hot air and setting your car temperature on fire. Terrified!

Well, don’t just panic in that situation. It might be due to corroded o – rings. As soon as this problem arises, just get your O-rings diagnosed immediately. O-rings are present where the front line connects near the engine. If your engine is found faulty or cracked, then you can get it replaced without any further problem.


6. Hot and cold air

Hot and cold air

Photo Credit: https://www.youtube.com/watch?v=bUXoKWpMJfs

There might be two possibilities for this problem. Sometimes, in your Toyota Sienna 2008 model, it may be due to a blender box. It is common for the driver seat and passenger seat to have separate air conditioner controls. These units may share as many parts as possible to keep the cost as low as possible.

It could mean that doors are setting different temperatures for both the driver’s seat and the passenger’s. Second is the refrigerant charge; sometimes, your refrigerant may have a slightly low charge, which will result in giving different temperatures to the driver as well as the passenger.

Air conditioners are invented to help you out in fighting with this continuously increasing temperature. As it is a machine, you cannot avoid the situation of being in an unsound condition at any point in time.

Whenever this situation arises in your 2008 Toyota Sienna, just handle it intelligently and try to diagnose it through the above-provided information. I hope you will not get fooled by your mechanic and will diagnose the problem by yourself in no time.