Home

Recent Posts

How to Restore Headlights Permanently?


How to Restore Headlights Permanently

Are you looking for a permanent way to restore LED headlights? If yes, then this guide can be very helpful for you. Here, you will learn how to restore headlights perfectly. What to do if my headlights don’t turn on?

Headlights start to fade over time. This faded headlight offers less amount of light, and you may find it very difficult to drive at night with this less amount of light that the faded headlights make out. You should be aware of it as sometimes it may be dangerous and difficult to drive at night.

Your headlights may begin to fade over time due to oxidation on the lens. Sometimes oxidation takes place, and it degrades the lens of headlights quickly as polycarbonate is a porous material.

Well, there are lots of ways to restore the headlights by removing oxidation. Wet sanding can also be a very safe and good option to restore your headlights to a normal and safer condition. People have to Install LED headlights just due to existing faded headlights, but you can try some techniques to restore your old lights.

We have been restoring headlights for a long time by using some safe methods that can prove effective, so we have suggested the same in this guide. We feel this important and useful information should be passed to our readers. You can check the process below:


What do you require to complete the process of restoring headlights?

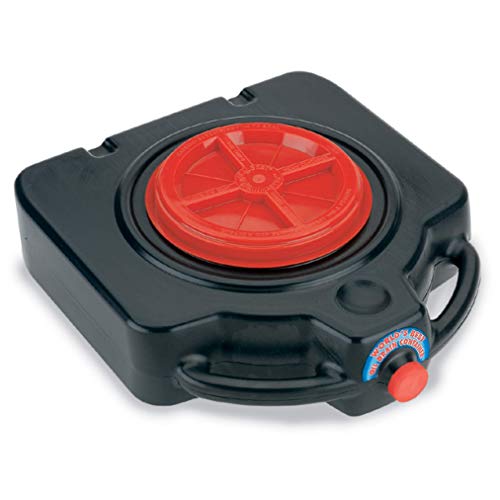
You require some important things, including shop towels, microfiber cloth, a rag, a small towel, sandpaper, automotive masking tape, 3M rubbing compound, a Drill, a spray bottle with water, a compound pad, rubbing alcohol, and a measuring cup, a spirit, and much more.

What do you require to complete the process of restoring headlights

Photo Credit: http://www.viralnova.com/how-to-restore-headlights/

First Step

You have to get everything prepared or ready for the further process. You should add water and a little soap to the spray bottle to keep the headlights lubricated. You should cover up the area around your faded headlights that you want to restore. You can cut your sandpaper into ¼ sheets.

Take the 800-grit sand paper, place it on the headlight, and spray it with a water bottle. It will stick to the headlights by itself. You can start sanding the headlight slowly. You should continue to sand and wipe the surface using a towel. It helps remove oxidation. Now, you can switch to the second step.

Second Step

You have to finish 800 grit sandpaper in one direction; now, you can move on to 1000 grit. You have to sand 1000 grit sandpaper in the same way as you did with 800 grit. Sanding it in one direction and keep the headlights lubricated to get a uniform finish. You would notice that the headlight would clear up slightly. You can wipe it off and move to the third step.

Third Step

Once you have finished with 800-grit and 1000-grit, now it’s time to use 2000-grit. This can be a very significant step. You will get better results if you spend longer time on it. You can take this sandpaper and start sanding headlights (do it in one direction).

restore headlights permanently

Photo Credit: https://www.youtube.com/watch?v=GPihLU9ZC-U

Again, you will get a uniform finish and a clear headlight. You can wipe it off and move to the fourth step. The shine of the headlight depends on the grit paper and how well you use it. You can use a microfiber cloth and plastic polish to remove sanding marks and scratches from clear coat.

Fourth Step

This is also very important step. You need a drill to attach the compound pad and hook it. You can apply rubbing compound on the headlight and use the drill to polish the headlight. It helps spread compound. When it spreads, you can turn the drill to full speed to get the new and shiny headlights.

You can get rid of 2000-grit scratches by using this process. You can also use the more compound and polish the headlight to make it shinier.


Other Methods to Restore Your Headlights

Other Methods to Restore Your Headlights

Photo Credit: https://www.youtube.com/watch?v=KMgZX5kklaM

1. Use Toothpaste to Restore your Headlights

Toothpaste and baking soda are easily available ingredients. You can use them to get rid of unclear and fizzy headlights. This can be the cheapest option to restore headlights as you just need baking soda and toothpaste. You can mix both ingredients and rub this mixture into hazy and oxidized headlights.

You can also use an old toothbrush to complete the process. The harder you rub, the better results you get. Let the toothpaste mixture dry for few minutes and wipe it off with warm water and cloth. Your headlight would look clearer. This can be a permanent solution to get rid of hazy lights.

2. Distilled White Vinegar and Baking Soda

This is also a cheap and easy trick to use. You just need some clothes and two jugs. One jug should be filled with baking soda and other with white vinegar. You can pour vinegar into baking soda to make the solution to fizz up. They both have different pH and nature.

White vinegar has acidic nature, and baking soda is alkaline, so it causes the mixture of both to fizz up. You can apply and rub this solution or paste to the headlight. You can use a cloth to rub it properly over headlights. Baking soda acts very well in getting rid of oxidation on headlights.

You have to rub the headlight thoroughly to get the amazing and desired results. You can wipe it off with a clean cloth and apply wax over it to make it look shiny and new.

You need to polish it or wax it to get clear light. You can leave it for some time and take the dried polish off from headlights with a cloth. You will enjoy the new clarity and shine of restored headlights. These are some easy tricks that you can try at home without spending a lot of money.

Now, this is the right time to appreciate your hard work. You can have a clean, shiny and nice headlight that helps you see properly at night while driving.

There may be lots of reasons of fizzy and oxidized headlights, but it may be dangerous and unsafe to drive with these lights especially in the night. Here in this guide, we have mentioned all the useful, easy and cheap tricks that you can try and have clean and nice headlights. You can try these tips at home to get shiny headlights. Hope you find this post informative and interesting. Do comment if you have any query regarding the simple and effective process to restore headlights permanently.

How To Change Head Gasket Like A Pro?


How To Change Head Gasket Like A Pro

The latest model vehicles are manufactured with an engine block and a cylinder head, and the head gasket will perform the task of a seal between them. A head gasket is situated between an engine block and a cylinder head, and it is a machined casting used for an internal combustion engine. The main function of the head gasket is to seal the oil passage from the coolant passage so that the fluid doesn’t get mixed.


What does a head gasket do?

A gasket should be powerful enough to seal the need and prevent leakage between crucial engine parts. They ensure maximum compression is obtained and the gasket is exposed to several elements of a vehicle, such as fuel, oil, water, and exhaust gases. You need the best header gaskets in your vehicle because it is their task to separate the passage of water and oil through the block and cylinder head of an engine.

change head gasket

Photo Credit: http://www.taurusclub.com/forum/82-maintenance-repair/176168-replacing-head-gasket-need-advice.html

The gaskets contain a compression ratio within the combustion chamber of a vehicle, so they are important. A gasket can blow off due to overheating. In some cases, the water will mix with the oil, causing severe damage to the engine. In certain situations, you may find compression in the cylinder, creating a hole in the gasket. The usual sign of a blown-up head gasket is the pressure rising fast in the cooling system.


What happens if head gasket fails?

If the gasket fails, the three liquids will start performing their function, and this may stop the performance of an engine of a vehicle. If the liquids get mixed, the engine can suffer long term deficit.

What happens if head gasket fails

Photo Credit: http://www.lastchanceautorepairs.com/how-much-does-a-head-gasket-repair-cost/

  • If the liquid is lost due to leakage, it may create a messy situation. If the coolant or oil is allowed to stay at a low level, the engine can overheat and wrap components.
  • If the oil gets mixed with the coolant, they will contaminate one another. This may cause fatal destruction to the engine.
  • If the fuel gets mixed with the coolant or oil, serious engine damage can occur. The result would be broken valves, pistons and other components. You will notice white smoke from the exhaust. The blue smoke indicates the fuel have got mixed with the oil.

How to change a head gasket?

Changing a blown head gasket is a hard job because you will be required to separate cylinder head from an engine block. To get there, you will require removing lots of components. Replacement of head gasket is not a job like do-it-yourself. You have to remove the alternator, power steering pump, and intake and exhaust manifold, wiring going across the cylinder fuel lines and head. Also, you should re-install them perfectly.

Here are given steps to change a head gasket. It is very important to obtain the service manual for your cars make and model. It is good to install LED headlights before you start the process so that you perform the task under proper lighting condition.

There will be images showing step by step procedure to replace the head gasket.

How to change a head gasket

Photo Credit: https://gobdp.com/blog/blown-head-gasket-repair-cost/

  • Step 1 – You must drain all the oil and coolant from the engine. By referring your cars service manual remove the parts connected to a cylinder head. You will need to remove the timing belt also. Make sure you see the alignment marks before you disassemble the components. The cylinder head will be connected with several bolts, and some head bolts must be replaced. Once you remove all the head bolts, lift the cylinder head off the engine block. The gasket will remain a thin piece of ceiling material that can be seen once you remove the head. They can be made of metal or deformable material. The failure can be a break in the gasket.
  • Step 2 – Check the head and the block and send the head to an automotive shop to be pressure tested. The head out of specification must be repaired at the shop, and they will also check for the cracks. You should never re-install a cylinder head which is not being professionally examined for cracks.
  • Step 3 – You should prepare the surface of head and block. Never scratch or remove any metal because they may prevent the head gasket from sealing. Prevent any debris getting into the cylinder or on piston while cleaning. Make sure you inspect the cylinder walls and piston tops for any damage due to overheating of a gasket.
  • Step 4 – Chase the head bolt with a thread chaser to remove the crud. Use compressed air to blow out the crud. It is important to correct the head bolt torque. Then tighten the head to the block.
  • Step 5 – Fit the head gasket to the block using a gasket sealant. Make sure you use the sealant specified by the manufacturer and use the directed amount in the particular place. The head gasket will be marked the top and up for proper installation.
  • Step 6 – You must correct the bolt tightening sequence and torque for proper gasket sealing. You should use new bolts if needed. You may coat the head bolt thread with few drops of engine oil before installing. You must follow the torque instructions and the way to tighten the sequence.
  • Step 7 – Replace other engine components you have removed. You must set the timing belt to proper alignment marks carefully by rotating the camshaft and the crankshaft. Make sure you don’t damage or bend the valves.
  • Step 8 – You may fill the engine with new oil and fill the cooling system with factory specified coolant. When you start the engine, keep the engine idle with a heater on full blast. Let the air bubbles go out. Once all air is out of a cooling system, and the engine is stable, check for leaking oil or coolant.

A blown head gasket is a serious problem, and it may have caused due to any mechanical issue in your vehicle. Head gasket problem can damage the engine, so it needs immediate fixing. It can be expensive to have a professional fix so that you may fix it your own.

An Informative Guide In Choosing The Best Oil Drain Pan


Best Oil Drain Pan

You will be able to save money and time if you have your own oil drain pan. Instead of being stuck at the mechanic’s shop while having your oil changed every three months, you can do this task at the comfort of your own home. There is a lot to choose from and we are here to help you decide. If you were having a difficult time picking the best one, we hope that you will come up with an informed decision after you read this post.

In this post, we will talk about all you have to know about oil drain pans. We will also provide you the top five recommendations for the best oil drain pan available in the market right now. Not only that, we will also give you a run down of the essential factors you have to take into consideration when choosing an oil drain pan. We hope that you can apply what you learn in this post before you purchase one.

Product (Amazon Links)

Brand 
No Longer Available

FloTool 42003MI Drain Container

Hopkins

Review

Lisle 17942 Black Plastic Drain Pan

Lisle

Review

Lumax LX-1632 Drain Pan and Waste Oil Storage

Lumax

Review

Capri Tools Portable Oil Drain Pan

Capri Tools

Review

XtremepowerUS 20 Gallon Portable Drain Tank

Xtremepower

Review

Things To Consider Before Buying An Oil Drain Pan

With the advantages oil drain pan can offer you, the price you pay is going to be a great investment and is something you will never regret. Below is a list of the essential factors you have to consider in choosing the best oil drain pan.

1. Size

The first thing you have to take into consideration is the size of the oil drain pan. It should be large enough to hold the amount of oil or anti-freeze that will be flowing from your engine while you are doing the oil change. With this, you have to check with the manufacturer’s manual to know exactly the volume of oil your vehicle is holding. You have to select a drain pan that can accommodate the fluid it currently holds.

Another thing to consider in terms of size is the height of the pan, as it should fit under your vehicle. Most models presented in the reviews below are suitable for low-profile vehicles, and it should be perfect for yours as well. It should be noted, however, that some low-profile vehicles require flatter and lower-profile oil drain pans.

2. Opening

A large opening would mean that less mess is created when you are trying to aim the flow of the oil into the pan. You should also look out for other features, such as wheels that allow flexibility in movement. Other features include the handles, caps, and seals that will be of great help during application.

3. Features

Any additional features that you think may be beneficial for your application should also be taken into consideration. These may include leak-proof features that prevent oil leakages and spills. This is very important as clean up may be a tedious task, and you will not be bothering yourself with messy cleanup if you have the best oil drain pan.

AD

4. Sturdiness

This is also a very important factor in choosing an oil drain pan. The sturdiness of the material reflects on its durability. You need an oil drain pan that you can use for a long period of time. Products that are made of low-quality materials are unlikely to endure harsh conditions. With this, you have to choose the one that possesses high-quality construction with high-density materials.

5. Reviews

User reviews come from the actual buyers of the product. It gives a detailed first-hand experience regarding the product, and there is no better source of this information than its actual users. These users are providing their most honest opinions about the product you are about to buy, and it will give you enlightenment about how well the oil drain pan will work out for you. Ratings are also very important as well for product comparison.

6. Price

The oil drain pans that will be discussed in the following section are priced differently from each other. Some may be priced higher, and some are priced reasonably. When it comes to the price evaluation, you have to review their key features, benefits, and drawbacks carefully so you can decide if the amount you pay is worth it. You should also be aware that not all high-priced products offer the best quality.


Top 5 Oil Drain Pan Reviews

In this section, you will find the top five recommendations for the best oil drain pan. Each product will have a detailed discussion on its main features, advantages, and disadvantages to help you narrow down your choices.

1. FloTool 42003MI Drain Container

No Longer Available

Hopkins Manufacturing offers a wide range of high-quality fluid handling products, and one of them is the FloTool Drain Container. The product’s success is driven by inventive, original, and no-mess solutions that will turn your basic funnel and spouts into products of higher value. It does not matter whether you are changing your oil, checking your vehicle’s fluid levels, or topping off the antifreeze; this product will be perfect.

The 16-quart FloTool Drain Container provides robust features that will change everything you used to know about the typical oil change mess. You will be able to store this product in an upright or flat position without leaking. It also features an integrated handle and grip for easy handling and carrying. It has an extended design that will be able to catch the entire stream of oil, eliminating messes.

Another great feature of the FloTool Drain Container is that it is designed for high capacity that enables you to make multiple oil changes and large equipment. It also has a leakproof design that secures proper disposal. For its specifications, the product dimensions are 17.2 x 20 x 6 inches, and it weighs 3.8 pounds.

Pros:

  • Features elongated basins
  • Easy clean-up process
  • Offers easy handling and carrying
  • Can endure multiple oil changes
  • Features a leakproof design
  • Has a capacity of 16 quarts

Cons:

  • Drain might be too small
  • Made of low-quality materials

2. Lisle 17942 Black Plastic Drain Pan

AD

The Lisle Drain Pan features an ergonomic design as it has two front handles and one back handle. This oil drain pan is definitely one of the best that are available in the market right now. It has a capacity of 18 quarts and is very easy to handle and carry, unlike the other slim models. It is also made of high-density polyethylene material that is resistant to harmful solvents and chemicals, which makes this product easy to clean.

It has a wide 1-inch diameter spout, which is very handy, especially if you want to pour the oil out carefully. You will also notice an anti-splash lip around the pan that prevents oil spills. It is important to note that the Lisle Drain Pan will be able to provide you with an easy transfer of fluids but will not be a great one for storage. The spout does not feature a plug, and you will not find a cap or cover.

For its specifications, the product dimensions are 18.5 x 22.8 x 6.6 inches, and it weighs 9 pounds, which is a little heavy and bulky for some users. Its color is black, and it has a smooth exterior.

Pros:

  • Features an ergonomic design for better handling
  • Has a capacity of 18 quarts
  • Made of high-quality polyethylene materials
  • Easy to clean
  • Resistant to solvents and chemicals
  • Leak proof design

Cons:

  • Not suitable for storage
  • Does not come with a lid

3. Lumax LX-1632 Drain Pan and Waste Oil Storage

AD

The Lumax Drain Pan is proudly made in the USA. This drain pan is a heavy-duty pan that can hold 15 quarts of oil, anti-freeze, gasoline, or any other type of fluid. It is also interesting to know that this drain pan can also serve as a waste oil and gas storage through its screw cap feature. The O-ring seal makes this product suitable for oil change and storage. Not only that, it has an 8-inch wide opening that prevents splashes and spills.

Another great feature of the Lumax Drain Pan is that it has a catch-all basket that covers the wide opening. It will be able to work even under low-profile vehicles. It has a heavy-duty design that allows easy handling and carrying through the E-Z roll wheels. The large opening will allow oil to enter the drain pan and will require no messy clean-up on the sides and top of the drain pan.

For its specifications, the product dimensions are 19 x 16 x 5 inches, and it weighs only 2.6 pounds.

Pros:

  • Has a capacity of 15 quarts
  • Can also be used for storage
  • Easy to handle and carry
  • Has a wide opening that prevents spills and splashes
  • No clean-up required
  • Lightweight

Cons:

  • Might not be totally leakproof
  • Made of poor-quality materials

4. Capri Tools Portable Oil Drain Pan

AD

The Capri Tools model will be perfect for you if you need an open oil pan and if you do not need oil storage before you dispose of it. It is small, lightweight, and portable. It has an open pan that will be able to hold 4.5 gallons or 16 liters of fluid. In addition, due to the fact that it has a completely open pan, the fluid drains directly into it. An anti-splash lip can also prevent spills when you are in the process of pouring oil.

Another great feature of this oil drain pan is that it has a molded handle for easy pouring and carrying. It is made from high-quality and tough polyethylene material, which makes this drain pan very durable. The 6-inch low profile design makes it able to be used even in the lowest profile situations. One downside is that it cannot be used for storage since it has no lid or any type of cover. It is just designed to catch and transfer fluid.

For its specifications, the product dimensions are 23 x 19 x 6 inches, and it weighs 1.9 pounds.

Pros:

  • Lightweight
  • Manufacturer offers 1 year warranty
  • Durable
  • Features an anti-spill and anti-splash lip
  • Designed for easy carrying and handling

Cons:

  • Not suitable for storage
  • Might require an additional funnel as the spout is pointing down

5. XtremepowerUS 20 Gallon Portable Drain Tank 

AD

The XtremepowerUS oil lift pan is designed to be 45 to 72 inches tall, which enables you to use it under a car lift. This drain pan tank can hold up to 20 gallons is perfect for collecting oil before you dispose it. It can use a vacuum system to extra fluids from your car. You can transfer the oil from the tank to a container for recycling using a simple valve.

Pros:

  • Has wheels and castors 
  • Has the capacity to hold 20 gallons of fluid
  • Has vacuum system hook up if desires
  • Less mess while using it
  • Features a handle and extraction tube

Cons:

  • Drain hole might be too small
  • Castor wheels could be better

Conclusion

Now that we have discussed everything you have to know about oil drain pans, it is now up to you to choose which one to buy. Based on the reviews discussed above, we do recommend the Lumax LX-1632 Drain Pan and Waste Oil Storage for the best oil drain pan. There is no doubt this product offers convenience. If you review carefully, you will be able to appreciate that it has a lot more features than others.

Do you need more products to hook up to your vehicle? Click here to see some of the options that are available in the market right now.

How Does A Car Cooling System Work?


How Does A Car Cooling System Work

The wheel changed a lot and brought a revolution in the invention. Many modes of transportation were found for utilization in our daily lives. In the list of transport, the invention of the car brought a dramatic role in our day-to-day life.

The car has luxuriously changed a person’s life. Therefore, it is too hard to live such a life and lead a normal life. Although we have a car of our own, we must be aware of the parts of a car and how it functions.

Here, you are going to see the in-depth function of a car cooling system. After reading this post, you will feel as if you are an automobile engineer. The cooling acknowledgment about the car will also help you learn how to maintain it.


How Does a Car Cooling System Work?

The engine is the only thing that changes chemical energy to mechanical energy. In these contemporary days, the engine comes with gasoline. Thus, there is more improvement in the engine system.

However, these gasoline engines couldn’t turn out to be efficient engines. The seventy percent of the chemical energy turns into a heat energy than that of the mechanical energy. Hence, the cooling system takes the control to prevent the overheating in the engine system.

If there is an overheating in the engine system, it may lead to the engine’s halt. Therefore, the automobile engineers made a coolant system. There are two types and they are Liquid Cooling and Air Cooling.

Car Cooling System Work

Photo Credit: https://in.pinterest.com/pin/455004368572808595/?lp=true


The Liquid Cooling

In this cooling system, a cooled liquid circulates and moves through the passageways and pipes in the engine. The cooled liquid passes through the hot engine and absorbs the heat by cooling the engine at that instant. Once the fluid leaves the engine, it moves to the radiator and transfers heat.


The Air Cooling

The liquid cooling system and the air cooling system are alike, but instead of the liquid here, the air is used as a coolant. However, the air cooling system is seen only in a few modern cars and some old cars. The air cooling process involves with an aluminum fin that covers the engine.

The aluminum fin, while covering the engine, absorbs the heat from the engine and then transfers the heat to the air. The most number of car’s cooling system is the liquid cooling system. Thus, we are going to focus on the liquid system.

Let us take this little bit in a handyman’s way because the car engine has a lot of plumbing systems. The cooled fluid moves through the pump straight into the engine block. The engine block makes way for the fluid. This way allows the fluid to move around the engine cylinders.

The location of the thermostat is near the engine, the spot where the fluid leaves the engine. In case, the thermostat closes its opening then the fluid gets back to the pump. Suppose if that the thermostat is open, the fluid goes to the radiator and then back to the pumps.

There is another circuit to heat. The fluid from the cylinder head is carried by the circuit to the heater core and, after that, led to the back to the pumps. In the case of automatic transmission cars, a separate circuit for transmission is constructed within the radiator.

Then the transmission pumps the oil inside it and outlets the oil to the secondary heat exchanger within the radiator. Talking about cars, it has a variable temperature. It can be either below freezing point or above boiling point.

Hence, water is the most effective coolant for a car; hence, water is used in cars. Since the water freezes immediately, ethylene glycol is used to hike the cooling. Along with the freezing point of the fluid (water added ethylene glycol), the boiling point also gets a hike.

A unique or specified pump is utilized in cars. The work of the pump is to circulate the fluid in a car while the engine is turned on. The fluid flow process starts from the pump, then to the engine block, after reaching the engine block it moves to the cylinder head then to the radiator, and finally, it gets back to the pump.

There are many passageways for the engine block as well as the cylinder head. The engine has a combustion chamber, and the temperature in that chamber can touch 2500 degree Celsius. There is an interesting way to drop the temperature in the combustion chamber.

It is the method to reduce the amount of heat energy transferred. If we use ceramic layer, which a poor conductor of heat, then the heat transfer drops down. Here comes the heat exchanger or radiator.

The Air Cooling

Photo Credit: https://www.howacarworks.com/basics/how-an-engine-cooling-system-works

The radiator in a car is a heat exchanger. The radiator is designed in such a way that it transfers all the heat from the hot coolant by a fan. The fan blows a speedy wind to transfer the heat from the coolant to the radiator.

The radiators have a tank on both sides. Inside the tank, you can find a transmission cooler. The transmission present in the radiator is like a radiator having another radiator inside. Here, instead of the coolant, the heat exchanger is between the oil.

The pressure cap hikes the boiling point of your coolant by 25 degrees Celsius. It acts just like a pressure cooker. A pressure cooker increases the temperature of the boiling water. The same process goes here.

After all these machines inside a car, the coolant’s work is determined by the thermostat. The foremost job of a thermostat is to permit the engine to heat up. After heating up the engine, the thermostat will constantly maintain the temperature of the engine.

Just like the thermostat, there is another friend to support in maintaining the temperature of the engine is the electric fan. Regular maintenance of your engine and cleaning the car engine safely will add life to your car as well as your engine. The best crate engines can prolong the car’s life.

Best Car Air Purifier: Healthier, Fresher Air While on the Road


Best Car Air Purifier

Improving air quality inside the car should be a paramount concern for everyone. It is important to invest in an air purifier, which will be a great way to get rid of allergens and other contaminants that can get mixed with air while inside the car. This is one good way to ensure your best state of health.

With too many options that are available in the market, which one can offer the best bang for the buck? If you have no idea what to pick for the best car air purifier, keep on reading the rest of this post. You will learn how to choose and what to pick, providing you with an assurance of making a decision that you will never regret.

Product (Amazon Link)Brand  

Car Air Purifier 3 in 1 

Pure

Review

Enouch Car Air Purifier with USB Car Charger 

Enouch

Review

Airthereal Air Purifier

Airthereal

Review

Choosing the Best Car Air Purifier

To start with, here are some of the most important considerations that will make it easier for you to make the right decision.

1.Technology

For starters, you might think that all of the car purifiers are the same, and hence, you may make a decision based on which one is the cheapest or which one looks most stylish. However, keep in mind that there are different types of purifiers, each with their respective technology.

Basically, you will have two choices. The first one is an ionizer. In the case of the latter, there are anions or negatively charged molecules that are released by the device. The more molecules are released, the better is its ability to improve the air quality in your car.

The second one uses HEPA filters. The latter absorbs air. Afterwards, air passes through a filtration process to remove the impurities that are present. Once it is done, air will be recirculated in the car, and this time, it is already free from the contaminants.

Different manufacturers also include different technologies in their products to separate it from the competition. For instance, there are some with absorption capabilities, which will help to get rid of foul odor, such as from cigarettes.

2.Filtration Capacity

You also need to take time to evaluate the technical specifications of the air purifiers that are available in the market. In the case of ionizers, look at how many negative ions it can release per cubic centimeter. The higher the number is, the more powerful it will be. These negative ions are the ones responsible for removing the pollutants in the air.

3.Ease of Use

Unlike in the case of air purifiers that are meant to be used in rooms, those that are designed for cars are usually simple and more straightforward to operate. Make sure that you can use it straight from its box. In most instances, all that you have to do is to plug it in the power source and it will already work on its own.

For the car air filter to be user-friendly, another thing that is important is that it should not require maintenance or change of filters all throughout its functional life.

4.Design

Do not also forget to evaluate the aesthetics of the air purifiers. This is one thing that will be exposed in your car. With this, might as well pick one that comes with an appealing design. Some models even have a LED or glow light, which will look nice at night, as long as it is not too powerful.

5.Safety

Before making any final decision on which one to purchase, it is also important to evaluate the safety features of the product. To be sure, pick one that has been certified to be safe. It must have certifications, which are provided only to products that have undergone and passed stringent testing. You surely would not want your air purifier to ignite a fire in your car.

To add, you should also stay away from ozone emitting purifiers. They can have a negative impact when it comes to the safety of the environment. If they emit ozone, they will be harmful to human health as well.

AD

6.Feedbacks

Luckily, there are many people who are generous enough to write reviews about the air purifiers they have used, most of which are available online. Take time to read online forums and blogs. This is one of the best ways to be educated on what makes one product different from all others. Pay attention to their experiences, but be intelligent enough to be sure that these are genuine users sharing their insights and not paid reviews.

7.Price

Without a doubt, a lot of you may decide on the basis of cost. It is natural for almost any buyer to choose one that comes with a low price. Nonetheless, quality should not be compromised in any way. At the end of the day, you should still choose a product with superior quality, even if this means that the price is quite higher compared to those with a cheap cost.

8.Warranty

Take a look at the warranty coverage or the satisfaction guarantee that is offered by the manufacturer, which will provide you with peace of mind. They must be able to offer free repair or replacement if the product does not function as advertised or anticipated by the user. To entice more buyers, some manufacturers are even offering a money-back guarantee.


Top Picks for the Best Car Air Purifier

Below are five of the top products that you might want to consider, as well as some of the features that provide them an edge above many others within the competitive landscape.

1. Car Air Purifier 3 in 1

AD

If you are looking for a car air purifier that a USB outlet this is one product that should be on the top of your list. It has a compact and sleek body, yet it is effective in odor elimination. 

With the use of this car air purifier, you will enjoy a product that is capable of kill germs and viruses in the air, which include allergens, odors, and pollen. This will be instrumental in the prevention of a wide array of health problems, such as bronchitis, asthma, and sinusitis.

In terms of its technical specifications, this car air purifier has 5.6 million negative ION concentration. In simple terms, the more negative ions are able to be generated by the purifier, the more effective it is in the improvement of indoor air quality.

Lastly, it is also good to know that this product has a money back guarantee.

Pros:

  • Creates a noticeable difference in air quality
  • Sleek and stylish design
  • Easy to use
  • Has 2 USB outlets

Cons:

  • May not eliminate odors well enough
  • May not turn off when car is off

2. Enouch Car Air Purifier with USB Car Charger

AD

This option might be for you if your in the market for a air purifier with USB ports. It is comparable to the previous model. It also has 2 USB ports.

From its long list of features, one that is worth that it has 5.6 million negative ions like the previous model.

Another innovative feature that you can find in this product is the purifier can help restore skin moisture. It helps get rid of odors and kills viruses in your car.

Lastly, the air purifier can charge two devices with its 3 amps of USB output. 

Pros:

  • Stylish appearance
  • Effectively neutralizes smell from cigarette smoke
  • Relieves allergies
  • Comes with 2 USB ports
  • Nice blue LED light

Cons:

  • May not turn off when car is off

3. Airthereal Air Purifier

AD

This heavy-duty air purifier comes with 7 in 1 True HEPA for air cleaning and odor removal. It clean air particles up to 0.1 microns for cleaner car air. 

Use in the car or at work to help with allergies and odors. The quiet operation will keep you focused on what you need to do. 

At 47 cubic feet per minute or air cleaning power, you’ll likely see the different in air quality fairly quickly.

Pros:

  • Traps and eliminates odors
  • Compact and space-efficient design
  • HEPA filter works for 6 months
  • 3 fan speeds

Cons:

  • Larger foot print.

Conclusion

From the brands and models reviewed above, if there is one that I can personally recommend, it would be Airthereal Air Purifier. It does a great job of purifying the air, making sure that it is free from contaminants that could put your health in danger.

Click here and learn more about other products that can be beneficial for your car.

Best Socket Set: An Essential Investment for DIYers


Best Socket Set

If you are into DIY tasks, such as when fixing minor issues in your vehicle and performing maintenance works, you need to have a socket set. It has the nuts and bolts that you will need for different jobs, among other tools. While they may all seem the same, the truth is, they are different in a lot of ways.

In the rest of this post, we will help you find the best socket set that is available on the market today. Aside from discussing the essential factors to consider, we will identify five of the products that should be on the top of your mind, including the reasons why they are incredible picks.

Product (Amazon Link)

Brand 

Stanley STMT71652 123-piece Socket Set

Stanley

Review

TEKTON ½-inch Drive Deep Impact Socket Set

TEKTON

Review

Neiko 10288A Socket Set

Neiko

Review

BOSTITCH BTMT72287 65-piece Socket Set

BOSTITCH

Review

Dewalt DW22812 Impact-Ready Socket Set

Dewalt

Review

Choosing the Best Socket Set

We’ll start by sharing with you some of the most important factors that you need to consider to easily narrow down the possibilities and choose which one is the best amongst the rest:

1.Box

One of the most important for a socket set is to have a solid case, which will help in keeping the pieces well-organized. Without the box, the sockets will be easily lost or misplaced. The box also makes it possible to bring all the sockets regardless of where you intend to work. See to it that the box comes with a solid construction, making sure that it will last for a long time.

2.Material

In this case, we are referring to the materials that are used in the sockets. Most of the good options in the market are made from alloy steel, which is a combination of steel and another material that is equally superior. They are combined through heat forging. Make sure that it is made from tough materials that will withstand even the toughest jobs and frequent use.

When evaluating the material, take a look at the finish as well. Most sockets have black oxide or chrome plating as their finish. See to it that the finish will provide protection from corrosion.

Still, with regards to the materials that are used, it is important to be aware that not all sockets are compatible with power tools. With this, if you intend to use the sockets for an electric or pneumatic impact wrench, make sure that they are impact sockets. They are made from thicker and stronger materials, making sure that they will not easily break when they are used in a high-torque tool.

3.Drive Size

AD

Aside from looking at what sockets are included in the set, you should also consider their drive sizes. Consider the type of job that you will be performing often to determine what size is the best. A good choice is a set that comes with a variety of drive sizes, making sure that there is one that you can use for every job.

When it comes to sizes, you also have to consider whether they have metric or inch measurements. SAE or standard-sized sockets have inch measurements and they are used for older vehicles. For the newer ones, on the other hand, most of them will require metric sizes. For versatility, a better choice is one that comes with both sizes.

4.Markings

How exactly will you be able to determine the size of each socket? A mere look at each of them will not be enough. You cannot just guess which one to pick. With this, it is also important to choose a product that comes with clear or etched markings on the side. The markings should be large and clear enough so that it will be easily visible, even in broad daylight.

5.Points

This will refer to what you can see at one end of the socket. If you want one that is stronger, choose those with 6-point socket, which is constructed in a manner by which the six walls will sit against the inner wall. On the other hand, if convenience and ease of use are more important for you, a 12-point socket will be the better option.

6.Pockets

In evaluating the sockets that are included in the set, you also need to determine whether they are deep or shallow. A normal socket is shallow, which means that it may not touch the nut before the top part touches the end of the socket. With this, it will be better if there are deep sockets in the set. One of the advantages of the latter is that it will easily fit sideways on the ratchet even if it is positioned sideways. It will also effectively accommodate a bolt’s long end and will have a snug fit on the nut.

7.Ease of Use

To avoid headaches in your DIY tasks, see to it that the sockets in the set will be user-friendly. One thing that will make it user-friendly is the presence of parts that are easy to snap on the ratchet. It must be effortless for you to attach it and it should not fall off easily. The ratchet must also block the sockets and it will also be good if the ratchet is reversible.

8.Warranty

Similar to the case of buying any other product, extensive warranty coverage is a sign of a superior product. Many will have a warranty that lasts for one year, but a better option would be one product that comes with a longer warranty coverage. If possible, pick a product with lifetime warranty. This means that at any point, the manufacturer will extend free repair or replacement, provided that you are able to satisfy the terms and conditions of the warranty.


Best Socket Set Reviews

In this section, you will know more about some of the best models you might want to include in your list, as well as their notable features. We will also identify a few of their pros and cons, making it easier for you to evaluate the possibilities.

1. Stanley STMT71652 123-piece Socket Set

AD

With 123 pieces in this set, you can be confident that you have everything that you will need for a specific task. The nuts and bolts are available in different sizes and you will also have the other tools that you will need.

In terms of construction, this is an exceptional choice. One of the reasons for such is that the body is forged with chrome vanadium, which is the one that is responsible for durability and torque. The pieces are also fully-finished, which allows it to prevent corrosion.

If you are looking for a set that is user-friendly, you have another good reason to include this in your list of choices. It is designed in such a way that even beginners will be able to use it without difficulty. The reversible mechanism and quick release switch also make it user-friendly.

Lastly, and perhaps most importantly, the manufacturer is offering a lifetime warranty for this set. If you are unhappy with the product or if it shows signs of defects, you can return it to the manufacturer and they will do what it takes to deliver a high level of satisfaction.

Pros:

  • Wide selection of tools
  • Built using anti-corrosive materials
  • Has a heavy-duty case
  • Pieces fit snugly in the box
  • Extensive warranty coverage

Cons:

  • Markings are difficult to see
  • Tools are not greased

2. TEKTON ½-inch Drive Deep Impact Socket Set

AD

With this socket set, you will be able to enjoy a variety of sizes, which range from 3/8 to 1 and ¼ inch. They are designed in such a way that they will make it effortless for you to loosen different fasteners.

Looking for sockets that will be able to withstand the test of time? This will also be an impressive choice if you want one that will be durable. The chrome that is used in the sockets is forged and heat-treated, allowing it to demonstrate exceptional longevity. It also has a black phosphate finish, which allows it to resist corrosion.

It is also a good thing that the socket comes with high-contrast laser markings. They are easy to see, regardless of the condition of the external environment. You can be sure that you will be picking the right one for the job.

Lastly, it is also worth noting that it has passed the ANSI performance standards. The latter is an assurance that it does not only pass, but even exceeds global standards.

Pros:

  • Box comes in a handy size
  • Comes with a lifetime warranty
  • Can resist corrosion
  • Perfect even for heavy-duty tasks
  • Printed socket size

Cons:

  • Limited drive sockets
  • Can easily fall from an impact wrench

3. Neiko 10288A Socket Set

AD

One of the things that we loved the most about this set is that they offer a high degree of precision, guaranteeing its reliability for every job. The bit tips are automatically machined, making sure that the size is accurate.

It also demonstrates high-quality construction, which is even made better by the fact that it comes with high quality construction. They are made using S2 alloy steel, which has incredible hardiness. The material of choice makes it not easily prone to wear and tear.

Another thing that we loved the most about this product is the high-strength chrome vanadium steel socket. The latter allows it to deliver superior torque and strength in every turn.

Pros:

  • Comes with every hex key you will need
  • Available in different sizes
  • High-quality construction
  • Has a handy box

Cons:

  • May not be good for heavy-duty use
  • Case has shallow grooves

4. BOSTITCH BTMT72287 65-piece Socket Set

AD

With 65 pieces in one set, this socket tool box will provide almost everything that you will need to accomplish a specific task. The sockets are available in different sizes with clear markings, making it easy to see which one is needed.

With chrome vanadium steel construction, you can also expect nothing but the best when it comes to durability. Even through the years, you can expect that it will deliver the best functionality.

It is also worth noting that it comes with 72-tooth gear. The latter is the one that allows exceptional ratchetting and improved accessibility.

Still not convinced to buy this socket set? Your mind might change after knowing that the manufacturer is offering a lifetime warranty. This means that throughout its functional life, you can expect support from the manufacturer.

Pros:

  • Sockets have an excellent finish
  • Lifetime warranty
  • Durable case
  • Lots of sizes to choose from

Cons:

  • Hollow sockets
  • May not always stay on the ratchet

5. Dewalt DW22812 Impact-Ready Socket Set

AD

This socket set is made by Dewalt, one company that has built a solid reputation in the market for DIY tools. This is more than enough to provide you with peace of mind and assurance that it will deliver superior reliability.

It is inclusive of six of the most common sizes of sockets that you will need for various jobs – 7/16, 9/16, 11/16, 13/16, ½, 5/8, ¾, and 7/8 inch. All sockets have etched markings that are easily visible, making sure that you will pick the right one all the time.

This product is also worth commending because of its durability, one thing that Dewalt is known for. It is made using high-impact materials, which will allow it to withstand wear and tear.

While most of the products in this post come with a lifetime warranty, this socket set has a warranty that lasts only for three years. Still, this is better than the standard one-year warranty.

Pros:

  • Made by a trusted brand
  • Easy to identify markings
  • Can be used for both corded and cordless wrenches

Cons:

  • Case is too big
  • No lifetime warranty

Conclusion

So, what is the best socket set? In my honest opinion, Stanley STMT71652 123-piece Socket Set is a notch above many others. With its high-quality construction, ease of use, and versatility, you will have countless reasons to choose this above many of its competitors. It is sure to make any DIY job a lot easier to accomplish.

Are you looking for other products that you can use for DIY tasks? Click here and allow our buying guides to help you make a decision that you will never regret.