Home

Recent Posts

Best Carport Kits: Choosing a Temporary Shelter for your Car


Best Carport Kits

You have a car, but you have no garage. What is the best thing to do? I believe that you should be looking for the best carport kits that are available in the market and consider investing in one. This will provide a portable garage, which can even double as a tent where you can gather with family and friends while enjoying the outdoors.

Not all carports, however, are created the same. Do not make the mistake of buying one only because of its aesthetics or its low price. You have to be responsible enough to carry out an intelligent evaluation of the possibilities, such as through the materials that are used and their functionality.

If you have no idea which carport kit is best to purchase, keep on reading, and we’ll share some useful insights that will help you come up with the right decision. Aside from discussing the most important considerations, we will also tackle five of the best options available in the market today, as well as the features that make them exceptional.


Essential Factors to Consider

To start our discussions, let us first have a quick look at some of the most important considerations in choosing a carport kit that will work best for your needs:

AD

  • Ease of Assembly: Most carports can be assembled by two persons. It is best to have a helping hand so that you can safely complete its installation. Pay attention to the instructions from the manufacturer as well.
  • Size: How big is your car? How big is the space available in the yard? These are two of the most important things that will help you to decide on the size of the carport. More often than not, a bigger carport is a better option since this guarantees better protection for your car.
  • Durability: If you want the best value for money, see to it that the carport is made from premium materials that will last for a long time. Powder coating is important for steel frames, which will allow the latter to resist rust and corrosion.
  • Versatility: In most instances, a carport should not only cover your car but must also double as a covered tent. This can be used if you have gatherings with family and friends, such as for lunch in the garden.
  • Portability: Lightweight carports are good in terms of portability, but make sure that the stability will not be compromised. Standalone carports are better than those that are attached to a fixed structure. This means that you can easily disassemble it and install it in a different location.
  • Warranty: This is an important consideration as it will provide you with peace of mind. The standard warranty is one year. Some can have up to ten years of warranty. A longer warranty is a better choice since this means that you can expect support from the manufacturer in case the product proves to be defective.

Top 5 Picks for the Best Carport Kits

Product (Amazon Link)Manufacturer  

VINGLI 10 x 20 Carport

Vingli

Review

Kdgarden 10 x 20 Portable Carport

Kdgarden

Review

American Phoenix Portable Commercial Shelter

American Phoenix

Review

TopCamp 10 x 20 Pop up Canopy

TopCamp

Review

Gazebo Penguin All Season Carport

Gazebo Penguin

Review

Below are five of the products that can provide the best bang for the buck. To convince you that they will make great choices, we will also list down their main features.

1. VINGLI 10 x 20 Carport

AD

Among other things, this is a well-loved option for a carport kit because it comes with a white top made from a strong material that delivers heat and water resistance. More than just being functional as a temporary and movable shelter for your car, it can also double as a tent to provide shade and protection from the rain during outdoor parties. The steel frame is also known for its durability. Powder coating can resist peeling and corrosion, among other problems.

Main Product Features:

  • Spacious 10×20 feet covered space
  • The polyethylene top is waterproof
  • 6 feet of side and 8.5 peak height clearance
  • Stake and rope kits are included
  • UV protection

Pros:

  • Has a spacious covered area
  • Putting up the carport can be accomplished in a snap
  • Open sides make it function as a tent
  • The top part is UV-resistant

Cons:

  • Metal parts seem thin
  • May not be able to withstand extreme wind

2. Kdgarden 10 x 20 Portable Carport

AD

While this may not be the easiest in terms of assembly, once you get the hang of it, you can easily put the pieces together. One feature that makes it stand out against its competition is the UV covers the car. With the latter, it will keep out the weather elements. The cover has a front and back zipper, so you can completely keep outside elements out. This provides an assurance that water will be kept out. The cover is also made from a material that is thick enough to be tough, and the steel is powder-coated.

Main Product Features:

  • Fitted with 10 steel legs
  • Frame is powder-coated
  • The shelter has 10 U-type ground stakes
  • UV-treated cover
  • Double zipper front and back

Pros:

  • Has side walls to keep your car away from prying eyes
  • Comes with a sturdy and durable side frame
  • Excellent wind resistance
  • A sturdy anchor system to keep the carport stable
  • Easy set-up instructions

Cons:

  • Assembly can take quite some time
  • The tarp is thin enough to rip with too much pressure

3. American Phoenix Portable Commercial Shelter

AD

If assembly of the carport is your main concern, this is one product that you might find to be an excellent alternative. It can be put up in a few minutes and without the need to deal with complicated instructions. Best of all, there are no tools that are necessary. It is also a carport that is open on the sides, allowing it to function as well as a tent. The problem with this design, however, is that it is not good if it rains. Your car will not be protected from the sides. Also, it keeps your vehicle exposed to the public because the sides are open.

Main Product Features:

  • 10 x 20 feet covered space
  • Powder-coated steel frame
  • The top is made from Oxford cloth
  • Water-resistant

Pros:

  • Lightweight construction, making it possible to be easily used anywhere
  • Open sidewalls for versatile functionality
  • Perfect even for commercial use
  • Set-up can be easily accomplished

Cons:

  • The legs can be easily prone to bending
  • Not enough protection from the rain

4. TopCamp 10 x 20 Pop up Canopy

AD

If transportation is an issue, this carport kit that is worth buying. You can easily take it with you wherever you go and use it for other purposes. It is large enough to be used for family outings, garage sales, and other outdoor events. Its easy setup is one of its defining features. No tools are needed to set up, and you can use the carrying bag to carry it easily to new places. The cover is water-resistant and is made from durable fabric. 

Main Product Features:

  • Dimensions: 10 x 20 x (11- at center) feet
  • Frame made from plastic and powder-coated steel
  • 420D waterproof fabric cover
  • Offers 100% UV protection
  • Comes with a carrying bag that has wheels

Pros:

  • Made from durable material
  • Not only a carport but doubles as a covered outdoor space as well
  • Does not require maintenance
  • Can set up quickly
  • Offers excellent UV protection

Cons:

  • May blow over if not secured down well
  • Plastic parts may break with stress. 

5. Gazebo Penguin All-Season Carport

AD

Similar to the ones that we have mentioned above, except that this one is constructed of different materials and functions differently. Nonetheless, this can be just the option you are looking for if you want a long-term solution that stays in place. It is made from materials that are built to withstand the test of time, especially the roof. One thing that makes it even better is the fact that it already comes with the gutter, making it easier to make sure that water will be kept out of the carport.

Main Product Features:

  • Base Dimensions: 3.55m x 4.51 m
  • Height: 2.36 m
  • UV-treated polycarbonate roof
  • Comes with a gutter and drains

Pros:

  • The roof comes with a high-quality design
  • Open side walls allow excellent air circulation
  • Generous space
  • Perfect for use throughout the year
  • Great height clearance

Cons:

  • Difficulties may occur when putting together 

What are the Different Types of Carport Kits?

It is important to be familiar with the different styles and types of carports that are available so that you can easily make the right decision. There are different ways to categorize the carports that are available in the market, such as through the following:

1. Material

  • Some of the most common materials that are available for carports include steel, metal, aluminum, and wood. Steel and metal are two of the top choices. They tend to be heavy, which is why some people opt for aluminum since they are lightweight.
  • Wood is the least preferred option for a carport. It requires heavy maintenance and may not be as long-lasting as its counterparts.

2. Design

  • In terms of the design of the carport, there are some that are independent and movable structures, such as those that we have mentioned in this guide.
  • There are also some carports that function as an extension of the house, garage, or any other permanent structure.
  • Some carports are open on the side, allowing air to pass through. There are some with side walls. The latter hides the vehicle from the prying eyes but can be prone to condensation because of the lack of air circulation.

At the end of the day, there is no universal answer on which one is the best. It all boils down to personal needs and preferences.


Quick Tips for Using Carport Kits

To make the most out of your carport kit and to make sure that it will offer the protection that your car needs, below are some of the most important things that you have to take into consideration:

  • Make sure to choose the right position of the carport. Do not place it in the street or in an area that is already beyond your private property. In some places, you will need to secure a permit before you can proceed with the installation of a carport.
  • Keep it clean to make the carport last longer. Even if they are made from the best materials that are available, they still need proper care and maintenance to extend their functional life. More often than not, soap and water will be enough to keep it clean.
  • You also need to pay attention to the anchoring system. They may already be included, but in some instances, you have to purchase them separately. This will be necessary to keep the carport stable amidst strong wind.
  • Pay attention to condensation as well. One of the possible causes of the latter is poor ventilation. With this, see to it that there is enough opening to let air come in. The material used for the carport can also lead to condensation.
  • Do not attempt to set it up on your own, especially if it is a large one. Do not hesitate to ask for a helping hand so that you can prevent injuries and be sure that the carport is set up the right way.

Conclusion

In sum, while all of the products that have been mentioned in this review are excellent, Kdgarden 10 x 20 Portable Carport stands out from the rest. If you are searching for the best carport kits and this will make an excellent choice. It is simple, versatile, and portable, making it almost everything that you will need for a carport.

Are you looking for more products that you can use for your car? Click here and our quick buying guides can provide you with more insights.

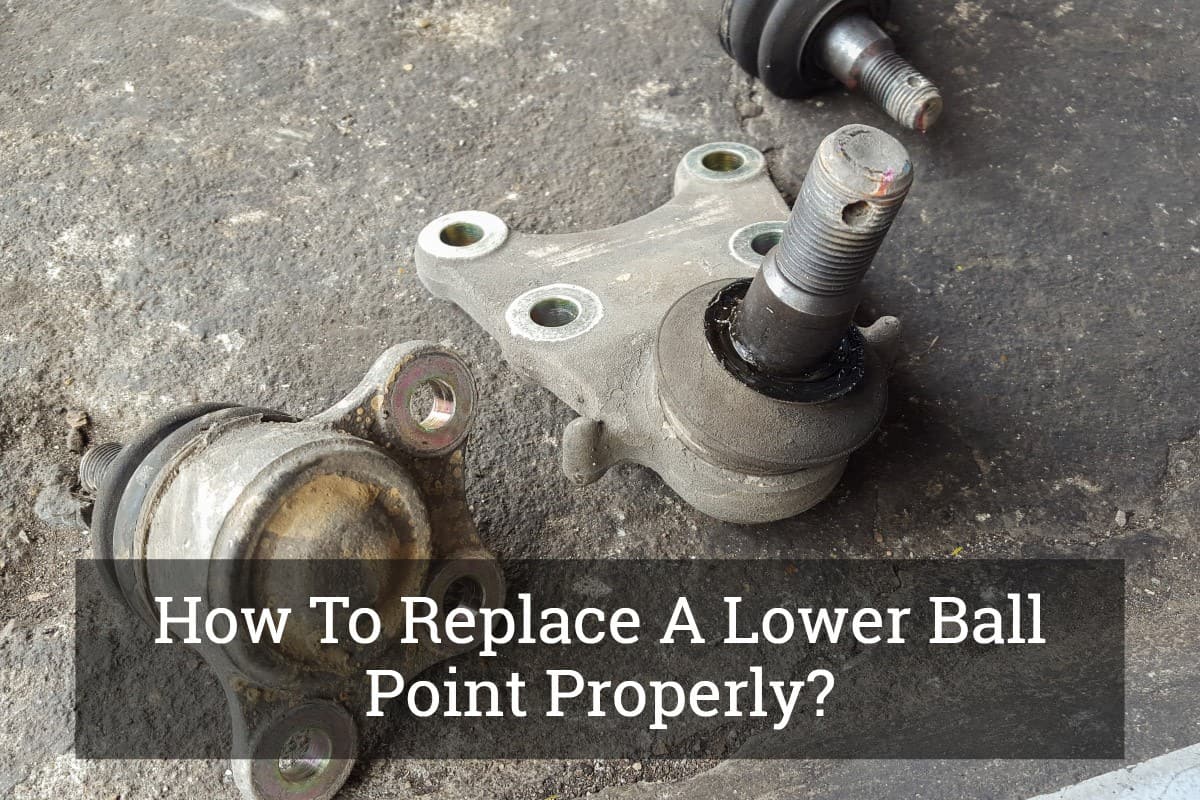
How To Replace A Lower Ball Point Properly?


How To Replace A Lower Ball Point Properly

Are you listening to a banging sound or experiencing sloppy or stiff steering? Is your tire worn out unevenly? If yes, then it is high time to replace the lower ball point properly. Ball joints have a role in your vehicle’s suspension and steering systems. Ball joints connect the wheel hub to the suspension in your vehicle.

The wheel and tire are mounted to the hub. With time, ball joints tend to wear and tear. Worn-out ball joints make it difficult to handle the car at low speed. It can make driving dangerous at a higher speed. You need to replace the old ball joints with the new ball joints.

Replacement of ball joints is not a difficult task. You need to have the right tools and a basic understanding of your vehicle. The right tools make your work very easy and quick. Some of the required tools are listed below:

  • Ramp or Jack- It is used to lift the vehicle.
  • Metal wire- It is used to hold the brakes in some vehicles.
  • Chucks or bricks- It prevents your car from moving. You can place these chunks or bricks behind the tires at the back.
  • Hammer and pickle fork- It allows the popping of the ball joint
  • WD-40- You can lose the bolts
  • Bolts and nuts- It can be used to replace old bolts and nuts
  • Wrenches- It helps to remove bolts and nuts
  • Drill- Its requirement depends on your vehicle. It helps to drill the rivets.
  • Torque wrench- Helps to tighten bolts and nuts

The step-by-step process to replace a low ball joint

The step by step process to replace a low ball joint

Photo Credit: https://mbworld.org/forums/e-class-w211/358747-diy-replacing-lower-ball-joint-w211.html

1. Get started to replace a lower ball joint

Park your car on a flat surface. Block front, rear, and back wheels. Jack front wheels above the ground. Provide support to your vehicle with the help of a jack stand. Have a look at the back tires, as nothing must move during your work.

2. Examine the ball joints and make sure that it requires replacement

  • Check the type of suspension in your car. Is it a control arm or strut style?
  • Examine the ball joint. You can jack the control arm to check wheel play.
  • In the case of strut suspension, jack up the car. Use a pry bar for checking wheel play.
  • The space between the contact point and ball joint must be nil.
  • In the case of space or moving of wheel, joint needs to be replaced.

3. Buy right replacement assembly for ball joint

Purchase the specific replacement part according to the model and make of your car. You must have the information about which type of vehicle you are having. In the case of help, you can get this information from a guide book.

4. Take out the wheel and reach to ball joint

Take out the wheel and reach to ball joint

Photo Credit: https://mechanics.stackexchange.com/questions/9884/macpherson-strut-lower-control-arm-ball-joint-play-and-suspension-geometry

  • Move the brakes aside. It depends largely on the kind of steering assembly you have.
  • By using a wire, hold the brakes. Please don’t hang them on brake lines.
  • Lose the mounts that are attached to sway bar or control arm. This is required to create the space for moving the suspension parts.
  • You must work around caliper and brake rotor. Also, focus on the line without taking out the assembly.

5. Keep the bolts in PB blaster or WD-40

Bolt joints are gunkiest ones in the undercarriage. They can be very dirty. The dirt could make it hard for you to remove the ball joint. You must spray a metal cleaner on the bolts. The bolts can easily be removed after spraying metal cleaner.

6. Pulling a cotter pin, castellated nut gets loosened

  • A component is there that has the top like a crown and bottom like a castle.
  • Turn the castellated nut.
  • If your car has strut suspension, then take out the pinch bolt.

7. Loose the ball joint

  • You can loosen the ball joint from the hole. The hole is located at the top part of the steering wheel.
  • It can be difficult as it is very tight. By using hammer and pickle fork, you can loosen it.
  • With the help of a wrench, take out the largest nut. After that, replace the old nut with the new nut.
  • Move the pickle fork in between the steering knuckle and control arm.
  • You are required to be rough and hammer it. This step can damage the gasket that is on the ball joint. So, don’t forget to replace it with a new
  • Now put the castellated nut. You must avoid popping out the ball joint.

8. Take out Allen bolts and free the control arm

Take out Allen bolts and free the control arm

Photo Credit: https://mbworld.org/forums/e-class-w211/358747-diy-replacing-lower-ball-joint-w211.html

  • Drill the rivets out that hold the ball joints.
  • If it is not coming out, you can heat the corroded components and loosen them.
  • If your vehicle has pressed-in joints, then remove control arm at the bottom.
  • If you are finding it difficult, then carry the assembly with a hydraulic press to your mechanic.

9. Put the new best ball joints from knuckle hole

  • Take the new rubber boot and slide it over the stud of a best ball joint.
  • Put new joint from knuckle hole.

10. Put the bolts back into their place by using the hardware

  • Now, it’s time to keep back the old bolts and boots of rubber.
  • Clean the old bolts properly.
  • You can also use the new bolts if the condition of old bolts is very bad.

11. Torque these bolts to the proper specifications

  • You can use the manufacturer’s manual that can help you to tighten these bolts.
  • Also, torque the castellated nut to the mentioned level.
  • If you are working on strut suspension, then put back the pinch bolt.
  • Refer to manufacturer’s manual to know the right number. However, the specs for screws are about 44 pounds for every foot. The specs for other bolts can be around eighty.

12. Finally, screw new fitting of the grease and put grease in the assembly

Finally, screw new fitting of the grease and put grease in the assembly

Photo Credit: https://www.tacomaworld.com/threads/part-identification-leaky-lower-ball-joint.304360/

  • Put back wheel and brake. Lower down the vehicle to test it.
  • If it is required, you can bleed your brakes.
  • If required, you can also repair other parts of your vehicle like brakes.
  • The alignment gets affected due to replacing the ball joint.
  • You must realign the vehicle.

The worn out ball joints can disrupt your journey. In that case, you will require a best fifth wheel hitch. The selection of the fifth wheel hitch depends on trailer and tow vehicle. If you don’t want this situation to come, then replace worn out ball joints immediately. Our guide helps you to remove the ball joints quickly with ease. Please mention your comments and share the article if you like it.

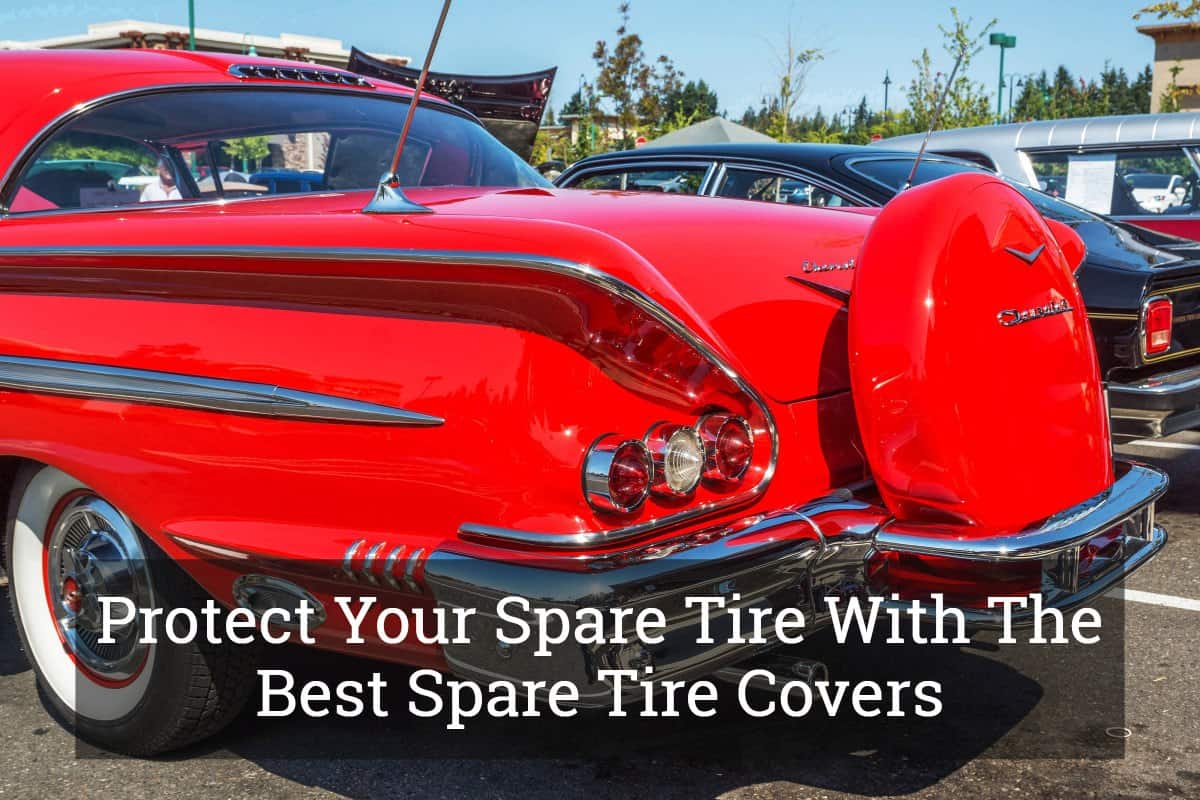
Protect Your Spare Tire With The Best Spare Tire Covers


Best Spare Tire Covers

Every car owner is advised to have at least one spare tire in case an accident occurs, and tire replacement is necessary. A lot of us would agree with this statement, but all of us should have to invest in a high-quality spare tire cover. These would come in handy to ensure that our spare tire is safe from external elements.

In this post, we are going to discuss all you need to know when choosing the best spare tire covers. Not only that, but we also have the top 4 picks for the best ones available in the market here. What you need to consider in selecting, its types, and along with some tips, we hope we can provide you valuable information before you make a purchase.


What Factors Should You Consider Before Choosing The Best Spare Tire Covers?

There are a lot of options for the best spare tire covers. This is the reason why it is very important that you consider the factors below before choosing the best one. When you review this, you will be able to narrow down your choices to make a good decision.

  • Type: Before you select the best one out of the four presented below, you should be aware first of the different types of spare tire covers: soft vinyl and hard. If you already know what type you are looking for, picking the best one will be a lot easier.
  • Size and Compatibility: It is mandatory that you know the size of your spare tire first before you actually buy a cover for it. Chances are the one you buy might be too big or too small for your spare tire. Compatibility is also an important factor as not all tires are made equally.
  • Construction: Materials used should be high quality, durable and strong. It should be able to withstand and endure harsh environments. The purpose of getting a spare tire cover is to protect it and that is why the one you should buy must be able to perform its task.
  • Ease of use and transport: The spare tire cover you should choose must be easy to use. Covering a spare tire is not a very difficult job, and it should not take a couple of minutes. Another thing is that it must be easy to transport. Some of the products below come with a carrying handle for carrying.
  • Features: When determining the best spare tire cover, you also have to consider the individual features of each product. Some brands offer a lot more than others and it is up to you to decide which spare tire cover feature you would most benefit from.
  • Price: After carefully reviewing the pros and cons of each product, you may now decide if the product you are eyeing to buy is worth your money. Getting great value results from paying less and getting more out of it at the same time. To get the best, you might have to treat it as an investment instead of an expense.
  • Product Reviews and Ratings: This is also a very important factor you have to take into consideration as it gives you information about how well the product has worked out for its actual buyers. Ratings will give you a summary of what these buyers think about the product you are about to buy.

Top Picks For The Best Spare Tire Covers

Product (Amazon Link)

Brand


Bestop Black Denim X-Large Tire Cover

Bestop

Review

AmFor Set of 4 Tire Covers

AmFor

Review

Kurgo Seasonal Tire Tote 

Kurgo

Review

Hummer H2 Hard Tire Cover

Boomerang 

Review

To help you come up with an informed decision, here are four of the products that I believe are outstanding than most of their competitors.

1. Bestop Black Denim X-Large Tire Cover 

AD

This offering by the Bestop brand comes in different sizes that should suit every type of tire you may have. It is also a high-quality cover that will be able to protect your spare tire from harmful external elements. It’s made from UV fabric that is mildew resistant. Its color is black and is elastic for snug fit.

Major features:

  • Size is XL
  • Material is made from UV fabric
  • Features twill fabric to ensures sturdiness and strength
  • Comes with a one year warranty
  • The fabric will not give the rims any kind of scratches
  • Blunt material is also incorporated to minimize movement of the cover in the boot

Pros:

  • Comes in different sizes
  • Weather resistant
  • Sturdy and strong
  • Easy to transport
  • Perfect fit for your spare tire
  • Elastic fit

Cons:

  • No waterproof information
  • Sizing may not tight enough

2. AmFor Set of 4 Tire Covers

AD

The AmFor spare tire cover is also a great product that protects your tires from water and other unnecessary elements. It is interesting to know that it comes in a set of 4 and is available in aluminum film gray. It should be able to fit a variety of tires. In addition, it is crafted from high quality and water resistant materials.

Major features:

  • Can fit XL spare tire sizes (Many sizes available) 
  • Comes in a set of 4
  • Material is high quality and waterproof
  • Features a system of vents and micro-pores
  • Outer cover is made from smooth and durable material
  • Great for RV or car not in use

Pros:

  • Suitable for use of XL-sized tires
  • 4 tire covers are included in the package
  • Water resistant
  • Very durable
  • Easy and comfortable to use
  • Can be folded and stored with ease

Cons:

  • Sizing issues may occur
  • Strap on back may be difficult to use

3. Kurgo Seasonal Tire Cover Tote

AD

Another great product in this list is the Kurgo tire tote cover. It will be accommodate tire sizes from 22 inches to 31 inches. These totes have a handle for easy transport for your tires. Another great feature of this spare tire cover is that it protects the tires and yourself as you move them.

Major features:

  • Can be used for cars and vans
  • Will keep your spare tire clean and safe
  • Perfect for seasonal storage
  • Comes with a carry handle for easy transport
  • Made from extra strong and durable materials
  • A lifetime warranty is a good bonus

Pros:

  • Suitable for use on a wide range of spare tire sizes
  • Can protect your extra tires 
  • Easy to transport
  • Sturdy and durable
  • Good for tires that need to be moved to several locations 

Cons:

  • Does not cover the entire tire
  • Handle doesn’t work as well as it could

4. Hummer H2 Hard Tire Cover

AD

What makes the Boomerang spare tire cover one of the best? It can enhance the look of your tires dramatically due to the fact that the exterior is made from steel. They also have covers for various car brands. This tire cover has a sturdy polished steel ring and plastic face, which will be able to endure small knocks. Another interesting thing about this spare tire cover is that you can add a personal touch by matching it to the color of your car.

Major features:

  • Includes a plastic face
  • Comes with a latch the opens the metal ring
  • Fits 2005 – 2010 Hummer H2
  • Made of thick stainless steel
  • Official GM product
  • 3 year warranty

Pros:

  • Spare tire can be secured from harsh elements
  • Color match for your car
  • Makes your vehicle look great
  • Fits 17″ and 20″ Tires
  • Lockable

Cons:

  • Might be vulnerable to rust

Different Types Of Spare Tire Covers

There are lots of different ways in classifying spare tire covers. Below you will find the most common types that you may encounter:

1. Hard Cover

  • Made from firm materials such as stainless steel and molded plastic
  • May also be a combination of both steel and plastic
  • Comes in two parts: face plate and ring wraps
  • The face plate will cover the front of the spare tire while the ring wraps will lock a latch in place
  • Can provide maximum security and protection for your spare tire

2. Soft Vinyl Cover

  • To use this, you have to wrap the cover around the spare tire
  • Tightening at the back portion is also required
  • May sometimes feature an elastic cord or sewed rope for tightening
  • An interior felt pad may also be attached to it
  • Most soft vinyl covers are made from heavy-duty and water-resistant fabric

Quick Tips In Using A Spare Tire Cover

AD

Once you have decided on what to buy for the best spare tire covers, here are some of the important points you always have to keep in mind:

  • Once your spare tire cover starts to show signs of tear and wear, you have to replace it as soon as possible.
  • Spare tire cover is necessary to protect the tire from sunlight that can degrade its finish, and it does not matter whether the tire is chromed, polished, or painted.
  • Uneven discoloration can also happen if you don’t use a cover for your spare tire.
  • Covers can also conceal the spare tire, as it also reduces the risk of being noticed by thieves.

Conclusion

The best spare tire covers are vital in making sure that you keep your spare tires clean, safe, and well maintained. It will be providing you security from harsh environments, as well as thieves. In addition, having one will guarantee that the tire you will use in case of an accident or emergency will be in its top condition. With the products mentioned above, we hope you will be able to choose the best one that will be a great value for your money.

Are you also looking for other products that will be of great use for your vehicle? Click here to find out about these products and we hope we can help you narrow down your choices.

How To Check The Working Of A Wheel Bearing?


How To Check The Working Of A Wheel Bearing

Drivers remain hypersensitive when their car starts making noises. Unusual noises are often signaled to serious problems, and this can affect your motor vehicle system. One alarming noise that can lead to a big problem is from the wheel hub bearings. If there is any issue with the wheel bearings, your car will start making a humming noise at a certain speed and become louder when you go faster.

Under such a situation, you must stop your vehicle and immediately call a mechanic. A mechanic will check the working of the wheel bearing, and he may say the wheel bearings are damaged. You may wonder, “What would be that.”


What is a Wheel Bearing?

A wheel bearing is a set of steel balls, and they are attached by a metal ring known as race. They help the wheels of a vehicle to spin fast with less friction. They are used from bicycles to cars. They are essential for the proper functioning and performance of your vehicle.

They are needed to support the weight of your car on the wheels. They help smooth the turning of the wheel. They are one of the easiest parts to replace. Make sure your car is equipped with the best wheel locks. The locks should be easy to remove to check the bearings.

What is a Wheel Bearing

Photo Credit: https://www.carthrottle.com/post/why-wheel-bearings-are-important-and-what-happens-when-they-fail/


Why does Wheel Bearing Fail?

  • A bearing wears out due to inadequate lubrication and improper adjustment. You must ask the drivers what kind of roads they drive on and what type of loads they carry. If drivers overload their vehicle, bearing damage is inevitable.
  • The over tightening of adjustable tapered roller bearings are one of the common issues that can lead to premature failure. The tapered roller bearings in front of the RWD vehicles should never be preloaded. They shouldn’t be snagged more than 15 to 20 ft.
  • The quality of the bearing is one of the main causes of failure. They are products that require complex manufacturing process. Bearing made of low quality steel and with poor heat treating can wear prematurely.

Symptoms of Bad Wheel Bearings

Symptoms of Bad Wheel Bearings

Photo Credit: https://www.youtube.com/watch?v=fe_WtKIKlYA

A faulty wheel bearing is difficult to diagnose. Some damage occurs without the knowledge of the driver. So it is important for the drivers to know the main symptoms of bad wheel bearings.

  • The grinding noise coming from the tire – One of the warning sign of wearing out the wheel bearing is the loud grinding sound that comes from the tire area of your car. This happens due to excess heat built up inside the bearing and loses
  • The steering wheel getting vibrated – Another common symptom is your car steering wheel getting vibrated while driving at a higher speed. This can be caused due to the worn out of the bearing. The situation gets worse when vehicle accelerate.
  • Uneven tire wear – Uneven tire wear of a car is very rare for wheel bearing failure. If the left tire of your car is showing wear, it indicates the problem of a wheel bearing. If you notice such issue, you must replace the bearing of both the tires of your car.

How to check the Working of Wheel Bearing?

You should learn how to spot such problems through some simple techniques. One frequent symptom remains unusual sound coming from the wheel. To find out whether the wheel has played, you have to raise the wheels, grasp them firmly and shake it. If you find any movement, it means the wheel has played, and the bearing needs to be changed.

The bearings come in a pair of an inner and outer bearing. They help your wheels to turn freely by cushioning the contact between the spindle and the wheels. The grease will pick up dirt and dust particles even though the bearings are protected by the hub and brake drum. Usually, only the non-drive wheels will be having re-packable wearing. The bearings on a car are quite complicated, so they should be re-packed professionally only.

How to check the Working of Wheel Bearing

Photo Credit: http://www.superchevy.com/how-to/wheels-tires/1512-wheel-bearing-packing-101/

Before you start checking your bearings, you must ask your dealer to find out whether the bearings of your car are sealed. If they are, then it is impossible to re-pack them.

You may conduct a simple test to find out whether your wheels have played. For this, you may use an auto jack to raise the wheels and support the vehicle using jack stands. If you find the elevation of the suspected wheel off the ground, you should place your hand at 12 and 6 o’clock positions. Slowly rotate the wheel and listen for any noises. Find out, whether there is any roughness when you turn the wheels. If you find any noise or roughness while rotating the wheels, it means the bearing has to be replaced.

Make sure you shift the car back into the gear before you lower your vehicle. It is good to have the best automotive creepers in your car to check the working of a wheel bearing. To fix problems, you need a solid creeper. A creeper with wheels will allow you to move around underneath your vehicle.


Some Other Tests

  • Hub Temperature – Drive your car roughly about 10 miles. Then check the heat on the bearing. The wheel will be hot, but the hub will remain slightly warm. If you feel the hub more than slightly warm, you must replace the bearing. It means the bearing is not working properly and friction is heating it up.
  • Turning the steering wheel roughly – When you turn the steering wheel of your car rougher, and if you experience roughness or if you hear any unusual noise, it means it is time to replace the bearing.
  • If you have disc brakes – You should remove the caliper to get the bearings. The brake system can kill you if they are not assembled. This job has to be done by a mechanic.
  • If there are drum brakes – You should check the bearing when you check the brakes. Make sure the grease hasn’t become fouled. If it has, this could wear away the connection to the bearing, and the result would be a noisy ride. In some cases, you may lose the wheel, so if the bearing looks cruddy, repack them with the help of a professional.

Make sure you replace the wheel bearings of your car recommended by the manufacturer. The bearings can affect fuel mileage, ride quality and performance of your vehicle. So make sure you choose the right replacement parts. Bearings are available in a wide range of prices. Find out an accessory that works within your budget. Drivers must be familiar with the warning signs of bad bearings to maintain maximum performance of their car.

How To Paint The Wheels Of Your Car Like A Pro?


How To Paint The Wheels Of Your Car Like A Pro

Just as you learn to drive your car like a pro, you should also know how to paint your car wheels like a pro. It gives a good look and style to the overall setup of your car. At the same time, it adds to the longevity and functionalities of your car wheel. You need to give a little of your time and effort.

You save a good amount of money and get the satisfaction of doing it yourself. Below are the sequential methods that will make you a pro in painting wheels if you follow it religiously.


Method 1: Remove the Wheel

Loosen the lug nuts with a wrench and jack up your car. Put jack stands to stabilize the resting of the car. To lift the whole car, put two stands on each side near each corner. Now, your car is in the air. Get the lug nuts off by using a lug wrench and pull out the wheel. Repeat the same process for all four wheels and take them to a workplace.

Remove the Wheel

Photo Credit: https://www.youtube.com/watch?v=u-TNsO33eqQ


Method 2: Cleaning the Wheels

Clean the wheels with soap and water. While removing the dirt and grime from your wheel, you can identify the rust, dents, and chips on the wheels. Then, clean them with grease and wax remover, like mineral spirit. Use a wire brush to remove all rust. You can sandblast to remove old paint glued to the debris.

If you find any coarse scratches, clean the wheel first with 300 grit sandpaper, then with 500 grit sandpaper. Use a water hose to spray off the remaining debris. After that, dry the wheels with compressed air. You can use a chamois cloth to wipe out every trace of water.


Method 3: Preparation

Choose a dust-free workplace, or you may spray down the floor or walls to avoid the chances of dust stirring up while painting. If the place is well-ventilated, dust will not contaminate the painting. Moreover, free ventilation helps in removing excess paint and thinner from the room.

Put a mask respirator to protect your head and face from the paint. Moreover, if your body is covered, the chances of lint or hair falling into the paint surface will be minimized. Keep in mind that paint and thinners contain volatile compounds like VOCs that are extremely flammable and toxic. These can be absorbed through skin or eyes.

It may be a little tricky if you want to paint a specific area of your car wheel. You need to put tape around the perimeter of the desired surface to be painted, keeping it exposed for painting. Over- spraying or paints landing on the undesired area is an anti-pro performance. Moreover, you may have to spend a lot of time in cleaning it off, later. An effective process will be to trim out the center of the plastic with a razor and tape the outside of the cut circle.


Method 4: Priming & Painting

Priming & Painting

Photo Credit: https://www.youtube.com/watch?v=NpAYCyTpgXY

Make a final wipe with wax and grease remover to remove any leftout dirt or dust on your wheel. Use a clean paper towel instead of allowing the cleaner to evaporate. Apply two or three coats of primer to ease the removal of dust and adherence of the paint.

Allow the coats to dry for the recommended time. After priming, inspect the primer coating and sand down if you find any blemishes or unevenness. Apply at least three coats of paint. Allow the recommended time after each coat. Paint back and forth the paint surface, keeping a reasonable distance to the surface and be slow but steady.

Spray your clear coat in case your paint is a single coat. Otherwise, you can skip it. Apply it in the same way as you did for priming and painting. You should keep in mind that clear coat runs easier that the prime or the base coat.


Method 5: Buffing & Polishing

After the painting, you may still observe tiny dirt spots in your paint job. You should send them out with a sand paper of 2000 grit or even a still milder one of 3000 grit. You need not use the buffing compound on the entire paint job unless it looks dull. Use it on the areas sanded.

Continue the process of buffing very slowly until the scratches made by the sandpaper are not visible. Take care to see that you don’t buff with very high speed otherwise it may lead to peeling or burning off the paint. After the buffing work is over, apply a mixture of water and isopropyl alcohol and clean off the excess buffing solution.

Finally, unmask the wheel, and if you find any overspray elsewhere on your wheel, remove the same by using a clay bar or lubricant. And as an ultimate step for getting the desired shining on your car, apply the polish with a buffer with soft foam by adopting low speed.

paint wheel of your car

Photo Credit: https://www.youtube.com/watch?v=DPIq5vgdb8A

Lastly, wipe it off with a clean microfiber cloth. One last caution: never use the traditional silicon or wax on the fresh paint. By sealing the paint, the paint cannot vent properly and may show bubbling and cloudiness on your paint job.

In this context, you may be required to know how to buy the best wheel. Below are the tips for your guidance.

The first and foremost thing to know is the names of the reputed brands of wheels that are available in the market. These are the Good Year, Bridgestone, Firestone, Continental, Yokohama, Michelin, and PIAA.

The next points for consideration are a rating of speed, quality of driving, safety, tread life, durability and resistance of the wheel.

When your car is exposed to open a place like parking, there is every possibility that steals parts of your car or even the car. Your best option, therefore, will be to go in for the best wheel locks. You can choose from any of the following wheel car locks available in the market.

  • Subaru B321SF GOOO Wheel Lock Kit
  • LCB 3L6HC-CH4 LK4, Chrome Wheel Lock, with DPA Accessories
  • Chrome-Cone Seat Wheel Lock- Make Mc Gard 24538
  • 00276-00900 Wheel Lock of Genuine Toyota Accessories
  • Arcorn Gorilla Guard Locks, 61631; of Gorilla Automotive

Rims and wheels are not the same. Rim can be a part of the wheels or individually. Some wheels come with the rim, the center, and the spoke. Thus, the rims can be changed if damaged. While you are getting new rims, you must look into the broadness of the rim, so that it links best with the tires. Your car then has better grip and handling. Aluminum is lighter than steel and consumes less fuel. However, Chrome-based are most commonly used.

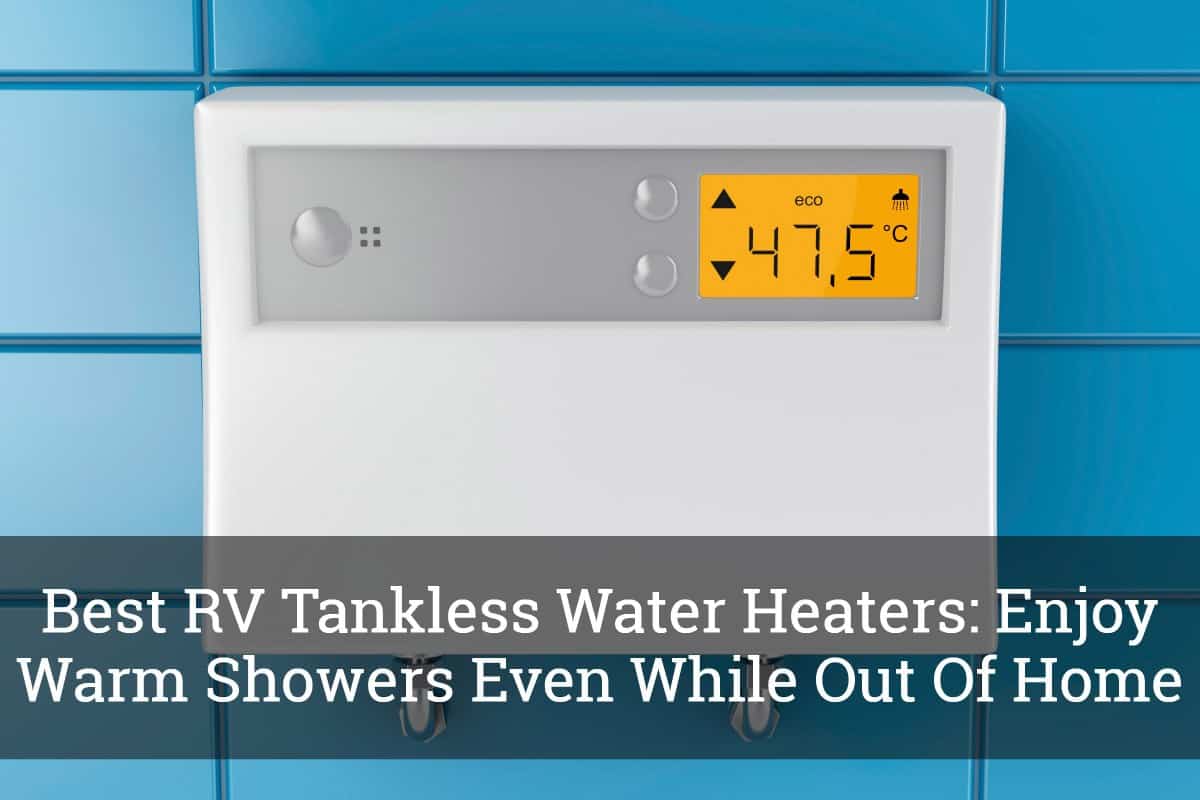
Best RV Tankless Water Heaters: Enjoy Warm Showers Even While Out Of Home


Best RV Tankless Water Heaters

When you are on the road, it is undeniable that you will be devoid of the luxuries of home, such as a comfortable place to sleep or even an en-suite bathroom where you can have a relaxing shower. Luckily, with technologies these days, you can have a warm bath even in your RV. All that you need is to find the right water heater.

In the rest of this post, we will tackle some of the best RV tankless water heaters that are available in the market today, as well as some of the reasons why they are amongst the best. We will also tackle some of the most important considerations and the types of water heaters that you might want to take into account.


What Factors Should You Consider When Choosing the Best RV Tankless Water Heaters

To start your search for a product that can provide the best bang for the buck, below are some of the considerations that will be helpful:

  • Feedbacks: The first thing that you should do is to consult with what other people are saying. Go online and look for discussion forums. Websites like Amazon is also a good place to gather opinions, which will allow you to easily weigh the pros and cons of the possibilities.
  • Power Source: Should you opt for an electric or gas-powered tankless water heater? More of this will be discussed later in this guide. Your choice will have an impact on factors like efficiency, cost, maintenance, and user-friendliness, among others.
  • Accessories: To be provided with excellent value for money, see to it that the manufacturer will already provide everything that you need to complete its assembly, such as the hoses and all the fittings. It will also be good if the unit is already inclusive of a high-quality showerhead.
  • Installation: As you evaluate the possibilities, take note as well of their installation. You must be able to do so in a snap and without the need for a helping hand. They should provide comprehensive instructions so that you will know the detailed steps on how to assemble the tankless water heater.
  • Heat Output: In the case of gas tankless water heaters, this is expressed as BTU or British Thermal Units. The higher the number is, the hotter the water could get within a short span of time, which will be effective of the product’s reliability.
  • Water Output: This is another technical specification that deserves your attention. This is expressed as GPM or gallons per minutes. This corresponds to how much water can flow out of the shower and the unit can heat within a minute.
  • Durability: If you choose top-of-the-line water heater, it can last for more than 20 years without any problem. See to it that it is made from superior materials that can withstand the test of time.
  • Warranty: What will you do if the product breaks unintentionally when it is used? If it is still under the warranty coverage, you can return it to the manufacturer. They will repair the unit and replace the parts that are problematic, at no cost on your end. Nonetheless, be sure to abide with the terms and conditions to be eligible for the warranty.

Top Picks for the Best RV Tankless Water Heaters

Product 

Brand

 
No Longer Available

EccoTemp L10 Portable Tankless Heater

Eccotemp Systems

Review

Rheem RTGH-95DVLN Tankless Water Heater

Rheem

Review
No Longer Available
EZ 101 Tankless Water Heater

EZ Tankless

Review

Camplux 10L Tankless Water Heater

Camplux 

Review

Aquaking Tankless Portable Propane Tankless Water Heater​

Aquaking

Review

If you are clueless on what will make the best choice, in this section, we will have a rundown of five of the options that you might want to consider.

1. EccoTemp L10 Portable Tankless Heater

No Longer Available

From installation to operation, this tankless water heater is the perfect choice if you are looking for one that is user-friendly. Given its space-efficient design, this will be an excellent choice for RV camping. It has an innovative ignition system, which will prevent the possibility of overheating and will extend the functional life of its components. To add, the manufacturer offers a one-year warranty.

Major Features:

  • 74,500 BTU heating power
  • Temperature can be adjusted from 80 to 165 degrees Fahrenheit
  • Has a maximum production capacity of 2.65 gallons per minute
  • Comes with ½ inch National Piper Thread Taper pipe fittings
  • Has manual temperature control

Pros:

  • Operation and installation can be easily accomplished, even for beginners
  • Rugged construction, which is tantamount to long-term functionality
  • Space saving design, perfect for small RVs
  • Shuts off when not used within twenty minutes

Cons:

  • The temperature range can be limited for some users
  • May not deliver optimal functionality in areas that are windy

2. Rheem RTGH-95DVLN Tankless Water Heater

AD

This water heater has many nice features and benefits, it is easy to be convinced that the cost can be justified. Equipped with a stainless steel heat exchanger, it is not only durable, but can also be 94% more energy-efficient compared to most of the options that are available in the market today. It also has hot start programming, which improves reliability as this will lessen the possibility of suffering from temperature fluctuations.

Major Features:

  • Self-diagnostic system for effortless troubleshooting
  • Digital display to show accurate temperature
  • Has intelligent electronic controls for ease of use and safety
  • Has an exclusive setting that will allow you to use less water
  • High-altitude capability

Pros:

  • Installation can be accomplished without professional help
  • Has the option to use either propane or natural gas
  • High energy efficiency rating
  • Can heat up to three showers at a given time
  • Has a digital remote control

Cons:

  • Can produce a lot of noise when functioning

3. EZ 101 Tankless Water Heater

No Longer Available

Value for money – this is one reason why this is a favorite for many RV campers. It can deliver superior water heating capability. It is space-efficient and user-friendly. It has 15 to 100 PSI, which is pretty much more than what you will need for an RV shower. The rated heat output, on the other hand, is 42,000 BTU.

Major Features:

  • Operates using a standard propane tank
  • Saves energy through the automatic ignition feature
  • Fully-automatic operation
  • Showerhead is included
  • Supplies up to 1.6 gallons per minute of water

Pros:

  • Has battery-powered ignition
  • Comes with several dials for adjustments
  • Weighs only 14 pounds, making it perfect for RV camping
  • Heats water in an instant, minimizing the need to wait

Cons:

  • Coil can be easily prone to breakage
  • May not be long-lasting

4. Camplux 10L Tankless Water Heater

AD

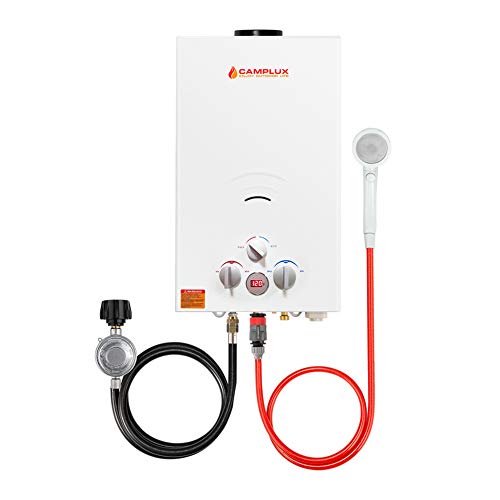
If you are on the lookout for a user-friendly tankless water heater, this deserves your attention. It can be easily installed, especially given that it has almost anything that you will need, including a high-quality showerhead. It is made from materials that are tough, which is why you can expect that this will work perfectly even in the outdoors.

Major Features:

  • Has an output of 2.64 gallons per minute
  • Shuts down after twenty minutes of being inactive
  • Has a multifunctional showerhead
  • Gas operating pressure is 0.4 PSI
  • Has a maximum heat output of 68,000 BTU per hour

Pros:

  • Comes with all the accessories that you will need
  • Rugged enough to withstand even outdoor use
  • Uses only a small amount of propane
  • Temperature adjustments can be done in a snap

Cons:

  • May not efficiently heat water
  • Unit may not last for a long time

5. Aquaking Outdoorsman Tankless Heater

AD

With the portability of this product, there is no doubt that it will be another great choice for a heater that you can use when RV camping. It delivers efficient heating without recovery time, which means that you can expect that there will be a continuous flow of hot water when you are in the shower.

Major Features:

  • Weighs only 10 pounds
  • Has battery-powered ignition, but batteries are not included in the package
  • Comes with pipe thread, as well as the gas and water connections that you will need

Pros:

  • Installation is easy to accomplish, even on your own
  • Tight fittings will guarantee that there will be no leaking
  • Has excellent water output

Cons:

  • Not as popular as the other models above
  • There are times that it will turn off all of a sudden

Different Types of Tankless Water Heaters

Especially for first-time buyers, it is pretty much normal to be overwhelmed with the long list of alternatives that are available. To make it easier for you to decide which one to purchase, it is important to be familiar with the different types of tankless water heaters that are available. Among other things, you can differentiate them on the basis of their source of power:

1. Gas Tankless Water Heater

  • It can be powered by either propane or kerosene. Most of the options use propane.
  • The price can easily go more than a thousand dollars, especially if you would like to opt for a model with innovative features.
  • Because of the low price of gas, compared to electricity, this will be cheaper in the long run. 
  • The efficiency of gas heaters can range from 80 to 85%.
  • This will also require more maintenance, especially because combustion can be a significant safety issue.
  • The production of greenhouse gases and the reliance on fossil fuels will make it detrimental to the environment.
  • It requires venting, which will add up to the complication of the installation.

2. Electric Tankless Water Heater

  • If you are looking for a budget-friendly alternative, this is cheaper than gas.
  • This is also much easier to install compared to a tankless water heater that is powered by gas.
  • You will need to install a supply of electricity in your RV, which can be a generator or solar panels, among other possibilities.
  • The efficiency of electric heaters can range from 98 to 99%.
  • When it comes to environmental impact, electric tankless water heaters can prove to be the better choice. You do not have to worry about greenhouse gas emissions and the environmental impact is relatively minimal.
  • There is no need for venting

Tips in Using Tankless Water Heater

It is not enough that you invest in a tankless water heater that can deliver superior quality. To enjoy its optimal functionality, below are some tips that you have to keep in mind:

  • Pay attention to regular maintenance of the water heater. Even if there seems to be no problem, once in a couple of months, you should take time to inspect the problem. This will let you identify an issue before it worsens, prolonging the life of the heater. This is also important for safety considerations.
  • Pay attention to the source of water as well. In some instances, you will notice that the water may be dirty or stinky. Your heater will not get rid of the impurities and dirt that are possibly present in water. Make sure that it is clean.
  • When cleaning the tankless water heater, you can use vinegar to flush out the system. Lemon and baking soda will also do the trick. They can be effective in getting rid of the traces of hard minerals that could have been left in the heater. These minerals are remnants from the hard water that you are using.
  • Use only the parts that are provided by the manufacturer. If there are accessories that you have to purchase, see to it that they will satisfy the specifications that will be suitable for the heater that you have.

Conclusion

In sum, the best RV tankless water heaters can deliver an abundance of benefits, which will make RV camping less frustrating. Even if you are in the woods and out of your home, you can have a warm shower. You will feel refreshed and rejuvenated as you bathe in warm water – one thing that you may have previously thought of being impossible.

Are you looking for similar products that can make RV camping less stressful? Click here and read our buying guides as we help you out in making a well-informed decision.