Home

Recent Posts

How to Replace Struts In Your Car or Truck?


How to Replace Struts In Your Car or Truck

If you have trouble with your household thing, a man will not care about the flaws in a house, but if he finds anything wrong with his vehicle, especially his car or truck, oh my god! He will cry out with pain.

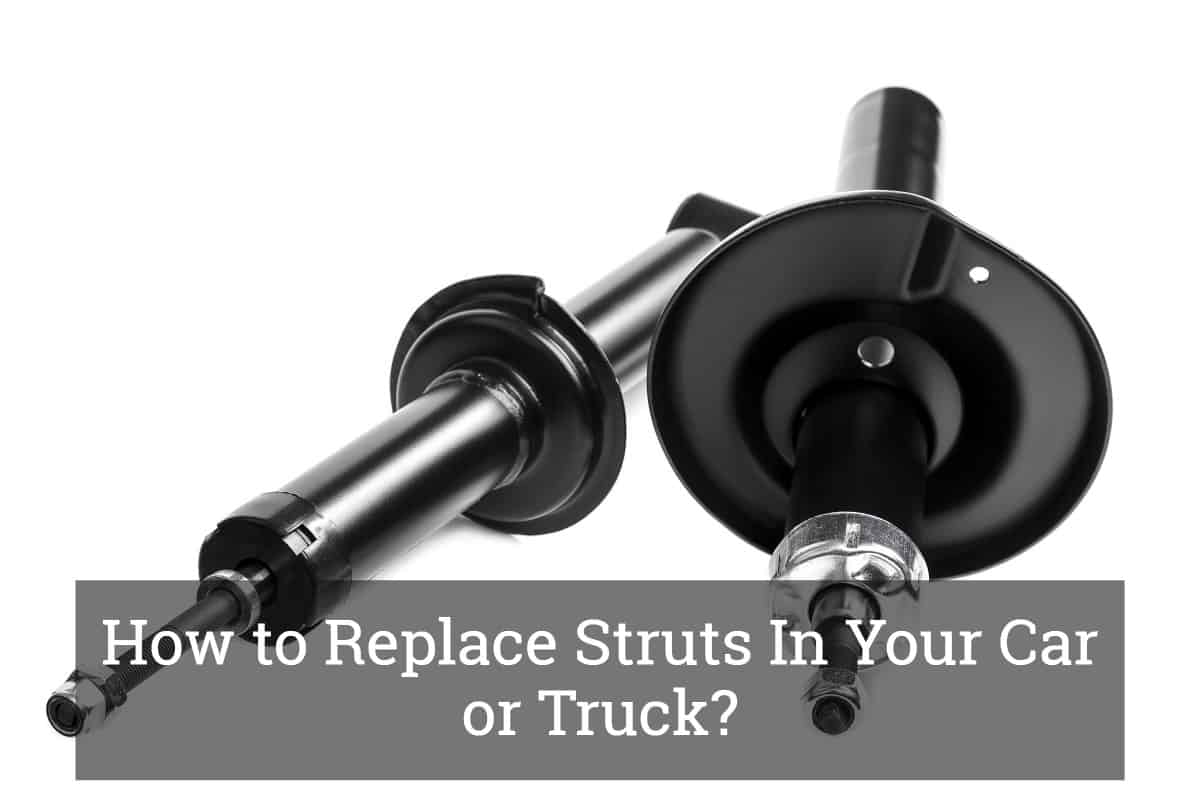
We use cars to travel a long distance, which pays a way to affect the struts in your vehicle. Make some tests to confirm that your struts fail and it needs a replacement. However, all the guys ask the question which is how you will replace struts in your car or truck.

Don’t worry, guys. I have got your back covered up because here we are going to see the step-by-step instructions to replace your struts in your car or truck.


How to find that you need an Immediate Strut Replacement?

  • If you travel more than 50,000 miles, then the struts need a replacement (it is not mandatory if the struts can go on. You can use it)
  • While driving, if you feel a bouncy ride, make sure you check your struts’ condition.
  • When you park or your car/truck is in motion, if you find any oil leakage in the strut area, then it needs a replacement.
  • Sometimes, when we notice some bends or curves in the struts, there is no objection in changing the struts.

Things that you need to replace Your Car or Truck’s Strut

Things that you need to replace Your Car or Truck’s Strut

Photo Credit: https://www.youtube.com/watch?v=hWoOPI_xsIw

To change your struts for your car or truck, the standard hand tools that you are going to need are:

  • Carjack
  • Pry bars
  • Hammer
  • Screwdrivers
  • Ratchets
  • Wrenches
  • Penetrating Fluid
  • Breaker bar

Just like the eight standard tools to replace the struts in your car or truck, we have eight step by step instructions to replace the struts.


Step-by-Step Instructions to Replace the Struts in your Car or Truck

replace strut in your car and truck

Photo Credit: https://www.youtube.com/watch?v=Uf3wVBUYxAE

Step One: Elevate your Car

First of all, you need to lift your car from the ground level and remove the wheel to replace the struts. Thus, to eliminate the wheel, you need a carjack. Place a car jack under the car and pump it to elevate your vehicle.

Step Two: Check the Struts

Do not forget to test the strut whether you have bought the correct strut that fits perfectly to your car or truck. You must double-check whether you have installed the jack in the right place. You must ensure that it does not fall while replacing the strut.

Step Three: Remove the Joints

Eliminate the strut from the knuckle of the wheel and the nut in the sway bar. Of course, you will find it quite difficult because of the rust and the firmness on the strut. So, to make your work as an easy go, just use the penetrating fluid for a quick job fix.

Just give some time to see the magic of the penetrating fluid then, you can precede the removing process. To remove the joints of the struts, first, you need to remove the brake line support. Just unhook the break line hook.

Step Four: Unscrew the Pinch Bull

After removing the broken line, by using a breaker bar loosen the tightness then, use a regular ratchet to remove the pinch bull from the strut. Usually, the pinch bull will be tight due to the rust formation over the strut and the wheel as well as the pinch bull. Once when you remove the pinch bull, the segment to eliminate is sway bar.

Step Five: Remove the Sway Bar

The next step in removing the strut is to screw out the sway bar. The sway bar bolt is located on the other side of the strut. So, turn the steering for your comfortable position to untie the bold from its fixed thread. If you feel bit awkward to remove the sway bar, then the bolds need some penetrating fluid.

After filling the penetrating fluid, use a wrench to untie the screw along with the torque. Place the torque in the middle the, and make you move to untie the sway bar.

Step Six: Eliminate the Strut Bolts at the Top

Once you remove the sway bar, the next thing you should do is to remove the stud from the thread. It is quite hard to remove. So, to eliminate the strut stud jack the disc of the wheel then elevate it to an extent, it will be effortless to remove the stud.

After doing this process, take your hammer then hit on the knuckle without harming the strut. Hammer until the knuckle releases the strut. Once removed the knuckle just head straight to the strut tower to remove the three bolts at the top of the strut.

Use a ratchet to remove the three nuts at the strut tower. Usually, these three nuts will come very quickly. In case you are struggling to remove it then, fill the nuts with the penetrating fluid, and use a breaker bar to eliminate the nut at the strut tower. While confiscating the third bolt, which is near the weather stripping. So, a proper angle with the nut can help you to remove the bolt easily.

Now, everything is set to remove the strut. After removing the three bolts at the strut tower, just a wiggle, it is enough to remove the strut from its position. That is all we wanted, right? Yes, of course. You have made it.

Place the bolts that were at the top of the strut tower and mark them with a marker to note the position, which helps you to re-screw it, back to its position.

Step Seven: Place the New Strut

Place the New Strut

Photo Credit: https://www.youtube.com/watch?v=bPbFJcjXO5A

In the scene of the old strut, which you have removed, put the new strut. Align the strut carefully. After positioning the strut, screw the three bolts at the tower of the strut. You have already marked the positions of the screw on top of the strut. Replace the lower ballpoints in the correct place.

A safe maintenance while replacing the strut are, after removing the strut, clean the area where it was, previously fixed, with a metal brush. Another tip while replacing the strut is, compare the old strut with the new strut.

Step Eight: The Final Fixation Process

Once you have finished the assembling process of the strut, just tighten all the nuts at the top of the strut with the ratchet. Refit the sway bar back to its original position. If you have done with everything, fix the wheel back to its position. Now, start your car or truck.

Here we have the eight handy and easy methods to replace your strut of your car or truck. Sometimes, your car or your truck struggles to start, which means, there is trouble in the starter. So, remove the vehicle starter, clean it and replace the car starter properly. Now, your car is ready for the journey without bounce.

How to Reset Low Tire Pressure Light?


How to Reset Low Tire Pressure Light

TPMS, or Tire Pressure Monitoring System, is an electronic system that measures the air pressure in pneumatic tires. This system was made mandatory in the US due to the increased number of road accidents due to abnormally inflated or deflated tires.

TPMS Systems are of two types. One is direct TPMS, in which sensors are in tire pressure valves. These act as an antenna and transmit the information to an onboard processor. Another one is indirect TPMS, where the sensors are located within the ABS braking system. They monitor the speed of the rotation of the wheels for any change and reflect their findings on the dashboard.


Why is Tire Pressure Sensor On?

If there is low tire pressure in your system, the TPMS warning light will turn on. If it turns on while you are driving, you must pull over your car on the side and check for various instances that could have turned the light on. Driving with this warning light on can be hazardous to you, and other patrons walking on the road.

It could also happen due to cold weather. The cold temperature tends to lower the pressure in your tires and may cause the TPMS dashboard warning light to turn on. In this case, you only need to add more air to your tire, but not too much as it can cause the tire to explode.


Resetting Your Tire Pressure Sensor System

When you see the TPMS warning light is on in your car, then you should check for below possibilities in the sequence they are presented and take the necessary steps to reset low tire pressure light.

Resetting your tire pressure sensor system

Photo Credit: https://www.youtube.com/watch?v=9f1MANsMsK0


Check the Pressure in Your Tires and Inflate Them.

First and most obvious reason for the TMPS warning light to be on is low air pressure in your tires. You must check the air pressure in all the four tires of your vehicle with a pressure gauge. And fill the tires with the required amount of air as prescribed by the manufacturer. You can get the more information online about the best tire pressure monitoring system.

You can get the recommended amount of air pressure for each tire either in the manufacturer’s manual, or it’s also mentioned on the drivers-side door panel of your car. In winters, you can add a little extra air to your tires since they tend to show low air pressure due to cold weather. This needs to be done with caution, since too much of air may cause tires to burst as they become warm with motion.

If you have filled the appropriate amount of air in your tires and still the TMPS indicator is on, then you should take your car for a ride for around ten to fifteen minutes. Sometimes the indicator takes time to recalibrate the inflated tires, and this is expedited by moving tires.


Check for Leaking Tires.

Once all your tires are properly inflated, then you need to set the TPMS sensor back to zero. To do this, depending on the make of your car, you may have to push a related button on your dashboard simply, or it may need to be reset with a magnet, or just a scanning tool from your car’s a dealer or manufacturer of the car.

In case, you have added enough air however TPMS indicator is still on then you should check your tires for air leakage. In this case, you need to get your tire fixed or replaced. You can check more information online about best spare tire covers.


Check Your TPMS System.

Check your TPMS System.

Photo Credit: https://www.cargurus.com/Cars/Discussion-t33028_ds509550

Your car may be having direct or indirect TPMS system installed in it.

If you have inflated your tires well, have also checked for leakage in your tires, and everything seems alright then you must check for malfunctioning of your TPMS system. It could be because the battery is dead or some internal fault in your TPMS system. It is recommended to replace your battery in every five to six years. Also, the old battery can cause a threat of leakage which can harm other parts of your car.

Direct TPMS system installs sensors inside each tire to gauge and transmit the information to the central control module. The sensors read pressure and temperature on each tire and analyze them against set thresholds. This information is sent to vehicle information system to turn on or off the related indicator. Since these sensors are exposed to direct weather, they get eroded very easily and may cause malfunction of the TPMS system to give false alarms.


Check Your Wheel Transponder’s Calibration.

As explained above, the TMPS system has installed a transponder for each of the four working wheels in your vehicle. The TPMS system needs to re-calibrate with the new settings after any change is made in the location of these transponders. These transponders may change their location due to rotation of the wheels and the TPMS system must learn their new location and calibrate itself per these changed locations.

The procedure for this calibration may differ from car to car and is available in your car manual. You can even search for the online videos which the manufacturers upload to explain the step by step process.

It is often recommended to get new valves when you get your tires changed. This is especially to be done if your valves also act as your TPMS sensors.

Check your wheel transponder’s calibration

Photo Credit: https://www.youtube.com/watch?v=gVILk8blve4


Use the Magnet Method to Reset Your TPMS Indicator

To reset your indirect TPMS system, you may require using the magnet method. To do this, just key-in your ignition key without turning on the engine. Turn on the lock and the unlock button. Start the initial chirp and then hold a magnet just above the valve stems on each tire. This needs to be done unless horn chips for each valve stem. And you need to follow this sequence – left front tire, right front tire, right rear tire, and left rear tire.

Verify the pressure readings that are being displayed on the vehicle information dashboard match the required level.

In case none of the sensors is being changed, then you can also use a scan tool to reset your TPMS indicator. You may get all the steps in the car’s user manual for this procedure.

I hope you find the above information useful and worthwhile. These are general instructions that will help you to handle all kinds of TPMS systems of almost any car and any make.

In case you have had a different experience of handling the TPMS system than the one listed above, please share it by commenting in the comment box. It will surely help other readers and will enrich this article.

In case we find your tips good enough, we will incorporate them in the article above and specify the credits for the contributor.

How To Replace Front Shocks In Your Car?


How To Replace Front Shocks In Your Car

A shock absorber has only one major task to perform, which is to stop the car from bouncing now and then. Though it is a small task to perform, it is one of the major things that are very important. The shock absorbers work in such a manner that they reduce the magnitude of the vibrating motions by simply converting the kinetic energy into heat energy.

It is very important to know how to jump-start the car when you get stuck in an unknown location. Also, it is highly advisable to know about replacing the front shocks in the car because if they ever get in bad condition, you should be able to replace them with much ease.


How to replace the front shocks in the car?

There are three different steps that you have to follow when it comes to replacing the front shocks in the car.

Step 1: Starting the procedure

Starting the procedure

Photo Credit: https://www.youtube.com/watch?v=pdnIWSsZblo

1. Making sure that you have new shocks:

If your car doesn’t get well with the potholes, then it is an indication that the front shocks need replacement and for that, you must have new front shocks. Before you start replacing the shocks, it is necessary to know the type of shocks that are attached to the suspension. Also, keep in mind that using struts is little difficult, so it is not necessary to use them.

2. Buying the shock absorbers:

Before you end up buying the wrong absorbers, it is important to talk to the local mechanics, which will help you in finding the perfect one for your car.

3. Upgrading the shocks:

You can also upgrade your old shock absorbers into some of the following shocks:

  • Twin tube
  • Coil
  • Monotube
  • Reservoir

4. Jacking up the vehicle properly:

When everything is in order, the next major step includes jacking up the vehicle properly by loosening the nuts from the front as well as the end. You can also check the owner’s manual if you have any confusion.

5. Checking the shock mountings and spraying them:

One of the most difficult steps in replacing the front shocks is to remove the old shocks. It is because they sometimes become junky with the passing age and the road grit and so they make it difficult for the bushings and the bolts to disengage from their original place. It is important to check whether the mountings are loose or tight and also check the rubber that is present around the brushing. You can also very easily spray the WD 40 to loosen the things very quickly.


Step 2: Removing the old shocks

After the jacking of the vehicle is complete, it is necessary to remove the old shocks from the car. This second step involves the following tasks:

Removing the old shocks

Photo Credit: https://www.youtube.com/watch?v=pdnIWSsZblo

  • Removing the shocks from the tower: In many of the cars, it is necessary to lift up the lining of the car to get in touch with the shock bolts and then remove it carefully with the help of ratchet and sockets. You can always feel free to consult the mechanic if you have any confusion and to get even more specific guidelines. To remove the shocks from the car, you have to turn the socket and the ratchet in the counter clockwise direction and along with that, grease the nuts. Most of the times, the shock tower bolts are present in the trunk of the car.
  • Disconnecting the shocks: You can make use of a socket set to disconnect the nuts that connect the shock with the suspension. In some of the cars, it is important even to remove the knuckles at the top of the brake.
  • Removing the shock absorber from the top as well as the bottom: It is sometimes very difficult to remove the shock from the bolts when they are mounted on the studs.

It is advisable to make use of the locking pliers on the end of the rod so that the piston rod does not keep on turning when you are loosening the nut. You can also bang on the bolt with the help of a hammer, but you have to make sure that you keep the nuts in their place after the work is done.

It is not at all advisable to misalign the bolts, and if you think that you have already misaligned the bolts, then it is highly advisable to consult a mechanic and not to try yourself to align the bolts again.


Step 3: Installing new shocks

After you complete removing the old shock absorbers from the car, the next step involves:

Installing new shocks

Photo Credit: https://www.youtube.com/watch?v=uwOzqrqvEj4

  • Fitting the new shock onto the suspension: When you start fitting the new shock onto the suspension, it is necessary to note that at that time you might need some pressure to constrict the shock so that it falls in the correct place. Also, while performing this step, there are chances that you may need some help while lifting the suspension so that you can reinstall the bolts in appropriate position? Lastly, it is very important that you screw the nuts very tightly, or else they might come off while you are on a drive and this will cause you many difficulties.
  • Fixing the anti-roll bar: If in any case, you have removed the anti-roll bar in the beginning, then it is time to fix the bar in its place again. It is important to note that you just don’t have to place the anti-roll bar in its position back but also have to screw the bolts tight so that it is fixed. Also, you have to replace the shock nuts that you might have removed at the beginning of the process.
  • Checking for the torque specs: The last step involves checking for the specifications of the torque so that everything is in its place once again. It is important to check for the specifications before you fix up everything.

If you own a car, then the most important thing is to carry the essential garage tools with you all the time. If in case your car stops in an unknown location, you must know how to jump start the car once again.

It is also very important to know about replacing the front shocks in the car as they will prevent the car from bouncing on every jumper. It is necessary to know about everything, starting right from the buying of new shock absorbers to replacing and fixing them in place.

How To Repair Wheels With Curb Rash And Scratches On The Car?


How To Repair Wheels With Curb Rash And Scratches On The Car

Do you want to repair wheels with curb rash and scratches? If yes, then you are right here! You might have observed that your wheel is damaged and requires repair. You can easily repair it by yourself, although there are many service centers that can repair curb rash and scratches.

But doing it yourself can save a lot of money and time. This tutorial will help you to repair the wheel of your car. You can easily fill scratches and curb rash. It focuses on repairing the wheel. This tutorial will help to rectify even the deepest scratches.

Your rim of the wheel can be rectified by following the simple repair techniques. By the stated simple steps, you can get the solution to your problem. The steps range from cleaning, sanding, and finishing the wheel rims. In this way, you can easily eliminate the curb rash.

In this tutorial, various things are required to repair this damage. The things that are required are:

  • Filtered water to dampen the sandpaper
  • Coarse and fine Sandpapers of various grades like 80, 220 to 2500 grit
  • Gloves and protection for eyes
  • Soft clothes for cleaning
  • Wheel paint
  • Automotive primer spray
  • Glass cleaner
  • Paper and tape for masking
  • Scuff pad
  • Automotive clear coat spray

1. Analyze if the rim of your car has a clear and clean protective coating

Analyze if the rim of your car has the clear and clean protective coating

Photo Credit: https://www.youtube.com/watch?v=9WQiqYlpxoY

  • This is the first step. You can use paint thinner to clean the damaged. You must wipe the surface thoroughly before painting it.
  • The focus is required to the damaged area. So, the clean surface is the prime requirement.
  • Take the sandpaper. It must be approx. 220- grit and coarse-grained. With the help of sandpaper and damaged spots situated on the rim.
  • If dust is produced in white color, then the coating has to be removed. The removal of the coating is required to reach to curb rash. If dust is produced in gray color, then follow further steps.
  • Remove the coating from the rim. You are required to clear the coating around the rim. It is required, so that treated spots have the same texture and color as rest of the surface.
  • With the help of sandpaper, buff your wheel by using strong strokes. With your grinding, if the dust converts in gray color, then the coating is removed.

2. Now, smoothen the curb rash

Now, smoothen the curb rash

Photo Credit: http://www.webcarvideos.com/watch-how-to-repair-wheels-with-curb-rash-or-scratches/

  • Take sandpaper and smoothen the scratches on your wheel rim. You can smooth the scratches and curb rash with 220- 80 grit sandpaper. You must clear all the gouges and scratches.
  • After completing this process, take a sand paper of 400-grit. In the feathering motion, blend the curb rash with the remaining surface of the wheel rim.
  • You must blend it by applying moderate to steady pressure. All the ridges must be at the same level. Use the sandpaper by applying angular strokes.
  • Now wipe the dust from the rim with a clean and soft cloth. You must repeat this process in every five minutes.
  • Now in order that the surface is refined around the repaired, take 2000-grit dry sandpaper. Apply this sandpaper in a circular motion with gentle pressure on the spots.
  • The edges must be perfectly blended and smooth. This process will take a more time as compared to previous steps.
  • Now sprinkle some water on the same sandpaper. Move the sandpaper in the circular motion for 5-10 minutes. You must complete the process of final finishing in 2 minutes.
  • Finish the repaired spots and scratches with dry sandpaper for a minute. Then, do it the final finishing with wet sand paper for a minute.
  • The process must be completed by using 2500 grit coarse sand paper. Wipe the repaired spots with a soft wet. Finally, remove the metal dust with a soft dry cloth.

3. Mask and Primer

  • Cover and mask your car with a sheet. Use a primer to fill the scratches and spots. Spray the paint on your car or primer and let it dry. You must not spray primer to the area that was not sand.
  • If the primer is sprayed, then scuff it by using your pad. In the case of bumpy spots, you must wait for ten minutes. Sand them by using fine sand paper. Clean the dust.
  • Clean the spray from the spokes of your wheel and area inside the rim. The primer is used to repair the curb rash and scratches.
  • After the primer has dried, sand it by using 400-600- grit sand paper. You must scrub wheel and tire with the solution of soap. This is required to remove the silicone from the wheel and tire.
  • Use a soft cloth to clean the wheel of your car. The extra primer needs to be removed to make the surface glossy.

4. Paint car wheels and apply clear coating

Paint car wheels and apply clear coating

Photo Credit: http://www.e90post.com/forums/showthread.php?t=708894

  • Before using the paint, carefully read the instructions on the packing. If the paint is used in cold or humid conditions, then it will be a mess. You must shake the can for a minute.
  • Push the nozzle by releasing the end. You must keep spraying and spraying from different angles. Spray by moving around the wheel.
  • You must apply a fine coating. Don’t make it too glossy. Allow the paint to adhere to the surface for 15-20 minutes.
  • Again spray the paint and allow it to dry. You can place your car wheel in the sun so that it can dry completely. Remove the overspray.
  • When the color coat has got dried, apply two layers of clear coat. The layer must be thin. Maintain the time of 20-30 minutes in between the two coats. With the help of damp 2000-grit sandpaper clear the extra spray.
  • Clean the surface– Remove the extra polish with the soft cloth. You must keep in mind that the polishing or spray needs to be uniform.
  • The paint must be uniform and smooth. You can also blend the spray with the coating on the surface of the rim. It can be done by applying high pressure by rubbing the paint or polish.
  • The repaired spots must glow and look smooth as the remaining wheel rim. Finally, apply the best wheel locks to the rim.

This is a complete tutorial that will help you to fix the problem. You can easily repair your car wheels with the problem of scratches and curb rash. I hope that this article is helpful to you. I have tried to explain the process in the simple language steps by steps. If you have liked this tutorial, please share the article with your friends.

How To Replace A Muffler Bearing?


How To Replace A Muffler Bearing

Want to increase the airflow and get the better MPG? Maybe all you need to do is to replace muffler bearing of your car. If your friend, girlfriend or wife don’t know anything about cars and are having a problem with the exhaust, then this is what you got to show them.

Muffler bearings are among the most important parts of your car which you are going to keep serviced regularly. Muffler bearing goes out now and then and that’s why it is important to learn how to replace it.

Have a look at the below mentioned DIY tutorial which shows off entire process and gives you the rundown on how this is all done. You will not get this type of detailed information on changing the muffler bearings of your car anywhere else. Pay Attention, because this is quite useful info!


Rattling Sound that Exhaust Makes

The need of changing the muffler bearing is the chugging noise it makes, which means there’s a blockage in your exhaust system. If your car’s rattling, it means that your exhaust system became misaligned.

So if you don’t hear the normal rumbling that you should be hearing and if the exhaust sounds much like it is from the mail truck, which is quite funny. Ever thought why most of the mail trucks or even Honda’s make such sound? Because the muffler bearing is defective right out from the factory and that is why they always sound like that.

Rattling Sound that Exhaust Makes

Photo Credit: https://www.youtube.com/watch?v=SeBVBCaWf0A

It’s not only embarrassing but it can also damage your exhaust, so it’s better you replace your muffler bearings as soon as possible. And if your mechanic says he will replace the muffler bearing then you probably need to change your mechanic, because you can do it on your own.


How Do You Know If the Muffler Bearing in the car is bad or not?

There are certain symptoms that you can observe to know if the muffler bearings in the car are in bad condition or not.

Problems in your car muffler

Let’s discuss the various problems in your car muffler that are possible:

  • Raspy Honda-like sound of exhaust
  • Smoke coming out of exhaust: which indicates that the bearing is getting burned up from the exhaust reaction
  • Lower MPG: pay close attention to how frequently you head over the petrol station

And lastly, to be 100% sure whether the muffler bearing has gone bad or not, you need to:

  • Take some soapy water.
  • Go under your car and have a look at the exhaust.

The common misconception that people have is that the muffler bearings are placed in the muffler, which is not true. The muffler bearings are located between the catalytic converter and the muffler. You’ll see the stretch of the pipe right there.

Installing a New Muffler Bearing

Photo Credit: https://www.youtube.com/watch?v=DHlGG6H0Uhc

If you see two exhaust pipe, then it means there are two muffler bearings. And if you’re not sure if there’s only one muffler bearing is bad, or there are two muffler bearings that are bad. So to figure it out:

  • Spray that soapy water down the exhaust.
  • Start up the engine of your car.
  • Inspect and look if there’s any bubbling.
  • If you see any bubbling, it means that muffler bearing is bad.

How to Change Muffler Bearings on Your truck Or Your Car?

Now that you have verified the bad muffler bearing shut your car off before the exhaust gets too hot as it is hard to work on. For the people who don’t know what muffler bearings are and what they do, here are some of the advantages of using muffler bearings:

  • Extend the life of muffler – so you can have your muffler last for a longer period
  • Reduce the exhaust friction – which is necessary for better power output and good fuel economy
  • Maintain proper back pressure – which is good for the exhaust

I’m sure you don’t want to do this again and again. So use a high-quality muffler and if you don’t know which muffler bearings you should be using, then contact the local parts store and ask them. You can also use the glass pack muffler as they are the simplest style, which is used on the performance rides. Make sure you look out for a high quality and the best glass pack muffler.

Tools and Materials Required

  • High-quality muffler bearing
  • High – temperature elbow grease, because the exhaust on the car gets high
  • Safety glasses
  • Reciprocating Saw
  • Magnet
  • Exhaust clamp

Installing a New Muffler Bearing

  • Step 1
    • The very first you need to do is to cut the exhaust right close to the muffler bearing, which you can do with the reciprocating saw or other different tools.
    • Cut right where the bad muffler bearing is and cut as straight as possible to line up seasonally when you put everything back together after replacing them up with the iron. Make sure you use a thin blade, so you do not remove excess material.
  • Step 2
    • Now go and look at that exhaust. You will see the muffler bearing right inside there. Carefully reach in there, and you’ll see that the bearing is all broken; the bearing race and muffler bearing out. You’ll see that some of the bearings on the carnage that reduce the exhaust are missing.
    • Take a magnet stick and remove those missing pieces from the inside. It’s important to remove those bearing pieces because if you don’t do that these pieces might travel into the muffler and you’ll get that raspy sound again.
  • Step 3
    • Now, take the new muffler bearing. You can use a two-piece style as well as a one-piece style bearing. Let me tell you, a one-piece style bearing is better because it’s sealed and allows more exhaust flow. It’s less likely to go bad compared to the two-piece style.
    • Take high-temperature elbow grease and apply a coat on the outside of the bearing with a thin layer all around the bearing.
    • If you’re using a two-piece bearing, then lubricate both the bearings and the outside race.
  • Step 4
    • Installing muffler bearing is very easy. Just make sure that the bearing goes in straight. Push till it seats itself.
  • Step 5
    • Put the exhaust back together. For that, you’ll need an exhaust clamp. Line up the two pipes and tighten the bolts down at each side little by little so that the clamp get tighten evenly.
  • Step 6
    • Now, start your car up and listen how it sounds with the new muffler bearings. Also, check the leakages. Grab the soapy water again and spray the exhaust pipe down. Check if you see any bubbling. Nothing will be bubbling up.

Voodoo! You have successfully installed a new muffler bearing. Let me know if this tutorial is helpful or not by commenting in the comment section.

Best Traffic Cones: A Tool That Is Useful Beyond Road Safety


Best Traffic Cones

There are many tools that can prove to be essential in promoting safety, and a traffic cone is one of them. They will be helpful in redirecting the flow of traffic on public roads. The best traffic cones are made from materials that will stand still on the road, but still, they need to be safe and must not cause damages on cars.

Traffic cones, however, can be used in more ways than one. Even as a private citizen, you can invest in one, but make sure that you do not use it on public roads. Doing the latter can lead to a hefty fine, depending on where you live. For private use, a traffic cone can function as a marker to determine hazardous sites and to reserve parking spaces, among other things.


Essential Factors to Consider

In your search for the best traffic cones, be sure to keep in mind the factors that we will briefly mention below. These considerations will make it easier for you to narrow down the options and decide which can provide good value for money and optimal functionality:

  • Reviews: Similar to buying car accessories and other products to ensure road safety, it will be best to start your search by reading the feedback of other people. All that you have to do is go online and look for reviews from real users. This is a good way to evaluate the good and the bad among the options that you will be confronted with.
  • Materials: This is important as it will be indicative of the overall quality of the traffic cone that you will purchase. Vinyl, thermoplastic, and rubber are some of the most common. See to it that the material is strong enough so that it can last long. Otherwise, you will only end up wasting your money. It is also important that the material will not cause any significant damage to a car if it has been accidentally hit.
  • Visibility: Traffic cones are meant to be used not only in broad daylight but even in the dark. With this, consider how visible the cone is before purchasing. Most of them have reflective stickers so that they can be easily seen. A better option is one that comes with a built-in light, which is battery-operated.
  • Customization: Depending on the product that you choose, there is also an option to customize the cone depending on the intended use. For instance, there could be stencils on the surface that say – No Parking or Reserved. Alternatively, you can buy traffic cones and put stickers that will mark the specific use of the cone.
  • Stability: The traffic cone must be able to hold up even if it is windy or when it is raining. One of the most important is to have a stable base, which will prevent the cone from tipping. It will also help if the cone is heavy, making it hard to be taken away by the wind.
  • Portability: Ideally, a traffic cone should be a tool that you can easily place in the trunk. With this, a portable option is one that comes with a collapsible design. Its height will be significantly minimized when not in use, which will make it space-efficient.

Top Picks for the Best Traffic Cones

Product (Amazon Link)

Brand

Eurow Safety Lighted Collapsible Traffic Safety Cone

Eurow

Review

Cortina 03-500-10 Traffic Reflective Cone

Cortina Safety

Review

Two Sided Fold-Out No Parking Sign

AMENITIES DEPOT

Review

Work Area Protection 36PVCS-R Traffic Cone

Work Area Protection

Review

Collapsible Safety Emergency Accident Traffic Cone

Reliancer 

Review

Here are five of the products that you might want to consider, as well as the features that you can expect in each of them. We will also have a quick discussion of their pros and cons to help you narrow down the possibilities.


1. Eurow Safety Lighted Collapsible Traffic Safety Cone

AD

One of the top choices within the product category, this is a traffic cone with traditional design, but integrated with modern features, such as a reflective light that makes it easy to be seen even when from afar. For the lights to activate, you need to have 2 AA batteries. Because of the collapsible design of the safety cone, it is hard to beat in terms of portability. You can easily place it in the trunk and use it anywhere you need a cone.

Main Product Features:

  • Height – 17 inches
  • Height when collapsed – 2.5 inches
  • Weight – 2.2 pounds
  • Range of Visibility – up to 800 feet
  • Product dimensions: 9.75 x 9.75 x 2.25 inches

Pros:

  • Collapsible design makes the traffic cone portable
  • Easy to see even when in a poorly-lit area
  • Ideal for both day and night use
  • Sturdy construction for long-term functionality

Cons:

  • Batteries do not last for a long time
  • The position of the circuitry at the bottom can be a bit awkward

2. Cortina 03-500-10 Traffic Reflective Cone

AD

One thing that makes this an exceptional option for a traffic cone is the all-vinyl construction, which is one of the reasons why it can deliver extreme durability. It has a long-lasting fluorescent color on its body, made even better by the reflective coating on the top part of the cone. This increases the visibility of the cone, even from a distance. The color has been ultraviolet-stabilized, which is why it will not be easily prone to fading, even with exposure to external elements. Lastly, there is a high-density base and low center of gravity, which are both important to keep the cone in a stable position.

Main Product Features:

  • Material – vinyl
  • Dimensions – 13.5 x 28 inches
  • Weight – 2.2 pounds

Pros:

  • Full-size traffic cone
  • Stable design that allows it to stand properly in its position
  • Heavy base to deliver wind resistance
  • Just the right height, making it easy to be seen

Cons:

  • Reflective stickers can easily loosen from the cone
  • Color is not deep orange, but more of salmon

3. Two Sided Fold-Out No Parking Sign

AD

Value for money – this is one of the reasons why this is one option that you might want to include in your list of choices. It is impressive that there are already three signs that are included in each pack. Signs are fold-able and easy to set up and store. The bright yellow and clear sign shows NO PARKING. It can clearly show where not to park. 

Main Product Features:

  • Easy to see
  • Easy to use handle
  • 12 x 16.5 x 24.5 inches (open)
  • Sold in a pack of three

Pros:

  • Comes as a pack of several signs
  • Double sides allowing the sign to be seen easily
  • Easy to use

Cons:

  • Made of plastic
  • May blow over in high winds

4. Work Area Protection 36PVCS-R Traffic Cone

AD

This full-size traffic cone may be heavier compared to many of the standard options. While it is not the best in terms of portability, the good thing about the weight is that it is able to hold up even when there is a strong wind. It has a one-piece design and made with the use of poly-vinyl chloride, a material that is known for its durability. The broad base also makes it stable. Lastly, it is heat-resistant, which means that you can use it even under the heat of the sun without worries that it will easily deteriorate.

Main Product Features:

  • Height – 36 inches
  • Diameter – 10.5 inches
  • Weight – 10 pounds

Pros:

  • Heavy weight allows it to be stable amidst wind
  • Big size makes it easy to be seen even at a distance
  • Bright reflectors for optimal visibility
  • Heavy-duty construction

Cons:

  • Inefficient packaging as the box is too big
  • Quite heavy compared to standard traffic cones

5. Collapsible Safety Emergency Accident Traffic Cone

AD

This may not be as popular as the four products that we have mentioned earlier, but it is still an option. One thing to love about the cone is the pop-up design. It is almost flat when it is collapsed, allowing you to easily store it in your car. While there is no internal light, there are reflective bands that will enhance the visibility of the cone when placed in dark areas.

Main Product Features:

  • Expandable height at a maximum of 18 inches
  • Dimensions when collapsed – 10 x 10 x 1.5 inches

Pros:

  • Collapsible design for optimal portability
  • High visibility because of the reflective surface
  • Pops up easily when ready to be used

Cons:

  • Too light, making it easy to be blown by the wind
  • May requires batteries 

What are the Different Types of Traffic Cones?

There are many ways to differentiate the traffic cones that are available in the market, but one of the most logical is through their design. In this case, the following are the choices that you will have:

AD

1. Flow Molded Traffic Cone

  • Solid, one-piece construction without seams
  • Typically a cheaper option because of its simple design
  • May not be as long-lasting
  • It has a single color from the base to the top, making it highly visible

2. Injection Molded Traffic Cone

  • Comes with a two-piece design and interlocking base
  • Better capability to hold up against wind
  • Has a firm and more durable body
  • The PVC base makes the cone skid-resistant

3. Collapsible Traffic Cone

  • The best option in terms of portability
  • Made from materials that can easily fold

Meanwhile, the traffic cone can also be categorized on the basis of color. Each color is linked to a specific use of the traffic cone:

  • Orange: Marking temporary traffic zones and directing vehicle flow
  • Lime: Heavy flow of pedestrians
  • Yellow: Indicates wet areas indoors
  • White: Marks valet parking or sponsor display
  • Red: Indoor machine traffic and workplace risks
  • Black: Traffic for funerals
  • Green: Markers for courses and tracks

Traffic cones are also available in different sizes, each with their respective meanings and uses

  • 6 Inches: Used only for indoor applications, such as for indicating a potential hazard
  • 12 Inches: Used for pet training and in athletic courses, such as a football field
  • 18 Inches: Normally used when painting roads
  • 28 Inches: Marking hazards for local streets
  • 36 Inches: For roadways with maximum speed limit of 45 MPH, as well as for industrial facilities

Quick Tips in Using Traffic Cones

To make the most out of the traffic cones that you will purchase, below are some of the most important tips that you have to keep in mind:

  • Be familiar with local rules and regulations. In most places, the use of traffic cones in a public road by a private individual is not allowed. You will use it mostly for parking spaces and marking hazards within private property, but not to direct traffic without permission from the concerned authorities.
  • If the traffic cone is old but still sturdy, you do not have to replace it immediately. In some cases, the only problem is the minimal visibility. In this case, you can wrap a reflective tape so that the cone can be easily seen.
  • Store the traffic cones properly when not being used. You can wrap it in a plastic bag so that external elements like dust and heat will not contribute to speed up its wear and tear.
  • Use more than one traffic cone if necessary. This is especially important if you are marking a large potential hazard.

Conclusion

From the best traffic cones that we have mentioned in this post, which one should you purchase? Personally, I can say that Eurow Safety Lighted Collapsible Traffic Safety Cone is the clear winner. I love how it has a collapsible design for maximum portability. The internal light is also a huge plus, making sure that it will be easily seen from afar.

Are you looking for more products other than a traffic cone? Click here and you will be directed to our buying guides to be provided with insights that will be instrumental in making a decision you will never regret.