Home

Recent Posts

How To Remove Swirl Marks From Your Car?


How To Remove Swirl Marks From Your Car

The swirl marks on a car are the scratches on the surface of the car. Out of the many reasons that cause swirl marks on the car, improper washing or drying techniques are the major ones.

The marks are not visible, but you can see them clearly under a microscope. It is very important to know about the removal of swirl marks from the car. If you do not remove them on time, they might get quite visible and steal the look of your car.

You can first try removing it by the most common and simple technique – touch-up painting the car. If it does not work, then you can try using the best rust remover.

In the blog below, there is a complete guide on how to remove the swirl marks from your car.


What causes Swirl Marks on the Car?

There are many reasons that cause the swirl marks on your car. Out of them, the most common reasons are as follows:

car swirl marks

Photo Credit: http://g35driver.com/forums/canada/306359-swirl-marks.html

  • Polishing the car with the inappropriate pad or operator
  • Making use of harsh polish and harmful paint cleaners
  • Using the towels that comprise polyester threads
  • Wiping the dusty car with a towel
  • Using a duster that already has too much dirt on its surface
  • Not washing the car completely before you start drying it
  • Not making use of a clean cover

The most common areas where you can see the swirl marks clearly are the hood and the trunk of the car. Also, the cars that have bright colors do not reflect much light, so you can hardly spot any marks on them, but the same is not the case with black color cars. You can easily spot all kinds of marks and imperfections if it is a black color.

You can easily remove the swirl marks by just polishing the paint on the car, but at the same time, polishing without any electric car polish machine is too hard, and the results are not much appreciated.


How to Remove the Swirl Marks from your Car?

To make sure that you remove all the swirl marks and scratches from your car, it is important to follow the procedure with utmost care. The steps that you have to follow for the same are as follows:

car swirl marks

Photo Credit: http://www.meguiarsonline.com/forums/showthread.php?54447-Swirl-Marks-on-my-black-2010-Audi-A4#QsvBrEIjwkFrB2TW.97

1. Making Use of a Paint Cleaner

To remove the scratches, i.e., the swirl marks from your car, you can make use of paint cleaner that is rasping. While you apply the paint cleaner, make sure that you apply it only in one particular direction; otherwise, it might result in making the scratches too messy.

If you are selecting a rasping paint cleaner, then it is always advisable to start with a less abrasive paint cleaner and then upgrade it as needed. Also, you can make use of chemical paint cleaners to make sure that you remove all kinds of marks from the car.

2. Polishing the Scratches

clean-your-car

It is one of the most important steps in the removal of swirl marks. When you make use of a polisher, make sure that you start with a polisher that is less abrasive in comparison to more abrasive polishers. This is because if you start with a more abrasive polish, there are chances that it might leave a froth of haze on the car.

Also, it is important to note that you apply only a small portion of polish at first. If you apply a large amount of polish at the beginning, then it might also cause a froth of haze on the car. It is always important to take special care when it comes to removing the marks from a dark colored car.

When you polish the surface of the car with a polish, the surface of the car tends to become silky and glossy. If this is not the case, then it probably means that either you did not polish the car properly or that the polishing is still incomplete, and you need to polish it more.

Once you finish polishing the car, you have to start wiping off the extra polish with the help of a soft microfiber towel. This entire process will help you get rid of the swirl marks as well as the scratches.

Always be sure that you use the proper brand of polish. It is recommended to read all the instructions carefully on the bottle of polish before you buy it.

3. Waxing It

The last step in the removal of swirl marks from your car involves waxing the car. Most of the people who start the procedure in a correct manner tend to stop at the second step only. It is highly recommendable to perform the last step as it will give you an assurance that the swirl marks will never return to your car.

Lastly, start by applying a low amount of wax to the car. After you finish applying the wax, make sure that it dries out completely before you perform any further steps. After the wax completely dries out, you have to start removing it with the help of a thin cloth. You can also remove the wax with an electric machine.

Some other important tips for removing the swirl marks:

car swirl marks

Photo Credit: http://www.meguiarsonline.com/forums/showthread.php?21611-A-Hard-Question-About-Swirl-Marks#3zR1fOYKBrjTukv3.97

  • Always make two separate buckets, one for dirty water and the other for clean water, while removing soap from the car. It is important as it prevents the contaminants from entering the paint.
  • While washing the car, always start from the top portion and then slowly come towards the bottom portion of the car.
  • Never make use of a detergent while washing the car. The detergent, without any doubt, will remove the lubricant and clean the car, but it will also remove the wax from the car.
  • Make use of paint cleaners and polish that are high in quality. Read all the instructions carefully on the bottle before you buy them.
  • Never drag the microfiber towel over a dry spot; just pat them dry. If you do so, it will reduce the benefits of the towel, and it will not be able to remove any more swirl marks and scratches.
  • Before you apply wax on the car, make sure to read the user manual carefully. Also, make sure to buy special wax if you have a black color car.

The swirl marks are merely scratched on the car and are sometimes not even visible to the naked eye, but you can feel them when you touch them. The swirl marks might appear because of using improper materials while cleaning the car or not using the proper cover for the car or any other such reasons.

It is important to get rid of the swirl marks at the right time because as time passes, there are chances that they might become visible. To remove the swirl marks, you can touch up the paint of the car, but there are chances that they might appear again.

If you wish to get rid of the swirl marks and scratches from your car completely, it is highly recommended that you follow the three-step procedure with utmost care.

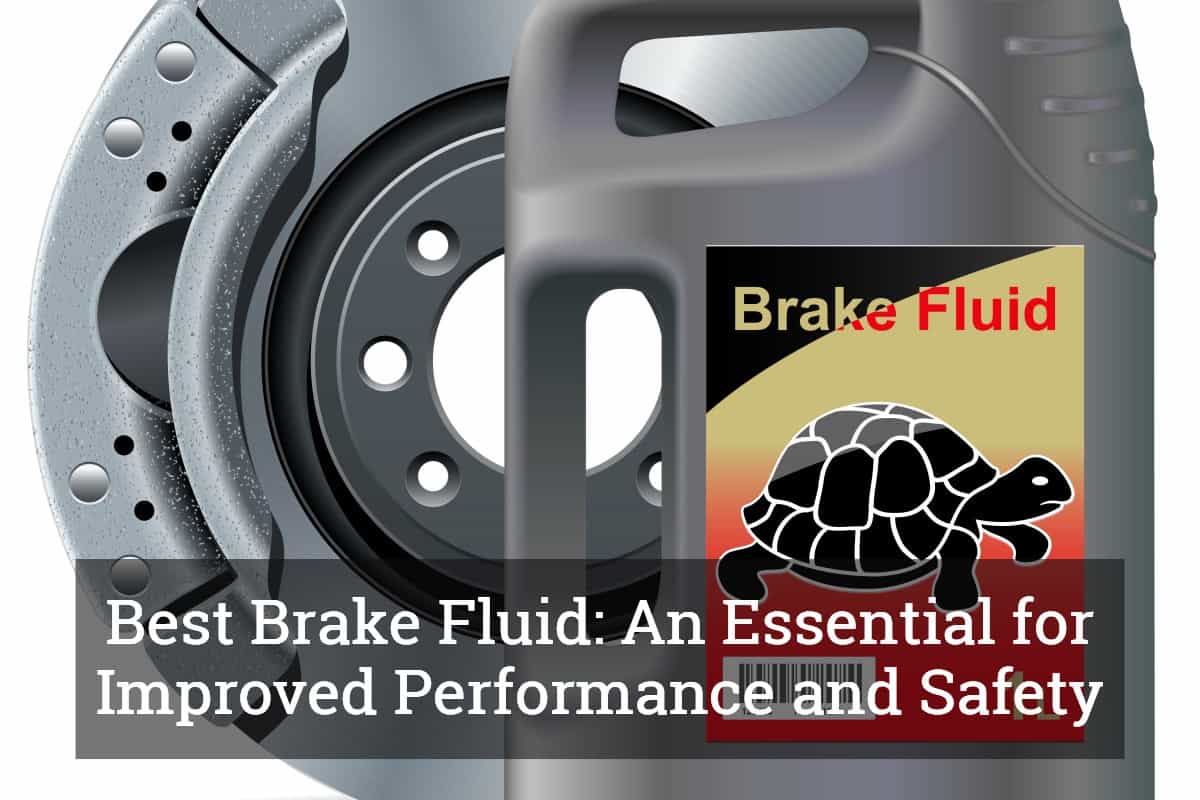
Best Brake Fluid: An Essential for Improved Performance and Safety


Best Brake Fluid

Many car owners ignore the importance of a brake fluid. According to most manufacturers, it is necessary that it is changed at least once every two or three years. By doing so, you can enjoy not only the improved performance of your vehicle but also be excellent when it comes to making sure that you are able to drive safely.

What is the best brake fluid that is currently available in the market? If you are clueless about what to purchase, this guide has got you covered. We will discuss what brake fluid is, including its different types. More importantly, we will give you a quick look at five of the top options that you might want to consider.


What is Brake Fluid?

As the name implies, this is simply a fluid that has the main function of improving the performance of your brake and clutch. Despite its importance, it is frequently neglected by many car owners, especially by those who are ignorant of the many benefits that it can deliver. It is often seen by many to be an added cost, even if it is actually an important part of car maintenance.

A brake fluid is generally composed of three parts. 60 to 90% is solvent, which is usually a combination of poly-glycol ethers. Polyglycols are oils with high viscosity, which is why it is necessary that they are mixed with ethers. 5 to 30%, on the other hand, are made from poly-glycol lubricants. Lastly, 2 to 5% are additives, including those that are added to the brake fluid to allow it to provide protection from corrosion.

The fluid is vital because it makes sure that the different parts of the braking system will operate in a manner that is as flawless as possible. Even at high temperatures or pressure, the fluid must be able to work. Otherwise, the pedal won’t cause the vehicle to brake, and you will end up in an unfortunate situation.

To ensure the optimal functionality of the brake fluid, see to it that it is replaced regularly or as needed. Through time, moisture and other external elements can lead to degradation, which will lessen its effectiveness and efficiency.


Top Picks for the Best Brake Fluid

Product (Amazon Links)Size 

Castrol SRF Brake Fluid

1 Liter

Review

Motul (2 pack) 8068HL RBF600 Brake Fluid

500 ml

Review

ATE 706202 Original Brake Fluid

1 Liter

Review

Prestone AS400 Synthetic Brake Fluid

12 Ounce

Review

Johnsen’s 2234 Premium Brake Fluid

1 Gallon

Review

In this section, we will have a glimpse at five of the products that can provide the best bang for the buck. To help you easily evaluate each alternative, we will tackle some of their notable features, as well as a few of their pros and cons.

1. Castrol SRF Brake Fluid

AD

The mere fact that it is made by one of the most trusted names within the product category can already provide you with a good reason to have it considered over all others. It is made using an exclusive European formula, which makes it unmatched by any other product within the competitive landscape.

It is impressive because of its high dry boiling point, which is approximately more than 300 degrees Celsius. This is more than what is recommended in brake fluids that belong to the DOT 5 category. It simply means that it will be perfect even in the most intense braking conditions.

A lot of people may also love the components used in formulating this fluid. It is made in such a way that it can be safely used even in the metal and rubber components of your car’s braking system.

Lastly, this is a brake fluid that is designed specifically for racing performance. Sports cars are some of the most common where it is used.

Pros:

  • Can withstand even extreme temperature
  • Premium quality
  • Impressive in terms of efficiency

Cons:

  • Bottle can be prone to being punctured

2. Motul (2 pack) 8068HL RBF600 Brake Fluid

AD

This is another brake fluid that can prove to be a perfect choice for racing cars. It will work best if you have a hydraulic actuated brake or clutch. It is packaged in a 500-milliliter bottle.

It is a poly-glycol fluid that is made using 100% synthetic materials. It does not use silicone, which is one thing that makes it better than many of its competitors.

Another thing that is worth noting about this product is how it comes with extreme thermal resistance while being able to demonstrate a high level of stability. The boiling point is 312 degrees Celsius, which is way higher than many others, making it excellent when it comes to dependability.

With the ability of the fluid to withstand even high temperatures makes it a reliable choice for high-performance racing cars.

Pros:

  • Has heavy-duty packaging
  • Bleeds easily
  • Does not boil

Cons:

  • Can make the pedal spongy

3. ATE 706202 Original Brake Fluid

AD

Among others, one thing that we loved about this product is its exclusive formula, which can deliver improved performance for your vehicle. To maximize the outcomes, however, it is important to make sure that it will be compatible with your car.

This brake fluid comes with a minimum wet boiling point of 374 degrees Fahrenheit. On the other hand, the minimum dry boiling point is 536 degrees Fahrenheit. When you compare it to most of its competitors, it is easy to notice that the boiling point of this product is better.

The binding properties used in the liquid formulation of this brake fluid is also excellent. They won’t be damaged even if the fluid is subjected to extreme temperature or once it reaches its boiling point.

Pros:

  • Has high-performance formula
  • High wet and dry boiling point

Cons:

  • Hard to tell if the bleed is done
  • Can is prone to bending

4. Prestone AS400 Synthetic Brake Fluid

AD

While there are many things that are commendable about this product, one that is worth highlighting is the use of excellent materials. It is made using different poly-glycol ethers. The latter will provide you with peace of mind, knowing that no toxic vapor will be produced.

Another thing that you might find to be impressive in this product is the additional safety that it provides to your vehicle when braking. This increases friction and will ensure the powerful braking performance of your car, minimizing the likelihood of suffering from an accident.

There are many braking fluids that will perform well, but the problem is that they tend to make the pedal spongy. Such is not one thing that you have to worry about as the consistency of the brake fluid will prevent the latter from happening.

Pros:

  • User-friendly
  • Takes a long time to expire

Cons:

  • Can easily absorb heat and moisture
  • Can make braking system rust

5. Johnsen’s 2234 Premium Brake Fluid

AD

If value for money is what you are looking for, you have a good reason to consider this product above all others. One gallon, which will make it useful for a couple of flushes before being emptied.

With this brake fluid, there is a minimum boiling point of 450 degrees Fahrenheit, which goes to show that it will demonstrate excellent performance even in extreme temperatures.

It is also worth noting that it exceeds the DOT 3 standards. It has been carefully tested before being released in the market, which will provide you with an assurance of its top-notch quality.

Pros:

  • High-temperature rating
  • Good for up to 10 flushes

Cons:

  • Can easily create mess
  • Cap is hard to seal

Types of Brake Fluid

The following are some of the most common options that you will be confronted with:

  • DOT 3: This usually uses glycol as the base material. This is also the most economical option that is available, which is basically because of the basic formula. To fall under this category, the dry boiling point should be 401 degrees Fahrenheit at a minimum and wet boiling point should be 284 degrees Fahrenheit at a minimum.
  • DOT 4: Like the DOT 3, the base of this brake fluid is also glycol ether. It is different in the sense that it has borate, which is the one that allows it to withstand a higher temperature. Aside from a higher boiling point, it is also better when it comes to stability. Its minimum wet boiling point is 311 degrees Fahrenheit while the minimum dry boiling point is 446 degrees Fahrenheit.
  • DOT 5: In the past, this formula is only possible with the use of components that are silicone-based. Nowadays, however, there are many options that fall under this category but they also use glycol ethers. They have been created specifically for military applications and they can resist degradation, even with long-term storage. Because of their inability to absorb water, they can resist corrosion.

Choosing the Best Brake Fluid

As you try to narrow down the possibilities and make the right choice, the following are some of the factors you should consider:

AD

  • Price: It is a given fact that most people will decide on the basis of their budget. However, I recommend that you go beyond cost. Pay attention to the specifications from the manufacturer. Think about what it can do and not only how much it is.
  • Feedbacks: For those who are having a hard time reaching the right decision, it is best to consult with what other people have to say. All that you have to do is to go online and read the experiences of other users. This will make it a snap for you to evaluate the pros and cons of the possibilities.
  • Size: Brake fluids are usually measured in quarts, gallon, and liters. Pay attention to how much is needed by the vehicle. Also, see what other people are saying to have an idea on how much you will use. It is best to buy only the quantity that will be needed as there are some types of brake fluids that are prone to degradation if they are not used as soon as possible.
  • Boiling Point: This is one of the most important factors that requires your attention. Simply put, it is the highest temperature at which the fluid will start boiling. When the temperature exceeds such, the performance of your braking system can be compromised. Also, take note that there are two figures that you have to look at – wet and dry boiling temperature.
  • Moisture Absorption: It is also necessary for the brake fluid not to absorb moisture and other external elements. This will help to preserve its original quality and will make it less prone to degradation. As much as possible, choose a fluid that does not absorb moisture easily.
  • Compatibility: You should also take note of the fact that not all fluids are compatible with all vehicles or cars. There are some fluids that will lead to corrosion if they are used in the wrong material. To avoid problems, make sure of suitability before purchasing and using brake fluid.
  • Packaging: Most of the brake fluids are packaged in tin cans or plastic containers. It is important that they are durable and sealed tightly, which will prevent damage or the penetration of external elements that could compromise overall quality.

Conclusion

The best brake fluid is an important component for the maintenance of every vehicle, especially those that are used in racing. This improves not only the performance of your car, but also your safety. From the five products that have been mentioned above, if there is only one that I can personally recommend, it would be Castrol SRF Brake Fluid. Aside from being made by a trusted brand, it is effective and efficient. It can provide excellent value for money, considering the performance that you can expect from the product.

Are you looking for other products that will help in improving the performance of your vehicle? Click here to learn more about the options.

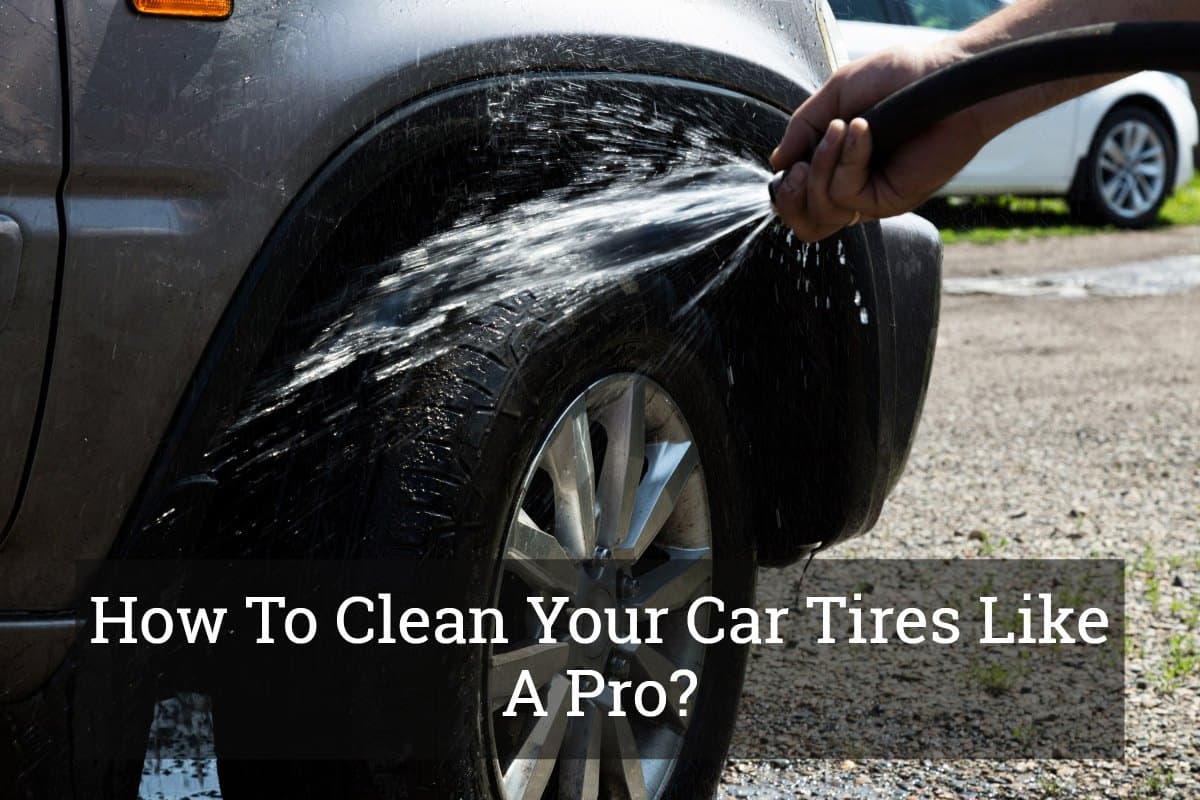
How To Clean Your Car Tires Like A Pro?


How To Clean Your Car Tires

Don’t you get that itchy feeling by looking at your dirty wheels? When I was with my car, my main concern is always that how I am going to clean car tires. Car looks nice, completely shining but the dirty wheels take away the charm.

Cleaning the tires won’t only make your car look nice but also protects them from cracking and weathering by removing the corrosion. Clean tires let you know the correctly the best time to replace car tires and whether you need to balance your car tires or not? The blog will take you through three different methods to help you out to clean car tires like a pro.


Type 1: Clean Your Tires using Efficient Tire Cleaners

What will you need?

  • Tire Cleaner
  • Brush
  • Water
  • Tire Gel

Step 1:Why to use tire cleaner rather the soaps available to wash the car? The answer would be very simple. The car soaps are specifically designed to clean and to protect the car paint but not to clean rubber. So numbers of tire cleaners available in the market are used.

wash and clean car tires

Photo Credit: http://rallyways.com/7182/clean-car-tires/

  • Also, tire cleaners hurt the paint of the car, so try to avoid spraying the cleaner on the paint. 
  • Now start by spraying the tire cleaner over the surface of the tire.

Step 2: After spraying the cleaner, aloe it to get settled down for a minute or two.

  • The surface of the rubber id porous and that it gets difficult to take off the dust and the Grimes off the tires and the braking system.
  • Allow the cleaner to remain on the surface for this period, allow it to soak and dissolve the major grime and dust particles off the rubber.
  • If you find it necessary, spray some more cleaners and wipe the old with the fresh rag.

Step 3: If the surface is still a brown color that means that the tire still has grim particles over the surface. It is advisable to brush with stiff hair rather than the one with steel teeth.

  • Steel tooth gets penetrated through the rubber and can result in a leak.
  • So, use one with the stiff hair and apply as much pressure use has to scrub off the grime from the wheel.
  • The direction in which you scrub is not a question. Go to and fro in any direction you want.

Step 4: Once you are done with scrubbing, clean the tires with the water.

  • Use an outlet with great pressure, so that the water coming out of the hose is sprayed to the tire with a pressure that removes even the hardest particles stuck onto it.
  • It is safe to let the cleaner + water mixture to run down your yard as they are environmentally
  • But do wear a safety protection for your eye while cleaning it

Step 5: After the cleansing is done if you still feel like the wheels aren’t cleaned, repeat the process again.

  • Spray the cleaner again and allow it to settled down, scrub it and rinse it thoroughly again.
  • But an important note, some cleaners comes with an instruction that the cleaner can only be applied to a dry wheel. So, it is important to let the wheels get dry and then apply the cleaner again.
  • There is not a limitation on cleaning the wheels in a day. You can use cleaners and clean them as much time as you want till you get satisfied.

Step 6: What if your tires are still brown and have grim particles all over, even if you have cleaned them multiple times? Use tire or rubber gels that bring back the original black shade of the tire.

  • Apply the gel using a sponge on the whole sidewall of the wheel and then rinse it off.
  • Do one tire at a time, because you cannot let the gel to get dry while on the tire.
  • Always apply tire gel after cleaning the tire.

Type 2: Clean Your Tires using Clear Coats or Tire Dressing

What will you need?

  • A towel
  • Tire dressing
  • Tire coat
  • Sponge

Step 1: Use a towel to dry the tire from every end.

wash and clean car tires

Photo Credit: http://carproductstested.com/how-to/how-to-make-your-tyres-look-great/

  • The trodden part is very hard to clean, so try to clean at least the sidewalls perfectly.
  • An important note: Use a towel that you are not going to use to clean the car. If you do so, the dirty towel will result in spoiling the paint and scratching the coat due to the dirt already present on the towel.

Step 2: It’s time to use the tire dressing! Before buying the one, take care that the tire dressing doesn’t include silicone as its content. Always choose water based dressing which will help to get an ultimate shine over the wheel.

  • Use a sponge to apply the dressing on the sidewalls thoroughly. Apply them in a way to create a thin coating by wiping over the walls.
  • You can apply it multiple times to get the same shining that you would have gained using the dressing having the silicon content.
  • Different brands have different methods of application. Apply as per directions on the cover.
  • At last, allow it get dried before you drive your vehicle.

An Alternative to the Tire Dressing is Tire Coating!

Step 1: Many of them use tire coating instead of dressing. It is used to create a glossy and protective layer on the rubber tire. Some of the coatings don’t wear off even for months like creating a permanent layer. These coatings protect the rubber even in the bad weather.

  • Use a sponge to apply tire coating on the sidewalls and the whole rim. It is specifically important to create thin layers of the coating.
  • Applying it multiple times won’t get you the shininess you want. The shininess you get on the first application is the final.
  • See the back cover of the coating to see the directions for the application.

Step 2: After applying the coat, allow it to settle down and get dry. The period of drying solely depends on the brand that you choose. It may even take few minutes or an hour before it gets dry.

  • After the tier gets dry, buff it with the help of a towel or by using buffing pads in the circular motion.

Type 3: Cleaning of the Tier before Washing the Car

What will you need?

  • A scrubber
  • Bucket full of water
  • Tire cleaner

Step 1: Clean the grime and the dirt off your wheel before you clean your car.

clean car tires

Photo Credit: https://www.youtube.com/watch?v=c8F1pnj8mHk

  • What will happen if you clean your car first? After cleaning your car if you clean your tier, there are chances of the dirt and grime splattering over the car’s body and even the tier cleaner being sprayed on the body.
  • Cleaning the tier first helps to clean all the grime splattered on the body and even the cleaner sprayed by mistake to prevent the wearing of the paint.

Step 2: Use two different buckets, towels and sponges for cleansing the body paint and the tire and brake system separately. If only one material is used, it will result in the dirt from the wheel on the towel to create scratches on the paint.

Step 3: Try not to get the tier cleanser been sprayed on the body paint as it may dull the paint and even remove the coating over the body.

  • Spray it with great precision and even if by mistake it gets sprayed on the paint, rinse it off

After spending so much money to buy the car, it is very important to maintain it, isn’t it? So, follow the methods very precisely and properly to maintain your car, and it will be an icing on the sugar; you get to impress everyone with the nice shiny car!! Avoid mixing up things to clean the tires and body of the car. Feel free to suggest different methods to our users by commenting below and do share your valuable feedbacks.

Best Power Inverter for Car: Buying Guide and Top Picks


Best Power Inverter for Car

It is an inconvenience if our favorite gadgets run out of batteries in the middle of a long-distance driving. This is the reason why you need power inverters equipped in your vehicle, as it may come in handy. In this article, we will discuss everything you need to learn about power inverters before you make a purchase. We will also provide you with a rundown of the top five picks for the best power inverter for cars.


What is a Power Inverter for a Car?

A power inverter for the car is an electronic device that converts direct current input into an alternating current output. Using a power inverter for your car will enable you to charge your laptops and other devices while on the road. Car batteries work on direct current, and most gadgets and electronics run on alternating current. It is a very useful device that you can equip on your car battery for emergencies, simple convenience, and mobile devices.

The power inverter for the car boosts the amount of current provided by the cigarette lighter to more substantial levels. Direct current, which is measured in volts, is converted into alternating current, which is measured in watts. This will allow its users to add power to their electronic devices, such as cell phones, laptops, and game consoles. However, factors including car battery capacity and output wattage must be taken into consideration.

Using a power inverter for a car may drain the battery if you use it while the engine is off. Many of these devices are equipped with a safety feature that shuts down automatically before the battery is completely drained. It is vital for people who need to work on laptops and people who love going on road trips. It is also useful for those who travel and parents who wish to keep their children entertained.


Top Five Picks for the Best Power Inverter for Car

Product (Amazon Links)Size 

BESTEK 1000W Power Inverter Dual AC Outlets Car Inverter

1000W Power Inverter

Review

Energizer 500-Watt Power Inverter

500W Power Inverter

Review

Kriëger 1100 Watt 12V Power Inverter

1100W Power Inverter

Review

Power Bright PW2300-12 Power Inverter 2300W

2300W Power Inverter

Review

In this section, we are going to discuss the top five recommendations for the best power inverter for car. We’ll talk about some of its best features, pros, and cons so you can come up with an informed decision.

1. BESTEK 1000W Power Inverter Dual AC Outlets Car Inverter

AD

Bestek is one of America’s leading brands when it comes to power inverters for car. It will be able to provide up to a peak power of 2400 watts continuous DC to AC power conversion. It offers maximum protection through its automatic overload and low-battery shutdown features. It has three external fuses and a built-in cooling fan. To add, it features lit power switch signal status.

Another great feature of this model is its rugged construction that allows it to withstand harsh environments. The power inverter comes with two battery clamps and one car cigarette plug, along with the user manual for instructions. It is designed as a portable device that offers high performance to charge multiple loads of household and electronic appliances. It weighs 3.63 pounds and working temperature is set at -10℃~40℃.

You should keep in mind that it is very normal for the inverter to become warm while being used. It should also not be exposed to direct sunlight or next to heat-sensitive materials.

Pros:

  • Packages include the inverter, two clamps, and one car cigarette plug
  • The Brand offers an 18-month warranty
  • Comes with three external fuses and a cooling fan
  • Can endure harsh conditions

Cons:

  • Might not last long
  • Finding a fuse replacement may be difficult

2. Energizer 500-Watt Power Inverter

AD

It is interesting to know that the EN548 is the first power inverter that incorporates 9.6A of USB charging capability. It can be permanently installed through the use of its built-in mounting post. The brand emphasizes its manufacture of high-quality products that offer a two-year warranty for parts and labor. The package includes one power inverter, a set of alligator clips, a cigarette lighter cable, and a user manual.

For its specifications, the Energizer offers 500W continuous inversion and peaks at 1000W. The model has been tested, validated, and approved for safety and performance by Intertek. Input voltage is set at 12V, and output voltage is set at 110V~120V. It also offers protection the user may need, such as overload, high temperature, and short circuits. Lastly, the model comes with an ultra-silent thermal fan.

Pros:

  • Features 4 port 48W USB
  • Comes with a set of alligator clips and a cigarette lighter cable
  • Approved for safety and performance
  • Peak power is set at 1000W

Cons:

  • May become unreliable after a few months
  • The product had complaints about its quality

3. Kriëger 1100 Watt 12V Power Inverter

AD

It took five years of research and development for Kriëger to produce the smallest 1100W power inverter. This model can power up tools, small appliances, and a lot more. It offers unmatched performance as the inverters are strategically designed to handle inductive loads. In addition, the brand offers a three-year warranty for its parts and labor.

For its specifications, power is set at 1100W continuous capacity, and it peaks at 2200W. You cannot go wrong with the Kriëger as they have been tested and approved by METLAB for performance and safety. Input voltage is set at 12V DC while the output voltage is set at 110V~120V. It features dual USB 2.1A shared and an LCD display that indicates input voltage, output wattage, and battery level.

Lastly, the Kriëger set comes with an 1100W power inverter and a set of 3 FT 4 gauge cables. To add, the set includes a remote control, an in-line fuse, and a user manual for the instructions.

Pros:

  • 1100W continuous power flow and peaks at 2200W
  • Tested, validated, and approved by METLAB
  • The brand offers three-year warranty
  • Features dual USB 2.1A

Cons:

  • Can burn up after a few months of use
  • Might not last long

4. Power Bright PW2300-12 Power Inverter 2300W

AD

The Power Bright Power Inverter is a heavy-duty product that you can plug directly into a 12V direct current battery. This will enable you to power up televisions, laptops, game consoles, small appliances and other gadgets in your vehicle. This power inverter features 2300W continuous power and it peaks at 4600W.

The power inverter’s case is made from anodized aluminum for outstanding durability. It also features a LED display that indicates input voltages and output wattages. It has a built-in cooling fan, an internal 30A fuse, and an overload indicator. Another great feature of the Power Bright is that it has an audible low-voltage alarm. It will shut down in case there is a power overload, short-circuiting and other thermal problems.

Pros:

  • Features a built-in cooling fan
  • 2300W continuous power and peak power is 4600W
  • LED display indicates input and output wattages
  • Features an audible alarm for low-voltage

Cons:

  • Cables are sold separately
  • Can easily blow up

Types of Power Inverters for Car

There are several types of power inverters that you should know about, and we are going to discuss three of them. This section is also important as it can help you narrow down your choices towards choosing the best power inverter for your car.

  • Single Outlet Inverters – These are simple and cheap devices that provide a continuous current capacity of 150W to 200W. These are smaller and are more compact allowing easy storage and transport. To add, only one device can be charged at one time, so you won’t have to worry about overloading.
  • Multiple Outlet Inverters – These are more expensive and larger than single outlet inverters. With this, they have higher continuous current capacity compared to the single outlet. They feature multiple outlets that enable you to power up multiple gadgets at the same time.
  • USB Outlets – USB ports allow its users to power up gadgets such as smartphones, tablets, and other USB-capable devices. The same amount of power is consumed if you plug a device into the USB port and a standard outlet. One downside is that it cannot power up most household appliances without a standard outlet.

Essential Factors to Consider When Choosing the Best Power Inverter for a Car

Before we finish this discussion, let’s talk about what makes a good power inverter first. This is essential, especially if you are having a difficult time choosing among the five presented above.

AD

  • Features – Factors such as the amount of continuous power the inverter can provide are important features to consider. Most inverters run on 150W-200W, so you have to evaluate based on the top five picks in the previous sections.
  • Safety – Some inverters have the capability of shutting down automatically before they reach the overloading point. You have to choose one that can offer you protection from overheating, overloading, and short-circuiting. Some models have displays that indicate input and output voltages, and they can be very useful. In addition, built-in fans are also essential to avoid overheating.
  • Design – Many of the recommendations above feature a compact design that makes it very easy to transport and store. It is recommended that you pick the one that which will be very convenient to use. Take note of the material the product is made, as an indication of the quality of the power inverter.
  • Number of Outlets – This should also be considered before making a purchase. It is important to check first if how many outlets are required for the power inverter to work.
  • Peak Capacity – Some power inverters feature 2000W average continuous power inversion. Choose one that can power up bigger appliances if you need to make use of its convenience while traveling.
  • Price – How much a power inverter costs is a factor to consider before making the actual purchase. In order to effectively evaluate, weigh each product’s pros and cons and pick the one that benefits you the most. After that, you may relate their features to the price indicated in the tag.
  • Warranty – If the product is of high quality, the brand will be most likely to offer longer periods of warranty on parts. Some brands presented above offer up to a three-year warranty, which is an assurance that you’re buying the best. You have to choose the product that you can avail of the warranty for a longer period of time.
  • Durability – The power inverter that you choose must be able to endure harsh environments. It should not break if exposed to extreme heat and this may come in handy especially on a road trip.

Conclusion

We have discussed everything you have to know about power inverter for car. Now it’s up to you to decide which makes great value for the price you pay. Choosing the best power inverter for car may be tricky, but with this guide, it should be very easy. You just have to weigh each product’s pros and cons to come up with a more informed decision. We hope we gave you some enlightenment regarding power inverter for car.

Are you also looking for products you can hook up with your vehicle? Click here to find out more products that are available in the market right now.

Top 10 Tips On Maintaining Your RV Successfully


Maintaining Your RV

Are you an adventure lover who just loves to crack up the old RV and go to new places? I know I am. Exploring new places in an RV is the best way to travel and satisfy your inner wanderlust. You can go on short as well as long trips with the utmost comfort, and that too on a budget. What more can you ask for?

To go on adventures regularly, you need to increase the life of your RV and maintain it with the utmost care. When you do this, your RV will pay big dividends down the road. Mentioned below are some tips that will help you tune up your motorhome and make it look brand new all the time.


1. Inspection

As an RV user, I have developed a habit of inspecting my RV once a month to check for any issues. This just takes 10-15 minutes and can save you from a future hefty bill of repairs. You can do this on weekends or before going to work. This small habit can do you huge favors. You need to inspect the roof seals and seams of your RV. Inspecting the roof of your RV is important because:

tips on maintaining your RV

Photo Credit: http://www.familyrvusa.com/5-tips-maintaining-rv-toilet/#.WR6unmiGPIU

  • Major water leaks are found primarily in the roof. This can be due to any open seats in the roof edges, vents, skylights or the air conditioning unit.
  • If there is a leak, then the water will be stored on the outer surface and slowly make its way to the inner framework. This can damage many parts of your RV. Once the damage is done, you will have no option other than to buy new parts. This is why inspection should be your utmost priority.
  • The best solution to this is to locate the leak and then use sealants to patch up your RV’s roof. Ensure that the sealant used is compatible with your RV’s roof.
  • Don’t ever underestimate even a small leak as it can cause huge damage, and when you notice, then it is too late. You should inspect the roof every three.

2. Tire Check

Here’s a situation: it is raining heavily at night, and you are driving on a secluded road, and suddenly your tires give out. Sounds familiar, right? No passerby comes to save you after your vehicle breaks down, unlike they show in the movies. You are left alone to deal with it. To avoid these situations, make sure to maintain your tires regularly to prevent any foreseeable damage.

Tire Check
  • Pressure check – When you are on long trips in your RV, driving with low tire pressure can be dangerous as you don’t know when they can give out. Always check the tire pressure before use, especially during winter, as the pressure drops with low temperatures.
  • Wear check – Check your tires for any wear and tear to make them durable for a long time. You can reduce the amount of wear by rotating your tires regularly. The front tires wear fast compared to the back ones, so by rotating, you can even out the wear. This will also reduce the number of trips to the mechanic, and you can get it repaired in one go.
  • Alignment – Now, people tend to remember the above points but always forget to focus on the alignment. If your tires are not aligned, then it can lead to a major road accident. It also can damage your tires and other parts of the car. Re-align your tires on a regular basis.
  • Spare tire – Always keep a spare tire handy to avoid any obstacles in your trip. Not keeping a spare tire will make you rely on nearby garages which are not an available option always. If you face a breakdown then changing a tire takes about 15-20 minutes and avoids any detours on your trip. Also, ensure that the spare tire is inflated.

3. Clean It

tips on maintaining your RV

Photo Credit: http://coolrvstuff.com/why-you-need-a-steam-cleaner-for-your-rv/

Take a good look at your RV. Does it look the same as the day when you first bought it? No, isn’t it? Many people have this perception that after using an RV for a while it is bound to look old and rusty. This is a misconception as if you regularly polish and wax your RV it will look brand new even after years of use.

Cleaning it is the most simple and efficient way of maintaining your RV by simply cleaning it with extra stress on the exterior. Apply a good coat of wax and polish it on a fixed schedule. Also, don’t forget to use the UV protectant as this way the exterior material will not fade even after prolonged exposure to the sun.

Maintaining the interior of your RV is as important as maintaining the exterior. I know you might have a very furnished interior of your RV with the best RV mattress and other commodities. The thing you need to focus is also a proper cleaning system of the interior by setting up bins, inspecting the furniture, checking on molds, etc. these tiny steps which take the very little time can save you a lot of trouble in the future.


4. Crank Up Your Engine

Crank Up Your Engine

Via: https://www.azrvsalvage.com/national-tropical-diesel.html

The engine is the most important part of your vehicle, and ironically that is the part we ignore the most. We stress more about the looks and forget about the inside. Your engine should be proper and updated. Change the oil on a seasonal basis as RV sits for a long period which can reduce the lubrication and decrease the quality of your engine parts.

It is recommended to change the oil of your RV every 3000-4000 miles or every year. Also, check for rust as it can cause some serious damage to your engine and cost a fortune to repair it.


5. Manage a Proper Toilet System

RV Toilet system

Via:https://www.youtube.com/

RV can give you a feeling of a free traveler and a great sense of independence. You will feel free from everything and think that you don’t need to rely on anybody for anything and can have a perfect life on the road. While you are perfectly happy with that travel vibe you have going on, you will face the sudden harsh reality of lack of toilet and clean drinking water. These are the things you take for granted for which you realize their importance in their absence.

Stopping every time for restrooms and using improperly maintained public toilets can take a toll on your hygiene. This is why many people hesitate to go on long trips. You can easily prevent this by building a proper toilet in your RV.

RV’s are now equipped with a proper toilet, but many people fail to maintain it. You need to maintain the toilet by regularly cleaning it and inspecting it for problems. Have the best RV toilet, and most of your problems will be solved. The best way to do is to set up separate holding tanks for different water systems.


6. Create a Good Waste Management System

tips on maintaining your RV

Photo Credit: http://www.rvglampingadventures.com/our-blog/rv-financesthe-downlow-on-costs-to-vacation-in-an-rv

During long trips, we live in an RV which means an accumulation of a lot of waste and products. Your main focus should be on the water system. Having an efficient water system will avoid many problems and give you a smooth trip.

You need to use an adequate amount of fluids and flush the system on a regular basis. Clogged water can create a lot of hassle and also damage the parts of your RV. You can create a good waste managing system by following a routine check on the wastes. It can be a solid or liquid waste. It is advised to have a separate system for both for proper maintenance.

There are three main storage tanks in a camper or a motor home which are fresh water, gray water, and black water tanks. These holding tanks provide you a higher level of personal convenience like a hot shower, clean and fresh drinking water and a sanitary place for a toilet. Having these three tanks in your RV is going to make your travel a lot more convenient and comfortable. Trust me on this.


7. Lights

Lights RV

Long trips require driving a lot and especially at night. You need to have a properly maintained set of lights to drive efficiently. I remember once getting stuck on a road at night with a busted light. There was no garage nearby and no phone signal. I had to spend my entire night there as I got help in the morning. That situation spoiled my entire trip as all the planned stops were delayed, and I was tired the whole day.

Just a small busted light can do a lot of damage. Lesson learned always keep your lights in a working condition and never drive with busted lights as it can be dangerous. For precaution, always keep spare lights with you at each trip.


8. Carry the Right Set of Tools

Carry the Right Set of Tools

Having a toolkit is a basic necessity for every RV owner. Your tool kit should include all types of wrenches and screwdrivers. Also, keep a kit of bolts and nuts ready if you require them on a trip. Once you hit the road, there is no looking back, that is why planning and packing all the essentials is the most vital step for a successful trip.

The right set of tools also includes an emergency kit. An emergency kit should be present in your RV at all times. You never know when you might need it, so it is better to be safe than sorry.


9. Battery Check

Battery Check

Invest money in a good multimeter or tester lights to keep track on the main voltages and battery. Batteries have to be maintained properly as a dead battery is the last thing you want on your trip. There are some batteries available which have water levels, and there are some batteries which are maintenance free.

They have a life of around 3-5 years after which they start to lose the capacity. The best option for you is to keep your battery charged at all times. The main coach batteries should be between 12.4 volts -12.8 volts when they are not charged. If the battery is below 12 volts, then you have to get them charged.

Now for the AC voltage, the range is from 108-130 volts, and anything above or below that is not appropriate.

I have gotten an EMS (electrical management system) to monitor the battery and other voltages, and I have been satisfied with the results. This is the best way to keep your batteries and other voltages in check and provide protection whenever needed. I highly recommend this for maintaining your RV.


10. Maintain your RV’s brakes

Maintain your RV's brakes

Via:https://www.youtube.com/

Always have an efficient brake system as it is important not only for your safety but also for others around you. Improper brakes can lead to dangerous accidents. The wheel bearings should be proper and lubricated all the time. Brake replacements cost a lot of money so make sure that your brakes are in a good working condition. Stress more on the wheel bearings and seal as they are the parts which wear very easily. Before going on a trip check that there is sufficient material on the brake to avoid any obstacles on your trip.

Following all the steps is a difficult and time-consuming task. For this reason, prepare a maintenance checklist and follow that properly. From my personal experience, this is the best way to keep your RV young and ready to hit the road. This also increases the life of your RV by many years. Before going on a trip, complete all the tasks on your checklist for the best trip.

So what are you waiting for? Go out and satisfy the wanderlust in you. If you find this post knowledgeable please share it with others and if you have different views about this, then please let us know in the comments.

Best Wheel Locks: Choosing the Right One for your Needs and Budget


Best-Wheel-Locks

There are countless potential risks if you own a vehicle, especially if you are parked in a suspicious neighborhood. This is the reason why you need to have your vehicle equipped with wheel locks. In this article, we are going to discuss all you have to know before you purchase a wheel lock. To add, we will also provide you with the top five picks for the best wheel locks available in the market right now.


What is a Wheel Lock?

Wheel locks are installed as replacements for your vehicle’s lug nuts. They can only be unlocked with a special key that is included in the set. The type of lock you’re going to need will depend on the wheel style and the shape of the key. It is also at your discretion if you will replace just one or all of the lug nuts in your wheels. To add, a torque wrench is required to install wheel locks so they will not rattle loose.

Having a wheel lock installed in your vehicle has a lot of benefits. First, it does not cost much as the replacement of rims. They will also provide you peace of mind that your rims will never be lost or stolen. Another benefit is that it drives away thieves, as the presence of an anti-theft device discourages them. Thieves won’t be able to unlock them as they feature technology wherein not all prying tools can fit into it.

You can avoid having your wheels tampered with or stolen if you have wheel locks. Whether it is car, motorcycle, or even trailer tires, they are easy to steal and impossible to track. This is the reason why thieves target this part of the vehicle more than ever. If you have a wheel lock, it could also mean that it can prevent you from being a victim. However, this won’t stop criminals from stealing your vehicle but it makes sure your wheels won’t be.


Top Five Picks for the Best Wheel Locks

Product (Amazon Links)Brand 

McGard 24538 Chrome Cone Seat Wheel Locks

McGard

Review

Genuine Toyota Accessories 00276-00900 Wheel Lock

Toyota

Review

Gorilla Automotive 71643 NBC Black Wheel Lock

Gorilla Automotive

Review

Genuine Honda Accessories 08W42-SNA-100 Alloy Wheel Lock

Honda

Review

DPAccessories LCB3L6HE-BK04LK4 Black Wheel Locks

DPAccessories 

Review

In this section, we are going to talk about the top five recommendations for the best wheel locks available. We will also provide you with a rundown of each product’s key features, pros and cons so you can evaluate more effectively.


1. McGard 24538 Chrome Cone Seat Wheel Locks

The McGard manufactures locks in the United States to meet and exceed OEM standards for durability and safety for vehicles. It’s also worth mentioning that the brand is a supplier to more than 30 lines of vehicles around the globe. The wheel locks are easy to use, and they function as a normal lug nut. In addition, they are equipped with a unique one-piece lock that can only be removed using a special key tool.

Another great feature of this wheel lock is the steel collar that guides the key towards the lock pattern. It places the key to be in perfect alignment for ease of removal and installation. The designs are also computer generated, and it permits you to create an infinite number of key patterns. In addition, they feature an extra narrow pattern groove that is resistant to intruding removal tools.

For its specifications, the material is made from restricted chemistry steel, which makes it highly reliable as well as durable. Plating includes three layers of nickel and a layer of microporous chrome that protects the lock against rust.

Pros:

  • The set includes four locks for wheels, one spare lock, and one matching key
  • Additional narrow groove patterns
  • Easy to remove and install
  • Made from rust resistant materials

Cons:

  • Losing the key would mean buying another set
  • Some buyers had complaints about its quality

2. Genuine Toyota Accessories 00276-00900 Wheel Lock

The Genuine Toyota Accessories Wheel Lock is one of the best available in the market right now. These wheel locks are made especially for use on Toyota cars. The set comes with a one-of-a-kind key that permits you to install and remove the nuts. This is a great feature because it prevents your wheels from being stolen by thieves. To add, the nuts feature weight balancing and shape, which makes them very easy to use.

The Genuine Toyota Wheel Locks feature a triple-nickel plating, which improves the quality of the wheel locks. It also is a great feature because it prevents corrosion due to extreme weather conditions. In addition, this feature indicates high performance, quality, and durability the wheel locks can offer. Lastly, the manual exhibits easy-to-follow guidelines for convenient installation and removal of wheel locks.

Pros:

  • Features a unique key tool
  • Locks are easy to install and remove
  • Guidelines are easy to follow
  • Features three nickel plating

Cons:

  • Not all Toyota models are compatible with the wheel locks
  • It may start to rust after a few months of use

3. Gorilla Automotive 71643 NBC Black Wheel Lock

The Gorilla Automotive Wheel Lock is another contender for the best wheel locks available in the market today. For its specifications, thread size is set at M14 by 1.50 and features a cone seat style. It is interesting to know that these locks are the original design that has set the standard for wheel security. This is the reason why the brand is one of the most trusted and has the most advanced locks today.

Another great offering of these wheel locks is the enhanced security they can provide the user. An external security pattern makes the Gorilla Automotive Wheel locks impossible to unlock without the matching key. The material is made from steel and is chrome-plated for additional strength and reliability.

Pros:

  • Features cone seat style
  • Offers enhanced security through an external security pattern
  • It can only be unlocked using a matching key
  • Made from steel and chrome

Cons:

  • Some buyers had complaints regarding the product’s packaging
  • It may start to rust after some time

4. Genuine Honda Accessories 08W42-SNA-100 Alloy Wheel Lock

These wheel locks are another great offering of the Genuine brand, but specifically manufactured for Honda cars. The locks aid in providing reliable protection from tire and wheel theft. This is the reason why you have to keep your Honda car using these factory wheel locks. What makes this outstanding is that it does not attract attention because the visual is very subtle.

A matching key comes with the wheel lock set. This key can be used for easy installation and removal using your Honda lug nuts in this wheel lock set. The material is made from hardened steel, which makes it long-lasting and resistant to rust. It also features chrome triple nickel plating that makes them shiny and corrosion-resistant. Lastly, the set comes with a handy storage pouch to prevent the misplacing of the key socket.

Pros:

  • Offers reliable protection
  • Easy to install and remove
  • Resistant to corrosion and rust

Cons:

  • May not fit all Honda models
  • It may start to rust after a few months

5. DPAccessories LCB3L6HE-BK04LK4 Black Wheel Locks

AD

The DPAccessories Wheel Locks feature closed-end bulge acorn-style locks that enhance the security of your wheels. They are one-piece solid locks that are produced with precision machined threads that make sure they fit the studs. The material is made from cold-forged and heat-treated steel, which, makes it durable and dependably strong. They also feature unique key-to-lock combinations that secure your wheels against theft.

Another great feature of these wheel locks is the proprietary cathode black coating, which improves their durability. It is also pleasing to look at because of the sharp appearance of the satin black paint. To add, the locks have undergone a quality control process that ensures the locks they manufacture are of the highest quality. One thing to note: this particular set will not work with a previously ordered set.

Pros:

  • Great for extreme weather conditions
  • Corrosion resistant
  • Durable and strong
  • Made from high-quality steel

Cons:

  • May not work with hubcaps and stock wheels
  • Does not come with a storage pouch

Types of Wheel Locks

In this section, we are going to discuss some of the types of wheel locks. They may be of great help to narrow down your choices if you are having a hard time choosing.

  • Tapered Seat: These are commonly found on aftermarket wheels such as Honda, BMW, Ford, Saab, and Renault. They feature a 60-degree cone wherein the thread links to the head on a bolt. To add, a 60-degree cone also fits into the nut’s wheel.
  • Radius Seat: This type of wheel lock features a curved area wherein the thread meets with the bolt. You can find them in cars such as Audi, WV and Mercedes.
  • Flat Washer: Lastly, this type features a flat washer wherein the wheel meets the thread. These are commonly found in Lexus, Mitsubishi, and Toyota.

Tuner bolts and nuts can also be considered as the fourth type of wheel locks. They have the same features as the tapered seat, but they are usually driven internally. This would mean that a special adaptor is placed into the center to fasten the bolts or nuts.


Essential Factors to Consider in Choosing the Best Wheel Locks

Before we conclude this discussion, let’s talk about what makes a good wheel lock first. This part is vital, as it will help you evaluate and choose more effectively.

AD

  • Size: It is important to measure the size of your vehicle wheel to know what wheel locks to buy. There are different sizes of locks, and they may not fit properly if you do not measure the wheel. It’s also important to note that you have to check with the manufacturer first if the wheel supports the locks. That way, you can make sure that you won’t make an expensive mistake.
  • Quantity: A set normally includes four wheel locks. However, some brands offer more than four. It is advisable to choose the one that features more than four nuts. With this, you can easily replace one if it has gone missing or stolen. To add, you will not have to buy a new set if you have spare ones. They may be priced a little bit higher but having the above convenience makes the purchase worthy.
  • User-Friendly: Wheel locks should be easy for you to use. They should also be easy to install and remove from your vehicle. While being user friendly, these locks should not be easy to be manipulated by thieves. You have to choose one that offers both qualities.
  • Unique Key: A unique key is mandatory if you want a secure wheel lock. Other brands may offer a universal key for all the locks they manufacture and you should be aware of that. This will put your wheels at risk because intruders can easily manipulate them. You have to choose one that features a unique key that only you can use, for that specific lock.
  • Customer Reviews: Reading customer reviews may be a great help if you want to know firsthand product experiences. There are many online websites, such as Amazon, where you can see user reviews. In addition, these reviews will help you decide on which wheel lock to purchase.
  • Price: Investing in an expensive and high-quality wheel lock is not such a bad thing. You should never compromise the safety of your vehicle by buying cheap and lower quality models. Just make sure that you relate each product’s features against their corresponding prices to make a better decision.
  • Quality: Lastly, it is worth mentioning that the product’s quality is mostly indicated by its price. High quality wheel locks are made of strong and durable materials so make sure you watch out for that.

Conclusion

We have provided you with valuable information regarding the best wheel locks. Now it’s up to you to evaluate carefully based on the reviews presented above. This may seem like a difficult task but if you’re armed with the right information, decision-making should be very easy. Just make sure to review the features, pros and cons carefully so you can relate their individual prices.

Are you also looking for other products to purchase for your vehicle? Click here to find out more about the products available in the market right now.