Home

Recent Posts

A Quick Guide To Choosing The Best Oil Filter Wrench


Best Oil Filter Wrench

To ensure that your vehicle’s oil is working properly, the filter needs to be renewed. If you don’t do this, your engine is likely to wear out sooner than expected. These filters can only be lifted hand-tight and sometimes, removing them would definitely be a challenge. This is the reason why you need to get the best oil filter wrench available in the market right now. Read this post and we hope you’ll come up with a decision.

Before you buy an oil filter wrench, take the time to review the essential factors that you might want to take into consideration in choosing the best oil filter wrench. We also have provided you the top 5 recommendations for the best ones, along with a detailed review of the features including each product’s pros and cons. If you were having a hard time coming up with a decision, we hope we will be of great help to you.

Product (Amazon Link)

Brand 

JDMON Universal Adjustable 3 Jaw Oil Filter Wrench

JDMON

Review

Neiko 03421A Two Way Auto-Adjustable Oil Filter Wrench

Neiko

Review

Motivx Tools Oil Filter Wrench

Motivx Tools

Review

Innovant Adjustable 3-Jaw Oil Filter Wrench

Innovant

Review

XtremepowerUS Two Way 3 Leg Oil Filter Wrench

XtremepowerUS

Review

Things To Consider Before Buying An Oil Filter Wrench

With the benefits an oil filter wrench can provide you, the amount of money you pay is definitely a great investment and is something you should not have second thoughts on. Below is a list of the essential factors you have to consider in choosing the best oil filter wrench.

1.Filter Size

The first thing you have to take into consideration is the size of your oil filter, as well as its location. If you have the right size, it would be very easy for you to determine the right fit and type you need. In addition, it would save you a lot of time if you check with your vehicle’s manufacturer first for you to determine the right size.

2.Features

AD

Individual product features are also very important as it sets one product apart from the other. This is also a determining factor when it comes to choosing the best oil filter wrench. As you will notice later on in this post, the products presented below have distinct properties that make them part of the top 5 recommendations. The best way to choose the best one is to review each feature carefully.

It will also be beneficial if you pick the one product that has features you would most benefit from. The oil filter wrench you choose may have one attribute that other models don’t. In the process of selection, this will greatly help you in narrowing down your choices and in turn will help you decide in choosing the best oil filter wrench.

3.Performance and quality

The oil filter wrench you should choose must possess outstanding performance and is crafted with high-quality materials. The last thing you want for your wrench is for it to break at the littlest pressure. If it breaks easily, it is a sure indication that the oil filter wrench is made of low-quality materials. With this, the wrench you should choose must be able to endure your strength, as well as the tightness of the oil filter you are removing.

4.Ease of use

You will save a lot of time and effort if the oil filter wrench is easy to use. What makes the job done is whether it has the capability of giving you a solid grip, as well as slippage prevention. In addition, the oil filter wrench you should choose must be able to remove even the tightest of the oil filters and will require you only little effort to remove it. If the wrench is a little complicated to use, you might end up damaging the oil filters.

5.Universal fit

Almost all models presented below can fit almost any vehicle oil filters. As we all know, oil filters come in different sizes in terms of diameter. This is the reason why it is very important that you know the size of your oil filter before you buy a wrench, as discussed above. In choosing the best oil filter wrench, pick one that is universal, which means that you will be able to use it on any oil filter size.

6.Price

The oil filter wrenches that will be discussed in the following section are priced differently from each other, some come cheap and some are not. When it comes to the price, you have to review each product’s key features, pros, and cons in order for you to decide if the price you pay is worth it. In addition, high priced products do not necessarily mean that they offer the best performance, so you have to watch out for that.

7.Reviews and Ratings

User reviews and ratings come from actual buyers of the product you are about to buy. They provide detailed first-hand experiences about the product and there is no better source of this information but its users. These users provide their honest opinions about the product that they bought and it will be able to give you enlightenment as to how the oil filter wrench will perform for you.


Top 5 Oil Filter Wrench Reviews

In this section, we have provided you the top 5 picks for the best oil filter wrench. Each product will have a detailed discussion regarding its mains features, pros, and cons that will help you narrow down your choices.

1. JDMON Universal Adjustable 3 Jaw Oil Filter Wrench

AD

The oil filter wrench manufactured by JDMON is one that includes extra parts in the kit. It has the ability to automatically adjust, as well as tighten as you apply torque to the oil filter. It is also capable of removing a wide range of oil filters from 2.4 to 3.8 inches. The JDMON oil filter wrench works well with 1/2, 1/4, and 3/8 inch square driver ratchet, which adds to its flexibility and versatility.

Another great feature of the JDMON oil filter wrench is that it is crafted from durable carbon steel material that makes it long lasting and strong. It also has rubber fittings on the ends of the arms that can help grip the sides of the filter. 

Pros:

  • Strong and long lasting
  • Engineered with durable carbon steel
  • Versatile and flexible
  • Resistant to rust
  • Easy to use and requires minimum effort
  • Adjustable

Cons:

  • Legs may be to thick
  • Gears may cause problems

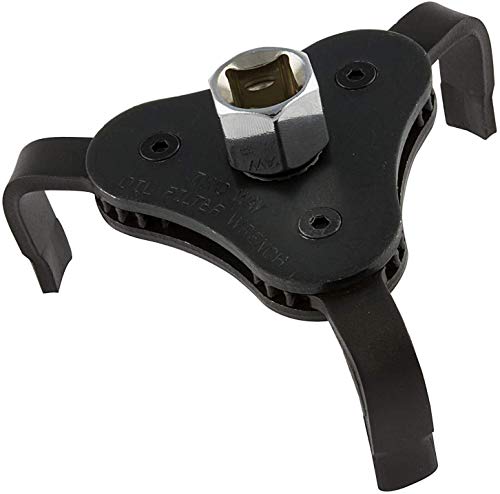
2. Neiko 03421A Two Way Auto-Adjustable Oil Filter Wrench

AD

The Neiko is another great product included in the list of the best oil filter wrench. It features an adjustable oil filter wrench that has a patented 3-jaw design. This feature makes it very easy for its user to remove oil filters. It also has a universal design and it works on almost all passenger and SUV oil filters. It should be noted that a wide range of oil filter sizes could be removed from 1 and 1/2-inch to 4-inch filters.

The Neiko oil filter wrench is very easy to use and it can be used with any 3/8-inch or 1/2-inch drive ratchet or breaker bar. It can also be used with any 13/16-inch wrench. It has a low profile design, as it can fit in tightly into low clearance areas. Another great thing about the Neiko oil filter wrench is that a 3/8th to 1/2-inch conversion socket is already included in the package.

For its specifications, product dimensions are 7.2 x 4.6 x 2.7 inches and it weighs 13.8 ounces.

Pros:

  • Features a patented 3-jaw design
  • Suitable for use on a wide range of passenger and SUV filters
  • Adjustable
  • Adapter is already included in the package
  • Easy to use
  • Has a low profile design

Cons:

  • Made of low-quality materials
  • Might not be able to fully grip the oil filter

3. Motivx Tools Oil Filter Wrench

AD

The Motivx oil filter wrench will be able to remove 2.5-inch to 3.25-inch diameter oil filters. It cannot be used on plastic housings and as you already know, an oil filter wrench is not designed to install oil filters. This wrench features a .050-inch spring and the tooth style design makes it less slippery and allows you a better grip. It is also crafted with chromoly steel that is attached to a solid steel top plate.

Another great feature of the Motivx oil filter wrench is that it has the ability to remove oil filters from the end instead of the sides. With the use of an extension, your hands need not be anywhere the oil filter. In addition, it can be used on a wide range of trucks, cars, motorcycles, ATVs, and a lot more. For its specifications, product dimensions are 2.9 x 2.5 x 2 inches and it weighs 13.3 ounces.

Pros:

  • Universal fit
  • Features high-quality design
  • Engineered with sturdy material
  • Easy to use
  • A 1-year warranty backed by the manufacturer
  • Allows solid grip and not flimsy

Cons:

  • Might break easily
  • Not useful for tightening of oil filters

4. Innovant Adjustable 3-Jaw Oil Filter Wrench

AD

The Innovant oil filter wrench features an easy off ratchet 3-jaw design that will be able to tighten up the sides of the oil filter. It also gives the convenience of being able to have a solid grip when removing even the toughest of oil filters. It is also multi-functional as it can be used for motorcycles, cars, and even heavy-duty trucks and tractor filters. With this wrench, you will be able to change the oil as if you are a professional.

Another great feature of the Innovant oil filter wrench is that the package already includes a 1/2-inch to 3/8-inch socket adapter and 5 pairs of black nitrile rubber gloves. No doubt this is one of the best oil filter wrenches, as it a great choice for spin-on type filter removal. In addition, it features cylindrical canisters that enable a solid grip even to the oiliest of the filters.

For its specifications, package dimensions are 3.7 x 2.8 x 2.1 inches and it weighs 13.6 ounces.

Pros:

  • Reversible
  • Universal fit
  • Package already includes an adapter and 5 pairs of gloves
  • Manufacturer offers a 60-day money back guarantee
  • Easy to use
  • Multifunctional

Cons:

  • Might puncture the oil filter while you are removing it
  • A little flimsy according to some reviews

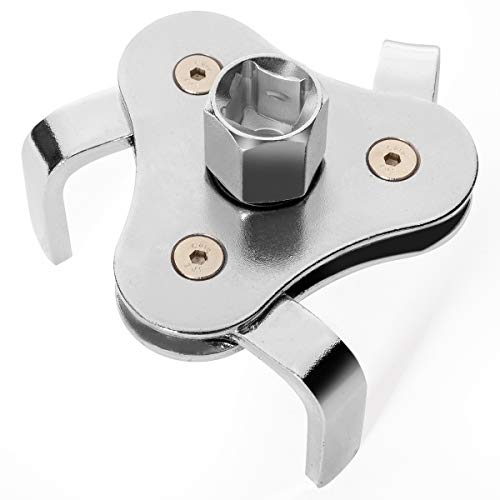
5. XtremepowerUS Two Way 3 Leg Oil Filter Wrench

AD

The XtremepowerUS oil filter wrench gives its user the ability to fit oil filters up to 2 and 1/2-inch to 4-inch diameter. It features a 3-jaw design that can be utilized for a sturdy clench onto the oil filters, thus prevents slippage. To add, it has a comfort grip that allows you to access the oil filters across different types of engines. Also, it can fit most of standard oil filters and it makes it easy to loosen and remove filters.

Another great feature of the XtremepowerUS oil filter wrench is that it can also tighten oil filters, instead of just loosening and removing them. It is also proven that even the toughest and tightest filters can be removed by this oil filter wrench. These features of the XtremepowerUS oil filter wrench makes oil changes a lot quicker and will not cause damages to your oil filters.

It should be noted that unlike the other models presented above, the XtremepowerUS oil filter wrench can be used to install new oil filters. For its specifications, package dimensions are 6.8 x 4.4 x 3.1 inches and it weighs 12 ounces.

Pros:

  • Can be used to install new filters
  • Each arm has gears
  • Can fit filters up to 4-inch diameter
  • Will not damage existing oil filter
  • Features 3-jaw design
  • Allows solid grip and prevents slippage

Cons:

  • Might be too complicated to use for some
  • A little floppy

Conclusion

Now that we have discussed everything you have to know about oil filter wrenches, it is now up to you to choose which one to buy. Based on the reviews, we do recommend the XtremepowerUS Oil Filter Wrench for the best oil filter wrench. There is no doubt that this product exceeds expectations. If you review carefully, you will be able to appreciate that it has a lot more unique benefits than others.

Do you need more products for your vehicle? Click here to see some of the options that are available in the market right now.

How To Pick Out The Best Seats For Your Car?


How To Pick Out The Best Seats For Your Car

The car is a luxurious vehicle used for transportation. For comfortable traveling to your destination, the most important thing is that your seats need to be very cozy. If your seats are not up to the mark, then your journey will pass in adjusting yourself only. A car seat is a seat used in automobiles.

These seats are inexpensive, and the material that is commonly used to make them is polyester. Best car seats prove to be the one on which you can enjoy your journey to the fullest without getting pain in your body at any point in time.

Choosing car seats is not a piece of cake. In this competitive market with numerous of options available, you will surely get confused as to which car seat you should prefer. Well!

I must tell you that you should identify your needs or requirements first before selecting a seat for your car. Here is a rundown of some points that you need to consider:


1. Time Duration for Usage of the Car

Measure the average amount of time that you will spend in your car daily traveling. Time duration will be directly proportional to the comfortable car seat. The longer the time will be, the more comfortable seat you should choose for your car.

To avoid problems while sitting in your dream car, you should try to pick up a comfortable car seat. In this high-traffic world, you cannot afford to adjust yourself at regular intervals as it may prove to be dangerous sometimes.

2. Purpose for Usage

Purpose for Usage

Photo Credit: http://smartbabyhq.com/

The next question that you should ask yourself is mainly for what purpose will your car be in use? Is it just for going on your job, for going on long journeys, on hill stations, for racing purposes, etc? The purpose of the car will help you greatly in choosing the best car seat.

For small walking in your car, you may afford to get a comparatively less soft car seat as small journeys can be easily done and you need not spend much on this purpose. But, if you have to go on for vacations to hill stations, rocky streets, or out of town now and then, you should be very careful to select the coziest seats for yourself as well as for your family.

Also, if you are making your car run on a racing track, beware of it!! Let yourself sit on the seat which is most suited for you as while racing, you would not like to get uneasy at all. While racing, you will be at your maximum speed, and there, you will not at all get a chance to adjust yourself, even for once. So, it will be better to pick up the right one as “prevention is better than cure.”

3. Small Baby

If you are traveling and your baby also goes with you, then you should go for a baby comforter seat. Options for this kind of seat are very much available, and you can choose any one of them accordingly. These seats are made to meet the needs and luxuries of the baby.

If you have a newborn baby, you should not ignore to keep this factor in mind while recruiting the seats for your car. At once, you can endure the pain of your chair but your baby cannot.

4. Duration of the Seats

The longer the duration, the more benefit you will get. Always pick up the one that you find will go on for a longer duration. Do investigate in advance as to which seats are made up of the material that does not get ruined in a short span of time to avoid the situation of changing your seats at very early stages.

This will prove to be more expensive for you. So, it’s better to investigate it online or from your friends as well as your relatives before buying it.

Duration of the Seats

Photo Credit: https://www.youtube.com/watch?v=ugWuTk-A5Fw

5. Spill Proof

It’s very common that your seats may get dirty for some reason or another. A lot of children may ride in your car, and it’s very natural that something or the other gets to stick on your seat. Make sure that the seat is spillproof to a large extent.

If not spill-proof, then at least cleaning should be easier to do. Also, to keep your car dirt-free, you should select the best floor mats that can, later on, be cleaned with the help of a vacuum cleaner easily and will evade getting spots on the car.

6. Changing Strategy

This factor relates to your plan of yours. You should analyze what your plans are. I mean to say, if you are thinking of changing the purchased seats, then you need not spend a lot of money on this. A medium comfortable quality can do your work easily.

But if you are looking for a long-term solution and no plans are there to get it changed shortly, then you can make a sensible investment into it. Try to make yourself clear to get the best-suited quality seats at minimum cost.

7. Budget

A very important factor that should be decided beforehand is the budget. You should be very specific in deciding how much you should go for in buying seats. Although a little bit may vary because of design and quality, everything comes in every range.

Budget

Photo Credit: http://northernallstars.org/

It’s all up to you as to how much you would like to spend on a particular thing. But be cautious: don’t let anyone fool you by giving you a cheaper quality seat. You should avoid getting one just for the sole reason of money. After proper inspection of the quality, you should buy the one that fits your budget.

8. Cushion Seats

Cushion seats always prove to be very comfortable. You should buy seats that have the cushion facility available at the back. Sometimes, it becomes very painful to sit in one place while driving or sitting for a longer period. Cushions will help you a lot in making your journey a pleasant and convenient one. Your body will be fully relaxed all the time with the presence of the best car seat cushion.

Superb designs, folding quality, the case for putting your bottle, and a fitted mas-sager are some extra features that you can look for in your car seat. Choose wisely, and enjoy your ride!

Best RV Awning: Choosing One That Will Withstand the Test of Time


Best RV Awning

Going on a road trip and camping in your RV is sure to be a memorable experience, especially when you do it with your family and friends. Nonetheless, at some point, this can also be frustrating, especially when you realize that you came unprepared. From a comfortable mattress for camping to a functional RV toilet, see to it that you will have the essentials.

Among others, one that should not be overlooked, although often ignored by many people, is the best RV awning. It will provide you with shade from the heat of the sun or from the rain. If you are unsure of which one will make the best choice, keep on reading the rest of this post, and we are here to help you out.

Product (Amazon Links)Brand  

Carefree 211600A Dark Gray Trim

Carefree

Review

SunWave Awning Fabric

SunWave

Review
EZ Travel Collection Black RV Awning

EZ Travel Collection 

Review

What Factors Should You Consider Before Selecting the Best RV Awning?

With the abundance of the choices that are available for the best RV awning, be sure to consider the factors that are mentioned below to make it easier for you to find the right product:

  • Size: Consider the amount of space that you would like to be covered. Be sure to check the specifications of your RV to know the right dimensions of the awning to purchase.
  • Material: Choose a material that will be indicative of durability, providing you with the assurance that it will take a long time before there is a need for the awning to be replaced.
  • Ease of Use: The installation of the awning must be effortless. It should be one thing that you can easily accomplish on your own. In the case of some manufacturers, they provide online videos for a comprehensive tutorial on how to successfully set up the awning.
  • Care and Maintenance: Look for an awning that does not require too much effort to keep in its tip-top condition even after a few years of use.
  • Style: Take time as well to check the aesthetics of the awning. From the color to the overall look, it will be good to choose one that will never be an eyesore.
  • Warranty: This is important as it will provide you with peace of mind. Longer warranty coverage is better since it will allow you to enjoy free repair from the manufacturer if the awning gets defective.

Quick Tips in Using an RV Awning

Here are some important points you must keep in mind:

  • Use only an awning that matches the specifications of your RV. If it is too small, it won’t provide adequate protection that you need.
  • Know the material that is used for the awning. This will make it easy for you to determine the best approach for its cleaning and maintenance. Use only cleaners that are recommended by the manufacturer. If it is made from acrylic, scrubbing should never be done.
  • When you are not using the RV awning, make sure that you stow it properly. Keep it secured.
  • Do not leave an RV awning unattended. When it is time to go to sleep, make sure to roll off the awning. It will not be able to withstand heavy water if it rains. The same thing is true in the case of a heavy wind.
  • Keep the fabric dry, especially when it is time to keep the awning. This will prevent the presence of mold and mildew.

Top Picks for the Best RV Awning

To make things a lot easier, here are three of the products that I personally believe can provide the best bang for the buck and can outdo most of its competitors.

1. Carefree 211600A Dark Gray Trim

AD

If you need additional room for your RV, this is sure to be a great option. It is perfect even for beginners since its installation will not require too much time, as well as its assembly. You do not need to drill any hole to complete the setup. The material that is used is tough and lightweight, making it excellent in terms of durability and portability.

Major Features:

  • Comes with a convenient storage bag
  • Has multi-position panels to prevent the rain from getting inside
  • Fits 12-volt awnings from Carefree
  • Has stakes and skirting for stability
  • Tight seal to prevent insects from getting in

Pros:

  • It comes with a spacious covered area
  • Offers optimal protection from the rain and the sun
  • Can add space for your pets or gears
  • Made from durable materials
  • Offers excellent ventilation because of the screen

Cons:

  • Door quality could have been better

2. SunWave Awning Fabric

AD

Among other things, the durability of the fabric that is used is one of its most impressive features. The vinyl that comes with this product is lightweight, yet it is long-lasting, providing you with the guarantee that it won’t easily give in to external factors. It is also a good thing that the fabric comes with color on both sides.

Major Features:

  • The fabric measures 17’ 2-3”, which is perfect for an 18’ awning
  • Manufacturer offers 14-day return policy for buyers who are unsatisfied
  • Material is covered with three years of warranty, enough to provide you with peace of mind

Pros:

  • Installation can be easily accomplished
  • Fabric has good color
  • Offers great fit
  • Has videos for assembly instructions

Cons:

  • Seam quality looks a bit inferior
  • No side protection

3. EZ Travel Collection Black RV Awning

AD

From the materials used to the overall construction of this RV awning, you can be confident that this will be hard to rival when it comes to its quality. It is a cost-effective solution to add more space outside of your RV. Even through the years, the awning will remain functional as it is made from thick fabric that is sure to last long.

Major Features:

  • Comes with spiral and straight stakes
  • Made from 100% woven polyester
  • Has superior grommets for long-lasting functionality

Pros:

  • Made from excellent materials
  • Installation can be accomplished in a snap
  • Provides adequate protection from the sun
  • Has the perfect fit

Cons:

  • Would have been better with more hangers
  • Does not provide privacy

Different Types of RV Awning

While there are many ways to differentiate the awnings that are available in the market, one of the best would be through the materials that are used. In this case, below are two of the most common choices that you will have:

1. Acrylic Awning

  • This fabric allows the circulation of air
  • It is made of woven cloth that will be able to repel water on the surface
  • Although they are not waterproof, they can get dry quickly

2. Vinyl Awning

  • Exposure to high levels of humidity and heat can make it prone to the presence of mold and mildew
  • It easily attracts dirt and dust
  • It is mildew-resistant, but it is not mildew-proof

Another good way to classify RV awnings would be on the basis of the mechanism on how they work. With this, the following are the options that you will have:

1. Fixed Awnings

  • As the name implies, the awning is in a permanent position.
  • They are installed over the RV’s doors and windows.
  • It can easily fall off when driving, and hence, not excellent if you are concerned about safety.
  • This does not offer flexibility since you cannot change the position of the awning based on what is most convenient for the situation.

2. Slide Out Awnings

  • This can be a perfect choice for those who are looking for a budget-friendly alternative
  • When you need the awning, all that you have to do is to roll it out manually.
  • Most of these awnings are made using canvas
  • Some may install mechanical means to make it easier to pull out the awning when needed.

3. Automatic Awnings

  • This is the most convenient and user-friendly type of awning that is available.
  • With a touch of a single button, the awning will open. Touch the button again and the awning will automatically close.
  • Because this is the most innovative awning that is available in the market, expect that it is going to be expensive.
  • The installation can also be a bit tricky since there are electrical systems that you have to be dealing with.

4. Sheltered Awnings

  • They are also often called patio awnings, which will allow you to create a room outside of your RV.
  • This type of awning does not only come with a roof, but also walls on the side and even a door for entry and exit.
  • You can use the additional space as a room for sleeping or for keeping your camping gears, depending on how big the space is.
  • Because there are side walls, it can provide excellent protection from the splashes when it is raining outside.
  • Most have windows on the walls to encourage ventilation.

Conclusion

The best RV awning is an essential to make sure that you will be able to maximize the use of available space in the campsite. It provides you with a covered area and even a screened room. This is a great way to make camping less frustrating, especially when it is raining. It can offer a wide array of benefits, but only if you choose the right product.

Are you looking for other products that will be useful the next time you go RV camping? Click here and we will help you narrow down the choices and end up making a decision you won’t regret.

Major Components Of An Electrical System


Major Components Of An Electrical System

When you take a journey on foot, your first step is most important. And this first step of your car journey is provided by its electrical system. If you want a trouble-free start-up and an uninterrupted journey, it is pertinent that you know the basics of your automotive electrical system. The battery works as the ‘heart’ of your car; the other two major components are the starter and alternator.


The Basics

The battery gives the impetus to the starter, and the alternator provides the energy to the starter. Your battery provides current to the ignition and the fuel system, which in turn creates the combustion required for your engine to function.

After getting a small amount from the battery, the starter motor rotates the flywheel, makes the crankshaft turn, and starts the movement of your engine’s pistons. During the running of your engine, the alternator keeps the battery charged.

Besides the basic functionality of the electrical component, you should be aware of the other major components, which are as follows:

car components of electrical system

Photo Credit: https://www.grc.nasa.gov/www/k-12/airplane/elecsys.html

1. Armature

An armature is a rotating device housed in a dynamo. It is made by winding copper wires around a core of iron. It vibrates when the electromotive force is produced.

2. Battery

The basic components of a battery are primary and secondary cells. They convert the chemical energy into mechanical energy. Your car uses a rechargeable battery which initiates with a voltage of 1.5 volts and generates from 500 to 1000 amps. Other components of the battery include boxes, terminals, cable, trays, plates, control systems, ground straps and voltage regulators.

3. Ignition System

The ignition system of your car burns a mixture of fuel and air inside the engine. The system produces enough voltage to create a spark to burn this mixture. Moreover, it controls the sparking time. From a source of 12 volts, the system produces a voltage that may vary from 20, 000 to 50,000 volts. The major ancillary components used in the system are magneto ignition distributor, coil wires, timing controllers, switches, coils, and boxes.

4. Starting System

It initiates the engine of your car. The first thing you do to start your car is to put your ignition key into the ignition switch. By doing this, you are making the current pass through the battery cables to the motor of the starter. Then your engine starts and makes the piston move down, thereby creating suction to draw air and making a mixture of fuel and air. This fuel mixture burns, and the engine starts.

5. Charging System

It controls and regulates the charge in your car’s battery and generates voltage varying from 13.5 to 14.4 volts while the engine is working. This current enables the operation of lights, music systems, engine electrical systems, and components. Its chief components include an alternator, generator, alternator fans, and alternator bearing.

6. Computer Chips

They are used for storing computer programs related to the management of various functions of your car engine. You can get feedback on the utilization of fuel if you use an Oxygen sensor, which is a kind of computer chip. Other kinds of chips are sensor rings and Engine Management Systems (EMS), performance monitors, speedometer calibrators, power train control modules, shift improvers, and performance chips.

7. The Wiring System

This includes various electrical fuses and blocks, flexible wires, and connectors. These are used for interconnecting various sources of electrical devices. Besides bearing the load of mechanical energy, the wiring system bears the responsibility of transmitting electrical energy and communication signals.

The Wiring System

Photo Credit: http://www.alternative-energy-news.info/technology/transportation/electric-cars/

With the advancement of automotive technology, the electrical system of cars is becoming more and more complicated. If you have a Honda Civic Car, you should be aware of the problems associated with Honda Civic electrical system and how to deal with them.

  • Honda Battery: It self-starts your car and ensures functionalities of electrical equipment like lights, horns, and indicators; Honda Civic battery is 12 volts and has six cells stacked with lead plates. Sometimes, by reacting with the electrolytes, the lead plates may produce harmful gases and may even cause an explosion. There are occasions when you find the battery terminals dead. To set it right, you need to clean the corrosion off or tighten the terminals. You can then check its voltage by a voltmeter, and if it is between 10 to 12 volts, your battery is good.
  • Honda Alternator: It produces Alternating Current (AC) and maintains the charge of the storage battery. It is belt-driven from the engine. It also maintains the voltage required by the system by using the voltage regulators in your car. To identify any problem with the alternator, you have to install an operational warning light and keep the ignition switch “on.”

If your engine does not start, check this warning lightly. If you find the alternator not starting, you should eject the plug from the alternator and ground the terminating wire.

There are occasions when you may find your Honda Civic turning idle while heating to high temperatures for long periods of time. The reason may be that the electrical resistance of the alternators has reduced the charging capacity of the alternator.

8. Fusible Link

It is a higher-capacity connector and helps protect the directly wired accessories. If you find it failing gradually or suddenly, you need to check the odd behavior of accessories that have been plugged into the power socket. You may also notice a pause before turning on the starter. If the fusible link is triggered, the electrical system will be shown as dead. You should then check all the connections before installing a new one.

9. Faulty Switch

If you find the switch failing, test it in all possible positions to confirm if there is any loose connection. You should also check the possibility of any shorts.

You can’t think of traveling by car without entertainment, and the audio system of your car is the chief source. You should, therefore, have a good understanding of the multiple components of car audio system. The major components of a car audio systems are i) the Radio or the Head Unit which generates the audio signal and controls the entire system, ii) Amplifier increases the strength of the audio signals and iii) Speakers produce the sound that you listen to.

Faulty Switch

Photo Credit: https://in.pinterest.com/pin/438397344950570987/

10. Head Unit

A car audio system is comprised of electronic components such as a radio tuner, preamp, CD player. These are housed in a head unit. It controls the overall volume of the system and different audio sources. Because of the latest development in technology, you can receive satellite radio from the subscription services. Your head unit can control media players like iPod and can navigate the content of a USB flash drive, connected to the stereo system.

11. Amplifier

Amplification is done in two stages that are handled by a preamp and a power amplifier. The former collects data from a radio, CD player or other audio sources and boosts the audio signal for feeding to the power amplifier which boosts it further.

12. Speakers

Speakers receive the amplified electrical signals and convert them into mechanical energy which in turn creates vibration in the air by moving the cone of the speaker, back and forth.

Keep reading our posts for more updates on automotive tips and tricks and useful techniques!

Keep Your Camping Van Tidy And Clean: Use The Best RV Vacuum Cleaner


Best RV Vacuum Cleaner

“A clean place is a happy place.”

You can’t keep your house or other places clean unless you clean it daily. Now and then, the place gets polluted or dirty. Mostly, things get cleaned up by wiping with a wet cloth or even a moist one. But there are some places where you should not do the cleaning with wet things.

There comes a need for an appliance that cleans the messed up place by sucking the dirt inside it without the use of water. Loose dirt is very difficult to remove, and sometimes it is hidden, which makes it difficult to scan with the naked eye.

Product (Amazon Links)

Brand


Stanley Black and Decker FHV1200W Cordless Mini Canister Vac

Black & Decker

Review

Dyson DC44 Animal Digital Slim MK2

Dyson

Review

Eureka Mighty Mite Canister Vacuum 3670H-Corded

Eureka

Review

Carrand 94005AS Auto Spa Bag less Auto – Vac – Hand – Held Vacuum

Carrand

Review

Shark Rocket Corded Hand Vac (HV292)

SharkNinja 

Review

Recreational vehicles require a differently designed machine that can clean them completely. The appliance needs to be small and streamlined and should be adjustable in different areas.

As an owner of a recreational vehicle, you need to keep yourself updated about the best garage Vacuum Cleaner that needs to be used to keep your vehicle clean and tidy. This responsibility is even more when you are driving around the country as you would not like to get into an RV full of dirt and dust.

I know that you all must be going through a question in your mind – which vacuum cleaner is the best RV vacuum cleaner? From so many options available, you should choose the best one. Here is a lineup of the Best RV Vacuum Cleaner that can help you a lot to choose the most suitable one for you-


What is an RV Vacuum? How does it work?

RV vacuum Cleaner is nothing but an electronic device to clean up your dirty area through the process of sucking. Earlier, people used to have broom or cloth to clean up an area, but nowadays, with the upgrade in the field of technology, a new and hygienic method is available to give your place a neat and tidy look.

Vacuum Cleaners can also be used for cleaning up your recreational vehicles and are known as RV Vacuum Cleaners. As an owner of it, it is your responsibility to clean it after every usage.

Now, for some of you, it may be a bit unclear as to how a vacuum cleaner works. A vacuum cleaner consists of an intake port, exhaust port, electric motor, fan, and porous bag.

As soon as you plug in the vacuum cleaner, the electric current operates the motor. Due to the connectivity of motor with a fan, which inherits angled blades, the fan blades allow the air to flow towards the exhaust port.

The density of particles decreases behind the fan while it increases in front of it. Due to this opposite pressure, suction is created inside the RV Vacuum Cleaner. As a result, intake allows the air to push into the cleaner, and due to friction, all the debris gets into it along with the air, thereby collecting it into a porous bag.


Best 5 RV Vacuum Cleaner: Product Reviews

1. Stanley Black and Decker FHV1200W Cordless Mini Canister Vac

AD

Cordless Mini Canister Vac is available with an extensible hose and provides a combination of convenient hand vacuum and elongated size of the same. This model has set up a great example of innovation and design of power tools. The merger of Black and Decor helps the user to get their job done efficiently and reliably.

There is no need to lug and plug to clean up your house or car, which makes this product a great choice. Stanley Black and Decor comes with different attachments, which comfort the user in deep cleaning by losing up the debris from the surface. With superior, long-lasting suction power and innovative design, FHV1200W provides you with the ultimate vacuum experience.

Major Features

  • It is equipped with a charger, storage caddy, and dishwasher-safe filters.
  • It has a high-performance motor, which helps provide strong suction.
  • Incorporates “Easy empty” dirt that prevents your hand from touching the dirt.
  • It is energy star approved product.
  • Cordless quality avoids plugging in for every use.
  • Consisting of versatile accessories helps to clean dirt even at small places.
  • Versatile cleaning attachments for usage on a variety of surfaces.

Pros:

  • Replacement of filter is available.
  • Perfect for big or small debris.
  • Compact and portable.
  • Dishwasher safe filter.
  • Cordless Canister vacuum.

Cons:

  • Long charge time is required.
  • Short run time.

2. Dyson DC44 Animal Digital Slim MK2

AD

With a Cordless machine, this Digital slim is suitable for every type of floor being carpet, ceramic vinyl, or wood. The thing that makes it distinctive from other models is that it has two types of brushes. One is known as anti-static carbon fiber filaments that remove the fine-dust from hard floor and the other brush is called as stiff nylon bristles that remove the dirt from carpets.

Its bristles can be driven deeper into carpets with more force for deep cleaning. High run time with constant high suction and easy to use even in the most awkward places makes this model buyer’s first choice. For the more difficult task, there is a separate function called boost mode, which creates a higher suction power for eight minutes.

Major Features

  • Two brushes available- one for cleaning hard floors and another one for removing debris from carpets.
  • Three times faster than conventional motors.
  • Bristles have the ability to drive deeper with more force.
  • It doesn’t lose suction because of Root Cyclone Technology.
  • Long reach hand is made up of light weighted aluminum.

Pros:

  • A two-year warranty available.
  • Increased run time.
  • Boost mode of eight minutes present.
  • Cordless vacuum cleaner.
  • Superb cleaning performance.
  • Long battery life.

Cons:

  • Charge dock may feels cheaply made.

3. Eureka Mighty Mite Canister Vacuum 3670H-Corded

AD

With quick and efficient cleaning ability, this light weighted Eureka Mighty Mite Canister Vacuum completely blows away the dust and dirt from garages and outdoor spaces. Due to its light weight, it is easy to carry around the whole house. If you want a multi purpose cleaner, this model works best for you.

Extremely good in cleaning floors, this corded vacuum cleaner works efficiently and effortlessly on stairs, tiles, and hardwood floors. For easy usage, this appliance comes with finger tips control, and also requires very little space for storage. Triple filtration mechanism allows the enjoyer of this model to make the air and floor free from all types of pollutants.

Major Features

  • Extra-long reach to remove debris.
  • Convenient cord storage.
  • Powerful 12 amp motor for deep cleaning.
  • Easy empty dust bag.

Pros:

  • Superb performance.
  • The low sound when it is turned on.
  • Light weighted and portable.
  • It is capable of Multi surface cleaning.

Cons:

  • It does not work great on carpets.
  • Non-retractable cord.
  • Extra costs need to be incurred to buy replacement bags.

4. Carrand 94005AS Auto Spa Bagless Auto – Vac – Hand-Held Vacuum

AD

Pretty compact in nature, this Auto Spa Bag less Auto Vac Hand is extremely light weighted and simple to use. It consists of a powerful suction quality and worth for a second look due to its power and versatility of its motor and attachments. The things that make it distinctive are its size and shape.

This device can be helpful for those looking for a handheld vacuum. This vacuum seems to be made fairly well. It is easy to use and helpful with on board storage makes this product to be easily transported. This vacuum cleaner reaches comfortably in tight corners and completely removes dust and dirt from carpets and seats easily.

Major Features

  • It has on board tool storage.
  • 12-foot power cord.
  • Three specialty tool vacuum.
  • A 550-watt motor is present, which makes it powerful.
  • Blower availability.
  • Different attachments for removing debris from vents, seats, and dashes.

Pros:

  • Reusable collection basket.
  • Easy storage is present for all the attachments.
  • It has a flexible hose.
  • No damaging of the surface takes place.
  • It is very lightweight.
  • Consistent and powerful suction.

Cons:

  • Too small in size.
  • It is very fragile.
  • Not portable.
  • You need to have a power outlet to make it useful.
  • You need to be close enough to the plug, which can prove to be dangerous.

5. Shark Rocket Corded Hand Vac (HV292)

AD

With a good, flexible hose attachment, this shark rocket is perfect for removing dirt and dust from the couch. It doesn’t lose suction until and unless its dirt cup is full. Its dirt box is very convenient to be vacated and also does not create a mountain of dust while doing this.

It provides a powerful cleaning with the help of a Motorized Brush. With this model, you need to worry about changing batteries, and it also comes up with washable and reusable filters. Without any interruption, you will be able to clean the whole stuff in one go. Specially designed handled at the end of vacuum, makes this model perfect for cleaning occasional spot cleaning.

Major Features

  • Does not allow debris to go out until full.
  • Washable and reusable filter.
  • Flexible hose.
  • Motorized brush.
  • For cleaning fine grooves, there are Micro Vacuum attachments.

Pros:

  • Rocket power.
  • Easy empty dust bag.
  • Great performance.
  • Light weighted.
  • Large dust bag.
  • Work great for pet hair.

Cons:

  • The effectiveness of filters goes away after every use.
  • The cord can be a nuisance sometimes.
  • Improvement can be made to its suction.

What Factors should you consider when buying an RV Vacuum for yourself?

You should be aware as to what factors you should consider while buying a Vacuum Cleaner:

AD

  • Lightweight: You should prefer a Vacuum Cleaner that is lightly weighted as you need to carry it over the places especially for cleaning the corners.
  • Ease of Handling: Vacuum Cleaner proves to be great if it is easy to handle. You should always ask for a demo to see whether it works properly without creating any problems in handling it before actually purchasing it.
  • A number of motors: The larger the number of motors, the cleaner the more powerful it will be. Always ask for a cleaner that consists of more than one motor.
  • Flexibility: For deep cleaning of your RV Vacuum Cleaner, the flexibility of your vacuum cleaner is a must. Flexibility allows the cleaner to get into any place without creating a nuisance and does a deep cleaning.
  • Noise: While working, most of the vacuum cleaners create a lot of noise, which in turn causes noise pollution. Always choose a vacuum cleaner that creates minimal noise when it is used.
  • Budget-Friendly: Last but not least, the most important factor is Budget, which should be kept in mind while purchasing a vacuum cleaner. Always choose the vacuum cleaner that has the maximum features within your budget.

Vacuum Cleaner has become a must appliance for your RV tool box. Picking up the right vacuum cleaner for your recreational vehicles is a little different one than choosing casual ones. Making a long story short, best vacuum cleaners are light weighted, slim and portable.

USP of a vacuum cleaner is its motor, so always pick up the vacuum cleaner having more than one motor. You should invest your time to know the pros and cons of each unit. Don’t get fooled up by purchasing the cheap quality product just because of the low price. You should be clear in your mind about your requirements and have the best one for your RV. So, when you are going to get one for yourself?

How To Repair A Windshield That Is Cracked?


How To Repair A Windshield That Is Cracked

Is your windshield cracked, and do you want to repair it? If yes, then you have come to the right place. You can repair a cracked windshield by yourself by following the given tips in this guide. Performing your windshield crack repairs can be so much easier if you do it properly. It can save you money and time as well.

Sometimes, a small chip or crack on the windshield can be the cause of more windshield damage. So you need to repair it soon to avoid any further damage. Windshield cracks are not among the car problems to avoid. Small windshield cracks can turn into bigger cracks if it is not fixed in time.

There are some cracks that cannot be repaired, and you have to hire professionals:

  • If there is a crack on any interior part of the windshield
  • Cracks through all windshield’s layers
  • Crack that impairs the view of the driver
  • Complex cracks
  • Big spider cracks
  • Long cracks (over 18”)
  • Contaminated Cracks
  • Cracks on the edge of the windshield

You can repair Small windshield cracks. Here in this guide, we have mentioned some tips to repair cracked windshields with Windshield crack repair kits.


Here are some steps that you need to follow:

repair crack windshield

Photo Credit: https://www.youtube.com/watch?v=0mHCsCRnQsE

First of all, you need to take a close look at a crack. You can examine it carefully with a magnifying glass. You need to check if your windshield can be repaired or it needs to be replaced entirely. If it can be repaired, you can follow the below-given instructions:

  • Buy a bridge-style Windshield Repair Kit
  • Plan to use a UV lamp or the sunshine
  • Tap out cracked glass
  • Clean windshield and Let it Dry
  • Repair the Damage

1. Buy a Windshield Repair Kit

First of all, you need to buy a Windshield Repair Kit from the departmental store or auto part store. You can also buy it online. You should look for a DIY repair kit. You should look for a kit with a bridge applicator. It is used to fasten to the screen of glass.

2. You Should Use The Sunshine or UV Lamps

When you fill the crack, it will need UV light to finish the whole crack repairing process. You can do it on a sunny day or use UV lamps. You should start repairing on a sunny day and avoid wintery, rainy or tough day.

3. Use Gloves to tap out cracked glass

You should wear gloves to tap out the cracked glass. You can use any thin metal to tap out glass shards.

4. Clean windshield and Let it Dry

Your windshield should be completely clean and dry. You should clean the damaged area. You can take out tiny pieces of glass or dust particles by using a razor blade. You can also use glass cleaner to clean the windshield completely.

5. Repair the Cracked Windshield

repair crack windshield

Photo Credit: https://autoglass-chattanooga.com/athens-tn/

  • Set up the applicator: You need to understand how the applicator works and how to use it. You should identify the barrel or syringe to load resin and an O-ring or cap for closing it. Now, you need to find a bolt that will be used to regulate or control pressure. Bolt will be helpful while moving the applicator away on into the windshield. Now, you need to check the directions for how to use the applicator.
  • Create a circular or semi-circular hole: It is only essential if you are going to fix large windscreen damage such as a long crack, but you need not create any hole in case of a small
  • Load resin in applicator: There are two types of resin come in repair kits including one to fill chips and another to fill cracks.
  • Set the applicator: applicator should be set properly to repair a crack. Suction cup should be covered with lubricant. It helps glide it across the screen. You can use Vaseline or Petroleum Jelly if repair kit does not come with any lubricant.
  • Resin Application: You can apply the resin to windshield crack. You should move applicator along 5 cm or two/three inches of crack. You should read the instructions of DIY kit and apply resin as per instructions. It uses vacuum mechanism and pushes the resin into the cracked screen. Sometimes resin does not reach to the deep into the crack, so you need to flex it gently using your thumb.

You should drip resin into cracked portion of your windshield slowly means you can drip one drop every three seconds. Now, wait and examine the crack carefully from various angles. You need to wait for five or ten minutes to find out if there any air bubble left in damaged or cracked area.

If you find any bubble, you should apply pressure inside windshield so that bubble can be removed. You press the windshield carefully and very slowly to avoid any further damage. Now you need to apply more resin and repeat it until the crack is filled completely. Make sure it contains no air bubbles.

Repair the Cracked Windshield

Photo Credit: https://www.youtube.com/watch?v=3UxQpTeQBQg

After doing it, you need to reapply more resin into the cracked area while placing the curing strip on top of the crack. Don’t apply pressure to strip and use them to cover the crack completely. A razor blade can be used to remove excess resin.

  • Seal the Crack: You can move the applicator over the crack. Once the resin is entered in the crack, you can seal it slowly.
  • Put the Car in Sun Light: Once you are did with resin, you can remove excess resin and let the car dry in sunlight. It may take 15-20 minutes. You can remove the strips once the resin is dry. Excess resin scraping can be removed using a blade.

Now you can carefully examine the windshield. You can repeat the same process of resin application if any crack is remaining. This is the simple step guide that helps you fill small cracks in your windshield. You better read the instructions to follow the process of filling cracks.

Is the repair perfect? If you have any small cracks on your windshield, you can use this information to repair it. This is all about a perfect repair of your cracked windshield. It is very expensive to get your windshield replaced or repaired with AutoGlass Company, so you can use a repair kit to save your money and time. You can use the above-given instructions to repair the crack. Hope you find this guide useful and informative. Do comment, if you have any query.