Home

Recent Posts

How to Jumpstart a Car with a Jump Starter: Rescue a Dead Battery in An Easy Way


How to Jumpstart a Car with a Jump Starter

There are many instances wherein you will be confronted with the need to revive an old battery, such as when you have accidentally left your car’s lights turned on. A dead battery can be a huge problem, especially for novices. However, as long as you have jumper cables, it will be easy to remedy the situation and bring the battery back to life.

Thinking of how to jumpstart a car with a jump starter? Clueless about how to do it right? No need to worry! I got you covered in the rest of this post. Keep reading and I will share the easy steps to follow. You will realize that it is not that difficult at all!

What You Will Need to Follow this Tutorial

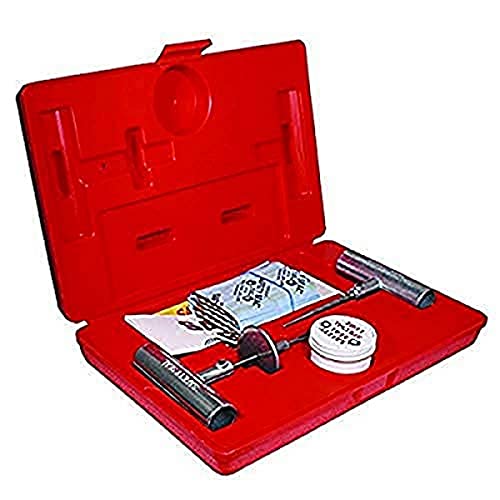
To follow the steps that I will discuss below, there is basically one thing that you will need:

  • Jumpstarting Kit (complete with the cables)

Step-by-Step Guide on How to Jumpstart Car with a Jump Starter

Before anything else, the first thing that you need to do is to make sure that the problem is with the battery. There are some situations wherein the source of the problem could be other parts. To know if the battery is the one that needs to be fixed, here is what you need to do:

jump starter

Via: https://www.youtube.com/watch?v=87Zgq7wsi24

  • Test the lights. If the lights are bright, there is no problem with the battery. On the other hand, if the lights are dim or if they won’t turn on at all, it is most likely that the battery is the culprit.
  • Start the car and look at the dashboard to see if it lights up. Test the stereo as well. If you notice flickers, the problem is most probably with the battery. Otherwise, if it does not turn on at all, you might want to check the ignition switch first.
  • Start your car. If it is cranking quickly, a dead battery is not the problem. If it is cranking slowly or if it does not crank at all, this is the time that you can blame the battery.

Once you are sure that the battery is the problem and there is a need to jumpstart, here are the simple steps that you should follow:

  • Get your jumpstart kit ready. Many products are available, but not all options are the same. Like in the case of other car accessories and tools, look beyond price. Consider technical specifications and the ruggedness of the design, among others.
  • Next, open the hood of the car and look for the battery. Its position will vary depending on the vehicle that you have. In most cases, however, you can find it between the firewall of the passenger compartment and the engine.
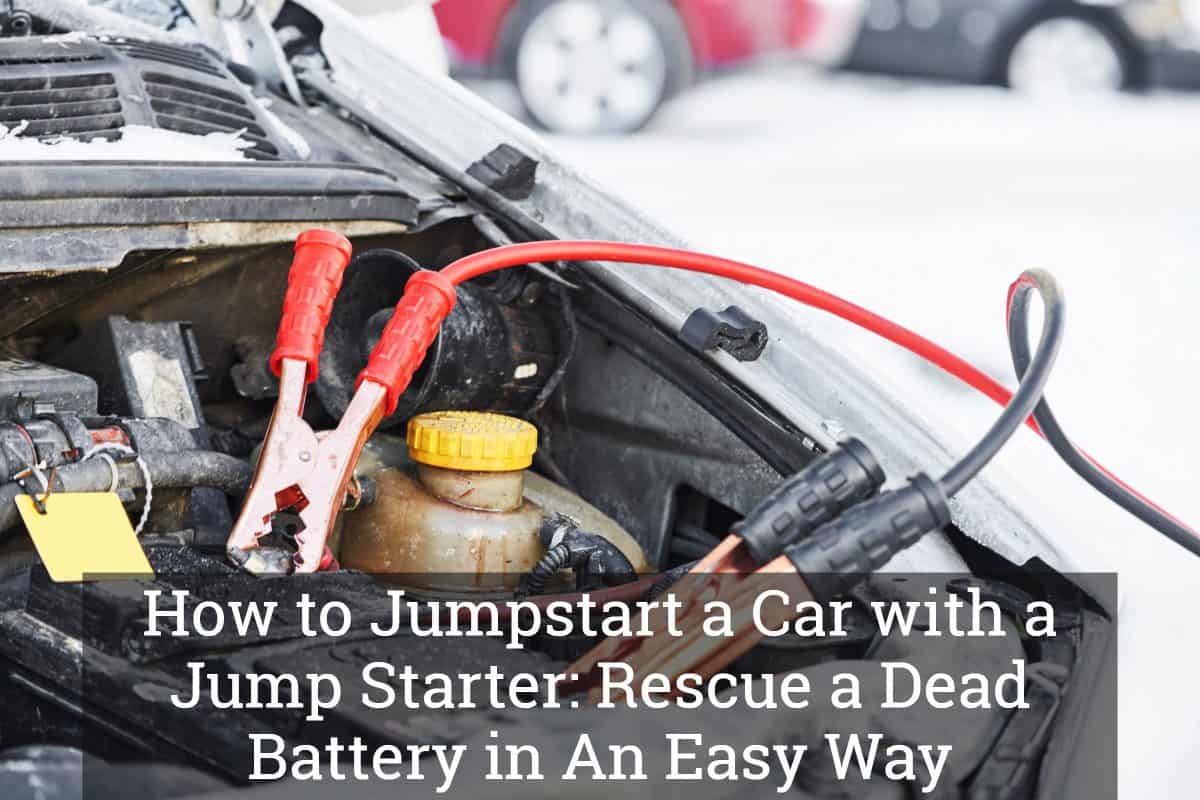
  • Connect the cables in your jumpstarting kit. Make sure that the latter is turned off before you proceed. This will prevent sparks that can easily scare off many, especially if it is your first time to try jumpstarting a car’s battery.
  • Connect the clamps to the right terminal of the battery. As common sense would dictate, positive should be clamped on the positive terminal and negative on the negative. The red jumper cable is the one that you should connect on the positive terminal and the black jumper cable is for the negative terminal.
  • Once the cables are connected, turn the unit on. By this time, it should start cranking the battery.
  • Start your car. At this point, the battery must have been already charged.
  • Disconnect the jump starter from the battery. Before you recharge it to 100%, you have to wait for at least ten minutes, giving it time to cool down.

For a visual guide on how to jumpstart a car with a jump starter, this short video below will help:

In the steps above, we have discussed how to use a jump starter and not the traditional jumper cables, wherein you will need another car on standby. A jump starter is a more modern alternative and offers many benefits, such as being more user-friendly and portable. For this reason, it is a better solution compared to jumper cables.


Pro Tips

While jumpstarting a car might seem easy in theory, it is important to note that risks are also involved. In this case, to be assured of your safety, here are some of the most important things to keep in mind:

  • See to it that everything is turned off, including the jump starter, lights, and stereo. To be sure, take off the keys from the ignition.
  • The positive and negative clamps should not be in contact with each other in any way.
  • When jumpstarting your vehicle, the right location is necessary. One thing that you should avoid is doing it near places with anything flammable or combustible.

Aside from these safety precautions, below are other tips that you have to be aware of:

Pro Tips

Via: http://www.bestekcorp.com/product/car-jump-starter/10000mah-portable-Car-jump-starter.html

  • Choose a powerful jump starter or battery pack. More often than not, the bigger and heavier the product is, the more powerful it is. It will have a higher voltage, making it easier to revive your battery.
  • After jumpstarting, it will help to keep the vehicle running for up to 30 minutes. This will be instrumental in achieving the peak condition of the battery.
  • Keep the jump starter charged. You will never know when you need it. It can be frustrating to find out it is not charged when most needed.
  • If the jump starter is not working, the problem could be with the cables. Check their tightness.
  • Always follow the instructions from the manufacturer. Lead acid batteries can be prone to explosion. Although the latter rarely happens, it pays to be safe than sorry.
  • A lithium-ion battery is better than lead acid when choosing a jump starter. Lithium-ion can offer more benefits, such as being more portable and having higher energy density.

Conclusion

Now that you have reached the end of this post, I hope that you are already aware of how to jumpstart a car with a jumpstart. The process is pretty straightforward; all you will need is a reliable jump starter. Nonetheless, be sure to take safety precautions to eliminate any risk that could possibly emanate.

Did you enjoy reading this post? Is there anything else that you would like to add? Do not hesitate to leave a comment below.

Best Tire Repair Kits: An Ultimate Guide for Buyers


Best Tire Repair Kits

When there are problems with your tires, there is no need to immediately call the pros and pay a hefty price for their services. In some instances, you can address the issue on your own with the help of the best tire repair kits. The latter is a toolset that is complete with almost everything you will need to complete the job on your own.

As car enthusiasts, we will do what it takes to protect our tires from damage. Nonetheless, some problems will be inevitable. When you are confronted with problems in your tires, having a repair kit ready will be handy. If you have no idea which product will make the best option, keep reading, and I will help you make the right decision.

Product (Amazon Links)

Image (Amazon Links)

Boulder Tools Heavy-Duty Tire Repair Kit

Safety Seal KAP30 Tire Repair Kit

Smittybilt 2733 Tire Plug and Seal Repair Kit


Blackjack KT-340 Tire Repair Kit

All Tools Tire Repair Kit


Benefits of Tire Repair Kits

Many of you may hesitate to purchase a tire repair kit because of the costs involved. Nonetheless, given their many benefits, the price should not be too much of a concern. With this, here are some of the reasons to convince you that a tire repair kit is a necessary investment:

  • Save Money: Rather than calling the pros for help and paying for their services, it will be a good idea to solve the problem on your own. The kit can save you much money in the long run since you do not have to pay someone for the job.
  • Save Time: When you have a broken tire, if you have a repair kit, you can immediately address the problem on your own. You do not need to wait for a mechanic to arrive. Even when on the road, you can immediately repair your tire.
  • Complete Set: Although this will depend on your specific product, most kits include all the necessary tools, providing the best bang for the buck.
  • Drive Safely: With a car repair kit on the road, it will be easier to ensure your safety. You can instantly pay attention to the problem of the tire and prevent any accident it can cause.

How to Choose a Tire Repair Kit

With plenty of options that will confront you, which is the best? To help you narrow down the possibilities, here are some of the most important considerations:

AD

  • Type of Tire Repair Kit: This will depend on whether you are a professional or simply someone who loves doing basic repair tasks.
  • Professional Tire Repair Kits: This is the one used by mechanics. They are usually more expensive, larger, and complete with the tools needed for tire repair. They are also generally more complicated since they are meant for the pros.
  • Consumer-Grade Tire Repair Kits: The products mentioned in this post fall under this category. They are the ones that are lightweight and compact, yet they are complete with the tools needed for the basic repair of a flat or damaged tire.
  • Inclusions: To differentiate the options, consider what is included in the kit. It has the necessary basic tools so you do not have to purchase others separately.
  • Case: You also have to pick one that comes with a lightweight and compact case for portability. It must easily fit in the trunk without consuming too much space in your car.
  • Versatility: For the best bang for the buck, the tire repair kit must be useful for universal applications. This means that you must be able to use it in all types of tires for different vehicles.
  • Durability: Ensure every tool in the kit is made from durable materials. This will help you save money in the long run since they will not quickly ask for a replacement.
  • Ease of Use: If you are a beginner, repairing a tire will be intimidating. Look for a repair kit that comes with comprehensive instructions. Some are even illustrated, making understanding how each tool works easier and ensuring you do the right thing.
  • Reviews: If you are still finding it hard to make the right choice, you have to rely on what other people have to say. Consult with online reviews and learn from other users’ personal experiences, making it easier to evaluate your choices.
  • Warranty: This is important as it provides you with a guarantee of satisfaction. The standard warranty is one year. If there is any problem within such duration, the manufacturer will provide free repair or will even issue a replacement.

Reviews of the Best Tire Kits

Below are five of the options that you might want to consider. We’ll also briefly tackle their major features and a few of their pros and cons to help you weigh the possibilities.

1. Boulder Tools Heavy-Duty Tire Repair Kit

AD

With 56 pieces, this tops our best tire repair kits list. It is complete with almost any tool that you will need for any job. It has a T-handle insert tool, a T-handle spiral probe, insert needle replacement, hex keys, a knife, long nose pliers, lubricant, and plastic valve caps.

For novices, I highly recommend this set. Aside from being complete with the essential tools, the manufacturer also provides detailed instructions. With this, you can effortlessly repair punctures and be confident that you are doing the right thing.

It is also worth noting that every piece in the toolbox is made using superior materials, guaranteeing its ability to last long. Even through the years, you will find each tool useful, and it will be long before they warrant a replacement.

If you are worried about the quality, you might have peace of mind knowing that the manufacturer is offering a warranty that lasts for one year. With its reliable customer service, you can have an assurance of your satisfaction.

Pros:

  • Easy to use, even for beginners
  • Built to withstand long-term use
  • It has almost everything that you will need to repair tires
  • It has a high-quality carrying case

Cons:

  • Some tools can be challenging to grip
  • It may not work for heavy-duty tires

Overall:

As the best option in the market, this kit is inclusive of 56 pieces. It is complete with all the tools necessary for tire repair. Each piece is engineered using top-notch materials that guarantee durability.


2. Safety Seal KAP30 Tire Repair Kit

AD

This kit is one thing that most people would easily notice, making them intimidated. Nonetheless, the performance ratio to other kits is probably similar, so you can easily realize that this is indeed a great product, considering how helpful it is for addressing common tire problems.

It comes with a metal T-handle insertion tool, metal T-handle insertion probe, insertion needle, set screw, and lube. Two razor blades will be useful for the removal of excess material.

The quality of this repair kit is also hard to question, especially in this case. The latter makes sure that you can easily organize each piece. This is also excellent in terms of portability, making it easy to bring with you anywhere.

A lot of beginners will also love this product because it comes with easy-to-follow instructions. Regardless of the problem you have with your tire, you can easily solve it with the detailed steps you will be provided with.

Pros:

  • Made from high-quality materials
  • Has plugs to seal your tires
  • Every piece is easy to use
  • It comes with comprehensive instructions

Cons:

  • The needle holding the plug is relatively weak

Overall:

This tire repair kit may be good compared to the competition, and having a case can be worth it. The kit comes with top-notch construction for long-term functionality.


3. Smittybilt 2733 Tire Plug and Seal Repair Kit

AD

Compared to the higher-end options that you can find in the market. This product comes with a leather case. Some might question its durability, but the good thing is that it is more compact and lightweight, making it an excellent choice in terms of portability.

This kit is inclusive of self-vulcanizing plugs, nose pliers, lubricant, dual-head tire pressure gauge, and tire patches, among others. All hand tools are made from aluminum, which is lightweight and heavy-duty.

The manufacturer also provides illustrated instructions, which will be easy to follow even for beginners. This will increase the likelihood of success as you try to repair a problem in tires.

Lastly, the entire kit only weighs less than two pounds. With the case’s compact size, it will be easy to fit in the trunk.

Pros:

  • Tools are made from solid materials
  • Small and practical, perfect for those on-the-go

Cons:

  • The case can be easily prone to deformation
  • It does not include plug insertion bits

Overall:

This may not be the most durable of the products mentioned in this guide, but given its strengths, this will prove to be another reasonable pick.


4. Blackjack KT-340 Tire Repair Kit

AD

This repair kit comes with the essentials that will be necessary for tire repair. Among others, it is inclusive of a T-bone handle with spiral probe, open-eye needle, screwdriver, hex wrench, valve core tool, razor blade, and a special lube. All of these pieces are organized in a convenient carrying case.

As a top-of-the-line product, it is also worth pointing out that they will work with almost all kinds of tires. Whether it is a car or an RV, among others, you do not have to worry about fixing common tire problems that will confront you.

Lastly, it has plugs that are super sticky, which is supposed to make your work a lot easier. It is not only a great time-saver but also perfect for those who are concerned about safety. You will be able to easily plug punctures in the absence of having to remove the tire.

Pros:

  • It comes with high-quality tire patches
  • Can provide reliable service for years
  • It has plenty of plugs

Cons:

  • A spiral probe needle can easily break

Overall:

Do not let the many pieces of this kit intimidate you. It includes the basic tools you will need, such as patches with premium quality and a screwdriver equipped with a reversible handle.


5. All Tools Tire Repair Kit

AD

This kit can prove to be handy for a quick repair of a flat tire. It comes with a T-handle split eye insert tool, string plugs, razor knife, and pliers. Plastic caps and valve cores are also provided.

With a tire pressure gauge, it will be easy to monitor the inflation of the tire and see if there is a problem. This will allow you to address the issue immediately to prevent worse problems and promote safety.

Lastly, there is a compact case that houses all the tools. They can easily fit in the trunk, and bring them everywhere, ensuring you will have a handy kit when needed.

Pros:

  • It has the essential tools that you will need
  • Compact design for portability

Cons:

  • The case is not durable
  • Handles can be quite flimsy

Overall:

An option for a tire repair kit may not be as exceptional as the others, but it will be an impressive alternative if safety is a concern.


Conclusion

Of the best tire repair kits that have been mentioned above, which one stands out? They are all great, but personally, I believe that Boulder Tools Heavy-Duty Tire Repair Kit is the best. With 56 pieces in a high-quality case, you do not have to look for anything else when there is a need to repair your tires.

Are there other products that you need for your car? Click here and learn from our guides.

How To Troubleshoot RV Electrical Problems?


How To Troubleshoot RV Electrical Problems goc

The RV is a short form of recreational vehicle. The core concept of the RV can be said to be a house that can move with engines and four tires. Based on the region, the term RV changes; in some places, they call it a ‘caravan’, and in some locations, people call it a ‘campervan’.

Most of us do not understand an RV’s electronics and electrical system (Recreational Vehicle). People decide that the RV electrical connections and the electrical problems are just a piece of cake. Yes, it will be like rocket science unless you know the procedure to solve those issues. Let us see the troubleshooting of RV electrical problems.


Your Guidelines for RV Electrical Problems

The first lesson I learned from the RV technical system is that it has a two-volt system, which is 12 volts. However, before that, safety advice is that while dealing with electronic stuff, do not forget to be alert or remember to safeguard yourself. Electricity can kill anyone with unsafe operation.

You will obviously be enjoying your vacation in the RV until the cracking of the electrical issue happens. No worries, here we have the perfect solution for your electrical problems in your RV. When the silly things regarding the electric power in your RV happen, you have to raise the questions.

Did the power go off? Does the EMS unit shut the power because it could find some problems? What should I do? These are the main questions that you should ask yourself because only questions can help you find an answer or solution to the problem. First, go to your RV’s breaker and check whether the trips in it go up.

Your Guidelines in RV Electrical Problems

Photo Credit: https://www.rvrepairclub.com/video/rv-distribution-center-troubleshooting-007934/

After checking the fuses, check all the fuses in the breaker to see if any of them are damaged. If so, then the fuses need an immediate replacement to turn on the power in your RV. Secondly, the portion that should be checked is the actual source of energy, where you will find a plug socket to plug up the power for your RV.

Make sure that you have a perfect checklist of your RV toolbox. The RV toolbox equipment contains regular hardware and should carry electrical stuff like the voltmeter, torchlight, spare headlamp batteries, frequency meter, and wire cutters.

To avoid and solve these electrical problems, absorb how they work. The working process can illustrate the problem-solving idea. All you need is to know the three facts about the electrical system in an RV.


1. RV 12-volt system

The RV 12-volt system is deep cycle batteries, which can power the light that contains 12-volt, circuit boards, propane detector, and leveling jacks. The RV has a converter inside that converts the 120-volts into 12-volts.


2. Chassis 12-Volt System

The chassis batteries discharge the power to the exterior running light as well as the turn signals of the RV.


3. The House 120 Volt System

Just the way we have in our regular home (bricks and sticks). The alternating current with 120 volts needs the power to operate the air conditioner units, the electric water heater, and the microwave. Almost every household product is 120 volts.

The electrical products have their volt description on their labels: amps, volts, and watts. Thus, the consumer must know what these are and should be aware of which product they consume the most. Understanding the watts, amps, and volts can easily solve the troubles faced by RV users.


The Knowledge of W.A.V.

What are Watts, Amps, and Volts? In our RVs, most of the electrical problems occur when there is no proper understanding of the WAV. It pays the way for an overload of an RV. A volt is nothing but the capacity of electricity through the wire.

Amp is the short form of an ampere, which is called an average flow of electricity. If you overload these wires with power, it gets heated up. Thus, the ampere is the average movement of the power.

Watts is nothing but the multiplication of volt and ampere (V x amp). For example, your RV has a volt as 120 volts and an ampere of 30 amps. Thus, the watt of your RV is 120 x 30, which is 3600 watts.

The remedies to avoid RV electrical problems rely on a simple format of the power usage. The user should not forget to turn off the appliances before shutting off the main power of the RV. The user should not forget to put out the devices that draw more amperes.

It will avoid tripping in the breakers of the RV. Turn the devices on when you need them but, on the other hand, do not turn the entire device at a time, especially the device with an ampere of 30 amps.

While using your air conditioner, do not plug the device directly into the 15 amp outlet. Try using an adaptor, then connect the best RV air conditioner. If you attempt connecting the RV air conditioner to the 15 amp, you will find a ruined AC and burnt-up wires.

Along with the instructions mentioned above, the RV users are advised not to plug the RV park electric pedestal without examining the power source of the RV park electric stand. Your RV is at risk. If you have no idea how to use a voltmeter, then learn how to use it or try to get an electrical management device. These devices are specially designed to detect electrical issues before plugging into the socket.


Summing Up…

Troubleshoot RV Electrical Problems

Via: http://www.modmyrv.com/2008/06/14/rv-ac-dc-power-inverter

Do not attempt running all of the equipment in your RV. You can turn on all the devices in your RV unless you know the ampere flow in the RV. Along with the ampere, if you have no idea about the watts required, then use the equipment in a limited manner. If you are confident in the flow of amperes, use the one that is 30 or 50 amperes in the RV electrical system.

Sometimes you can also come up with the breakage of the fuse, so the best solution to get rid of that fuse problem is to replace it with a new one. Do not feel annoyed when there is trouble in your RV. It is a problem that has an easy solution.

The moment you encounter the RV electrical problem, check the tripping area, then the fuse area, then the power area. Try resetting the power. However, the best way to avoid the electrical problem is to consume less electricity at a time.

How To Spray-On Bedliner Like A Pro?


How To Spray On Bedliner

Pickup trucks are famous in the USA, and millions of trucks are sold yearly. If you recently bought a pickup truck, you need to consider adding a liner if the bed does not have one. Without the use of a bedliner, it would be hazardous. You may face any damage to your truck or anything you carry. You should invest your money in adequately protecting your pickup truck, as it may ensure longevity.

If you don’t want to spend money on professional help or you want to do it on your own, then this guide can be helpful. You will get great results at a fraction of the cost.


Things to Know about Spray-On Bedliners

Simply bedliner or truck bedliner are products used to shield the inner surface or side of a pickup truck bed from any risk or damage. A truck bed liner can create a resistant surface that keeps cargo in place. Spray-on bed liners are a popular category of truck bed liners.

The bed of this truck is the most abused part and is designed to tow almost anything, so it needs protection. Spray on the bedliner can be the best option to protect the bed. It works effectively and adheres to bed. It helps to create a protective layer that bonds with metal and paint. It can be considered permanent protection as it doesn’t damage the pickup truck. You can choose the best spray-on bedliner to ensure excellent protection.

If you want to save money, apply the spray to the bedliner. Here in this guide, we have mentioned the essential steps to apply it; check them below:

Things to Know about Spray-On Bedliners

Photo Credit: https://www.youtube.com/watch?v=797vHu47XCU


1. Remove Accessories and Wash

You should remove the accessories and tailgate from the truck before applying the bed liner. You can vacuum or sweep the debris and dirt from the truck bed. All drains and holes should be clear.

You can scrub both the tailgate and bed with TSP and water as it helps to remove wax base residue, petroleum, and oil. You may feel the need for scrapers or chemical removers to wash it. You can wash it with water, a user wiper, and a clean rag. Please leave it to dry after washing correctly.


2. Mask Off all the Areas

You can use painter’s tape off all the areas you want to keep uncovered. These areas may be at the back of the bed or near the tailgate. You can firmly form a protective seal by pressing the painter’s tape down. You should cover the drain holes using tape to seal them neatly.


3. Scuff Painted Surfaces

 Scuff Painted Surfaces

Photo Credit: http://shedheads.net/raptor-liner/

You need to scuff these painted surfaces as it helps to ensure a perfect bond. You have to work to scrape glossy areas. You can use sandpaper to sand rust areas and create a texture that a bed liner can adhere to safely. You must remove sanding dust by blowing or wiping down the bed.


4. Clean Out the Debris and Dust

When you sand the surface, some debris and paint chips sit behind that should be removed. You can vacuum these surfaces to remove dust, debris, and other paint chips. If you don’t remove it, there may be the chances of bubbles in the future.

You can apply a primer or rust converter coat on uncovered or bare areas and leave it to dry for a few minutes. Now, you can use acetone to wipe the bed area. You can use a spray bottle and start at the bed front. You can leave acetone to sit for a few minutes. Now, you can wipe it by using a towel. You should carefully wipe the surfaces as the material is being applied here. Leave the surface for a few seconds to let it dry.

Tips: don’t forget to wear a respirator and chemical-resistant gloves.


5. Brush

You need to mix all the material with the help of a power drill and paint mixer. You need to stir this material before applying. It would be best if you started using it for corners and seams. Mix xylene in it if you need a thinner mixture than average.

Once you are done with corners or seams, you can apply a handle and roller cover to the rest of the areas. Now, you must use the mixture to the side and front panels and roll the mixture on the back side or tailgate. Now you can cover the floor of the bed. This is the first coat of the material.

Now, this is the time to apply the second mixture coat on the taped edges. This should be done before 1st mixture coat dries as it prevents the tape from tearing while removing it. You can use a small brush for touch if any area has been missed. You should discard the roller cover once you are done with it. Now, you can use a plastic bag to wrap the brush.

If you want to remove excess mixture, you can use xylene. But use it only in the state when it is wet. The first coat may take 5-6 hours to set up. You can apply the second coat once the 1st coat is set up.

spray-on bedliner

Photo Credit: https://www.youtube.com/watch?v=VdjdzRqJDDM


Follow the Instructions

You should also follow the instructions before applying DIY spray on the bed liner. You should read the instructions of manufacturers to make it simpler. These instructions ensure the correct application of the material. This is quite simple to apply bedliner, and it also allows you to save time and money.

Once you read all the instructions, you will indeed feel that you need not hire any professional to complete the process of applying bedliner. Apart from that, you need not send your pickup truck to a company or professional.

Essential Tools and materials that you may need when applying bedliner:

  • Safety glasses
  • Gloves
  • Paint roller
  • Plastic bag
  • Screwdriver
  • Acetone
  • Xylene
  • Sandpaper
  • Masking tape

You can protect the bed of your pickup truck by carefully applying quality bed liners. You need to learn the entire process; you will surely get good results. This step-by-step guide will surely help you. It enables you to know how to apply the spray to the bedliner on your own to protect the bed of your pickup truck.

By using the above tips, you will get it done perfectly. I hope you find this guide relevant. Do comment if you have any queries regarding the DIY spray-on bedliner.

Best Car Window Cleaners: Keeping It Crystal-Clear and Spotless


Bestt Car Window Cleaners

Many products will be essential if you want to keep your car clean. For instance, you need the best garbage cans to tidy the interior. A vacuum cleaner, on the other hand, will suck dust out. Meanwhile, a pressure washer will help clean the exterior. Another important product that should not be missed would be the best car window cleaners.

In the rest of this post, I will discuss some of the factors you must consider before buying. More importantly, I will list five of the products that should be part of the list and the things that make them impressive and worth your money!

Product (Amazon Links)

Image (Amazon Links)

Driven Extreme Duty Glass Cleaner

Meguiar’s G8224 Perfect Clarity Cleaner

Invisible Glass Premium Glass Cleaner

Chemical Guys CLD_202_16 Glass Cleaner

Sprayway 443331 Glass Cleaner


Tips for Cleaning Car Windows

Aside from choosing the best cleaner that is available in the market, here are some valuable tips to keep in mind for spotless car windows:

  • Use other materials, such as a microfiber cloth, to make the most of the cleaner. See to it that it is clean and soft, eliminating the possibility of leaving scratches on the glass. 
  • Pay attention to the instructions from the manufacturer. Not all products are the same in terms of the directions on how they are used.
  • Look at the warnings. Some window cleaners can damage tints. Stay away from this if you have a tinted window.
  • It is also essential that you learn the proper wiping technique. Wipe the cleaner in a single direction and cover one area first before you proceed to the rest.
  • If you use window cleaner in a spray bottle, do not spray it directly on the glass. Instead, spread it on a clean cloth and use it to wipe your window.
  • In the end, if there are still marks and streaks, it might help to polish the surface quickly. Pick a polish that does not contain oil.
  • It is common for most people to forget the top part of the window – the portion that touches the rubber seal. Do not forget to clean this part as it often has unsightly marks.
  • If there is stubborn dirt that you cannot remove, such as bugs or insects that are stuck on the glass, use a pressure washer. Do this before applying for your choice of car window cleaner.

Essential Considerations in Choosing the Best Car Window Cleaners

To quickly narrow down the available choices, below are some of the most important things that you have to consider:

AD

  • Ingredients: Choosing one that does not contain toxic ingredients is essential. Among others, ammonia and synthetic perfumes are some that you might want to avoid, as they can create streaks and watermarks on the glass.
  • Container: Two types of containers are generally available: aerosol cans and spray bottles. An aerosol is excellent because it creates a thick foam and can be spread to cover a large area of the window you are cleaning.
  • Ease of Use: When a glass cleaner is easy to use, it does not need elbow grease to be effective. It must deliver astounding results in no time. If not, you will end up exhausted and frustrated.
  • Smell: Some are too fragrant, which can irritate people with allergies. Look for a cleaner that has a fresh scent that does not overwhelm.
  • Versatility: If you want value for money, I suggest that you go for a product that can be used in more ways than one. Meaning it should be helpful to go beyond car windows. Most of the products can be used even for ceramic tiles. Some even go beyond cleaning as they can also effectively kill bacteria within the household.
  • Feedback: By now, if you still cannot decide which product will provide the best bang for the buck, it will also help if you consult with what other people say. Their experiences, expressed as online reviews, will be an excellent way to gauge the possibilities.

Top Picks for the Best Car Cleaners

Below are five products you should include in your list of choices. To be convinced that they are indeed amongst the best, I will also give you a glimpse at some of their notable features and a few of their pros and cons.

1. Driven Extreme Duty Glass Cleaner

AD

Built for tough dirt – this is what you can expect from this glass cleaner. Even the toughest stains will be easy to remove with this product. Hard water build-up will also be effortless to eliminate with this.

What makes this product effective in removing dirt and stains? This is possible because of the innovative formula and premium ingredients used. It has Extreme Cutting Abrasives, providing it with an unrivaled cleaning ability.

The versatility of this window cleaner is also exceptional. While many of you might use it for car windows, its applications extend beyond such. It can also effectively clean glass doors, porcelain sinks, and ceramic tiles.

Lastly, you do not need to use a lot with this premium acid gel. Even a tiny amount will be effective in dealing with dirt. One bottle will last long, providing the best bang for the buck.

Pros:

  • Quickly gets rid of water deposits in car windows
  • Also, it is effective for the removal of limescale and calcium build-up
  • Multiple applications, even for glassware and shower rooms
  • It does not require a lot of effort
  • Safe and easy to use

Cons:

  • It can leave visible water spots
  • Can cause scratches

Overall

This product is known for versatility, making it effective beyond cleaning car windows. It is made from premium ingredients that can remove even the toughest dirt and stains, including calcium build-up.


2. Meguiar’s G8224 Perfect Clarity Cleaner

AD

Meguiar’s is a company that has been in the business for more than 100 years. Such extensive experience speaks a lot about their reputation. After all, they would not have been in the business until now if they were not significant in their actions.

The unique formula of this product gives it an edge over most of its competitors. It has an anti-hazing formula, which is the one that is responsible for its clarity. It is also easy to wipe, regardless of the type of glass where you will apply it.

Its cleaning capability is also hard to rival. Aside from dirt and dust, it is also effective for vinyl fog, tree sap, and bugs, which can cling to your window.

The unique lubricant that is present in the product is also excellent. It provides a slide effect, making gliding the cloth through the glass effortless without creating friction that can cause scratches.

Pros:

  • Cleans the surface without creating visible streaks
  • Works on all types of glass
  • It has a pleasant smell, not chemical-like
  • Easy to wipe off from the glass
  • Keep the glass clean for a long time and repels dust

Cons:

  • The spray nozzle can sometimes experience clogging
  • You can leave a layer of oil on the glass

Overall

Made by a brand trusted globally, this product contains a unique formulation that prevents hazing and makes it easy for cloth to slide on the glass, preventing scratches and streaks.


3. Invisible Glass Premium Glass Cleaner

AD

The product’s name fits what it can deliver—have you ever wondered why it is called Invisible Glass? Apparently, this is because it provides superior cleaning performance and invisible clarity.

The Clear Dry Formula is one of the many impressive things about this product. Simply put, the latter means that no dyes, soaps, scents, or additives are used in the formulation of the window cleaner. As a result, there will be no streaks and residues on the glass.

Even if your car window has a tint, there is no need to worry. It does not contain ammonia and other chemicals that can damage tints.

Ease of use is another reason to choose this product. It comes in an aerosol can; spray it directly on the glass you need to clean. It also evaporates quickly.

With this product, you will be able to achieve professional results. No wonder even the most discerning users prefer this over others within the competitive landscape.

Pros:

  • It does not leave streaks
  • Can effectively deal with all types of dirt on glass
  • Does not cause damage to tints
  • It does not contain traces of ammonia
  • No residues will be left on the glass

Cons:

  • Not available in a smaller bottle

Overall

This product has a Clear, Dry, and ammonia-free formula, making it safe even for tinted car windows. It evaporates quickly and does not leave streaks on the surface. Similar to its name, it will make your glass appear invisible because it is crystal-clear.


4. Chemical Guys CLD_202_16 Glass Cleaner

AD

Do you want your window to be as clean as a mirror? You might want to give this product a shot and see why I have included this in the list of the best choices for car window cleaners.

With the unique formula in this product, you can expect advanced cleaning. This will clean not only glass windows but even the screens of your gadget. It can work even on plastic and will not damage tints.

Unlike other cleaners, you will require only a few sprays to clean the car window. You do not need too much, yet you can be assured that the outcomes will be impressive.

Pros:

  • Useful even for cleaning screens of gadgets
  • It can easily wipe even dead bugs
  • Safe even for tinted windows
  • It does not contain ammonia and other toxic ingredients

Cons:

  • Glass can be prone to streaks
  • It can be challenging to wipe off after cleaning

Overall

This ammonia-free product does not only effectively get rid of dirt in glass windows but can also help clean the screens of your mobile phone and laptop, among others.


5. Sprayway 443331 Glass Cleaner

AD

This ammonia-free glass cleaner promises to make your windows free from streaks. Nonetheless, even if it is free from ammonia, it is essential to note that the spray contains perfume-grade alcohol, which is why some people avoid it.

Once sprayed, it will let out heavy-duty foam that will cling to the surface of the glass. This is unlike in the case of others that may slide easily. Once the foam is in the glass, use a clean cloth to spread it and clean the surface.

Similar to the other products I have recommended in this post, this is versatile. You can use it not only for car windows. It can also be used on other surfaces with tough dirt and grime.

Pros:

  • It has a fresh scent
  • It does not leave a noticeable film on the surface
  • Aerosol can is available in two sizes
  • Dislodges even tough dirt easily

Cons:

  • Some ingredients can be toxic
  • The smell can be overpowering for some

Overall

While this car window cleaner does not contain ammonia, it is essential to note that it has professional-grade perfume, which can cause alarm to some users.


Conclusion

By now, I hope you are already aware of the top choices for the best window car cleaners. If you ask me to pick one clear winner from the five products above, I would say that my choice is Invisible Glass Premium Glass Cleaner. Its cost can be justified by the fact that it delivers superior results.

Are there other products that you need to keep your car clean? Click here to be redirected to our collection of insightful buying guides.

How Good Is A Spray-On Bed Liner For Your Car?


How good is spray on bed liner

The bed liner is an essential component of your car. But, most often, you may be overlooking this aspect. As a result, the painting job may get scratched. The bed liner provides a protective coating on the bed. Therefore, you have many things to know about spray-on bed liners.

First, you should know that there are two-bed liners: Spray-on and Drop-in. The drop-in bedliner can be replaced easily and customized for your needs. Moreover, it can be installed easily. But the negative point about it is that if it is plastic, it can trap water on the shape between the liner, and the liner can cause rusting and corrosion.


Things to Consider Before Buying Spray-On Bedliner

Considering the above facts, you may consider having the spray-on bedliner and get the following benefits.

Things to Consider before Buying Spray-On Bedliner

Photo Credit: https://www.proteccoatings.ca/single-post/2015/04/15/FIVE-REASONS-OF-GETTING-A-SPRAY-ON-BED-LINER

  • Durability: Besides durability, it is corrosion-resistant.
  • Noise Resistant: It reduces the traveling noise.
  • Watertight: It protects the trapping of water and rusting.
  • Resale Value: By maintaining the condition of your car, it can fetch good value on resale.
  • Versatility: It can protect rocker panels and fender wells and can replace interior floor mats

As the name suggests, the bedliner is a liquid sprayed over your car’s surface. It is made from polyurethane, which is also used to make sealants. The three main types of Spray-on bed liners are hot or high pressure, cold or low pressure, and Do It Yourself (DIY).

Hot pressure refers to the temperature of the product. The warmer products have shorter curing times, and the older ones take longer to cure fully. The spray-on beginners are made from 100% polyurethane, 100% polyurea, or a hybrid of both. The one made from 100% polyurea performs better due to higher tensile strength, tear strength, and hardness.


Essential Factors for Consideration

To make the best bedliner, you should consider the following factors.

Essential Factors for Consideration

Photo Credit: https://in.pinterest.com/explore/truck-bed-liner-spray/?lp=true

  • Reviews: You should go through the reviews shared by the actual users. They will mention both the pros and cons of the bed liners. This will enable you to compare the functionalities of different products. In particular, you should focus on the quality of the bed liner and any severe flaws. You can then know what you can expect from the product.
  • Ease of Use: There are many bed liners that you can do yourself (DIY) if you know specific basic steps. A user-friendly product is of great assistance to you. It comes with the necessary tools that you require. An added advantage will be if the manufacturer provides detailed instructions and guidelines for doing it yourself. You can then get the desired result. 
  • Durability: Durability implies that the bedliner stays on the surface of your car for a more extended period. It is not easily cracked or peeled even if it is constantly exposed to sun and rain. It should also resist dust and steam.
  • Color Compatibility: Before choosing the color shade, you should match the color of your car. Avoid over-application, as otherwise, the color may become darker than its actual shade. It would be best if you were meticulous in selecting the color.
  • Quantity: Depending upon the size and area to be covered, you should determine the exact quantity of bedliner to be obtained. More than the actual requirement will be a waste of money.
  • Inclusion: You need to consider including everything required, such as an applicator or a gritting paper.

The best spray-on bedliner will be an essential investment for you. You may pick the best spray-on bedliner from any of the five bedliners available.

spray-on bedliner

Photo Credit: https://www.bestdiybedliner.com/

1. Hercliner HCL1 Brush Kit

With this spray-on bedliner, you get everything you require for coatings, such as brush, rollers, and applicator brush. You can do it yourself easily without needing to have any technical knowledge.

You can use it for other applications. It creates a skid-free surface that won’t fade after many years of use. There will be no cracks and dents. It can resist gasoline and external elements. The con is that it can’t withstand the sun’s UV rays.


2. U-Pol Tintable

It is comparatively expensive and provides excellent value for your money. It comes with the tools and a lightweight spray gun. The coating is tintable, and you can customize the color: light or dark. The coating lasts for a long time and is UV-resistant.

Stain, corrosion, and mechanical damage. Rust and temperature can’t affect the surface. It minimizes noise and vibration and dries quickly. A little higher cost is its only con.


3. Liner Xtreme Spray-on Bedliner

It comes with all the tools and materials required for the job and an applicator gun. The manual containing the guidelines will make your job much easier. It includes three gallons of the kit of spray-on bedliner and two cans of reducer.

Because of its toughness, it can resist external elements and remain in tip-top conditions for a long time. It comes with a free spray gun.


4. Al’s Liner ALS-BL Polyurethane Liner Kit

It is simple and can be used for multi-purpose. You can add more tints till you achieve the required shade of color. It is long-lasting. You can apply a thick coating to provide the needed protection. It does chip even under rough and harsh conditions. You can control the color of your finished job.


5. T-Rex Black Bed Liner

You will find this product more economical if you are looking for a cheaper alternative. The quality of the product is not inferior. Besides protecting the bed of your car, it can deaden sound and vibration.

It is made from 2K urethane and provides impressive adhesive properties. Before applying on the surface, make it free from dust, oil, and dirt, which makes the bedliner cling strongly.

The spray-on bedliner prevents scratches, rusting, and corrosion. It is, therefore, pertinent that you put every possible effort into making the right choice of bedliner.