Home

Recent Posts

A Beginner’s Guide on How to and Auxiliary Coolers


How to Install In-Line Filters and Auxiliary Coolers

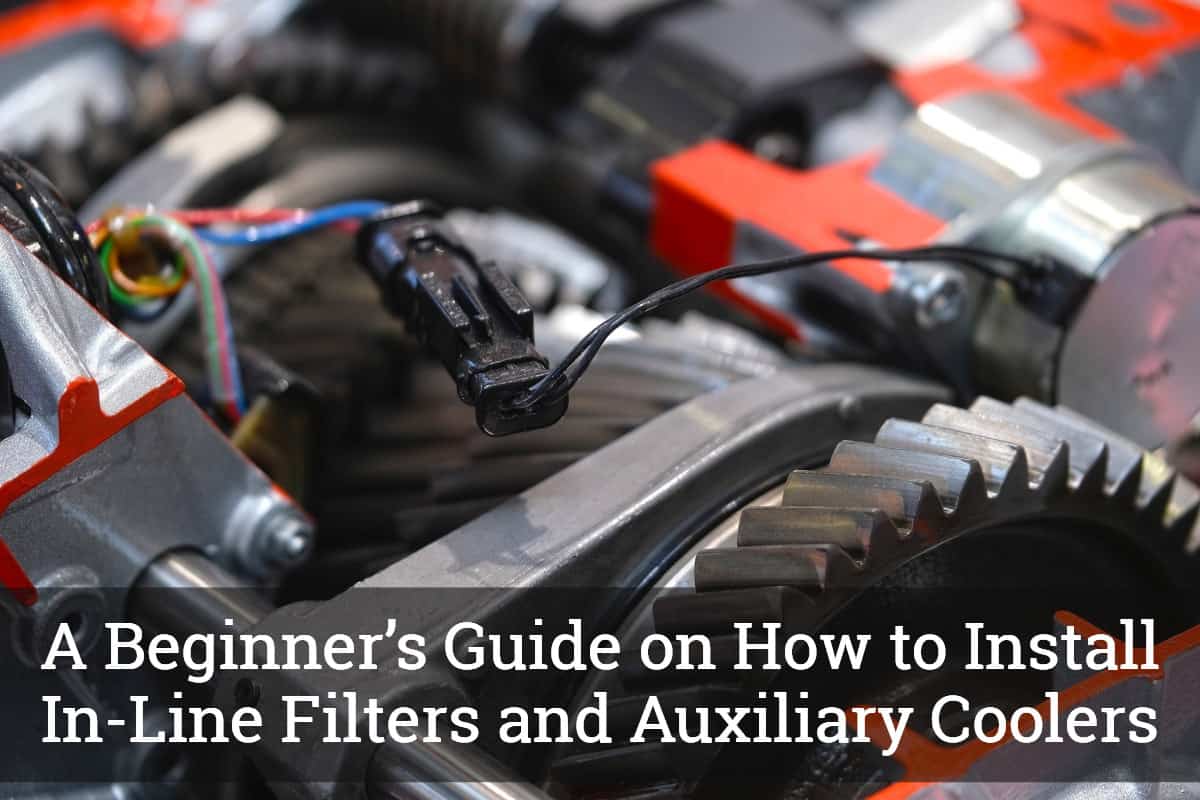
When it comes to cars, there are basic tasks that you can successfully complete without the need to pay professionals for their service. A good example of this task is the installation of in-line filters and auxiliary coolers, which both have a significant role in the performance of your engine.

In the rest of this post, I will share with you how to install in-line filters and auxiliary coolers. It can be intimidating at first, but with the right steps and patience, you can accomplish the job even without a helping hand. It is critical, however, that you use the right products to be assured of the optimal outcomes and peak performance of your vehicle.


What You Will Need to Follow this Tutorial

Before we proceed with the steps, here are the materials that will be needed:

  • In-line filter
  • Auxiliary cooler
  • Sticky foams
  • Hose
  • Locking round washers

Step-by-Step Guide on How to Install In-Line Filters and Auxiliary Coolers

Watch the short video below and read the steps on how you can easily install in-line filters without the need to go to a mechanic in your neighborhood:

To add an in-line filter to your car’s cooling system, here are the simple steps that you have to follow:

  • Pay attention to the flow direction of the in-line filter and see to it that you are installing it right. The in-line filters are designed to flow in a single direction. If this is wrong, you are at risk of suffering from complicated problems.
  • Install the line that connects the in-line filter. As shown in the video above, you have to look at the direction of the flow coming out of the radiator.
  • Flare the end of the tube at which the in-line filter will be connected. This ensures a better and more secure connection between the two, preventing the possibility of leaking.
  • See to it that the in-line filter will not be positioned anywhere it will be near an exhaust. Too much heat can cause significant damage to the filter.
  • By now, the in-line filter is installed, making it possible to offer the protection that the transmission needs from contaminants.

The installation of an in-line filter is important because it improves the transmission, making sure that no contaminants will get through. If there are no impurities in the fuel system, you can enjoy big cost savings in the future. The good news is that these filters are affordable and require almost no maintenance.

Now that you are done with the installation of an in-line filter, the next thing that you have to do is to install the auxiliary cooler. Many products are available, which is already inclusive of everything that you will need to complete this task:

  • Purchase a transmission cooler kit. Yes, there are countless options in the market. No, this does not mean that you should choose just any product. Take time to evaluate the possibilities and see which one is appropriate for your needs.
  • Loosen the clamps that connect the intercooler hose. Remove the latter.
  • Now, prepare the auxiliary cooler that you will install. Attach the sticky foams and the hose, making sure that you have the right connections.
  • Remove the bolts that you can find on the top of the cooler. Raise it so that you can easily access the auxiliary cooler from behind.
  • Position the auxiliary cooler next to the intercooler that you have. See to it that when the hood closes, it does not get in contact with the cooler. Lock and secure the auxiliary cooler using locking round washers.
  • Connect the hoses that will link the auxiliary cooler to the transmission. At this point, you have already finished the installation of both the in-line filter and the auxiliary cooler.
  • Before you consider the job done, start the vehicle. Run it for a few minutes. Open the hood. Inspect the auxiliary cooler and the in-line filters. See to it that there are no leaks to know if you have successfully completed the task.

An auxiliary cooler will help in extending the life of your vehicle’s transmission. It prevents the possibility of overheating, especially during long drives and if you live in a place that is usually hot. Just like the human body, too much heat can slow down the transmission, which is basically why you will greatly benefit from an auxiliary cooler.

The installation of an auxiliary cooler is also necessary if you often tow, especially heavy weights. Towing can add stress to the transmission and can make it experience too much heat, which can be minimized if you have an auxiliary cooler.


Pro Tips

In-Line Filters and Auxiliary Cooler

Via: https://www.4runners.com/threads/how-to-4th-gen-v6-radiator-replacement-tranny-cooler-install.349/

Below are some tips about in-line filters and auxiliary coolers, or transmission coolers in general, which every novice in cars and engines should know:

  • Always choose the right products to install as part of your transmission or engine system. You might be tempted to choose products that are cheap, but the price should never be your concern. Quality is the most important factor that should be given emphasis.
  • After the installation of the in-line filters and the auxiliary coolers, make sure that there are no leaks. Seal any gaps that are apparent and see to it that all connections are tight and secured.
  • Proper transmission fluid is also necessary. The coolers and the filters will not be enough to optimize the performance of your car. They can get rid of contaminants and prevent overheating, but the fluid is important to shift smoothly and prolong the lifespan of the components.
  • If you are going to install in-line filters, make sure to do this at a time when the system is working at its best and when the transmission fluid is clean. If you install the filters when there is already a problem, it can only lead to clogging, and the issue can be worse.
  • Routine inspection and maintenance are necessary. Check the in-line filter and auxiliary cooler. See to it that they are not deformed and they are not leaking.

Conclusion

Knowing how to install in-line filters and auxiliary coolers can help you save a lot of money while also providing a guarantee that your vehicle will reach its peak performance. As shown above, it is pretty much straightforward. Nonetheless, see to it that you will do it the right way to prevent leaks and other problems.

Have you tried installing in-line filters and auxiliary coolers before? Do you have other tips to share? Let your opinions be heard by leaving a comment below.

How and When to Use an Auxiliary Electric Fan: Know the Answer in this Post


How and When to Install and Auxiliary Electric Fan

A belt-driven fan is one of the most important components of your engine. It has the primary function of cooling and hence, prevention of overheating. Nonetheless, there are many instances wherein this primary fan is not enough, especially if you often get stuck in traffic or if you live in a place that is extremely hot. This is where the use of an auxiliary fan enters the picture.

In a nutshell, an auxiliary fan supplements the airflow and cooling that is provided by the belt-driven fan. It will be essential in drawing the extra air that is needed by the engine, especially when you are moving slowly. With this, if you are interested to know how and when to use an auxiliary fan, read the rest of this post and I have the answer that you are looking for.


What You Will Need to Follow this Tutorial

To start with the installation of an auxiliary fan, make sure that the following materials are ready:

  • Measuring tape
  • New auxiliary fan
  • Wires
  • Nylon bolt
  • Speed nut

Step-by-Step Guide on How to Install an Auxiliary Fan

  • The first thing that you have to do is to measure the radiator. By doing this, you will be aware of how much space is available. In turn, this makes it easier to choose the right fan, making sure that its size is appropriate for the radiator.
  • Based on the measurements that you have taken, you can now proceed in shopping for an auxiliary fan. See to it that it is made from high-quality materials and that it is from a reputable manufacturer.
  • Provided that you have no old auxiliary fan that is installed, you can now proceed to the installation of the new one.
  • Position the fan in front of the radiator. Having it connected will depend on the fan that you have. In most cases, you will have a nylon bolt and speed nut that should be pushed to the back of the fan.
  • If there is an auxiliary transmission cooler that is already installed, you might need to have it repositioned. This is necessary to make sure that the fan will be facing the radiator directly.
  • Wire the fan into the vehicle. This will provide the fan with the power that it needs to operate and direct airflow where it is needed. Connect the black wire to the positive terminal and the red to the negative.

The short video below presents a visual summary of the things that have been mentioned above:


When to Use an Auxiliary Fan

For those who do not know a lot about cars, I am sure that many of you are wondering when an auxiliary fan is necessary. If you do not know how it works and what it does, you might instantly think that it is an unnecessary cost. On the other hand, if you are familiar with its benefits, you will realize that this is a must-have.

There are many situations wherein you will find the need to use an auxiliary fan and one would be when you experience overheating frequently. Your engine is overheating because of the lack of air that circulates. One remedy to this issue is having an auxiliary fan to provide the cooling effect that is needed.

Another situation that warrants the need for the installation of an auxiliary fan is when you often get stuck in traffic or when you are driving slowly. In such instances, there is no air that is pushed through the engine because of the slow movement of a car. With an auxiliary fan, there will be air to cool down the engine.


Pro Tips

It is not enough that you follow the right steps in the installation of the auxiliary fan. Keep these things in mind for an assurance that it will deliver an optimal performance:

Auxiliary Electric Fan

Via: https://www.youtube.com/watch?v=8ZdY8hJbLz0

  • When you are looking for a new auxiliary fan, stay away from one that comes with a fully-shrouded design. If there are shrouds in front of the radiator, which is where the fan will be installed, it can block airflow.
  • To hit two birds with one stone, you might want to consider the possibility of installing a cooler transmission that comes with an integrated electric fan. This will allow you to move the heat source to a place other than the front of the radiator.
  • When installing an auxiliary fan, pay attention to your safety. See to it that the car is parked in an open space with a flat surface. Turn off the engine and allow it to cool down for a few minutes before you start to work.
  • Pay attention to the routine care and maintenance of your auxiliary fan. It can be prone to dust, debris, gunk, and other external elements that can affect its performance. Clean it regularly so that it can provide optimal cooling.

On the other hand, here are some of the tips that you have to know to prevent overheating:

  • Always be prepared for the worst, especially when going for long drives. It is good to have a coolant and water ready in the trunk, which can help to cool down the engine immediately and prevent worse problems.
  • Another simple solution to overheating is to open the hood as soon as possible. Allow the heat to disperse rather than trapping it in the hood. Park your car in a shaded area before you do this.
  • Inspect the hoses and see if there are leaks, which is one of the possible reasons why the engine might have overheated.
  • Keep an eye on the temperature gauge. If you can see that it is already getting hot, act quickly. If you act too late, the engine will overheat. This is one of the classic examples of prevention is better than cure.
  • Replacing the battery might also be necessary, especially if it is older than three years. It may be unable to supply the power needed by the car, making it exert more effort and, hence, overheating.

Conclusion

In this short guide, I have briefly discussed how and when to use an auxiliary electric fan. As noted, installation is necessary if you experience overheating a lot and if you often drive slow or get stuck in traffic. The fan can supplement the airflow that is needed to keep the radiator and the engine cool.

Did you enjoy reading this post? Is there anything else that you would like to share? Do not hesitate to leave a comment below.

How to Check and Replace an Oxygen Sensor: Do It On Your Own


How to Check and Replace an Oxygen Sensor

You might not realize it, but an oxygen sensor is one of the most important parts of your car. Without being too technical, the main function of the oxygen sensor is to improve the efficiency of the engine operation. It detects the oxygen content in the exhaust stream. It gauges the fuel mixture, letting you know if it is burning rich or lean.

It is paramount for any driver to maintain the best condition of the oxygen sensor. In some instances, it might not be broken, but a replacement is still necessary. In fact, according to experts, it needs to be replaced after every 100,000 miles. This can be a bit costly, but it is one thing that should not be ignored for the optimal performance of your car.

Now, if you are wondering how to check and replace an oxygen sensor, this post is for you. I will let you know how to inspect the sensor to be sure that it is the problem. More importantly, the discussions below will also cover how you can replace the sensor. It might seem difficult at first, but it is actually a straightforward task.


What You Will Need to Follow This Tutorial

To successfully complete this task, be sure that you have the following materials:

  • Multimeter
  • Oxygen sensor replacement
  • Oxygen sensor socket
  • Gloves
  • Wrench

Step-by-Step Guide on How to Check and Replace an Oxygen Sensor

Before anything else, you have to make sure that there is a problem with the oxygen sensor.

Check and Replace an Oxygen Sensor

Via: https://www.youtube.com/watch?v=CiOVORhfepg

  • The most obvious indication of the problem is the blinking of the Check Engine light.
  • By now, you already know that there is a problem with the engine, but you are still not sure that it is the oxygen sensor. This is the time when you will need to use a multimeter to diagnose the problem.
  • Before working, make sure that the engine is cool. It is extremely hot and you will burn yourself if you rush to work.
  • Look for Bank 2, Sensor 1. Test the sensor. This will provide you with an assurance that the actual source of the problem is the sensor.
  • Press the tab and pull out. By this time, you should see four wires – two black, one blue, and one white. Use a multimeter. Connect the multimeter to the prongs connecting to the black wires. If there is no resistance or reading, this is an indication that you have a problem.
  • Now that you are sure that the oxygen sensor is the issue, it is time to have it replaced with a new one.

You are ready to replace your faulty oxygen sensor. To be sure that you are doing it the right way, these are the things that you should do:

  • Use an oxygen sensor socket. You do not have to buy a new one. You can rent it from a local mechanic. This is going to make the task a lot easier and quicker to accomplish. The main function is to strip the old sensor and install a new one easily.
  • Slide the socket into the wire. Once it is in place, use a wrench to remove the old sensor. Screw it all the way until it is completely removed. To be sure, wear thick gloves as the surface can still be hot.
  • Install the new oxygen sensor. Before you proceed, compare the new one with the old one and make sure that they are the same. You can also remove the old one first, bring it to a car parts store, and ask them to give you the same one. This way, there is a lesser likelihood that you will end up committing a mistake.
  • Thread the new oxygen sensor in its place. Use the socket to do this. Connect the clip on the other end.
  • It is important to make sure that the sensor is not too loose, as the gases can escape. On the other hand, if you tighten it too much, the sensor can end up being damaged. Use a torque wrench to be sure.
  • Start the engine and see if the Check Engine light is still on. If it does not blink anymore, this means that the problem has been successfully fixed.

For a visual guide of the steps that have been mentioned above, this short video will help:


Pro Tips

To guarantee the best outcomes, here are some of the tips that you have to keep in mind:

  • A quick visual inspection will already give you an idea that an oxygen sensor is damaged. Usually, the color should be light tan. If it is light gray, black, or white, this can be a sign that there is a need for a replacement. Nonetheless, you should still proceed with the testing to be sure.
  • It is important that you protect your hands by wearing gloves, as noted in the steps I have mentioned above. You should also be careful with the probes. See to it that their tips won’t end up touching the exhaust pipe or the exhaust manifold because its extreme heat can damage the probes.
  • The oxygen sensor can be extremely fragile. For this reason, you need to handle it with extreme caution. The tip should not get in contact with anything as it can end up being contaminated. It is made from a special type of ceramic, so you have to be extra cautious.
  • Always consult with the manual from the manufacturer. The appearance of oxygen sensors may differ depending on the car that you have, so that means there can be different approaches to how things should be done.
  • Do not use oils and sprays to clean the oxygen sensors. They contain contaminants that will have a negative effect on the performance and function of the sensors.
  • Generally speaking, oxygen sensors do not need care and maintenance. Once they become faulty, they can no longer be saved. Instead, the best thing to do is to have them replaced.

Conclusion

Knowing how to check and replace an oxygen sensor is vital for every car enthusiast, which can also help you save a lot of money in the long run. You do not need to rely on the services of a local mechanic and pay them for the job. You can do it on your own, but you have to be careful, especially in terms of determining that this is actually the problem.

Have you tried checking and replacing an oxygen sensor before? Is there anything else that you would like to share? Do not hesitate to leave a comment below.

Best Engine Air Filters: Our Top Picks in the Market


Best Engine Air Filters

There are several requirements for vehicles to deliver their peak performance, such as a well-maintained engine. In the case of the latter, one of the things that you will need is an engine air filter, which has the primary function of ensuring the supply of clean and filtered air. It removes the debris from the fluid that goes through the engine and protects the latter from wear and tear.

With the wealth of options for the best engine air filters, deciding which one to buy can be a challenging task. To help you make the right decision, keep on reading the rest of this post and I will share some practical tips to narrow down the options and list down some of the best products that you should include in your list of choices.

Product (Amazon Links)Image (Amazon Links)

EPAuto GP013 Engine Air Filter

Mann Filter C 3698/3-2 Engine Air Filter

FRAM CA11042 Air Filter

EPAuto GP075  (CA10755)​

EcoGard XA10496 Engine Air Filter


Importance of Changing Engine Air Filter

Replacing an old engine air filter should be part of routine maintenance. It should not be seen as an expense but as a necessary investment. Here are some of the reasons why you might need to have a new engine air filter:

  • Ensures Peak Performance: This is perhaps one thing that could sum up the benefits of changing engine air filters. This will enhance engine performance, making it run more efficiently.
  • Improves Fuel Efficiency: The cost of buying a new engine air filter can be justified by the long-term savings that it can provide. When your engine air filter is cleaned, the car consumes less fuel without the need to sacrifice its performance.
  • Removes Impurities: Similar to other types of filters, they have the primary function of removing contaminants in the system, including soot and dirt. This not only benefits performance but also lessens wear and tear. This lengthens the life of the engine and its different components.
  • Reduces Emissions: If you are concerned about the environment and if you want to become a responsible driver, you need to change your engine air filters from time to time. The latter prevents toxic emissions that could harm the planet.

AD


When to Change an Air Filter

Especially for those who are new to cars and often rely on their mechanic for most common problems, it is common to be clueless about when exactly engine air filters should be replaced. There are different factors that will have an effect on the answer to this question, such as the car that you have and specific driving conditions.

Different vehicle manufacturers will have different recommendations on when a replacement is warranted. It is recommended that you replace them at least once a year or after running about 15,000 to 30,000 miles. If you live in the country and if the roads are dirty, you might need to change more often as the filter can easily get clogged.

There are also different signs that you should look out for, such as when the gas mileage is significantly reduced. Fouled spark plugs and difficulty in starting the car are also problems that could possibly be indicative of the need for new engine air filters.


How to Choose the Best Engine Air Filter

There are countless brands that will confront you, but this should not be taken as an excuse to buy just anything. To help you narrow down the possibilities, here are some of the most important considerations:

  • Ease of Installation: See to it that the manufacturer provides clear instructions on how you can install the air filter. It should be one thing that you can do on your own instead of paying a mechanic to do such a simple task.
  • Durability: The overall construction of the product is also a critical concern. What is the main material that is used? Can it survive wear and tear? These are some of the questions to ask to determine how well the filter can keep up with the demands of the engine system.
  • Effectiveness: This would refer to its ability to filter impurities in the engine. To know if it is effective, you have to read online reviews and use the experiences of other people to list down the best options.
  • Compatibility: It is also important to note the fact that engine air filters do not offer universal compatibility. Before you buy, make sure that its size is appropriate for your car so that your money will not end up being wasted.
  • Warranty: Most of them will have a warranty that lasts for a year. Within such a period, if there are defects or issues, let the manufacturer know and they can offer free repair or replacement, depending on their policies.

How to Change Engine Air Filter

After selecting an engine air filter, your next concern is how to have it installed. It is quite a straightforward process, which you can accomplish by following the steps briefly mentioned below:

  • Start by making sure that you are safe. See to it that the car is parked properly. Turn off the engine and allow it to cool down for a few minutes. Otherwise, you might end up being burnt.
  • Find the engine air filter that will be replaced. It is usually in an air box housing with an attached hose.
  • Loosen the clamp that connects the hose to the cover of the air filter. Take it out and clean the case to get rid of dirt that might have accumulated on the surface.
  • Remove the old air filter and replace it with a new one. Insert it into the housing with the surface facing up. Make sure that the edges are sealed.
  • Insert the cover back in its original position. Press it firmly and put back the screws or nuts.

Short Reviews of the Best Engine Air Filters

Here are the products that can provide the best bang for the buck, as well as some of the reasons why they are well-received in the marketplace.

1. EPAuto GP013 Engine Air Filter

AD

My personal top pick from all the options that will be discussed in the rest of this post is that this is particularly a great replacement for engines in Honda cars. When you compare it with the original filter from the manufacturer, you will see that they actually look alike.

One of the things that I love about this product is how it can significantly improve fuel mileage, offering the benefit of efficiency. In the long run, this can translate into significant savings. To optimize such benefit, however, make sure that you replace the filters after the vehicle runs 12,000 miles.

The installation of the engine air filter is also relatively easy, making it an excellent choice if you want one that is user-friendly. First, find the housing of the filter and remove the clips. Take out the old filter and clean the housing. Install the new ones and cover them. It does not take a genius to figure out how its installation can be completed.

Pros:

  • Installation can be accomplished in a snap
  • Looks identical to the original engine air filters from the Honda
  • Significantly extends the performance of the engine

Cons:

  • The rubber gasket can easily detach from the filter
  • May fit poorly

Overall

This engine air filter delivers an abundance of benefits. Its installation can be accomplished in a snap, even without a helping hand from the pros. Most importantly, it improves the efficiency of the engine.


2. Mann Filter C 3698/3-2 Engine Air Filter

AD

The mechanical stability and dirt separation capacities of this air filter are hard to rival, especially given it fits very well in most cars. With this, expect that it will be impressive in separating dirt, water droplets, soot, and pollen, among others, that can lead to contamination.

More than just cleaning engine air, these filters are able to deliver more advantages, making it easy to be convinced that you need them. They will also improve fuel efficiency and will lessen the noise that is produced by the engine.

Lastly, it is also worth noting that the manufacturer is offering a warranty that lasts for 12 months from the date of installation. This can provide you with peace of mind, knowing that a comprehensive warranty covers it.

Pros:

  • Offers excellent value for money
  • Provides the perfect fitment
  • Effectively separates impurities from oil

Cons:

  • The seal can be too thick
  • Measurements can have some inaccuracies

Overall

This engine air filter which can deliver high mechanical stability, is a good choice. This results in better fuel efficiency and lesser noise, among other notable benefits.


3. FRAM CA11042 Air Filter

AD

Among others, one thing worth noting about this product is the fact that it is made from premium materials that are not easily prone to breakage. It also improves the overall performance of the engine while also saving fuel in the long run.

The rigid design of the frame is perhaps another asset of this product, which is reflective of its high-quality construction. The latter makes it strong enough to withstand vibrations and pressure that it could be subjected to.

Compared to the standard brands that you can find in the market, as the manufacturer has claimed it, this product can lessen the dirt by as much as two times. This prevents too much engine wear to keep it at its peak performance.

Pros:

  • Made from a solid material
  • Inserting the filter does not require too much effort
  • Durable construction for long-term functionality

Cons:

  • There can be discrepancies in sizing information.
  • It may not effectively musk unwanted smell.

Overall

This is another option that is perfect for buyers who want a durable product. This engine air filter can significantly improve horsepower and airflow.


4. EPAuto GP075 (CA10755)

AD

Another top-rated option for an engine air filter. Change every 12,000 miles. It is made of good quality materials, has a coverage number of ribs for a filter, and works well. 

The fitment of the engine air filter is also great. It is not for all types of vehicles, but looking at the list from the manufacturer, it covers quite a lot of models. Check the list of compatibility before purchasing to avoid wasting your money.

Pros:

  • Easily fits without the fuss
  • Snug fit but not too tight
  • Has a wide range of vehicle compatibility

Cons:

  • Filter material may not be as effective as others
  • Description of fitment for some car models seems to be incorrect

Overall

This engine air filter has a wide-ranging compatibility. Nonetheless, the coverage area is quite minimal compared to leading competitors.


5. EcoGard XA10496 Engine Air Filter

AD

​If popularity is your gauge when choosing an engine air filter, this is definitely going to be lost. It is made by a brand that may be unfamiliar to most people and only a few reviews are available online. Nonetheless, there is no need to hesitate as it can offer decent quality, especially given long-lasting protection.

Because of its factory fit, installation can be easy, even if you do not have extensive experience in car work. Nonetheless, keep in mind that it is only fitted for a limited number of vehicles, which the manufacturer clearly states.

Pros:

  • Installation is easy to accomplish
  • Made from high-quality materials
  • Provides long-lasting protection

Cons:

  • Minimal user reviews are available online.
  • It may not fit some cars that the manufacturer claims it is compatible with

Overall

With a few reviews from actual users, this is clearly not as popular as the other products mentioned above.


Conclusion

With five of the best engine filters that have been briefly discussed above, which is the winner? If you ask for my personal opinion, EPAuto G​​P013 Engine Air Filter is the top pick. From installation to price to performance, it has clearly outweighed the four other products.

Are you looking for premium car products? If yes, click here and read some of our buying guides to help you be enlightened as you decide which one to purchase.

How to Install a Backup Camera in your Car: Here’s How to Do It Right


How to Install a Backup Camera in your Car

Backing up a car takes special skills. Especially if you are just starting to drive, it can make you anxious, especially when you are left on your own. Even if you turn your head on your back, there can be blind spots and you can still be prone to collision. Luckily, with modern technology, especially in the form of backup cameras, backing up becomes a lot easier.

Interested to know how to install a backup camera in your car? While a lot of you might instantly think of paying a pro to do the job, you can save a lot of money if you opt to do it on your own. After all, it is not as difficult as it seems. Even as a beginner in car-related tasks, you can easily do it. Keep on reading the rest of this post and I will share with you how exactly it can be done.


What You Will Need to Follow This Tutorial

To follow the steps that will be mentioned below, be sure to prepare the materials that will be listed below:

  • Wireless backup camera
  • Wires
  • Marker
  • Hand-held driller
  • Pliers
  • Screwdriver

In most cases, the wireless backup camera that you will purchase is already complete with the wires and connectors that will be needed for its installation. If you have to buy the wires yourselves, make sure that you know which type is suited for the camera.


Step-by-Step Guide on How to Install a Backup Camera in Your Car

Before reading the steps that will be outlined below, here is a short video that pretty much sums up what you are about to read:

  • Once you have gathered the required materials and safely parked your car, remove the spare tire if you have one at the back. This will leave you with more space as you drill a hole in the spot where the camera will be installed. It will also reveal the holes where you will be running the wires.
  • Place the license plate frame on the bumper and use a pen to mark the position of the camera. It should be at the center.
  • Drill a hole exactly on the area that you have marked. The size of the hole will depend on the size of the wire that you will insert. Most of the backup cameras today have small wires, so you do not have to create a hole that is too big.
  • Attach the license plate frame. At this point, the camera must also be attached to the frame as well.
  • Next, connect the wires from their original position to power up the lights that illuminate the license plate at night.
  • By now, you have to deal with the wiring of the actual backup camera to have it powered.
  • Depending on the car where the camera is installed, you have to lift the panel at the trunk to expose the wires and to make it easy to bring it to the passenger compartment.
  • Look for the hole where you will have to insert the wire. Use a wireworm to make it easier for you to pull the wire from your backup camera. Go under the car and make sure that the cables do not tangle and that it will not interfere with your spare tire.
  • At this point, you can now run the wires to the front of your vehicle. Open the panel on the side and run the wire through its position.
  • Attach the wire to the wire that connects to the stereo and tuck it neatly on the sides.
  • Connect the camera’s power wire to the power wire for the radio.
  • The next connection that you have to make is the ground wire, which is usually the one in black, as it is also shown in the video above. Loosen the screw and add the terminal of the wire for grounding. This is where the radio and the camera will derive their ground.
  • Connect the video feed of the camera to the input that you can see at the back of the interior. In the video above, this exists in the form of a yellow RCA connection.
  • Next, connect the wires from the radio to the wires in your vehicle.
  • Rejoice; you are finally done connecting the wires, which is pretty much the challenging part of the process. Tidy up everything, making sure that the connections won’t tangle. Reassemble everything that you have earlier removed. It is now time to put it to the test and see if you did a great job.

Pro Tips

To ensure ease of installation and proper functioning of the backup camera, below are some of the most important tips that you have to keep in mind:

How to Install a Backup Camera in your Car

Via: https://www.pinterest.com/explore/backup-camera-installation/

  • The steps mentioned above are based on the short video that I shared in the earlier part of the article. Take note that these instructions do not have a universal application. At the end of the day, the best thing that you can do is to consult the manual and follow the assembly instructions from the manufacturer.
  • If you are having a hard time remembering the wires, it will be best to put color-coded tapes on the end. This makes it easier to determine which wires should be attached to each other. 
  • It will be good if you have a crimper ready. This is one of the most useful tools for any car lover and DIY enthusiast, as it can cut wires in seconds.
  • Use zip ties to keep wires together and to prevent them from tangling. Otherwise, there is a chance that they can easily dismantle, and you will have to reconnect them.
  • Want to make your life easier? Why not opt for wireless backup cameras? They can be quite expensive, but they are better in the sense that you do not have to deal with complicated connections to complete their assembly.

Conclusion

In sum, installing a backup camera does not need to be a complicated task. As is shown from the steps that have been briefly discussed above, even without a helping hand from an experienced mechanic, you can easily accomplish the installation. Make sure to pay attention to each and every step to enjoy the optimal functionality and superior performance of the backup camera.

Have you installed your own backup camera? Are there tips that you would like to share? Let us know by leaving a comment below.

How Does Car Engine Oil Work and Other Important Things to Know?


How Does Car Engine Oil Work

Interested to know how car engine oil works? I got you covered in the rest of this post. The discussions below will provide insights on how the oil travels to the different parts of the car’s engine. More so, it also covers the main functions of the oil. By the time you are finished reading, I hope that you will realize how oil is as important as fuel to optimize the performance of your car.


How Does a Car Engine Oil Work?

For a better understanding of the answer to this question, watch the short video below:

https://youtu.be/9RSWs44PdkE

Based on the video above, here is the journey of the oil through your engine, which can take as little as five seconds:

  • It all starts in the sump of the engine, which functions as the reservoir. This is also known as the oil pan and you can find it at the bottom part of the engine. When the engine is turned off, this is also where oil is collected. Typically, the sump can hold four to eight quarts of oil
  • From the sump, the oil is pumped. The oil is sucked from the pump and it goes through a pickup tube. This happens as soon as the engine is turned on. This is also where the oil becomes pressurized.
  • The next part where the oil goes through is the oil filter. As with any filter, the main function of the latter is to get rid of the impurities that can possibly be present in oil, making sure that it is completely clean when it travels to the other parts of the engine. This removes the contaminants that can be damaging to the engine.
  • Once the oil is clean, it will be transported to the critical parts of the engine, which include bearings, pistons, and valve trains.
  • Through the oil channels, the oil returns to the sump. This is the point when the journey of the oil is completed.

What are the Main Functions of Oil?

Now that you know how car engine oil works, the next important thing you need to learn is the functions of oil. Why do you need oil in the first place? Here are some of the things that it does for your engine or your car in general:

What are the Main Functions of Oil

Via: https://carfromjapan.com/article/car-maintenance/6-easy-steps-change-oil-yourself/

  • Reduces Friction: The engine is made of metal components. When they touch each other, friction is created. This makes it more difficult for the parts to move. With this, oil is used for the reduction of metal-to-metal contact.
  • Reduces Wear: As a result of the reduction of friction, wear throughout the drive is also minimized. In the long term, this can translate to huge savings. Otherwise, you need to replace the worn-out parts of the engine frequently.
  • Reduces Harmful Deposits: Oil is like a water filter. It absorbs the impurities that can be present in the oil. When these contaminants reach the engine, they can interfere with its optimal functionality.

What Are the Types of Oil?

Not all oils are created the same. There are different considerations that will help you to decide which type of oil is perfect for your needs. Two of your choices are:

  • Mineral Oil: This type of oil comes from petroleum or a by-product of petroleum. This is popular for budget-conscious people as this is generally a cheaper choice. It does not last long and cannot withstand extreme temperatures.
  • Synthetic Oil: On the contrary, this is not naturally derived but is made in a factory. It is more popular today and it makes use of different synthetic chemicals. In terms of lubrication, this oil does a better job.

When to Consider an Oil Change

When to Consider an Oil Change

Via: https://www.youtube.com/watch?v=O1hF25Cowv8

In a budget-strapped economy, as much as possible, we would like to avoid expenses. However, keep in mind that an oil change is one thing that should not be ignored, and hence, you need to spend money on such. In the case of most cars, you have to change the oil once every three months, or at least after running 3,000 to 5,000 miles.

Is it time to change your oil? To make it easier for you to know when it is about time to do so, below are some of the things that you should be watching out for:

  • When the oil is already black – It does not take an expert to figure this out. A quick inspection will let you know that the oil is already dirty, and hence, a replacement is necessary. If not, the filter will be overloaded and the oil will no longer be able to perform its intended function.
  • When the engine produces a loud sound – As the owner of your car, you most probably know how the engine normally sounds. If it changes all of a sudden, to the point that it is already annoying and distracting, consider changing the oil.
  • When oil levels drop – Sometimes, all that you need to do is dip a stick and see if the oil is still at the right level. If it is too low, which means that the engine has eaten most of it, change the oil.
  • When the engine light is lit – If the engine light is constantly turned on, you most probably have a problem with the oil. In the case of newer models, there is a dedicated light that will notify you if you have to change the oil.

Conclusion

Engine oil enables the incredible performance of your vehicle. Whether you have a new or old car, having the right oil will affect the way it performs. From the sump through the other parts of the engine, oil journeys for about five seconds. As it passes through the different components, it reduces friction, minimizes the possibility of wear, and removes or reduces mineral deposits.

Do you learn from this post? Is there anything else that you would like to add? Let us know in the comments section, and let us talk more about engine oil.