Home

Recent Posts

The 8 Different Ways on How to Remove a Stripped Nut


Remove a Stripped Nut

Isn’t it frustrating to find a stripped nut when you are about to install or repair a part on your motorcycle, or you are just getting ready to start a restoration project? These tasks require you to loosen bolts and nuts, and if these stripped nuts don’t come off, your project will be put on hold, and it can take any excitement out of you.

In this post, we are going to talk about the 8 different ways how to remove a stripped nut.

  1. By using Brute Force
  2. By using a Blow Torch
  3. By using a Metal Saw
  4. By Rocking the Bolt
  5. By using a Power Drill
  6. By using a Welding Machine
  7. By using a Bolt Extractor
  8. By using a Pipe Wrench

We have also provided you with step-by-step instructions on how to use these 8 easy methods. After you have finished reading this article, we hope that you will be able to apply your newfound knowledge to do these jobs right the first time. Read on if you want to know more.


What is a Stripped Nut?

Before we proceed with the discussions, it’s essential that we first discuss what a stripped nut is and some reasons behind it. In case you’re not familiar, a stripped nut is usually a hexagon-shaped metal fastener that has a circular hole that is threaded to fit onto a bolt, but some of the threads are stripped, or the outside has become rounded.

When trying to remove or apply a stripped nut, you might end up with a broken one or, worse, a broken or stripped bolt on your motorcycle.

It would be very frustrating if you ended up paying more for the repair because of this mistake. It could also lead to injuries, especially if you are not doing it right. We will discuss 8 different methods to remove a stripped nut correctly so you can get the best results.


The Different Methods How to Remove a Stripped Nut

Remove a Stripped Nut

If the thread is stripped, then you may need to get a threading tool to fix the bolt threads or part threads. But if the nut is stripped on the outside, follow the method listed below.

In this section, we are going to discuss the 8 methods on how to remove a stripped nut from your motorcycle or car. Make sure that you have read everything carefully, so you can avoid expensive and dangerous mistakes. As with any tutorial, we recommend that you seek professional help if you are not confident that you will be able to perform these tasks on your own.


1. By Using Brute Force

We sometimes tend to lose our patience and choose a method that uses brute force when we encounter a stubborn bolt or nut. Strong force may be part of the solution with the proper method and tools, but with not anger or frustration, so let’s see how we can remove nuts.

  • Using a chisel, an air hammer, or a punch, hit the head of the bolt exactly at its center. You may also resort to using an impact gun. (see video)
  • You can also hit the bolt from its other side if possible.
  • Do steps 1 and 2 alternately until the bolt separates from the nut.

2. By Using a Blow Torch

While the cold makes the metal contract, applying heat, on the other hand, will make the metal expand. Make sure that you have worn safety glasses and gloves before you proceed with this step.

  • Using a blow torch, heat the bolt or nut until the metal expands.
  • Wait for the metal to cool down.
  • Try twisting the bolt or nut until they come off.


3. By Using a Metal Saw

You will be using a metal saw (see video) to perform this method. Make sure that the cut is precise, as you may end up cutting the bolt along with the nut. Using gloves and taking your time will prevent mistakes and injuries. So, be very careful.

  • Saw through the nut, just like you are cutting a ring into two.
  • Once you have cut it, gently pry open the nut, so it is able to loosen.
  • Using pliers, try twisting the nut off of the bolt without stripping the bolt.

4. By Rocking the Bolt
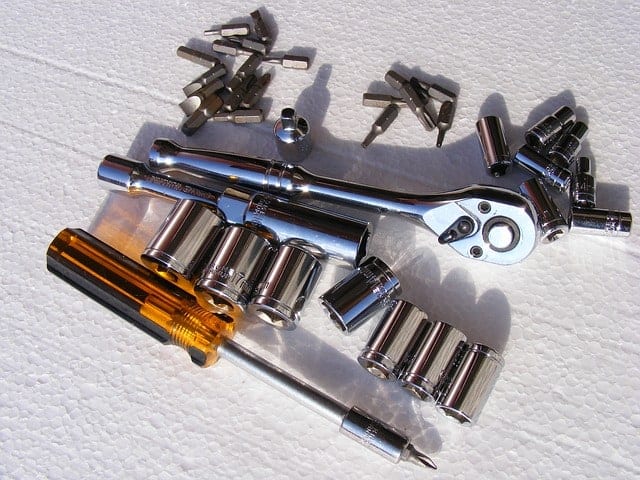
socket set

You will need a socket and a ratchet for this method. It should be noted, however, that you need to try this one out first before you resort to more desperate measures.

  • Rock the bolt or nut back and forth with your racket and socket.
  • Once you have successfully nudged the nut, spray a penetrating spray onto the exposed thread.
  • Repeat step number 1 until you see another exposed thread. Work slowly and wait for the spray to penetrate. 

5. By Using a Power Drill

Remove a Stripped Nut using a power drill

This method is slightly similar to the saw-cutting method, and only you’ll be using a drill. However, you should only use this method if nothing else works.

  • Assemble a power drill with a small metal cutting drill bit.
  • Use the drill kinda like how you would use a saw and cut the nut until you get to the bolt.
  • Take off the stripped nut carefully.

6. By Using a Welding Machine

If you notice that the nut is already in very bad shape and the strip level is a little too high, you might want to consider using a welding machine. Using this method would simply require you to use the welding torch to attach a nut or bolt. This method would also require you to be a certified welder.

  • Use your welder to attach the nut or bolt to the stripped nut.  
  • Use some pliers to turn the stuck nut or bolt.
  • Take off the stripped nut carefully, trying your best not to strip any other parts.

7. By Using a Bolt Extractor
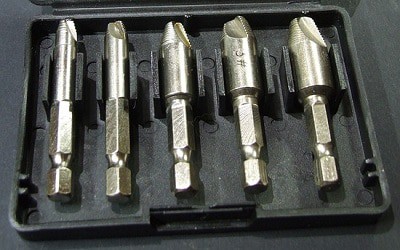
screw-extractors

You can always find a good bolt extractor out on the market right now. However, be wary of low-quality bolt extractors. Doing this method will allow you to use hardened bits, which grab the threads of the bolt or nut to be able to remove it.

  • Drill a tiny hole in the bolt. (See video)
  • Place the extractor tip against the bolt or screw and place the drill in reverse.
  • Slowly start extracting the bolt.

8. By Using a Pipe Wrench
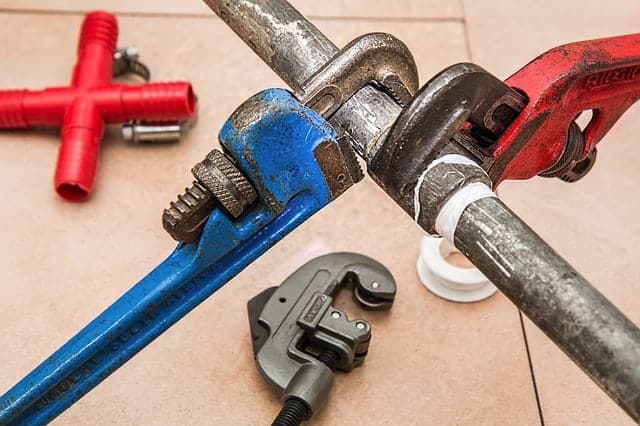
pipe wrench

Using a pipe wrench might be considered one of the easiest and simplest ways how to remove a stripped nut. It is also very convenient, as anyone with a motorcycle might have one in their garage.

  • Place the pipe wrench properly onto the bolt or nut. Make sure it has the perfect fit.
  • Start tightening it with ample pressure on the bolt or nut.
  • Apply pressure to the end of the pipe wrench. This should help the wrench grabs harder onto the bolt or nut.

In case the bolt or nut doesn’t budge, you may opt to use an extender on your lever, such as a metal pipe. Be very careful when doing this method. It should also be noted that a pipe wrench is a lot different from a monkey wrench. You may buy high-quality pipe wrenches online or at a local hardware store.


Conclusion

Probably a combination of two methods would have solved your stripped nut problem. But what’s important is that you need to be extra careful, especially when dealing with dangerous tools such as drills, blow torches, ratchets, sockets, bolt extractors, welding machines, and pipe wrenches. As we have mentioned earlier, seek professional help if you cannot do these tasks on your own.

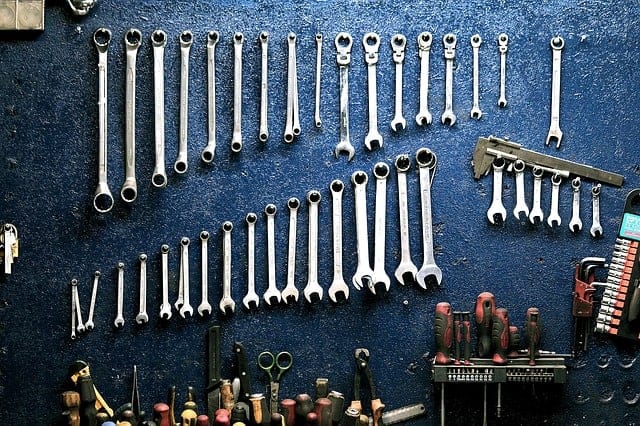
Wondering what tools are helpful to have on hand in your garage that most people need? Look at these articles to find out:

14 Essential Tools For Garage That You Must Have
13 Best Tools For Fixing Your Car At Home
Top 14 Automotive Tools That Are Essential For Every Car Owner
tools

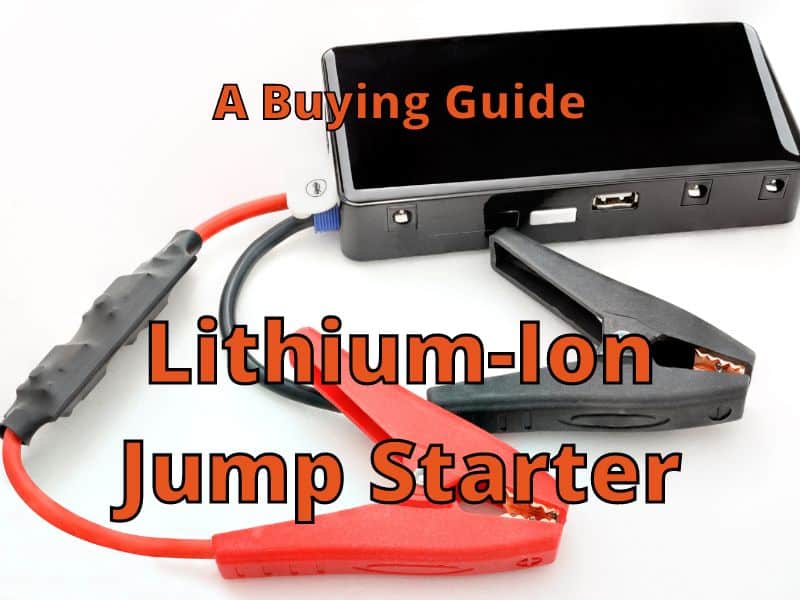
Best Lithium Ion Jump Starter: A Must-Read Before You Buy


Lithium-Ion Jump Starter

Whenever you are confronted with the need to jump-start your car battery, there are different solutions to the problem. You may try to find another car to help you jump-start your car or call a jump-starting service. A better solution, however, is to use a lithium-ion jump starter.

Portable lithium-ion jump starters are small battery packs with jumper cables that can be conveniently placed in your toolbox or sometimes even the glove box of your car. When the need arises, you can use it to jump-start your car. When choosing the best lithium-ion jump starter, make sure to consider the following things:

  • Positive Reviews
  • Easy to Use
  • Durable
  • Safe to Use
  • Extensive Warranty Coverage

If you are interested in a lithium-ion jump starter, that’s a smart choice. You’ll always have help when you need it. As you look, you may want to choose the cheapest one, but larger cars need more power. Take time to consider how big your car’s engine is and what the product quality is like before buying. 

As you research, you may find a product that meets your car’s needs just right. Keep reading to learn more about these jump starters.


What is a Lithium Ion Jump Starter?

AD

Let’s first discuss what a jump-starter is. It is simply a device that can be used to jump-start a vehicle’s battery, which can no longer start a car. If you have a dead battery, this device will come in handy. 

With a portable jump starter, you will have a dependable companion while you on the road. This also means that you do not need to find another car and use their battery to help, which always carries the possibility of damage to the electrical systems.

Previously, portable jump starters were made from lead acid batteries, which were bulky and heavy. However, the new generation of jump starters is efficient and portable. They use lithium-ion batteries; some of them do not weigh more than a pound and are as compact as a pocketbook.

They were first introduced in 2013 and since then have continued to improve to offer better functionality and performance. A key feature of these devices is their versatility. You can use them to jump-start your car’s battery for charging gadgets, laptops,  and mobile phones.


Benefits of Lithium Ion Jump Starter

There are many reasons why a lithium-ion jump starter is beneficial. Here are some of the things that will make this an excellent investment to have:

  • Compact: This is perhaps the best thing about a lithium-ion jump starter. It won’t take up too much space in your car. It is small and lightweight, so you won’t have to lug around lead-acid jump-starters, which can weigh more than 20 pounds. 
  • Safe Jump Starting: Another good thing about lithium-ion jump starters is that they are equipped with state-of-the-art microprocessors. They have various safety features that can provide you with peace of mind when used.
  • Packs a Lot of Power: Besides the small size, lithium-ion jump starters can deliver many cranking amps. It is able to provide multiple starts before it needs to be recharged.
  • Use it Wherever You Are: In the past, you needed another car or a tow truck jumper service to jump-start your battery. With a lithium-ion jump-starter, you can be self-reliant. No need to depend on other vehicles or pay anyone to help. 
  • Multipurpose: Another good reason to invest in the best lithium-ion jump starter is that it can be used in more ways than one. As noted earlier, it can also function as a portable charger for your gadgets.

Essential Factors to Consider

When choosing the best lithium-ion jump starter, make sure that the following things are taken into consideration:

  • Reviews: To start with, it’s a good idea to go online and learn more about what other people are saying about the product. Look for pros and cons. Finding detailed experiences can help you narrow down your choices.
  • Ease of Use: No one wants a jump-starter that is too complicated to operate. Look for one that is simple to use and reliable. Again, you can consult the reviews from other users and use them to determine which ones will work best for you.
  • Durability: A lithium-ion jump starter should withstand and continue to work well over time. Make sure yours is durable. See reviews and look for quality construction with a sturdy case. Impact resistance is a good idea when jump-starting a car.
  • Safety: If you want to have peace of mind, you should also pay attention to the safety features that can be found in the product. For instance, there should be protection from overloading and reverse polarity. This will be helpful in prolonging the life of the lithium-ion jump-starter.
  • Warranty: If the manufacturer believes that their product will deliver long-lasting quality and functionality, they will offer extended warranty coverage. This means that within the warranty period, they may offer free repair or replacement if the product encounters any problem, as long as it is within the specified terms and conditions.

Top Picks for the Best Lithium Ion Jump Starter

By now, you may be wondering which product is best for you. Below are five models that may work to meet your jump-starting needs.


1. NEXPOW Car Jump Starter – 1500A Peak Q10S for Up to 7.0L Gas and 5.5L Diesel Engine12V Auto

AD

 With a 1500A peak current, the Q10S car jump starter can start the 12V vehicles up to 7.0L Gas/5.5L Diesel engines. The battery starter is equipped with a high-performance force start function that helps you start depleted car batteries, even in extreme temperatures.

The powerful lithium battery booster – up to 20 jump starts on a single charge (just over 25% of power is enough to start your car). Suitable for cars, trucks, motorcycles, boats, RV or tractors, and so on.

Q10S Car Starter is designed with 2 USB outputs (5V/3A)and (5V/2.1A); the quick charge 3.0 USB port can fully charge your cellphones, tablets, and other mobile devices at the fastest (up to 75% faster than a standard charger). You can power your other car accessories by using a 12V-16V/10A DC port. like tire inflators, inverters, and more.

Pros:

  • Compact and lightweight
  • Comes with a user-friendly design
  • Delivers multiple functionalities

2. BUTURE Car Battery Jump Starter 6000A Jump Box 65W Fast Charging (All Gas/12.0L Diesel)

AD

The car battery jump starter has unmatched 6000A current, 5 times that of general jump starter. The portable car jump starter with dual start assurance can instantly start your stranded vehicles (up to all gas/12L diesel) including completely drained batteries even at -20℃, and support 1000+ recharge cycles. Start car confidently every time, which is far easier than getting help from another car or roadside service!

The jump starter battery pack is featured with updated 600 lumens LED lights, larger luminous area and 300°wide-angle irradiation, significantly providing 400%+ brightness and can be used for 96 hours constantly. 4 modes lights are for different emergency and double as warning triangle. Outperform countparts and bring you sense of safety.

Pros:

  • Compact and lightweight design
  • Easy to use
  • Comes with 8AWG durable and 33 inches extended cables
  • 2-year warranty

3. JNC660 1700A Peak Amp 12V Jump Starter

AD

This is another option that is well-received in the market for portable jump starters. It has 1,700 peak amps and 425 cranking amps, which are enough to provide enough power for most heavy-duty cars or trucks. 

The unit may be larger and heavier than most of its counterparts, but this is only because it is feature-rich. It has functions and features that will make it the perfect choice for everyday drives and pros. It comes with a voltmeter that will make it easy to monitor the charge status.

The PROFORMER Technology that is present in this jump starter is another great reason to pick this above most of its competitors. It optimizes the power and ensures it will provide extended power when you need it the most. This technology help with cranking power and the service life of the battery.

Lastly, it has built-in automatic recharging, letting you recharge by plugging it into an outlet. With this, you can expect that the jump starter will always be ready when you need it the most. It will never run out of charge.

Pros:

  • Comes with plenty of power for jump-starting
  • Jump starts quickly
  • Popular even for the pros

4. NOCO GB40 1000A 12V Ultrasafe Lithium Jump Starter

AD

This is another dependable option that should definitely be part of your list. It has an abundance of safety features, which will also make you confident that it will last long. For instance, it comes with reverse polarity protection and spark-proof technology. You can connect it to any battery without worries.

It is also worth noting that it can deliver up to 20 full jump-starts on one full charge. It is perfect for vehicles of all sizes. It can easily start a 6.0L V8 engine. There is no need to look for another car with a battery that is in excellent condition.

Lastly, you might also love how it comes with LED light. Not only that, there are seven light modes that are available, making it versatile.

Pros:

  • Has advanced safety features
  • Durable construction
  • Has LED flashlight

5. DBPOWER Peak 1600A 18000mAh Portable Car Jump Starter (up to 7.2L Gas, 5.5L Diesel Engine)

AD

POWERFUL & COMPACT: Jump starts your vehicle (up to 7.2L gas or 5.5L diesel engine) up to 20 times with 1600 amps of peak current and heavy-duty clamps and cables. It’s compact enough to store in your glovebox.

SMART CHARGING PORT: With an 18000mAh capacity and a smart USB port, it can fully charge your smartphones, tablets, and other devices at the fastest speed possible.fastest speed possible.

The newly-added LCD screen can exactly show the remaining power. The compass can help you find your way home when get lost in the wild.

Pros:

  • Sleek design
  • Easy to use
  • 1-year warranty
  • Comes with a case

Conclusion

Indeed, the best lithium-ion jump starter is one thing that every car owner should own. They are usually compact and lightweight yet powerful. It is more portable compared to traditional lead acid jump-starters. What’s more, it’s a great way to be self-reliant compared to using jumper cables. There’s no need to wait for the arrival of roadside assistance or to ask random motorists for help to help jump-start your car.
Despite the many benefits that can be delivered by a lithium-ion jump starter, you need to choose wisely. Not all deliver quality battery power or good customer service. Some may make claims that are not always accurate. Check product reviews and do your own research to help you make the right choice.

Are you looking for other gadgets for your car? Check the review section to learn more about gadgets and other helpful items for your car.

How Long Does It Take to Charge a Motorcycle Battery: Read and Find Out!


To Charge a Motorcycle Battery

Just like any vehicle, every minute you spend riding your motorcycle means your battery is getting that much older. The battery constantly charges and loses charge if the chemistry is incorrect. If you maintain it, the battery will last until it can no longer take charge effectively.

The time it takes to charge a motorcycle battery is about 4 to 24 hours. Each battery and charger can influence the time it takes to charge your battery. If you just purchased a new battery, there should be instructions on how long to charge it.

Once I purchased a motorcycle and noticed the battery acid levels were low. It needed some distilled water to be added to the fill line and a charge. I left it on the trickle charger and used it the next day.  

Keeping your battery charged at a healthy level will likely prevent all kinds of potential failures in your motorcycle’s engine. In this post, we will go into more detail about how long it takes to charge a motorcycle battery. When the day comes when you hear the sound of your bike not starting, you will be thankful that you have read this post.


Things You Need to Know About Your Motorcycle’s Battery

Wet BatteryGel BatteryAGM Battery
ADADAD
Charges relatively quicklyCharges slowlyCharges quickly
Can be discharged to about 50% before having problemsSealed battery – no need to refill over timeSealed battery – no need to refill over time
Overcharging is less likely to damage the battery badlyGood for deep discharging useDo well in the cold/snowy conditions
Does not give off hydrogen gas when chargingDoes not give off hydrogen gas when charging
Takes vibrations wellTakes vibrations well
Hold charge well
Over time liquid inside can evaporateCan be higher pricedCan only be discharged to 80% before having a problem
Need to check fluid levels and refill if neededLose power faster in cold temperatures (32°F)Overcharging can damage the battery
Doesn’t take vibrations as wellMay have a shorter lifespanHeat sensitive
Overcharging can damage the battery.Should be stored with a full charge
Heat sensitive

Essentially, all motorcycles use one of the three types of batteries above, and now more are using lithium-ion batteries as well. These batteries are the Lead Acid or wet type, the Absorbent Glass Mat (AGM) type, and the Gel-filled type.

Wet batteries will need to be filled once in a while with distilled water, while the others are sealed batteries and have no need to be filled. All motorcycle batteries require charging if you don’t use your vehicle often. Some can go longer periods without recharging, like the 

You may also find that some batteries say they are maintenance-free. This means no liquid needs to be added, but all batteries need care. They need to be charged to the proper level without falling too low, or damage to cells will start to occur. That is why a smart charger is very important to have.

Lithium-ion Battery

AD

ProsCons
Charges quicklyMay need extra time to wake up in cold weather
Very lightweightHigher price than other batteries
Last longer than most batteriesVoltage-sensitive – Can’t be discharged too much while in use without damage. 
Slow discharge – can last longer without being charged when not using a motorcycle.Overcharging can damage the battery.
Hold charge well

Maintaining Your Battery

While the lifespan of a regular Lead Acid motorcycle battery is around 3 years, you should also be aware that proper maintenance is required if you want it to last longer. Both gel and AMG batteries can last 6 years or longer with proper care, and lithium-ion batteries will also last 6 years or more as well. This applies to high-quality batteries.  

When your motorcycle is not in use, you can take good care of the battery by using a smart charger to maintain the correct voltage for your battery type.

A smart battery charger needs, say, lithium on it to charge lithium-type motorcycle batteries, and all smart battery chargers should work for the other battery types, although Gel batteries need to be charged slowly, so read the instructions to be sure to meet its charging requirement.

AD

Sometimes it might be OK(?) to use a pigtail adapter, connect it to the battery and then trickle charge your bike by connecting the adapter to the charger. But most of the time, you should take out the battery when charging. It depends on the battery type, components that might be sensitive to heat near your battery, and the electronics on your bike.

If you ride your motorcycle on the weekends only, you’ll want to consider charging your battery each week. Although each bike is different, electronics and normal discharge can drain the battery while the bike is not in use.

Wet batteries might be able to go 1 week without a need for a charge, AGM and Gel batteries about 2 weeks, and lithium-ion batteries might be able to go even longer. However, your motorcycle type and battery quality will determine these numbers. Generally, if you’re not using the motorcycle daily, charging weekly is best

Checking the voltage output using a multimeter can give you a better idea of how the voltage of the battery is draining. It is recommended that all batteries should be maintained/charged with infrequent motorcycle use, such as riding on the weekend only.  

When using a multimeter, you would want a reading of 12.5 to 13.5 volts on a 12-volt battery. A 6-volt battery should read between 6.5 to 7.5.


Storing Your Battery/Not Riding For a Month

AD

If you are not using your motorcycle for a while, charge and store the battery in a dry, cool place.

Always take the battery out of the motorcycle first, and use your smart charger to charge it until it is full. Most motorcycle batteries will be fine for several months before needing a charge again. 

Another option is to use a trickle charger and leave it attached to the battery. This will maintain your battery at full capacity the entire time it is not in use and may help remove deposits on your battery cells that may have been deposited during over-draining.

Safety is also an issue with any electronic device left on. Regularly check that your battery and charger are working properly and that there are no issues. Make sure it is a safe environment for the battery and charger to operate. No extreme conditions should be introduced, and a fire extinguisher should be on hand, just in case. 

Reading the battery and charger instructions will give you more information about whether this is OK for your battery. When you take good care of your motorcycle battery, it will offer years of service and reliability. 


How Long Does It Take to Charge a Motorcycle Battery?

How Long Does It Take to Charge a Motorcycle Battery
Via: https://www.youtube.com/watch?v=k20X6qPz7lU

Most batteries that are in good condition and regularly used in a motorcycle will need about 2-3 hours of charging with a smart charger, but this also depends on lots of factors, like the type of battery, when it was last used, and how fast the charger is.

A smart charger can usually intelligently recharge your battery. It won’t overcharge it and can charge quickly if your battery is capable. Older motorcycle chargers may overcharge your battery, causing irreparable damage to your battery.

Another great feature of these smart motorcycle chargers is that they can trickle charge for safe charging. 

But if your battery is taking forever to charge, It’s time to check your motorcycle’s battery. When you notice your motorcycle is not starting like normal, the battery doesn’t seem to hold a charge, or it doesn’t charge well, then it’s time to investigate. 

You can do this with a physical check: look for cracks, leaks, or corrosion in the terminals. Using a smart motorcycle charger can also help you determine if it is able to hold a charge, and a multimeter can show you how many volts are available. 

If you don’t own a smart motorcycle charger, you may opt to use an older motorcycle charger instead. Normally, it will take anywhere between 4 to 24 hours to charge a motorcycle battery. Using this type of charger, it’s necessary that you check the voltage every once in a while to see if the process has been completed.

You should also be aware that if the charger does not have a “float mode,” which makes sure that it will not overcharge, it is highly recommended that you charge it at the slowest possible rate, ideally at 1-2 amps. However, if your battery has been damaged, has gone flat, or is no longer taking any charge, it might be best to replace it with a new one.

You also should consider taking good care of your battery by charging it regularly. It costs less, and you will get the most out of your battery’s lifespan.


Is There a Non-Battery Operating Motorcycle?

Is There a Non-Battery Operating Motorcycle
Via: https://www.youtube.com/watch?v=j3CuzpQwH6A

If you don’t want to be troubled with charging a motorcycle battery, you might have wondered if there are other options available. Not that I know of, except for some old and new technology that you may be interested in. 

What am I talking about? Kickstart motors and all-electric motorcycles.

A kick-start engine is found on older motorcycles and offload dirt bikes. These can allow you to run your motorcycle even with little or no battery power.

But most, if not all, use a battery for the electrical components of the bike. If you want to try to get rid of the battery altogether, it might be possible with a capacitor, but it might also create some electrical problems with your bike. 

What some people are looking forward to is the all-electric motorcycle

2020 Livewire2020 SR/F
105 Horsepower110 Horsepower
City – 146 miles / HWY – 70 milesCity – 161 miles / HWY – 99 miles
0 to 60 in 3 seconds0 to 60 in about 2 seconds
Weight – 549 lbs.Weight – 485 lbs.
Level 2 charge time – 60 min.Level 2 charge time – 60 min.
Price $29,799Price $18,995
(Most of the information was obtained from: https://www.jpcycles.com/)

In fact, Harley Davidson has released the Livewire, and Zero Motorcycles has released the Zero SR/F this year (2019). Each model has favorable reviews. With their futuristic look and power, no wonder so many people like them. 

As more and more electric-style vehicles are coming out each year, we will see how people value battery power. These motorcycles will be part of the test that tells how much battery power may be seen as a positive way to power vehicles. 

One thing I liked was finding out about the city miles range of these motorcycles. One rider found they could use their bike around town all week without charging it. 

It is also noteworthy that these electric motorcycles handle the same as normal motorcycles. Their fast acceleration without shifting is what really makes them stand out from the crowd.


Conclusion

Recharging your motorcycle battery should take 2-3 hours but may take up to 24 hours. Make sure not to overcharge it, or use a smart charger to be sure. I hope that you found this information helpful and interesting. Taking time to take proper care of your battery will pay off, so you can get the most out of your ride.

How Much to Paint a Motorcycle: Prepare to Pay These Costs


For Painting a Motorcycle

​When I was a teenager, I once painted my own motorcycle tank. Everything went perfectly, I thought, except I didn’t add the primer, and my tank turned out to be a dull red. Painting can cost a little for smaller parts or a lot for an entire motorcycle, but make sure you consider how exactly you want it to appear since a nice paint job takes more time and money. 

You can expect to pay about $300 to $1500 for a motorcycle paint job. There are many variables to consider, so narrowing down the price will depend on what exactly you need to be painted and how difficult the job will be.

We will discuss the cost of regular, customized, and DIY paint jobs.

Regular Paint Job Custom Paint Job DIY Paint Job
$300-1500 $600-$3000 $100-$500

If you are hoping to customize your motorcycle, you are in luck. You can do it yourself or get someone to help add a little flair for a relatively low price.

But if you need to repaint an entire bike, you’ll need to pay quite a bit more. Get some ideas on how you want to customize your motorcycle,  and you’ll be well on your way to getting the job done. 

Each paint joint will depend on how much of the bike you plan to paint. Some people just want to paint the tank, others the tank, fairings, and fenders, and yet others the entire frame. 

Therefore, the cost of painting your motorcycle can vary considerably. If you are a do-it-yourself (DIY) kind of person, then you’ll need to decide between using a spray can or a paint machine to get the job done. This will also play a factor in your costs.

You may need to sand and spray a reformer paint on if you have rust. With a small paint job for scratches, you may want to do it yourself. 

And don’t forget about the paint and designs you’ll be using. Getting a quality paint job and finish depends partially on the paint quality and if any mistakes are made. Custom paints and quality craftsmanship will cost more.    

Regular Paint JobCustom Paint JobDIY Paint Job
About $300 – $1500About $600 – $3000About $100 – $500
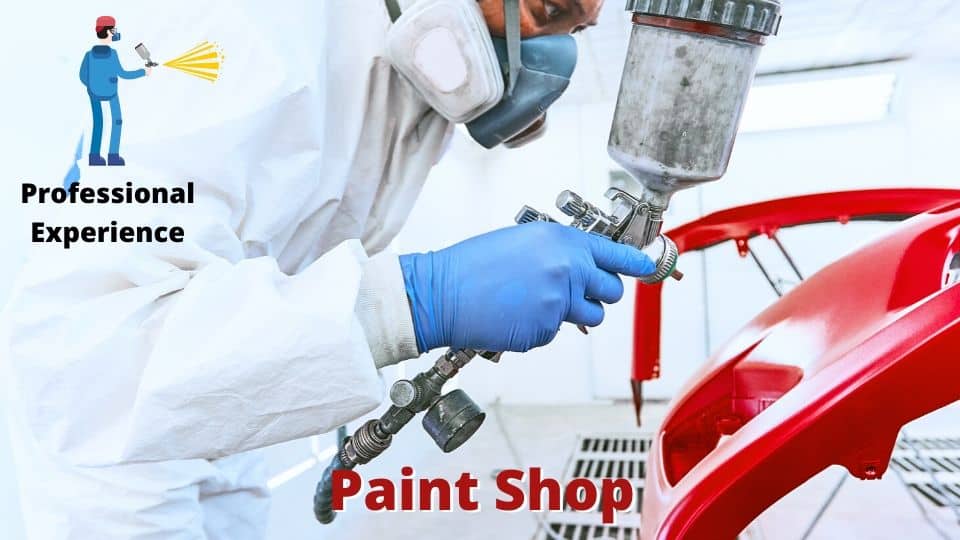
Experienced ProfessionalExperienced ProfessionalThe outcome depends on your skills.
Average paint qualityHigher paint qualityQuality depends on the equipment and paints chosen.
Customization and better resale value
Wide range of prices and qualitiesUsually good quality but may be a much higher priceQuality might be lower than from a paint shop


Cost of Using a Regular Motorcycle Paint Shop

Cost of Using a Regular Motorcycle Paint Shop

A regular paint job for your motorcycle will likely cost you around $300 to $1500. As with any paint job, the price is highly dependent on the amount of work that must be done before you have it painted.

Keep in mind that the actual painting is just one part of the process and that the biggest part of the job may be sanding off the old paint from your motorcycle.

Sanding your motorcycle requires manual work, and it will take more time. In addition, the cost will also be increased if there is a lot of preparation that must be done before the actual painting job.

Parts need to be covered or removed to effectively paint much of the frame, as well as other parts that need to be removed to be painted completely. 

Here’s a tip: begin preparing your bike before you go to a professional. You can start the work yourself and then ask a professional to finish.

This could reduce the cost quite a bit, so you might only need to pay half for a regular paint job (about $150 to $750). If you do the preparation yourself, you will also see if doing the entire job is possible for you. 

If paying for a paint job is prohibitive, ask a paint shop how much they will charge if you take off the parts yourself. If you just want to paint the tank as well as the fairings of your motorcycle, removing them and doing any prep work will save the paint shop time and money.

Take time to learn how to detach and reattach any parts that you want to paint the right way. After the parts are painted, be careful not to scratch the paint and clean up the surrounding areas, so all the newly painted parts will look nice.

Saving money is great; just make sure to avoid any problems when doing any prep by being careful.


Cost of Getting a Custom Motorcycle Paint Job

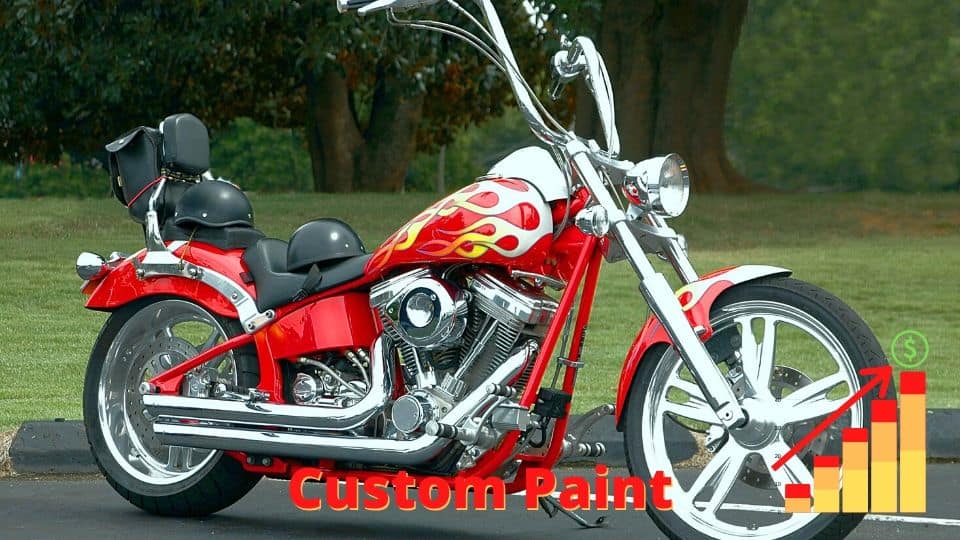
Custom Paint

As mentioned in the previous section, a regular paint job is way cheaper than a customized one. However, it should be noted that if you are restoring the paint of your motorcycle, it might cost you a lot more.

You may want to take some pictures of your motorcycle and use an art program to check out what it will look like with the design you have in mind before actually painting it.

You can also hire an artist to come up with a design for you. At fiver.com, artists can help with all sorts of design concepts, including designing decals for your motorcycle. 

Remember that it might be impossible for you to haggle down the price if the professional performs customized painting and design for your bike. Expect to pay twice as much as a normal paint job (about $600 – $3000).

Why are custom paint jobs so much? Here are a few reasons to consider:

  • More preparation work is usually needed. 
  • More paint is usually needed.
  • Sometimes a lot more time is needed. (Sometimes a paintbrush artist is needed) 
  • Costume mixed paints may be required.
  • Established and well-rated shops will cost more.

A custom paint job can raise the value of your motorcycle. However, the market for unique paint designs may lower the number of people interested in buying the motorcycle. 

Not that you have a costume paint job, but your motorcycle is also a work of art as well as transportation. Its uniqueness will stand out from the rest and give you pride.

Just make sure you really want the design that you are asking for. You stuck with it once it’s done.  


Cost of a DIY Motorcycle Paint Job

Paint Your Motorcycle Yourself

Doing the motorcycle painting on your own might only cost you less than $100. This amount, however, is dependent if you are purchasing equipment and the quality and type of paint used.

DIY is definitely cheaper and can turn out well if you have patience and follow all the directions, and don’t take shortcuts.

You’ll be looking at a fair amount of work to get a good finished product. You can expect to do some prep work ahead of painting and possibly make a few mistakes.

Although, doing the dirty work yourself is part of the fun of learning to accomplish a task that may be challenging.

When you paint a motorcycle, it’s important to practice your skills, especially if you are on a tight budget. Whether you are using a spray can or a paint sprayer ($30-$200), painting a motorcycle is something that most people can do, even if you’ve never done it before.

The key is the take your time and practice your technique. Make sure you have the right paints and do your homework beforehand for all the items you’ll need (air compressor $100+). Then you can obtain the kind of quality you can be proud of.

With a DIY paint job, most of what you need to spend on are the paint. Tools may or may not be needed.

Primer

(Amazon Links)

Base Coat

(Amazon Links)

Clear Coat

(Amazon Links)


The best part is that you can do the painting of your motorcycle on your own time. With practice, you can do a great paint job on your motorcycle. If you have mastered your painting technique, others might soon be asking for your help.

Make sure you have the best environment to paint your motorcycle. Weather, ventilation, and overspray are factors to think about. 

One factor you should consider is the design’s price and the colors you want for your motorcycle. If you prefer custom metal decals, that may cost you a lot more unless they’re predesigned metal, vinyl, or plastic decals.

When choosing the motorcycle that you want to get painted, think about how important the type of paint is. Higher-end paint brands tend to be a lot more expensive than others.

Another thing to take note of when doing a paint job by yourself is to get help when needed. You’ll likely spend more money than you intended and more time trying to fix mistakes.

From sanding to putting on the finish coat, doing it wrong might cause a mess on the surface of your bike. Just remember that you need to be very careful with DIY painting.


Conclusion

As discussed, a regular paint job would cost you $1500 at most; a customized paint job ranges from $600 to $3000, while DIY paint jobs are a lot less, $500 at most. Also, doing some of the work yourself can help slash prices by a few hundred dollars. Just remember that you might not get a reduced price when the job involves repairs or a lot of work, like a customized design.

Why Does My Car Smell Like Burning Rubber?


Why Does My Car Smell

Most of the time, cars offer a safe and comfortable ride from place to place, but you may encounter problems from time to time, as I have. When something smells different than normal, I usually start to look at the tires or under the hood to find out what’s going on. 

The smell of burning rubber could be explained by a number of things going on with your car, including tires, leaking fluids, hoses, and belts. The air from outside the car cabin can get inside the car and start to indicate there’s a problem with your car.

If you do smell burnt rubber, never ignore it, and try to figure out what is happening or ask someone to check it out for you. The faster you take action when your car smells like burning rubber, the better for your car. Repairs may be costly if you ignore them for too long. 


Does Your Car Smell like Burning Rubber?

Burning-Rubber

Do you smell a burning odor coming up from under the hood of your car? Such symptoms are noticeable after the engine has become hot or operated for a long duration. When your car smells like burning rubber, it may be a sign of a problem that may get bigger if not treated. 

Some other smells may be strong as well. Try to identify the odors and where they may be coming from. Whenever you get a smell of rotten eggs, burnt toast, burning carpet, sweet syrup, or burning oil, raise your attention level to be high, so you can solve these issues as well.


Precautions & Tips

As a thumb rule, keep in mind the following precautions and steps to take when you smell any strange odor from your car.

  • Turn the car off. Inspection under the hood to identify any fluid leakage.
  • Let the engine cool. You should be extremely cautious while working with hot or rotating engine parts.
  • Perform any checks where hands are required only when the engine has cooled completely.
  • Do not smoke while checking for a fuel leak or inspecting your car battery.
  • If you smell a gasoline odor, even if you just filled your tank, get it checked immediately.

If you can’t figure out what is wrong by yourself, ask for help or rake your vehicle to the car mechanic.


Why Does Your Car Smell like Burning Rubber?

The following possibilities could be reasons why your car smells like burnt rubber.


1. Lose Hose

Lose-Hose
Via: http://www.troublecodes.net/wp-content/uploads/2015/11/3-toyota-sienna-evap-canister-hoses.jpg

When one of the rubber hoses under the hood is loose or pressed against a hot part of the engine, the rubber may start to burn after a while. If you installed something that caused a hose to move, this might have exposed it to a hot surface. 

Solution: Move the hose and replace it if needed. Check the condition of the clamps as well if they seem loose. 


2. Melting of Drive Belt

If one of the devices that use the drive belt, such as the alternator, air pump, water pump, or AC compressor, is locked up, the drive belt will spin but not the device. This friction on the belt creates heat and causes a burnt rubber smell. This smell is also accompanied by a squealing noise.

Solution: The faulty drive belt must be replaced, and the device that stopped working should be replaced or repaired. It is highly recommended to check the drive belts for proper operation every six months.


3. Motor Oil Leak

Motor-Oil-Leak

If the motor oil starts to leak onto the hot engine exhaust pipe, it may give rise to a burnt rubber smell. This is a dangerous scenario and can lead to a car fire.

Solution: Stop the engine, wait 30 minutes, and check for leaks. Once you find the leak, clean up any oil that has spilled and determine your next course of action.

The best course of action, though, would be to replace any damaged parts or take them to a mechanic. If you continue driving with an oil leak, you are sure to cause more damage and more money to repair your car. Oil leaks need to be corrected as soon as possible.


4. Accidental Plastic Bag

exhaust-pipe

A plastic shopping bag can sometimes get stuck to the exhaust pipe under your car and slowly melt or burn, producing a smell of burning rubber.

Solution: Wait until the muffler has cooled, and carefully remove the plastic bag from beneath the car. While driving, try to avoid contact with plastic bags lying on the road or flying around. Plastic bags can also cause other problems if they get caught near the engine.


5. Leakage of Coolant

Photo Credit: https://www.e90post.com/forums/showthread.php?t=917067

The heater core could be leaking coolant into the heating system or air conditioning system, causing a burning rubber smell. This causes significant coolant loss and also sufficient damage to your car. Solution: Check if your coolant tank has any cracks in it.

If the coolant is leaking, you may smell a sweet-smelling odor. It could smell like burning rubber if it leaks somewhere very hot. Unfortunately, these coolant fumes are unhealthy to breathe, so get it checked out or fixed right away. Loss of coolant can cause significant damage to your car if not replaced.  

Solution: Check your coolant tank for any cracks. Coolant hoses can also crack or become loose. Replace or reattach as needed.

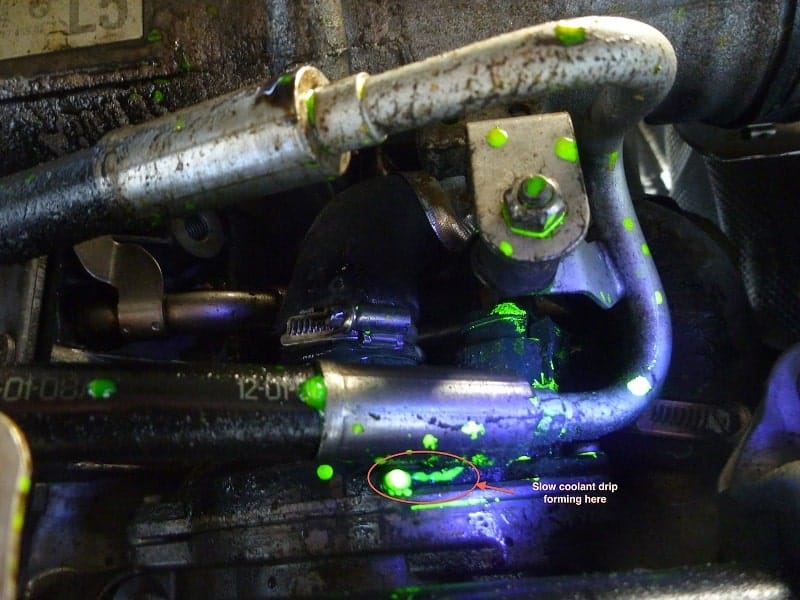
Any cracks, even small ones, need to be fixed. One way to check for leaks is to use a UV dye in the radiator and a UV light (Amazon Link) to see where the leak is coming from. 


6. Electrical Problem

Electrical-Problem

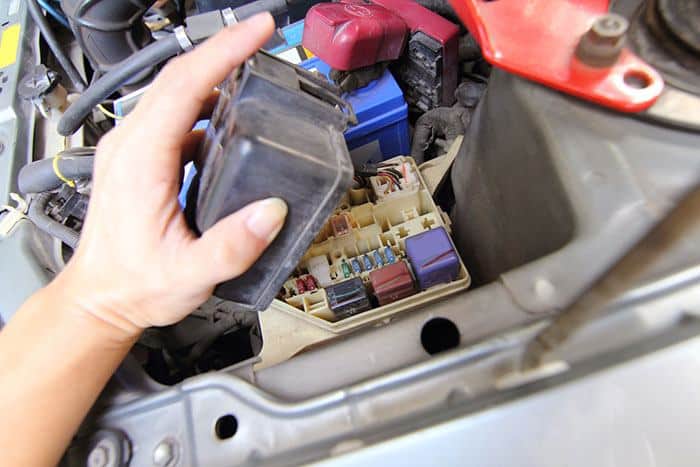
If a fuse is blown or a short circuit occurs. The odor could smell like burning rubber. The odor then enters your car through the AC duct. 

Solution: Check all the wire connections for melted areas and loose connections, and check fuses to see if any of them have blown. Once you identify the problem, replace the fuse, wire, connector, and secure connections. Use the owner’s manual or do some research for the correct replacement parts for your vehicle.


7. Heating of AC Compressor

check-AC-Compressor

When the refrigerant levels have been reduced, there may be a lack of sufficient lubrication for the AC compressor. It will get overheated and may produce a burning rubber smell. 

Solution: During the maintenance inspection of your car, have the mechanic check the AC. Notify the mechanic of the smell and any associated issues. The AC compressor may need to be replaced, or you may just need to add refrigerant to the AC system. 


8. Oil Leak from Gasket or Seal

When oil leaks from the gasket or seal, it can cause a burnt smell when it comes into contact with the exhaust manifold.    

Solution: It is highly advisable to replace the gasket or seal. Sometimes a gasket leak sealer can be bought over the counter (Amazon Link) for a temporary fix. However, some don’t recommend it.

Another temporary solution is to tighten the coupling surface of the gasket and seal it. But this method can also worsen the scenario, as the leak tends to worsen if the gasket is heavily saturated with oil.


Conclusion

If you smell burning rubber, it’s important to take steps to avoid any major issues with your car. Have your vehicle inspected by a professional technician, or do it yourself. as soon as you recognize any burning rubber smell coming out.

We hope that this article has helped you to identify the reason behind the burning rubber smell from your car. Pass on your feedback and comments below.

Do you have any other questions about your vehicle? Looking at these articles may help: Best coolant, Why is Pink Fluid Leaking From My Car?,  and How to Change Your Oil Like a Pro?


Best Fuel Additive: What You Should Know Before Buying


Best Fuel Additive

We are living in a financially-strapped economy. Most people need a way to cut expenses. To make matters worse, salaries are not rising as much as inflation, making it harder to sustain daily expenses. Fuel costs are something that concerns most people.

Fuel additives are helpful in removing carbon deposits in the combustion chamber. Higher deposits affect the engine’s performance and fuel economy. Whether you are using gasoline or diesel, you may be concerned about the increase in fuel prices. No wonder why there are many people who are interested in ​finding the best fuel additive. Before buying the best fuel additive, make sure to take the following factors into consideration:

  1. Cost Efficiency
  2. Cleaning Capability
  3. Ease of Use
  4. Reviews

These additives can improve the quality and efficiency of your fuel and may save you some money. What is the best fuel additive that is available in the market today? If this is the question that you are asking, we got you covered! Keep on reading, and we will help you to come up with the right choice!


What Is Fuel Additive?

If you have not used a fuel additive before, chances are, it is because you are not aware of what it is and what it can do for your vehicle. So, to start this guide, let us first talk about what it is.

Simply put, they are something you add to the fuel tank in order to improve the quality and efficiency of the fuel that you are using in your vehicle. They have been more popular in recent years because many people are looking for the most effective way to maintain their engines and, more importantly, to improve fuel economy.


Benefits of Fuel Additives

AD

It is not enough to know what exactly it is. To have a better understanding of how it works, here are some of the benefits that it can deliver:

  • Save a Lot of Money: If your car has been sitting for a while or you have just purchased a used car, then adding a fuel additive can be particularly helpful. You’ll be removing deposits and helping the engine perform better, thus using less fuel. Some of the chemicals may be effective in increasing your fuel economy by up to 8%.
  • Improved Power: Looking for the best way to enhance the power of your engine? It is believed to be highly instrumental in improving the octane rating of the fuel, which, in turn, will be vital in having more power while using the same amount of fuel.
  • Enhanced Lubrication: It is also believed that the use of fuel additives can be effective in improving lubrication for the engine. This equates to lesser wear and tear. This can prolong the functional life of the engine and can help minimize the likelihood that you will have to spend a lot on repairs and maintenance.
  • Good for the Environment: If you are conscious of the impacts of your car on the environment, there is another good reason to use fuel additives. It can result in better combustion. Consequently, this means that you will be producing fewer emissions. This is a good way to go green!

How To Choose The Best Fuel-Additive?

AD

Thinking of which one to pick? To be sure that you will be making the right decision, make sure to take the following factors into consideration:

  • Cost Efficiency: Many may agree that cost is one of the most important considerations when evaluating the options that are available in the market. Although, quality should be given equal value. In addition, it will also be good to take a look at how much fuel it will treat. You may be interested in using it several times instead of just once. 
  • Cleaning Capability: Each fuel additive is made with different specifications. Consider which factors are most important to you when choosing. Therefore, you should pick one that can deliver what you’re looking for; its ability to clean your engine and be most beneficial. 
  • Ease of Use: Generally speaking, the way fuel additives are used will be the same across most brands. There are key differences, however. Packaging may be easier to use, hold more fluid, or show how much is left. Some require a funnel to pour, and some require a small or large amount of additive to be added to the fuel.
  • Reviews: If you still find it hard to decide which one to pick, check reviews. Thankfully, there are many reviews that you can find online. With this, it will be easier for you to compare and weigh the possibilities. Pay attention to what others are saying so that you will know what you can expect from a specific product.

Top Picks for the Best Fuel Additives

In this section, we will take a look at some of the best products that are currently available in the market, as well as a few of their pros and cons.


1. BG 44K Fuel System Cleaner

AD

Editor Rating :

Are you looking for the perfect way to improve fuel economy and engine performance? There is no need to search far. Whether it is for the restoration of performance, improving efficiency, or increasing power output, you can be confident that this fuel additive will be beneficial in more ways than one.
This additive can be used several times if needed. The container contains 11 ounces and can be used to treat 20 gallons of fuel. This means that it may be used over the course of a long period.

Lastly, it is also worth noting that it is the top choice even for automotive professionals. This is trusted even by experts, with many claiming that it can indeed deliver top-notch performance. From the improvement of ignition to the removal of minerals that can cause buildup, you can be confident that this will be an excellent choice.

Pros:

  • High efficiency
  • Well-received by many users
  • Does not contain any alcohol

2. Lucas 10013 Fuel Treatment – 1 Gallon

AD

Editor Rating :

Fuel additives need to have the right components for effective use. This additive has no solvents or alcohol. It is made from heat-resistant oils and additives that are guaranteed to deliver a high level of performance.

The versatility of this product is also impressive. It can effectively improve the octane rating of gas in a variety of situations. Whether you are using gas or diesel, this can work in both. In addition, it is also useful for marine, locomotive, and non-road engines. Another thing that contributes to its versatility is the fact that you can use it for both carburetor and fuel-injected engines.

What can you expect with the use of this fuel additive? Well, a lot of good things! Aside from increasing the power of your engine, it can help lessen your fuel consumption. This can also be good when it comes to lowering exhaust emissions.

Pros:

  • Made by a reputable company
  • No harmful solvents

3. Royal Purple 11722 Max Clean Fuel System Cleaner and Stabilizer

AD

Editor Rating :

One of the best things about this fuel additive is that it can be used in more ways than one, providing you with a multitude of benefits. Aside from power and efficiency, this is also effective for the prevention of rough idling and stalling.

For the environmentally conscious, this will help in the reduction of carbon monoxide, nitrogen oxide, and hydrocarbon emissions. Engine knocking and pinging due to deposits will also be significantly lesser with the use of this fuel injector.

Its high compatibility is one more thing that is worth noting, which is another reason why it is indeed a versatile choice. Regardless of the engine of your car or the fuel type that is used, you can be sure that it can deliver the same superior quality.

Multiple product tests have been conducted in order to prove that this is indeed going to be an effective choice for a fuel additive. In these tests, the results showed that fuel economy is improved by as much as 3.2% and horsepower is increased by about 2.6%.

Pros:

  • Versatile applications
  • Inhibits corrosion and oxidation
  • EPA/CARB-compliant

4. Chevron Techron 65740 Concentrate Plus Fuel System Cleaner

AD

Editor Rating :

This brand name is a trusted provider of quality products. It is made by Chevron, which is an established global brand. The quality of this product is also evident by the many positive reviews.

The manner in which it works is also impressive. It provides several benefits for your engine. It not only cleans but also restores and protects. Even through the years, if this is used as directed by the manufacturer, you may be able to notice that your engine is showing fewer problems while saving fuel.

Lastly, as the manufacturer claims, it is excellent for both older and newer engines. Regardless of the type of car you have, you may experience better fuel economy, enhanced power, and fewer emissions. It will prevent engine deposits that could harm your system’s performance.

Pros:

  • Lab-tested and proven to be effective
  • Made by a reputable brand
  • Powerful

5. Redline 60103 Complete SI-1 Fuel System Cleaner

AD

Editor Rating :

The options for gas additives are many, but this one shines brighter than many others. It can provide up to 100% fuel efficiency within a single treatment. 

So, why exactly should you be using this fuel additive? Well, aside from the fact that it can reduce your octane needs by 2 points, it can also help clean the control valves and clean deposits from the combustion chamber.

It is made with the use of high and low-temp detergents, which have been carefully selected to ensure that they will help enhance the performance of the additive. No components will be toxic to your engine or to the environment. It also contains synthetic upper cylinder lubricant.

Pros:

  • Safe even when used continuously
  • Effectively raises gas mileage
  • Cleans carburetors

Conclusion

Do fuel additives ever work? If you ask us and many others who have used it in the past, the answer is YES! It can be an effective way to improve fuel economy and keep your engine working at its best.

However, if there is one thing that you should keep in mind, it is the fact that not all products are the same. You should do your research to pick the best fuel additive for your car. A newer car or well-maintained car may have little need for additives, while others will benefit greatly.

We hope that this article has been helpful in educating you about fuel additives and, more importantly, in making it easier for you to make the right choice.