My truck has been on the road for over 100,000 miles. It has seen its share of road debris. Over time my truck hood has accumulated several chips in the paint. Some of the chips have gotten worse over time and so now is a good time to repair them for aesthetics and as a preventative measure.
The steps to repair a paint chip for your vehicle are: sanding, cleaning, adding primer, and then painting. For an almost unnoticeable repair, some additional steps are needed, including more sanding, more painting, and buffing with a compound. The easiest is to get a touch-up kit with only 3 steps.
I have never painted a car, but I have painted my house several times. I know that over time I have felt the fatigue of painting for long periods. For my truck, I’m more inclined to go with an easier and faster solution. Although, with some of the chips that have rust, I’ll need to take more steps to prevent further problems and get a professional look.
What Size Chip Do You Have?

Size does matter when painting chips. If you have tiny pin-sized chips, a simple paint and acetone kit will do the job with good results in just a few minutes. Bigger pen-sized chips can still be painted with a quick kit but will be noticeable upon getting closer to the car.
A paint chip touch-up pen can also work to cover the chip and protect your car from getting rusty and helping the car look better.
To get good results with pen-sized chips or bigger ones, you may want to sand, clean, prime, paint, use a clear coat, and buff with a compound. This process will take a while but will be much less noticeable upon closer inspection.
If your chips have any rust damage, then sanding will be the first step before anything else. You may also use a chemical rust remover for rust.
What Options are Available?
There are many ways to repair paint chips. Here are three methods we’ll discuss in this article.
Touch-Up Pen: Results: OK

- Pens can be a good quick way to help you protect your car.
- They will help your car look better as long as you are careful with the application and get the correct color.
- There are various ways to use a pen, and they can give you similar results as a touch-up kit.
Touch-Up Pen Repair

AD
Step 1: Clean The Area
- Clean the area with isopropyl alcohol to remove any waxes.
- Use a Q-tip or cloth to get into the chips and remove any dirt and wax.
Step 2: Apply Primer
- Practice using a primer pen before applying primer to the chip.
- Primer may not be needed unless the chip goes down to the metal.
- Dab the primer onto the chip to ensure complete contact with exposed metal.
- The primer should not fill the chip but cover the entire exposed metal area.
- Let dry.
Step 3: Add the paint
- Practice using a paint pen before applying it to the chip.
- Paint should not fill the chip.
- If you are not using a clear coat, then you can fill the chip entirely.
- Dabbing the paint carefully into the chip is usually the best method for filling.
- Let dry.
Step 4: Add the clear coat.
- Practice applying a layer on paper if necessary.
- The clear should fill the chip.
- Let dry, and add a second layer if the is not entirely filled.
- Dabbing the paint carefully into the chip is usually the best method for filling.
- Although not supplied with pen kits, using a rubbing compound to smooth out the chip area may help it look smoother and more flush with the rest of the car surface.
Touch-Up Kit: Results: Good

- A touch-up kit will help your car look like a more professional job is done with many of the chips.
- The application is easy and fast. It may not completely create a flush finish with the rest of the paint surface with some of the chips.
- With small chips, this is a great way to fill in the chip quickly.
Touch-Up Kit Repair
Step 1: Clean The Area
- Clean the area with the provided solution or with isopropyl alcohol to remove any waxes.
- Washing your car may also work if it is not waxed.
Step 2: Apply Paint
- If primer is not needed, apply paint by dabbing or letting it flow into the chip.
- Try not to brush the paint.
- Fill the chip completely.
In this video, they apply paint to a scratch using a kit. (Although, I would try not to brush the paint.)
Step 3: Wipe Off Excess
- Using the instruction, wipe off the excess paint with the solution included.
- The goal is to wipe away the excess paint without wiping any paint away from the chip.
See the video for advice and how to wipe off excess.
Step 4: Use the Rubbing Compound If Needed
- Follow the directions for your kit.
- If you have a rubbing compound, you can apply it to help the chips look smooth.
- The compound may be more useful with areas that have scratches.
DIY Paint Chip Repair: Results: Very good

AD
- Taking time to do all the steps for a professional paint job will take a while but will create a great finish.
- You will need to take your time with each step to ensure that it is done well.
- If you decide to do this, you might want to do all the chips at once because it is so intensive.
DIY Chip Repair
Step 1: Identify and Sand


- Find each chip and sand it with 1000-2500 grit sandpaper. Finer grit will help you get more control over your sanding.
- Using water while sanding will help create a smoother sanding motion and a better finish.
Step 2: Clean the Chips

- Use isopropyl alcohol or a lacquer thinner to clean each chip.
- Washing your car may be all that is necessary for cleaning the chips, but if you think there could be any wax on the car, be sure to clean each chip before priming.
- Let dry.
Step 3: Apply Primer

AD
- Practice using a primer pen, tool, or brush before applying it to the chip.
- Apply primer if needed. Some chips go down to the metal, and this is when the primer is needed.
- Dab the primer, ensuring contact with exposed metal.
- The primer should not fill the chip but cover the entire exposed metal area.
- Let dry for about an hour. Refer to instructions.
.
Step 4: Apply Paint

- Using a fine-tipped brush, toothpick, or tool to apply paint will help you get enough paint to fill the crack.
- Apply enough to just about fill it if you are going to add a clear coat.
- If you are applying paint with a clear coat included, apply enough to fill the crack completely.
- Wait for the paint to dry and see if you need to add a second layer of paint with a clear coat.
- If your paint doesn’t have a clear coat in it, leave room for the clear coat to fill the rest of the chip.
- Let dry for about 24 hours. However, you may be able to apply a clear coat after 1-2 hours. Read the instructions on the paint container.
See the video for tools you can use and advice.
Step 5 Add the Clear Coat

AD
- Add the clear coat after the paint has dried. Be sure to add enough to fill the chip.
- After an hour or two, check to see if the clear coat needs another coat to fill the chip and add another coat if needed.
- Let dry for 1 – 2 days. Check the directions on the clear coat.
Step 6 Apply Rubbing Compound

- After everything is dry, use a cutting/rubbing compound to smooth out the clear coat’s surface, so it matches the surrounding paint. This may take some time.
- If you get an aggressive compound, it will be faster to buff the area smoothly, but you may accidentally get swirl marks if you buff too much.
- If you get a more gentle cutting cream, it will remove any bumps and leave the surface smooth, but it may take a while. You’re less likely to get any marks left over with a gentler compound.
Here’s a complete beginning-to-end video for DIY chip repair.
When fixing chips in your car’s paint, you’ll need to decide how long you are willing to take and what level of result you want.
Which Method to choose?

There are more methods for repairing chips and painting than I have mentioned. Each has its pros and cons. I think most people would opt for one of the three methods above or a combination of them. The best method will be the one that takes into consideration how much time and effort you are willing to take to fix your chips. You also need to consider how professional the job will look when finished. My personal method would be to get a chip repair kit because it is very easy to use. It may not look perfect after you’re done, but it will look good and provide protection.
Chip Repair Products
Touch Up Pens

AD
Easy-to-use pens that help you cover your paint chips.
- This kit comes with cleaner, primer, paint, and a clear coat.
- Colors are available for many cars.
- Easy to use and store away for next time needed.
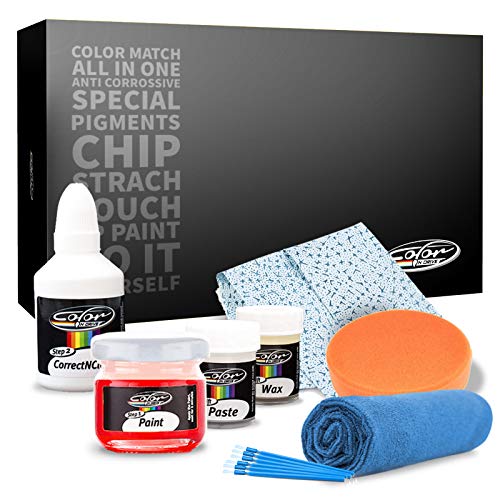
Chip Repair Kit
AD
Easy to use system that is very quick with good results.
- Includes the paint, cleaning solution for a smooth finish, paste, and wax.
- Colors are available for many cars.
- Comes in an easy-to-store away box.
DIY Chip Repair

AD
You’ll need to buy many different products, including sandpaper, cleaning solution, possibly primer, paint, clear coat, and rubbing compound.
- The excellent result if done properly.
- It will take time, but it will look great when finished.
- This can be a cheap option when using your hands for sanding and buffing.
Related Products You May Want
Rubbing Compound
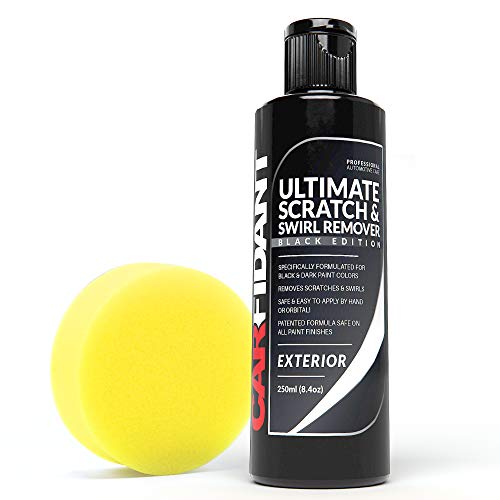
AD
Used to help remove scratches and smooth out your paint job.
- Helps create a uniform look.
- Helps the entire surface of the area look newer.
- It can remove water spots.
Paint Chip Tool

AD
Used to help drip paint to chip, so it looks smooth.
- Works on scratches and chips.
- Easy to use for good accuracy.
- Easy to clean after use.
Choose a method that works into your budget and time schedule while considering the quality of how the job will be done. Soon you should be able to decide what is best for you.
Why Do It Yourself?
When you’re considering what to do repairing chips in your car’s paint, you could be better off doing it yourself. Painting jobs at repair shops take time and effort and costs lots of money. You can get similar results as some repair shops if you take the time to repair your own chips.
If you are thinking about repainting an entire panel, that could become costly. So, to protect your car, save money, and help it look nice again, using the method mentioned above can help.
Conclusion
When repairing chips in your car’s paint, repairing it at home can be fairly easy and have good results. If you want professional-looking results, you can do that too. It will take more time and effort, but it will look great.
So if you have any chips in your paint, why not try a method to fix it yourself, save money, have a nice-looking car, and protect your car from further damage?