Do you love listening to rock or smooth jazz while driving your car? If you are fond of having good-sounding music, then you know how important a good audio system is. And the amplifier of a car’s audio system can make all the difference in the sound you hear.
The car stereo part that amplifies the audio signal is known as an amplifier. If you try to look into your car’s audio system architecture, then you may find that it is somewhat confusing.
Due to the complexity of its design, it can be very difficult to figure out which part of your car’s audio system is not working properly. However, there are a few signs that can help you know if your car Amp is blown
There is a noticeable distortion in the sound.
There is no sound even if you have already turned on your audio system.
Your stereo system starts making bizarre sounds, such as farting sounds.
However, you can always check your car amplifier because it plays a vital role in sending signals to the speakers.
How do you Figure Out that your Car Amplifier is not Working Properly?
There are plenty of signs, manifested while listening to music or voice audio, that can hint that your amplifier may have issues. These are listed below:
There is a noticeable distortion in the sound.
Even if you have already turned on your audio system, there is no sound.
Your stereo system starts making bizarre sounds, such as farting sounds.
If you notice any of the signs mentioned above, then it is important to check out your amplifier. There are chances that other components in your car audio system could also cause such distortions, but your car amplifier is usually related to these issues. Fixing a car amplifier may solve issues quickly and get you up and going soon.
The stereo and amplifier are often combined if you have an audio system at your home. Usually, your stereo doesn’t blow out. Why is your home audio system work fine, but many car audio systems blow out so often?
The difference between a home audio system and a car audio system is to have different levels of stress. A car audio system can have several components that may or may not work together well made by different companies. Car owners put stereo components together in ways that may cause more stress than a system can handle.
Another reason is that car stereo systems are subject to different environmental stresses.
Continuous vibrations
Different stresses on a road
Temperature extremes
Your home audio system is usually tested and made to work together and does not have these extreme environmental conditions. These are the reasons why your car amplifier blows out more frequently than the one you have in your home.
Now we will talk more about how you can know if the amp is blown. There are many to troubleshoot the problem. Here are some options below.
Is the Protection Mode of Your Car Amplifier on?
First of all, before assuming anything is wrong, check to see if your amp has gone into protection mode. This feature on an amplifier can help prevent damage to the amplifier and speakers. If the amplifier encounters a problem, it may switch to protection mode.
This situation can occur if the speaker’s wires are touching each other and causing a short circuit. Checking that the wires are properly installed can help fix this issue. If not, also check the car’s charging system (battery, fuses, alternator, voltage regulator).
Is Blue Wire Connected to the Right Part of Wiring Harness?
A blue wire may be used in your audio system to access the amplifier remotely when power is turned on. If it is not connected properly to the right place, then it will fail to provide adequate voltage to the amplifier. Therefore, you may need to check this wire and its connection.
Do you find a Loose or Blown Fuse?
Every car audio system includes a fuse to prevent damage to the audio system in case of any short-circuiting. It can be placed under the hood in the power line that goes to the car cabin. So, if the fuse is blown, you won’t get any power to the amplifier, and the amp will not turn on.
Check that the wire and fuse are connected well, and replace the fuse if needed.
Have you checked the Input of the Amplifier and Output of the Amplifier?
The input of the amplifier comes from the head unit or stereo. If you aren’t sure the connection is good, check to see if the audio cables are loose or have other problems.
Another solution is disconnecting the RCA cables and connecting a new set to check if the cables were the problem. If the old set was connected well and didn’t seem to work and the new set does work, then you’ve solved your problem.
If your amplifier can now receive a signal from the stereo, then you’ve probably fixed the issue. However, if you only get a partial signal from the stereo, and all the cables seem fine, then there may be an issue with your head unit.
But before you blame the stereo, you’ll also need to check the cables going from the amp to the speakers and see if all the connections are good, possibly replacing any cables that seem to have issues.
If everything seems to work well, but the speaker is not responding to the signal, try disconnecting the speaker that doesn’t work and connect the cable to another speaker. This will let you know if the speaker might have an issue. So, if the speaker is bad, then replacing it with a new speaker can solve your problem.
The Amplifier is Blown
If all else seems intact and working fine, then we need to return to the amplifier and determine if it is blown. As mentioned above, the amplifier can cause the speakers to make strange noises. This can be an indicator of a problem, as well as excessive heat, smoke, or a burning smell.
Replacing the amplifier is needed if it has overheated and burned any of the parts inside. (See Video Above) You could try taking the amp out of the car and opening it. Use gloves and try not to touch any electrical components.
If you feel you still have a good amplifier, you can ask a car stereo professional to check your amp and give you more information about what might be wrong.
What are the known Benefits of Car Amplifiers and Subwoofers?
If you’ve ever been immersed in music, like when you go to the movies, you will certainly understand the benefits of car amplifiers and subwoofers mentioned below. If you do not have an amplifier and subwoofers installed in your car audio system, then think about these qualities they can offer:
Enhanced audio quality
Higher volume
Good speaker power efficiency
Great design and organization
An immersive experience
In a nutshell,
Every car stereo system includes the stereo and speakers, but only some have a separate amplifier. If you are wondering about the audio quality of your system, there are a couple of ways to enhance it. You can get a new stereo, new speakers, or add an amplifier.
So, when you encounter what seems to be a blown amplifier, do your research on your specific amp brand and see if you can get more information about common problems that may occur with that amp.
Most car amplifiers can bring new life to a stereo system. It plays a crucial role in powering speakers that have specific power requirements, so there will be no sound distortion. It is very important that you choose the best car amplifier for your car audio system.
There can be many other ways to figure out whether your car amplifier is blown. Hopefully, you found something useful you can use to help with your amplifier issues. Thank you!
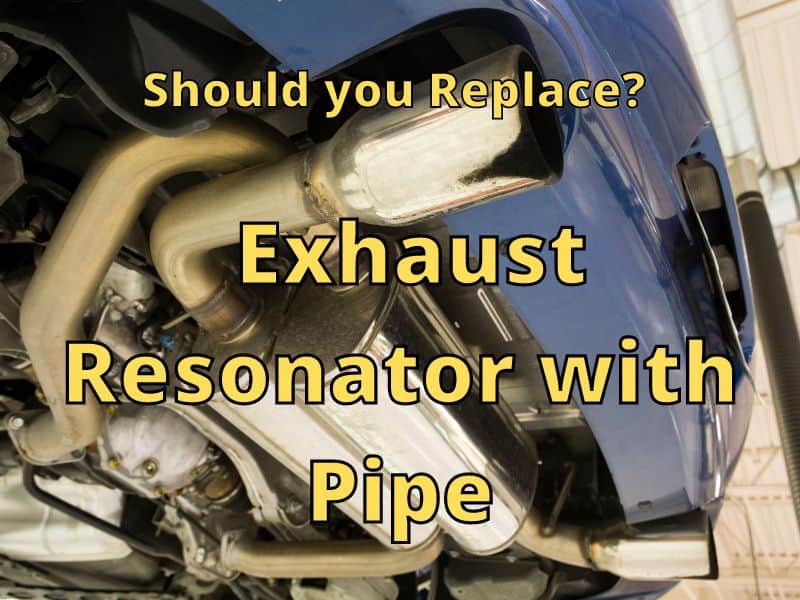
What Happens if you Replace the Exhaust Resonator with a Pipe: Should you Do It?
Because of the high cost of visiting a local mechanic for basic car repairs, a lot of people consider doing it on their own. After all, given the numerous resources that are available online, a lot of DIY tasks are now easier than ever. For some, making a change to the exhaust system by removing the exhaust resonator is something they feel will improve their car.
Personally, using a pipe in place of an exhaust resonator is one thing that I do not advise. When you take out the exhaust resonator and replace it with a pipe, the back pressure can be affected. It will reduce the efficiency of your car, and you might end up consuming more fuel while also hearing a louder noise.
When replacing a resonator, most people will use a pipe instead, especially because it can end up being cheaper. But is this recommended? Will it cause danger to your car? Will it cause a negative impact on its performance? Read the rest of this post and learn what happens if you replace an exhaust resonator with a pipe.
What is an Exhaust Resonator?
Before we talk about anything else, let me first provide you with a primer on the functions of an exhaust resonator. Especially for those who do not have extensive knowledge of cars, it is sometimes easy to confuse it with other parts of the car, such as mufflers and catalytic converters.
In most cases, an exhaust resonator is made from a hollow steel cylindrical tube. It is not the same with a muffler. Instead, it is a part of the muffler, but it is not used in every car. It is a chamber used to reduce and change the noise produced by the engine. Performing like an echo chamber minimizes sound for a quieter driving experience.
More than just the reduction of noise, an exhaust resonator also improves the engine’s overall performance. You will end up having a smoother driving experience since the car can produce higher horsepower and use less fuel. In a nutshell, it also improves efficiency.
What Happens when you Replace the Exhaust Resonator with a Pipe?
As you can see from the video above, you can definitely consider a pipe as a replacement for an exhaust resonator. Nonetheless, just because you can do so doesn’t mean that you should do it. Personally, using a pipe is one thing that I do not advise. It can be cheaper and more convenient, but the cons may outweigh the pros.
Aside from muffling sound, the main function of the exhaust resonator is to create back pressure to improve the performance of your car’s engine. When you remove the exhaust resonator and replace it with a pipe, the back pressure can be affected. It will reduce the efficiency of your car, and you might end up consuming more fuel while also hearing a louder noise.
Why is back pressure important? As has been discussed in the short video clip above, back pressure is provided by the resonator, ensuring that the exhaust gases will come out engine at the correct rate. Consequently, this leads to achieving peak performance and saving fuel. Again, this explains why the replacement of the resonator may have a smaller or more significant impact on your engine.
Why You Should Replace an Exhaust Resonator?
The best reason to replace your exhaust resonator is to optimize the performance of your engine or your car in general. As noted above, it can create less pressure, but at the same time, it can be too restrictive. You could achieve more horsepower.
It also affects your fuel efficiency. If you want to save money in the long run, consider replacing the exhaust resonator that you currently have with a new one or a pipe. This may help if there’s any restriction of airflow from years of soot.
If you are wondering when the exhaust resonator should be replaced, you should perform a quick visual inspection. If it is rusted, dented, or damaged in any way, this is obviously a sign that it is seeking a replacement. These can also be signs if the engine is roaring too loud or if there is too much combustion.
What is the Best Replacement for an Exhaust Resonator?
Via https://www.youtube.com/watch?v=7UwTQs4v7lw
It has been pointed out that a pipe may not be best as a replacement for an exhaust resonator, although some people do use it. That being said, the best replacement for an old exhaust resonator is a new exhaust resonator. By doing this, you can be assured that it will be able to deliver the same function, but better.
When looking for a resonator, make sure that it is made from premium materials to guarantee its durability. It should be constructed in such a way that it will not be easily prone to wear and tear. It must be effective in minimizing noise, and more importantly, it should be compatible with your muffler or your car.
Other Ways to Minimize Exhaust Noise
Without a doubt, the use of an exhaust resonator will be a big help in the reduction of noise that is produced by your engine – one thing that a pipe might not be able to do as effectively. If you have a sports car, you may be able to remove and plug the sound tube.
Another effective solution that does not involve touching the exhaust system is sound deadening. This way, you are minimizing the sound you can hear inside the car, but not the sound people can hear outside the car.
You can modify the doors, trunk, and other areas by adding insulation to them to quiet outside noises. Inside your car, you’ll hear much quieter sounds.
Conclusion
So, what happens if you replace the exhaust resonator with a pipe? As highlighted in this post, doing so will reduce the efficiency of the engine most of the time. It will negatively affect the performance of the engine, and its fuel consumption can also increase. For this reason, using a pipe should be carefully thought out and only used as a replacement for a resonator in certain circumstances.
Would you like to know more about the exhaust system? Read this article:
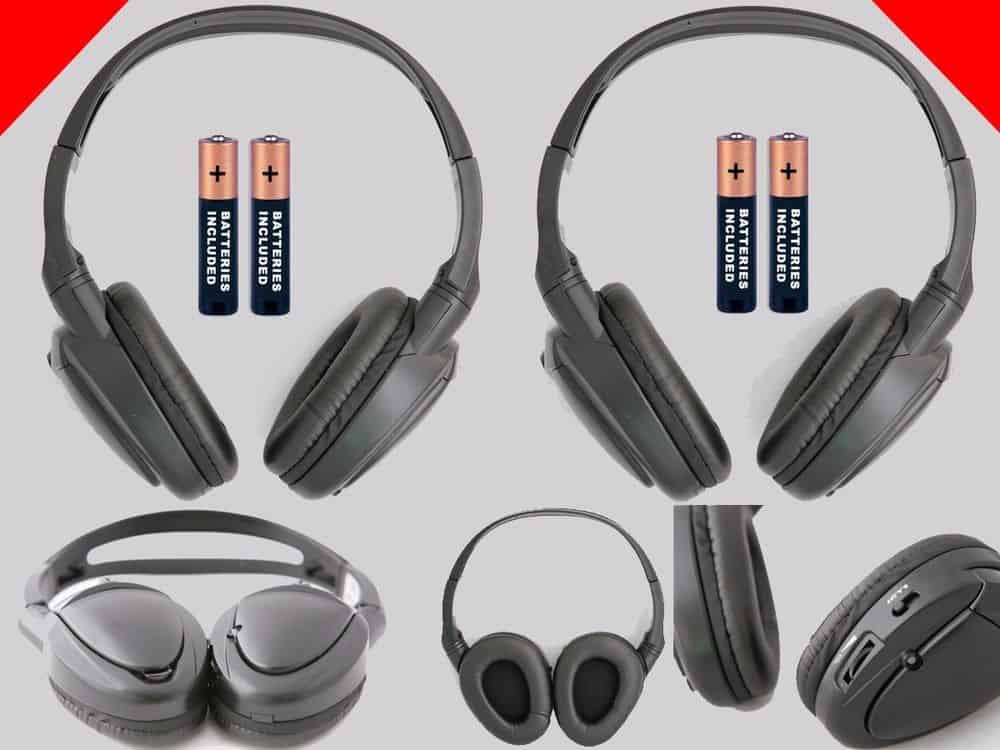
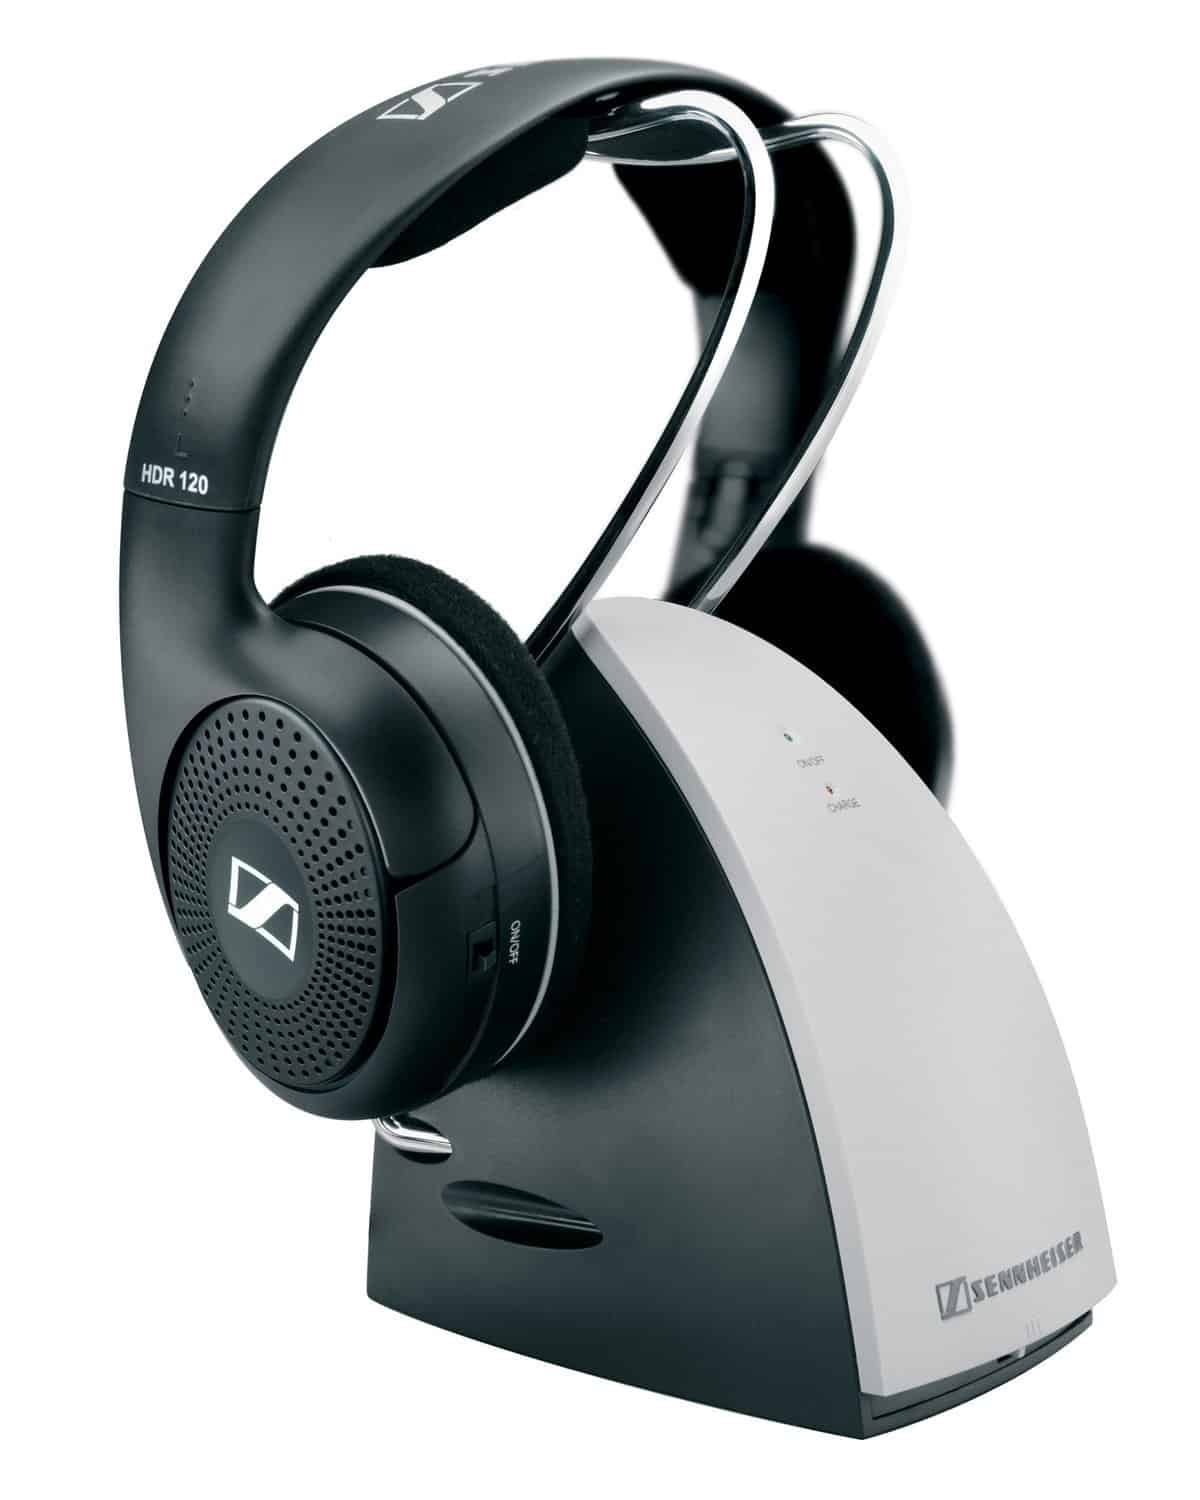
The amazing Honda Odyssey Wireless headphones are foldable and compatible with the DVD systems in most Honda vehicles (listed in the compatibility chart of the headphones). The user should keep in mind that these headphones are not compatible with vehicles that are not listed in the chart, so they should avoid using them with any other vehicle.
If your Honda Odyssey Wireless headphones are not working properly, here are a few things you can do:
Check the Batteries Used
Test the Infrared Signals
Check Owners Manual and Online Search
Check Exchange Policy
Change Your Headphone Mode
Enter the Keyword HEADPHONES
Recheck the Installation
Do Not Plug
Change the Wire
Do not Panic
The Honda Odyssey wireless headphones come with many excellent features like automatic signal detection for improved battery life, volume control on each of the headsets, no need for programming, and it is adjustable, so it works with adults as well as kids.
What Should One Do When their Honda Odyssey Wireless Headphones Do Not Work?
If you just purchased a new pair of original Odyssey headphones, make sure you remove any plastic wrapping that could block the infrared signal. Then make sure to use a new battery, and as the earphone is turned to fit on your ears, they are switched on.
But many people still have questions regarding their non-working wireless headphones. There have been many answers to the questions, yet the customers always still have trouble getting them to work. We have listed all the solutions that may help you get the answers your looking for.
When the headphones stop working, try checking the batteries to see if that is the problem. Make sure the batteries are new batteries and are placed in the correct directions. Also, the user should check whether the LED is illuminating or not when the headphones are turned ON. (see video)
2. Test the Infrared Signals
The user should test the headphones while they are seated in the rear seat to see if the line of sight infrared is sending a signal. The overhead screen should be ON. Also, make sure that the headphones are facing the proper direction.
The headphone that is marked with the letter ‘L’ should be placed in the left ear, and the one with ‘R’ should be placed in the right ear. If the user does not place his or her headphones on properly, there’s a chance that the infrared signal will not receive well.
In addition, make sure you are directly behind where the infrared signal is coming from (headrest or flip-down DVD player).
If you use your smartphone camera, you can check that the infrared signal is working by pointing the phone at it and looking for the infrared light shining.
3. Check Owners Manual and Online Search
If you have tried all the methods you know of, and your headphones are not working, you can look at your owner’s manual or do an online search for your car year. If you have an audio navigation system, you can refer to try using it to see if you can figure out what steps you may need to take.
4. Check Exchange Policy
The headphones should come with a warranty period. When the headphones stop working, and you are sure it’s a faulty headphone, check and see if you can exchange the headphones for another pair. If they are broken due to an accident, then you may want to exchange them for a new pair that you can purchase online.
Each Odyssey may have a slightly different way of getting the audio connection to work. When you’re having difficulty receiving a headphone signal, try changing the connection mode. (see 2015 Honda Odyssey video)
You can change from DVD mode to AM/FM or CD mode. By changing the mode, the headphones may not work properly. Sometimes this is a wiring issue. For example, the DVD audio wiring could have come loose.
Other times it might just be that the headphones and the control panel are not in sync. Make sure that the headphones are getting a signal and that the correct mode for headphone use is selected.
If you’ve purchased new headphones, you may need to figure out how they connect differently than the original headphones.
6. Enter the Keyword HEADPHONES
If you have an audio console where you can enter the keyword HEADPHONES, then you should be able to select troubleshooting items. Check out what the options are for fixing any connection issues.
Honda Odyssey Wireless Headphones should work properly for a while, so if you all of a sudden don’t get a signal, check the step above and look in the owner manual for how to set up the headphones for first-time use. (see 2018 Honda Odyssey video)
Some settings could have been changed accidentally, and that’s why your headphones are not getting a signal. If the headphones are getting older, consider replacing them with a new pair.
8. Do Not Plug
Sometimes you may want to use an audio cable to connect directly to the entertainment system. This can help if the signal isn’t coming through well for some reason.
But when you’re using them wirelessly, make sure that there are no wires attached to the headphones. This would prevent the audio from the DVD from being heard by the listener.
9. Change the Wire
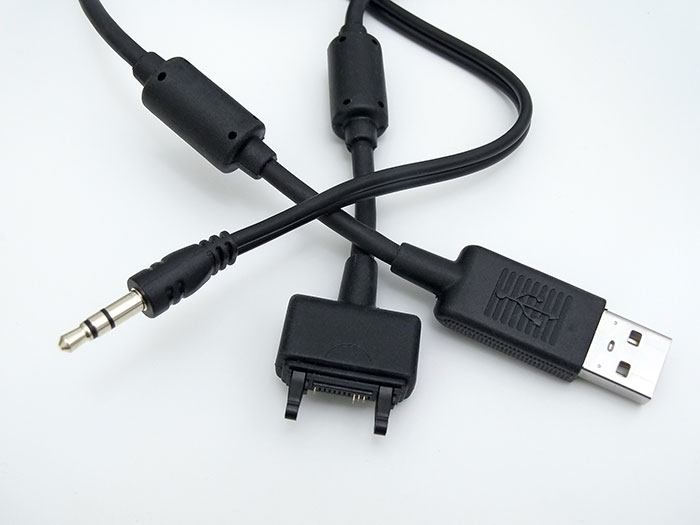
While using the headphones with the DVD player, the user should make sure that the connecting cable between the stereo and the DVD unit is connected properly.
If the cable wire is not connected properly, you may hear the sound of whining or hissing. You might get some signal but with signal disturbance. The wiring would normally be loose at the DVD player but could also be somewhere in between the stereo and the DVD player.
If you’re using an audio wire to connect to the DVD player and are having the same problem, just replace the wire, and it is likely to solve the problem. Otherwise, the headphone unit may have an issue with the audio input.
10. Do not Panic
It is common to feel the need to solve the problem right away. Electrical appliances may seem to stop because they are broken, but later we find out there’s a technical issue.
So for your well-being, take it step by step, and don’t be afraid to get help from someone. A friendly Honda dealer might know just how to solve the problem.
One solution that works for many items is to try turning them off and ON again. By doing so, many of the electrical connections/issues tend to be resolved.
If all else fails and the headphones can’t be exchanged, then getting a replacement pair could be the answer. Unfortunately, the original new Honda Odyssey headphones cost over $100. Fortunately, there are headphones that will work the Honda Odyssey for much less. You could also try eBay for used pair.
Honda Compatible Headphones
Volume Limiting Headphones
Folding Kids Headphones
Folding Kids Headphones
ADS
Conclusion
Honda Odyssey wireless headphones are great headphones to have. If you need a new pair, you can get a new one or one that is compatible. I hope the information provided can help you with solving your headphone issues. For more information on other car accessories, click here.
There are several ways to remove rust from car parts. Sometimes I’ve used steel wool to scrub off some bits of rust on a tool or car part. But sometimes, it takes a long time to get the rust off. What are some good ways to help get the rust off without taking all of your time?
To remove rust from tools and car parts, you need to decide on the method that will work best for you. Fast removal of a small amount of rust might call for a grinder or sandpaper. While those willing to wait a while can use chemical baths or electrolysis to remove rust in a day or two. Here are 10 ways to remove rust from car parts:
Use a Brillo Pad/Steel Wool
Try Some Sand Paper
Use a Pumice Stone
Soak Your Rusty Parts in Vinegar
Apply Baking Soda and Lemon Juice Paste
Chemical Bath
Try Electrolysis
Apply Vinegar and Salt
Rust Converter/Neutralizer/Reformer/Primer
Use Citric Acid
I have effectively removed rust spots on tools and parts, but I usually just did small sections that involved a bit of consistent work. Whether you’re restoring some old tools or working on your car, you can remove the rust that is preventing you from seeing its true value and purpose.
Before You Start
The best result comes from those who take their time and use the correct tools for the job they are trying to do. When you take into consideration the time and money you’ll need to take to remove the rust, some people opt to get a new part or tool because it costs less.
Consider safety when using chemicals or electronics and how you will clean up safely when finished. If you are preparing a part to be painted, your process might be different than just removing rust. Decide on a process that will be best for your tool or part before you begin.
1. Use a Brillo Pad / Steel Wool
Be careful about which steel wool you get. Some are thicker, and some look like steel wool but are made of plastic. The kind pictured above may work a bit, or using the one-label steel wool will work well, although it does tend to break apart easily.
This works like sandpaper to scrub off the rust and help parts get back to their natural state. Wearing gloves is good, as sharp bits of the metal may enter the skin.
You can find steel wool at the dollar store.
Steel Wool
Scrub the affected area with steel wool. (Not the kind with soap in it)
Dust will accumulate, so a well-ventilated area will help, and a rag or brush to remove dust.
If using water, keep it out of the sink when scrubbing tough rust spots. Part of the pad may go into the drain, causing it to clog or jam the disposal.
Using this for small jobs usually works well. Remember, there are different grades of steel wool, from Superfine to coarse. Coarse would be good for scrubbing, and fine would help with polishing and lighter scrubbing.
2. Try Some Sand Paper
Whether you’re doing a large or small job, most people use sandpaper to sand down the body of the car before it is painted. Much like steel wool, sandpaper can remove rust, and it comes in different levels of coarseness.
While it may not fit into hard-to-reach areas, it is very versatile, making it great for removing rust in different ways. There are wet/dry sanding and sanding machines of various types (Dremels, orbital sanders, belt sanders, and disc sanders), sanding sponges, sanding blocks, and sanding pens/detailers.
Use the sanding tool of your choice. A power sanding wool may speed things along.
Dust and metal bits will accumulate and might fly off, so having a well-ventilated area, gloves, and safety glasses will help to keep you safe.
Using different grades of sandpaper will be needed if painting a surface is required.
Sanding can work for small to large jobs. Power tools and sanding by hand is usually what will be needed to effectively remove rust and leave the surface smooth.
3. Use a Pumice Stone
Not only for rough feet or scrubbing your toilet, but a pumice stone can also help remove rust. One nice property of pumice is it will conform to the shape of the object being scrubbed.
You can remove rust from tools and parts well fairly well, although pumice will not last long, so this may only be effective for smaller jobs. It can come in different levels of density, and many bathroom stones will come with a handle.
If you are looking for a cheap way to do a small rust removal project, try pumice. It’s good for other applications, so you can feel good about getting some for more than just rust, such as the BBQ and pool tiles. Getting a higher-density stone should help it last longer.
Use the stone, just like sandpaper, to scrub off the rust. If you use the same pattern of scrubbing, the pumice will eventually conform to differently shaped metal pieces that are being scrubbed.
Bits of stone will fall off as you scrub. You can use water if that help makes scrubbing easier and raise off the particles. Just remember not to get water into the crevices of metal parts, as this moisture will be hard to get rid of.
Pumice is lightweight and easy to hold, so this makes scrubbing a bit easier.
If you go to the dollar store, you should be able to buy some pumice and try it out and see if you like it.
4. Soak Your Rusty Parts in Vinegar
AD
Vinegar is not only good in salad dressing, but because it is acidic, it can clean off the rust from parts. This may take a while since most white vinegar has only 5% acidity. Expect lite rust removal.
You can feel good about buying this item for multiple purposes as well, such as cleaning brass and copper dinnerware for the laundry, eliminating odor on your hands, and cleaning windows.
You usually will soak the tool in a container of vinegar, or you can wet or spray a paper towel and cover the rusted parts. Make sure it stays wet the entire time. Using a lid can help prevent the vinegar from evaporating.
This is another cheap way to remove a light layer of rust from parts or tools.
Soak or spray the vinegar as described above. Let sit for about 24 hours. Scrub off any remaining rust with a toothbrush or other cleaning device you don’t mind getting dirty.
Bits of rust should fall off or cloud the vinegar. You can wipe any remaining vinegar and soak the tools or part in baking soda and water to neutralize the acid. Thoroughly rinse and dry all parts so no moisture is left.
A second treatment can be used if needed. If you have time and patience, this is a helpful and easy solution.
Here’s another product you should be able to find at a dollar store. When you try vinegar, you may have to wait for it to do its job, but it requires very little hands-on time when getting the rust off.
5. Apply Baking Soda and Lemon Juice Paste
Baking soda paste with lemon juice will act as a rust dissolver of sorts. With this method, you don’t necessarily need to do any scrubbing, but it might help.
This is a simple and cheap way to solve your problem with a bit of time. Both lemon juice and baking soda also can be used for multiple purposes as well, baking or household cleaning. You can find these at the dollar store.
You usually will mix the two ingredients until it has a toothpaste-like consistency. That way, you can easily spread it onto parts without it falling off. Make sure it’s not too dry or too wet, or it won’t stick to the item it’s applied to.
Lemon has about 5% acidity, just like white vinegar, so you can use it by itself as a rust remover as well. The same applies to baking soda. Just apply a paste of baking soda and water to a rusted item and scrub to remove lite rust.
Once you’ve made the lemon juice and baking soda paste, apply it with a brush or other tool to all the rusted surfaces of the object.
Let it sit for 30 minutes or more. If the paste is drying out, you may want to keep the object in a container with a lid or spray the paste with more lemon juice or water.
Scrubbing off the paste with a toothbrush may help remove more rust after you’ve done waiting.
Rinse the part off with water and repeat the process for more rust removal.
6. Chemical Bath
AD
These products can do a good job of removing rust with little or no scrubbing time involved. If you look at the video below, you can see how well some of them perform.
A chemical solution may require the use of gloves and safety precautions, especially around animals and children. Try to find the best container that will not tip over and cover the area you use in case of spills.
Once you’ve filled your container with the product of your choice, make sure it covers the item completely so it can remove all of the rust.
An alternative method for large parts that can’t be submerged in the chemicals is to place the part in a plastic bin that has a cover and then place paper towels over the part and saturate the towels with the chemical product.
Make sure the lid is on to prevent evaporation. This won’t be as effective as a bath, but it can still help cover large areas.
Prepare the area for using your product and, using gloves if needed, submerge the part or tool completely in the liquid or gel.
Let it sit for up to 10 hours more, depending on the product. Checking on the object after a couple of hours will help you better estimate how long it should be left in the solution. Be careful because so products like muriatic acid will start to dissolve the metal as well if left in too long.
Scrubbing off the rust will likely not be necessary; just place the object back in the solution unless the metal is being dissolved.
Rinse the part or tool with water and let dry when finished.
7. Try Electrolysis
If you decide to use electrolysis to remove rust, you’ll be using an electric current to drive a chemical reaction. As shown in the video below, you can do this yourself fairly easily with a few parts, but it may not be the best solution for all parts and tools.
Electrolysis requires the use of gloves and safety precautions as well. Be sure to keep animals and children away from the area being used and make sure it is a well-ventilated area.
The items that you will need are a plastic bin, 4 steel rebar pieces, copper wire, wire nuts, washing soda, water, a wood board, steel wire, and a car battery charger. (Don’t use stainless steel or copper in the water solution!)
There are some alternative methods, but most are very similar to this process. When attaching the copper wire to the rebar, you’ll likely need a drill to make holes in the container. Drill holes are just big enough for the wires to get through.
Make sure the container is far enough away from the battery charger to prevent any problems if water should somehow spills out.
After the container is wired up with the rebar and copper wire, prepare the container for use by adding the water and one tablespoon of washing soda per gallon of water.
Mix the solution thoroughly. Place the part into the solution using the steel wire and board.
Then place the negative battery charger clamp on the steel wire that’s attached to the part. Next, place the positive clamp on one of the rebar pieces.
You’ll see bubbles rising if your connections are good. Let it sit for a couple of hours or more if needed, and unplug the battery charger. Now you can remove the clamps and check the part.
If it looks rust-free, the last step would be to remove any sludge left over by scrubbing the part and rinsing it off.
8. Apply Vinegar and Salt
AD
While using vinegar can help remove rust, adding salt can speed up the process. Salt seems to act as a catalyst to speed up things.
While using vinegar and salt, don’t expect quick results on rusted parts. Keeping your parts in the solution for several days may be necessary.
As seen in the video, you’ll need vinegar, salt, a container, a plastic bag or a container top to keep moisture in, paper towels if needed, and a steel brush. You can find vinegar and salt at the dollar store.
It may be a good idea to use gloves as you clean off the part(s) to keep your hands from drying or cracking.
Make sure the container is far enough away from the battery charger to prevent any problems if water should somehow spills out.
Prepare a solution of vinegar and salt for the part to be submerged in, if possible. I would probably add 4 tablespoons per 16 oz of vinegar.
Mix the solution thoroughly. Place the part into the solution in a container with a lid or plastic bag.
Let the part sit for at least 24 hours and check on its progress. You may want to scrub a bit with a steel brush to see if the rust will come off or need more time in the solution.
After a day or more, clean off the part with a steel brush, and after all the rust is gone, rinse the part off with water. If the part has hard-to-reach areas, dipping the part in a solution of baking soda and water will help neutralize any acid remaining on the part. Use some oil on the part or tool to help prevent rust.
9. Rust Converter / Neutralizer / Reformer / Primer
AD
They may be called different names, but they do the same thing, convert rust into ferric phosphate, which creates an inert black surface. This type of compound can be sprayed over a large surface, which might be impossible to do with a rust remover.
You can then paint the surface of the object because the rust is no longer exposed, and it will help stop the spreading of rust into the paint. Watch this video to see a comparison of the two products used.
When using rust converts, use it only on rusted areas since it may prevent paint from adhering well to nonrusted areas.
As seen in the video, you’ll need vinegar, salt, a container, a plastic bag or a container top to keep moisture in, paper towels if needed, and a steel brush.
It may be a good idea to use gloves as you clean off the part(s) to keep your hands from drying or cracking.
Make sure the container is far enough away from the battery charger to prevent any problems if water should somehow spills out.
Make sure to prep the area to be painted if you expect the paint and rust converter to do a good job adhering and preventing rust from reappearing.
When applying the rust converter, you may need to spray or brush on several coats. You’ll need to wait about an hour between coats, depending on the product.
Then you’ll need to wait 24 to 48 hours to let the converter cure before painting.
After painting a car or other metal object with rust, remember that rust can come back. The number of coats of rust converter and paint will determine how long your paint job will last.
10. Use Citric Acid
AD
Citric acid can be used to remove rust from metal tools and metal car parts. You can decide if you want to just add a couple of tablespoons of citric acid to your container of water and that’s it or if you will add some heat with a fish tank thermometer to help speed up the process.
Citric acid is found naturally in fruits such as lemons and oranges, and you can buy it to use for canning, cooking, and for bath bombs.
When using citric acid for rust removal, don’t expect any fast results unless there is a minimal amount of rust.
To remove rust, you’ll need a container, citric acid, and water.
Gloves aren’t necessary but can be helpful, especially if you have a cut. Gloves can help your skin stay less prone to drying out or cracking.
Make sure the container is in a safe place, and if you use a fish tank heater, help prevent any problems by keeping it out of the reach of pets or children.
Use a container and add 1-2 tablespoons of citric acid per 16 oz of water. More citric acid may be used to help speed up the process.
When cleaning lightly rusted tools, wait about 2-3 hours before taking them out to clean up with a scrub brush. You may need to wait 24 to 72 hours to let heavier, rusted tools become rust-free.
After removing the tools or parts, make sure to scrub off any remaining rust/sludge and rinse them in water or water and baking soda to help counteract the acid.
BONUS: Use Ketchup
Just like citric acid, ketchup has acid that can help remove rust. It has acetic acid and may be about as effective as lemon juice.
Ketchup is readily available in most kitchens, so you might want to try an experiment for yourself on a rusty utensil before using it on garage tools or car parts.
When using ketchup for rust removal, don’t expect any fast results unless there is a minimal amount of rust.
To remove rust, you’ll need a container and ketchup. You can find this at the dollar store.
This unconventional way of removing rust is probably not something you want to use for heavy cleaning or for multiple tools, but it can be fun to try it a time or two when you don’t have anything else readily available.
Ketchup won’t cause any damage to anything but may stain clothing, so caution is needed when dispensing.
Thoroughly cover the object with ketchup and cover the container or use a plastic bag.
Let the ketchup sit for 2 – 24 hours, depending on the rust level.
After removing the tools or parts, make sure to scrub off any remaining rust/ketchup and rinse them in water or water and baking soda to help counteract any acid.
Conclusion
The interesting thing about removing rust is you don’t necessarily need to spend a lot of money on cleaning solutions. For a few dollars and some patience, you have a brand-new-looking tool or car part.
If you need some serious help, try a professional rust removal product. I recommend either muriatic acid or Krud Kutter if you want to get good clean tools or part fairly quickly with little work on your part.
Be sure to watch videos and read reviews about any product you want to buy to be sure it will work the way you need it to. I hope this article has been helpful, and if you are looking for more information about rust removal, try these articles:
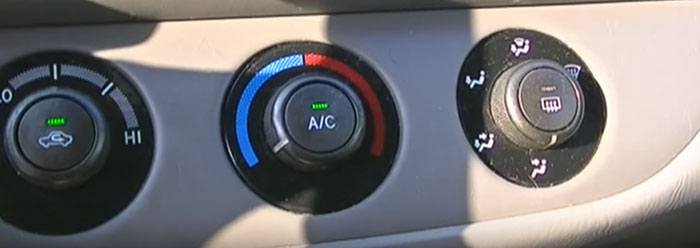
The 2002 – 2006 generation of Toyota Camry cars once had the problem of the A/C light flashing and would not allow cool air to enter the cabin. You would see the A/C button flashing and know there was a problem.
2002 Camry A/C light flashes if the belt is slipping or the compressor is not turning properly. Another possible reason is that the speed sensor of the compressor does not match the speed of the engine.
Two different and distinct cooling channels go through your vehicle’s engine block. One of those channels is for the engine oil, while the other is for the coolant. These help cool the engine and keep it from overheating.
Even if the engine is cool, you may not be able to get cool AC because of other issues. The issue that we are going to look at is the AC compressor clutch. If the fuse for the clutch is not working, it needs to be replaced.
Try Replacing the Relay
It is possible to fix this AC problem. You’ll need to look for the relay (which is bigger than a fuse). The video below has some details of what to look for. If you want to save money, do it yourself. Here’s a list of steps you can follow:
Turn off your car and open up the fuse box, which is mostly located on the right side of your battery.
Find the relay located as shown in the video or on the back of the fuse box named MG CLT.
Purchase the item “AC Relay” numbered 35874 from a store. Alternatively, you can use the car horn relay and put it where the AC relay is located.
After replacing the relay with a new one or the horn relay, start the car and check to see that the AC compressor clutch is working and the AC light is solid.
Make sure to put the car horn relay back if used.
There are two things to note:
Replacing the cabin air filter may be a good idea since you’re working on your air conditioner. This will make sure your getting clean air to the cabin, so you can breath easy.
You’ll find the AC cabin filter in the back of the glove box. Just replace it in the correct direction for cleaner air and possibly better airflow.
2002 Camry A/C light flashes if the belt is slipping or the compressor is not turning properly. Another possible reason is that the speed sensor of the compressor does not match the speed of the engine.
Check that the belt is not loose or slipping. If the belt is loose, the belt tensioner can be adjusted, but this should be done by a mechanic to prevent creating other problems. Look for wear and cracking on the belt. This means the belt will need to be replaced, which should be fairly easy to do yourself.
To confirm that the relay is the problem, you can try putting the clutch relay where the horn relay was. Try the horn. If the horn works, your relay is probably fine, and the AC compressor may have an electrical or mechanical issue.
If your Camry 2002 still has a flashing A/C light without any cold air, fix it by following this.
Look at the wires connected to the AC compressor. If the connector is loose, tighten them. Also, look for leaks in the compressor and AC system, as well as listenfor strange sounds.
The video describes hitting the relay hard, but I would recommend getting a new relay since they are easy to get.
Via: https://www.youtube.com
How to Replace the Relay?
If you decide to buy a new relay, then you can pull out the old one and replace it with a new one. The fuse box is located under the hood (not to be confused with the one that is located under the dash) near the car’s battery.
Unlatch the black cover, which pops up or off depending upon the direction of the force. Don’t apply excessive force because you don’t want to break the latch. Your task is to find the correct relay.
Use the inside lid of the fuse box to find where the correct relay is located. Otherwise, you can look at the owner’s manual, which may have the information you need. In some cases, the required relays will have a number that you can look up and see what type of relay it is if you’re still not sure.
If you need to use pliers to pull out the relay, be careful not to crush the relay. Usually, a little wiggling will help a stuck relay come out. The new relay will fit in the say direction as the old one. Again, use gentle force to make sure it sits flush against the bottom of the fuse box.
Applying dielectric grease can also be applied if necessary. Now, the next main step is to check that the new relay is working properly.
So when you finish, enter your car, start it, and check your AC light. Did it stay on, and is the AC working now? If so, everything you need to do is complete. The last step would be to turn off the car and replace the fuse box lid.
If the AC system continues to have problems, you can check to see if the AC compressor clutch is engaging. If not, you may have another problem with your AC system. Check these articles for more information. (Article 1 and Article 2)
Another solution that may help is to keep your engine on for a while after installing the new relay until the AC flashing light goes away. Some people say that resetting the car’s computer memory may also help fix this issue.
AC System Problem Troubleshoots with Error Codes
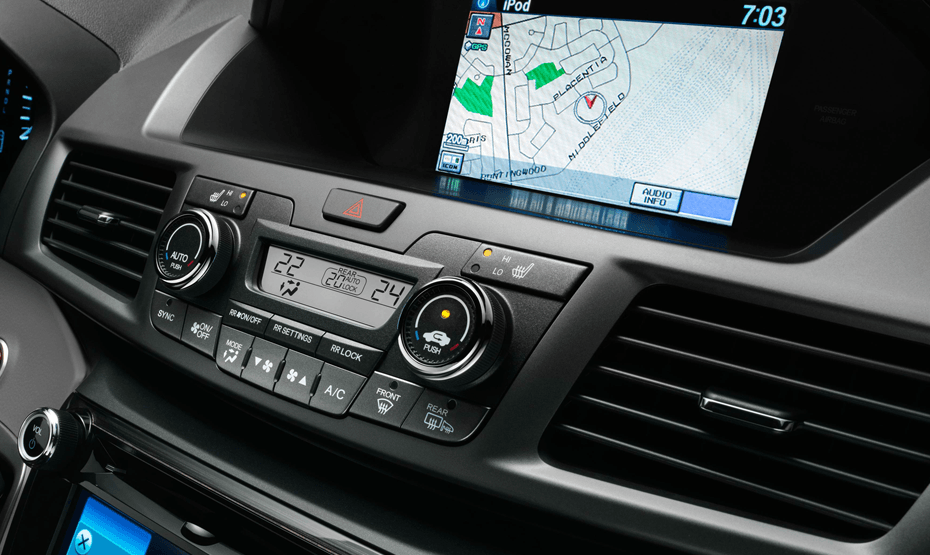
When you enter your car put the key in the ignition switch and see if you can find the recirculation button and the button labeled AUTO and push them at the same time. (Not all models will have this option). Then turn the key on while holding the buttons. The air conditioning error screen should show up. It has a numerical code for problems, and you’ll see a code of (00) if everything is normal.
The LED screen will flash for a while, and then you will see that everything is normal (00) or that you need to fix an error. After the error codes display, you can hit the off button to stop the diagnosis.
Before trying to display these codes on your car, here is some information about the codes.
The heater control panel of the AC has an ECU that keeps the codes and monitors the circuit system. The ECU has a memory of all the codes in case of any problem, but it doesn’t have a memory of code numbers 22 and 23. To get stored codes, see for the retrieving code. All these codes display on the temperature display panel.
If an error code is present, you may need to check out the problem, especially if it has anything to do with the coolant or evaporator, since these can cause more serious problems with your car. The display will slow down by one step each time you press the button. If you hear a tone every time the code displays, this may mean the problem is continuing to persist.
Below is the list of all the error codes which can help you diagnose your car’s problem:
Getting rid of rust is one thing that most car owners will be confronted with at one point or another. This can be a problem for various parts, including those that are hidden inside the car. In some cases, painting the exterior can help stop the spread of rust. Nonetheless, this may not always work. In some instances, the best thing to do is remove the rust with the best remover.
Rust removers that are available in the market can be classified in a number of ways, such as soaking rust removers, spray rust removers, and paint rust removers. When buying rust removers, make sure they have positive reviews, are cost-effective, and are safe and easy to use.
We will discuss the pros and cons of different rust removers and things to consider before buying one.
What is a Rust Remover?
To begin with, allow me to explain what a rust remover is. It can remove rust from the surface of the metal. If the metal is in fairly good condition but has rust, rust remover will help remove rust from steel and iron, usually without any harsh fumes.
Rust removals can work in different ways, depending on the specific brand that will be chosen. Once applied, some will transform rust into black or gray iron phosphate. In turn, this will result in the interruption of the rusting process.
When using some rust removers, one of the most important things to remember is that they may contain an acid formula that may be toxic. This makes it important to handle it with care or, better yet, choose those with no acid.
AD
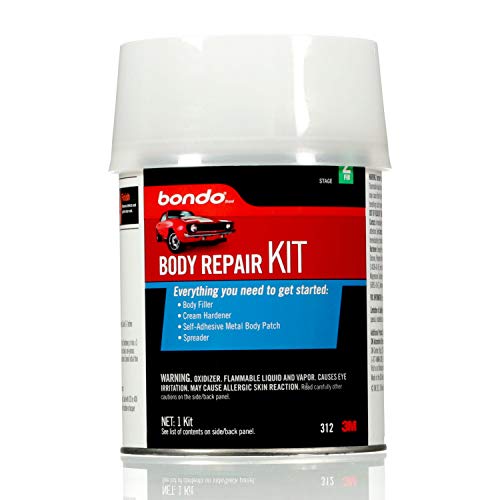
Body Repair Kit
Rust removers are likely to remove surface rust and help stop the spread of rust. Rust that has penetrated all the way through metal will need to be completely removed and replaced by replacing the part or substituting the metal for something else.
There are different ways to use the rust remover, which will vary from one manufacturer to another. Generally, however, you need to soak the area that will be treated with the solution. If it is large, you will coat it with the rust remover. After which, it should be covered for the prevention of evaporation.
The rust remover is best to be used if your intention is to eradicate the rust and bring the object back to its pure state of being metal. On the other hand, if you plan to repaint it, you might want to consider using a rust converter instead.
Types of Rust Remover
The rust removers that are available in the market can be classified in a number of ways. For instance, they can be grouped on the basis of the way they are applied. In this case, the following are some of the options that you will see:
AD
Soaking: With this rust remover, you need to submerge the part that needs to be treated into the solution. This will be an excellent choice for screws and bolts. For larger items, on the other hand, this may not be best for long areas or spots.
Spray: This is a preferred option if you are going to remove rust from a large item. However, they are often sold in small bottles, and the contents may not be enough if you need to deal with a large area.
Paint: As the name implies, all you have to do is paint it in the area where rust needs to be removed. It is like a gel that will coat the surface and eventually will remove the rust. It is the best choice for surfaces that are too large to be submerged in liquid. They will be applied in the way you use a clear coat for the car.
Essential Factors to Consider
As you try to differentiate the options that are available in the market, make sure to consider the factors mentioned below:
Reviews: A good starting point is to consult with what other people have to say. Luckily, many have used online platforms to share their experiences with a certain product. This will make it easier to weigh the pros and cons of the possibilities.
Cost: There are some instances where the rust remover is more expensive than buying a new part. Think of practicality. Make sure that the product is within your budget. Nonetheless, even with its economical price, ensure its performance will do the intended job.
Safety: It should also be noted that some rust removers have toxic ingredients, which negatively impacts your health. Take a look at the list of ingredients and the warning from the manufacturer. Make sure to follow the steps that are specified to be assured of the effectiveness in removing rust.
Ease of Use: We mentioned earlier the different types of rust removers that are available on the marker. You should pick one that can be applied without complications. The manufacturer must provide comprehensive instructions to ensure its proper application and guarantee optimal outcomes.
In this section, we will have a rundown of five of the best products that are available on Amazon.com. To help you evaluate, we will also tackle some of their most notable features and a few of their pros and cons.
1. Evapo-Rust The Original Super Safe Rust Remover -1 Gallon
AD
If you are looking for the best rust remover, this is one option that you might want to consider. It comes in a one-gallon container, giving you up to 1/2 lb of rust removal. You can use it for numerous applications. One gallon can treat up to 300 pounds of steel, which is helpful for many repeated uses.
Another thing that you might love about this product is how impressive it is when it comes to safety. You can be confident that using it will not harm your health. There are no acids, and there is no foul odor. It is safe even if it gets in contact with your skin.
Lastly, it is non-toxic and environmentally friendly. The materials used are biodegradable. It is also a product that is water-based.
Ease of use is one thing that gives it a distinct advantage over many others that you can find in the market. People will like that you can use it and let it do its work. All you have to do is soak the part that needs to be de-rusted. There is usually no need to scrub or brush.
This can be an easy choice if you are looking for a safe and easy-to-use product. There are no acids or caustics. Even if it gets in contact with your skin, you do not have to worry about the possibility of injury.
With some rust removers, you cannot flush them directly down the drain or dispose of them anywhere. This is because they have toxic compounds. On the other hand, this product can safely be disposed of down the drain in most cases.
Pros:
Works as advertised
One gallon can be used for many rust removal applications
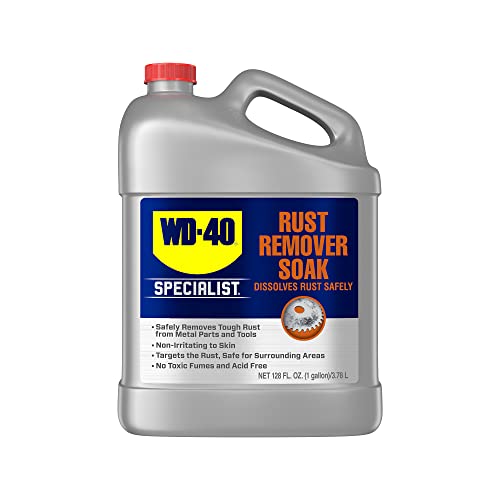
A lot of you are probably aware of the brand WD-40. The brand name has a good reputation. This may give you the peace of mind that you need to try this as a rust-removal product.
This rust remover works by soaking objects in a solution. This means that you do not have to do much work. No brushing or scrubbing will be involved. Even the toughest jobs can be dealt with fairly quickly.
Also, it is important to note that it is industrial strength. It can cut through rust in 30 minutes to 8 hours. Use for 24 hours for tough rust.
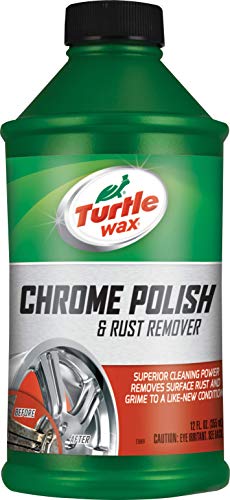
This is another option that is perfect if you are looking for an alternative that works well. However, take note of its 12-ounce size, which is smaller than other products we reviewed earlier.
It is made specifically for dealing with chrome parts with rust. I like that it not only removes the rust but also restores the shine of the bumper and tire rims, making them look as good as new. It also leaves a protective coat that helps prevent future rust issues.
Another good thing about this product is its versatility, especially when it comes to its application. You can use microfiber, foam, or cotton pads, yet you can safely have good outcomes.
Lastly, this is an exceptional choice because it also helps with tarnished chromes. Be careful not to get into the eye as this can cause problems.
Pros:
Leaves a shiny and polished look
Creates a protective shield to prevent future rusting
5. Bull Frog 94236 Rust Remover 16 oz
AD
This is another rust remover that is safe not only for you but for the environment as well. By taking a look at the list of ingredients, you will be happy to know that none of them are toxic. This won’t be a threat to your health or the environment in any way.
The best thing about this product is that it removes rust and protects the surface of whatever is treated. This will prevent rust from returning.
It comes with the revolutionary Vapor Corrosion Inhibitor, also known as VCI. The latter allows the rust remover to have electrochemical bonding with the metal. This will help in getting rid of moisture and air that can prevent rusting.
Pros:
Works great without the fumes
Does not contain toxic chemicals
Conclusion
From the information above about the best rust remover, you can see which product may be the one that is best for you. If you are restoring your car or fixing minor problems, these products can help, even if used on industrial machinery. Nonetheless, doing your research will help you find the best solution for your needs.
Hopefully, one of the five options we have shown above will work to help you complete your project. Are you looking for other products that can be useful for your cars? Check out our reviews section to learn more about other car parts and accessories you may need.


")