Home

Recent Posts

Fix Your Dislodged Car Vents


Dislodged Car Vents

When I accidentally dislodged the vent in my truck, I never thought that it would be so easy to fix. It just seemed stuck and wouldn’t move. While some vents are actually broken, others just need to be replaced properly.

To fix your car vent, first, see if you can remove the vent. Next, check if the vent body, control tab, pivot points, and fins are fine. (Use epoxy or glue to repair pivot pins and vents if needed.) Then replace the vent. Here are a few steps you need to follow to fix your dislodged car vents.

  1. Start Looking with a Flashlight
  2. Remove the Vent
  3. Check the Vent for Damage
  4. Replace Tabs
  5. Fix Fins
  6. Put the Vent Back in Place

When I repaired my vent, I found an easy solution to fix it, but vents attach to the dashboard in several ways, so be cautious when beginning your repair. And like I’ve learned from several experiences, forcing anything will just make the problem worse. 


Start Looking with a Flashlight
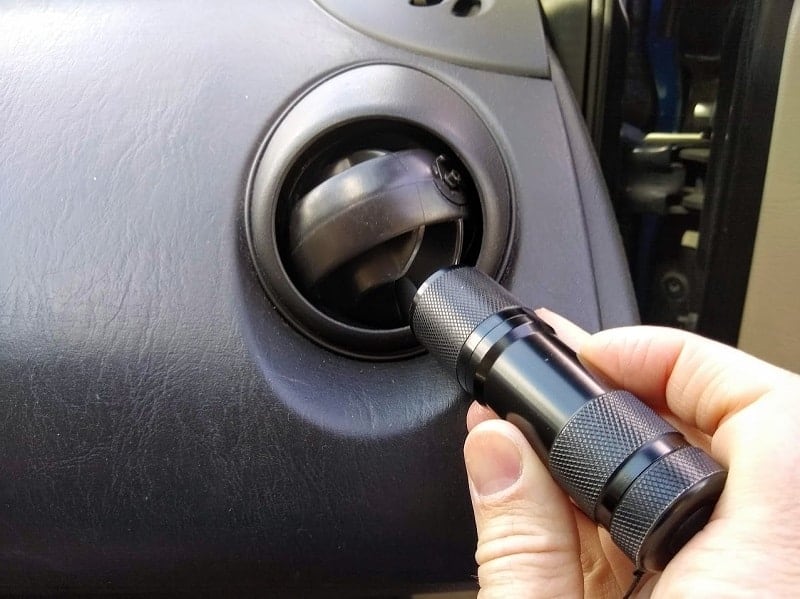
There are many different types of vents, and each may require a different method of fixing. Using a flashlight is one of the best ways to identify what is broken or if the vent just needs to be put back in place. 

Before moving the vent around too much, identify where the vent is attached to the air outlet area. See if there are pins sticking out, tabs that may need to be lifted, or clips that may have spring action.

vent pin

My experience has shown that I need to proceed slowly so I don’t lose a piece that may get swallowed up in the vent to never be seen again. You can use your phone camera light to help you see clearly into the vent.

If you can’t see any contact points try moving the entire vent if you have that kind of moving the vent fins.


Remove the Vent
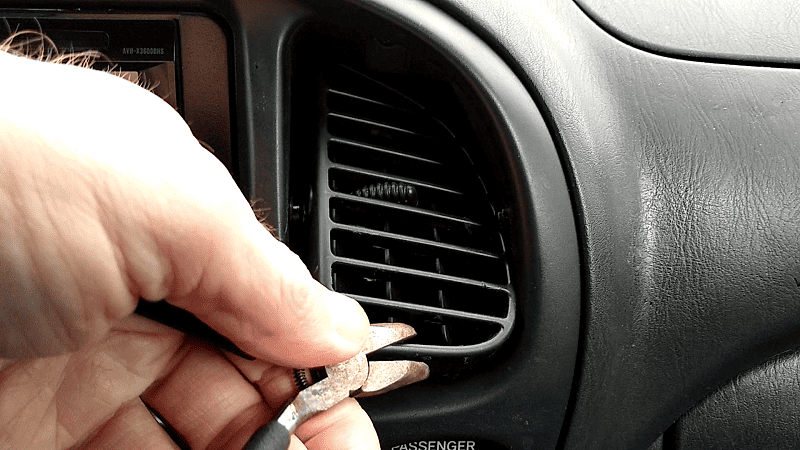
remove vent

The best way to check to see how you can remove your car’s vent is to go online or use an owner’s manual to see how the vent is removed. 

But if you were able to see how the vent is attached and know that you can pull it out safely without damaging the vent or surrounding area, then you can proceed.

First, you should check to see if you can maneuver without any prying at all. In my Toyota Tundra vent, I was able to push on the top of the vent until the bottom of the vent was easily pulled out just under the contact points. 


What If They Don’t Come Out?

Other cars may have vents that don’t remove as easily. You may need to remove a dashboard section to get it out. On this Saturn, the vents don’t come out, but you can access the contact point and see if they are in good condition.         

As you look inside the vent for this car, you’ll notice that the pins that are used to hold the vent in place have a home on either side of the vent housing. The only way to get the vents into place from the outside would be to maneuver them into place.

Pliers might be needed to cox it into place, but before I would do that, I would want to look at instructions to see if I could remove the section that holds the vent in place so I don’t break anything when replacing the vent.
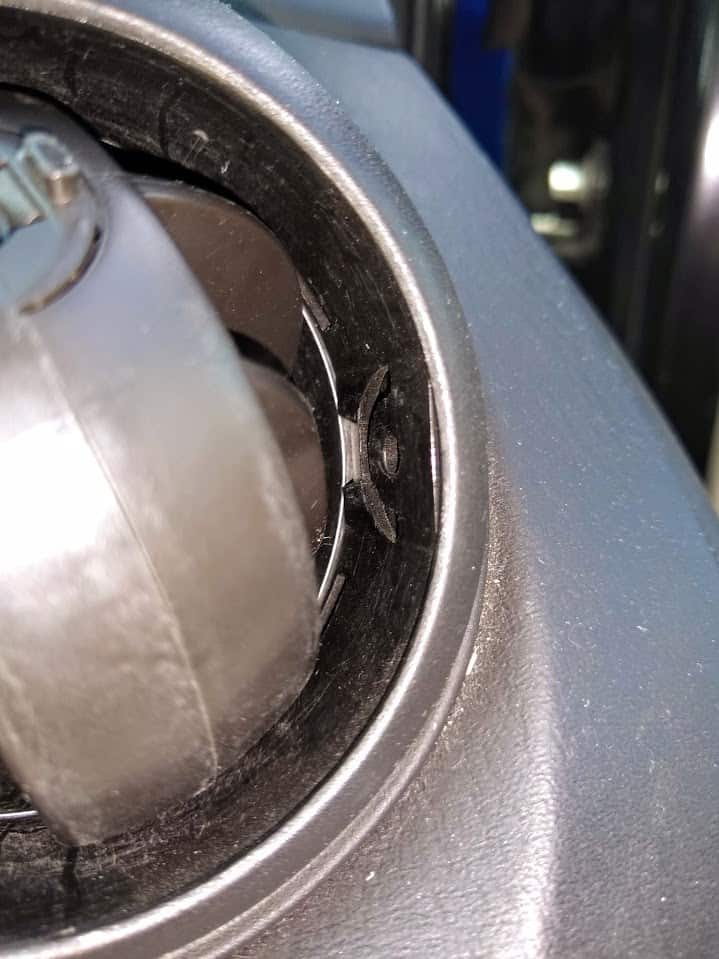
vent housing

Maybe your best source for information on your specific car model is YouTube or a dealership. When I tried looking it up in my manual, I couldn’t find any information on vent removal, just removing the instrument panel. 
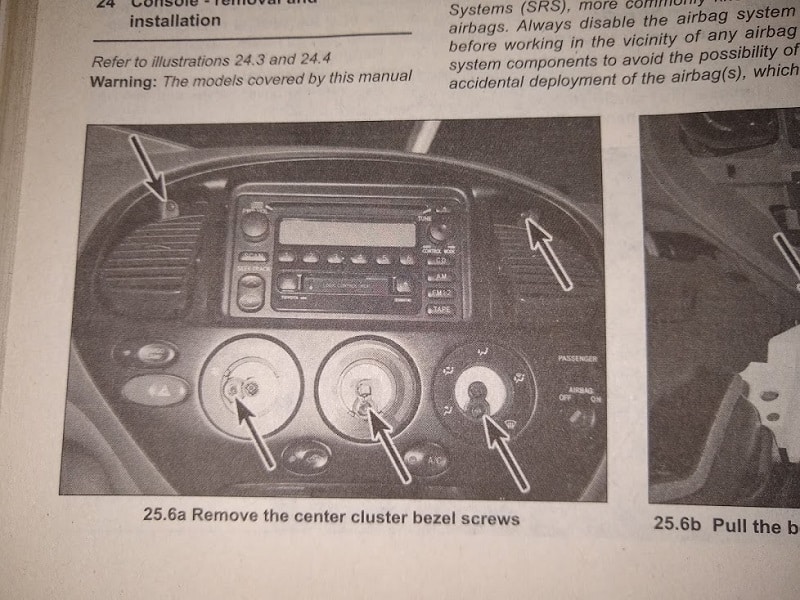
owners manual
Credit: Haynes Repair Manual (Toyota Tundra & Sequoia 2000 – 2006)

If you find out how to open the control panel or remove the housing for the vents, you can get a better look at the vent from both sides. It may be that the vent pushes in easily from the other side, or you can get a better view to line up the vent and the housing. 

It may only take an extra few minutes, and it will be worth it if it prevents further damage to your vent. 


Check the Vent for Damage


Cracks

If you were able to check all the areas of the vent and found no problems, then you are ready to replace the vent back in its place. 

If your bent has a crack, you might need or want to fix it first. 

For the post or pins that hold the vent in place, you’ll need something strong, like an epoxy mix, to create a permanent bond so the contact point will be like new. 

For other areas of the vent, you might be fine with super glue or a similar type of product. 

Sometimes it’s not worth trying to fix because you might cause more damage trying the apply the glue. Applying a layer to the surface of the vent fin and not bending or forcing any parts out of position too much will help you maintain the structural integrity of the vent.


New Vent

The other alternative is to get a new vent. These usually don’t cost too much, so it depends on how important the aesthetic value of the vent is. If you can’t get comfortable if the air isn’t directed toward you, then it might be important to replace a vent that no longer functions well.

Your comfort while driving can be impacted by vent control, so getting placed correctly or replaced can help. Below is an example of a vent and tools you may want to use to help you when replacing some vents. 


Vent Related Products


Common Toyota Vent

AD

This vent requires no tools, so you can just replace it as long as the vent housing is still in good condition.


Trim Removal Tools

AD

These tools are helpful when removing various parts of the car so, you don’t damage the plastic.


Replace Tabs

AC TABS

If your vent tab is broken, this is usually an easy and cheap fix. Sometimes all you need is a new tab (sometimes called a clip) if the tab gets broken. Find the specific one for your car to get the right fit. 


Fix Fins

Another problem you may be able to fix easily is reattaching loose fins. Sometimes you can use pliers to reattach the fins into place. See the video for instructions.


Put the Vent Back in Place

When replacing the vent for my car, I just pushed the vent in, and it was able to slide in and attach to both contact points so, it worked properly again. It was easy to remove and replace my vent.

I thought that I would need my pliers to coax the vent back into place, but after pushing the top of the vent, it easily slid under the contact points.

Then I could easily push the vent back in without forcing anything to move in a way it wasn’t supported too.

The problem I find is that I want to get things fixed within a few minutes, and sometimes research and patience are necessary to fix things right the first time. It will be worth the wait to get it done right, and feeling the satisfaction of having done it yourself, has been my experience.


Conclusion

When fixing your air conditioning and heating vents may be a simple procedure, or it may take a long time to get it done right. If you do need a new vent, they should not cost too much unless you go through a dealership. 

Each car vent is different and may require different techniques to fix. Doing research will help you determine if you really want and need to fix it. Determine how long and hard the steps are from start to finish to see if it’s quick or a multi-step process. 

Soon, as you take the appropriate steps, your vent will be operating just like new.

Complete List Of The Major Components Of Car Audio System


Car Audio System

There is no need to dispute the fact that any ride is incomplete without music. To have that amazing experience, all you need is a rocking audio system. Are you sick of your factory stereo system? Are you looking for a mesmerizing system for your car?

A car stereo needs a head unit (also called a single or double din stereo receiver), an amplifier (sometimes included in the head unit), and speakers. These major components make up your car’s audio system and are linked together with audio and power wires. 

Do you need a new audio system or want to make changes to the old one? If you are looking forward to making changes to the old one, then you have to figure out which components of the car audio system need to be altered. Now what you have to do is to follow these steps.

  • Listen to your car stereo system while it is parked.
  • Drive for a while and listen to some great songs.
  • Observe how the sound of your audio system works while it is parked somewhere after driving.
  • Make a list of all the components and rate how they work according to listening enjoyment.

After following all the steps mentioned above, you will end up with a list of a few components you might want to change. On the other hand, if you are planning to buy a new audio system, then you have to list out all your requirements. What do you expect from your new audio system?

car's audio system
Photo Credit: https://in.pinterest.com/stres1/car-audio/
  • Should it be able to make calls and access music using a wireless Bluetooth connection?
  • Should it be able to tune into various radio broadcasts?
  • Should it be able to control different portable devices?
  • Should it be easy with DVDs, CDs or MP3 files?
  • Should it be able to play loud without any distortion?

What Do You Know About Your Car Audio System?

If you are not willing to tolerate the noise of traffic, the sound of engines,s and the wind, then only one thing can save you. Music is something that cannot be put into words so easily and can remain silent for a while even. All you need is the awesome sound from your audio system.

This melodious sound is nothing but electric waves, which are converted by your car’s audio system. There are mainly three components of a car audio system, which are widely known as the head unit, amplifier, and speakers. To get to know more about it, go through the information mentioned below meticulously.

The receiver, also known as the ‘head unit’, is the first one. It controls the complete car’s audio system and receives the car’s audio signal. The amplifier comes second on the line. It enhances the car’s audio signal strength. The second one is responsible for driving the third component, which is the speakers. Speakers are responsible for reproducing the sound.


1. Head Unit / Stereo Receiver 

Head Unit

  • If you look into the audio system at your home, then you may find many components such as a CD player, radio tuner, or different cables. However, this cannot be the case in a car audio system because it should be very compact due to lack of space.
  • To satisfy this limitation, the head unit is the main part of any car’s audio system because it aims to perform various operations. The main functionality it offers is to control the sound level and access the different audio sources.
  • In earlier times, AM radio was the only available option. However, as technology evolved, FM radio and now HD radio came in handy. Moreover, MP3, CD, and DVD players are also popular among users. The Head unit gives easy access to all these sources.
  • You can also control the various media players such as iPod and also go through the contents of your flash drive using the head unit. Wireless access using Bluetooth is the easiest way to navigate through the content in your music files.
  • The Head unit also controls the treble and bass controls. The user can adjust the sound of the music by adjusting these tone controls. There are some audio systems that adjust the volume automatically.

2. Amplifier

Car Amplifier
  • You might not know that sound produced at an earlier stage does not have enough power. There is a component known as the amplifier, which is used to boost the power of the audio signals.
  • The amplifier is mainly divided into two stages. The first one is known as the pre-amplifier, and the second one is known as the power amplifier. Pre-amplifiers input is the audio signal from the audio sources. It boosts the signal at a certain level, which is adequate to send to the power amplifier.
  • A power amplifier takes the input from the pre-amplifier and then boosts it at a certain level, which can create adequate sound. Some of the audio systems have inbuilt power amplifiers, which are installed in the head. If you want even better sound quality, then you will need power amplifiers. They need separate space away from the head unit due to heating issues.

3. Speakers

Car Subwoofer

  • This is a commonly known and significant component of an audio system. It takes the output of the power amplifier and converts this power into mechanical energy, which later on creates sound.
  • This sound is a result of air vibrations, which reach the human ears. The paper cone vibrates to make the sound in the speaker. Normally, the frequency of these waves lies between 20 to 20,000 Hz. This range is audible to human ears.
  • In earlier times, speakers were designed in such a way that included a whole frequency range. The problem that occurred was when the bass was needed. It was poor when the frequency was high. That is why speakers, which are designed to produce specific frequencies in a narrow range, sound better.
  • You can use woofers to get a better low-frequency bass sound. There are also tweeters, which are used to better represent higher frequencies.
  • In a nutshell, you can use different speakers and amplifiers. By mixing all of these speakers according to your need, you can get the exact sound from the audio system you seek.

Before you change any component of a car audio system, ask the questions presented below to yourself. You will be able to easily figure out what you need to change in it to enjoy the music.

  • Are your speakers working well, or do you find them broken or old? If you feel a need for new speakers, then go ahead. First of all, consider your requirements and then buy.
  • Do you find the music of your audio system low and distorted? If this is the case, then you need to get new amplifiers, which can boost the signal, and you can have powerful signals.
  • Does your car make so much noise? While driving, the noise of the car engines, road, and surroundings may be disruptive. All you need is sound-deadening material. This will absorb unwanted sound and vibrations and allow you to enjoy your music.
  • Can’t you feel the beat of the music nicely? Install new subwoofers in your car audio systems to enjoy the lower bass sounds of the beat in your songs.
  • What do you use as your music source? If you want to use your phone or flash drives as the source of the music, then make sure your head unit has this functionality.
  • Do you travel a lot and even with your family? If you like to travel a lot alone or with your family, then you can consider a change. You can install a video receiver instead of just audio.

Conclusion

So when thinking about the components of your car audio system, remember that the head unit, amplifier, and speakers all must match correctly in order for your music to sound good. Observe how your current system sound before making any changes. 

Don’t forget that a costly audio system doesn’t make it better, although getting the correct components for your head unit will make a big difference. So, go ahead and make changes if your current boring factory stereo system isn’t working out. There’s no fun driving your car without some good-sounding music!

Updated (3/2020)

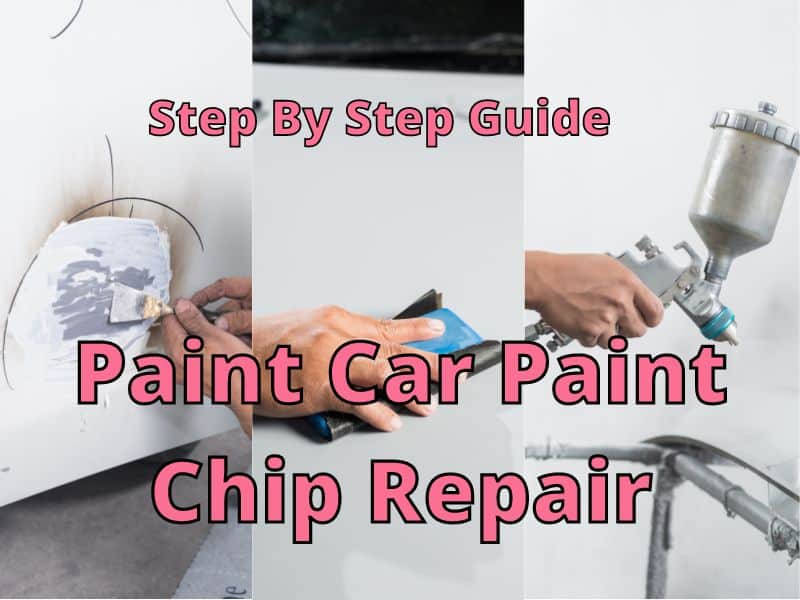
Step By Steps Paint Car Paint Chip Repair


Paint Car Paint Chip Repair

My truck has been on the road for over 100,000 miles. It has seen its share of road debris. Over time my truck hood has accumulated several chips in the paint. Some of the chips have gotten worse over time and so now is a good time to repair them for aesthetics and as a preventative measure.

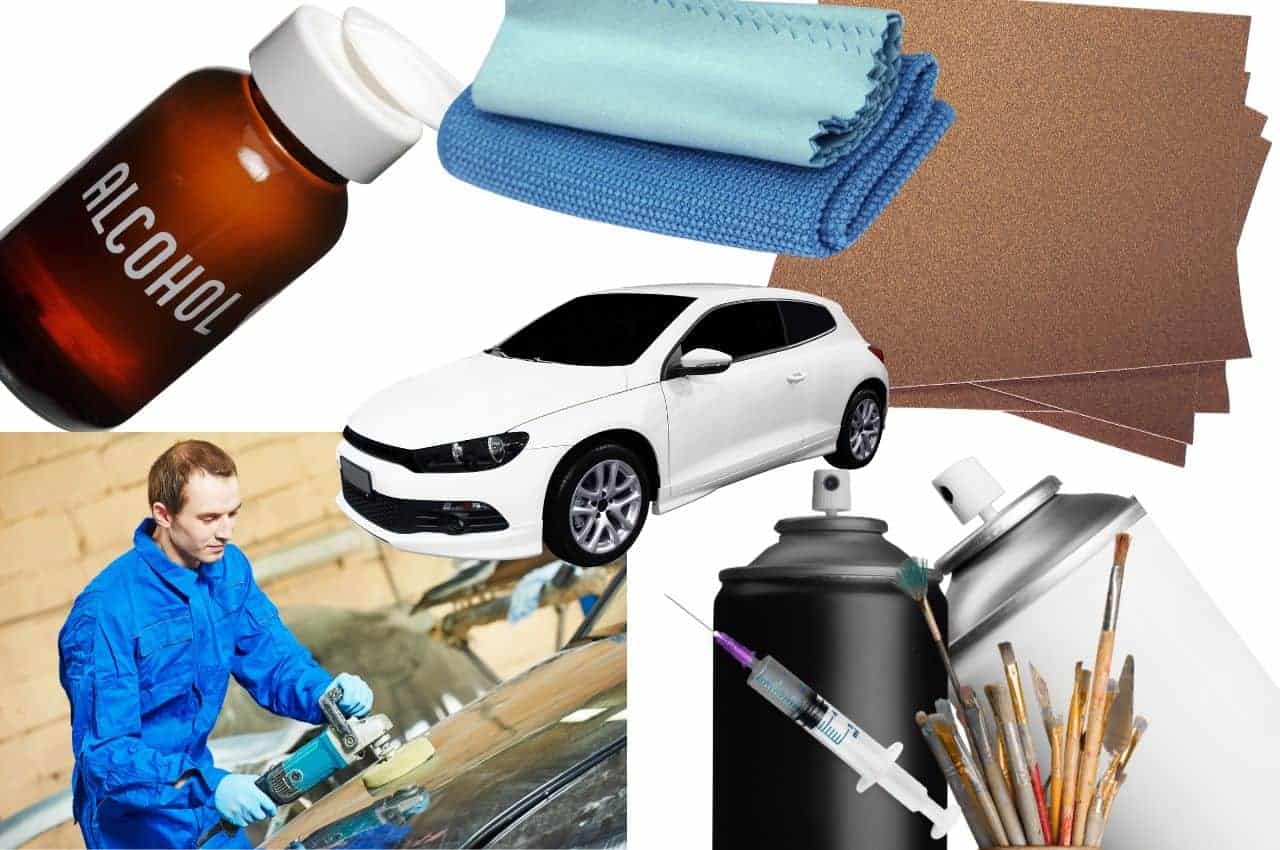
The steps to repair a paint chip for your vehicle are: sanding, cleaning, adding primer, and then painting. For an almost unnoticeable repair, some additional steps are needed, including more sanding, more painting, and buffing with a compound. The easiest is to get a touch-up kit with only 3 steps.

I have never painted a car, but I have painted my house several times. I know that over time I have felt the fatigue of painting for long periods. For my truck, I’m more inclined to go with an easier and faster solution. Although, with some of the chips that have rust, I’ll need to take more steps to prevent further problems and get a professional look. 


What Size Chip Do You Have?

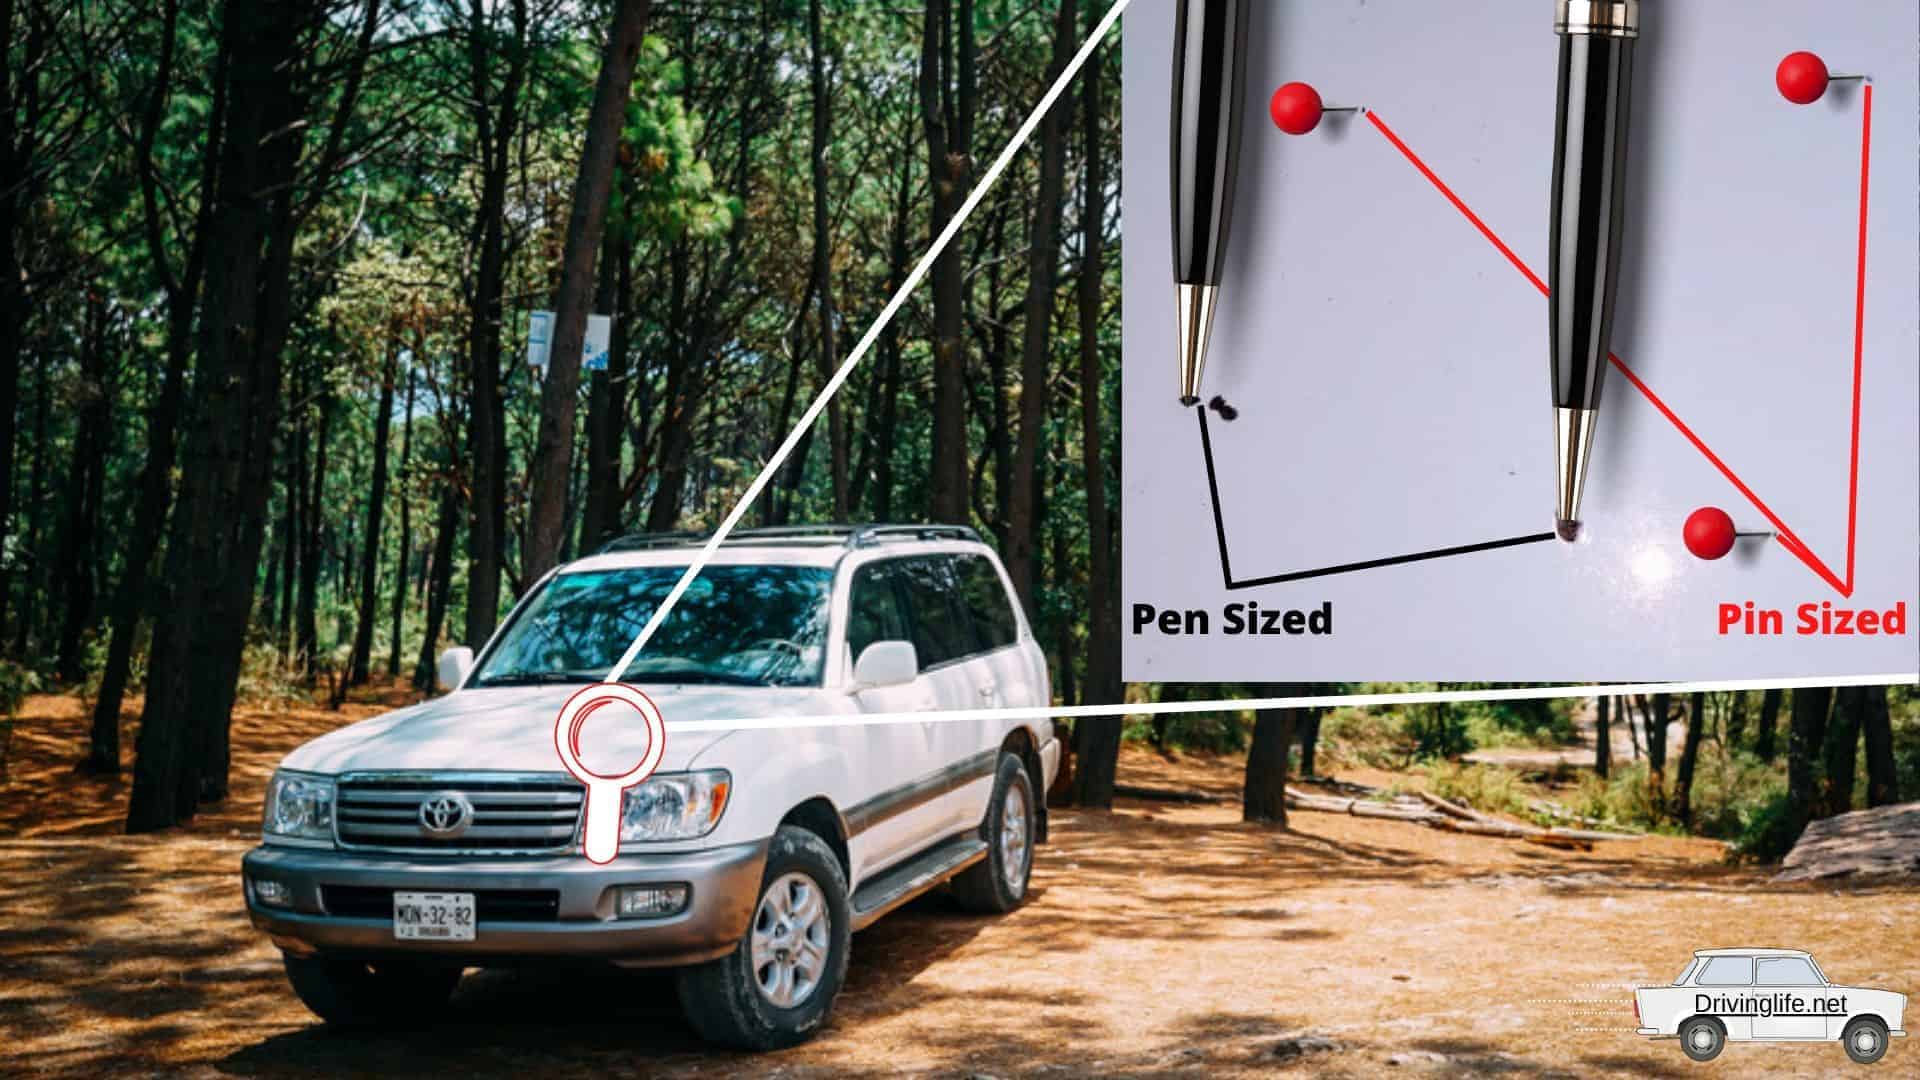
pin sized or bigger paint chip

Size does matter when painting chips. If you have tiny pin-sized chips, a simple paint and acetone kit will do the job with good results in just a few minutes. Bigger pen-sized chips can still be painted with a quick kit but will be noticeable upon getting closer to the car. 

A paint chip touch-up pen can also work to cover the chip and protect your car from getting rusty and helping the car look better. 

To get good results with pen-sized chips or bigger ones, you may want to sand, clean, prime, paint, use a clear coat, and buff with a compound. This process will take a while but will be much less noticeable upon closer inspection. 

If your chips have any rust damage, then sanding will be the first step before anything else.  You may also use a chemical rust remover for rust


What Options are Available?

There are many ways to repair paint chips. Here are three methods we’ll discuss in this article.


Touch-Up Pen: Results: OK

AD
  • Pens can be a good quick way to help you protect your car.
  • They will help your car look better as long as you are careful with the application and get the correct color.
  • There are various ways to use a pen, and they can give you similar results as a touch-up kit.

Touch-Up Pen Repair

AD

Step 1: Clean The Area

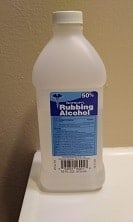
  • Clean the area with isopropyl alcohol to remove any waxes.
  • Use a Q-tip or cloth to get into the chips and remove any dirt and wax.

Step 2: Apply Primer

  • Practice using a primer pen before applying primer to the chip. 
  • Primer may not be needed unless the chip goes down to the metal.
  • Dab the primer onto the chip to ensure complete contact with exposed metal.
  • The primer should not fill the chip but cover the entire exposed metal area. 
  • Let dry.

Step 3: Add the paint

  • Practice using a paint pen before applying it to the chip.
  • Paint should not fill the chip.
  • If you are not using a clear coat, then you can fill the chip entirely.
  • Dabbing the paint carefully into the chip is usually the best method for filling.
  • Let dry.

Step 4: Add the clear coat.

  • Practice applying a layer on paper if necessary.
  • The clear should fill the chip.
  • Let dry, and add a second layer if the is not entirely filled.
  • Dabbing the paint carefully into the chip is usually the best method for filling.
  • Although not supplied with pen kits, using a rubbing compound to smooth out the chip area may help it look smoother and more flush with the rest of the car surface.

Touch-Up Kit: Results: Good

AD
  • A touch-up kit will help your car look like a more professional job is done with many of the chips.
  • The application is easy and fast. It may not completely create a flush finish with the rest of the paint surface with some of the chips.
  • With small chips, this is a great way to fill in the chip quickly. 

Touch-Up Kit Repair

AD

Step 1: Clean The Area

  • Clean the area with the provided solution or with isopropyl alcohol to remove any waxes.
  • Washing your car may also work if it is not waxed.

Step 2: Apply Paint

  • If primer is not needed, apply paint by dabbing or letting it flow into the chip.
  • Try not to brush the paint.
  • Fill the chip completely.

In this video, they apply paint to a scratch using a kit. (Although, I would try not to brush the paint.)

Step 3: Wipe Off Excess

  • Using the instruction, wipe off the excess paint with the solution included.
  • The goal is to wipe away the excess paint without wiping any paint away from the chip.

See the video for advice and how to wipe off excess.

Step 4: Use the Rubbing Compound If Needed

  • Follow the directions for your kit.
  • If you have a rubbing compound, you can apply it to help the chips look smooth.
  • The compound may be more useful with areas that have scratches.

DIY Paint Chip Repair: Results: Very good

AD

  • Taking time to do all the steps for a professional paint job will take a while but will create a great finish. 
  • You will need to take your time with each step to ensure that it is done well. 
  • If you decide to do this, you might want to do all the chips at once because it is so intensive.

DIY Chip Repair

Step 1: Identify and Sand 

Sheets of sand paper
  • Find each chip and sand it with 1000-2500 grit sandpaper. Finer grit will help you get more control over your sanding.
  • Using water while sanding will help create a smoother sanding motion and a better finish.

Step 2: Clean the Chips

isopropyl alcohol
  • Use isopropyl alcohol or a lacquer thinner to clean each chip.
  • Washing your car may be all that is necessary for cleaning the chips, but if you think there could be any wax on the car, be sure to clean each chip before priming. 
  • Let dry.

Step 3: Apply Primer

AD

  • Practice using a primer pen, tool, or brush before applying it to the chip. 
  • Apply primer if needed. Some chips go down to the metal, and this is when the primer is needed.
  • Dab the primer, ensuring contact with exposed metal.
  • The primer should not fill the chip but cover the entire exposed metal area. 
  • Let dry for about an hour. Refer to instructions.

.

Step 4: Apply Paint

many paint brushes and watercolors arranged
  • Using a fine-tipped brush, toothpick,  or tool to apply paint will help you get enough paint to fill the crack. 
  • Apply enough to just about fill it if you are going to add a clear coat. 
  • If you are applying paint with a clear coat included, apply enough to fill the crack completely. 
  • Wait for the paint to dry and see if you need to add a second layer of paint with a clear coat.
  • If your paint doesn’t have a clear coat in it, leave room for the clear coat to fill the rest of the chip. 
  • Let dry for about 24 hours. However, you may be able to apply a clear coat after 1-2 hours. Read the instructions on the paint container.

See the video for tools you can use and advice.

Step 5 Add the Clear Coat

AD

  • Add the clear coat after the paint has dried. Be sure to add enough to fill the chip.
  • After an hour or two, check to see if the clear coat needs another coat to fill the chip and add another coat if needed.
  • Let dry for 1 – 2 days. Check the directions on the clear coat.

Step 6 Apply Rubbing Compound

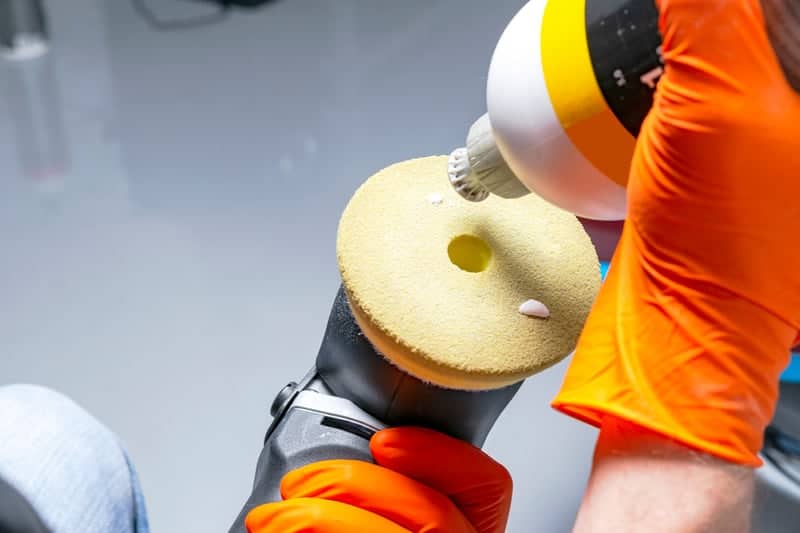
Car polish wax worker hands holding polisher and polish. Close up at hand holding car polisher. Man holds a polisher in the hand and polishes the car. Car detailing
  • After everything is dry, use a cutting/rubbing compound to smooth out the clear coat’s surface, so it matches the surrounding paint. This may take some time. 
  • If you get an aggressive compound, it will be faster to buff the area smoothly, but you may accidentally get swirl marks if you buff too much. 
  • If you get a more gentle cutting cream, it will remove any bumps and leave the surface smooth, but it may take a while. You’re less likely to get any marks left over with a gentler compound. 

Here’s a complete beginning-to-end video for DIY chip repair.

When fixing chips in your car’s paint, you’ll need to decide how long you are willing to take and what level of result you want. 


Which Method to choose?

needed for paint chips repair

There are more methods for repairing chips and painting than I have mentioned. Each has its pros and cons. I think most people would opt for one of the three methods above or a combination of them. The best method will be the one that takes into consideration how much time and effort you are willing to take to fix your chips. You also need to consider how professional the job will look when finished. My personal method would be to get a chip repair kit because it is very easy to use. It may not look perfect after you’re done, but it will look good and provide protection.


Chip Repair Products


Touch Up Pens

AD

Easy-to-use pens that help you cover your paint chips.

  • This kit comes with cleaner, primer, paint, and a clear coat.
  • Colors are available for many cars. 
  • Easy to use and store away for next time needed.

Chip Repair Kit

AD

Easy to use system that is very quick with good results.

  • Includes the paint, cleaning solution for a smooth finish, paste, and wax.
  • Colors are available for many cars. 
  • Comes in an easy-to-store away box.

DIY Chip Repair

AD

You’ll need to buy many different products, including sandpaper, cleaning solution, possibly primer, paint, clear coat, and rubbing compound.

  • The excellent result if done properly.
  • It will take time, but it will look great when finished.
  • This can be a cheap option when using your hands for sanding and buffing. 

Related Products You May Want


Rubbing Compound

AD

Used to help remove scratches and smooth out your paint job.

  • Helps create a uniform look.
  • Helps the entire surface of the area look newer.
  • It can remove water spots.

Paint Chip Tool

AD

Used to help drip paint to chip, so it looks smooth.

  • Works on scratches and chips.
  • Easy to use for good accuracy.
  • Easy to clean after use.

Choose a method that works into your budget and time schedule while considering the quality of how the job will be done. Soon you should be able to decide what is best for you.


Why Do It Yourself?

When you’re considering what to do repairing chips in your car’s paint, you could be better off doing it yourself. Painting jobs at repair shops take time and effort and costs lots of money. You can get similar results as some repair shops if you take the time to repair your own chips.

If you are thinking about repainting an entire panel, that could become costly. So, to protect your car, save money, and help it look nice again, using the method mentioned above can help.


Conclusion

When repairing chips in your car’s paint, repairing it at home can be fairly easy and have good results. If you want professional-looking results, you can do that too. It will take more time and effort, but it will look great.

So if you have any chips in your paint, why not try a method to fix it yourself, save money, have a nice-looking car, and protect your car from further damage? 

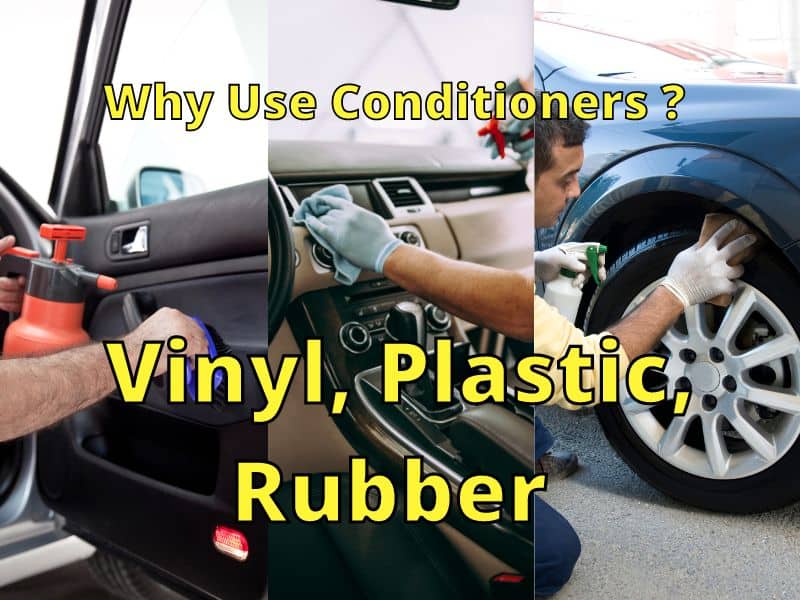
Why use Vinyl, Plastic, and Rubber Conditioners on Your Car?


Vinyl, Plastic, Rubber

Many of your car parts are made with vinyl, plastic, and rubber. I have seen the damage that can happen when cars are left sitting in the sun and rain for long periods. Everything eventually starts to weather, or in other words, your car surface gets damaged.

Vinyl, plastic, and rubber conditioners are used to protect your car’s interior and exterior parts from the damage that is caused by UV radiation and the weather. It helps your car look newer and provides a protective coat.    

While conditioning my truck dashboard, I noticed that my conditioner worked well to clean and restore the color, so it didn’t look faded and made it look shiny.  

The sun, rain, wind, and snow can take their toll on your car. Washing and waxing your car can provide some protection on the exterior, but what about the vinyl, plastic, and rubber surfaces?   

The best way to look after those surfaces is to use a conditioner/restorer/protector that can provide UV protection and condition as well. 

Protective products for vinyl, plastic, and rubber are called different names but should all do essentially the same thing. They provide UV protection and help provide a protective layer so they remain shielded and won’t crack.

If you get a product that only protects vinyl and rubber, you’ll need to buy another bottle for the plastic parts of your car. I prefer to use one that can cover all three surfaces to make it easier to use. 


What’s the difference between Vinyl, Rubber, and Plastic?

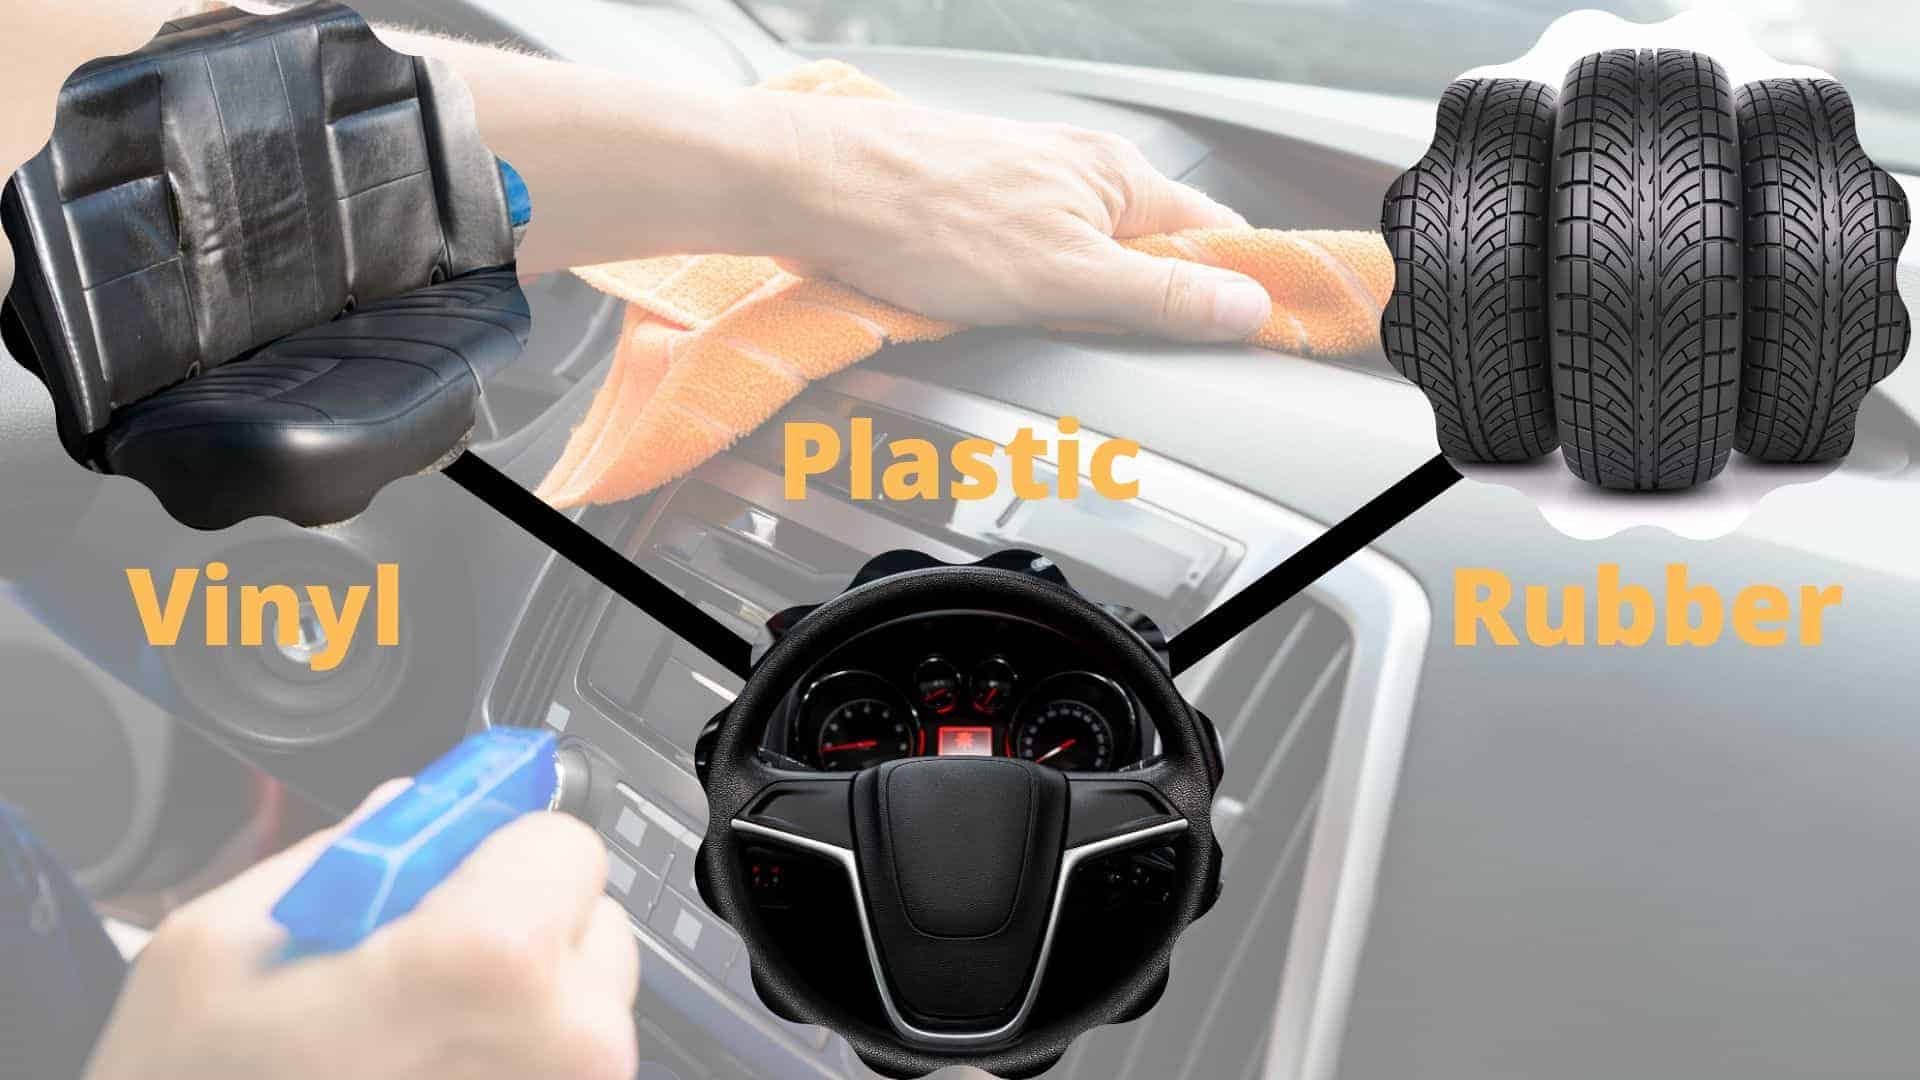
vinyl, plastic, rubber car parts

Vinyl and plastic are both polymers. A polymer is “a large molecule, or macromolecule, composed of many repeated subunits” (Credit Wikipedia). These synthetic compounds are made into various car parts.

Vinyl is made of Polyvinyl chloride, also known as PVC. The hard type of PVC is used in piping, such as for watering the lawn. The soft type can be used in car interiors, such as for car seats

Vinyl can be cleaned easily and needs to be conditioned every so often, so it remains soft and doesn’t get damaged by the sun.

Plastic, on the other hand, is made of a variety of combined parts to make different kinds of plastic. All of the hard parts on your car are likely made of plastic. 

Plastic is also easy to clean, and although it may take longer to get damaged by the sun, it also needs to be conditioned and protected from the sun’s rays.   

Rubber is a natural product that is derived from the rubber tree. This product can be used for many parts of the car, including the tires, weather stripping, and trim.  

It can also get damaged over time by the sun and weather. Using a conditioner and protection will help it stay pliable, protected, and look nice. 


How Can Protective Products Help?

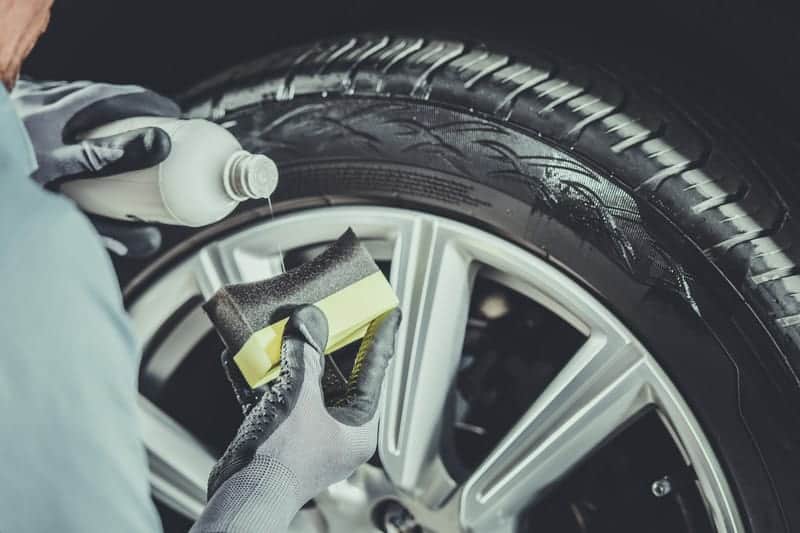
Tires and Alloy Maintenance

When you apply a protective spray or cream to your car, you will help protect and clean the surface of the interior and exterior. Most cars have plenty of vinyl, plastic, and rubber parts, so starting off with just one section of your car can help.


Moisturize

Most protective products can moisturize your car’s vinyl, plastic, and rubber surfaces fairly well. The protective layer can help vinyl and rubber remain pliable and help prevent plastic from becoming brittle.

Beware of products that contain oils; these may dry up and degrade the plastic and rubber. Most popular protectants are safe, but each is comprised of a different formula. Checking the product’s specifications can help you make a good choice.   


UV and Dirt Protection

After the surfaces have been moisturized, they are able to create a protective layer to help prevent UV damage. Once the product is dry to the touch, it should be able to prevent the accumulation of dust and grim for a while. In a month or two, it will need to be reapplied again to protect it effectively.


Restore

When car surfaces start to fade or get dry, applying a protective product can help the surface look new again. Dull black surfaces will start to look darker. Depending on the type of product you use, some will also create a shiny surface.


How do I Apply Vinyl, Plastic, and Rubber Protective Products?

male car cleaning service worker washing black car

It should be fairly easy to apply most products when protecting the interior and exterior of your car’s vinyl, plastic, and rubber. Although you want to avoid getting it on any other surface besides the ones it is intended for.

  1. First, make sure the surface is fairly clean. If it has too much stuck on the gunk, then use a clean rag and a spray bottle with soap and water to clean it off.
  2. Second, apply the conditioner/restorer/protector to the surface or clean the rag as described in the instructions for the product. 
  3. Third, wait the time instructed before wiping off the excess product if instructed to do so. Check to see if there are any spots you missed. A second coat of the product can sometimes be applied but don’t overdo it.
  4. Forth, check back later. Make sure it has had time to soak in fully. Use a clean rag to check the surfaces again. Make sure they are not greasy. Greasy areas can wipe off on your clothes. 
  5. Keep the rags and the product together for the next application. If you are serious about keeping your car looking nice, apply the product once a month. 

Here’s an example of how you can apply products to protect your car’s interior and exterior. 


CAUTIONS:

  • If you do accidentally apply some conditioner/restorer/protector to a painted area, for example, just use a clean rag and a spray bottle with soap and water to clean it off.
  • If you get some spray in your eyes, perhaps by rubbing your hand over your eye, then raise your eye thoroughly with water.
  • Don’t apply the protector to your steering wheel if it has a slippery finish. Try applying it to a smooth plastic surface first and see how it feels after it is dry. If the surface is not slippery, then it may be fine for the steering wheel.  

How Long Will It Last?

Most protectors don’t claim how long it will last, but there are a few that claim it will last many months or years. You can do some shopping around to find the one that is best for you.

Some of the factors you may want to consider are how long it will last, how easy it is to apply, and does it leave a greasy film after it dries.

Here are some products you may want to check out and see if they are the right ones for you. 

Protector Type

PICTURE (AMAZON PHOTO LINK)

What Does it do?

Claimed Time It Last

Finish

Restores plastic, rubber, leather, and vinyl 


Permanently Bonds with faded surfaces using acrylic polymer. 

Years

Leaves no greasy residue. No VOCs.

Restores plastic, rubber, vinyl, and more 


It deeply permeates plastic and actually changes the chemical chemistry. UV Protection.

6 Months

Leaves no greasy residue. No harsh fumes.

Restores plastic, rubber, and vinyl


Renew and seal surfaces. UV protection.

Several Months

Leaves no greasy residue. No harsh chemicals.

Restores plastic, rubber, and vinyl

Water-based protector – safe on all surfaces. UV Protection.

A long time. (Probably several months)

Leaves no greasy residue. 

Protects plastic, rubber, leather, fiberglass, and vinyl


Restores and protects. UV protection.

(Probably 1-2 Months)

Leaves no greasy residue. 


Conclusion

When using a vinyl, plastic, and rubber protector, your car will benefit by looking new, getting clean, and being protected from the elements. Many new products do a great job helping your car look and function like new ones without causing a greasy finish.

If you want to use one of these products, it will be useful in providing a protective coat, so cleaning the next time will be much easier. Best wishes for your efforts in shielding your car from sun and weather and restoring its original beauty.  

Water in Your Headlights? [6 Steps to Help]


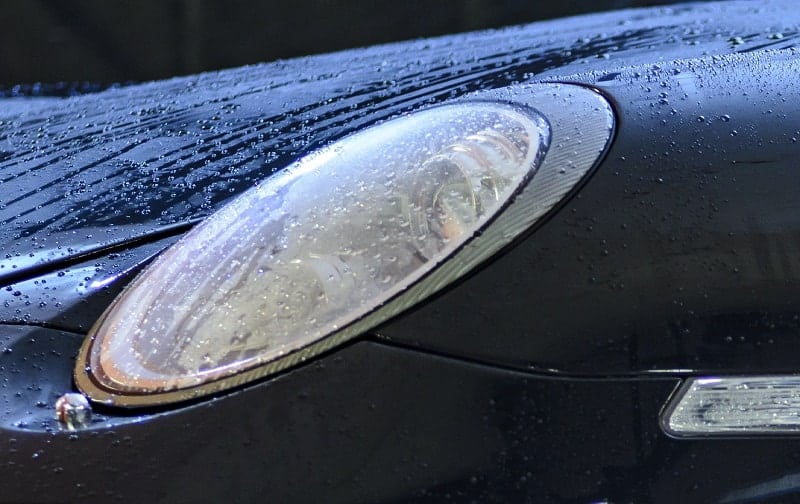
Water in Headlights

When a headlight has moisture or water inside of it, there are ways to fix the leak and get rid of the water. If water is in the headlights, the bulb can still work, but it has an impact on the brightness of the lights. 

If there is water in your headlights, you can replace the headlight or repair it. Although repairing your headlights is cheaper, replacing them can be faster. Replacement costs vary from $20 – $200+, and restoring it can cost less than $20 with the right tools. Fixing a headlight involves removal, evaporating all moisture, sealing, and replacement. In about an hour, you’ll have repaired or replaced it.

It may be a bit of extra work to repair a headlight, but it can be worth it to save some money. But regardless of which way you choose to fix the problem, it’s important to take action because the water in the headlight(s) can impair night driving visibility. 


Diagnose if Water is in Headlights Assembly

headlight with water

To know if there is water in your headlight assembly (I’ll also be calling it headlight & housing),  you will see a pool of water collecting in the headlight. It may also appear as moisture and water droplets on the inside of the headlight.

What if you notice water moisture one day, and then it is gone later? Then you may have seen moisture on the outside of the headlight, or the moisture has found a way to escape.

One way to make sure there is moisture in the headlight is to use a flashlight to check for any moisture or pooling water on the inside.

If your headlight is hazy, try to clear it off by using one haze removal method, or you can just place some water on a rag and apply it to the headlight to temporarily see clearly inside.

If you are still not sure, the next step would be to look carefully around the headlight for any cracks where water could enter and check the seal where the light bulb is inserted.

You will need to open the hood and may need to take out the headlight to thoroughly examine the headlight housing.


If Water is Found in the Headlight Assembly

What If you have not found any water or moisture in the headlight, but there is a crack? Then the seal for the bulb is likely letting moisture in. You will need to fix those problems by following the steps under the next heading.

If you have found water or moisture in the headlight, there are several steps you can take to remove it. Your headlights can be sealed up, so they don’t let in moisture anymore.

You may need one or more of the tools listed to help you with your job. A flat head and Philips head screwdriver may be needed, as a pair of needle noses or regular pliers, a socket set, and possibly rubber gloves if wanted. Don’t forget some sealant for any cracks if necessary. 

Gloves

Sealant

Pliers

Socket Set

Phillips and Flathead Screw Drivers

AD

Steps to Take out the Headlight Assembly

If you have identified water in the headlight, a leak, or a crack, the next step would be to take out the headlight to fix it.

This involves removing any clips, any screws holding the headlight in place, pressing any tabs that might hold the headlight, and carefully taking out the headlight bulb or disconnecting the wire, depending on the headlight.


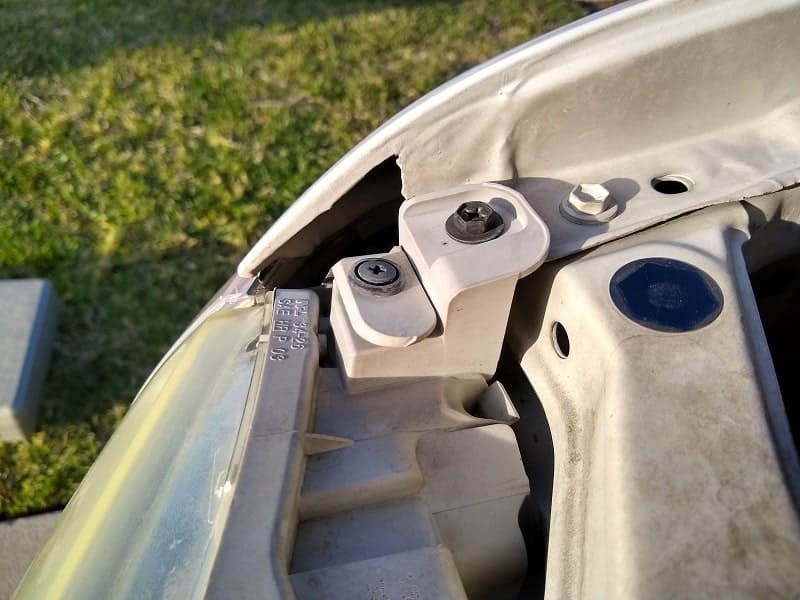
Step 1. Screws, Nuts, Tabs, and Clips

headlight screw and nut - water in headlight

Remove any screws or clips holding the headlight in place. See if there are any tabs that need to be pressed in order to release the headlight assembly. 

Use a repair manual or find out information online to understand the correct procedures. Some jobs may require you to take off the bumper, turn signal, or other items.

To take out the screws or bolts. Sometimes you will need to check for any tabs that may be holding the headlight in place.

You may need to wiggle it as you pull it out. If it doesn’t pull out, check and see if the wiring is preventing movement, tabs, or another hidden screw or bolt.

Other cars may have clips that hold the headlight assembly in place. So, look behind the light and see if you find any clips holding it in place. Some require pulling, and others pinching.

Pull on the assembly to see if it is free. Then you can go to the next step.

It’s a good idea to watch a couple of videos for your car make and model before trying to take out the headlight assembly. Sometimes it’s easy, but other times you may need an hour or more. 

In this video, you can see how an entire headlight assembly is replaced. Sometimes a crack is too severe to easily fix, and it might be worth it to replace the headlight assembly altogether.


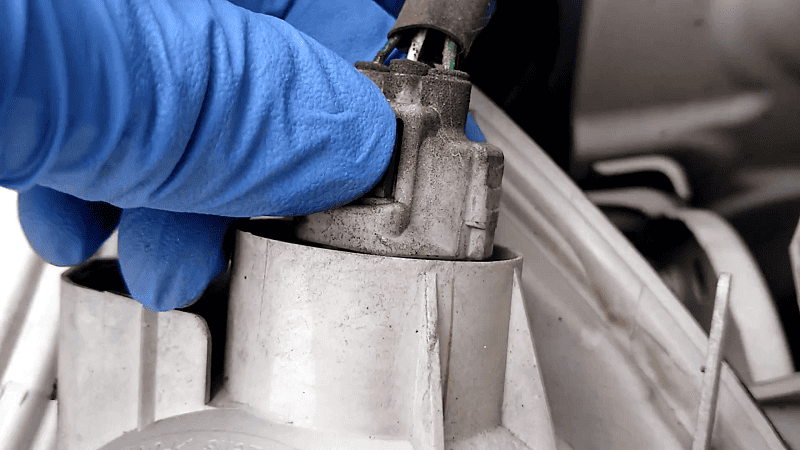
Step 2. Disconnect Electrical Connection and Bulb

headlight connector

Once the headlight assembly is free, disconnect the electrical connectors.

There may be tabs that require a flat-head screwdriver to help pry them tabs (this might also break the tab, so be careful). Most should come off by pushing on the tabs at the connection. 

At this point, your assembly may be free or may require you to remove the bulb.

To remove the bulb, you can turn the bulb (usually counterclockwise) or pull it out by wiggling it back and forth slightly. My truck has a metal pin that holds the bulb in place that needs to be unlatched.

Since not all bulbs will twist or pull out, so be aware of locking rings, clips, or other parts that secure the bulb to the headlight assembly.

At this point, you might want to have some nitrile gloves, to help you avoid touching the light bulb with your fingers or hand. If the oil from your hands gets on the bulb, it will cause it to burn out faster. 

Carefully remove the bulb and place it somewhere safe. Then, inspect the rubber gasket or rubber cover to see if it is allowing water or moisture to enter the headlight housing.

Check for breaks, particles, or creases in the gasket that might let water in. 

Remember to remove plastic clips carefully so you don’t break any of the connectors or clips holding things together.

In this video, you can see how the electrical connection for a Honda Accord headlight assembly is disconnected. 


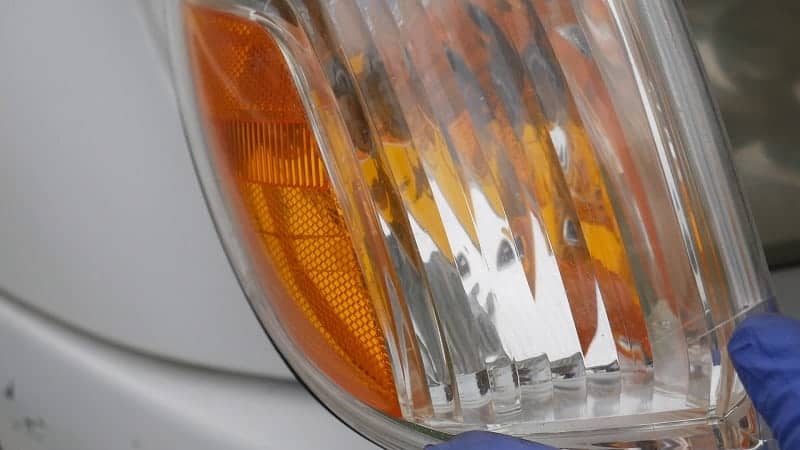
Step 3. Check the Headlight Housing for Cracks and Leaks

cracked turn signal - water in headlight

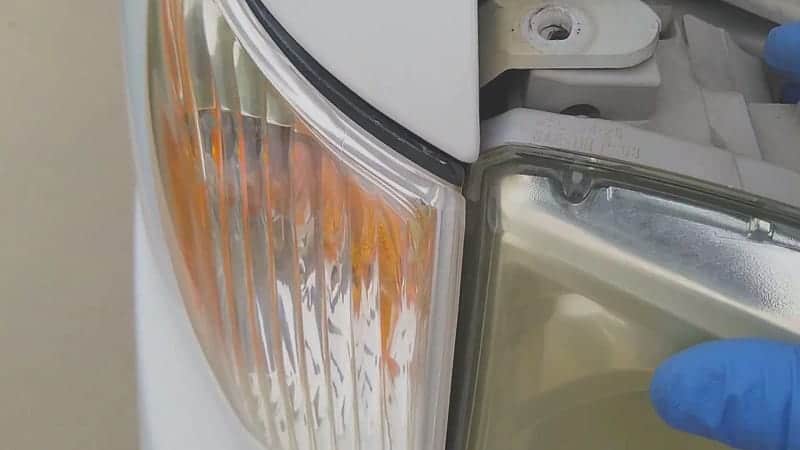
Now that you have detached the headlight assembly, look around for any obvious cracks. Sealing the crack with sealant could work if the crack is on the lens. Determine the damage’s extent to decide if sealing or replacement is needed. 

In the video below, you’ll see how you can fill the housing with water and determine exactly where the water is entering the headlight.

After you have determined where the leak is coming from, remember or mark the area. Later, you can apply a sealant to the correct area to prevent further entrance of water. 

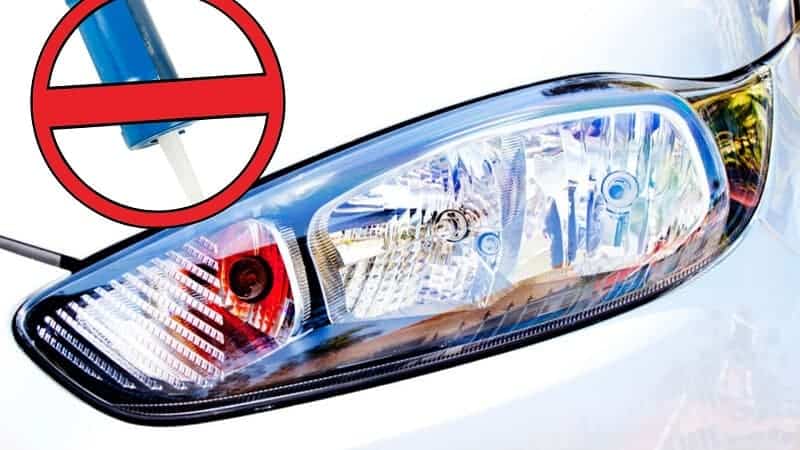
Now you need to evaporate all the water in the headlight. The video has a good idea: using a hair dryer or heat gun (AD).

If you don’t have either of these, placing the housing in the sun may help. However, you need a dry, warm environment to help the moisture evaporate. 


Step 4. Seal the Headlight Housing

seal Headlamp

If you have gotten all the water and moisture out of the housing, you need to seal up the areas that let water in.

Use the correct sealant. One that dries clear works well with high temperatures and is waterproof. 

Apply the sealant on the area that has a crack or opening. Make sure to pat it down into areas with indents or grooves. 

Sometimes you may need to apply pressure if the headlight housing has split. Use a clamp after using the sealant in and on the crack(s). Wait about 2 hours to ensure it will stay closed.

Look at the product information to determine how long it takes to cure. It will be dry to the touch in about an hour. After that, the headlight can possibly be installed on your vehicle. 

You may not want to go on any bumpy streets or roads if it hasn’t been cured, but if everything is smooth, you may be able to risk driving without a problem with the headlight before it cures.

It’s probably best to fix the headlight in the evening and wait until the next day to drive it. 


Step 5. Replace the Headlight Assembly

replace headlight- water in headlight

When installing the headlight assembly, it’s usually best to reverse the process used when taking it out. 

What if you use a new headlight assembly? Then you want to make sure to compare it with the old one to ensure it’s the correct match.  

Just like taking removing the assembly, be sure not to force anything into place. Gentle wiggling and aligning parts correctly will give you the best results. 

Try hand-tightening bolts and screws to ensure they are correctly threading, then use your ratchet to finish the job.

https://youtu.be/CW1VXcmDJE8

Step 6. Finishing Touches

water in headlight

Now that you are done replacing your headlight turn it on the headlights. In addition, test the turn signals if needed. Check that all the electrical connections are working.  

Clean up any grease around the headlight that may have gotten on your paint. 

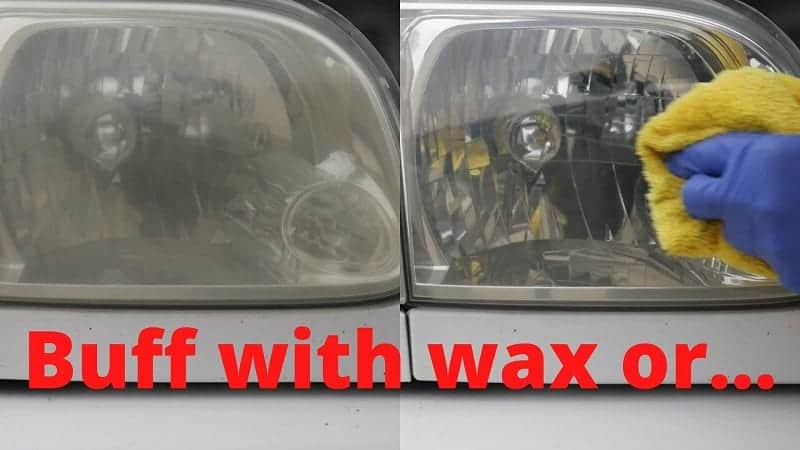
If your lens seems hazy, that may be due to normal hazing that occurs over time from UV exposure. 

After your headlight sealant has cured, you can use a bit of wax or another product to buff out the haze on your headlights if desired. This can help give you a bit more brightness when driving at night.

https://youtu.be/0EJ9iAC1MvY

Conclusion

Clearing your headlights of water and sealing them up again may take an hour or more. However, you can save a lot of money. With some research and patience, your headlight will be fixed in short order.

If you have some basic tools, you’ll need some sealant to get the job done. Then you’ll have a headlight without moisture in it. It will shine brighter on the road at night and help you stay safe while going to all your destinations.  

How to Test for a Bad Head Gasket: Signs To Watch Out For


A Bad Head Gasket

Your car’s engine is composed of different parts, each with a crucial role to play in its overall performance. Among others, one of the most important is the head gasket. It has the primary function of sealing in the combustion process while also minimizing the likelihood that the engine oil and coolant will get mixed in the combustion chamber.

To test for a bad head gasket, you can perform several tests, including testing for hydrocarbons ( unburnt gases from combustion), testing for cylinder pressure, checking the oil for coolant or contaminants, checking the coolant for oil or bubbles, checking the spark plugs for discoloration, and noticing when the engine is overheating or not working properly. 

Looking out for warning signs that show the head gasket is not functioning correctly. If it is already blown, a replacement or repair is necessary as soon as possible.

Over time, the head gasket is subject to wear and tear, which can lead to head gasket problems. A blown head gasket means that the gasket has a break in it, even if it is very small, and oil, coolant, and gases can mix or leak out. As a result, the engine can malfunction, and its power can be reduced. To prevent this from happening, you need to know how to test for a bad head gasket.


What You Will Need to Follow this Tutorial?

In most of the steps that will be mentioned below, you will not need tools as most of the signs are visual. Nonetheless, if there are materials that may be needed, here are what you should prepare:

  • Gas analyzer
  • Probe
  • Compression tester

Step-by-Step Guide on How to Test for a Bad Head Gasket

When testing if the gasket is blown, it is important to determine if it is really the head gasket or something else. If so, a replacement gasket is necessary. If the tests reveal that the head gasket is not bad, you need to proceed with the diagnosis of the other parts until you are able to determine the source of the issue.

Before proceeding, watch this short video below for a primer on the next steps outlined in the article.


1. Check for the Possible Contamination of Oil

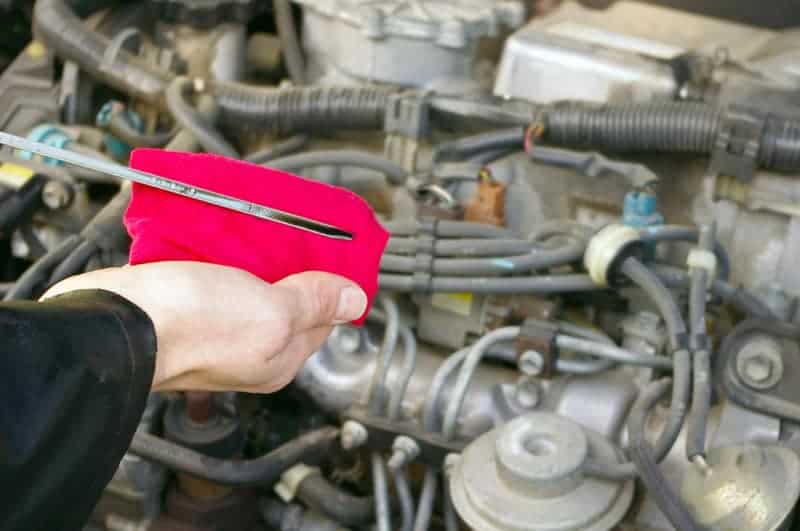
The engine oil is one of the most obvious indicators of a potential problem in the head gasket. Before you proceed, make sure to turn off your car and allow the engine to cool down. The least that you would want is to burn yourself while working. Open the engine oil cap or look at the dipstick to see if the oil is discolored or contaminated. If there is a problem, there should be a milk-like ring.

Checking engine oil dipstick in the car

However, take note that this is only a preliminary procedure. Even if the engine oil seems fine, the head gasket could still have a hole in it. To be sure if there is a problem with a bad gasket, continue with the other tests that will be briefly tackled below.


2. Inspect the Coolant

coolant system

The next thing that you have to check is the coolant. You may see oil in the coolant, and it can sometimes be a bad head gasket or a couple of other issues. 

Specifically, you have to look for the presence of hydrocarbons, which means that there are unburned fuel gases in the coolant. If you have these gases in any cooling system, you can detect them with the use of a to find their way there unless there is a broken head gasket.

AD

The best way to check for the presence of hydrocarbons and unburned fuel is through the use of a gas analyzer, which has been shown in the video posted above.

An external leak from the coolant is also indicative of the problem. Watch out for signs of leaks along the surface of the head gasket.


3. Look for Bubbles

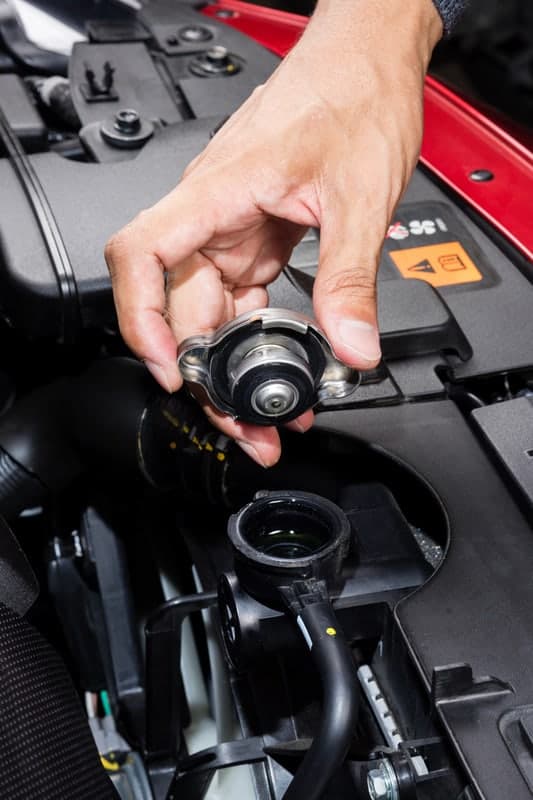
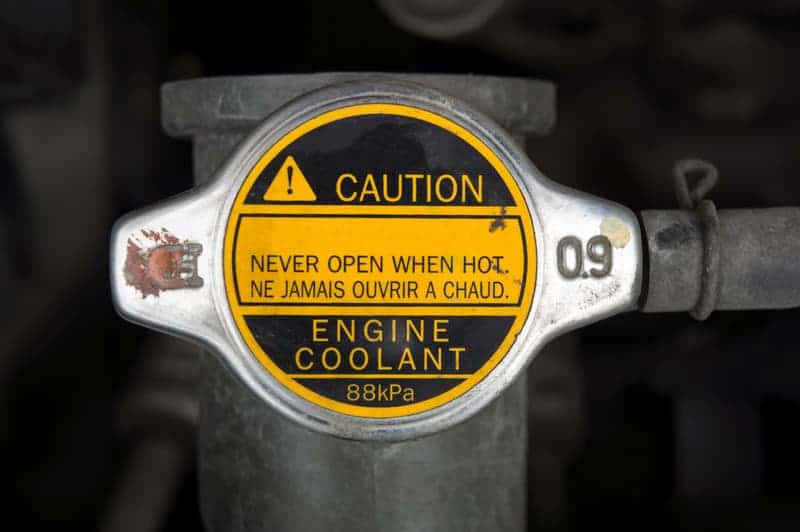
car automobile coolant lid antifreeze water plug radiator concep

When testing for a bad gasket, you also have to look at the radiator and check if there are bubbles. To confirm if there are air bubbles, remove the cap that covers the radiator after the engine has cooled for at least 30 minutes.

Start the engine and rev it a few times. If bubbles are forming, this may indicate that your head gasket is leaking gases and is broken somewhere.


4. Check the Spark Plugs

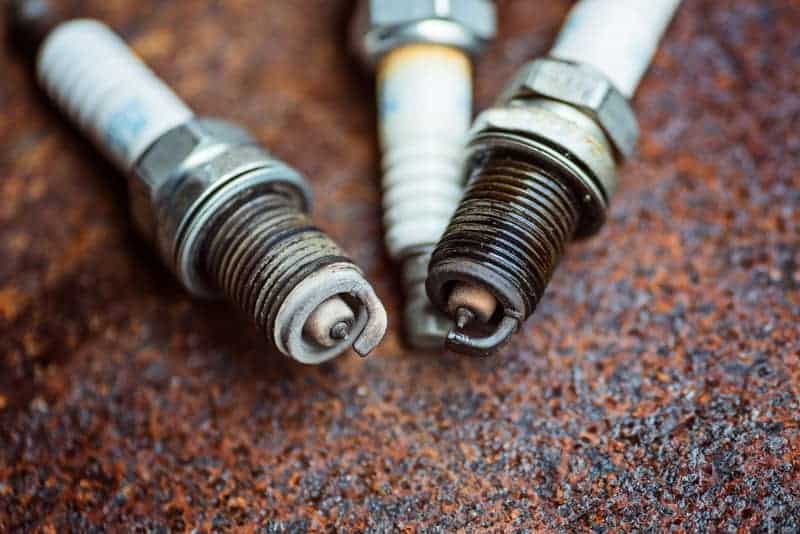
car spark plugs

Another sign that you have a bad head gasket is when you have colored tinted spark plugs. Usually, you will notice that there are white deposits surrounding the spark plugs. This is a result of the burning of the coolant in the combustion chamber. 

If you use a green coolant and if you see greenish particles in the head gasket, take this as another indication of a head gasket problem.


5. Look for Problems in the Engine

Problems in the Engine
Via:https://www.youtube.com/watch?v=vlVjX1BEQmY

The engine will not function properly if the head gasket is blown. One of the problems that will likely occur is an overheating engine. This is because the engine is not able to receive the right amount of coolant. A bad head gasket can also cause overheating during the combustion process.


6. Perform a Cylinder Compression Test

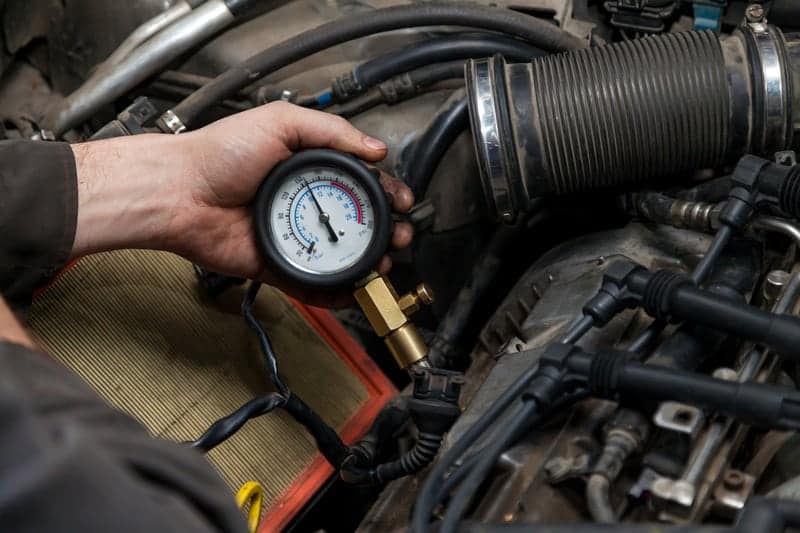
measures the compression in the cylinder of a ca

This is one of the tests that you can perform to determine if there is a problem with the head gasket. The failure of the head gasket can cause low compression and misfire in the cylinders.

To perform a compression test, remove the spark plug(s) and use a compression tester (Video). If it shows low pressure in the cylinders, you may have a problem with the head gasket.


Pro Tips

Below are some tips to keep in mind when dealing with head gaskets, not just when testing if it is bad but also when it comes to care and maintenance:

  • Using the right coolant is one of the easiest ways to prevent the head gasket from being blown. Mixing coolant or using one that is not suitable for your engine can speed up the wear of your head gasket.
  • See to it that the cooling system is in good condition. From the coolant to the water pump, make sure that they are all in good shape. Otherwise, they can cause the engine to overheat and, in turn, will negatively impact the head gasket.
  • When installing a new gasket as a replacement for the one that has been blown, one of the most important is proper sealing. This will prevent the entry of foreign materials and contaminants that can cause wear and tear.
  • Replacing a broken head gasket can be expensive. Good thing there are products that can effectively provide a temporary remedy to the problem. There are products that can seal cracks and gaps in a head gasket, but most people don’t recommend them as a proper or permanent fix. 

The video below shows one last alternative to check for a blown head gasket.


Conclusion

I hope that you can find any problems with your engine as you check for a bad head gasket. As discussed above, it will require a quick visual inspection of oil, spark plugs, radiator, coolant, and possibly other parts of the engine. Testing for compression and hydrocarbons can also help you know if the head gasket is blown.

As you follow the steps above, your understanding of the problem should be clearer, and that will give you options for your next steps.

Revised 2/20