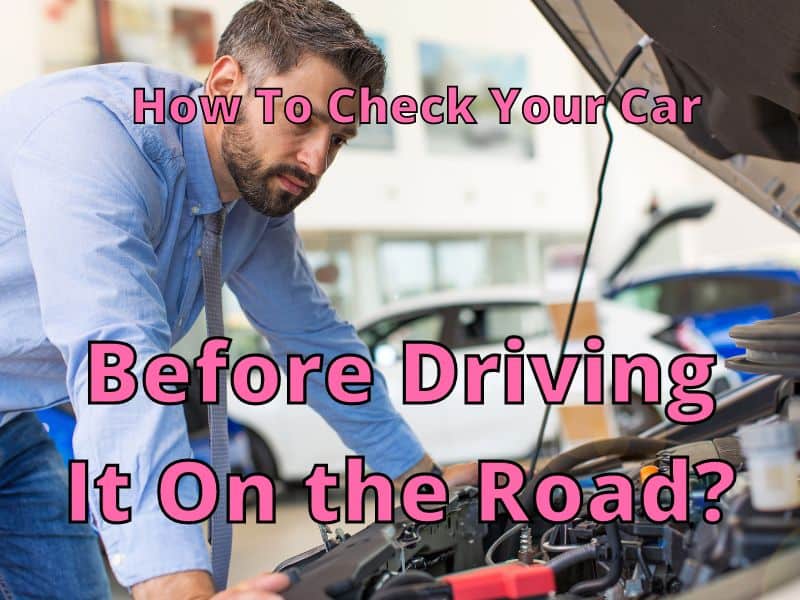
When you are driving out in your car on the road, you are either going for a short or long trip. In both cases, there are elements of uncertainty and unpredictability. That’s why checking your car before a trip is helpful.
You generally want to check the tire pressure and tread, gas levels, oil level and condition, lights, dashboard gauge, and windshield wipers before you go long distances.If you know about or suspect any car issues, check and fix them before you travel.
These items and others will help you prevent issues while on the road. The following are a few tips that will take you a long way on your journey by car in an uninterrupted, safe, and smooth manner.
According to the intended distance of your destination, you have to plan your fuel. Check the fuel content of your fuel tank and plan the fuel you need to fill up from the next fuel situation. While doing your fuel planning, you should consider your car’s average fuel consumption.
Besides you should also check the brake fluid, coolant, and windscreen wash levels. Refer to your Owner’s Manual and check where the fuel reservoirs are located. Besides your clutch fluid, check the power steering fluid.
2. Check the Air Pressure
https://www.youtube.com/watch?v=QTst6ZdlVtg
The maximum air pressure of your tires is mentioned in your Owner’s Manual. It is also mentioned in the body where the driver’s doors shut. Ensure that the pressure of the tires is maintained at the maximum level and does not exceed it. Ensure that the spare tire is at its maximum level because that will save you from a lot of trouble or even standing in case the running tire gets punctured.
3. Change the Oil of Your Car
If you are going on a long trip, it is essential that you change the oil of your car; as otherwise, your motor may be subjected to additional stress. You may be thinking that since you have added extra oil earlier, an oil change may not be required. But that is a misconception.
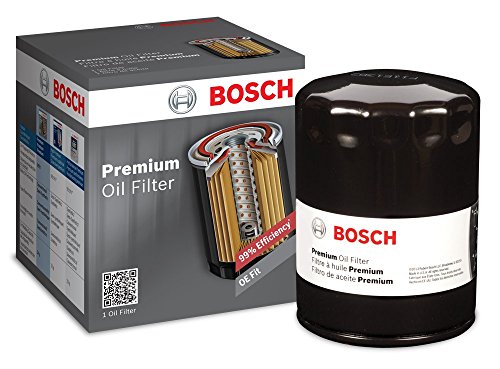
Moreover, since you are continuously adding cleaner oil, the oil may look clean, and you may not be bothered about a complete oil change. If you are going on a long trip, this is the right time to change the oil. Never forget to change the oil filter when you are changing the oil.
4. Check the Lights and Signals
Take the help of another person to check the lights and signals of your car. Sitting in the car, turn on each light and signal and ask the person if the particular light or signal is working or not.
In case you find some not working, replace the bulb. It will still be better to carry some spare bulbs for headlights, tail lights, indicators, and reversing lights. Since changing to front lights takes time, don’t leave its replacement till the last moment.
Sometimes, the light may not work because a fuse may require replacement. Also, check the alignment of your headlights by using a garage door. Adjust the alignment if you find it incorrect because poor headlight alignment may reduce visibility at night, particularly if the road is not lit.
5. Check the Air Filter
Via: https://en.wikipedia.org/wiki/Air_filter
An adequate supply of clean air to your engine gives better performance and efficiency, particularly if your car is on a long trip. Therefore, besides checking the air filter, change the cabin filter or pollen filter of your car. If not properly serviced, it may cause the supply of poor-quality of air to your car cabin.
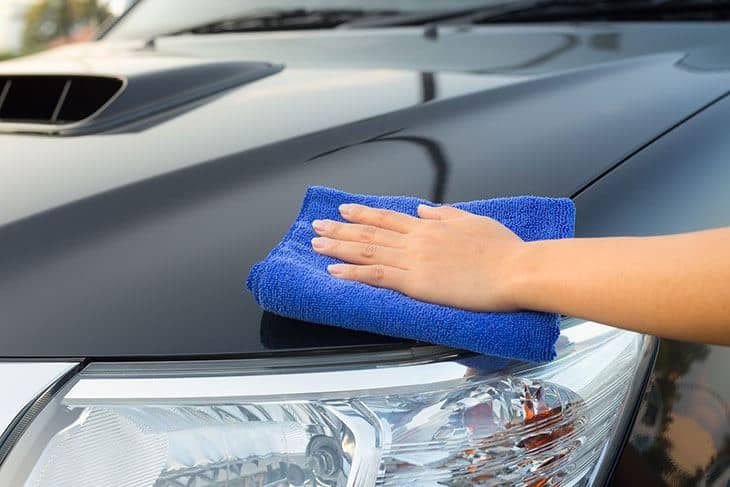
Clean the windows of your car for the best visibility. Check the condition of the wiper blades and replace the same with a new one, if you find it necessary.
The tread of the tire must be at a minimum of 1/16th of an inch or 1.6 mm. In case you find the tire tread less than 1/12″ or 2.5mm, you may consider replacing the same, particularly for a long trip by car. While on long trips and with consistent movement, the tires may heat up and even cause blowouts.
8. Carry Emergency Equipment
The emergency equipment of the car includes a spare tire, cell phone, updated route map, flashlight, pliers, screwdriver, adjustable spanner, first-aid kits, and fire extinguisher. Also, carry the mandatory Reflective Warning Triangle if you are moving to a member state of the European Union (EU).
In case you are moving to a right-hand driving state, ensure that your beam detector is working well so that other road users are not dazzled with your right-hand driving.
Check the heating system, vents, and air-conditioning system to confirm that they are working well. This enables you to defrost or defog their windows whenever required.
Driving in adverse winter weather calls for a different driving acumen from what is required for usual driving. The basic adverse elements are less sunlight, continued heavy snowfall, and floods. The following are the tips for driving in winter:
1. Prepare Your Vehicle
Prepare your vehicle to have clean lights, a fully charged battery, a clean window screen, wiper blades, tread and pressure of the tires, perfect brakes, and fluids for washing the windscreen. Carry tow rope, shovel, Wellington boots, de-icing equipment, first-aid kits, a car blanket, warm clothes, working torch, and emergency rations.
2. Prepare Your Journey
Collect the present and future weather bulletin related to the area of your proposed journey. You can get it from the national or local weather bulletin. As the weather condition may change quickly, you must depend upon the latest forecast. If the too-bad weather is predicted with warning signals, you may consider canceling or postponing the trip.
3. Prepare Yourself
Tell a closer person where you are going so that he can alarm you if you don’t return in time. You may choose an alternative route if your original route is impassable. Make your fuel tank full. Have a fully charged mobile phone so that any emergent situation could be communicated. You may undergo specific training for driving in rough weather and terrain.
4. How to Drive in Snow?
Reduce your speed to avoid any chance of skidding. Drive at a speed at which you can bring your vehicle to stop at a visible distance. Slow down at places wherever required. Sudden braking may cause your car to spin. Keep an adequate distance from the front vehicle.
5. Getting Stuck in Snow
When stuck, don’t try to revive your engine to go forward. Instead, move your car backward and forward by applying the highest gear. If nothing works, then ask the help of a passerby to push the car forward.
6. Caught In a Snow Drift
Instead of leaving your car there, call your breakdown service. Avoid running the engine to keep it warm.
7. Strong Winds
Sit quiet, keeping both your hands on the steering wheel, and expect sudden gusts of wind, particularly with the passing of high-speed vehicles. Avoid driving over bridges.
You should use jumper cables when your car is stuck for the battery to get discharged. Find a boosting car and keep both the cars closer and clamp the red jumper cable to the positive terminal of the dead car and, similarly, the negative terminals; till your battery is charged and jumpstarted.
Just as you should look before you jump, you should check before your start your car to go out for a long trip.
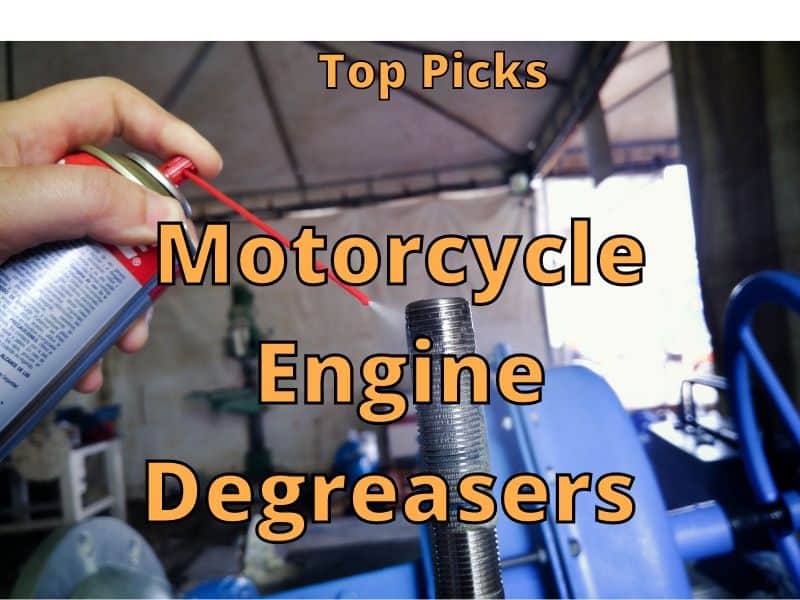
When I owned a motorcycle, there were a few times I needed it cleaned spotless. When I was selling my motorcycle and when I was working on my motorcycle. Whatever your reasons for cleaning your bike, an engine degreaser is a helpful tool.
I’ll share my recommended motorcycle engine cleaners. Most car engine cleaners work fine on motorcycle engines. Yet, many engine degreasers are powerful and can cause problems with aluminum, paint, and plastic. So choose wisely and consider elbow grease over chemicals.
The best choice for your motorcycle engine is likely the most gentle one, such as plain dish soap. Some can work great at getting grease off, but you may need to do a bit more scrubbing than an engine degreaser spray.
Why Did I Choose These Engine Degreasers?
These bikes and engine degreasers all claim to be safe to use on your bike. From what I have read and learned about, that seems to be true for almost all customers who use these products.
If I was degreasing a motorcycle and didn’t have the money or time to get a degreaser, I would instead just use dish soap. These aren’t always the best for your bike’s paint, but they can be effective at cleaning your bike’s engine.
All you need is to put in the time to scrub with a brush and clean with some rags to get a very good clean. You’ll likely need to do this with many engine degreasers anyways.
Top Motorcycle Engine Degreasers
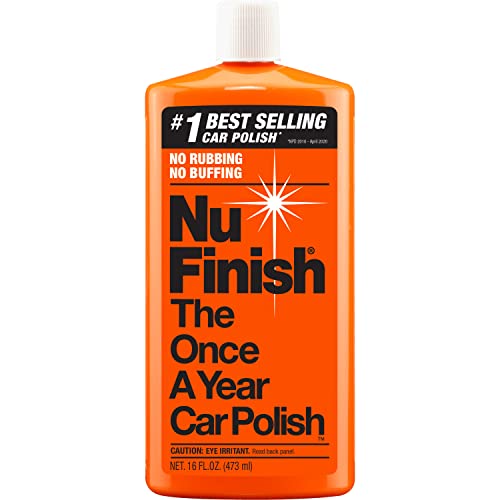
1ST CHOICE: NU FINISH
AD
Choose Nu Finish if you want the gentlest cleaner for your bike. I like that it cleans effectively and is still safe all over your bike.
It’s made with orange oil and is supposed to help you get a streak-free finish on your paint. It claims that it can remove tar, sap, and stuck-on-road debris. Customers seem to agree.
I would use this on my motorcycle before other products, although I would be careful not to get it on my bike seat because I don’t know how the orange oil would affect that.
2ND CHOICE: CHEMICAL GUYS ORANGE DEGREASER
AD
Choose Chemical Guys Orange Degreaser if you want a gentle clean for your bike that is more potent. I like that it cleans effectively and is fairly safe for your engine and greasy bike parts.
It’s made with citrus and is supposed to work fast to emulsify grease, oil, dirt, and grime. It is a concentrated formula, so you may want to dilute it if you are concerned about it being too powerful.
I would use this on my motorcycle but try diluting first to see how well it cleans at lower concentrations just to be safe.
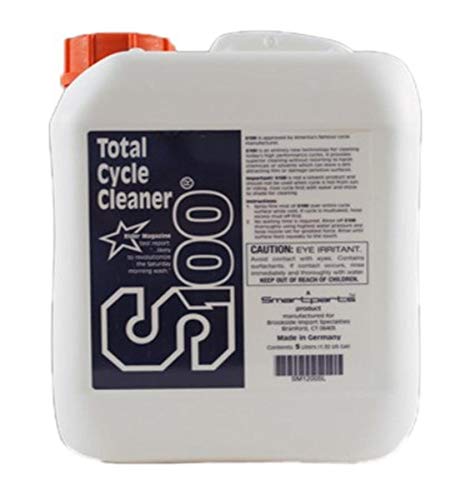
The S100 Total Cycle Cleaner is the first spray-on, rinse-off degreaser from the S100 series. The product sneaks into every corner of your vehicle’s engine to clean it thoroughly.
The best thing about it is that it will not require scrubbing off. You will have a sparkling engine in five to ten minutes, depending on your vehicle. It is very convenient to use and will save you a lot of time during maintenance.
The S100 degreaser is also very easy to use. You just spray it on. It works on almost all types of surfaces, such as rubber, plastic, bearings, alloy, as well as base paint.
The product will also protect your engine, as the formula contains no toxic or harmful chemicals. This is also perfect if you need to degrease your bike, which takes less than five minutes to clean.
Pros:
Used on various surfaces such as plastic, rubber, alloy, and base paint
The spray is easy to use
No scrubbing is required after the application
Does not contain any harmful or toxic chemicals
Should I use Dish Soap to Clean My Motorcycle Engine?
If you are ready to clean and you don’t know which cleaner you should use, you can always try regular gentle soap. I love this video from ChrisFix about cleaning his car engine with only dish soap and water.
You’ll see how he cleans effectively with only dish soap, although it does take some time. If you don’t have the time, I still think using a spray bottle with a bit of dish soap is a good idea, just get a good brush and do a quick clean.
Cleaning your engine is important for maintaining your motorcycle. It helps the parts work properly and helps you see if problems need to be addressed.
I hope you can find the best product that works well for your bike and get the clean engine you want. Thanks for visiting this page.
Are you shocked by those trips to the local garage when you get charged so much for a simple car tune-up? I agree. Tune-up is a vital part of car maintenance and should not be overlooked. Instead, why not consider doing your car’s tune-up yourself?
To perform a tune-up, you need the right tools and parts to ensure your car operates at full capacity. Check your fluids, tires, brakes, and routinely replaced parts to ensure your car is fully tuned up.
To perform an auto tune-up, all you need is some spare time, quality tune-up parts and tools, and the right resources.
What is an Auto Tune-Up?
An auto tune-up is nothing but a procedure where you inspect each and every component under your hood to check for signs of damage and to clean out the debris and grime that had accumulated on various auto parts. It’s nothing but regular car maintenance to keep your vehicle running smoothly.
Performing preventive maintenance and replacing all worn-out parts at regular intervals not only improves your engine performance and reliability but also protects your investment and extends the life of your vehicle. Tune-up interval varies from one vehicle to another, so it is advisable to check the owners manual to understand what and when your car needs a tune-up.
Tools and Auto-Parts Required for a DIY Tune-up
Some of the basic tools and auto parts you’ll need when tuning your vehicle include:
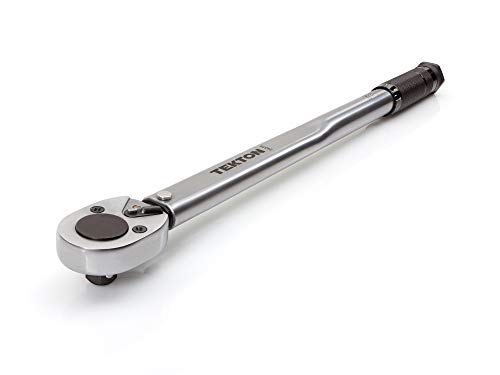
Torque Wrench
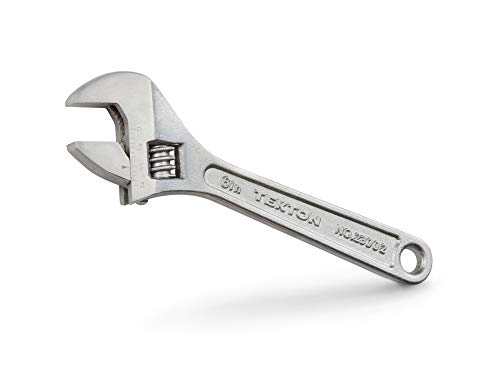
Adjustable Wrench
Pliers
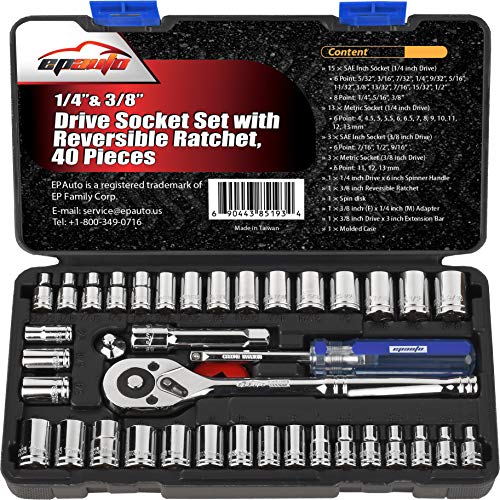
Socket and Ratchet Set
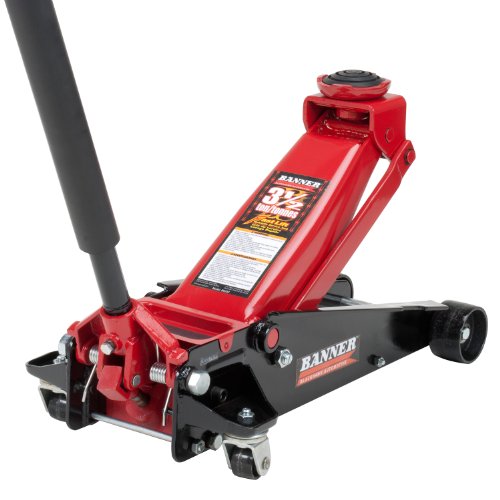
Car Jack
Phillips and Flathead Screw Drivers
AD
AD
AD
AD
AD
Other tools that will make the job safer and easier are:
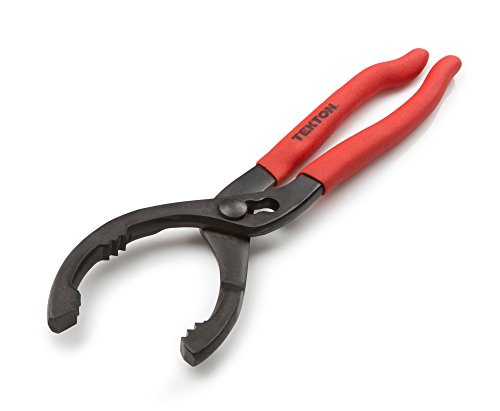
Oil Filter Wrench
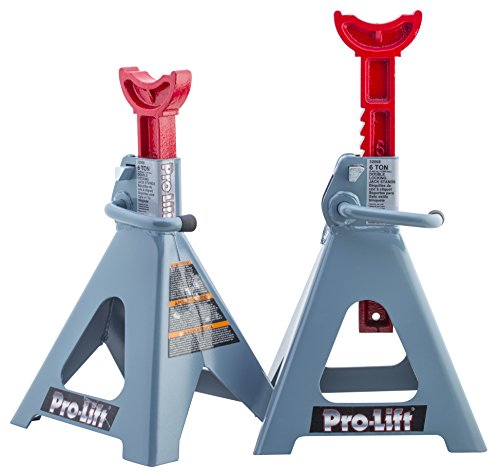
Jack Stand
Tire Stopper
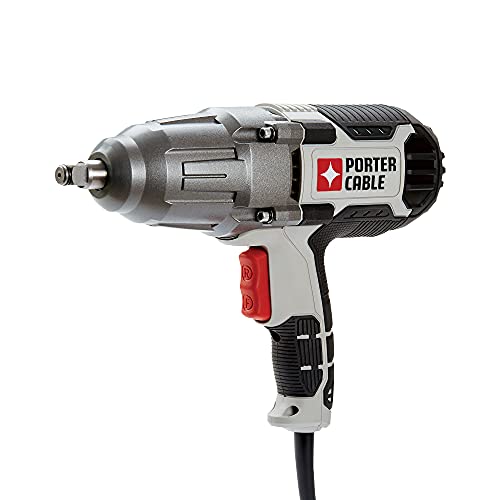
Impact Wrench
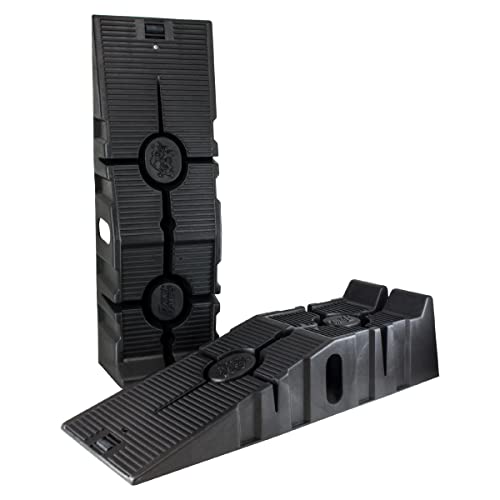
Tire Ramps
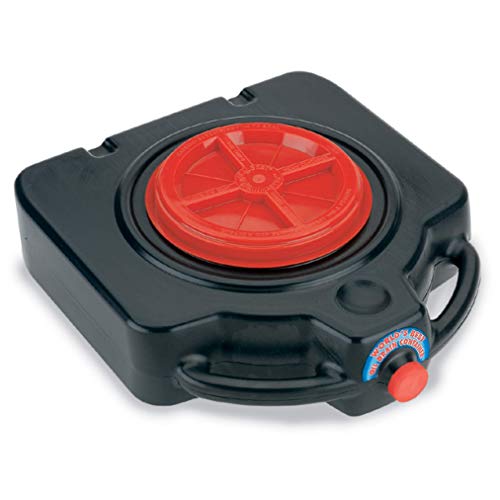
Fluid Drain Pan
AD
AD
AD
AD
AD
AD
If you’re doing a replacement, then you may need to buy spare auto parts too. Some common auto parts that are replaced when tuning up your car include spark plugs, plug wires, plug coils, oil filters, fuel filters, air filters, cabin air filters, engine oil, brake fluid, coolant, transmission fluid, and power steering fluid.
There is no big deal in picking the right tool, except they have a good grip and hefty handles. Auto parts can be purchased from any seller online; just enter your car’s year, make, and model number to get the spare parts you need for your car. Every car is different, so make sure to enter the right information to get the right auto spare part.
Car Tune-Up:
An auto tune-up may be as simple as a basic inspection or may sometimes involve a complete overhaul of the car. Here let’s discuss what is typically included in a tune-up and why each inspection is necessary for the well-being of your car.
1. Oil: Check and Top-up, and Change the Oil if Required
The most important part of preventive maintenance is to keep up with your car’s oil level. Here, let us discuss checking your car’s oil level and knowing when to top up and when to change.
Assessing your car’s oil will tell you two things:
How much oil your car has?
If that oil needs to be changed?
When to Top-up Oil?
Check your car’s oil level frequently to ensure that the level is proper, and add more oil if the level is too low. Oil check is easy; With the engine off, open your car’s hood and look for the dipstick. Pull out the dipstick and wipe it off clean. Then, insert the stick back into the tube and push it down. Now, pull it out and check both sides of the dipstick to find where the oil is located about the two indicator dots. If the oil level is at the lower dot or just slightly above it, then it’s time for a top-up.
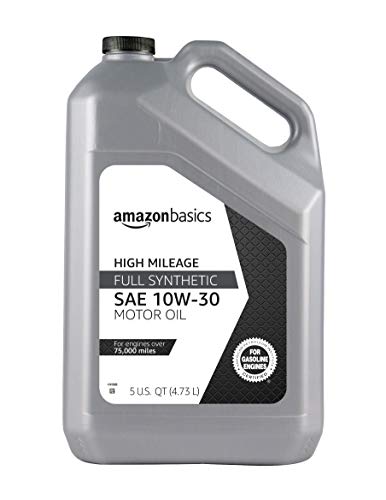
Add high-grade motor oil that is appropriate for your car engine using a funnel and recheck the oil level once you have topped it off.
When to Change Oil?
Check the color of the oil, and if it is cloudy and gritty in texture, then it is contaminated with atmospheric elements like dust, metallic deposits, and rust. Another aspect to check is the engine sound; if your engine seems to run louder than usual, then it can be a sign that your oil has gone bad. Contaminated oil often has less lubricating qualities that are essential for the smooth functioning of your car.
How to Change the Oil and Oil Filter?
Changing oil yourself is easy, and you’ll save a lot. Tools required for oil change include a wrench set, safety glasses, rubber mallet, rags, oil pan, funnel, and oil filter wrench. In addition to these, keep the following materials handy before starting the project: Engine oil, an oil filter, a container for collecting oil, and an oil filter gasket.
AD
AD
Steps Involved in Changing Your Car’s Oil
Look for drain plugs under your car.
Place a container to collect oil under the oil drain plugs.
Open the drain plug and allow oil to drain into the container.
At the top of your engine, you can find the oil filler cap. Now remove the cap and unscrew the oil filter by using your hand or wrench.
Empty the oil from the oil filter into the oil pan. Moisten the gasket on your new oil filter with fresh engine oil.
Screw the new filter into the engine.
Once all the oil is drained, replace the oil drain plug using an adjustable wrench.
Use a funnel to pour fresh engine oil (1 quart) through the oil filler hole.
Replace the cap and run the engine for 30 to 60 seconds.
Switch off the engine and wait for 5-10 minutes for the oil to settle and check the oil levels.
Keep adding more oil and check using a dipstick after each addition until the oil level reaches the “Full” line.
Remove the drain pan from underneath your car and do a test drive.
Check the oil level using a dipstick after 5 to 10 minutes of your test drive, and if everything is ok, you are good to go.
How Often to Get an Oil Change?
To keep your engine functioning to its maximum potential, change the engine oil every 3000 miles. However, the service interval of 3000 miles varies from one vehicle to another. So, check the car owner’s manual to see what it recommends.
2. Tires: Check, Rotate and Replace, if Required
Inspect Tires
Evaluate your tires by checking their tread depth, tire pressure, tire condition, and age. The Penny test is a simple way to evaluate tread depth. Just place a coin upside down in the tread, and if you can see Lincoln’s head, then it’s time to change your tire. Pressure gauges can help you to check tire pressure. You can find one in most gas stations or buy one from auto parts stores. Read the tire’s pressure using a pressure gauge and check it against your vehicle’s recommended pressure. Keeping your tires inflated to the recommended specifications improves mileage and handling. In addition, you can also look for any damage to your tires, like cuts, scrapes, bulges, punctures, cracks, or bumps that require a tire replacement.
Rotate and Replace Tires, if Necessary
You should rotate tires and reposition them periodically, using the correct crossing pattern recommended by the vehicle manufacturer. Tire rotation spreads wear out evenly across all four tires, and its tread life is maximized.
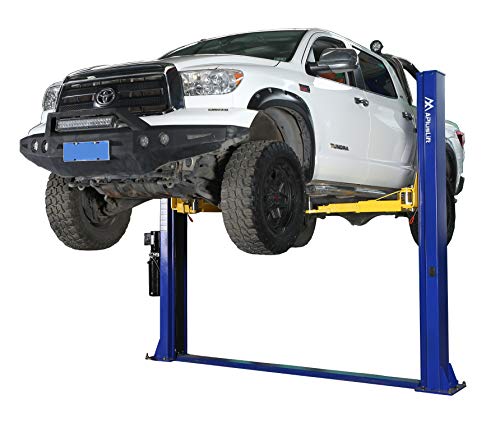
Tire rotation might look like a tedious job for you, but with the right tools, you can do it voila. Use a hydraulic floor jack to lift your car, and once done, use jack stands to rest the car on top while switching tires.
Steps Involved in Rotating Your Car’s Tires
AD
AD
Decide how important this is to do yourself. Lifting your car off the ground can be extremely dangerous if you make mistakes. Tire stores can do this service relatively cheap, so paying $50+ dollar might be your choice.
If you are ready to do it yourself, make sure you have the right tools and stay safe.
Find a level area to work at.
Place the car in park and put the emergency brakes on.
Place tire stoppers behind the back tires and in front of the front tires.
Now you can loosen the lug nuts for each tire before jacking up the car. This will prevent the car from moving too much while jacked up.
Use a car jack to lift your car and place jack stands under areas marked on your car. If you’re not sure where to place the jacks, it is usually near the outer edge of the car bottom, right in front of the back tires and right in back of the front tires. Look at the owner’s manual to be sure.
Use your ratchet set or fingers to take off the lug nuts for each tire. Take off the tires and put them gently down to the side, being careful not to scrape the rims. Keep the lug nut at the same location, possibly in a plastic sandwich bag or container under the brake rotors.
If there are little arrows on the side of the wheels indicating which way the wheel should turn, then you have directional tires. You’ll switch the back tires for the front tires, but keep the tires on the same side of the car.
If you have non-directional tires with a normal tread pattern on your tires, then it depends on whether you have front or rear-wheel drive. For front-wheel drive, take the front tires straight back, staying on the same side of the car, while the back tire moves to the opposite side of the front. For rear-wheel drive, take the front wheels to the opposite sides of the back, and move the back tires straight forward to the front staying on the same side of the car.
After you have rotated the tires, hand-tighten the lug nuts so each tire is securely fastened, or you can use an impact wrench to get them snug but not tight.
Start the process of lowering your car to the ground. Tighten each nut in the correct pattern and the correct manufacturer recommendation.
You’ll need a torque wrench or an impact wrench that can tighten each nut to the correct amount of foot-pounds that is stated for the lug nuts in the owner’s manual. TIP: It can be helpful to use a car jack to raise the car tires a bit off the ground so that when you tighten the wheel, it goes on easily.
After you tighten the lug nuts in the correct star-like pattern, you can slightly shake the tires to see if they were seated correctly and if there is no play. It’s helpful if the tire is a bit off the ground when doing this.
Check the oil level using a dipstick after 5 to 10 minutes of your test drive, and if everything is ok, you are good to go.
How Often to Rotate Your Car’s Tires?
To keep your tires functioning well, rotate them about every six months or 5000 to 8000 miles. You’ll notice the tire tread is wearing thin on the inside or outside if you don’t rotate them, and then you need to replace them if the tread is too low.
Tip: If the tread doesn’t reach the head on a penny when Lincoln’s head is facing down, then it’s time to replace your tires.
3. Fluid Levels: Check, Top-up and Replace Them, if Required
A great way to keep your car in good running condition is to check the following fluid levels frequently. It is an easy and straightforward process, but it takes some know-how.
Transmission fluid: Check Fluid Levels, Top-up or Replace Fluid and Filter, if Required
Transmission fluid keeps your transmission lubricated, which can prevent your car from developing many expensive issues. Checking transmission fluid level is similar to an oil check; use the dipstick method. Look for a dipstick handle sticking out of the transmission, which can be found toward the rear of an in-line engine on cars with rear-wheel drive. However, for front-Wheel drive cars, you can find the dipstick sticking out of the transaxle. There are several types of transmission fluid, so check the owner’s manual to find which type of fluid is required for your car.
Steps Involved in Checking Your Car’s Transmission Fluid Level
Pull out the dipstick. (do this when your engine is on and still warm, with the gearshift in neutral or park and parking brake on )
Check the fluid by rubbing it against a white paper towel to see if it’s clear or pinkish. If you find particles in it or it smells burnt, then it is time to replace transmission fluid.
Wipe off the dipstick using a clean, lint-free cloth; re-insert and pull it again and see if it touches the “Full” line on the dipstick. If the fluid is clear, then you can refill with extra transmission fluid.
AD
Steps Involved in Replacing Your Car’s Transmission Fluid
AD
Here are the basic step-by-step instructions to change the transmission oil. If you have a sealed transmission like many newer cars, you won’t be able to use this method.
If you are ready to do it yourself, make sure you have the right tools and stay safe.
Find a level area to work at.
Place the car in park and put the emergency brakes on.
Place tire stoppers behind the back tires.
Use a car floor jack to raise the front of your car, or use tire ramps. For safety place, the jack stands under the front of the car jack stand points.
Keep a container under the transmission oil pan to collect oil.
Allow the oil to drain by loosening the pan bolts. Now, fluids will gush out and get collected in the container (Caution, the fluid may be hot, so let your car cool down before servicing).
Replace the transmission pan filter and gasket, and clean the transmission pan and transmission mating surfaces.
Once the fluid is completely drained, fix the new filter and gasket, and tighten the bolts.
Refill with new transmission fluid using a funnel.
Place the dipstick in its position, and you are done.
AD
How Often to Replace Your Car’s Transmission Fluid?
To keep your transmission in good working order, you should replace the transmission fluid about every 30,000+ miles. Every car is different, and some cars have a sealed transmission requiring replacing the transmission fluid less often. Look at your owner manual for more information.
You’ll probably want to go to the dealer service center if you have a sealed transmission. Each car has a different procedure for changing a sealed transmission, and the manufacturer may void your warranty if you try to change the fluid yourself.
Brake Fluid: Check Fluid Levels and Top-up if Required
To make your car’s brake system function properly, you must have enough brake fluid, and that too in good condition. Learn how to check the brake fluid in your car.
Steps Involved in Checking Your Car’s Brake Fluid Level
Open the car’s hood when your engine is at rest and find the brake fluid reservoir.
Before opening the reservoir, clean the outside of the reservoir thoroughly. Now, open the lid of the reservoir (careful not to keep it open for a long time, as it will absorb moisture from the atmosphere and spoil your system).
Check for fluid levels. Most new cars have ‘max’ and ‘min’ levels mentioned in the reservoir.
Add brake fluid only if its level has come down below the specifications. Also, use brake fluid with DOT specifications mentioned in the owner’s manual.
AD
Radiator fluid: Check Radiator Fluid Levels and Top up or Change if Required
Your car’s radiator is the heart of its cooling system and directs coolant around valves and cylinder heads for absorbing heat, gets it back to the radiator, and safely eliminates them. Due to this, it is important to check radiator fluid levels frequently and add to them when necessary. Check the owner’s manual and buy the right coolant for your car type.
Steps Involved in Checking Your Car’s Radiator Fluid Level
AD
Raise your car’s hood and look for the radiator cap. A radiator fluid check should be done when your car is parked on a leveled surface, and the engine is lukewarm.
Use a rag to wrap it around the coolant cap and slightly loosen it. (caution, it might be hot). Step back until the pressure releases, and then remove the cap completely.
Check the level of the radiator fluid. Mostly it should be near the top.
Besides the radiator tank, most cars will have a radiator overflow tank. Find its cap and remove it. You should normally find little fluid in there, but if you find coolant level to the top in the radiator overflow tank and little fluid in the radiator tank, then it’s time to send your car for servicing.
If your radiator fluid levels are low, add fluid into the overflow tank. If your car doesn’t have an overflow tank, then you can add it directly into the radiator using a funnel. Use diluted coolant by itself and if you are using concentrated coolant, then mix 1 part of coolant with 1 part of distilled water and use. Make sure not to add fluid when your car is still warm.
Steps Involved in Replacing Your Car’s Radiator Fluid
AD
Before starting the project, ensure you purchase the right type of coolant and the capacity requirements for your car.
Park your car on a leveled surface and allow it to cool sufficiently.
Disconnect the battery and jack the car up.
Find the drain valve in your radiator and open the valve into a large bucket for the fluid to get collected.
Once you have drained all the fluid, close the valve. Open the radiator pressure cap (found at the top) and check for fluid levels, which should be very low.
Fill the radiator with water and close the cap. Start the engine and allow it to run for 10 minutes. This will help to drain all the coolant from the system completely.
Now locate the thermostat (check the owner’s manual if you couldn’t locate it) and disconnect the radiator hose using a Phillips head screwdriver or pliers. Collect all the remaining coolant to drain on a bucket.
Use a hand or socket wrench to unbolt the thermostat housing and remove it. (Be careful not to break anything). Use a razor blade or scraper to remove the thermostat’s cover and install the new gasket. Bolt the housing back into place and reconnect the hose.
Allow your car to cool again and drain the water from the radiator. Add in the new coolant up to the MAX level and recap it. Run the engine and check again for coolant levels, and fill again if required. Shut the vehicle after 10 minutes and check the temperature. If it reads normal, the coolant change is complete.
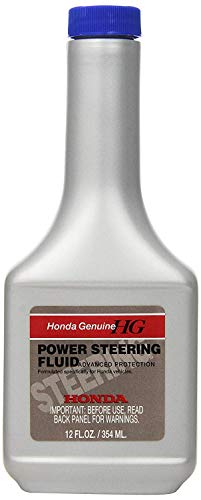
Power Steering Fluid: Check Fluid Levels and Top-up or Change if Required
AD
If you are not checking your power steering fluid, then you are putting yourself at risk of losing control of your vehicle. Low-power steering fluid can put you in real danger, sudden loss of control, cause hard steering, and fatal car crashes. Here you will find detailed instructions on how to check power steering fluid levels and top-up if required.
Steps Involved in Checking Your Car’s Power Steering Fluid Level
Locate the reservoir (mentioned something like power steering fluid only) that holds power steering fluid. Most cars these days come with plastic reservoirs that will allow you to check fluid levels without opening the cap. But if your car’s reservoir is opaque, then you’ll need to open the cap to check the level.
Before you open it, clean the reservoir cap with a rag. Use the dipstick that is attached to the cap to check the fluid level.
If the level is low than recommended, then it’s time for a top-up. Before you top-up, ensure there is no fluid leak. Once you are sure that there is no leak, open the cap and start pouring fluid inside and fill it to the FULL or MAX.
Replace the cap and tighten it.
AD
Steps Involved in Checking Your Car’s Power Steering Fluid Level
When you open the reservoir, older fluid may smell burnt and appear to be darker in color. In such cases, you may want to change the power steering fluid. Use fluid according to the specifications given in the owner’s manual.
If you are ready to do it yourself, make sure you have the right tools and stay safe.
Find a level area to work at.
Place the car in park and put the emergency brakes on.
Place tire stoppers behind the back tires.
Use a car floor jack to raise the front of your car, so your tires are off the ground about an inch. Also, use jack stands under the front of the car at the jack stand points.
There are two ways to empty the fluid:
Use a pump/siphon or use a turkey baster to remove all of the fluid in the brake fluid reservoir. Remove as much as possible and put it in a container.
You can do this step after step one or before. Find the hose that is connected to the power steering pump and remove the clamp so you can direct the hose into a container to collect the fluid. Some fluid is likely to spill, so some prefer to only do step one.
Keep a container under the car to collect the fluid.
When the fluid levels get very low, get into the car and carefully turn on the key, so the car is off but the steering wheel can move right and left. Turn the wheel all the way left and then all the way right. Doing this allows the steering pump to push all the remaining fluid out of the system. Then you can drain it or siphon it out. (DO NOT start the engine). Clean up the drips with a towel.
Check the reservoir for filters, which can be cleaned, replaced, or left as they are.
Reconnect the hose if you removed it. Pour in new power steering fluid using a funnel; ensure not to overfill. Replace the cap.
Again get into the car and turn on the steering from lock to lock again. Check and add more oil if needed.
Remove the jack stand. Start the engine for about 15 seconds, again turning the steering lock to lock. Check fluid level again.
Go for a small ride and check fluid levels one last time. If it is in FULL or MAX level, you are good to go. Check for leaks in the following days.
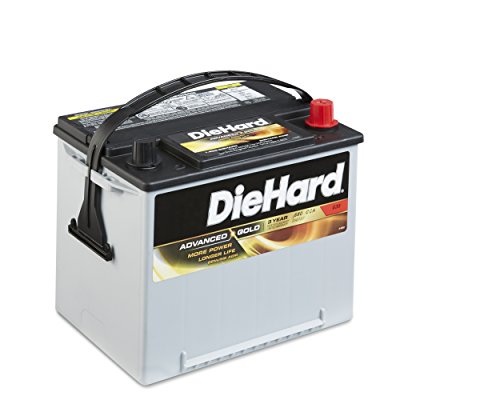
4. Check the Condition of the Car’s Battery
AD
Always check your car battery for corrosion and other types of wear. To check battery condition, just follow the below steps.
Steps Involved in Checking Your Car’s Battery
AD
Open the hood and turn the headlights on for 15 minutes (do not start the engine)
Check the condition of your battery, like leakages, bulging, and corrosion.
Load-test the battery by keeping the headlights on. Crank the engine over and check for the brightness of the headlight bulb. When using the starter, you should notice the headlights dim only slightly. If it dims way too low, followed by a clicking sound, then it’s time to replace your battery.
5. Check the Car’s Brakes and Brake Pads
AD
You can check the condition of your car’s brake with these simple instructions.
Steps Involved in Checking Your Car’s Brakes
Listen to your brake when you stop the vehicle. If squealers are installed in your brakes, they will let out a loud, high-pitched sound, indicating that your brake pads have got thin.
Push the brake down to the floor, and if your vehicle doesn’t come to a stop, then you got a worn-out brake pad.
A vibrating or pulsating brake pedal indicates that your rotors are warped.
If your car pulls on one side when it stops, then it means that one side of the brake is more worn than the other side.
Steps Involved in Checking Your Car’s Brake Pads
AD
If you are ready to do it yourself, make sure you have the right tools and stay safe.
Find a level area to work at.
Place the car in park and put the emergency brakes on.
Place tire stoppers behind the back tires.
Loosen the lug nuts on the front tires.
Use a car floor jack to raise the front of your car, so your tires are off the ground about an inch. Also, use jack stands under the front of the car at the jack stand points.
Remove the front tires.
Locate brake pads and check their thickness on both sides, up and down, using a compass tool.
Replace brake pads if it is less than 1/4inch (6.4 mm) thick; otherwise, they could damage your rotor.
Follow similar steps for the back tires, always using safety precautions.
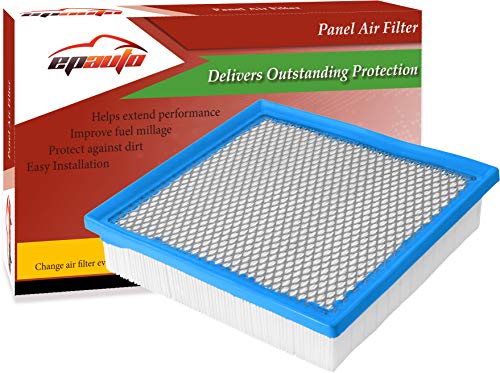
6. Replace the Car’s Air Filters
AD
Replacing your car’s engine filter is very important, and your owner’s manual will give you a mileage estimate for how frequently you should change it. Replace air filters if they are dirty. This DIY manual will help you how to change air filters by yourself.
Steps to Replace The Car’s Air Filter
Open up the hood and locate the airbox that houses the air filter.
Remove the top of the housing by removing the screws or clamps.
Remove the air filter and wipe off any dirt and debris from the housing and the seal using a rag.
Check for damage or cracks to the exterior or interior of the housing as well the connecting air intake hose. (caution that no dirt falls into the carburetor)
Fix the new filter, put the housing, and replace clamps or screws. Now, you are good to go.
7. Replace Cabin Air Filters
AD
Cabin filters are very easy to replace and make your ride more pleasant. The best way to find when to replace cabin filters is either by olfactory, visual inspection or by noting how much airflow is being imparted. Replace them if it smells bad, are filled up, or restrict the airflow. Here is a detailed step-by-step procedure that will help you change the cabin filter easily,
Steps to Replace Your Cabin Air Filter
Remove the glove box and remove the cabin filter cover.
Remove the old cabin filter; Vacuum the region to remove all dust and debris.
Install new filter after noting correct airflow direction (will be indicated by an arrow).
Fix in cabin filter cover, then install the glovebox, kick panel, or cowl cover.
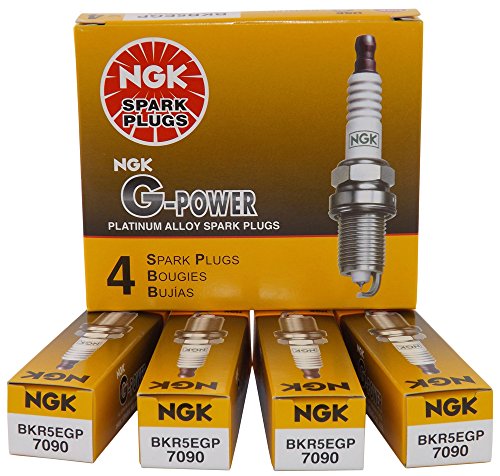
8. Spark Plugs: Check and Replace, if Required
AD
Spark plugs are an essential part that channels the electrical current from the ignition, thus igniting the fuel. Like any other part in your car, spark plugs undergo wear and tear. But the good thing is that it can be replaced easily. You may need tools like an extension bar, a ratchet socket drive wrench, and a spark gap gauge to replace spark plugs.
Steps to Inspect Your Spark Plugs
Open up the hood and locate the spark plugs. You can check your owner’s manual for reference.
Allow your vehicle to cool, and carefully remove the first spark plug.
Check if it needs replacement. Remove one spark plug at a time and check for existing wear and tear like heavy, sooty build-up, missing electrode parts, evidence of burning, and white, limey build-up on the electrodes of the spark plugs.
Measure the spark plug’s gap, which should be around 0.028 to 0.060 inches (use your owner’s manual for reference).
If the gap is large than it should be, you can either try correcting the gap if the plugs are in good condition or replace new spark plugs.
Steps to Replace Your Spark Plugs
AD
Purchase the right spark plugs, and clean around the threads before reinserting the new speak plugs.
Lubricate the spark plugs using an anti-seize lubricant before reinserting.
Tighten the new spark plugs using a torque wrench. Use the correct torque. The spark plug box may have instructions or use an owner’s manual.
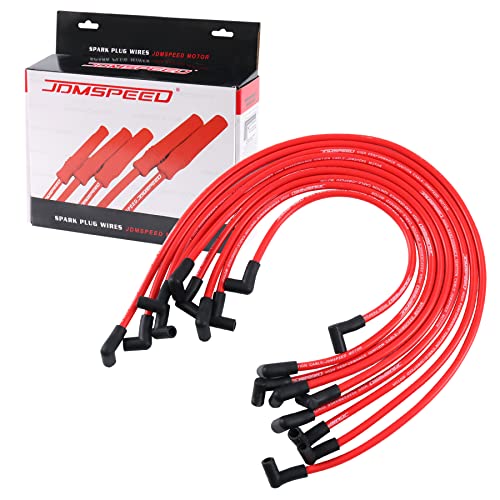
9. Spark Plug Wires: Check and Replace, if Required
AD
Some spark plug wires are made of carbon fibers, and over time, the delicate carbon fibers break down, and the fibers separate, creating high electrical resistance. Worn-out spark plug wires can create performance problems.
Other wires are made from the solid copper core, spiral wound, and grounded metal braid wires. Read below on how to replace them if needed.
Steps to Replace Your Spark Plug Wires
Record wire locations using a camera to know how the wire attaches to the coil and the path they take to the plug.
Sort the new plug wires based on their length.
Use a spark plug wire puller tool (I recommend buying this) to twist the boot to break the seal from the plug and then pull it off from the old plug.
Apply dielectric grease to both the plug and coil end of each wire. Route and press it onto the coil/plug until it clicks.
Repeat the same procedure until you have changed all the plug wires.
10. Spark Plug Coils: Check and Replace, if Required
AD
A faulty spark plug coil can create several frustrating problems with your car’s engine. With a little understanding, it is easy to identify a faulty spark plug coil and replace it.
In order to check if your coils might be faulty, run the vehicle for 30 minutes and then rap the module gently with the head of the screwdriver. If your car’s engine dies, then it indicates a faulty spark plug coil.
To check the resistance of the ignition coil, you can also use a test light or standard voltmeter.
Steps to Replace Your Spark Plug Coils
Disconnect the battery and remove the ignition coil using a screwdriver or a wrench.
Apply dielectric compound on the bottom portion of the new ignition coil.
Insert the new coil and apply the appropriate torque using a torque wrench.
Reconnect the battery and start the engine to ensure all the cylinders are firing properly.
11. Belts: Check and Replace, if Necessary
AD
Belts often called Serpentine belts wear and tear over time. This means, there could be a serious impact on your car’s engine or system. Inspect belts regularly; read below to know what to look for.
Steps to Replace Your Serpentine Belt
Check for squealing sounds: worn-out, loose, or damaged belts can cause squealing sounds while driving.
Look for signs of wear by visual inspection.
Inspect belts for places where the rubber is glazed or slick in appearance.
Check the pulleys and the belt tension. Belt tension should be between 0.5 to 1 inch.
12. Hoses: Check and Replace, if Necessary
Hoses are designed to hold coolant under pressure and are subjected to extreme heat and cold, oils, dirt, and sludge. They are made of weak rubber components and are subject to damage very easily.
Steps to Check Your Hoses
Check for squealing sounds: worn-out, loose, or damaged belts can cause squealing sounds while driving.
Look for signs of wear by visual inspection.
Inspect belts for places where the rubber is glazed or slick in appearance.
Check the pulleys and the belt tension. Belt tension should be between 0.5 to 1 inch.
Steps to Check Your Hoses
AD
Ensure your car has cooled down and open the radiator.
Unscrew the radiator drain plug, and drain all the fluids into a container.
Remove hose clamps on both ends of the hose using a screwdriver.
Fix the hose clamps onto the new hose and put it in the proper position.
Fill the radiator with coolant as recommended in the owner’s manual.
It is important to consider taking proper care of your car’s engine. It makes a good impression on anyone when you show them your clean engine.
Having the best engine degreaser will make your engine good-looking, as well as maintain its performance. Not only that, the degreaser can allow your car to run smoothly for longer.
In this article, we will be discussing all engine degreasers. We will discuss their benefits and some of the most popular types. Let’s start by discussing what to do before getting an engine degreaser.
What to do Before Using an Engine Degreaser?
The Battery – You want to check your electrical connection for tightness and disconnect the battery if possible. This way, you avoid shorting any electrical parts.
Clean off Dirt – This may not be necessary, but it helps remove more dirt. Vacuum out or blow out all the dust and dirt. You can use a soft brush to help remove some of the stuck-on dirt.
Get all your Tools – Avoid using a pressure washer and go for a regular hose to prevent water from entering electrical connections. Get brushes, degreasers, rags, and anything else needed.
What is an Engine Degreaser?
Before proceeding with the discussions, we should first define an engine degreaser. An engine degreaser is basically a fluid that consists of chemicals that get rid of oil and grease.
These are the hardest substances to clean or eliminate on your engine. It is a product that’s not only for cleaning but also acts to increase your engine’s lifespan.
Using this product for your engine has a lot of interesting benefits. It can make your car look better maintained, good looking, and a lot newer. The engine will also run smoothly if it’s clean.
Using an engine degreaser can help you detect grease and oil leaks. Detecting leaks at an early stage won’t cause many problems to your engine, as you can have it repaired immediately.
Cleaning your engine can save the repair charges, as it is also proven by professionals that it can prevent mechanical problems. If your engine is clean, you will get a reasonable value if you want to trade or sell the car.
In case you notice petroleum or dust on your engine, you should use an engine degreaser. They are useful when cleaning your engine.
Use a degreaser if your car engine hasn’t been maintained or cleaned for a while. It can help you quickly and easily remove built-up dirt and grease and make it look new in no time.
Types of Engine Degreasers
Now that we talked about the top five recommendations, we will now discuss some of their types. This section is also considered critical as your decision may be based on what type you need.
Also, this will help you shorten the list of your choices in finding the best engine degreaser. Below we will discuss six of its most popular types.
Environment-Friendly Degreaser: This might be considered the most highly recommended one out of all the types. Its components, mostly include baking soda, vinegar, lemon juice, soap, and cornstarch, are very effective in cleaning engines.
Metal Solvent Degreaser: This type of degreaser is normally used in machinery and vehicles. It is also rendered effective in removing grease from bearings, joints, and motors.
Petroleum-Based Degreaser: This product contains distillates and ethanol, working best for vehicles and their parts. Aside from grease removal, it is also used for removing residues from gasoline, oil, and other lubricants.
Vapor Solvent Degreaser: This might be different from all the degreasers in this list. The part of the vehicle will be placed on top of the vapor, wherein the vapor does its work.
Foam Degreaser: This type of degreaser is normally applied to electrical appliances and car engines. You just have to wipe after application without using water.
Ultrasonic Degreaser: The ultrasonic degreaser uses an advanced formulation called ultrasonic waves to remove residues and grease from engine parts.
Top Picks for the Best Engine Degreaser
Choosing the best one is going to be frustrating, especially if you don’t know what you’re looking for. We are going to talk about some of their outstanding features, as well as their pros and cons. This can help you narrow down your choices.
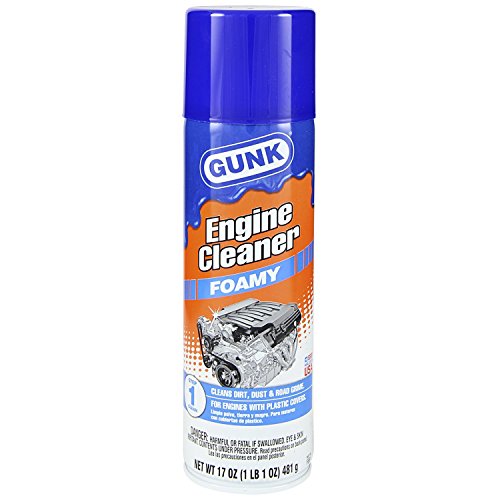
You can have an easy job if you use this foam engine cleaner. It comes in a 17oz. Can and can easily spray on your engine. This one is good for some grease and dirt, but if you want something stronger, try original or heavy-duty Gunk spray can cleaners.
Customers really like how easy it is to use and that it does a fairly good job. Some say it may be a bit difficult to work with when spraying at angles or on wide areas.
Pros:
No scrubbing is needed.
Easy to use and safe on all engine parts.
Sprays off with water, so there is no need to use your hands and a rag.
2. Chemical Guys CLD_201_16 Signature Series Orange Degreaser (16 oz)
AD
The Chemical Guy Orange Degreaser is strong and fast-acting, and many customers say it works great at degreasing your engine. You can use it to degrease your engine, tires, rims, and tools.
Because it is concentrated, you can dilute it for various applications, as stated on the bottle. It can be used to clean most of the fluids that may have spilled on your engine, including motor oil, coolant, hydraulic fluid, blinker fluid, and diesel fuel.
Pros:
Fast-acting and strong
Just Rinse off with water
Uses citrus extras to cut through grease well
Versatile – Use for many jobs in the garage or house.
3. Oil Eater AOD1G35437 Original 1 Gallon Cleaner/Degreaser
AD
Oil Eater is designed to dissolve grease safely on many surfaces. It doesn’t have harsh chemicals and is water-based and biodegradable.
It features a concentrated formula that dissolves tough grease and allows you to remove dirt build-up on surfaces. It can be used on engine bays, wheel arches, and undercarriages that need cleaning. Also, the formula is excellent for removing years of grease and grime build-up.
The best thing about this product is the many uses that it can have. Use it in the house to clean up some floors and carpets and as a prewash for laundry.
Also, if you dilute it to 20:1, you can use it to clean the kitchen counters and cover or paint surfaces. At 3:1, you can use it to clean paint brushes, tools, and various grimy machinery.
Pros:
This water-based product is non-corrosive, non-hazardous, and contains no acids or abrasive or petroleum solvents.
Cleans a wide variety of items.
It can be used on engine bays, wheels, and undercarriages.
Heavy-duty grime and grease remover
Factors to Consider when Choosing the Best Engine Degreaser
Before we conclude this discussion, we will tackle what makes a good engine degreaser. Sure, all of the brands mentioned above are great, but some of their features are more outstanding than others. You should also be informed of these important factors to make a sound decision.
Contents: You have to check the contents of your degreaser. You have to look for the ingredients that will not only clean your engine but also maintain it. Another thing, the formula should not contain harmful and toxic chemicals. You should also look for a non-flammable and biodegradable degreaser.
Safe for any Surface: The one you should purchase should not cause damage to the surfaces it is being applied on. It should be safe on plastic, rubber, steel, as well as paint.
Odor Generation: Most degreasers generate an odor that may be harmful when inhaled. Choose one that is odorless or has an artificial scent and is something you can use for longer periods of time.
Does not Leave Residue: You should not worry about cleaning up the extra white residue left by some degreasers. You should look for one that leaves no spot on the surface.
Versatility: You should find a product you can use for other cleaning jobs besides cars. There are many options in the list above that you can use for household and general maintenance.
Should You Use Soap to Degrease Your Engine?
Soap is possibly the safest method of degreasing your engine. I will probably take a little extra time, but you can ensure that it won’t have any issues with corrosion, bad smells, skin and eye irritation, or harmful chemicals.
If you want a good clean, try a soap that can degrease but is mild, such as a dish soap cleaner. The video below gives a great example of using soap.
Now that you have learned about engine degreasers, we hope you can make a better decision now because you will be able to make an informed decision about the best engine degreaser.
If you are looking for other products that can be used for your engine or your car in general, click here and learn more.
Having an RV and using it for road trips and camping can bring incomparable joy to anyone. It is one of the best ways to explore and enjoy the great outdoors on your own, with your significant other, or with family and friends. To make the most out of your RV, however, you need to make sure that it is well-maintained, which will minimize frustrations on the road.
To repair your RV leak with a sealant, you need to determine how extensive the repair is and what type of roof your RV has. Here is a list of common repair methods.
For a Simple Seam or Joint Repair – Use a bead of sealant.
For Small irregular Areas – Use a fiberglass kit or wide sealant tape with a bead of sealant around it.
For a Fiberglass RV Roof – Use a fiberglass repair kit or possibly sealant tape with a bead of sealant around it.
For a Metal RV Roof – Use sealant tape with a bead of sealant around it.
For a Rubber RV Roof – Use a Rubber repair kit or use sealant tape with a bead of sealant around it.
While there are many aspects of the RV that require your attention, one of the most important is the roof. That being said, in the rest of this post, you will learn the basics of RV roof leak repair. From the first sign of a problem, you need to act as soon as possible. If not, it will get worse and will most probably be costlier to repair.
What You Will Need to Follow this Tutorial?
Before you get started, here are the materials that you may need before starting:
Utility Knife
Drill
Clean Cloth
Gloves
Sealant / Sealant Tape
Brush / Roller
Fiberglass Repair Tape
Caulk
Putty knife
Paint or elastomer
Steps to Seal a Simple RV Roof Leak
Once you have gathered the needed materials, here are the steps you need to follow in fixing a leaking RV roof.
The first thing that you have to do is to clean the roof. When it is free of dirt and dust, it will be easier for the sealant to cling to the surface. If there is a previous sealant, remove it using a knife. Use a clean cloth to wipe the surface. Allow it to dry before you proceed. A wet surface may resist the sealant, so be sure it is completely dry before applying it.
Now that you are done cleaning the leak area, it is time to proceed with the main task – sealing. If the leak is small, the best solution is to use a sealant(ad) that is commercially available. Wear gloves and apply a sealant to the leak. Apply to make sure that the entire area is covered.
If in case there is a bigger hole that cannot be fixed by the bead of sealant, you have to use a fiberglass repair tape kit or a wide tape sealant. For fiberglass, spread sealant on the hole, cover it with the fiberglass repair tape, and apply more sealant. For a wood or metal RV roof, use wide sealant tape.
In some instances, caulking will be the best solution to fix the RV roof leak. This is especially an effective solution if the leak originates from a joint. Apply the caulk liberally on the crack and let it dry.
Once you are done repairing the leak, you have to coat it. For extra protection and to improve the look of your roof, paint it. You can cover it with paint or an elastomer(ad) to achieve a consistent look. Choose a coating with the same color as your old roof so that you will be able to achieve a uniform look. The best way to ensure a uniform look is to paint an entire section across the roof.
In some cases, your might not work. You might be frustrated after repairing the roof several times and finding that leaking still occurs. If this is the case, it’s best to have the entire roof inspected (by you or a professional) and then replace any damaged areas.
This can be costly and complicated, but it will be the best solution if you plan on using your RV for a while in the future. When replacing roof sections, make sure you have done enough homework to ensure a good job and get someone to help.
Steps to Fix/Replace Large Areas of an RV Roof
Here’s a great video about repairing an RV roof. They removed everything, cut out the bad wood sections, replaced the bad wood sections, sealed them, and installed all the parts again.
This 21-minute video is a great place to start if you have intensive roof repairs. It will give you lots of information and ideas about how to go about your specific roof repairs.
If you watch the entire video, you will be able to get a good feel for how much time is involved, how labor-intensive it is, and what materials you might need to pay for.
It is also helpful to remember that mistakes will be made with any big job like this and that you may want as much help as possible before undertaking.
The steps mentioned above may generally apply to RV roof leak repair, but it is important to keep in mind that the approaches to fixing the problem will depend on the material used.
Rubber is one of the most common materials that you will see in RV roofs. It is popular because of its durability. When repairing a rubber roof, make sure to stay away from petroleum-based products, as they can cause significant damage. There are repair kits that are specifically made for rubber roofs.
On the other hand, if the RV roof is made of metal, you can use most roof coatings that are used in the household. Nonetheless, if you need to do more than sealing, such as when there is structural damage, seal tape will come in handy, which will work like duct tape.
Meanwhile, for a fiberglass RV roof, repair can be quite complicated because the material is fragile. A small crack can instantly become bigger if it is not given immediate attention. You could try a patch kit(AD) which may work well for sealing but not for structure. You can also use a kit specifically made for fiberglass(AD) to create a strong repair. If getting your RV looks like there’s no damage, you’ll need to repair it with resin, sand, and paint. You may also need to use a gloss to make it look as good as new.
Here’s a video with more details about making larger repairs to a fiberglass RV.
Regardless of the material that is used, the sealant and the coating must be UV-resistant. If not, they can be easily prone to damage as a result of exposure to the harsh heat of the sun.
Prevention is Better than Cure
Similar to other problems that you can experience in your RV, it is important to point out that regular care and maintenance are important. If you take care of your roof in the first place, you can prevent leaks, and hence, there is no need for repair. The more vigilant and careful you are, the less likely that you will have to deal with leaks.
One of the things that you may not want to do is step on the roof unless you know it’s able to support you. Your weight may cause some roofs (older ones usually) to crack. This is especially true if the roof is made from a material that can easily crack.
Regular cleaning and UV protection are also important for your roof. Use cleaning products that are for RVs. Some may contain harsh ingredients that can damage the roof, so stay away from those. Again, consider the roof material to know the right cleaning products you can use.
Conclusion
This simple post can help you make an informed decision about what to do with your RV roof leak repair. Each RV is different, but simple repairs can be pretty straightforward.
No need to pay hefty fees for a simple patch job. The steps for repair kits are usually quite simple, but if the repair is complicated, make sure you get the help you need. Remember to repair the problem as soon as possible before the leak becomes worse.
Best wishes for a successful repair and getting your RV ready for your next adventure.
RV Holding Tank Treatment (Top 5 Recommended on Amazon)
Most of us don’t like to talk about this topic but doing regular maintenance on our RV’s septic system is important. As none of us would want to use stinky porta-potties, as well as dirty common bathroom cubicles, managing our own RV holding tank is very helpful and convenient for all of us.
Given the benefits an RV holding tank can provide us, it is necessary to take proper care of it to prevent its deterioration. In this article, we will discuss the best RV holding tank treatment and the factors to consider before you buy one. We have the top 5 picks, as well as some tips.
Factors to Consider Before Choosing The Best RV Holding Tank Treatment
While there are numerous choices for the best RV holding tank treatment, you have to ensure that the factors mentioned below are considered to make choosing the best one a lot easier.
Travel time: Your RV’s toilet system might require extra consideration if you are planning on traveling for a long period of time, especially if you do not have the time or chance to discharge the holding tank. It should also be noted that an RV that has a portable toilet should always have an extra tank for bigger capacity.
Composition: The one you should buy must not contain harmful chemicals, however effective they may be, such as formaldehyde. These are not environmentally friendly and can cause irritation to chemically sensitive people.
Material: If you care about the environment, you should consider choosing an organic and biodegradable product. In addition, choosing a non-toxic holding tank treatment is guaranteed to deliver the same result as those that contain harmful chemicals.
Type: It is important that you consider this factor first. As you will see below, there are various types to choose from, and it will save you a lot of time if you know what type you are looking for initially.
Compatibility: While there are many types and products to choose from, consider buying the one that you will be able to use for both black and gray tanks. This will save you a lot of money as you only need one instead of buying two separate treatments.
Ease of use: The RV holding tank treatment you should consider buying must be easy and convenient to use. Some products cause spillage when measuring. This is already considered a hassle because extra cleanup will be required. So as a helpful tip, go for the product that will not create a mess when using.
Features: Before you evaluate the price of the product, review the features carefully first. This will give you enlightenment on what features you will most benefit from.
Price: This is also considered a very important determining factor when choosing the best RV holding tank treatment. Product features, pros, and cons should be carefully reviewed to be able to come up with the price you will be willing to pay for the product.
User reviews and ratings: First-hand experiences are vital because they detail how well the product has worked out for the actual buyers. User ratings also give you a summary of these reviews.
Top Picks for the Best RV Holding Tank Treatment
To help you narrow down your choices, here are five of the products that I believe stand out against most of their competitors.
1. Happy Campers Holding Tank Treatment
AD
Aside from being one of the best odor neutralizers, the Happy Campers holding tank treatment is also a cost-effective product. Unlike many chemical treatments, this product features a highly concentrated mixture that gets rid of odor without covering it up with perfume. In addition, its performance will not be affected by factors such as extreme cold and hot temperatures.
Major Features:
Made from biodegradable and organic materials
Septic tank and environment friendly
It will not give off sewer or chemical smell
Can withstand extreme hot and cold temperatures
Has the ability to liquefy most solid wastes, as well as common household tissue
Item weight is 8 pounds
Pros:
Odor-free
Cost-effective
Made of a highly concentrated monohydrate mixture
1 scoop will treat your 40-gallon black tank
1 scoop will treat your gray tank
2. Tank Techs Rx – RV Holding Tank Treatment & Cleaner
AD
The Tank Techs RX holding tank treatment is a great product, as you only need a small amount to do more of your maintenance task. In addition, it costs less, which makes great value for your money. You can just use this treatment on your holding tank, and it will be able to multiply itself so it can cover a lot of areas. For its specifications, the product dimensions are 9.6 x 3.6 x 3.3 inches, and the item weight is 2.4 pounds.
Major Features:
Has a large 8-inch opening
Features a cap that has an O-ring seal
Comes with a 15-quart drain master
The opening has a catch-all basket
Features an easy-handle design
Pros:
Ideal for recycling oil
Impenetrable by gasoline, oil, and anti-freeze
One bottle can last for a long time
It can be used for black and gray tanks
Customer service is one of the best
Fast shipping
No messy cleanup on top and the sides of the holding tank
3. Unique RV Digest It Holding Tank Treatment
AD
With the Unique RV holding tank treatment, you can finally say goodbye to those embarrassing clogs and odors. Customers say that you will travel without worry if you have this in your RV. It is already satisfying to know that the Unique brand features an advanced mixture of waste-ridding components that is capable of eliminating foul odors and is proven to liquefy solid wastes from the gray and black tank.
Major Features:
Comes with an advanced enzyme formula
Free from formaldehyde
Can unclog clogged tanks overnight
Has the ability to clean and restore level gauges and tank sensors
Capable of getting rid of all types of toilet papers
Can liquefy stubborn solid wastes
Item weight is 32 ounces
Pros:
It can be used for up to 16 treatments
The result is odor free
You will not need any kind of special RV toilet paper
Works effectively
No harsh chemicals were used in producing the treatment
Safe for you and your family
4. Yara ODORLOS Holding Tank Treatment
AD
The Odorlos holding tank treatment can do more using less of it. One use will be able to get rid of foul odor, and it can completely dissolve toilet paper, as well as solid wastes. Not only that, but it also has the ability to lubricate valves and prevent clogs of any kind. Probably the best thing about this holding tank treatment is that it is safe for chemically sensitive people.
Major Features:
Comes in a 40-ounce bottle
Terminates all kinds of foul odors
Dissolves solid wastes effectively
Prevents clogs
Can lubricate valves
Biodegradable
Pros:
Effective in maintaining your RV holding tank
Scent-free
Creates no stains
Contains no formaldehyde
Safe for use even for chemically sensitive people
Get rid of solid wastes, as well as toilet papers
5. Valterra Pure Power Blue Waste Digester and Odor Eliminator
AD
The Valterra waste treatment is natural and non-toxic. It can be used for black and gray holding tanks and will be able to eliminate all kinds of foul odors. It is interesting to know that this product contains bacteria and enzymes designed to eliminate odors. In addition, it can work in conditions up to 130 degrees.
Major Features:
A bottle can be used up to for 64 applications
All natural and non-toxic
Cost-effective
Features very powerful odor control
It can be used on the gray and black water tank
For the boat, RV, and porta-potty use
Comes in a 128-ounce bottle
Pros:
Easy to use
Get rid of the bacteria-causing odor
Safe around children and pets
Solves odor problems while keeping your tank clean
It can be used after single toilet use or regular maintenance
Will be able to break down solid wastes
Different Types of RV Holding Tank Treatment
There are many different ways to classify RV holding tank treatments that are available in the market. Below are two of the most common choices that you will encounter:
1. Tablet Holding Tank Treatment
Let’s you add a tablet to the tank
It will not require you to measure anything
Will not create a mess from spillage
2. Liquid Holding Tank Treatment
Easy to use as you only need to flush the toilet down
Requires measuring of the chemical before pouring it down the holding tank
Spillage may occur
Very convenient to use
Another way of classifying RV holding tank treatments is through their composition and how it is made: here’s what you need to know:
1. Made with formaldehyde
Very effective in killing bacteria
It can also prevent bacterial growth
May be harmful to the environment
Might cause irritation, especially to chemically sensitive people
2. Formaldehyde-free
Formaldehyde was not used in the blend
Environment friendly
Safe to use by your family, even for chemically sensitive people
Quick Tips For Using An RV Holding Tank Treatment
Once you have the best RV holding tank treatment in hand, here are some important points you always have to remember:
If you are using your RV toilet on a regular basis, deep cleaning is required at least once a week.
You might need a tank-cleaning wand to further clean your holding tank.
Another tool you might want to consider getting is a sewer hose connector. It is helpful, especially if you want to check what’s coming out of your holding tank.
When using the treatment, make sure to flush the toilet twice. This will ensure that there is water that covers the bottom part of the holding tank.
In addition, you have to make sure that the toilet is full of water before using your holding tank treatment of choice.
Clogs can result from using different types of RV toilet paper. Worry no more, as some of the products that are listed above have the ability to break down toilet paper, as well as other solid wastes.
A well-maintained RV holding tank will guarantee hassle-free and comfortable RV traveling.
A swiveling sewer connector might be better to use because it is easier and delivers a more sanitary hook-up.
A sewer hose seal can also benefit your tools while cleaning and maintaining your RV holding tank. It takes minimal space and costs not as much. Its task is to prevent any kind of spillage or leakage from the sewer hose onto the ground.
Conclusion
The best RV holding tank treatment is very important in maintaining your RV toilet. It will provide you with a hygienic toilet to use whenever you are out on an RV trip. In addition, this will guarantee a hassle-free and less frustrating RV trip, especially if you are in a remote area. With the products mentioned above, we hope you can choose the best one that will be a great value for your money.
Are you looking for other products that will be of great use for your next RV trip? Click here so we can help you narrow down your choices and end up making a decision you will not regret.