Home

Recent Posts

Give Your Diesel Car the Highest Protection – Use The Best Diesel Additive!


Best Diesel Additive!

When we imagine a diesel car, we get an image of a large truck puffing out smoke. This perception has been changed for some time as now people lean towards energy-efficient cars, which makes diesel cars increasingly common. Long gone are the days when diesel cars were seen as dirty and noisy ones. Now their performance is just like any gas-powered car with stylish looks.

Diesel engines do put on a load on the engine and emit smoke. for this reason, the government has made it mandatory for diesel engine makers to install a special emission control to filter the smoke and keep the air pollution free.


What is a Diesel Additive?

The features of the diesel can be stabilized by the use of additives which can increase the yield. These additives can be added at different stages by the producer or the consumer, which can show massive improvement in the performance of the car. There are many types ​​of additives available that enhance the performance of the car in a specific way. You can choose any of them depending on your need. The types of additives and their functions are:

AD

1. Fuel Handling Additives

These types of additives specialize in the engine’s distribution and handling of fuel. Their primary function is to get maximum yield from the fuel by variation in its properties for best performance.

  • They maintain the low temperature of the car so it wouldn’t heat up.
  • They increase the flow
  • They reduce the foam formation
  • They are anti-wax in nature
  • They prevent corrosion in the engine
  • They reduce the formation of ice and protect the engine from variations in the outside temperature.

2. Fuel Stability Additives

The primary function of these additives is to stabilize the characteristics of the fuel and protect it from any external harm.

  • They are anti-oxidizing in nature and inhibit anti-corrosion properties
  • They act as dispersants.
  • They also deactivate the metal present in the fuel to enhance performance.

3. Combustion Additives

  • The efficiency of the car can be highly enhanced with the improvement of the combustion of the engine.
  • Controlling the smoke inhibitors
  • Improving the ignition power
  • Catalysts for the better combustion process

These additives can be added to diesel fuel in three stages. They are:

  • During the Refinery Stage: The fuel refiners ensure that the additives are compatible with the engine. The best results of the additives at the refinery stage are achieved by choice of the oil used, mixing process, blending of the oil, etc. here, the process of Additization is done at the production stage.
  • During the Fuel Distribution System: Here, the Additization is done at the distribution stage, where the operators of the pipeline insert these additives. This is practiced in many countries to improve cost efficiencies and to control corrosion at the distribution stage so that it doesn’t go any further.
  • During the Final Stage or the End User: These are also known as the aftermath additives, as the customers use them at the final stage of consumption. These additives can be customized varying on the needs of the specific individual, as they can be used to save the engine from the cold climate; they also act as detergents and lubricants to enhance the performance of the fuel. Many aftermarket additives are available, which are of high quality and have shown the best results.

Top 5 Best Diesel Additive 2017 Market​

To help you choose the best diesel additive, we have reviewed the top 5 such products to make your decision process a little easy.


1. Hot Shot’s Secret

The new and improved formula of the hot shot’s secret cleans all the engine components to give you the best performance. It also acts as a lubricant, which avoids friction to make your engine run smoother than before. It reduces wear and is highly durable.

Major Features

  • Model-HSS64Z
  • Extra power and mileage
  • Keeps oil pressure intact
  • Provides warranty

Pros

  • Reduces contamination
  • Compatible with maximum kinds of trucks and cars
  • Cost control
  • Fuel efficient
  • Prevents sludge
  • Noise-free

2. Hammonds Diesel Treatment


AD

It helps to prevent clogging by filtering out all the deposits. It sterilizes the fuel completely and also adds improved lubrication for a smoother run. The durability of the engine enhances and provides better fuel efficiency and mileage.

Major Features

  • Model-HB-01US
  • Certifies by the U.S coast guard
  • It lowers the sulfur levels
  • Eligible for warranty of parts

Pros

  • Prevents microbial growth
  • Fuel efficiency
  • Effective cleaning of the fuel system
  • More durable

3. Hot shot’s secret P040464Z diesel extreme clean and boost

AD

It contains a cetane improver which raises the cetane level and increases performance. It acts as a great fuel stabilizer and filters out impurities which makes it a less maintenance product. It also treats 150 gallons of fuel, allowing you to treat more gas with less.

Important Features

  • Model-P040464Z
  • High lubrication
  • Anti-corrosion properties
  • Warranty and support

Pros

  • Elimination of water from the system
  • Increases cetane level
  • Sterilizes the tank
  • Improved fuel mileage

4. Rev-x DIS1601 Distance

AD

This is a high-quality additive that boosts fuel performance at its optimum level. It reduces the emission of smoke and provides protection in all weather conditions. It also acts as a fuel stabilizer and increases fuel storage to give you extra mileage.

Salient Features

  • Model-DIS1601
  • Provides warranty and support
  • One bottle can treat 800 gallons of fuel

Pros

  • Increases the cetane level by 6 points
  • Reduces wear
  • Improved lubrication
  • Protection from the rusting process

5. FPPF Killem Biocide Diesel Treatment

AD

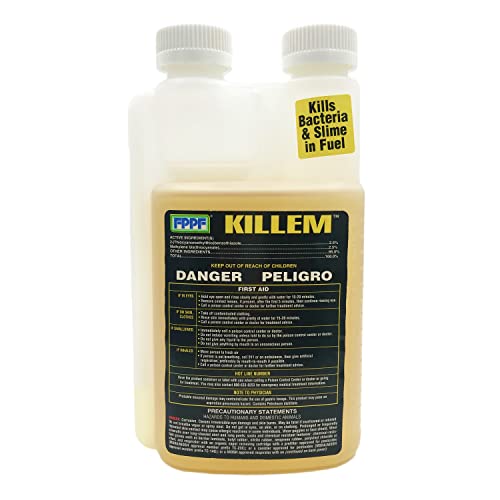
This additive is a type of diesel biocide that doesn’t allow the formation of microbial growth by eliminating the water from the fuel. The presence of water aids in the formation of algae, bacteria, and fungi which can cause decreased performance and the presence of rust. This biocide sterilizes the fuel and removes all the impurities for the best performance.

Key Features

  • Model- 00119
  • One bottle can treat 1920 gallons of diesel fuel
  • Reduces Corrosion

Pros

  • Eliminates all the contamination
  • It can be easily dissolved in fuel
  • Controls bacteria and fungi

How Does Diesel Additive Work?

They serve as a catalyst for an engine to suppress the negative impact of diesel by cleaning and lubrication to enhance performance. They are added to the fuel of the engine directly. After adding the additive, make sure to top up the tank to avoid any additive getting stuck in the fillers.

Filling up the tank will ensure that the additive washes down to the tank completely. So the amount of fuel in the tank doesn’t matter as after adding the additive filling, the tank becomes essential. They immediately mix with the fuel and start to carry out their functions. The properties of the additives are such that they don’t allow the particles of the fuel to stick together and give extra power to the vehicle.


What are the Benefits of Using a Diesel Additive?

Diesel additives have proved to be a blessing for diesel car owners and choosing the right and best diesel additive is very important. To understand this, we need to know its major benefits. They are:

  • Improved Lubrication: The additives increase the fuel’s lubrication, which enhances its longevity and makes the car run smoothly. It increases fuel efficiency and also makes it last for a longer period. It adds a higher lubricating value by distributing the compounds into the diesel fuel.
  • Fuel Cleaner: Many additives act as a detergent and clean the entire fuel system of any impurities present. This prevents clogging in the system and acts as a filter for the fuel. Always replace your filters on a regular basis, and you can add these additives to help you go the extra mile.
  • Fuel Stabilisers: They stabilize the fuel system by preventing the growth of algae or any other kind of contamination. They also prevent the formation of sludge in the fuel, which avoids the sticking of particles to provide high-end performance.
  • Improves the Cetane Level: It increases the cetane level, which increases fuel efficiency and also controls the cost. This can result in high-performance gains and extra power. Higher cetane levels will prove shorter ignition delay periods and less fuel consumption.
  • Weather Protection: The additives’ inhibitors help control the engine’s temperature and protect it from the changing external temperature. Many additives have several properties to help in de-icing the engine and stabilize the fuel system.
  • Separation of Water from Fuel: Mixing water with fuel is the most common problem faced by every car owner and can prove to be quite a hassle if not treated in time. The diesel additives help in the separation of the two and also prevent any further mixing by getting rid of the water.
  • Extra Power: Many additives help create extra power and efficiency, ensuring that the engine burns the fuel in the most efficient way possible. This will result in added power to the piston with every stroke. This will make your vehicle run smoother than ever before.
  • Anti-Oxidising Properties: Many car owners face the problem of rust in their engines. By adding additives to the diesel, oxygen flow into the fuel is restricted, preventing corrosion.

How to Choose the Best Diesel Additive for Yourself?

Choosing the right and the best diesel additive is the most important step. You need to figure out your specific need and conduct careful research to prevent any adverse effects on the engine. You can choose the best diesel by the following steps:

AD

1. Maximum optimization of needs

Many diesel additives are available that cater to different needs and use. You should select the kind of additive which covers all your needs so that you won’t need to buy many additives. Finding a fuel stabilizer additive would be a good option which will help in the anti-oxidation process, avoid sludge by separating the particles so that they don’t stick together, the presence of metal deactivators so that they don’t cause a chain reaction, etc.


2. Economical rate

You should select the kind of additive which doesn’t cut deep into your pockets by calculating the monetary value of the fuel and comparing it with that of the additive. You need to remember that lowering the treatment rate of the additive means it will treat more gallons of fuel. A higher rate means less fuel treated. So you need to keep this ratio in mind and select the additive with a lower treatment rate.


3. Environment friendly

Diesel vehicles are a little harmful as compared to alternative fuel vehicles, so you can go green by purchasing a diesel additive, which is eco-friendly and will go easy on the environment. These additives can reduce the carbon emissions of your diesel vehicle. So, look for the green mark on the additive to help prevent any further harm to Mother Nature.


4. Avoid active ingredients

There are chemicals in the additives, which are the same as those used by the refinery. Try to avoid these ingredients as they will make your engine run smoother but will also permanently damage the injector tips. Ingredients such as ancho and alcohol damage the gaskets and have proven to be very less durable.

According to the customer feedback and our product review, the best diesel additive is Hammond’s diesel treatment(AD) for a smart buy. The reason behind this is its multi-functioning property of sterilizing the fuel and also improving lubrication. Very fewer fuel additives can provide this quality, and it has been shown to give the best results.

It is cost-efficient, so it doesn’t cut deep into your pockets and ensures high performance with extra mileage. It covers all your needs and doesn’t possess any active ingredients. We highly recommend this product for you to reap the benefits of extra power and mileage at an affordable cost.

A Quick Review of the Best Motocross Knee Braces


Best Motocross Knee Braces

It makes sense to get a motocross helmet to prevent serious head injuries. You might also need to wear other important safety gear, including knee braces. Most offroad riders will get knee pads of some type. While knee guards supply some protection for knee impacts, a knee brace is best for preventing knee injuries.  

A knee brace has a system of support around the knee that prevent it from getting injured, unlike a knee guard. It will not only protects from impacts like a knee guard but prevent the knee from moving in positions that can tear ligaments. 

In this post, we will be discussing everything we know on how to buy the best offroad / motocross knee braces. If you are unsure about which one you prefer, look at our picks and their reviews. We’ll discuss the pros and cons of each, and we hope you can find one that is the right choice for you.


Knee Brace VS Knee Guard

Knee BraceKnee Guard
Provides impact protection
Protection from brush
Rock and debris protection
Provides protective frame around the knee
Affordable 
Restrict range of motion
Low supportive level
Protects from hyperextension, twisting, and landing injuries (jolts). Little or no knee ligament protection
higher priced
Can be bulky

What is Motocross Knee Braces?

Knee braces for off-road motorcycle use are very important for healthy knees. Most off-road motorcycle users have hurt or landed on their legs where an injury could have occurred. Motocross riders also tend to have knee injuries, but these can be cut in half with a good pair of knee braces.

Knee injuries can occur to the ligaments and meniscus when maneuvering, falling, or even seemingly small impacts on the knee joint. A brace will take on that force to prevent knee joints from sudden lateral or sideways movement, reducing the impact on your knee joint. 

This means that if you ever experience a crash or adjust your position while riding, knee braces will absorb some of the force of the impact, thereby reducing the likelihood of a knee joint injury. 

If you look at the chart at the beginning, you are aware of the differences between a knee brace and a knee guard. Knee guards can reduce the impact of objects, like when falling on your knees; the plastic and cushioning take some of the force. 

But it can help with anything besides impact. So if your leg moves in an unnatural manner, it won’t protect you against serious knee injuries. It is normally made from hard plastic with foam padding. It also features hardened gel or foam, which serves as the barrier between the rider and the ground.

Experiencing a knee injury can be quite scary, as well as painful. It can hinder your ability to walk, as well as your normal day-to-day life. In addition, you might need to get physical therapy to help you improve your knee’s strength and to decrease the pain after being injured. Based on this, I believe a knee brace is a way to go when going off-road or racing.

Here are some of the benefits you can expect from getting knee braces. Better lateral and medial support for your knees, a reduction in leg rotation, helping with leg position awareness and feedback, and they can be used to limit the unnatural range of motion.


Factors to Consider When Choosing Motocross Knee Braces

You need to consider several factors when looking for a good motocross knee brace, and it’s not always about the price. Factors such as protection, adjustability, and comfort, as well as braces that are easy to maintain, make a good motocross knee brace. Read on for more information:

AD


1. Protection

You might be considering knee braces mainly for knee joint protection. It makes sense to choose one that will function effectively. We recommend that you choose knee braces that have been proven to be safe. 


2. Adjustability

Another important factor that you should consider is the knee braces’ adjustability, especially if you are using it for a while when riding. In addition, your preference might be to choose one that is easily adjustable and still provides your knee joints with the protection they need.


3. Comfort

When riding, it is also very important that you are comfortable with whatever safety gear you are wearing. This factor will come in handy with your knee braces, especially if you are riding for extended hours. Knee braces are normally made of a solid external frame, which can be comfortable. Look for padding types, joint types, and levels of breathability. 


4. Price

It can be hard to know an item’s quality based on the price. Do some fact-finding if you don’t have all the information you need. Even better, go to a store that sells motorcycle knee braces and try on a couple if you can.

Evaluate each product’s features. If you can try it on, this is the best way to find out how it fits you. This way, you will have an idea if you’re getting what you want. As with any other product, if the motorcycle knee braces are made of higher quality material, expect to pay more.


Our Top Picks for the Best Motocross Knee Braces

In this section, we will be talking about our top 5 recommendations for the best knee braces for off-road and motocross use. Take time to evaluate each product using a detailed summary of their best features, pros, and cons, especially when you need to narrow down your choices. We hope that these braces will be helpful in giving you the information you need to make an informed decision.


1. Pod Unisex-Adult K4 Knee Brace 

AD

A good thing to know about the Pod knee brace is that most people find it works well for them. This knee brace has a pivot point that joins the glass-reinforced polymer frame. It can fit a variety of leg sizes with its four adjustable straps and hinge spacers. 

These knee braces are lightweight and still remain strong and durable. They have protection for knee impacts with the self-tracking patella guard. In addition, they have extra padding so you can customize it the way you want and not have any pressure points.

These have a 0 – 25 degree extension stop so you can control your range of motion and have the support and protection you need.

Pros:

  • Very comfortable to wear
  • You can get on and off with ease
  • Features hinge spaces
  • Customizable
  • Protects your knee from injury and impacts  
  • Lightweight
  • Has 4 adjustable straps
  • It is registered as a medical device

Cons:

  • It may need to be replaced if in a significant impact (Normal for most braces)
  • Braces are left, and right specific – it may add time to put them on

Overall

Given that it has customization and is lightweight, you may feel comfortable wearing these good-quality knee braces for long periods.


2. EVS Sports Web Pro Knee Braces

AD

Another good product in this review is the EVS Sports Web Pro, which features four straps like the Pod, and it is also lightweight. It is made of twin-wall carbon fiber for strength, and it is rigid for good protection. 

These knee braces have a minimalistic feel covering just enough to provide plenty of strength with lots of breathability. It has a hinge system that provides natural motion with dual hinges and uses aluminum and steel for strength.

The full coverage knee cup can protect well, and the hyperextension lockout will help prevent injury to your joint. In addition, the Sharkskin neoprene helps prevent the brace from moving during riding for stable protection.

Pros:

  • Made of high-quality materials
  • Offers full protection in a minimalistic way
  • Durable and sturdy
  • Comes with hyperextension lockouts
  • Equipped with 5 adjustable straps
  • Provides impact protection and knee injury protection
  • Is lightweight
  • Medically Certified

Cons:

  • Velcro might come unglued
  • It may need to be replaced if in a significant impact (Normal for most braces)

Overall

Even though they may be lightweight, they are overall very protective and comfortable. It is rigid yet accommodates flexibility in the hinges and straps. 


3. Leatt C-Frame Pro Carbon Knee Braces

AD

If you are looking for a very strong and sturdy knee brace, you should consider choosing the Leatt C-Frame knee brace. The frame around the knee is made of a very stiff cast aluminum alloy. It also includes carbon fiber protection for the lower shin area. The knee pad will stay in place while your leg move for impact protection.

There are different ways to customize the brace, including different-sized padding. The brace has quick-release straps on the top that are fairly easy to use and seem to work well. The main feature of this brace is that there is no hinge on the inside of the brace, allowing the rider to feel their legs closer to the motorcycle for a more natural ride. 

You can adjust the knee lock-out point to your preference within a range and get a good feel, but it may take several adjustments. 

Pros:

  • Comfortable to wear
  • Made of strong and sturdy materials
  • Has fastening buttons that offer quicker on/off time
  • Has 3 straps but 4 contact points for a secure fit
  • Unique joint ensures natural knee bends
  • CE 1621-1 certified knee protector 
  • Build-in fracture points for impact protection

Cons:

  • It may not encapsulate the knee joint as well as some like
  • Getting them to fit well may not be easy

Overall

Most people who try them seem to feel they offer a good level of comfort and protection, but it may take some customization for the best fit.


4. Alpinestars Unisex-Adult Fluid Tech Carbon Knee Brace Set

AD

This brace has a polymer carbon construction, so you will get a lightweight feel when wearing them. There are 4 straps for a solid grip on your leg and memory foam in the knee cup for impact protection. 

For added protection, the carbon fiber construction makes the chassis rigid, and along with the straps, you can get a solid fit, so the brace stays in place. The full knee guard helps with impact protection when bending your leg. 

There is a double hinge for a natural range of motion and hyperextension lockout protection. You have spacers that go on either side of the knee for a customized fit at the knee joint. It comes with some ventilation for cooling.

Pros:

  • CE-certified CE 1621-1 K Type B
  • Durable and lightweight
  • Ventilation points
  • Some customization available
  • Hyperextension protection and secure knee cap protection
  • Comfortable to wear
  • Dual pivot hinges
  • Quick clips for faster on/off time

Cons:

  • Not much first-hand rider information
  • A little tight for some. May need the next size up.

Overall

An overall good brace with lots of nice features and lightweight construction. This may be best for thinner-legged individuals, but larger sizes may accommodate all leg sizes.


5. Mobius X8 Knee Brace

AD

The Mobius X8 knee brace is one of the most impact-protective knee braces. It lacks the ventilation that other braces have but has complete coverage of the knee area from the top of the brace to the bottom. 

It has a unique cable system that helps secures the brace to your leg using a strap to provide a very secure fit so the brace won’t move and can protect your legs properly. It is constructed from a PIM glass-filled nylon shell and anodized aluminum parts.

It has anodized aluminum dual hinges for a natural range of motion and riding position. The molded EVA foam can provide comfort, and the impact-absorbing rubber helps with impacts.

Pros:

  • Cable routing system
  • Durable and overlapping full protection for the knee
  • 3 velcro straps and 1 cable-routed strap
  • Made of durable materials
  • EVA foam
  • Good for impact protection
  • Good for larger-legged riders

Cons:

  • No ventilation system
  • A little bulky

Overall

While it may feel warm while you’re wearing it, it still is one of the best knee braces because of its durability and lightweight properties.


Conclusion

Choosing the best of the best might seem a little daunting, but if you think about what’s most comfortable and offers the features you want, you can likely find one that is best suited for you. We just hope you will be able to make a decision that works best for you. Viewing some helmets might help clear your mind, and then you can come back and look again to make a better decision. 

Home EV Charging Station Cost [5 Examples of Electric Car Chagers]


EV Charger Cost

In recent years, electric vehicles have become more popular as a part of the growing trend toward having eco-conscious modes of transportation. More and more companies plan to phase out gas cars and transition to EV cars.

Purchasing an EV charging station will cost about $400 – $1200. The cost to install it is $0 if a 120V outlet is used, $50 if you want to do it yourself, and about $1200 for an electrician. Altogether the average cost to buy an EV charger and use an electrician would be about $2000. 

Many electrical vehicle owners may want to upgrade to a faster charging system. The chargers in this article are level two chargers (up to ~70-mile range an hour), meaning they can charge many times faster than a level one charger (up to ~30-mile range an hour). We’ll look at 5 level 2 chargers.   


Before Choosing An EV Charging Station

For those who have doubts on which one will make the best choice, below are some considerations that might make it easier for you to arrive at the right decision:

  • Ease of Use: One of the most important is for the product to be user-friendly, not only when it comes to the operation but also its installation. The manufacturer must provide comprehensive instructions on how to use the product. It must be devoid of complications.
  • Reviews: For those who are still undecided on which to pick, it is also best to consult on the feedback of other users. Through their first-hand experiences, you will be able to easily weigh the pros and cons of the possibilities.
  • Charging Time: You can opt for a slow, fast, or rapid charger. More of this will be tackled in the latter part of this article. Obviously, the faster ones will be the better choice, but the problem is that they can also be costly.
  • Technical Specifications: To be a responsible buyer, you need to look at the technical details and know what they mean. For instance, consider the amperage, voltage, and wattage. You need to learn how they will have an impact on the performance of the electric vehicle charging station.
  • Safety: There are products with inferior quality, and hence, they can pose threats. With this, buy only a charging station that has undergone and passed stringent tests, which should be proof that it goes in accordance with global standards.
  • Warranty: A product with a longer warranty option will definitely be a tempting choice since you can have peace of mind. This is because if there are defects that are apparent, the manufacturer can handle the repair and replacement of the parts without any added cost on your end.

5 Examples of Home Electric Vehicle Charging Stations

Below, we will let you know five of the popular products that are worth considering. We will list down a few of their notable features, as well as some of their pros and cons, which will be useful in trying to narrow down the possibilities.


1. JuiceBox 40A EV Level 2 Charging Station

AD

Power and reliability. These are two things that you can expect from this product. It will provide your house with a dependable charging station.

It is also considered a compact option, although not the smallest on the market today, making it the perfect choice for those who have limited space at home. It can be mounted on the wall; alternatively, you can also easily take it out and use it even when traveling.

Major Features:

  • Weatherproof construction
  • Wattage – 7.7 kilowatts
  • Voltage – 240 volts
  • Amperage – 40 amps
  • 25-foot cord
  • Uses a phone app and the web to control charging

Pros:

  • Indoor or outdoor installation
  • The unit appears durable, making it last for years
  • Can use 120 volt (w/ adapter not included) or a 220-volt outlet.  
  • Get access to your real-time and historical charging data
  • You can easily remove the unit from its mounting plate and take it wherever you want
  • Plug into any NEMA 14-50 outlet

2. ChargePoint 50 Amp Level 2 Charging Station

AD

With this product, you will be able to charge your electric vehicle at an average rate of 25 miles of range per hour, a feat that may be quite hard to surpass for many of its competitors. The package comes with a standard connector that will fit in most vehicles. In terms of safety, there is no need to worry as it has passed several global tests to prove that this is indeed going to be a dependable choice. Lastly, it is also worth noting that it comes with a warranty that lasts for three years.

Major Features:

  • Comes with a status indicator light for ease of monitoring its functions
  • Wi-Fi enabled for ease of control through a mobile app or remote
  • Level 2 charger
  • Amperage – 50 Amps, 240 volt
  • 23-foot cord

Pros:

  • Charges battery within a short span of time
  • Can be started and controlled remotely through the accompanying app
  • Offers options that can be customized based on user preferences
  • Has an attractive design
  • A tough body that will withstand the test of time

3. MUSTART TRAVELMASTER Level 2 Portable EV Charger

AD

Efficiency and simplicity – are two of the things that you can expect from this model. It comes with user-friendly features. The simple design makes sure that it is space-efficient. Lastly, it auto-adjusts to charge your EV at the maximum safe current.

Major Features:

  • 25 ft cable
  • Amperage – 15/25/32 amps
  • Level 2 charger
  • Indicator screen for simple operation

Pros:

  • Works perfectly and smoothly for a wide array of electric vehicles (SAE J1772)
  • Installation can be accomplished within a short time
  • Indoor installation, but has a connector rating of IP67 for temporary rainy conditions
  • Has adapters for both 120V outlet and 240V outlet
  • Automatically adjusts to provide as much power as your EV can accept

4. LEFANEV EV Charger Level 2 Station

AD

The simplicity of this product is one of the first things that will captivate your attention. From the installation to the operation of this electric vehicle charging station, it is sure to be user-friendly. You will also love the intelligent charging.

Major Features:

  • Charges with 7.7 kilowatts
  • Comes with a 20-foot flexible cord
  • The manufacturer is offering a 30-day unconditional replacement warranty
  • Uses SAE J1772 plug type at 32 amps

Pros:

  •  IP66 Waterproof Mode 3 Wall Box 
  •  Monitors Voltage, Current, Charging Time, and Power Consumed.
  • The cord will last for a long time
  • NEMA 14-50 plug 

5. PRIMECOM Level 2 Electric Vehicle Charger

AD

The installation of this unit is sure to be a piece of cake, especially because all you need to do is connect it to your 240V outlet. It comes with a pretty long cable – 25ft. Compact design. Multiple light indicators let you know how your unit works for peace of mind. You can power share with multiple units. 

Major Features:

  • Amperage – Adjustable from 16 – 40 amps
  • Wirelessly control your charging – App
  • Input – 240 volts
  • 25-foot flexible cord
  • 3-year warranty

Pros:

  • Easy to install and use
  • Charges your battery fairly quickly – Level 2 
  • Has simple operation
  • Solid construction and safety features

Different Types of EV Charging Stations

As you try to slim down the available options, think about how they differ. Among others, one of the first considerations would be the speed at which they will charge your electric vehicles. In this case, the following are the options that you have:

AD

1. Level One Charger

  • This one is the slowest of the three types based on the charging speed.
  • Will use 120 volts of power to charge your electric vehicle
  • For an empty battery, it will take about eight hours before it can be fully-charged
  • Installation cost is low
  • An affordable option for many who are still new in electric vehicles
  • Can be connected to any wall socket
  • Can charge a battery that is good for two to five miles per hour

2. Level Two Charger – Ones shown in this article

  • Electric vehicles that are charged using this type of charger will have an additional runtime of ten to twenty miles per hour.
  • For short charges, it can deliver higher energy efficiency compared to Level One Charger
  • The installation cost is higher
  • Will need 240 volts of power
  • The wiring requirements are similar to those used for stoves or dryers

3. DC Fast Charger

  • This is the fastest of the three types but also the most expensive when it comes to product price, installation costs, and operation.
  • Drastic reduction in charging time, allowing users to charge their battery to up to 80% in under half an hour
  • If you live in a place with extremely cold weather, it may not be as reliable in terms of its battery charging performance.
  • Make use of direct current instead of the usual alternating current
  • More often than not, this is a practical choice only for public facilities because of its excessive costs

Install An EV Charger Yourself 

Getting a professional electrician to install anything that requires you to go into your electrical box is usually advised. Some electrical panels can handle 240V, and some can’t. You’ll need to know exactly how everything works with your EV charger and your panel.

You should have some experience working with electric panels, so you don’t make mistakes. That being said, this video shows how you can install your own EV charger.

If you planning to do it yourself, you can buy all of the items in this video for about $50 if you have the tools and are able to mount it similar to the video. 

 Here are the items that he used. You can also use the links under his video on YouTube. 

If you want an electrician to install it, you will need to pay about $1200, but rates can vary widely from electrician to electrician and from job to job. It all depends on how difficult the job is and how many parts are needed. 

It’s a good idea to go to places like Google or Yelp to get an idea if your electrician is a good one. If you see an AD in your search engine, be careful to look up more about the company because it might not be the best source for reviews.


Quick Tips for Using an EV Charging Station

Keep in mind the things that will be mentioned below, which we believe will be essential in making the most out of your electric vehicle’s battery and the charging station as well:

Usually it 

  • You need to know when enough is enough, especially if you are in a public charging station and the line is already getting too long. In most instances, most owners of electric vehicles consider 80% to be enough if they are charging in public.
  • To conserve battery and minimize the need to frequently charge the battery, it will be best to reduce your speed when driving. The faster your speed is, the more it will be able to drain your vehicle’s battery. Also, keep in mind that as of these days, electric vehicles are not meant to be driven like sportscars.
  • Download compatible mobile apps. Not all electric vehicle charging stations can be connected to an app. In the same way, not all apps will have universal compatibility. The good thing about apps is that you can monitor everything easily.
  • Pay attention to safety. If you are installing your own charging station at home, it will be good to read the instructions from the manufacturer, especially the part that outlines how to install the product the right way. The right location will also help to minimize possible hazards.
  • Do not be afraid to ask for help, especially regarding installation. Some manufacturers will offer expert installation services as a part of the bundled price of the product. This is a good choice if you are not into electric cars and if you are admittedly someone who is not into technical complications.

Conclusion

If you have finally decided to join the electric vehicle trend, you need to invest in the right charging station. A vehicle charging station is an investment that you are sure to love. Make sure to pick one that has been well-received by its users. Pay attention to technical specifications as well to determine how powerful and reliable one product can be.

Are you looking for other products that will also be useful for the garage? Click here and read some of our buying guides that will help you determine some tools you might need for an electric vehicle.

List Of Major Problems Associated With Mazda RX8


Mazda RX8

The Mazda RX8 is one of the best sports cars, which was first ever shown in the North American international auto show and was highly praised by the viewers. As it was seen, the car is a successor of the RX 7 model and was made up of the highly boosted Wankel engine.

Despite having many amazing qualities, such as the best rearview mirrors, a highly durable engine, and being one of the most favorite cars among people, the company decided to discontinue the production of the Mazda Rx8 cars because of the following problems.

  • Apex seal wears down
  • Overheating
  • Break noise
  • Hard to start
  • Shift cable needing adjustments
  • Trouble shifting gears
  • Clutch issues
  • Bad sensors
  • Engine noises
  • Risk of theft

As per the reports, there were many issues regarding the engine that people were facing, and there weren’t enough solutions, which led to the discontinuation of the car.

In the article below, there is a mention of various problems with the Mazda RX 8. Read below to find out more:


1. RX8 Engine Issues

Problem with the Engine
Photo Credit: http://www.motortrend.com/cars/mazda/rx-8/2010/2010-mazda-rx8-last-drive/

One of the biggest issues that people face with this car is its engine. It is generally viewed that the rotors of the engine would wear down, which would result in the mixing of air and fuel in the car. 

The apex seals tend to go bad for many people, and then you would need to eventually replace parts at a high cost. 

After some time, the mixture of the air and fuel would start leaking from one of the combustion chambers and would pass into another combustion chamber, and this would continue for some time.

This video shows how a rotary engine works. One can imagine that a little bit of wear could cause a lot of problems.

This would also result in low efficiency of the engine, and not only this, but it would also result in low compression, making the performance poor.


2. RX8 Overheating Issues

Overheating is one of the most common issues that is faced by people who are using Mazda RX 8. If you drive the car for a little too long than it can actually handle, then you might see steam or a little bit of smoke coming out from the front of the car.

In addition, there are chances of smoke coming out from the needle on the engine temperature gauge of the car. If the coolant was not provided to the car instantly, there were chances of the car starting to have faulty leaks or bursting of the entire fan connection system in the car.


3. RX8 Brake Issues

brake drum dust

The brakes of the car were fantastic in the beginning, but after some time, they became a little too noisy, and it was intolerable to the people who drove the car. The brake drums would easily catch dust and would result in the production of creaky noises from the brakes.

If you want to fix this noise, you might try a brake parts cleaner, and you may need to adjust the brakes a bit if they touch the drum while the wheel is moving.


4. RX8 Starting the Car Issues

Problem with the Starting of the Engine
Photo Credit: https://www.cars.com/research/mazda-rx_8/

There were many issues reported with starting the engine. Sometimes it would take a lot of time to start, and sometimes it would not even start at all, which would cause a lot of frustration for drivers.

Some people have reported the problems were the battery terminals of the car or cable connections to the battery. (See video for solution)

Along with this, there were many problems with the fluid level sensor that was present in the expansion tank.

Reports that the car was always thirsty made people upset because they had just put in enough gas to last for a while. 

Check this video for some more things to consider when starting your car.

If you have checked all of the reasons that your car might not start, remember to double-check any item that you may have brushed over quickly to ensure the problem is really not just a simple loose wire, etc.


5. RX8 Transmission Issues

rotary transmission stuck in gear

Seemingly the worst problem facing owners of the Mazda RX 8 is their transmissions. There were many instances where the transmission refused to budge at the exact time when the user depressed the clutch pedal and attempted to move the stick shift. 

For this very reason, many sports car racers refused to drive the Mazda RX 8 model while racing.

Along with this, RX8 racers said that while they tried to shift the car into the first gear from a stop position, the gears got stuck in position, which made it difficult to pick up speed for the driver. 

The issue may be the level of RPMs the engine is at and learning how to shift the way the gearbox needs you to shift, not what you might think is normal. 

Also, the RX8 may need too much adjusting of the shift cables and also the clutch linking. Being a sports car, it can be difficult to near impossible to fix and adjust the settings every time you drive aggressively.


6. RX8 Gear Issues

Problem with Gears
Photo Credit: https://www.cars.com/research/mazda-rx_8/

Most cars will drive fine and without having problems until the transmission or gearbox starts to wear down. The Mazda RX8 seems to face the problem of slipping gears sooner than drivers expected.

With any type of car, you need to check the oil and transmission fluid regularly. This applies to the RX8 even more so. People tend to drive them aggressively, and they encounter oil and transmission fluid burn at times from high engine temperature or lack of fluid. Bits of metal may also be floating around in these fluids, and they start to wear down the engine and transmission moving parts. If you are having trouble changing gears, one of the first things to check is your fluids. You may need to check your gearbox, transmission, and engine for issues. Remember to check your fluids regularly, and if you feel gears slipping think about getting the clutch looked at as well.


7. RX8 Clutch Issues

clutch

One of the biggest nightmares of people who drive sports cars is a dragging clutch. For instance, if you’re pressing completely on the gas pedal in order to avoid an accident, and the car clutch does not engage fully into gear, leaving you without the power to move out of the way quickly. Another example is when you are driving along, you may see the RPM start to increase before it should after you put the car into gear. Sometimes the clutch doesn’t engage, and sometimes it drags. A dragging clutch is one that fails to disengage from the clutch disk and flywheel at the time when the driver of the car pushes the clutch pedal. When the driver attempts to shift the gears, the gears will refuse to shift because the clutch won’t pull away from the flywheel.

Sometimes the issue is the cable that is attached to the clutch pedal has become loose. Tightening it may solve the problem. 

So, when your shifting gears and the car is not shifting or making strange noises, it’s time to get it checked out as soon as possible. 

If you are changing gears, listen for any noise that may be an issue because it may be causing some transmission damage over time.


8. RX8 Engine Light Issues

Engine Lights

It is important to have engine light indicators on your dashboard so that they can indicate problems that may be occurring with your RX8.

Some people have problems with these lights because of sensors that either doesn’t work properly or need replacement (YouTube video). One person found an after-market sensor was the reason their car was having several problems. 

It may be difficult to know if your sensor is the issue unless you have someone look at your car who has experience with the issues you’re having with your car. 

In one video (shown later), the RX8 owner explains that he can replace the sensor because it’s integrated into the part.

If there is anything wrong with the engine of the car, the sensor will let you know when things are not working properly.

Getting an OBD2 scan tool to help diagnose the problem can be helpful for those wanting to take a more hands-on approach.


9. RX8 Engine Noise Issues

There have been many people who have experienced a humming or a slight buzzing sound when driving their RX8. When the driver or the racer shifts the gears, they may also hear a clunking sound.

These sounds could be normal, but it’s important to get them checked out. 

Before starting your car again, you can check the clutch cable for slippage, the fluids, the seals, and the wire connections, and look for anything out of the ordinary. 

With a keen eye and an attentive ear, you can determine when you need to stop and figure out reasons for humming and clunking sounds. 

There are several forums you can go to look for answers to your Mazda RX8 problems, including:

So if you are a do-it-yourself kind of person, you’ll be able to figure out a lot of solutions on your own. 


10. Minor Issues

The video explains that some issues to look out for that aren’t normally known about are the following:

  • Heated Cup Holders
  • Coolant Sensor
  • Cracked Dashboard
  • Back Windows

The Mazda RX 8 model was one of the best models of the RX series. Despite all the amazing features, there were many problems that the people who owned the car were facing, due to which the company decided to stop the production of the car. 

You may decide that with all the issues that people have with the RX8 that it’s not worth having, but many people do love to drive this car. 

Be ready to go through some difficulties with all the issues that you will face driving this car, and be ready to have some fun because after all is said and done, it really is a fun car to drive.

How to Wash a Harley: Bring your Bike Back to Showroom Quality


How to Wash a Harley

Motorcycle enthusiasts are most likely to describe a Harley as their best friend or companion. It is not just a great bike; it is very special and can be regarded as a valuable family member. So, do you know how to properly wash a Harley? Sure, you would rather ride it than wash it, but after a weekend of riding, it would be great if you could bring it back to showroom quality.

In this post, we are going to talk about the step-by-step guide on how to wash a Harley. We also have provided you with a rundown of the tools you will need, as well as some tips. Here are the four main steps you need to follow to wash your Harley:

  1. Remove Bugs and Grease From Your Harley
  2. Wash Your Harley With Soap and Water
  3. Drying Your Harley
  4. Polish Your Harley

Making sure your Harley is clean, shiny, and polished is guaranteed to enhance your riding experience and may add more years to your bike’s lifespan. Now, let’s talk about what you will need to follow in this tutorial.


Items You Need to Wash a Harley

In this video, you’ll see what items you generally will want when washing any motorcycle. Some owners use a pressure washer, but a hose can work fine as well.  

If you wash your Harley at a commercial car wash center, you might not have all the tools you need to get your motorcycle clean. Unfortunately, some of the items you need you may not find at the car wash center, but you can use more specific tools that you have at home:

Here’s a list of items that will help:

ITEMS NEEDED

  • Wheel and spoke brush
  • Microfiber cloth/mitt/sponge
  • 1-2 water buckets
  • Car/Motorcycle wash soap
  • Chamois or microfiber towel
  • Hose or pressure washer
items needed to wash your motorcycle

ITEMS YOU MAY WANT


Step-by-step Guide on How to Wash a Harley

Steps to Wash

Start in a convenient area. Try for a level, hard driveway. You need to be free to work and clean without obstructions. 

Once you have prepared all the necessary tools, you may now begin the process of cleaning and polishing your Harley. Just remember that you wash your Harley with precision and care. If you don’t, you might be exposing your motorcycle to inadvertent damage. Here’s what you should follow:


1. Remove Bugs and Grease From Your Harley

Before you begin to wash your bike, decide if you want to clean the chain. This would be the time to do that as well. You certainly want to clean off the grease in all areas that are hard to reach and areas that are hard to clean off. 

First, it’s a good idea to check the headlight and the front fender for tar and bugs.

It’s a common occurrence that bugs stick to your bike’s body while riding. To remove them, you need to use warm towels in soap (see video) or use a bug spray remover to get the job done. Then you can wait and rinse it off with water. 

Next are the nooks. Use a couple of rags or clothes that can get greasy. You may need to crane both your neck and arm to reach the exhaust pipes, the swing arm, under-seat suspensions, the exhaust arm, and the cylinders. 

Then you can also use a toothbrush to clean the suspensions and tight areas around the cylinders.

Sometimes all you need is a good engine degreaser to thoroughly clean these areas. Spray it on, wait and wash it off.

Last are the wheels, which tend to get grimy because of the chain lube and various dirt from the road. You need to use a tire cleaner spray on all the angles and nooks of the wheel. 

You can also use a plastic brush to thoroughly remove stubborn dirt or grime. You need to give it some time before you can wash it off using a hose.


2. Wash Your Harley With Soap and Water

Wash Your Harley With Soap and Water

First, make sure you can prepare two buckets, one with soap and water and the other one with just water. 

One thing to take note of is that the sponge or microfiber cloth you are using is free from dust particles and grease. Prevent paint damage by using only clean, particle-free cloths. 

Next, rinse the entire motorcycle with clean water. Avoiding water-sensitive areas (engine bay, dashboard, and chain) if using a pressure washer. Soak the wash mitt/cloth in the soap bucket or spray on soap with your pressure washer.

Then, use your cloth or mitt to clean all the areas of the bike with soapy water unless they still have grease. Rub painted areas with lite pressure to help prevent scratching if particles are still left on the paint. 

TIP: Try to keep your bike wet when washing. You can wash and rinse in sections if necessary to prevent soap from drying on the motorcycle.

A foaming soap sprayer helps keep the soap on the bike longer. It also remains wet longer. Going from bottom to top when spaying ensures even coverage. 

Last, check that you have washed all the areas of the motorcycle that need to be cleaned, and begin rinsing it off with clean water from the top to the bottom (it helps prevent dirt from spaying up). 

Ensure that all soap has been rinsed off, especially in the hard-to-reach areas. You can use the wash mitt to ensure thorough cleanup of the tiny areas. 

Another thing to remember is that you should avoid pressure washing when rinsing, so it doesn’t penetrate the engine, chain, and dashboard components. 


3. Drying Your Harley

Drying Your Harley

Most people like to use microfiber towels when drying their motorcycles. They’re cheap, clean effectively, and safe on paint. Although, a chamois (Amazon Link) is also a great tool to have because it is so effective at soaking up water.

First, wipe the water off your bike in all areas possible. Avoid the rubber on your tires and the chain. If there’s still grease in an area, avoid using your towel on it.   

Next, ensure your bike is completely dry to avoid spots or streaks. Recheck to see if you missed anything. 

Last, ride your motorcycle to help remove any remaining water. If necessary, stop the bike after a couple of blocks to wipe up any streaks that have developed. Carry a microfiber towel to wipe up water if needed.

Another option is a motorcycle dryer. It can effectively help you dry your bike. A leaf blower (see video below) may also work. Make sure it has a narrower attachment to help push more forcefully. 

Air pressure is a good way to get into those nooks and crannies that are hard to access. You’ll be glad you dried your bike thoroughly because it will look great. Make sure your chain is dry also, and add lubrication if needed. A wet chain over time will cause corrosion.


4. Polish Your Harley

polish motorcycle

The last step in washing your bike is to make sure it has been polished and sealed. It is common knowledge that a well-polished Harley can repel bugs and dirt.

You may use wax (Amazon Link), along with a microfiber towel, to polish the tank and fairings on your Harley’s body. You may need to leave it on for a few minutes before cleaning it off.

TIP: Keep waxes away from your windshield, as some may create a haze that won’t remove them. If your forks are really bad, you might consider using sandpaper and a buffing tool and then polish. 

To polish the metal part of your Harley, use a metal polish (Amazon Link) to help all those parts shine. If your bike parts get very dull, you may need to clean, buff, and then polish them. (see video for quick method)


Tips on How to Wash a Harley

Tips on how to wash a Harley
  • You need to remove all the items that you don’t want to get wet such as tank bags, luggage, and GPS.
  • It is very important to know beforehand when and where you wash your Harley. You cannot wash it directly from a long ride. Give it time to cool down before you clean it. It is also considered dangerous to perform the washing on the street.
  • Regular washing is recommended. If you drive your motorcycle every day, washing weekly or biweekly is recommended. You don’t need to overdo it.
    • TIP: During washing, check your bike for any issues, including fluid and oil leaks. Clean squashed bugs soon, if possible. It’s more difficult to remove later on.
  • Remember that quality cleaning products are important to use. Using the wrong product in the wrong area could damage your bike.
  • When washing your Harley, make sure that you don’t drop the wash mitt, a piece of cloth, or a sponge to the ground. These materials can easily pick up dirt, and even just a small grit can scratch your bike.
  • If you are dealing with strong and harsh compounds, it would be beneficial for you if you wear rubber gloves.
  • Never dismiss the effectiveness of using an old toothbrush to clean hard-to-reach areas of your Harley.

Conclusion

Now that we have reviewed how to properly wash a Harley, you can take steps to do a professional job on your own. All you need to do is prepare all the necessary materials, and you are good to go. Just make sure that you have read the tips we have provided, so you won’t have a difficult time washing your Harley.

Best H11 Bulb: Your Guide To Making The Right Decision


Best H11 Bulb

​Light bulbs are among the most important parts of your car. They are not only an accessory that adds aesthetic value to your vehicle, but they are also essential when it comes to your safety. With this in mind, it is important to make sure that your headlights are the right kind for your needs. 

The best H11 bulb may come down to preference and performance. Here are some characteristics of some of the best-selling headlight bulbs.  

Bulb Type

Lumens per pair

Color

Fan Speed

Watts per pair

Fahren

LED

6,000 ?

6,500K

Fanless

60W

Sylvania 

HALOGEN

2420

3,675K 

NA

55W

Cougar Motor

LED

18,000

6,500K 

High Speed

80W

Philips

HALOGEN

2806

3,675K 

NA

55W

Beamtech

LED

12000

6,500k

Fanless

60W

(Credit – bulbfacts.com – some chart information)

To help you make a choice, in the rest of this post, we will be taking a quick look at some of the best options for the best H11 bulb. We will also discuss some of the factors that may have an impact on your decision, and more importantly, we will have a look at five of the best models that are available now.


What Is An H11 Bulb?

What is an H11 bulb? The H11 type bulb is used as a regular headlight for your cars. Some headlights are dual-beam, but H11 bulbs are single-beam lights. That means you need two bulbs per headlight.

This makes it work well for replacing the high beams, low beams, or fog lights. They come in both halogen and LED bulbs. Your car owner’s manual will let you know what type of bulb to use, or you can look at the bulb you’re replacing to make sure you have the correct number.

You’ll also notice that there are different types of bulbs. The halogen is cheaper, more fragile, won’t last as long, and may not be as bright. The LED light may be higher priced, is energy efficient, usually brighter, and lasts longer.

light brightness chart
Photo Credit: https://www.flickr.com/photos/carpartsblvd/4108957756

And don’t forget about color. Some lights look sort of orange, others white, and higher kelvin (K) lights look bluish.

Looking at photos of cars that have the bulb you want can help you decide if it is the kind that will work for you. Blue headlights may not be legal in your area since they tend to be too bright.


Headlight Bulbs Brightness Changes With Housing  

All headlight bulbs are brighter when the high beams are on. The problem comes when oncoming traffic is blinded by high beams. In order to get the best performance from your lights, the headlight beam pattern, housing, and lumens should be taken into consideration. 

  • Almost always, the more lumen or lux a bulb has in housing, the better it performs.
  • Be careful with any bulb over 6500K in color. It may be too bright to be safe.
  • LED bulbs are usually brighter in regular reflective headlight housing versus projector housing
  • Many LED headlights will perform very well in fog light housing and may perform better than in headlight housing.
  • Halogen bulbs tend to have smooth coverage over a road’s surface when in regular reflective housing. 
  • Some LED bulbs show a bit less smoothness than halogen bulbs in regular reflective housing and may have a dark patch here or there. This is usually made up by an LED’s brightness and if it has a good design.   

Top Picks for the Best H11 Bulbs

Having a hard time choosing which bulb to buy? In this section, we will discuss five of the best options you might want to consider and their features. To help you decide, we will also have a list of some of the pros of each light.


1. Fahren H11 LED Headlight Bulbs

AD

This bulb is a very bright LED bulb with a brightness of 6500K. The cool white color can light up the road well, and the light can reach about 800 feet ahead of the car. An impressive amount compared with the competition.

They are three times brighter than a halogen light yet will not blind oncoming traffic as some LED bulbs do. 

They are rated as IP68 waterproof, which means they can “withstand dust, dirt, and sand, and are resistant to submersion up to a maximum depth of 1.5m underwater for up to thirty minutes.” (samsung.com)

These lights work with most vehicles and come with a life span of about 50,000 hours. The compact design makes it easier to install. This light H11/H9/H8 plug will fit a standard factory socket.

Pros:

  • Produces clear light
  • Long-lasting functionality
  • Installation is a snap
  • Come in both cool white 6500 K and 80W
  • 50,000 hours of life

2. Sylvania H11 Silver Star Ultra – High-Performance Halogen Headlight Bulb

AD

Sylvania has gained a reputation as one of the best in the market, and this product is a testament to the global reputation that the company was able to build.

They have a world-class manufacturing plant, which is equipped with the latest technologies that allow them to produce high-quality H11 bulbs.

From their product line, this is the brightest down-road headlight. Such a feat is made possible because of the use of highly-engineered filament, which is complemented with an exclusive halogen gas mixture.

In addition, it also utilizes cobalt blue nano-coating technology, which is another innovation that makes it out performance many others within this category.

It also complies with all of the legal standards set in the United States. This means that it is legal to use, and most of all, its performance has been tried and tested.

This should be more than enough to provide you with the confidence that you need to choose this bulb if it meets your needs.

Pros:

  • Provides optimal night vision
  • Does not increase the glare
  • 4100 K color
  • About 145 hours of life

3. Cougar Motor H11 LED Headlight Bulbs

AD

This bulb is a bright LED bulb with a brightness of 6500K. The cool white color can light up the road well at 18,000 lumens.

It has a high-speed fan, which may help the bulb last longer than other bulbs with slower fan speeds.  

They are rated 150m range, which means they can operate well in rainy and snowy conditions.

These lights work with most vehicles and come with a life span of about 50,000 hours. (Normally, most LED Headlights will not last this long, but they should surpass regular halogen bulbs) These H11/H9/H8 bulbs will work well with most vehicles, with some exceptions.

Pros:

  • Excellent heat control
  • Works well with most car computers
  • Easy to install
  • 6000 K color
  • 50,000 hours of life may be possible

4. Philips H11 CrystalVision Ultra Upgrade Headlight Bulb

AD

Philips has more than a century of experience in manufacturing light bulbs, which is sufficient reason for you to believe that this is indeed a good choice. It has passed the requirements of the Department of Transportation, which means that it is street-legal.

It is advertised as a 4000K bright white light, which makes it a promising option. This will provide you with the optimal white light that you need on the road.

There are some, however, who noted that its brightness does not really seem to be as advertised.

One good thing about this model is the blue cap that is integrated into the top of the bulb. The latter will provide a cool blue effect, which will make the light warmer, especially when you are driving during the daytime.

This is one product that we can highly recommend to most car owners. In spite of the fact that it is made by a trusted brand and even if it has impressive features, it can be useful for most car owners.

Pros:

  • Street-legal
  • Made by a trusted brand
  • Around 3600 K color
  • 150 hours life

5. Beamtech  H11 LED Headlight Bulb

AD

Although this is a brand that many of you have not heard of in the past, this can prove to be a promising option. It can deliver bright light, which has a stated output of 12,000 lumens at 6500k. This will allow you to enjoy optimal illumination when driving.

With this H11 light bulb, there is no need for you to be worried about the installation. In fact, its installation can be completed within just 20 minutes. Just follow the instructions, and for sure, you won’t have to sweat.

This bulb is waterproof, and one more thing that is worth noting is that it will not drain power on start-up. This is an innovation that allows the light to deliver an abundance of benefits, such as durability and energy efficiency. It also reduces electromagnetic interference and will make sure that it won’t produce glare.

Lastly, it only consumes 60 watts of power. With this, as has also been pointed out earlier, you can be confident that it will be energy-efficient.

Pros:

  • Easy to install
  • Exceptional life span
  • Does not produce dark spots
  • 6,500 K color
  • 50,000 hours life

Types of Headlight Bulbs

headlight bulb types

When looking for a light bulb that can be used for your headlights or fog lights, it is important to be aware of the different options that are available, as well as their pros and cons. Below are three types of H11 bulbs:

  • Halogen: Since it was launched in the 1960s, it has become one of the most popular choices when it comes to H11 light bulbs. They are cheap and simple to install, with some being able to offer a lifespan of up to 1,000 hours.
    • However, one of the problems with this type is that while it creates bright light, it can also generate heat. It can also be contaminated by various substances and is quite fragile, making it important to handle with care.
  • HID: The efficiency that is produced by this type of bulb is commendable. It is made from gases and rare metals. They can last more than 2,000 hours, and while they can produce exceptional brightness, the power consumption is minimal, usually only 35 watts.
    • However, it has the potential to create a bright glare, which makes it a potential disturbance in traffic. It is also expensive and complex.
  • LED: This is an excellent choice among designers because of its size. With its thinness, it can be easily shaped in different forms. Its brightness may not be comparable to HID, but within only a few seconds, it will be able to achieve its optimal brightness. Its biggest benefit is its energy efficiency.
    • In fact, many houses today and TVs use LED lighting because of their minimal power consumption. Its price is close to that of halogen light, so most people are choosing these lights as a brighter, longer-lasting solution.

Factors to Consider When Buying H11 Bulbs

winding road night

When choosing the best H11 bulb, the following are some of the most important things that should be taken into consideration:

  • Compatibility: One of the first things that you should do is make sure it is compatible with your car. Not all light bulbs will be compatible with your headlight system. Double-check your owner’s manual and read any reviews about how they fit in your car model. 
  • Ease of Installation: The good news is that H11 bulbs can be installed on your own. You do not need help from a mechanic, nor do you need to be a pro.
    • You just have to make sure that it is easy enough to install. The manufacturer may be able to provide instructions on their website or packaging, allowing you to complete the job easily. In addition, make sure that you do not hold the glass part of the bulb, as this can break.
  • Lifespan: Make sure to choose a bulb that is going to be long-lasting. More often than not, the manufacturer will state the lifespan of their H11 bulbs based on the number of hours. ​
    • Although many LED bulbs claim to have a long life, the heat produced by these bulbs can shorten their life considerably. Yet, they will usually last twice as long as halogen lights if they are built well.
  • Brightness: The main purpose of H11 bulbs is to provide the illumination that you need on the road. It is important to make sure that it is bright enough so that it can function as expected.
    • Nonetheless, there are some that can be too bright, which can blind other drivers. Pick one that is street-legal. These are usually less than 100-meter beam length and yellow or white in color, not blue.
  • Feedback: To help you decide on which one should be chosen, it would be best to gather feedback from other people. Most reviews can tell you the specific information that will help. Getting an expert review is often helpful as well. I like bulbfacts.com for its reviews and recommendations.

Conclusion

Your search for the best H11 bulb will never be an easy undertaking. With the abundance of options that are available, picking the right one can be challenging, especially as each manufacturer will claim that they have the best. To make things easier, limit your choices to the brands and models that we have mentioned above. 


References

https://www.bulbfacts.com/

https://www.angieslist.com/articles/which-headlights-shine-best-halogen-hid-or-led.htm

https://www.lifewire.com/how-long-should-headlights-last-4117128

https://blog.1000bulbs.com/home/halogen-hid-and-led-headlights

https://www.samsung.com/global/galaxy/what-is/ip68

https://www.powerbulbs.com/us/blog/2017/10/which-bulbs-are-road-legal