Home

Recent Posts

Step-by-Step: How to Service a Car A/C (Air Conditioner)


How to Service a Car AC (Air Conditioner)

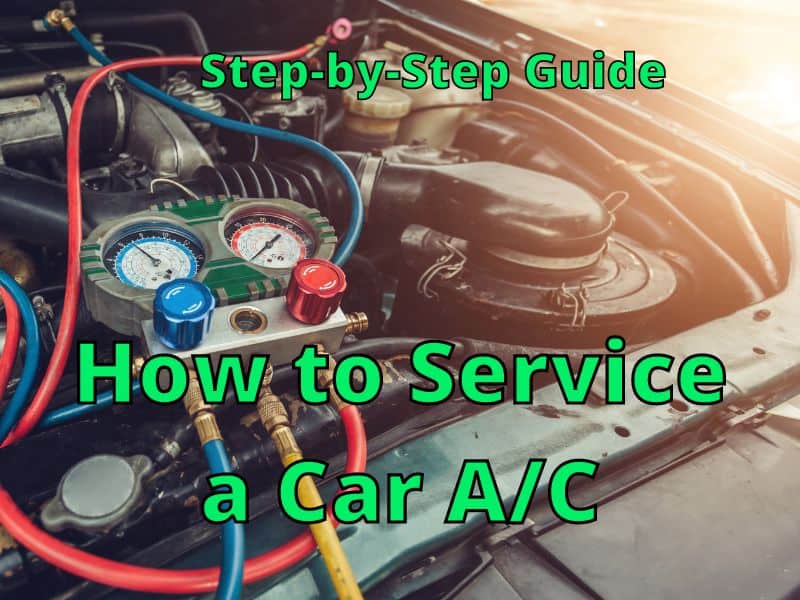
There is nothing worse than trying to cut on your car A/C on the first warm day of the year only to get lukewarm air blowing or (even worse!) no air at all. The air conditioning system of a car is one of the most complicated systems on the vehicle, and services depend on what part of the A/C system is malfunctioning. 

Servicing a car’s air conditioning system involves diagnosing the part of the A/C system that is not working, determining if the owner can service it, and then repairing the system. Car A/C problems can range from slow freon leaks to seized-up compressors and usually require a mechanic.

A/C repairs usually can’t be performed easily by the car’s driver, but in the case of a slow freon leak, you might be able to keep your car’s A/C functional a little while longer before a professional needs to step in and intervene. Keep reading and learn more about common problems with a car’s A/C system and how you can service them, as well as how to maintain your car’s air conditioning system. 


First Things First – Know Which Car A/C Parts Need Professional Service

Several aspects to a car’s air conditioning system may require maintenance at one point or another during the service life of the car, some more accessible to the driver than others. 

When you look into servicing a car’s air conditioning system, you will typically run into problems in one of the following areas: 

  • A/C compressor: The compressor in a car’s air conditioning unit is responsible for compressing refrigerant freon gas, which quickly heats it. 
AC compressor
  • A/C condenser: Once the compressor has compressed and heated the freon, it is passed to the condenser, where it is formed into a supercool liquid. 
AC Condensor
  • A/C Receiver-drier: The receiver-drier is the part of the car’s A/C system that removes moisture from the air in the A/C system. 

AD

  • A/C evaporator: The evaporator is the part of the car’s air conditioning system that turns the supercooled freon into a refrigerant mist. The air in the car’s air conditioning system is blown over tubes containing a supercool mist to remove heat before blowing it back into the car’s cabin. 

AD

  • A/C hoses: A/C hoses send air and freon throughout the car’s air conditioning system. If these hoses spring a leak, freon can leak out of the car’s A/C system to the point that it no longer blows cold. 
AC Hose
  • A/C blower motor: The blower motor is the part of the car’s air conditioning system that pushes cooled air from the evaporator back into the car’s cabin. 

AD

  • Electrical circuits: If a car suffers from wiring problems, it can sometimes interfere with the car’s ability to trigger the air conditioning system from the cabin instrument panel. This kind of systemic electrical issue is usually caused by faulty wiring harnesses or bad relays. A car wiring diagnostician is typically required to repair this level of A/C malfunction. 

AD

Because these components are often located deep in the guts of a car’s chassis and the engine compartment and sometimes require specialized equipment to repair correctly, these kinds of A/C repairs are usually left to an automotive repair shop rather than attempted at home. 

There are some easy ways to figure out how bad your car’s A/C problems are with a little troubleshooting. Keep reading to determine what part of your car’s air conditioning system is malfunctioning and what you can do to fix it. 


My Car’s Air Conditioning System Is Not Working! A Troubleshooting Guide

So, you go out to your car, turn the key, click on the air conditioning system, and—nothing. Perhaps there is hot air, which can feel even worse on a blazing summer day than no air at all. What do you do at this point? It depends on which symptom your car is presenting with. 


No Air Blowing from the Car’s A/C Unit

AC No Air

If you turn your car’s A/C system on and there is no air at all, this could be a sign of several problems. The worst-case scenario is that the car’s A/C compressor dies. The relatively high cost of the parts involved in replacing this component, plus the intensive labor involved, means that you will likely end up spending between $1,500 and $2,500 at a mechanic’s shop to get your car’s A/C replaced. 

If a car’s A/C compressor has quit, many mechanics will not replace the compressor without using a kit that also replaces other components of the A/C system, such as the condenser and drier-receiver. This is because a new A/C compressor can be damaged by debris from older or damaged parts in the air conditioning system once it is operated. 

If a mechanic agrees to replace the A/C compressor without replacing the associated components of the A/C system, in many cases, they will do so on the condition of the A/C compressor, not receiving a warranty. With a part as expensive as an A/C compressor, it simply is not worth the risk. 

  • NOTE: If you have no air blowing from your car’s A/C fans, it is essential to determine whether or not the car’s radiator fans are running. If the car’s radiator fans are also malfunctioning as the result of an electrical issue, this can lead to the car’s engine overheating (a much more significant repair than the air conditioning system). If there is any doubt as to the function of the radiator or the thermostat, have the vehicle towed to a mechanic.  

Blowing Tepid or Warm Air

AC Warm Air

If your car’s A/C is still blowing but is blowing hot or a little warmer than usual (and is not cooling, no matter the setting), your likely culprit is a leak in the freon system. A slow leak can usually be limped along by recharging the car’s A/C system once a year during the warmer months, but a more significant leak in the A/C system will prevent it from being able to hold freon at all. 

While a car’s air conditioning system is designed to be a closed vacuum system, age can eventually affect the rubber, plastic, and metal components of a car’s air conditioning system until leaks develop as a result of dry rot and other factors. Sometimes a smoke or leak test can be run on the car’s A/C system to see if a specific hose is leaking. If a major leak is found in the system, the hose can then be replaced. 

However, leaks in the A/C system are often slower and occur at disintegrating seals throughout the A/C system. This causes a slow freon leak in which the A/C gets gradually less and less cold until it stops blowing cold air entirely. At this point, the freon in the car’s A/C system must be refilled or recharged. 


Barely Blowing Air

Barely Blowing Air

If air is still blowing through the car’s vents but does not feel as forceful as it should, this can be the result of the air cabin filter becoming clogged. Check the filter in the car’s engine compartment to ensure that it does not require replacement. Once a dirty, clogged cabin air filter is replaced, this can usually restore A/C airflow to the car’s cabin as long as other components are not defective. 

A good time to have your car’s cabin air filter checked is during a routine oil change or a trip check. Mechanics can inspect the air filter and replace the filter as necessary. 


Air Not Blowing Out of All Vents

AC from Only some vents

Another issue that can crop up in the car’s A/C system is when cold air will blow out of one side of the car’s dashboard but not the other side. This is usually the result of an issue with the blend door actuator, a component in the car’s A/C system that mixes hot and cold air to achieve the required temperature of the A/C’s control panel. 

The blend door actuator can be damaged by debris in the A/C system or can become bound because of age or broken linkage. This is one of the few parts of a car’s A/C system that can be repaired individually rather than as a systemic unit. 


Servicing a Freon Leak in a Car’s Air Conditioning System

Servicing a Freon Leak

If your car is starting to blow a little warmer than you’d like, one of the first pieces of advice that you’re likely to encounter is that you need to “top off” your car’s freon. In older cars, this is usually the most cost-effective way to keep a car’s A/C system running for as long as possible without being forced to replace it entirely. 

It is essential to keep in mind that topping off a car’s air conditioning system incorrectly can damage delicate components in the system and inadvertently cause a more expensive repair. Without a pressure gauge and the proper specifications, this is not a procedure that should be undertaken unless you have prior experience in automotive maintenance. 

The safest way to get your car’s A/C recharged is to take it to a mechanic. Here are some typical aspects of a freon recharge service:

  • Typically runs around $200 to $280 depending on the cost of freon and the size of the vehicle.
  • It can usually be performed in a few hours, sometimes while you wait if you secure an appointment at the mechanic’s shop ahead of time. 

If your car has a slow freon leak, a mechanic will usually not just recharge the system with freon; they also add a paginated oil to the system that will show up under a UV light inspection if all of the freon leaks out of the system again. This will hopefully help mechanics discover the direct source of the freon leak and repair it for the next season when the freon leaks out again. 


Tools Used to Diagnose Freon Leaks in a Car Air Conditioning System

AD

Consumer Freon leak detectors are available for those who want to identify if a leak is occurring. 

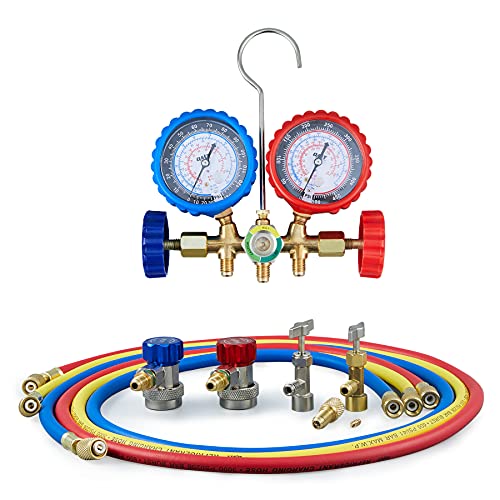
Mechanics use two major tools other than direct observation to detect and diagnose freon leaks in a car air conditioning system: 

  • Smoke test: A smoke test is performed using a piece of equipment that blows smoke through the car’s A/C system to help mechanics identify any potential leaks in the system where freon might be escaping, such as a faulty A/C hose seal. This is an excellent test to perform for more massive A/C freon leaks. 
  • Paginated oil: For smaller freon leaks, paginated oil is usually included in a freon recharge service along with the freon itself. Not only does this paginated oil help lubricate the A/C system and shows mechanics exactly where potential freon leaks might be hiding by highlighting them under UV detection

In cases where a car’s air conditioning system is running completely hot, mechanics will typically try to discover the source of the freon leak before recharging the system. This is because if there is a significant leak in the A/C system, the freon will be almost immediately lost, and the mechanics will be right back to square one on the vehicle in a day or two. 


Can I Repair My Car’s Air Conditioning System Myself?

Repair AC Yourself

​​​​Freon recharging kits available online and in automotive supply stores will allow you to recharge a car’s freon at home. While this might seem like a convenient alternative to taking your car to the auto mechanic, there are some significant risks involved with working on your car’s A/C system yourself. 

The biggest risk of recharging your car’s A/C system at home is operator error—if you add too much freon or over-pressurize the system, it can permanently damage the A/C compressor. This can turn a thirty-dollar repair into a repair that costs more than the value of the vehicle in some cases. Depending on an individual’s experience in auto repair, this may or may not be a risk worth taking. 

If you do decide to go about refilling your car’s freon on your own, it’s a good idea to read your car’s owner manual carefully and watch several online videos or read several tutorials on how to do it before attempting it on your vehicle. It is also better to attempt a first-time repair on a vehicle with a more experienced mechanic observing and helping out if you can swing it. 


How to Refill a Car’s Air Conditioning System with Freon – DIY Method

AD

Once you decide you have enough automotive repair experience to attempt a do-it-yourself recharging kit, you can pick one up either online or at an automotive supply store. If you buy the parts of the recharging kit individually, you will need to buy two cans of refrigerant (r-134), a refrigerant dispenser, and a pair of goggles for safety since you’re working with compressed freon. 

To recharge the freon in your car’s system, follow these steps: 

  • Verify that your car’s A/C compressor is functioning (if not, there is no point in recharging the system).
  • Find the low-pressure side refrigerant fill port. 
  • Attach the refrigerant dispenser to the fill port. 
  • Recharge the system, monitoring system pressure as you do so.

To recharge a car’s air conditioning system on your own successfully, you must follow the instructions included with your refrigerant dispenser to the letter and make sure that you don’t over-pressurize the A/C system by accident. If you do, you might end up spending significantly more to get cold air for the summer than you anticipated. 


Risks Involved with DIY Freon Refills

common mistakes AC servicing

There are several points in recharging a car’s air conditioning system where you can inadvertently cause damage to the A/C system. Here are some points to keep in mind when you are recharging your car’s freon:

  • If your car has a major A/C leak, recharging the system with freon is a waste of time and money. Within a few days, all the freon will leak out, and the air conditioning will be running hot again. It is usually easier for a mechanic to verify the severity of a car’s freon leak than the car’s owner.
  • The high-pressure side hoses in the A/C system become extremely hot, and inadvertently touching them while recharging the system can lead to a significant burn.
  • Turning the freon can upside-down during a recharge can lead to the transfer of liquid freon rather than gas. While experienced mechanics are capable of doing this gradually with suction lines to prevent damaging the compressor, most DIYers are not. It is not worth the risk to the A/C compressor if you are not 100% sure what you are doing.
  • If you accidentally add too much freon to your car’s A/C system, venting excess freon into the air is illegal per Section 608 of the Clean Air Act. If you believe you have accidentally over-pressurized your system, you will be forced to take it to a mechanic to undo the damage. 

It can be tempting to try to recharge a car’s air conditioning system yourself, especially if you are dealing with an A/C unit in an older vehicle that is not worth much. But unless you are willing to risk losing the air conditioning entirely, it is a good idea to leave A/C refills to the professionals unless you’re confident you know what you’re doing. 


Is It Worth It to Replace the A/C in Your Car?

consider factor when fixing AC

If your car’s air conditioning unit needs expensive service, you might wonder whether replacing the A/C in your car is even worth it. Ultimately, this depends on the age and condition of the vehicle, as well as the climate that it is driven. 

  • Someone who lives in a colder climate might be content to forego air conditioning a majority of the time, but someone who lives in a southern temperature will be much more likely to jump on their A/C repair as soon as it’s necessary. 
  • It also depends on the severity of the repairs needed for the car’s air conditioning. If a car only needs a freon recharge once a year, for two hundred bucks a year, it can be well worth keeping an older car running with a cool air conditioner. 
  • However, if your older car throws an air compressor that will cost more to replace than the value of the car, it is worth taking a second look to see if replacing the compressor is even worth the trouble. 

You could likely find a car of equivalent value with a working air conditioner already for that amount of money. An A/C compressor kit is one of the most expensive repairs on most vehicles, so it is worth considering whether replacing the car entirely wouldn’t be a better option depending on the rest of the car’s condition.


Maintaining a Car’s Air Conditioning System

Maintain AC

When it comes to car A/C repair, the bottom line is that you’re likely going to need to contact an automotive technician to handle any but the most minor of car A/C repairs unless you already have some experience in automotive repair yourself. 

A car’s A/C system can be one of the trickiest systems on the entire car to repair as a layman, and doing it incorrectly can lead to further damage that can potentially turn a job that costs a few hundred dollars in parts into a job that costs a few thousand instead. Most drivers do not have the level of experience to repair a car’s A/C system safely and effectively on their own. 

However, there are many ways that the driver of a car can service their car’s air conditioning system to keep the system in good working order and minimize the need for repairs. 

Here are some of the steps to ensure that a car’s air conditioning system remains working well:

  • Run the air conditioning system at least once a week for at least ten minutes, regardless of the ambient temperature. This will help keep the gas pressure in the A/C system equalized, which in turn goes a long way towards preventing A/C leaks. 
  • Run your car’s defrost mode regularly (at least for ten minutes once a week) to evaporate any excess moisture. This is especially important in humid or damp climates.
  • Replace older A/C hoses or other defective components to prevent freon leaks in the air conditioning system. Usually, multiple air conditioning components are replaced all at once during an air conditioning service to minimize the cost of labor and prevent damage to new parts by older auxiliary components. 
  • Keep items out of the vents. Small children are notorious for pushing pencils and other small knick-knacks into car air conditioning vents, where they can potentially cause damage to the system further down the line. Make sure that your vents remain clear of any debris.
  • Prevent water damage. Water damage in a vehicle from flooding or rain can not only cause mildew in the cabin compartment, but it can also cause mildew in the car’s A/C system. This can lead to damaged components and an unpleasant smell in the vehicle.
  • Change the air cabin filter regularly. Not only does this ensure proper air circulation through your A/C system, but it also increases the air quality in the car’s cabin. Cabin air filters are usually inspected during a car’s routine oil change, but you can request this service if it is not offered.
  • Do not run A/C with car windows down. This forces the car’s air conditioning unit to work much harder than it has to, causing the entire system to age and deteriorate more quickly from the additional workload. 
  • Get your car’s A/C system maintained regularly. Recharging the system every two years once it starts to lose some of its coolness can help you keep your air conditioning blowing ice cold and help mechanics diagnose, identify, and repair more minor problems within the A/C system before they become a considerable expense.

Maintaining a car’s air conditioning system is much easier than trying to replace it, so it’s a good idea to prevent added stress on your car’s A/C if you can make it last longer. 

Once a car’s A/C system is old enough to fail, the car itself is often comparable in value to the A/C repair. This can make repairing the air conditioning on an older vehicle a tough choice, especially when you could buy a used car for roughly the same price or put a down payment on a new one. 


Servicing a Car’s Air Conditioner Can Be Hard for Novices

Because there are so many different components that can break down in a car’s A/C system, and many of them are difficult to access or observe properly without specialized tools and supplies, many services related to a car’s air conditioning system are better left to professionals. It is possible to recharge your freon using a do-it-yourself kit, but those who do this risk damaging their A/C system accidentally. 

Luckily, the low cost of servicing a car’s air conditioning system with a freon recharge every few years is well worth it to keep your ride in cold air.  


References

https://www.jiffylubesocal.com/jiffy-lube-blog/2017/09/tips-maintain-cars-air-conditioning-system/

https://ricksfreeautorepairadvice.com/vent-blows-cold-one-side-hot-on-other-side/

https://autoservicecosts.com/ac-recharge-cost/

https://www.epa.gov/section608/section-608-clean-air-act

https://driving.ca/auto-news/entertainment/think-hard-before-fixing-that-broken-air-conditioner

https://www.autozone.com/diy/climate-control/how-to-recharge-car-ac

12 Ways to Prevent Car Doors From Rusting


Prevent Car Doors From Rusting

Purchasing a vehicle is a major investment for a lot of people. We want to protect our investment by keeping our vehicle running smoothly and looking good. Rust can be like an infection on the body of our vehicle in places such as the doors. What is rust, and how can we prevent it? Let’s roll up our sleeves and find out.

Here are one dozen ways to help prevent car doors from rusting:

  • Consider Climate and Weather
  • Keep Vehicle Clean and Dry
  • Remove Door Drain Plugs and Clean
  • Clean Off any Substances Quickly
  • Store Out of the Elements
  • Install Mud Flaps
  • Watch Where You’re Going
  • Repair Damage Right Away
  • Keep Your Car Polished
  • Use Rust Prevention Spray
  • Do Thorough Winter Cleaning
  • Inspect for Scratches and Bubbles in the Paint

This is a guide to a better understanding of rust and what it means to vehicles. Educating yourself on rust will help you in preventing it. 


Rust Problems and Prevention

What is rust, anyway? You may be wondering what exactly rust is and what causes it. We do know that it is unsightly and potentially an expensive problem to have on your hands (or on your car doors.)

That ugly growth on your car door could cost you more than your peace of mind if you don’t properly address it in a timely manner. But, for now, let’s just think in terms of prevention, assuming you do not have any current rust issues that you are dealing with.

Technically rust is a reaction that happens called oxidation. Oxidation occurs when water meets metal. Water can come from nature in the form of ice, snow, rain, or even air moisture called humidity. It can even come from living near the ocean and having constant misty breezes blowing over your vehicle.

Rust-causing water can come from things outside of the weather, too. Rust is a naturally occurring reaction. Fortunately, there are plenty of simple things that you can do to prevent rust from forming on your vehicle. 

Frequent inspection of your vehicle will help your stay ahead of tons of issues. You don’t have to get out the magnifying glass and get down on your hands and knees every single day. But if you are familiar with the condition of your car, you should know where to watch for rust.


12 Ways to Prevent Car Doors From Rusting

Though rust is a naturally occurring reaction, it won’t happen to your vehicle if you take care of it properly. Part of vehicle maintenance and care includes understanding what the environment can do to your car. 


1. Consider the Climate and Weather

SNOW AND SALT RUST

The weather in your area may not have much of an effect if conditions are typically mild. Not many places in the world get weather that is mild all of the time, so we should take into account the following. Climate can have a major effect on the condition of the metal. 

  • Humidity– Rust is created from water and metal mixing. Humidity is water, also known as moisture in the air. Not all regions of the world have problems with humidity, while others have high humidity levels throughout the year.
  • Salty air– Living by the sea can be wonderful with the calming of the water and wildlife. But, if you live near a large body of saltwater like the ocean, you will definitely notice how destructive saltwater can be. Washing your vehicle 3-4 times per month is suggested for rust prevention in life by the sea.
  • Snow and salt– It is no secret that winter is harsh on every aspect of life. When temperatures drop, some cars get stored for the next few months. Car owners cringe at the idea of salt getting all over their cars and wheels. Plus, some cars simply are not good in the winter.

When your neighborhood starts sprinkling salt or sprays brine on the roads, you will notice a film forming on your car. This is a warning. Every minute that salt/brine sits on your paint, it is eating away at the top coat and paint, headed to spread rust to your car doors and entire vehicle. 

It is a challenge to wash your car in the winter, but you must! At least once a week.

  • Sand– Small rough particles that fly through the air like sand can be very abrasive on vehicle paint. Over time, sand can literally wear away the paint, exposing the bare metal underneath. When the metal body is exposed, rust can set in at any time.
  • Bird droppings– Birds are lovely, but they can wreak absolute havoc on our vehicles. Bird droppings can stain paint, and eat through paint, if not washed off. We have all made the mistake of parking under a tree and regretting it in the morning.

Most of these issues can be kept at bay by keeping up with washing/detailing your vehicle.


2. Keep Your Car Doors Clean and Dry

wash your car keep it dry

Without a doubt, one of the best ways to prevent car doors from rusting is to keep your vehicle clean. Washing your vehicle is a way you can show respect for your belongings and ensure it stays looking nice for a long time.

Whether you are hand washing it in your home driveway with a bucket and a hose or you take it to your favorite local car wash, you are helping to prevent door rust. There are pros and cons of both home washing and taking it to a car wash.

  • With home washing: You have the obvious benefits of the comforts of home, and it is often more cost-efficient to wash at home vs. dropping $10 (or more) each time.
  • At a car wash: Your session is on a timer, and that timer is constantly ticking down the seconds to when you will have to feed it more money. But their commercial equipment is often more powerful and effective than home sprayers and tools.

Either way, lean in close and put some elbow grease into it. The lower half of a vehicle’s door is typically the first place rust begins to show up. Pay some extra attention to that area when you are cleaning and applying a clear coat protectant.

You have paid plenty of attention to the parts of the vehicle that you can see, but what about the parts that are not visible from a standing position? Don’t forget to spray down the undercarriage and wipe down all the spots you didn’t think of before. Road dirt and other debris can get under there and start to form rust.

Keep It Dry!

Rust forms when metal, water, and air get together. Therefore, it is in your best interest to keep your vehicle as dry (and clean) as possible. After you wash it, thoroughly dry it with clean, soft towels.

After it rains, it is wise to get out there and towel dry your vehicle. Rain may be essentially clean water, but it can be damaging to your paint and underlying metal body. You don’t have to go crazy trying to keep every single drop of liquid off of your vehicle, but just understand that if left, it can be harmful to your cause of rust prevention.

Another way that we can keep it dry is after a good wash or a healthy rain check the door drain plugs. See the next section for details. 


3. Clean Your Door Plugs

clean door plugs

Some of you might be saying, “door plugs?” while others may be saying, “oh yeah!” These are not found on every vehicle, so don’t go crazy looking for them. But, when your door does have a plug, it will be on the bottom of an open door.

Otherwise known as a drain hole, there are holes with plugs in them to drain out water. Dirt and debris do get stuck in there, clogging the drains. When the drains are clogged, water cannot come out.

Also found around bumpers or near the trunk lid, drain plugs are usually round black plastic plugs that should easily slip in and out. See the owner’s manual for the exact location and instructions.

When water is stuck in metal areas such as your car doors, and it just sits there, over time, it will cause your vehicle doors to rust. We may not even know about these drains, so how would we know the problems they can cause us? Tell a friend what you just learned!


4. Clean Off Any Substances Quickly

Clean Off Any Substances Quickly

Washing your vehicle regularly is a great way to wash away all the elements that you can (and cannot) see that could possibly eat through your clear coat and create rust. 

Cleaning your vehicle may be something that you do as a weekly routine while never stopping to think about what you are washing away. Random things like bird droppings could be very damaging if not washed off.

It is mostly acidic liquids and such that you have to watch out for. Acidic liquids can eat through the top coat and paint, resulting in rust. The rust won’t happen overnight, but it may seem to come out of nowhere if you do not pay attention.

Do you live in an area where it snows in the winter months? Then you should know all about the salt that is sprinkled or the brine that is sprayed on the roads to prevent ice from forming. These salty things are good for keeping the roads clear, but they are not good at all for your clear coat, paint job, or undercarriage of your vehicle.

Salt and brine are the enemies of your vehicle, although they can be your best friend. Even if the forecast says there is more ice/snow in the near future, it is never a waste of effort to at least give your car a quick rinse to get the salt/brine off.

Act Fast

Should there ever be a spill on your car, such as coffee or soda, or something non-edible such as a harsh chemical or cleaning product, wash it off immediately. If you can’t do a full wash right away, at least wash the area that was affected by the spill.

One more big thing to look out for is gasoline drips near your gas tank. We can be as careful as possible, but accidents do happen, and you don’t want to let gasoline sit on your paint.


5. Store Your Vehicle Out of the Elements

Store Your Vehicle Out of the Elements

Do you have access to a garage? Storing your vehicle in a garage when you are not using it is a great way to keep it safe from the elements. Weather, nature, neighborhood kids. 

Most of us use our garage for storage, and we are not talking about storage for the vehicle. Clean out the clutter and make room for something that matters more than holiday wrapping paper. A vehicle is a major investment in most people’s lives. Do what you can to protect your investment. 

If you do not have a garage or have access to one, you could look into the portable car shelter tents that are on the market. They typically cost a few hundred dollars and are sold in kits that you can assemble in the outdoor garage yourself. 

Some residences do not have a yard or an outdoor area to put up a shelter for their vehicle. In these cases, vehicles should be parked in the shade, but not under a tree that drops leaves/sap/flowers, and especially not one that is inhabited by birds that tend to have excessive droppings, when at all possible.

If you have the choice, park your vehicle in the best parking spot available. This will not only decrease the probability of you having to wash it more often but will also keep it away from possible rust producers. You may also consider investing in a car cover for use during the harshest weather conditions.

You may be storing vehicles that you are not using on a regular basis. Vehicles that are in long-term storage should be checked on, if possible.


6. Install Mud Flaps

Install Mud Flaps

While driving, tires do get debris stuck in between the tread, whether we are cautious or not. This debris can be things like rocks or dirt or any little thing that is on the road. This debris can be picked up from the road and thrown up at your vehicle from the front tires.

Though they may not be the coolest accessory that you could possibly add to your vehicle, installing mud flaps on your wheel wells will be worth it. Check with your dealership to see if they sell them before you go to the store. 

A set of mud flaps can be plain or personalized with patterns, sports teams, or your vehicle brand logo. Installation can be a DIY project if you are into it.  If you are not into it, it should be a quick and affordable job done by a professional mechanic.


7. Watch Where You’re Going!

Watch Where You’re Going! Avoid scratches

Coming to a fork in the road, and you don’t know which path to take? Well, if you are concerned about keeping your vehicle in a certain condition, it is suggested to take the smoother road. 

Driving through bumpy, muddy, dusty, or sandy roads may not be avoidable in some cases. But, if you have a choice, driving on smooth and clear roads minimizes the chances of debris flying up and nicking your paint. We know that scratches can lead to rust, right?

Likewise, watching the road for puddles of sticky liquids that could splash up. Keep your vehicle as dry as possible when focusing on rust prevention. Moisture and metal can breed rust.  

Driving past construction sites can invite all kinds of hazards for a vehicle, including flat tires from screws and other hardware on the ground and dangerous obstacles/debris hitting and scratching your vehicle. Avoid construction when you have the option.


8. Repair Damage Right Away

Repair Damage Right Away

Did you know that small nicks and dents can potentially lead to bigger problems down the road? Problems like paint chipping and rust formation can happen. 

Little scratches from putting your key in the door or from your jewelry may not seem like a big deal at the time. But, if scratches are left untreated, they can allow rain and other elements to slowly get under the clear coat and paint, where rust begins.

When damage is greater than a tiny scratch, say from a car accident or powerful hit to your vehicle, it can result in immediate damage and also future damage. Immediate damage is usually obvious and can be further diagnosed by a certified auto mechanic. 

Future damage is what happens when you do not get the necessary repairs fixed. If there is crinkled or damaged metal from the accident, you expose your vehicle to the risk of getting rusty quite quickly. Leaving bare metal open to the elements is an invitation for rust to attack.

Get the repairs done as soon as possible to prevent rust from setting in. You will be happier when you do, and your vehicle will, too.


9. Keep Your Car Polished

protect car paint

Not every vehicle is created equal; therefore, not every detail of maintenance will be the same for car owners wishing to prevent rust. When vehicles are manufactured, they are painted and finished with a thick, durable glossy clear coat finish to keep them looking shiny and to protect the paint underneath.

But the general rule is to wash the vehicle regularly, using high-quality products. Search for the best clear coat protectant/shine product that you can find. Applying a protective finish will serve as a good defense against the elements and prevent rust spots from starting.

If it makes you feel more comfortable with the task, consult your dealership and ask them what line of products they recommend for your vehicle. There may be something special that works better for your clear coat and paint.

If you are not able to wash, dry, and shine your vehicle regularly, you may want to look into hiring a professional. Drop it off at least once a month. More often than that, depending on the amount of use, weather, budget, and personal preference.  Be sure to specify what you are looking for. If you are concerned with rust prevention, there are certain things they can do and products they will use to get the job done properly.


10. Use Rust Prevention Spray

Rust Prevention Spray

Using a clear coat protectant at the end of a wash is usually enough, especially for newer cars. Did you know that if you are buying a brand-new car, you can order it with an extra rust protectant?

But, in extreme weather cases or for older vehicles, you can take it a step further and apply a special rust prevention product, typically a spray. This product can be used if you have seen rust forming or if you just want to get a few steps ahead of it.

Rust prevention sprays are an investment that you will not regret purchasing. They are very affordable and prevent costly jobs like rust removal and repair. If you have to have a vehicle panel (like a door) repainted by a professional, it can get extremely expensive.

For the DIY cleaners out there, these sprays can be found in any auto parts store. Just ask the clerk to point you toward the rust prevention spray for the vehicle body. For those that hire a car detailing service, ask if they offer a rust prevention spray add-on.


11. Do Thorough Winter Cleaning

car care in winter

Most areas experience cold weather and the threat of winter precipitation. And it comes around every single year. Arm yourself with the knowledge of what winter means to vehicles and vehicle care.

To prevent winter damage and stress on your vehicle, it helps to understand what the elements can do.

Winter brings weather conditions such as ice and snow. Driving in these conditions can be dangerous. Luckily, most states have fleets of trucks that are sent out to treat the roads we drive on so that we can still get around town.

The downfall of the treated roads is what they are treated with. Typically trucks sprinkle salt or spray brine (a liquid salt compound). Either of these can be very damaging to our vehicles. They eat away at the paint and metal on a car.

Extra washing is encouraged to keep the salt from sitting on your car and doing tons of damage. The longer that salt sits on your car, the more damage it will do in the long run. Don’t neglect the undercarriage of your vehicle. Get under there and spray it down.


12. Inspect For Scratches and Bubbles In the Paint

Inspect For Scratches and Bubbles In the Paint

Oh, those pesky little bubbles! We visually inspect our vehicles for scratches and dents all of the time. Another thing we should be on the lookout for is patches of bubbles. Or even a single bubble in the paint.

Bubbles mean that something is going on under the surface. The fact that we have a signal like bubbles to let us know about the underlying issue is good. At least we know about possible rust before we have big patches forming.

If you can access the backside of the panel that has the bubbles on it, get in there and do a thorough inspection. Use a flashlight and take pictures if you can.

Moving forward will depend if you find rust and if you are going to do the work yourself or hire a pro. If you are not sure, it cannot hurt to get a second opinion. Take it to a professional and just ask what they recommend for your problem.


How to Remove Door Rust?

We do all we can to prevent rust from forming on our vehicles. If you do happen to spot a bit of unfortunate rust, you will want to act as quickly as you can before the little spot turns into a large one. There are several DIY solutions for rust removal. That rust isn’t going to remove itself, so let’s get to it.

Fortunately, if you are just catching your first sighting of rust, chances are it is probably just surface rust. Lucky for you, surface rust is a far less serious problem than rust that has had time to eat through the metal causing unsightly holes in your car door.

DIY rust removal products are sold in a few different styles. Most places sell it as a kit since you will often need more than just a product to get the job done properly. You may find pump sprays, aerosols, gels, pastes, or powders for removing rust from cars.

You should follow the instructions on your kit. You may also need sandpaper, primer, and touch-up paint. Always start with a clean and dry surface, so give it a thorough wash down.

If you are not feeling confident or comfortable with this project, you are not alone. Most people would not take this job by themselves. Hiring a professional auto body work specialist is the best way forward before the rust spreads.

13 Steps to Replace a Car Starter: The Complete Guide


13 Steps to Replace a Car Starter

The undeniable fact that an automobile’s moving parts are sophisticated affects most of our thinking when it comes to repairing them. However, luckily, not all of a car’s body parts are complex and require a mechanic’s touch. For example, replacing a car starter is one of the more common, simpler fixes that can be done by the owner of a vehicle. 

You can replace a car starter even while parked at home. However, it requires some basic tools and a little technical application. The only necessary things to know are how to locate the starter, solenoid, and car battery and loosen or tighten a bolt. Here are the 13 steps to replace a car starter:

  1. Turn off the ignition.
  2. Disconnect battery.
  3. Jack up the car (if necessary).
  4. Locate starter.
  5. Disconnect the solenoid wire.
  6. Loosen starter bolts.
  7. Remove starter.
  8. Compare old & new starters.
  9. Place new starter. 
  10. Insert & tighten starter bolts.
  11. Connect the new starter’s wire to the solenoid.
  12. Reconnect battery.
  13. Start & test the car.

Replacing a car starter is not easy, but it is straightforward. It takes an average of two to four hours to complete the task. The remaining of the article will go over what car starters are, how they work within your vehicle, the symptoms of a bad starter, and how to replace and maintain them. 


What is a Car Starter?

The name may sound technical, but the function is simple. A car starter is a motor, and it contains in-built gear that rotates on its own; thus, a car starter is also called a starter motor. 

A starter is a cylindrical object with two different parts, each with various openings. The primary function of a starter is to stimulate the engine such that the engine can begin to work. There are three types of starters, each following the same working principle but differing in design and mode of operation.  

Types of Starter

Functions

Mode of Operations

Electrical

Convert electrical energy to mechanical energy.

Through interaction between the motor’s magnetic field.

Pneumatic

Convert compressed air to mechanical energy.

Linear motion or rotary motion.

Hydraulic

Convert hydraulic pressure to mechanical energy.

Working pressure.


The Working Principle of a Car Starter

A starter works on the principle of a combustion engine. The combustion engine follows four cycles of operations: intake stroke, compression stroke, third stroke, and exhaust stroke. 

For a car engine to work, the power to initiate the engine must come from an external source, which is supplied by a car starter. The first two steps of the combustion engine must come from a car starter; thus, the intake stroke and compression stroke are performed by the starter.

When the processes are completed and the car engine starts running, the function of the starter is no longer needed. 

In summary, a starter is required to start a car engine, and without it, a car can’t get started.


5 Symptoms of a Bad Car Starter

The following five symptoms are signs that you may need to replace your car starter:


1. The car may sound weird.

A car owner usually recognizes the familiar sound of their car when the ignition button is pushed to start or the key is turned. The first sign your starter is bad is when you begin to notice a clicking noise as you try to start the vehicle. 

It is worthy of note that the car may die without seeming to emit a sound at all or may die immediately as the power switch is turned. Try to listen carefully for that clicking sound if you don’t notice it the first few times around. 


2. The light only turns on.

This is another means of identifying the starter as the cause of a car problem. If the car’s dashboard lights up, but the engine refuses to start, it could be a starter issue. However, note that many other technical malfunctions can lead to a dead engine, not just the starter.


3. The engine refuses to start even after a jump start.

If you noticed the previous symptom and applied direct jump start, but the engine still refuses to start, the problem is highly likely a damaged starter. If a jump start cannot light up the car, immediate attention to the starter is required.


4. A smoky car.

If a car refuses to start, it is likely that you will try to repeat your attempts to start it up. When you continuously turn the ignition key, there is a possibility that the car will begin to give off smoke due to the poor connections of the starter with the car’s electrical system. 

When a car gives off smoke while you try to start it, it is highly possible that the error is due to a damaged starter.


5. An oil-drenched starter.

A starter can only be covered by engine oil if there is leaking, which is a very narrow possibility. Once the starter is soaked in oil, it can quickly go bad. 

As you can see, a single symptom does not confirm that a car problem is the result of a bad starter. Because there are a lot of mechanical errors that can lead to a damaged starter or the other way around, further troubleshooting before you decide you want to try replacing your starter is the best course of action. 


Can a Car Starter Be Replaced without Mechanic Support?

Yes! The owner of a car can replace a car starter even while parked at home. It requires some basic tools and a little technical application. The only necessary things to know are how to locate the starter, solenoid, the car battery, and how to loosen or tighten a bolt.

Once the car’s components can be identified, the rest is an easy do-it-yourself process. Although the process might be stressful and take a little time, changing a car starter is simple!


13 Steps to Replace a Car Starter

Replacing a car starter is similar to the process of changing a bulb in a lamp. The steps involved include identification, switching, and testing—just like a bulb replacement. Knowing how to identify each component is mandatory for a successful starter replacement.

Replacing a car starter requires some sets of tools and materials, which are:

  • Socket sets
  • Sets of spanner
  • Screwdriver
  • Torchlight
  • Pliers
  • Hammers 
  • Engine oil
  • Rags

1. Turn off the ignition.

This first step might seem straightforward, but it is the most crucial part. The process of dealing with electromagnetic devices requires safety first! You do not want to mess around with an electrical component of your car while it is still running. 


2. Disconnect the battery.

A socket wrench is required to loosen the tight connection of the battery. The main target is the negative terminal of the battery. An ideal starter replacement requires you to remove the cable and put it in a place that prevents it from touching the terminal again.

Always remove the terminal—at least the negative terminal—before working on the starter! It is highly important for your safety. Removing the positive cable is not mandatory, and once the negative terminal has been tucked away, it is safe for you to move on to the starter.

Safety measures to keep in mind:

  • Do not touch the terminals with your bare hands.
  • Do not hold the socket with a wet hand.
  • Wear a glove if necessary.
  • Place the cable in a safe place, away from the terminals.
  • Do not remove the battery from the car.

3. Jack up the car if necessary.

There are different cars with various starter positions. Some vehicles require carjacking. In that case, carefully place the required jack under the correct area related to the starter position, and then jack the car up to access the starter from the ground level. 

Make sure the jack is steadily engaged under the car at the appropriate height and the settings are firmly arranged. 

Safety measures to keep in mind:

  • Do not place the jack on a stone.
  • Use a jack that is perfect in shape.
  • If there is a need to go under the car, use safety kits.

4. Locate the car starter.

The starter is usually cylindrical, and there are two cylindrical-shaped devices attached: one is bigger than the other.  The small cylinder is the starter solenoid. Another means of identifying the starter is the connection between the battery and the solenoid. In essence, a wire runs from the battery to the terminal of the solenoid, usually at the top of the solenoid.

The key point in identifying the starter is the connection. The starter is majorly connected to the battery or fuse box through some running wire. 

There might be some difficulties in identifying the starter, as different cars are designed in several ways. At this point, the best option is to refer to your car’s user manual. If it is not present, a manual for your car may be accessed from the manufacturer’s website; you will only need the released year and model of the car to search for it.


5. Disconnect the solenoid wire.

Different electrical connectors that transfer electrical power from the power source to the starter are equipped in cars, depending on the manufacturer. 

There are two types of connections to keep in mind: the clips and bolts. If your car is designed with the clip-type solenoid, it is simple: just remove the clip from the solenoid. On the other hand, if your car has a bolt connection, you may need to unscrew or loosen bolts.

Safety measures to keep in mind:

  • Carefully draw the wires.
  • Do not disconnect additional wires outside of the battery and solenoid.
  • Loosen bolts with care; they are susceptible to damage.
  • Remove clips with care; they might break.
  • Place the solenoid wire away from the battery terminals.

6. Loosen the starter bolts.

Loosening the starter bolt is the beginning of the main process. A socket will be required at this point. 

Considering the connections of the starter, solenoid, and battery, there are primarily two bolts that keep the starter in place to prevent falling or shifting to unfavorable sides. However, there may be more than two bolts in some car models. Your goal is to figure out which bolts are holding the starter in place. 

The starter may be on the heavier side; therefore, you may need to use extra force to pull out the starter after removing all of the bolts or clips. 

Safety measures to keep in mind:

  • Keep the bolts in a safe place so you can put them back where they belong later. 
  • The bolts are susceptible to damage, so handle them with care.
  • Hold the starter tight to prevent shifting while you loosen bolts or clips. 
  • Be mindful of the car parts surrounding the starter so as not to damage them. 
  • Use the correct socket size to remove the bolts.

7. Remove the starter from the car.

After the bolts have been removed, the next step is to remove the starter from the car. This measure requires additional care to avoid other car parts damage. 

Place your hand on the right and left sides of the starter; be careful not to injure your hand. Carefully raise the starter (the starter might be heavy), and place it on the ground or a table. Make sure you stay aware of the terminal.

Safety measures to keep in mind:

  • Carry the starter with care to avoid the starter falling on your foot or leg.
  • The starter might be heavy, depending on the model of your car.
  • Carefully place the bad starter on the floor, as it might still be useful.
  • Do not make contact with the battery as you remove the starter.

8. Compare the old and the new starter.

This comparison is to check for similarities. The new starter must be identical to the old one in the number of holes, the placement of the holes, and the size of the starter. Although it is not compulsory for an ideal match, they must at least be similar in size. Note that the number of holes might be more than the one in the old starter because of the new model.

If by chance, the starter is not identical, it is highly possible that the new starter is not the fit choice for the starter replacement. 


9. Place the new starter into space.

Place the new starter in the same position as the old starter; a little wiggling for perfect fitting into the space is necessary. This process might be done either from above or beneath the car engine, depending on the car model. 

Safety measures to keep in mind:

  • An additional hand might be required to replace the starter, depending on its location and weight.
  • Make sure the starter is in good condition and is the right match for your vehicle. 
  • Place the new starter with care to avoid damage.

10. Insert and tighten the starter bolts.

Next, you will need to replace the two bolts that you loosened earlier. Carefully place them in the right position and then turn the bolts with your hand in a clockwise direction until they are tightened well enough that they can no longer be twisted by hand. At this point, use the right socket to tighten the bolts and make sure they are firmly in place.  

Note: a car starter can loosen up through the vehicle’s vibration if it is not properly tightened. To avoid damage due to improper tightening, make sure your starter is firmly in place before trying to start up the car again. 

Safety measures to keep in mind:

  • A loose starter might lead to a road accident; make sure it is properly tightened.
  • Use a proper socket to rotate the bolts.
  • Do not use a wounded hand to turn the bolts.
  • Make sure you tighten bolts in the right direction (clockwise) to prevent bolt damage. Wrong turning might damage the head.

11. Connect the starter’s wire to the solenoid.

The starter and the solenoid are two different components that are attached. So, do not forget to reconnect the two. There might be a little difference between the old and new solenoids because of newer models; for example, the new solenoid might come with four terminals instead of two.  

When the perfect position of the starter and solenoid has been achieved, the next step is to reconnect the wires that were disconnected from the former starter. Make sure you connect them to the right terminals. If you are not sure of which terminals are negative or positive, check the car’s manual and confirm the correct ones to avoid damage.

Note: The solenoid might require a different number of bolts. If the new solenoid is designed with four bolts and the old solenoid has two bolts: connect the top and bottom bolts on the new solenoid to the car to ensure a balanced and secured connection. If the new solenoid has the same bolts as before, then the connection is direct—just tighten the bolts with respect to the bolts’ position.

Safety measures to keep in mind:

  • Note the terminals and make sure they are connected to the right parts.
  • Tighten the connections to prevent further complications.

12. Reconnect the battery.

Carefully take and reconnect the battery cables to the terminals. Use the proper socket to tighten the battery terminals’ cables.

Note: Make sure the connection is tightened to prevent future complications.


13. Start and test the car.

When all of the previous steps have been done correctly, start the car. The car should run properly. If not, listen to the sounds it makes and note any changes to the usual sound. 

Check the battery and the starter connection if the car does not start; a proper connection should give a positive response.


3 Ways to Care for a Car Starter

There are various things you can do to care for a car starter; all require a little time and physical contact with the starter to become familiar with it. 


1. Check and clean the battery-starter connections.

The starter is the main starting button that initiates the engine to start an action. If the starter is dirty or rusted, there will be little or no power supply. It is necessary to check for dirt and clean the battery and starter’s terminal. Try to avoid water spillage and keep the component clean and dry whenever possible. 


2. Tighten loose bolts.

The bolts connect the starter to the car; it is important to always check the starter bolt and tighten the connections often. A loose connection might cause some strange sounds when the ignition key is turned, so there is also a need to be familiar with the sound of your car and notice any unusual noises.


3. Always check and clean the solenoid.

Just like the effect of dirt on the battery terminal, the solenoid can go bad if the connection is dirty or rusted. It is important to always clean and dry the terminal to prevent rusting.


4 Challenges of a Car Starter and Solutions

The following are some common challenges car owners face with faulty car starters and their replacement: 


1. Price

You might be wondering about the reason it is necessary at all to change the starter by yourself when mechanics are nearby. 

According to Angie’s List, the average price of a car starter (without considering the model) ranges from $344 to $562. This is the average price without the labor costs added in. According to the same source, the average price for labor for replacing a starter ranges from $128 to $163.

Following this trend, the total price of replacing a single starter, including the labor cost, has ranged from $472 to $725, depending on the car model and the mechanic you choose to go to. On the other hand, the same car starter replacement can cost a total price of $344 to $562 if the owner performs the technical procedure on their own, thus saving a total of $128 to $163. 

The Cost of a Car Starter

Outside of paying hundreds to get a car starter replaced professionally, it is one of the most expensive parts of a car. Depending on the car model, the latest cars come with a very expensive starter, although some old cars have a relatively cheap starter in relation to the newest model.

The problem of the cost might not surface during the process of getting the car; the effect emerges when the car breaks down, due to the starter, in a bad economic period. Based on the model and price of the vehicle, some of these solutions might solve the challenge:

  • Insurance: Getting car insurance might sound odd for a car starter, but it’s not! You are not only getting insurance to protect you from paying damages for accidents but because of some enormous potential damage too, which might occur in the future. Insurance helps carry expenses when the cost of repairs is beyond the bearable level and the crisis has affected your savings. Staying on the safe side is the best option.

  • Savings: According to Five Cent Nickel, about $1,200 per year is enough as a “car maintenance budget.” Notwithstanding, Clark shows that the “car maintenance budget” varies depending on the car model and declares BMW and Mercedes-Benz as the leading model with a budget of approximately $5,500 per annum.

  • Geographic Location: The cost of a starter varies geographically as well. Even if it is ideal to order from a popular automotive part store, the shipping price may be high. The best solution is to check your options and try to find the lowest price with good quality.


2. Quality

The quality of a starter varies with the price. The confederation of economic strength arouses the ideal of building economic-friendly motor parts. Depending on the strength, you can choose the starters that fit your budget. The primary thing is to consider the quality and know if it will last for a more extended period.


3. Proper Maintenance

Many car users do not know how to care for their vehicles. Maintenance is the trickiest part of getting familiar with a car, as well as understanding how it and its parts work. It is highly recommended to inspect the car occasionally before embarking on a long trip. 


4. Perfecting Technical Maintenance

The act of going to a mechanic shop seems to be the easiest thing to do when a problem develops in a car. However, it can be a nightmare when a freshly repaired car breaks down in the middle of the road or while you’re away from home. 

If you decide to get a starter professionally repaired, make sure you talk to the mechanic who operated your vehicle to get a run-down of the process that took place. Becoming knowledgeable on the subject will also help you identify if a starter was installed incorrectly or if other damage took place during the replacement process. 


In Summary

Starters are designed in different shapes and sizes, depending on the model of the car. However, their function is the same: they all work to power the car engine. 

If you have a faulty starter, it is possible to successfully replace it yourself. They can easily be replaced with the right knowledge and equipment; you will only need to know how to identify the components and gather the necessary tools.

Many people may prefer to visit the mechanic to replace a bad starter, but sometimes, it is fun to try doing the repairs on your own. It also saves time and money, and although the process is not exactly simple, it is well worth the effort. 

References

https://en.m.wikipedia.org/wiki/Starter_(engine)

https://www.popularmechanics.com/cars/how-to/a5837/how-to-replace-a-cars-starter-motor/

https://auto.howstuffworks.com/under-the-hood/vehicle-maintenance/how-to-replace-car-starter.htm

https://www.autozone.com/diy/starter/replacing-a-starter

https://www.instructables.com/id/Starter-Motor-Repair/

How to Fix a Sagging Car Roof: An Essential Guide


How to Fix a Sagging Car Roof

A sagging car roof isn’t just ugly to look at—it can potentially be a dangerous distraction or even obstruct the driver’s view of the road. Luckily, there are some ways to fix a sagging car roof if the damage hasn’t become too pronounced. 

A sagging car roof can be temporarily fixed with headliner adhesive, pins, staples, double-sided tape, or with steam and heat. If a car’s headliner is only sagging slightly, it can usually be repaired at home, but severe sagging can generally only be fixed by completely replacing the headliner.

If your car roof is only sagging a little bit, chances are with just a few supplies and maybe a little help from a friend, you should be able to fix the car’s headliner yourself (at least temporarily). Keep reading to find out more about how you can fix your car’s sagging roof and when it’s time to turn things over to a professional. 


Which Method Should You Use to Fix a Sagging Car Roof?

The supplies you need to fix a sagging car roof depend on a few different factors:

  • Whether you are trying to permanently or temporarily fix the headliner: There are several different methods you can choose from to try and fix a sagging car roof. Some of them are permanent fixes (or as permanent as you can get without replacing the headliner entirely). Others are temporary rigs designed to fix up a headliner until it can be adequately replaced.
  • What method of repair you are attempting: You’ll need different supplies to attempt a total replacement of your headliner than you would if you are simply trying to pin up or repair a loose corner of it.
  • What kind of budget you’re working with: If you have plenty of money, you might opt to have a professional replace your headliner outright or at least buy a new headliner, but if you don’t have that kind of money, you might have to stick with gluing or pinning up your headliner instead, at least as a temporary measure.
  • How much work you’re willing to do: Doing a complete replacement of a car’s headliner is messy, expensive, and tedious to do correctly. Taking a temporary measure to fix the sagging might be cheaper and easier, but it also usually looks cheaper, too.
  • How much automotive repair experience you have: Ripping out your car’s headliner panel for a full replacement probably isn’t a great idea if you’ve never so much as attempted to change a tire before, but if you have at least an intermediate level of experience with car repair it might be worth an attempt. 

After reading about some of the methods you can employ below, you’ll have several options as to how far you want to go to fix your headliner and whether you’d prefer a more temporary or permanent solution to the problem. 


How to Fix a Sagging Car Roof?

There are several different methods you can take to fix your sagging car roof yourself. There are a few different ways you can go about it. Keep in mind that some of these methods are only meant to be a temporary fix for a sagging car roof until you can get it addressed by an upholstery repair shop or an automotive technician, while others are a more permanent solution. 


Method 1: Glue Your Sagging Car Roof Back Up

AD

Supplies Needed: Headliner spray adhesive, 3M adhesive removers, unused paint roller

Average Cost: $50 (+$150 and up if including a new headliner) 

An automotive-grade headliner adhesive can be used to glue your sagging car headliner back to the roof of the car, and this can be done either partially to try and glue up a section of the car roof that has come down, or the entire headliner can be replaced and re-glued. 

The advantage of gluing the headliner back up is that this method of fixing a sagging car roof is more aesthetically pleasing than some of the other methods, especially if you take the effort to remove the entire headliner panel and replace the headliner rather than just glue up a section of it. 

The disadvantage of replacing the whole headliner is that it costs more than repairing the sagging section of the existing headliner since it requires the purchase of a new one, and the level of work involved usually deters anyone who doesn’t regularly work on cars from trying to attempt it. If a new headliner isn’t installed correctly, it will be just as prone to sagging as the old one, and you’ll have to start all over again. 

AD

Follow these steps to glue your headliner up:

  • Take out the headliner panel of the car for the best results. This can be somewhat difficult without the aid of a technician or at least a friend to help pitch in, so assess your car repair experience level before attempting this.
  • Remove any old headliner adhesive with the 3M adhesive removers. This will help ensure that the new adhesive sticks cleanly and does not become contaminated by the old adhesive.
  • Re-apply fresh headliner adhesive spray to the headliner and reinstall. Be sure that the headliner is stretched tight across the roof of the car to prevent any new looseness in the fabric.
  • Use the paint roller to roll the headliner flat and taut to make sure that the adhesive attaches evenly and that there are no bubbles beneath the fabric. 

The above method can also be used to replace the headliner with a new piece of fabric rather than reusing the old headliner if it is too tattered. However, this significantly increases the cost of the project overall since it includes the purchase of a new headliner.  

For a detailed video on how to partially re-glue a sagging car roof, check out this YouTube tutorial from The Car Flip


Method 2: Pinning Your Sagging Car Roof Back Up

AD
AD

Supplies: Upholstery screws or pins, needle nose pliers (for adjusting or twisting screws), and measuring tape.

Average Cost: $40

Another method for securing a sagging car roof is to use upholstery screws or pins to secure the sagging section of the roof. While this might not be as aesthetically pleasing as some of the other methods of fixing a sagging car roof, it has the advantage of being cheap and attainable through easily obtained materials. 

Another good reason to pin up your sagging car roof is that this is an excellent temporary fix if you plan to replace the car’s headliner more permanently later down the line when your budget allows. Temporarily pinning up the car’s headliner can at least keep it out of the way and prevent it from either distracting the driver or obstructing the driver’s view. 

Pinning up a sagging car roof is a good option for older, less valuable vehicles or cosmetically damaged vehicles where it doesn’t make any financial sense to dump a bunch of money into cosmetically improving the car’s interior. 

You don’t want to spend four hundred dollars replacing a car’s headliner when it has lousy paint or a giant ding in the door. Likewise, you don’t want to waste money replacing a headliner entirely when you have mechanical issues that need tending to first. 

Follow these steps to pin up a sagging car roof:

  • Pull the sagging headliner taut against the roof of the car and secure it along the edges with the upholstery screws or pins. Be sure to secure pins evenly across the edging of the headliner to maintain an orderly appearance.
  • If the sagging of the headliner is bad across the center of the car’s roof, more pins can be applied across the headliner in rows or a diamond pattern for a more deliberate look. Use a measuring tape to ensure that pins are distributed in an even pattern across the car’s roof.
  • If sagging is only occurring in one area, a single pin can be used to straighten and secure the headliner at that spot. However, sagging in one area is usually an indicator that the adhesive on the rest of the headliner is about to go. It can be a good idea to go ahead and pin the entire headliner if you notice it starting to sag to decrease the effect of gravity pulling down on it. 

Pinning up a sagging headliner can be an excellent way to safely secure a headliner in a car where more expensive options, such as replacing the car’s headliner, just aren’t cost-effective. 


Method 3: Taping Your Sagging Car Roof Back Up

AD

Supplies: Industrial-grade double-sided tape.

Average Cost: $20

If the sagging in your car roof is relatively minor or can be easily accessed through the side of the headliner panel, double-sided tape is a fantastic option to fix a sagging car roof temporarily. Like upholstery pins, double-sided tape is a good, cheap option for fixing a car’s headliner, but if the backing on the headliner is breaking down, the tape may have a difficult time adhering. 

Another disadvantage of double-sided tape is that it is a little more susceptible to the pressure of being pulled taut when the headliner is tightened up and is more likely to come loose than a headliner which is pinned down. This can potentially be dangerous if the headliner drops down and sags suddenly into the driver’s line of vision while driving. 

This is not a result of a deficiency in the tape itself but rather the foam that the tape is adhering to. At a certain point, the foam backing in many older headliners begins to disintegrate. 

Follow these steps to tape your headliner up:

  • Locate the area of the headliner that is sagging away from the edge of the car roof. Make sure that the headliner is pulled taut before applying the tape.  
  • Cut a section of the double-sided industrial tape and align it with the edge of the headliner between the headliner and the car roof.
  • Press the headliner into the car roof and apply firm pressure for several minutes until the tape has a chance to meld the car roof and the headliner securely. 

The advantage of double-sided tape for fixing up a sagging car roof is that some form of it is commonly found in many garages and home workshops, so it’s an excellent way to straighten up a car’s headliner temporarily until a more permanent fix can be found. 

If you’re attempting to use double-sided tape as a more permanent cheap solution for a sagging car roof, it’s a better idea to go with industrial-grade double-sided tape.


Method 4: Heating Your Sagging Car Roof Back Up

AD

Supplies: Portable steam cleaner, unused paint roller

Average Cost: $40

In some cases, if a car’s headliner begins to sag because heat and age are causing the adhesive glue on the backing of the headliner to dry up, applying steam can moisten the glue on the back of the headliner and allow it to re-attach to the car’s roof. 

This is a good option for fixing a sagging car roof that has only begun to sag recently (minor sagging). The less sagging there is in the headliner, the fresher and less oxidized the glue behind the headliner generally is. Since a sagging headliner also stretches out, a headliner with significant sag can be more challenging to re-attach smoothly. 

Follow these steps to heat your sagging headliner into better condition:

  • Take a handheld steam cleaner and apply heated steam to the headliner and car roof, making sure the headliner is well-moistened in the process.
  • As you run the steam cleaner along the car roof, follow along behind with a paint roller to press the headliner hard into the roof. This will hopefully help the moistened glue re-attach to the car roof.  

Remember that heating a car roof with a steam cleaner should be done carefully to avoid burning the headliner fabric. Once the interior of a car’s headliner is exposed by a cut or burn, the foam backing of the headliner can begin to deteriorate more quickly from exposure, which also accelerates sagging. 


What is a Headliner?

AD

You probably don’t dedicate much time to thinking about it, but the headliner is a piece of foam-backed fabric that is present on the roof of your car’s cabin. The headliner of the car serves several functions in the cabin: 

  • Tactile aesthetics: Since the cabin is the part of the car that is encountered directly by the people in the car, most car manufacturers design a car’s interior to feature plastic, fabric, and leather construction materials rather than fiberglass and metal. This results in a cabin that is softer and more pleasing to the touch.
  • Protection for the car’s structural elements: The headliner and other components of the car’s cabin protects the car’s infrastructure from being accessed or tampered with by the car’s inhabitants. Elements such as wiring and mechanisms are hidden behind plastic and cloth paneling.
  • Temperature insulation: The bare metal in a car’s roof can reach scorching temperatures in the spring and summer, and a cloth headliner can act as a buffer between the passenger and this heat. The foam-backed cloth of a headliner can also help prevent heat from seeping out of the car during cold winter months.
  • Sound reduction: Headliners help muffle the noise of car stereos to traffic outside of the vehicle or passersby. Headliners also help muffle any ambient road noise which might irritate passengers of the vehicle. 

There are lots of good reasons why the majority of automotive designs feature a headliner, but these headliners inevitably sag as a car gets older. 


What Causes a Car’s Headliner to Sag?

why headliners sag

There are several different reasons why a car’s headliner might begin to sag, but the issue is seen most commonly in older vehicles, especially those manufactured in the seventies or before. The reason is that the foam and glue used in automotive manufacturing inevitably become degraded and lead to the headliner falling away from the car’s roof in time. 

Here are some of the other reasons you might run into a sagging car roof:

  • Age: No matter what model car you drive, the older your car gets, the more likely you are to run into issues with your headliner sagging. The materials and chemicals used to adhere a headliner to a car’s roof aren’t time-proof, and like any glue, these adhesives eventually degrade and lose their effectiveness.
  • Heat: The headliner of a car is backed up by the metal of the car’s roof, which routinely gets above a hundred degrees Fahrenheit in summer temperatures and can get as high as a hundred and ninety degrees Fahrenheit in black cars. Repeated exposure to these high temperatures eventually causes the foam and glue on the backing of the headliner to dry rot.
  • Moisture: If a car’s headliner is subjected to moisture, such as high levels of humidity or a sunroof leak, the resulting moisture can cause the glue in a headliner to break down and result in a sagging car roof even in a car that isn’t very old. Moisture in the car cabin also has the added disadvantage of causing mildew in car carpeting and potential electrical issues.
  • Wear and tear: In the course of its working life, a headliner is pinched, prodded, stretched, and sometimes even singed with cigarettes if you have particularly careless friends. This means you’re likely to end up with a headliner that has some cosmetic issues the older your car becomes and the more road experience it has.
  • Sunroofs: Cars with sunroofs are particularly prone to having issues with sagging headliners – both because the headliner has fewer points of contact for adhesion and also because the headliner is exposed to more direct sunlight and moisture. Headliners on cars with sunroofs are also typically more difficult to repair than headliners on cars without a sunroof. 

While there are several reasons why a car’s headliner might begin to sag off the car’s roof, the bottom line is that if you are driving an older vehicle, you’re likely to run into this problem at some point or another.

Most of the time, this unsightly problem can be fixed well before it becomes a safety hazard. In some cases, it’s better to give up and have a headliner replaced entirely rather than trying to fix a sagging car roof yourself. 

Here are some of the indications that your headliner issue is bigger than a do-it-yourself weekend project and you need to pass the car along to professionals:

  • The headliner has rips, tears, or significant stains.
  • The headliner needs to be replaced entirely.
  • The headliner is sagging badly enough to endanger the driver.
  • The foam behind the headliner is crumbling from dry rot.

Minor damage or sagging in a car’s roof can be fixed and addressed at home, but if a car’s roof is sagging badly or the headliner is so old and damaged it isn’t worth saving, it’s probably better left to someone who has the tools and expertise to address the problem correctly and replace the whole thing.


Tips for Re-attaching a Sagging Headliner

AD

No matter which method you use to try and re-attach your sagging car roof, there are a few tips that can make the process easier to manage.

Here are some helpful tips for making your headliner repair easier:

  • If you’re using glue, work in a ventilated area. Spray adhesives such as headliner adhesive produce toxic fumes in enclosed spaces, so be sure to work in an open area if you’re repairing your car’s sagging roof with headliner adhesive.
  • Apply pressure. Whether you’re using glue or pins, making sure to apply firm, smooth pressure across the entire repair job will help make sure that your headliner repair adheres without any bubbles or wrinkles (or at least as few as possible).
  • Get help from a friend. Since you’ll be working upside down to attempt a headliner repair, it often helps to get a volunteer partner or two to help you keep the headliner pulled tight and straight to make sure it gets secured where it’s supposed to go.
  • Check online. If your local car dealership doesn’t have a replacement headliner for your car and you want to replace it, check online markets. They often have aftermarket headliners and other accessories that aren’t available OEM for discontinued models.
  • Work in broad daylight. Don’t try doing this kind of repair at night. You won’t have the free hands to hold a light on your work and work at the same time. Without a reliable source of light, you’re also more likely to miss wrinkles or other cosmetic flaws as well.  

Watching some YouTube videos or other tutorials of headliner replacements before attempting one can help you figure out what to expect and anticipate any potential problems before you start messing with your car’s headliner. Just have a plan B (or an upholstery shop) on call in case the repair doesn’t go the way you thought it would. 


Ways to Make Your Headliner Last Longer

AD

Once you’ve repaired your headliner (or if you’re looking to prevent having to do it), there are ways for you to avoid a sagging roof in the first place.

Here are some of the things you can do to avoid dealing with a sagging car roof:

  • Avoid owning cars that were manufactured from the seventies through the nineties. Many cars manufactured during this period had weak adhesive in their headliners as a near-universal engineering flaw, and classic car owners are still battling it decades later.
  • Use a windshield shade and tinted windows. Keeping your headliner out of sunlight can go a long way toward preventing the dry rot of the foam backing and adhesive behind your car’s headliner.
  • Keep your car in the garage. The sun baking down on your car’s roof is a significant contributor to the deterioration of the car’s headliner from heat-related damage.
  • Avoid opening the sunroof. Sunroofs are notorious for two things: headliner problems and leaks. Neither one is fun to deal with as either a car owner or a car mechanic, and both are costly. To avoid dealing with unnecessary headliner problems, avoid cars that have sunroofs or moon roofs. 

While it isn’t possible to completely avoid age-related damage to your headliner, following the hints above can help you avoid having to deal with them. 


Minor Sagging in Car Roofs Can Be Fixed at Home

If you notice your car’s headliner beginning to sag a little, it isn’t the end of the world. In many cases, this problem can be fixed with just a handful of supplies and a little elbow grease. However, if you’ve got more serious problems with a billowing headliner, it might be time to bring in someone a little more familiar with car upholstery to replace it for you. 

And remember – if you’re shopping for cars and want to prevent a sagging roof as much as possible, the newer the model, the better!

Sources 

http://www.thehogring.com/2018/02/21/an-epic-rant-against-sagging-headliners/

https://extremehowto.com/repair-a-sagging-headliner/ Update: page unavailable​

https://carcaretotal.com/how-to-fix-sagging-headliner-without-removing/​

http://innovationsautointeriors.com/headliner-material-falling/

https://www.youtube.com/watch?v=OjlVxZwZ1C4​

https://theluckyneedle.com/fix-sagging-headliner/​ Update: page unavailable

https://www.angieslist.com/articles/reupholstering-options-your-car.htm

How to Repair a Car Cigarette Lighter Socket?


How to Repair a Car Cigarette Lighter Socket

Whether you are a smoker, have a host of car accessories that you need to charge on the go, or simply just do not like having little things go wrong with your vehicle, there can be nothing more annoying than having a car cigarette lighter socket go out. The problem is that when it does, most people just write it off as broken and live with the inconvenience.

Roughly 90 percent of dead lighter sockets are due to a blown electrical fuse. However, you can easily repair a car cigarette lighter socket yourself. Here are the steps you need to follow:

  • Locate Fuse Boxes
  • Get Required Materials
  • Pull the Burnt Fuse
  • Inspect the Pulled Fuse
  • Insert Replacement Fuse
  • Check the Replacement Fuse

In most modern cars, the terms “cigarette lighter socket” and “electrical outlet” are interchangeable, and there are often multiple such ports at various points around the vehicle. It is important to know where all of these ports are located in your vehicle, as they can help you in the identification of the problem with the dead cigarette lighter socket.

Keep receptacles clean – not only does this ensure a strong connection between your device and the port, but it prevents the buildup of any corrosion that may occur over time.


Troubleshooting a Dead Car Cigarette Lighter Socket

broken cigarette socket

In the age of portable devices, a dead electric outlet in your vehicle is one of the most easily identifiable problems you will encounter, as the need for juice after a long day out and about is a never-ending need in contemporary society.

While a dead socket is likely to cause frustration that may tempt you to take your car to a mechanic and “just get it fixed,” the repair can often be easily accomplished at home without the hassle and expense of taking your vehicle to a professional shop.

And while the likely cause of a blown fuse itself is a simple enough repair, there are a couple of items you will want to cross off your list before you start digging into your fuse box.


1. Make Sure Your Car is Turned On

For older vehicles that you have to remove the lighter to access the socket, you are likely to receive power whether or not the vehicle is turned on.

However, with newer vehicles that are highly electrical and have many computerized settings, some electric outlets will not function unless the car’s battery is engaged, so if the cigarette lighter socket is not working, make sure that the car is turned on.

While you do not have to start the car all the way, if the radio is playing and the fan is blowing, but there is still no power coming to the socket, then you will need to move on down the troubleshooting list.


2. Check the Other Electric Outlets in Your Vehicle

As mentioned, most modern vehicles come with a bevy of electric outlets located at various points in the vehicle. 

In addition to the main cigarette lighter socket on the driver’s side dashboard, there is likely to be an additional outlet on the passenger’s side dashboard, as well as in the center console and any rear consoles, depending on the size of the vehicle.

If your main socket is not working, be sure to plug in your cord to the other ports and see if you get any power. If you do, then you are definitely dealing with a dead socket. If there is still no power when checking the other sockets, then you will have to do a little more research, as it is unlikely that all outlets are dealing with a blown fuse simultaneously.


3. Try Different Charging Cords

If your vehicle is on, but you are not receiving power to any of the electric outlets, then you are likely dealing with a bad charging cord. 

Switch out your main car charging cord with a different one and see if this gives you any power. If it does, great–problem solved. If it does not, or the new cord works in all of the ports except the main socket where you initially experienced the issue, then you are likely looking at a blown fuse that needs to be replaced.


How to Repair a Blown Car Cigarette Lighter Socket Fuse?

socket outlet fuses

As mentioned in the introduction, roughly 90 percent of dead lighter sockets are due to a blown electrical fuse. While it is cheap and easy to replace a fuse yourself, you must be very meticulous in your approach to avoid damaging other fuses or doing more extensive electrical damage to your vehicle.


Locate Fuse Boxes

Depending on the make, model, and year of your vehicle, the fuse box is likely to be located in one of three places: under the hood, in the cabin on the driver’s side, or in the trunk. Some vehicles may have only one fuse box, while others may have two or three. The following are some general characteristics that you can expect from each:

  • Under the hood – this fuse box will be black and plastic, roughly 12 x 9 inches. It can be found at the extreme edge of either the driver’s or passenger’s side and is usually nearer the windshield than the front of the hood. The lid will be held on with several plastic clips that must be detached to access the fuses.
  • In the cabin – fuse boxes in the cabin will be on the driver’s side, often near the hood and trunk release, but typically tucked further under the dash. This box will usually have a latch that you can hook your fingers into and pull open.
  • In the trunk – this fuse box will be located on either the driver’s or passenger’s side wall of the trunk. It will look like a small door camouflaged into the wall of the trunk, and you will notice a small latch where your fingers can be inserted to pull this door open and access the fuses.

While the majority of fuse boxes will be located in one of these three locations, or more than one of these locations, some vehicles may be designed differently, so it is important to consult your user’s manual to be certain of the location and number of fuse boxes in your vehicle.

After you locate each fuse box, you will want to pop the lid and check for a bay of spare fuses. This may not be present in older cars, but most modern vehicles come with spare fuses.

It is important to check all of your vehicle’s fuse boxes for spare fuses because even if the cigarette lighter socket’s fuse is located under the hood, its spare may be stowed in a bay in the vehicle’s trunk.


Get Required Materials

Car Cigarette Lighter Socket Supplies Needed

Now that you have located all of the fuse boxes in your vehicle and have checked for spare fuses, there are a few items you will want to gather before starting the replacement:

  • Needle nose pliers – try to get the smallest, finest pair you can find, as your vehicle’s fuses are very fine and delicate.
  • Flashlight – this may or may not be necessary, but it is a good idea to keep it handy, especially if you have a fuse box in the cabin that curls under the front dash. In addition, the many fuses in your vehicle are color-coded, so you will want to have a sharp light source in the event that any have faded and become indistinguishable.
  • Multimeter (optional) – while fuse issues can certainly be reconciled without a multimeter, it is easier with one. A multimeter measures electric current and voltage at a given point, so attaching a multimeter to a fuse can easily let you know if any current is flowing. These devices can be purchased for as little as $10.
  • Replacement fuse (if necessary) – if you have checked in all of your fuse boxes and there is no spare fuse bay, then you will need to get a replacement fuse. These are readily available at auto parts stores, but make sure you give an associate run the make, model, and year of your vehicle so they can ensure you get the right product.

Pull the Burnt Fuse

On the lid or door of your fuse box, there will be a map and legend that will help you pinpoint the cigarette lighter fuse. There are many different fuses that control a variety of electrical functions in your vehicle, so make sure that you are extra thorough during this process so as not to choose the wrong fuse.

Many times, the cigarette lighter fuse will be labeled “CIG,” but there are many exceptions across the various vehicle models, so be sure to cross-reference the legend. If you have an older vehicle that has seen the fuse map and legend fade or become unclear in any way, there should be a replica version that you can find in your user’s manual.

After you have pinpointed the cigarette lighter fuse, you will want to connect your multimeter to it, if available. If the fuse is functional, you will hear a “beep” indicating power. However, as it is likely burnt, nothing is likely to happen once the multimeter is attached.

If a dead fuse is confirmed, you need to pull it from the fuse bank. Most modern vehicles will have a fuse-pulling tool located in the fuse box. This is a small plastic tool that looks like a pair of tweezers. Take this tool and pinch it on the tip of your finger a couple of times to get a feel for how it works. It should conveniently grip the lip of your fuse, making for easy removal.

If you have an older vehicle or any other model that does not come with this special fuse-removing tool, this is where the needle nose pliers come in. They can serve the same function as the specialized plastic tool, but you must be very careful to grip only the lips of the fuse and avoid squeezing too hard, causing your pliers to slip and crush the fuse’s body.


Inspect the Pulled Fuse

Your cigarette lighter fuse will look like a bigger version of your cell phone’s sim card tray when pulled open, with a wide head in front of a thin, delicate body.

If you have a multimeter at your disposal, you are probably already aware that the fuse is blown. However, if you are without a multimeter or simply want to confirm your multimeter’s reading, a blown lighter socket fuse will be easily identifiable by looking at the body of the fuse, with a couple of symptoms likely present:

  • Broken or cracked wire – the body of a functional fuse will have a thin, plastic, see-through casing that protects a small electrical wire. This wire should be in a small, continuous hump, like the normal curve used in statistics. If this hump is cracked or broken, the fuse is no good.
  • Burn marks – if the wire is charred or the plastic casing is charred with black tar, then the fuse has burned out and is no longer functional.

Insert Replacement Fuse

The various fuses in the fuse box will be colored differently and assigned a number based on the amount of current they can handle.

For example, either on the head of the fuse or on the legend on the fuse box lid and owner’s manual, the cigarette lighter fuse will be given a value of “20” or “20A” (note: not all lighter fuses have this value, but it is a common value for lighter fuses in many vehicles).

This means that this particular fuse is capable of handling 20 amps of current. Any other fuses with this capacity will be colored and labeled accordingly. 

As such, when selecting a replacement fuse from the spare bay, you must be sure that it matches in value and color of the fuse you just pulled. If you got your replacement fuse from an auto parts store, you should already have the right fuse, but you will want to double-check to be sure.

When getting the replacement from the spare bay, you will need to use the same fuse-pulling tool or needle-nose pliers you used to remove the burnt fuse from the main fuse bank.

Put the old fuse and the replacement fuse side by side and compare. The difference should be noticeable, as the replacement should have a nice, clear body that displays a solid, bell curve-shaped electrical wire that forms a visible contrast to the old fuse.

You will not need the fuse-pulling tool or needle-nose pliers to set the replacement fuse. However, you should be very careful when inserting it into the fuse bank, ensuring proper alignment and no forceful actions that may cause the replacement fuse to crack or break.


Check the Replacement Fuse

Now that the new fuse has been properly inserted, your dead cigarette lighter socket should come back to life. Use your multimeter to check the new fuse, if available. You should now get a “deep” signaling flowing current.

Go back into the cabin of your car and test the electric outlet. If there is power flowing to your lighter or device, you are all set. Make sure that all fuse boxes are closed and all tools used for the repair are picked up and properly stowed, especially the fuse replacement tool if utilized.


What if the Lighter Socket Still Is Not Working?

lighter socket not working

While the vast majority of dead lighter sockets are remedied by replacing a blown fuse, there are a few rare instances in which a new fuse does not solve the problem. 


The replacement Fuse Blows Immediately

There are cases, especially if a replacement fuse has been sitting in the replacement bay for many years, where the fuse components have deteriorated, and the sudden introduction of electricity can cause a replacement fuse to blow the first time the car is turned on.

This can be a tricky scenario to identify because when a fuse has just been replaced, the owner is highly unlikely to consider the fuse a second time.

However, it is the first place you should look if the socket is still not working after a fuse replacement. Using the same process described earlier, check the lighter socket fuse again to ensure that the replacement did not immediately blow upon being introduced to the electrical current.


Check the Receptacle

If the check on the replacement fuse comes back clean, there is a chance that you are dealing with a faulty receptacle.

Over time, the receptacle can accumulate food particles, dust, and other debris that may prevent a proper connection with your cord. Take a rag and thoroughly clean the port to ensure that there are no foreign particles interfering with the connection.

If you have cleaned the receptacle and everything is still dead, there is a chance that the receptacle itself needs to be replaced. 

On the head of the lighter and/or cover of the electrical outlet, there will be a voltage rating for the socket, generally 12V (12 volts). If you attach a multimeter to the port and do not get a voltage output in this range, then you will need to order a new part and have the receptacle replaced. 

One other thing to look for is the prongs that touch the adapters that you plug into the cigarette lighter. If they are bent, they may not have contact with the adapter. (see video)


Hard Computer Reset Needed

This is likely only a remote possibility in newer models of vehicles that can see glitches due to faulty computer codes.

However, computer issues have been known to cause power windows to malfunction, so there is a chance that other electrical systems in your car, like the lighter socket, may be influenced by a computer issue.

As slim as this possibility is, a computer reset could be necessary if the following steps have been taken to no avail:

  • The car is turned on.
  • No electric outlets are working.
  • Different cords and devices have been tried.
  • The lighter socket fuse has been replaced and confirmed to be in good shape.
  • The receptacle has been cleaned thoroughly and/or replaced.

The first step to reset a vehicle’s computer is to simply start and restart the engine. This is not likely to resolve your problem because you have already turned your vehicle on once to ensure that power is being sent to all outlets. It is still worth trying, though, as killing and restarting your car is a simple step that may potentially reset any computer glitches.


Performing a Complete Drive Cycle

If starting and restarting the engine proves unsuccessful, the next step toward resetting your computer would be to put your vehicle through a complete drive cycle. This can be accomplished through the following steps:

  1. Let your vehicle sit overnight – make sure that it is parked in a place that is less than 90°F and that all fans are turned off, and connected devices are unplugged. Also, make sure that your keys are out of the ignition, as this will ensure that no onboard computers are still booted up while the car is resting.
  2. Warm it up – after letting your vehicle rest overnight, turn it on the next morning and let it run in the park or idle for about five minutes. During this time, you can check the cigarette lighter socket. If it is working, the problem is solved. If not, drive your vehicle slowly through a residential area for several minutes, stopping completely at stop signs and accelerating up to a safe speed.
  3. Take your car onto the highway – get your vehicle up to 60 miles per hour and drive it for at least five miles. After you have reached five miles, bring it back for another slow drive through the neighborhood.
  4. Park your vehicle and leave it sitting overnight – test your electrical outlet one more time. If it is still not working, turn your car off and let it sit, just like in step one. Start your vehicle and try the cigarette lighter socket again.

Disconnecting the Battery for Computer Reset

If the socket still is not working, then it may be time to disconnect the battery to ensure that the computer is fully reset and that no faulty codes are causing electrical glitches. While it is annoying that disconnecting the car battery will also reset any saved settings, such as the clock or radio preferences, it is guaranteed to reset the computer.

Your car battery can be disconnected and reset using the following steps:

  • Pop the hood and locate your battery – for most vehicles, the battery will be located near the front center under the hood.
  • Disconnect the terminals – you will most likely need a small wrench to get the terminals loose. Once loose enough to detach, pull them straight up, making sure not to get them confused with each other. Use a rag to make sure the terminals and terminal heads are clean.
  • Reattach the terminals – making sure that the positive and negative terminals are placed back from where you removed them, ensure a firm connection and tighten them back in place.

After exhausting these steps, you can be assured that the computer either is or is not causing an electrical glitch that is causing your cigarette lighter socket to fail.


Why Do Car Cigarette Lighter Sockets Fail?

why car power sockets fail

There are a number of reasons why your car cigarette socket may fail. Any one of the following combinations can lead to a blown fuse that results in a dead electrical outlet:

  • Age – let’s face it: Dead lighter sockets are more likely in old vehicles than new ones. As with everything in life, the time has deteriorating effects, and years of exposure to heat can cause wiring and other electrical components to go bad.
  • Moisture – while most fuse boxes are airtight with numerous layers of protection shielding the fuse wires from moisture, even the slightest introduction of moisture can cause a fuse to short out, breaking the electrical connection to your lighter socket.
  • Overuse – as mentioned earlier in the article, the age of portable devices makes lighter sockets hot items in cars, with everything from phones to laptops to portable air compressors having adapters that allow for electric charging with lighter sockets. This heavy use expedites wear and tear.
  • Non-compatible connections – as stated, most lighter socket ports are rated to handle 12V of electric potential, while most fuses can run 20 amps of current. If you try to charge a device that has greater power demands than what the fuse is rated to handle, you are at risk of blowing the fuse as it tries to force too much electricity through.

How Can You Keep a Car Cigarette Lighter Socket from Breaking?

While there is no way to guarantee that a lighter socket lasts for the life of your vehicle, there are several steps you can take to make sure that it lasts as long as possible:

  • Check the power needs of your devices before connecting – this ensures that you are not trying to force more electricity through the system than it can handle.
  • Unplug devices while not in use – by only using the lighter sockets to charge when necessary, you can minimize wear and tear on the components.

Thanks for visiting Drivinglife.net

Should the Head Gasket Match Bore Size?


Should the Head Gasket Match Bore Size

For someone that doesn’t build race cars every day for a living, the process of selecting the right parts for an engine build within a given budget can sometimes be overwhelming. It usually starts with having a dream car that you always wanted or inheriting that classic oldie but goodie that you want to revive some life into your true classic. Then you decide to go beyond the dreaming phase finally, and you end up with a beautiful engine block sitting in the garage, a wad of cash for parts and accessories burning a hole in your pockets, and a headache of a research project. Even though it can be a daunting task, spending that cash should be fun, not stressful.

The bore size and the head gasket should not match. It is common for the actual gasket bore to be slightly larger than advertised. For example, if you buy an 81mm head gasket, the actual hole will measure slightly larger than 81mm to prevent any overhang. Some people will play it even safer and order a gasket with the next bore size up from their block to make the possibility of overhang even less likely.

There is more information you may need to consider about gaskets than just hole cut to size; for example, you’ll soon discover that aftermarket performance head gaskets come in a variety of sizes and materials. A quick Google search may have you feeling a stock gasket is not what’s best for your soon-to-be street beauty.


Basic Gasket Information

_Gasket information

Of course, we got to find out basic measurements for our parts, but poorly selecting pieces can get expensive in the long run. In the worst-case scenario, this could lead to total engine failure. 

There are myriads of engine bibles and tech forum posts to scroll through, which can overwhelm even more. Still, today I wanted briefly supply information on a little headache affectionately known as the head gasket.

A head gasket sits between the engine block and cylinder head in an internal combustion engine. Its purpose is to seal the cylinders during combustion and avoid any leakage of coolant or engine oil into the cylinders. Most professionals will tell you the gasket is the most critical sealing application in any engine, and for a good reason.

I’ve found that one of the most common questions about head gaskets is about how to match the head gasket size to the bore size. So instead of searching from Genesis to 1 Peter in a random engine encyclopedia, here’s the quick and short answer, as well as some follow-up that can help you make those decisions and ask better questions.

The head gasket has cylinder bore holes cut in it that line up with the cylinder holes in the block. In a convenient world, the measurements would equal up perfectly. Still, instead, boreholes in the gasket are intentionally cut a little larger than the actual bore to prevent any of the gaskets from hanging over the edge into the combustion chamber. 

If the gasket were to hang over into the combustion chamber, the combustion would heat that section of the gasket, become hot, damage, and even cause detonation in the engine, which leads to all kinds of other nasty stuff like an upset wife or global warming.


Gasket Thickness

gasket thickness

When selecting a gasket for your engine, you can either select the same bore size as your block or one service size (typically 0.5mm / 0.020″) larger. If you ask for a second opinion, you may hear an expert or enthusiast recommend up to .060″ larger. Over time, the touching surfaces of the engine block and the head can warp and bend. Even in small measurements, these imperfections will cause the “mating” surfaces to no longer be evenly flat. These surfaces must be flat and smooth for an aftermarket gasket to seal properly and prevent further issues.

Is there a difference between a thinner verse and a thicker gasket? While shopping around, you’ll quickly discover the answer to that question is a resounding yes, as well as develop another headache. To prevent a future aneurysm, I’ve organized a bit more information to help you find which is better for your auto project.

It’s normal for the mating surfaces of the block and head to be machined flat and smooth again during an engine rebuild. This process will remove some material, though. When you remove material from the top of the block or bottom of the head, the pistons get closer to the valves, and the compression ratio of the engine increases. Sometimes small increases will lead to problems if not managed and prevented sooner. Many mechanics will deploy a thicker-than-stock head gasket to make up for the difference in the material removed during the clean-up and machining process.

There are other reasons why someone would want to run ahead gasket that is thicker or thinner than stock. Head gasket thickness can be used to make minor adjustments to compression ratios intentionally. In general, thinner head gaskets can be better at sealing and raise the compression ratio slightly. Thicker ones will lower compression ratios somewhat. Any major changes in the compression ratio should happen with the piston, not the gasket. Remember that too thick of a gasket could give you trouble sealing between its layers, and too thin of a head gasket could lead to engine components colliding with each other and not in a good way.


Gasket Materials and Layers

materials and layers

Many stock gaskets are made from soft composite materials that function and seal perfectly well in “factory lab” conditions. Problems can soon arise when your beast of a performance vehicle does not “perform”, similar to easy-going and controlled conditions. They end up not holding up well to the abuse of performance applications and are usually intended for one-time use in a new market stock vehicle. In rebuilds, we shouldn’t be reusing these composite gaskets.

Most aftermarket head gaskets are made of multiple layers of steel that are riveted together. The top and bottom layers can sometimes be coated in a rubbery substance to help seal against the pair of surfaces between the block and head. When thinking about gaskets and layer composition, the area of most importance is usually around the edge of the borehole. There is a lot of engineering design that goes into this section to help seal the combustion inside the chamber. 

All complicated stuff, but not in a crazy alien/government conspiracy way, but more in a MacGyver physics kind of way. I generally would recommend, especially in a performance rebuilt engine, going with a multi-layer steel head gasket.

If your engine came from the factory with a multi-layer steel head gasket, you might be perfectly fine going with a brand-new OEM gasket for your project. Engines like the Toyota 2JZ-GTE and Mitsubishi 4G63 (Evo) came from the factory with multi-layer head gaskets that hold up to a lot of power. But if your engine came from the factory with a composite softy, you should consider upgrading to a multi-layer steel gasket for the heart of your dream.


What if I need more information?

As you have seen, there are a lot of options to consider when selecting head gaskets for your bottom-end build. It can be overwhelming, but it’s an expensive project, and you should take your time learning the necessary information to make decisions confidently.

Just remember, if you get overwhelmed at any point, professionals are waiting to help you through the process. Whether you need us to work up an entire plan from scratch or you are just looking for a second opinion on your project, there are options such as https://www.realstreetperformance.com/ that do just these things for friends in need such as you.