Home

Recent Posts

Easy Cleaning Tips for Your Car Interior


For Your Car Interior

I tend to clean my car when it needs it. Sometimes I wait too long, and dirt can get ground into the carpet, and spills are more difficult to remove. There are a few tips that I’ve learned to help me when I need to clean my truck and make it look beautiful again. 

When cleaning a car, one of the most important tips to help you is having access to everything you need when you need it. That means having a vacuum available and cleaning products on hand when needed. Here are some basic tips that will help you:

  • Organize your supplies.
  • Use your home vacuum cleaner.
  • Use good conditioning spray or liquid.
  • Clean your steering wheel regularly.
  • Clean your car’s mats regularly.

As I’ve cleaned my truck over the years, I’ve found that being organized and having what I need for the job available makes all the difference. If you have a car, you plan to keep it for more than a year, or you lease your car, keeping it clean can make all the difference for resell value and your personal sense of happiness. ​​​​


Tips for Organizing Your Supplies

Keeping organized can make the difference for me between cleaning and not cleaning my car. I need to be able to find the items I need easily, so I can get the job done within the time I have planned. An organized area for your car cleaning products will likely help you feel more capable and ready to tackle the challenge. 

Some people have a garage set up for all their tools and car cleaning supplies, and storage. If your garage is like mine, you may not have room for your car or just about anything else. What should I do with little space available? 

My solution was to buy shelving, so I could stack items and then place all the car cleaning supplies together in containers so I know exactly where things were. Here are some things you might want to try:

  • Store cleaning supplies in a plastic bin with a lid so that if a spill occurs, nothing leaks out.
  • Store similar products together. If you have a big box with cleaning items, use smaller containers to organize items within the box, so you can find items easier.
  • Clean out items that you no longer need and sell them or give them away. If you’re committed to getting organized, you’ll be willing to part with items that no longer serve you. 
  • Sometimes we buy an item because it sounds like a great item to have, but then we end up using them only once or twice. Next time you want to buy something, consider if you will use it and really need it.
  • Do your research before buying products and find the best one you can afford, so you don’t need to buy another one soon after.  

Tips for Cleaning with Your Vacuum

Whether you go to a car wash center or vacuum your car at home, vacuuming can make all the difference between feeling like you have a dingy old car or a freshly clean car.

Sometimes a deep cleaning is needed in order to get some stains out and remove all the debris that has accumulated over the months.

Your pride in ownership will start to show when you have a nice car to drive each day, and you’ll likely have a more positive feeling while driving a freshly cleaned car.

Here are some tips that can help you achieve that clean car interior a bit easier:

  • When I used a hand vacuum, it wasn’t powerful. I didn’t have a shop vac, so I used my home vacuum cleaner, and it worked really well. If your vacuum is good but doesn’t have a long enough cord, decide if investing in an extension cord is right for you.
  • Take everything out first. I do this so I don’t accidentally suck items into the vacuum that shouldn’t go into it. I remove all my mats and take out all the items from under the seat.
  • I think the first thing all vehicle owners should consider before vacuuming is if they need a vacuum in the car at all times. When you have children or are prone to spilling liquids, having a small wet-dry vacuum can be a lifesaver. 
  • If you have a handheld vacuum in the car, consider all the places you can store it. Sometimes storing items in a seat back organizer works for some people.
  • Consider using a nailbrush or hard bristle scrubber to help comb out and relax carpet fibers, so that ground in dirt can be lifted easier with your vacuum. Some people will use a penny and pull the edge over the carpet to quickly help fluff up compressed areas.
  • For matted carpet, place a damp cloth on the matted area and iron over the damp cloth for half a minute. After ironing the area, vacuum the fibers. This can help loosen carpet fibers, so they look fluffy again. 

Tips for Cleaning the Plastic, Vinyl, and Rubber

While plastics, rubber, and vinyl areas inside your car are likely to last a long time, protecting them with a good conditioning spray or liquid will keep them looking new and lasting much longer.

Your car can be protected much better if garaged or placed out of the sun. Weathering can impact the exterior and interior of your car. Adding a protective layer against heat, dryness, and the sun can help your car weather the elements better.

It’s amazing how you can make a dirty car look new again with a bit of effort. Here are some tips that can help you protect your car’s plastic, rubber, and vinyl interior:

  • While plastics, rubber, and vinyl areas inside your car are likely to last a long time, protecting them with a good conditioning spray or liquid will keep them looking new and lasting much longer.
  • Keep your conditioner and cloth together, so you can use them the next time you need them. A one-gallon zip lock bag can come in handy for storing products and cloth together.
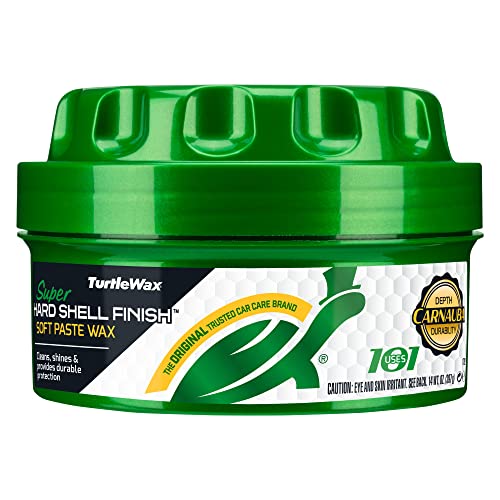
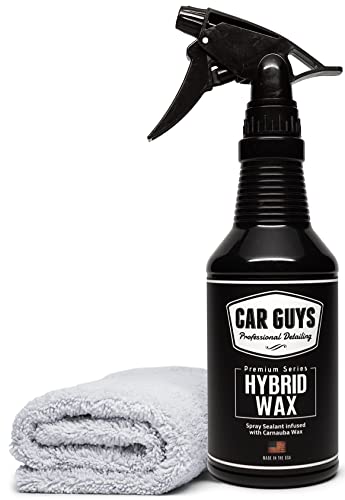
  • Use a product that is meant for conditioning, not cleaning. Make sure it has UV protection and can work on all three surfaces. (Amazon Link)

Tips for Cleaning Your Steering Wheel

A steering wheel is important to keep clean as well as easy to grip. Some sprays that help clean other plastic and vinyl areas leave a slippery surface that is hard to hold. 

Be sure to keep your steering wheel clean to prevent the spread of germs and protect it so it looks and lasts for a long time. 

Here are some tips that can help you achieve your goals:

  • Using soap and water with a microfiber towel is a good idea when you don’t have cleaning or conditioning products available. Be sure not to use water on a leather interior unless you have a conditioner to place on it soon after.
  • Be sure to try cleaning and conditioning products on other surfaces first to make sure they are not slippery when dry.
  • Some steering wheels will need a thorough cleaning before they are conditioned. Be sure to have a microfiber towel or a scrubbing cloth. 

Tips for Cleaning Mats

When taking care of your car’s carpet, your car’s mats will do a great job. If you clean them regularly, your car will be able to handle plenty of dirty situations. 

The mats can be an effective guard against water, snow, dirt, and food. If you replace your mats with something sturdier and waterproof, your carpet will likely look great for the life of your car.

Here are some tips for maintaining your mats: 

  • It’s easy to clean carpet mats once a week if you want your car to look cleaner. Just take them out and hit them against a solid wall or driveway to remove particles. This only takes a few minutes if done regularly. Better yet, keep a rechargeable handheld vacuum in your car and vacuum the mats for a minute each week.
  • If you have a newer car, one option that I’ve used is to replace the original mats with a cheaper version. This way, I can keep the car’s carpet looking good and keep the original mats in perfect condition by storing them until I resale the car. 
  • Another idea is to purchase easy-to-maintain mats (usually made with thick rubber or plastic), so you can wash them off and place them back in the car right away. Carpet mats can stain and take a while to dry if washed off.  

Tips for Cleaning Time Management

We all have a limited amount of time and energy to accomplish our goals, and cleaning our cars may not be our top priority. It’s important to put things into perspective when it comes to using our time for cleaning our vehicle and deciding the value it holds for us. 

Some things to consider are the ability to take time regularly to maintain your vehicle, the cost of DIY cleaning vs. having someone else clean your vehicle, the resale value when kept clean, and how you feel when driving your car when it looks and feels clean.

If you have decided on a way of cleaning that works best for you, you can set a regular schedule for cleaning so that you can accomplish your goals. Here are some ideas you may want to try:

  • Take bite-sized efforts to get your goals meet. If you’re like me, you may feel overwhelmed at the thought of cleaning your car for an hour. So break up the process and commit to only 10 minutes, and agree with yourself that whatever you get done is fine. You may also decide to commit to one section, such as just cleaning the dashboard. 
  • Have someone else clean your car every six months, so your car gets a deep clean and improves the feel and resale value of your car.
  • Set a date on the calendar and keep a regular monthly day to clean the car and push everything else back, so they take second priority.
  • Don’t wait to clean up trash. Clean any trash in the car whenever you get out of the car and have a trash can readily available.
  • Organize your vehicle after work for one minute before you get on the road.
  • Keep wet wipes in your car and clean up any sticky or dirty areas before leaving the car each day.
  • Group up on cleaning. Ask a friend or family member to help you clean. You can switch off helping each other.
  • Set a timer and stop cleaning when it goes off. Plan on another time to clean if you don’t finish.
  •  Take a photo. When you look at your phone photos, you can get a reminder of what you want to clean, and after you’re done, you can take a photo to feel a sense of accomplishment.  

Time Task Chart

how to clean your car chart

Starting with smaller tasks on our car can be easier until we are more motivated to do larger tasks. 

Remember not to buy any new car cleaning gadgets until you have at least regularly committed to cleaning your car for about 5 minutes each week. Larger tasks can seem daunting, and that new gadget may go unused for years.

Try starting small and getting some tasks done regularly, and you will start to feel a sense of accomplishment as you complete tasks that are easier to achieve.


Conclusion

When cleaning your vehicle, it helps to have a plan of action to know what to do and how long it will take. If you are organized, this will improve your chances of creating a good experience, and you’ll have the supplies you need available. ​

Starting small can be helpful. Try a task this weekend to help your car look its best. 

I hope you can achieve your cleaning goals, whatever they are. To learn more about cleaning your car, check out this article – 12 Common Car Cleaning Mistakes That You Can Avoid.

Wash Your Motorcycle [15 Easy-to-Follow Steps]


Wash Your Motorcycle

Have you taken your motorbike on a cross-country tour or over grimy roads?  Then your bike must be dirty and may have oily grim around the engine and chain. This is a good time for a motorcycle wash.

Washing your motorcycle is not the same as washing your car. Care is needed to protect bike parts and ensure a thorough cleaning. All you need is a bucket with soap and water, rags that can get dirty and some that stay clean, and some degreasing product(s).  

When I owned a motorcycle, I didn’t go in the mud, so mine was fairly easy to clean off. I just needed to ensure that I kept the chain in good condition and that I thoroughly cleaned all the water off when I finished washing. 

Here are the steps you can take to easily clean your motorcycle.


1. Preparation For Washing Your Motorcycle

Place the bike on a center stand if you have one. Make sure it is on stable level ground. Washing in a shaded area will help the washing process.

During the preparation stage, the bucket should be filled with lukewarm water. Then, add the stipulated amount of soap concentrate for a foamy mixture. Avoid the use of detergents that contain coarse salts because they result in corrosion.

Ideally, get soap made for washing cars or motorcycles. Some soaps may be too acidic or alkaline and cause damage to the paint.

Furthermore, avoid using vinyl-based detergents on the seat because it could become slippery. 

It may be worthwhile to use hand gloves when cleaning up greasy areas of the motorcycle.

One recommendation for some people is to use WD40 on the electrical parts, such as the battery terminal, to prevent the water from sticking to them. 


2. Applying Degreaser On Your Bike

Applying Degreaser

Some portions of the bike tend to get extremely dirty such as the engine, wheels, and chains; they should be treated with a degreaser to facilitate the removal of the stains.

Make sure to use rags that can get dirty, and then don’t use them on anything else besides cleaning grease again.

Never wash a greasy rag in the washing machine. The grease can transfer to other clothes and transfer to the washer. 

The same applies to the dryer. Don’t place greasy rags in the dryer. Grease may burn at higher temperatures.  

AD

3. Wipe off the Degreaser

With the help of a rag cloth, the areas covered with a degreaser should be wiped off. This helps to remove particles and will allow the soap and water to help clean the bike.


4. Use Degreaser on the Chain​

Follow the directions for the type of degreaser and chain cleaner you use.

It may be helpful to rotate the wheel or put the motorcycle on a center stand or a motorcycle jack. 

Also, try to reach areas such as the rear suspension and swing arm to give the motorbike a thorough cleaning.

AD

5. Remove the Degreaser

The following stage necessitates the degreaser to be wiped off properly. Microfiber cloths should be used for wiping the wheel hubs, engine casings, and cables for the effective removal of greasy substances.


6. Use Soap and water

washing your motorcycle
Photo Credit: http://www.kacasni.com/3-things-avoid-washing-motorcycles/

Use a hose to spray a low-pressure stream of water on the bike to rinse off dirt and particles. 

Then you can use a microfiber towel in the soap and water bucket to wipe down the bike everywhere except the greasy areas. 

You can also use a foam sprayer instead of a bucket and microfiber cloth; ensure it becomes completely wet. 

Give the motorbike a good wash; concentrate on areas that may be hard to get to for a thorough clean. 

AD

The usage of microfiber cloths, fine steel wool, sponges, toothbrush, scourers, or brushes are recommended for scouring wheels, exhaust pipes, and radiators

Decide which is best for each area to effectively remove grime. However, test to ensure that they do not scratch any areas, especially if they are painted. 

Waiting a couple of minutes will help the water and soap penetrate the dirt and grime on your motorcycle 


7. Washing Off Your Bike

The next step entails squirting water over the bike. Take the hose and rinse off the bike with low pressure. Repeat the process until all of the soap is removed. If you don’t have a hose, try rinsing the bike by pouring water over the soapy areas.


8. Draining the Water

If you want, you can wait for 5-10 minutes for the water to drain. It may also be helpful to move the motorcycle to a sunny area. But it’s a good idea to dry painted areas right after the rinse.


9. Drying Your Bike

With the use of chamois or a microfiber cloth, remove as much moisture as possible. All water needs to be removed so that corrosion or rust will not occur.


10. Lubricate the Chain With A Chain Lubricant

When the chain is fairly dry, lubricate the chain with a chain lubricant.

Make sure the entire chain is coated with the lubricant. Make sure to adhere to the instructions given on the package. 

Some chain lubes are wetter, and others are drier. Check this article for more information (How Do You Choose the Best Motorcycle Chain Lube?)

AD

11. Use WD40 if Needed

Apply WD40 to exposed metal areas that may not be able to remain dry. It is helpful for getting rid of water. Do not apply it to moving parts, paint, plastic, etc. Here’s an article that tells you where you can use it.


12. Polishing Your Bike

washing your motorcycle
Photo Credit: http://www.uniquebike.com/features/2015/04/cleaning-your-bike-top-tips.aspx

Take another rag and apply a little amount of polish to the paint. It is advisable to use good-quality wax.

It provides protection from the harmful UV rays of the sun and keeps the paint protected.

Paste wax helps add a layer of protection to protect the clear coat, and whether it is a spray or a paste, you can help your motorcycle stay looking great for a while.

Follow the directions for the type of product you choose. Some paint jobs may look better if you know how to apply the wax properly. See this article for more information.

AD
AD

13. Buffing the Wax

After application of the body polish, let the wax dry. Later, use a lint-free cloth to continue buffing off the wax.


14. Polish the Metal

If you’re interested in polishing the shiny metal parts on your bike, try using a metal polishing product.

Apply some polish on a rag, and you can clean the forks, clutch levers, and metal foot pegs.

Use it on aluminum and other metal parts you want to shine. 

AD

15. Finishing Touches

Let the motorcycle dry, and then clean with a soft cloth any spots you missed.

You should also take the bike for a ride for about 5 minutes. Squeeze the brakes to remove excess water. If you can go for a longer ride at a fast speed, this can help flush water from areas you may not be able to reach.

Some parts face the risk of corrosion if water is allowed to remain on them for a couple of days. A leaf blower can also be useful for removing water.

After returning home, you can use a microfiber cloth to give the bike a final wipe-down to get rid of streaks that may appear as a result of the water drainage.

Some Tips

  • Choose lukewarm water over cold water for higher effectiveness in cleaning.
  • Turn off the engine before wiping the chain or doing any cleaning.
  • Take care that grease, soaps, waxes, and degreasers are kept away from your eyes. Wearing protective eyewear to prevent any problems.
  • The usage of WD40 is suggested for keeping some areas water free and clean; it helps in preventing corrosion.

Remember to follow safety guidelines and take any necessary precautions when cleaning your motorcycle. It is important to clean the bike regularly so it can serve you well over the years.


Conclusion

The use of degreasers on the soiled portions can help in adding a sparkle to your vehicle. Polishing and buffing the bike make it look as good as new.

Maintaining the motorcycle is important for its effective functioning; washing your vehicle on a regular basis is an integral part of the maintenance measures and should be given priority. Take it one step at a time, and in no time, you’ll be finished washing your motorcycle.

Remember you’ll need a bucket, soap, microfiber rags, degreaser, a chamois if wanted, wax paste or spray, WD40, a spray lubricant, bike polish, sponges if wanted, and metal polish. Good luck, and send a photo of your cleaned motorcycle to someone, and they may be inspired to do the same.

If you can send a link to this article to someone, I would appreciate it!

Extra Tips

Get organized during your wash and remove any accessories from the bike that should not get wet, including the GPS. 

Changing your oil can keep your bike running smoothly for a long time. Is it time for an oil change?  (How Often to Change Motorcycle Oil: What You Need to Know)

Auto Shop Software – Why Tekmetric Gets 5 Stars


Why Tekmetric Gets 5 Stars

A good piece of software can make all the difference in how easy and helpful your job is. Some software programs have a lot of options, but it takes 50 or more hours just to get the basics. We love intuitive and helpful software that gets the job done. That’s why so many people have purchased the iPhone and similar products.

Tekmetrics get 5 stars from most users because it is intuitive, has great customer service, lots of updates, and is high speed. Users of the software like that it has a texting feature to communicate with the customer, it allows electronic approvals over the phone, has customer history, unlimited auto shop users, the ability to send pictures of car issues, and is integrated with most vendors.  

When I look for software, I always look at the customer reviews, and Tekmetric has been getting some very good reviews for ease of use, value, customer support, and functionality. Customers are likely to come back when they find value in their experience, and Tekmetric adds value for customer and service center operators. 


Customers Feel Welcomed

Make Customers Feel Welcome
Via: https://techcrunch.com/2015/08/06/researchers-hack-a-model-s-tesla-sends-out-over-the-air-fix/

Most auto shops are too busy to focus on their customers. Not only do they have cars to fix, but they also have an overload of administrative duties to take care of. The Tekmetric auto shop software helps reduce the workload and allows you to focus on the needs of your customers.

So instead of a quick “hello, we’ll be with you in a minute,” which then leads to fifteen minutes because you are too busy working on other things, your employees can spend less time with software and more time making customers feel welcome.


You Can Send Work Details By Email

The Tekmetric auto shop software will get 5 stars in part because it enables you to send the customer a detailed description of the work you will be carrying out on their vehicle via email or text. You can also send pictures so that customers will have peace of mind because they will know exactly what is wrong with their car and how you intend to fix it.


You can Send Promotions and Tips Via Email.

The Tekmetric auto shop software can also be used for email marketing and allow you to stay in touch with your customers. Customers like to feel taken care of. 

So sending promotions to your customers can help them feel appropriate because they can get a good deal by email. To go the extra mile, you can also send them free tips on car maintenance, all of which will make your customers feel appreciated and keep them coming back.


It can Teaches Drivers.

How to Keep Their Cars Out of The Garage
Via: https://www.archdaily.com/886041/private-garage-in-agueda-paulo-martins

To your customer, you should be seen as an expert in their mind; therefore, you will need to position yourself as such. You can do this by demonstrating your expertise, so instead of just fixing cars, you can send customers informative articles that help and inform them about their cars. This can be done with Tekmetric software. 

You can build trust and loyalty by letting customers know you are thinking about them.


Customers Give 5 Stars 

To look at customer reviews, you can go to the website Software Advice.com. It will help you see why they like the Tekmetric auto shop software.

To find out more about the software for the company, go to tekmetric.com.  If you want to see some videos, you can also go to their Facebook page at https://www.facebook.com/tekmetric/


Conclusion

Tekmetric is an intuitive software that helps service center operators to get things done easily and helps customers to feel like they are being informed and appreciated better. It has been getting a consistent 5-star review from users of the software because it works so well and has great customer service.

It is also great for the customer since you can send pictures and text to them. This helps the service center and customers relay information and get approvals for repairs easier. This communication helps build trust and can help customers come back time and again.

How to Turn the Steering Wheel: A Quick Guide for Novice Drivers


To Turn the Steering Wheel

Driving can be intimidating at first, especially given the fact that you have a lot to learn. Among others, one of the first things that you need to learn is steering. In theory, it might seem easy. But, once you are in the driver’s seat with your hands on the steering wheel, you might be confused about what technique to use.

If you want to know how to turn the steering wheel, there are several ways to proceed. The first step is to know you can do it and have some faith in yourself. Fear needs to be replaced with calm as much as possible, so you don’t overreact. Also, the following three methods will help you learn how to turn the steering wheel.

  • Hand Over Hand
  • Milking the Cow
  • Wiping the Dishes

As you calmly turn the steering wheel, you begin to master the skill of steering. It can seem difficult at first, but if you know the right steps, things can be a lot easier. It won’t take long before you can finally drive like a pro!


Step-by-Step Guide on How to Turn the Steering Wheel

Before we proceed, it is important to note that there are different methods of turning the steering wheel. As a beginner, it is helpful to place your hands in the 10 and 2 o’clock positions.

This means if your steering wheel was a clock, your left hand would be holding the wheel at 10 o’clock, and your right hand would be holding the wheel at 2 o’clock. Some steering wheels have bumps in those areas to make turning the wheel easier.

Later, as you get better at driving, you may have a position that is more comfortable, but for now, start in the 10 and 2 positions. If you are comfortable with this position, it is your safest and easiest way to drive once you use to it. 

While gripping the steering wheel, hold it firmly but not tight. You’ll need to be somewhat relaxed as you make turns and release your grip while gripping it again soon.

To have a better understanding of ways to turn the wheel, here is a short video that will help:


Hand Over Hand

The hand-over-hand method will work best if you have to make turns. This will allow the wheel to be turned at a greater distance within a short span of time. For U-turns, turning onto a crossing street, turning slowly, and other sharp turns, hand over hand, is best to use. 

Here are the steps that you should follow when making a hand-over-hand turn:

  • Position your hands on the steering wheel at the 10 and 2 o’clock positions. This is usually right above the car horn and usually above the cross section that some people use to rest their hands on.
  • If you are making a right turn with the use of this method, your hand should be positioned at about 10 and 2 o’clock.
  • Rotate the steering wheel clockwise until your left-hand reaches about the 2 o’clock position. At this point, release your right hand and bring it to about the 12 o’clock position.
  • Continue rotating the wheel if needed, always keeping your palm grip towards the center of the wheel and never facing out (see video).
  • After the turn, release your grip while holding the steering wheel at the 10 and 2 o’clock positions. The steering wheel will turn back, and then you can grip the steering wheel again.

Milking the Cow

This is the second method that is shown in the video above. This method can be useful when making smaller turns. It may not be as useful unless accuracy is needed and may be best during slower speeds. Not normally used in regular driving, this method can come in handy at times as roads slightly curve, so being aware of it and practicing once in a while can be helpful. 

  • Position the left and the right hand at 10 and 2 on the steering wheel. Be sure that you are as relaxed as possible and not stiff.
  • While turning the wheel, you bring one hand to the other hand, but the hands never cross. This requires you to alternate gripping the steering wheel between your hands. As you repeat this step, the original position of your hand should return to about 10 and 2 o’clock each time.  

Wiping the Dishes

While most people would say that both of your hands should hold the steering wheel all the time, there are situations where one hand will be needed, like when you are backing up. This is where it becomes useful to learn this method of steering.

  • If you’re backing up, you’ll usually hold the wheel with your left hand in the 11 or 1 o’clock position. This can help you get more control at the beginning of your turn.
  • Putting your right hand on the back of the passenger’s seat can help you control your steering and enable you to accurately view the rearview mirrors and look behind you as you back up. 
  • Turn the steering wheel with your left hand in a slow, steady motion. Just remember to keep your hand palm over the wheel, facing away from you, and not palm facing towards you as you turn. 
  • As you turn, you should be able to apply pressure with your palm on the steering wheel, so you can turn it as much as needed without using your finger much, so you don’t twist your wrist.

Pro Tips

Now that you know how to turn the steering wheel using the methods discussed above, here are some of the important tips that you also need to keep in mind:

steering

  • As much as possible, hold the steering wheel with both hands. One of the few exceptions would be when backing up, as discussed in the washing the dishes method of steering. You will have better control of the wheel when both of your hands are touching the steering wheel.
  • You also need to maintain the 10 and 2 o’clock positions for safe driving. When you are driving long distances, some people have the tendency to just lay their hand flat on the steering wheel without gripping. This gives you less control.
  • When it comes to holding the steering wheel, most of the time, most people use these two positions – the 10 and 2 o’clock position and the 9 and 3 o’clock position. If you have power steering, the latter will be possible. On the other hand, if you are driving an older model, it will be best to choose the former.
  • The position of your thumbs is also critical, depending on the road conditions when you are driving. It is recommended that you hook the thumb around the steering wheel if you are on a paved surface. On the other hand, when you are off-road, you can release the thumbs to help you stabilize the wheel on rough roads.
  • Be aware of the steering wheel airbag. Do not keep your hands crossed when turning. Do not drive with one hand at the top of the wheel. These positions can result in injury if the airbag goes off. It’s safest to keep your hands at the 10 and 2 o’clock positions.
  • Before you steer, especially when making sharp turns, make sure to reduce your speed. This is not only for safety but will also provide you with better control as you turn. 

Conclusion

As a new driver, one of the first things that you need to know is how to turn the steering wheel. I hope that this post is able to provide you with insights on how to do it right. Always remember to position your hand correctly and to turn with caution. Keep an eye on the road, be mindful of your hand position, and have a safe driving experience!

To learn more about driving tips, see these articles: 

Safety Guide for Driving With Your Phone 

List of Auto Parts That You Should Know Before  Driving A Car 

Essential Tips For Beginners On Driving Automatic Cars

How To Solve The PT Cruiser Transmission Problems?


PT Cruiser Transmission

As with most cars, the PT cruiser can have transmission problems. The A604 (41TE) transmissions are generally thought of as a good transmission but can have problems. First, let’s look at common issues.

Here are simple ways to solve the PT Cruiser Transmission Problems.

  • Change the transmission fluid of your car.
  • Dismiss error codes from your computer:
  • Look for symptoms of a faulty Transmission Solenoid.

Start with the simplest solutions, and if you’ve tried a couple of those then the more research and effort you put into figuring out the problem the more clear the solution will become, but at some point using a transmission expert is the best solution to get your car working well again.


Chrysler Automobile Transmissions

HISTORY – Chrysler launched The PT Cruiser, which was sold from 2001 to 2010. PT mainly stands for Personal Transportation. It is a retro-styled Compact car launched as a five-door hatchback car in 2001.

A 2 door convertible was also launched in 2004, and a four-door convertible was added in 2006. The assembly of the car takes place in Toluca, Mexico. The manufacturing takes place in Graz, Austria. 

Chrysler has several automobile transmissions; these include:

  • Semi-automatic
  • Automatic
  • Manual

A transmission is present in most cars to deliver to correct torque and power needed to spin the driveshaft. It allows the force from the engine to be delivered correctly to the tires. 

A transmission goes through plenty of stress compared to most components or parts of the car. The stress can be due to heat generation or friction because of the movement of different transmission parts.

The automatic transmission uses a gear system to transfer power to the drive shaft and drive the car forward or into reverse. The PT used three types of transmissions: the Ultradrive 40TE, the Ultradrive 41TE, and the Getrag. 

Finding out the PT Cruiser transmission problems can be a daunting task. Now, if we discuss the PT cruiser transmission problems, we find they are both mechanical and electrical. 

You may feel vibrations and sounds that aren’t normal. The replacement of transmission parts is expensive. There are a lot of things that can go wrong with the transmission of your car.

Some of the most common PT Cruiser Transmission problems are:


1. Low Transmission Fluid (Most Common)

PT Cruiser Transmission
Photo Credit: http://vesasautomotive.com/tag/transmission-fluid/

When you change your car’s transmission fluid, using the recommended fluid is important. All Chrysler six-speed and four-speed automatic transmissions are sensitive to specific transmission fluids. Using an ATF+4 in transmissions is a must. You should avoid using Dexron or Mercon. The incorrect filter is also not helpful.

Flushing your system: Flushing the transmission fluid also works sometimes. You will notice clean red fluid oozing out after flushing out half of the fluid. This method is less preferred as only half of the fluid is replaceable.

The best thing to do is to change the entire transmission fluid. You’d need to go to a service shop to pump out all the fluid and replace it. 

Before doing a fluid change, you’ll want to check the levels and color of the fluid.

  • Firstly, you need to put your vehicle on the surface level and turn off the engine.
  • The engine should be warm, approximately up to 180 degrees Fahrenheit. You can check the fluid after having driven for about five minutes.
  • Pull the dipstick handle and wipe off the end. Replace it and pull it out again. The level should be in the hot region mark on the dipstick. 
  • If your engine is colder and the fluid is at 80 degrees Fahrenheit, the level should be in the cold region mark on the dipstick.
  • If you notice a burnt smell or see contaminated particles, then you’ll need to change the transmission fluid as soon as possible. There may be damage already done to your transmission if you were running on low fluid levels for a while or the fluid is dark or black.

​2. Retraining the Computer​

chrysler-pt-cruiser

After changing the transmission fluid, your computer may need to know it can dismiss any error code or warnings. Like all modern vehicles, Chrysler cars have an electronic control module (ECM). 

Sometimes the computer might receive data from sensors indicating transmission problems. 

AD

You may see the check engine light for some warning. For example, if the transmission output speed sensor is damaged, the car’s computer won’t know the speed of the car. Your speedometer may not work, and your ECM will report an error code if you use an OBD2 scanner.

A car dealer can also diagnose other problems if you are not sure what is going on with your car’s transmission.

When the computer receives sensor information of a major failure, it may activate Limp Mode. If the transmission is stuck in second gear, this could mean you are in limp mode. To be sure of the problem, use an OBD2 scanner to make diagnosis easier.

What to do to dismiss error codes from your computer:

  • See if there is a warning light on the dashboard. You can also check this video on how to show codes on your odometer. If not, use your OBD2 scanner to check for error codes.
  • Find out what the code means. Some newer scanners show code error meanings. You can also go online.
  • Fix any problems, such as changing the transmission fluid or fixing electrical cables, as they also frequently cause errors. 
  • If you use an OBD2 scanner or go to a service center, you’ll be able to clear any code; make sure the problem is fixed first. Some people will disconnect the battery for a few minutes to reset the computer, but this may cause problems.

3. Transmission Solenoid: Replacement Cost and Symptoms

Automatic transmissions use hydraulic fluid, which is under pressure, so it can help change the gears. When a gear change takes place, the car computer activates a transmission solenoid.

It directs transmission fluid into the valve body, which in turn engages the correct gear. When the car moves down the road, the computer analyzes data sent by engine speed sensors and vehicle speed sensors.

There are various ways in which a car’s computer controls the transmission solenoid:

  • If the vehicle has a Transmission Control Unit, it can close or open the hydraulic circuit using a 12v signal.
  • The Engine Control Unit can control the solenoid’s plunger by turning the ground circuit off and on.

Depending on the complex design, a solenoid can control either a single or multiple gears. There are certain Symptoms of a faulty Transmission Solenoid:

  • The Transmission will not downshift: If the downshift does not occur, one of the solenoids may become stuck open/closed. It prevents fluid from entering the transmission valve body and pressurizes the correct gear.
  • Erratic Shifting – a failed transmission solenoid can cause skipping in the transmission from a lower gear to a higher gear or from higher to lower, repeatedly.
  • Severe delay in Shifting/Stuck in Neutral: for controlled automatic transmission to shift gears, the solenoid must regulate the fluid pressure to activate the appropriate gear. The solenoid can remain stuck open or closed if it receives dirty transmission fluid or uneven electric current. Gear engagement becomes difficult, which causes the transmission to be temporarily locked in neutral.

The ECU then registers an error code and triggers the engine light. The transmission will go into limp mode.

The location of the Solenoids is on the outside of the transmission (see install video). Replacing it may take 2-4 hours to complete. Mechanics may charge $80 – $100 per hour. The cost of the transmission control solenoid is about $100 on Amazon. Make sure to get the correct type for your transmission type. 

Depending on the model of your vehicle and how you fix it, you could spend $100 – $600 to replace the solenoid unit if needed. (Before doing any replacement, always check the electrical connections, as this could solve the problem.)


Other problems that may solve the PT Cruiser Transmission may have are:

  • Ground Strap might be Missing or Broken: If this is the case, your car needs a new transmission or computer.
  • Delayed forward and/or reverse engagement with a double ‘bump’ sensation – 41TE transmission. (Link)
  • PRNDL lights malfunction – 41TE/42LE transmission (1996>) (Link)
  • Speedometer reading when the vehicle is not moving – 41TE transmission / 41TES transmission (Link)
  • Bad Input Sensor (Common): When you look at the screen of a scan tool, you may find a bad sensor error message. Replace the sensor to solve the problem.
  • Upgrading Computer-Firmware: Computer firmware updates may help with some issues.
  • Loose Electrical Connection: There is a possibility that the electrical connection may be loose.
  • Adding Transmission Cooler Fluid: Regular transmission fluid maintenance can double the life of your car’s transmission.
  • Additives: You should avoid additives. But remember to use ATF+4 transmission fluid only to avoid transmission damage.

The major advantages of maintaining your transmission fluid are:

  • It has better anti-corrosion and anti-wear.
  • It maintains correct frictional properties.
  • It controls oxidation and also eliminates deposits of contamination.
  • It is Anti-foaming.
  • It can help your car operate at low temperatures.

Conclusion: If you want to know more about other car’s transmission problems, you may enjoy the following articles:

Why Is My Transmission Shifts Hard When it Hot?

What Happens When Too Much Transmission Fluid Is Added

A Quick Guide to Manual Transmission Maintenance

How To Solve The Trailblazer Transmission Problems?


Trailblazer Transmission

Transmissions are prone to several problems, especially if with heavy use or low levels of maintenance. If your transmission is having difficulties, check whether any of the following symptoms occur. 

If you have a Trailblazer, you may have encountered one of the common transmission problems that occur with many transmissions. These problems may include the following:

  • Clutch Problems
  • Transmission Fluid Leaks
  • Worn or damaged Torque Converters
  • Worn or damaged Gears
  • Solenoid Damage

Let’s find out what to look for and how to troubleshoot problems you may encounter with your trailblazer transmission.


What to Look for?

Common transmission problems include:

Clutch ProblemsWhen the engine doesn’t shift into gear while driving, this could indicate a problem with the clutch. You may experience grinding and shaking when using the clutch.
Transmission Fluid LeaksLow fluid level or thickening of transmission fluid can cause shifting problems. Slipping out of the particular gear suddenly while driving, especially if the engine slips into neutral, may mean the clutch disc may be worn and need to be replaced. Low fluid can cause a number of issues. 
Transmission fluid is responsible for the bumping noise in neutral gear. To help this, add or change the fluid. Noisy transmission in neutral could also be caused by the Worn bearings, gear teeth, or the reverse idler gear.
WornIf you feel and hear grinding or brushing sounds when driving, this may mean that there is a torque converter problem. Worn or damaged torque converter needle bearings may cause transmission damage or failure or cause the transmission to make strange noises when operating in different driving gears.
Gears & Damaged Torque ConvertersSometimes, gears can also wear and get damaged, likely from low fluid or extreme operating conditions if you experience troubles while in gear or strange noises, your gear may be worn or damaged.
If you hear noises that stop when you are in neutral, your torque converter may be the problem and may need replacement or to be fixed.
Solenoid DamageGear slippage or slow shifting are symptoms of solenoid problems and may also signify the transmission has low fluid levels. If you don’t have any leaks, it indicates there may be damage to the solenoid, which may be caused by low fluid levels or electrical problems.
When looking for leaks, you’ll usually want to check the gasket seals or input and output fluid ports.

Automatic Transmissions of the Trailblazer

automatic-transmissions

Automatic transmissions will not have a clutch which can eliminate some of the issues you may face with your transmission. An automatic transmission will encounter similar issues to a manual transmission depending on fluid levels and temperature extremes. What to look for: 

  • Make sure the correct levels of fluid are maintained.
  • Fluid may leak through worn seals in the transmission, torque converter, and lines too and from the transmission.
  • If the radiator coolant somehow mixes with the transmission fluid, problems can occur. Fluid problems can cause the gears to slip and the vehicle to shift irregularly or slowly.
  • A solenoid valve controls the flow of fluid through a system and, if damaged, will disrupt the flow of fluid in the transmission, and the gears may not shift or work properly.
  • Operating the vehicle when the transmission fluid is low may damage the valve. It may also not work correctly when there are electrical problems. Vehicles that do not shift properly, even when fluid levels are full, are usually experiencing solenoid valve problems.
  • It uses a clutch in the torque converter. It sometimes causes jamming and locking of the solenoid valve. The problem initially seems like a low fluid problem, but eventually, there is a loss of power.

Manual Transmissions of the Trailblazer

Trailblazer Transmission Problems
Photo Credit: http://forums.trailvoy.com/showthread.php?t=93187

Manual transmissions use a clutch, and shifting is done by the driver. A manual transmission will encounter similar issues to that an automatic transmission but may need less work overtime when kept up. What to look for: 

The major culprit of all transmission failures has to do with the fluid. Old, burnt, thick, or low fluid can eventually break your transmission.

Check the transmission fluid at least two times a year to prevent possible problems. Older cars and recently serviced ones need to be on the lookout for leakage of fluid.

It’s easy to check for the leakage in the transmission because only a few places in the system are there where a leak may appear. 

In addition, the filter may have a clog. The filter is vital to the transmission’s performance, so make sure it is replaced when you change your transmission fluid.

  • Grinding or shaking may indicate a problem with the gears. Grinding noises are more common, which may or may not be because of damaged or worn gear synchronizers.
  • Noises that occur after engaging the clutch and shifting gears may indicate that a clutch adjustment is required or a replacement is overdue.
  • There is a higher tendency of shaking or jerking rather than grinding; you may need to disassemble the transmission to locate the source of the problem, but not before exhausting all other avenues.
  • Burning smells from a vehicle may indicate overheated transmission fluid.
  • Transmission fluid must be cooled properly to lubricate transmission components. A system that runs too hot can cause increased friction and premature wear.
  • Two common causes of overheating could be low fluid levels or using a type of transmission fluid that is unsuitable for your vehicle.
  • If the problem gets worse, then a new or remanufactured transmission could be an option when heading for transmission failure.

Some Important Things to Consider

Trailblazer Transmission Problems
Photo Credit: http://forums.trailvoy.com/showthread.php?t=22724

If your transmission fluid is leaking and the fluid under the car has a burnt smell, this can indicate the fluid needs to be chained immediately, and your transmission has probably already taken on the damage. After you change the fluid, your transmission may not shift correctly since the damage has already occurred.

(It only shifted normally before the fluid change, possibly because the old fluid had bits of metal that aided while shifting.)

The solenoids are attached to the vehicle’s electric system, and when the ECU encounters an error and it can trigger the check engine light if anything goes wrong. The transmission may enter Limp Mode, where it engages only second or third gear to limit the speed of the vehicle but without immobilizing the vehicle.

Transmission solenoid failures can occur because of electrical issues. Dirty fluids can also cause the solenoid to be stuck open or closed. Some of the problems that can occur due to changes in transmission fluid pressure are the following:

  • Shift Solenoid: There could be difficulty getting out of third gear, which may be caused by a faulty shift solenoid.
  • Jerking: Problems with shifting from first to second gear with a hard jerking are possible.
  • Continuing Forward: Sometimes, when the transmission is cold, the car may experience surging after the brakes are applied, requiring the driver to put the vehicle in neutral.
  • Transmission Failure: The transmission is a complicated piece of machinery in your car. Because of their complexity, they can be complicated and get costly to fix. If the fluid levels are not maintained, the inability to change gears and problems starting the car may be experienced.
  • Erratic Shifting: When dealing with a transmission solenoid that has failed, the gearbox could skip a gear up or down or shift back and forward in between the gears. It may also get stuck in the same gear, and that doesn’t want to shift.
  • Transmission Won’t Downshift: Whenever it happens that the transmission does not downshift, it could mean one of the shift solenoids is stuck in the open or closed position. This restricts fluid from entry into the transmission valve body so it can pressurize the right gear.
  • Severe Delay in Shifting / Stuck on Neutral: In electronically controlled transmissions, the gear shifting occurs as the solenoid operates correctly. Fluid pressure needed for gear changes can’t happen if the solenoid receives too much or too little electrical current. This may make the transmission temporarily lock into neutral.

Be prepared to act quickly if you are experiencing a transmission problem. The same day that the problem occurs, try to get a diagnosis. You may be able to partially diagnose problems yourself through inspection or using an OBD2 scanner. It can be very costly to wait in terms of money and safety. 

A fault in the transmission may cause a delay in responsiveness from gears and may affect steering as well. This could be dangerous when driving, and some loss of control over the car occurs.


Conclusion

You or a mechanic can inspect error codes on an OBD2 scanner. Evaluate the symptoms yourself or ask a technician to find out possible issues. It could also be as easy as bad ground or as complicated as a solenoid pack that has failed.

Some other resources for troubleshooting the Trailblazer transmission issues include these articles:

Why Is My Transmission Shifts Hard When it Hot?

What Happens When Too Much Transmission Fluid Is Added

A Quick Guide to Manual Transmission Maintenance