Home

Recent Posts

Ignite Your Ride Performance With The Best Glass Pack Muffler – Complete Buyer’s Guide


Best-Glass-Pack-Muffler

A glass pack muffler is made of aluminized steel, and most of the mufflers available are constructed with a wide-open performance design. Through the automobile muffler, the exhaust gas gets right inside the muffler’s center.

The basic design of a glass pack muffler is it consists of a small tube placed inside a large outer tube that swells in between. The gap between the swollen parts of the large tube is packed with fiberglass. There are a few things to be kept in mind while buying the best glass pack muffler for your vehicle.


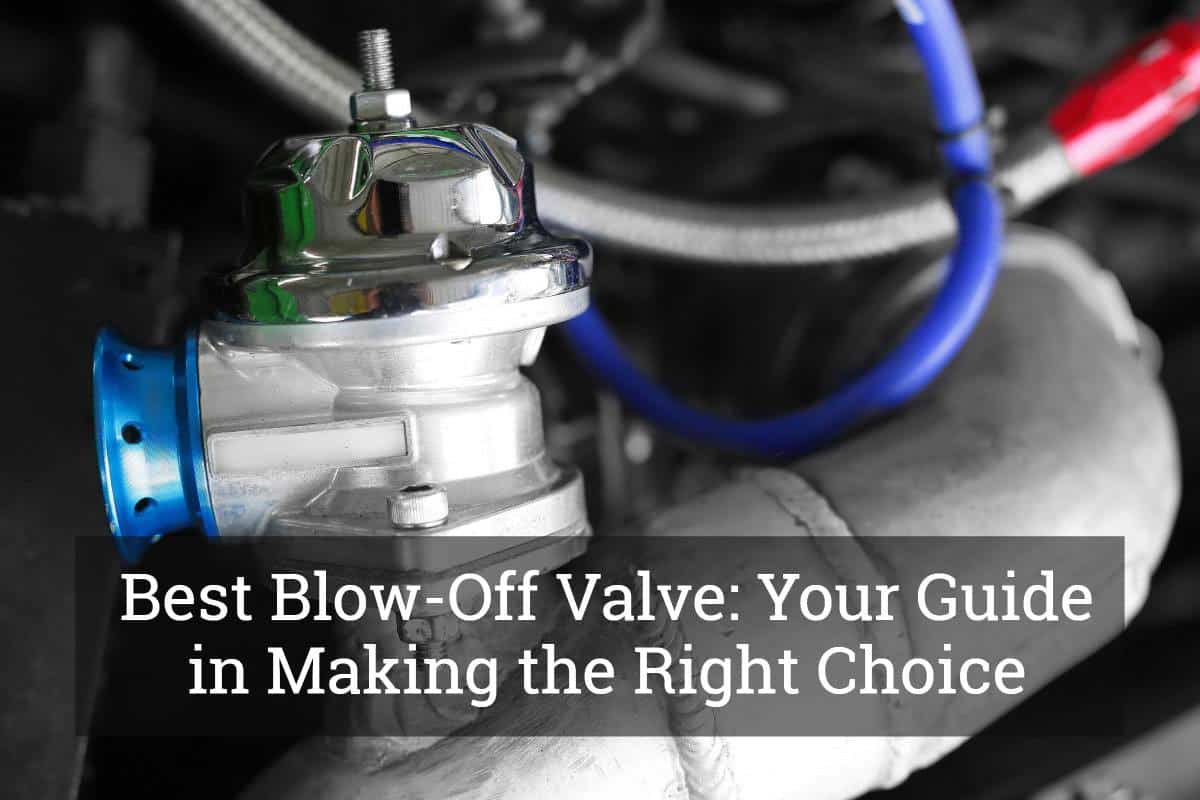
Top 4 Best Glass Pack Mufflers​

Product (Amazon Links)Brand  

Cherry Bomb 87522 Glasspack Muffler

Cherry Bomb

Review

Flowtech 50252FLT Red Hots Glass Pack Muffler

Flowtech

Review

Thrush 24205 Glass Pack Muffler

Thrush

Review

Jones Exhaust A3518s5 Glasspack Muffler

Jones Exhaust 

Review

What is a Glass Pack Muffler, and What are Its Uses?

  1. A glass pack muffler is present in all vehicles. The exhaust enters through the middle portion of the pipe, and the pipe creates vibration and sound. The mufflers will have rounded bullet-shaped ends with a mellow sound when the engine of the car is raced.

The mufflers remain a great addition to your vehicle since they not only improve the performance of your vehicle but also give it a show-stopping look. They are specifically developed using a deep tone sound. They are proven to increase horsepower and torque.

  • Glass pack mufflers are available in different lengths and sizes to create the sound.
  • The mufflers come with one chamber or multiple chambers.
  • Chambered ones are used in vehicles to reduce noise when driving on the street, and they will make you feel a car growl.
  • The performance depends on the muffler, as it can be a low, throaty, growl, or roaring.
  • Youngsters install them on their vehicles to produce powerful roaring sounds.
  • The ceramic designs can lower the temperature under the hood.
  • The increase in flow will help in your vehicle’s fuel economy.
  • The best glass pack muffler will be constructed of aluminized stainless steel.
  • They add value to your vehicle.

What are the Advantages and Disadvantages of Using a Glass Pack?

Glass packs are the simplest form of mufflers used on performance rides. The sound created by the car engine will be passed through a material that can absorb sound before it is released. By using a glass pack, only less sound is allowed to escape through the muffler.

The sound creating the capacity of a glass pack remains excellent. By installing them in your vehicle, you will get better fuel mileage. They have low back pressure and excellent tone quality. They have better sound muffling abilities, and this remains one reason for many people choosing a glass pack instead of others. They don’t allow sound to resonate.

When sound is produced, it reduces the pressure on the engine by dissipating the pressure of sound waves through glass particles. One of the best advantages of using glass packs is they are available at a cheap rate.

The main disadvantage of glass packs is that they can’t be used on every vehicle. When it gets old, the muffler will start making a bad sound. You must always check with the experts before installing a used one.


How to Choose the Best Glass Pack Muffler?

How-to-Choose-the-Best-Glass-Pack-Muffler

The main aim of using a muffler is to reduce the powerful sound to a tolerable level. Few things have to be kept in mind to buy the best glass pack muffler.

  • Search for the correct fit and diameter – First, you must check for your vehicle’s present exhaust system and choose a muffler style according to that. Find out whether it is a single or a dual system. It will help you to decide the number of inlets you need in your muffler. A single exhaust needs a single muffler, and a dual exhaust will need a dual inlet muffler. Find the diameter of your exhaust pipe. For this, you have to compare your inlet and outlet with the present exhaust diameter.
  • Find the room needed for the glass pack – The outer side dimension of your muffler should provide proper clearance below the vehicle. Choose the correct length for quick installation and proper clamping. To fit properly within your vehicle, you must choose the right casing size and shape.
  • Pick up a style you need – There are three main styles available: chambered, glass pack and turbo. Chamber mufflers are suitable for muscle cars. They reduce noise by providing throaty performance. Glass pack mufflers are designed to provide horsepower and maximum flow. They are straight, and the perforated pipe is wrapped in fiberglass packing. They are a popular choice for racing cars. Turbo mufflers have S design allowing the gas to travel through the tubing. They offer better noise reduction. They are good to be used for street applications.
  • The construction – Mufflers are built to handle high-pressure gasses that exhaust and should be able to resist corrosion. They are available made of aluminum and stainless steel. Aluminized steel is quite affordable than stainless steel. Stainless steel glass packs provide greater corrosion resistance and durability than the aluminized steel version.

Here are given a product review of some best glass pack mufflers, which will help to choose according to your need.


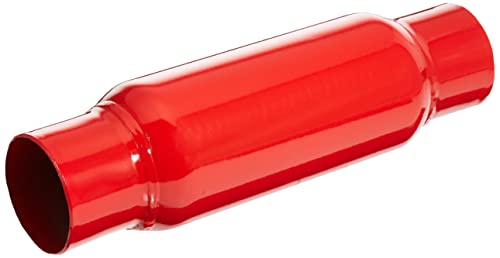
1. Cherry Bomb 87522 Glass Pack Muffler

AD

The 12-inch long muffler weighs 3.5 pounds. The 8-inch body will have 2.5-inch size inlet and outlet. They featured straight through design and constructed of aluminized steel. They produce a sound louder than the norm with a unique deep tone.

It has a high temp red finish, and they are designed to be reversible for easy installation. They weigh less than 4 pounds, and they are small, allowing them to be installed on a wide variety of vehicles.

Major Features

  • It has a unique compact size
  • The exterior resembles a resonator
  • The straight through construction emphasize performance
  • It weighs less than 4 pounds and considerably smaller than other mufflers
  • Most manufacturers provide warranty against artistry

Pros:

  • The fully welded body offers maximum durability
  • It improves throttle response and offers a great sound
  • They are easy to be installed
  • They are available in a compact size
  • Most manufacturers provide warranty against defects in artistry

Cons:

  • They can crack when water hits them when they are hot
  • The fiber inside the muffler will shrink and becomes brittle when cold water hits it

2. Flowtech 50252FLT Red Hots Glass Pack Muffler

AD

Red hots glass muffler from Flowtech is considered to be one of the best mufflers when compared with others. They have a classic design, including long-lasting, thick, high heat ceramic wrapped around a power louver baffle.

They sound red hot and boost power. The backpressure will be decreased to increase flow. They are available in red, rich finish with a diameter 3.5-inch case. The outlet diameters are available in your choice of 2 inches, 2.250 inches, and 2.5 inches.

Important Features

  • They provide excellent rust and corrosion protection
  • They are powerful enough to lower down under hood temperature
  • They offer more horsepower
  • They provide great appearance
  • They have a longer life

Pros:

  • They have a stylish design and deliver a powerful hot sound
  • The backpressure has been decreased to increase the flow
  • They are well constructed
  • Great quality for the money you spend

Cons:

  • You have to be careful with installation
  • The direction to install the muffler is not provided
  • Sometimes it rusts quickly

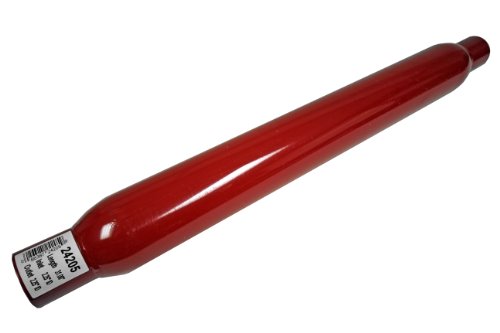
3. Thrush 24205 Glass Pack Muffler

AD

Thrush muffler is a dual outlet model, and they provide a unique combination of classic design with today’s power enhancing engineering enhancement. They are good to be used for muscle cars and trucks.

The muffler comes with an inlet and outlet size, 2 1/4 inch and a body size 3 and a half inch. The overall length of the muffler is 31 inches, and they are available in red color. They can be used for custom applications.

Salient Features

  • They have expandable bushing for custom applications
  • They are constructed of stainless steel
  • They provide maximum flow and power
  • They provide maximum durability

Pros:

  • Due to the presence of heavy gauge shell, it provides maximum durability
  • They look attractive and can add value to your vehicle
  • The straight through design provides maximum power and flow
  • They are reversible for maximum flexibility
  • The fiberglass matting provides better sound control
  • They are made of 100% extended construction for lasting life

Cons:

  • They are not specific to any model, as they are custom fit part
  • Make sure there is enough room to fit the muffler because it is long

4. Jones Exhaust A3518s5 Glass Pack Muffler

AD

Jones offers a variety of mufflers in a different style, size, and material. They are engineered to reduce in-cab and exterior engine noise. They are constructed of aluminum steel for durability. They are designed to provide long service life. The product features in and out diameter 2.250.

The overall length of the muffler is 23.00, and it weighs 5.9 pounds.

Key Features

  • The Jones muffler is designed with high-quality material
  • Each muffler provides you the option to choose standard flow or reverse flow
  • They offer maximum engine performance
  • They are available in a wide variety of size and style
  • The round shaped muffler gives you a smooth sound

Pros:

  • It is a great product made of high-quality material and meets the highest quality standards
  • You have the option to choose standard flow or reverse flow
  • They provide maximum engine performance
  • They are available in different size to suit your exhaust system
  • They appear good and can be installed easily

Cons:

  • They are not suitable for vehicles that are looking to produce big sound

The job of a muffler seems to be easy enough. All it has to do is to reduce the exhaust and to produce a sweet noise. Performance mufflers are designed for horsepower, torque and noise control. Out of the various types of mufflers, glass pack is considered to be highest in demand, and this is mainly for those people who focus on sound.

To know what muffler sounds the best, you must first know what each one does. The straight through muffler comes with basic style and they are usually used in performance cars and trucks. They are good, and they offer value for money. Share your views about the best glass pack muffler available today so that our reader may benefit.

How Do I Deal With My Frozen Car Battery?


frozen-car-battery

Climatic conditions and weather change according to the place and time. During cold climates, we hide from the freezing temperatures. Many of our things are hidden in a warmer region. However, the car that we use is covered by snow.

This vehicle is non-covered, and there is no other option to keep it warmer. Well, after the cold drops out. We will start the car, but it won’t start. Yes, of course, you might interrogate why and how. A simple answer to this question.

It is because of the frozen car battery. When the temperature drops to minus degrees, the cold surroundings deactivate the car battery. Sometimes, the battery gets frozen in warmer temperatures, too.

It happens when your battery is not fully charged up to its maximum. If your battery is not charged to the maximum, the sulphuric acid inside the battery and the distilled water inside the battery will not mix properly.

Thus, this distilled water gets frozen even in warmer temperatures. So, with your frozen car battery, it is not at all possible to start your vehicle. To make your vehicle start, we are going to see how to deal with your frozen car battery.


Steps to Recover Frozen Car Battery

Usually, the batteries are safeguarded from freezing. It happens when the battery gets a full charge. The issue may lead to serious damage to the battery. Finally, you have to replace your car battery.

Never attempt to charge the battery or to jumpstart the battery, or else this will make the battery explode in certain cases. (the frozen battery)

1. Inspect your battery with a keen eye.

my frozen car's battery

Photo Credit: http://ezbatteryreconditioning.com/video/?utm_expid=106169069-68.M0GY6VeqQLa-k6HBSqUevQ.1&utm_referrer=http%3A%2F%2Fs3.amazonaws.com%2Fezbatteryown%2Fcar-battery-for-sale-cape-town-of.html

  • This procedure is to make sure that the battery is not frozen outwardly.
  • The case of the battery, when frozen, may lead to some cracks outside. So, have a clear inspection of the case. Suppose the case gets cracked. You must need an immediate replacement or take the battery to the retailer.
  • If you find that your battery is not damaged, remove the battery with care. Then, move the batter to a safer and warmer place. While removing it, take the time to remove it, and don’t rush this process or else the battery will spoil.
  • After removing it, try to keep it in a warm place. Inside the battery, the electrolyte contains 75% of distilled water and 25% of sulphuric acid. Due to the cold climate, the distilled water inside the battery turns into an ice cube.
  • As the distilled water freezes, the distilled water inside the battery will expand. This expansion will push the plates, which lead to a short between the negative and the positive plates in this frozen car battery.
  • To get a quick recovery, you can take the battery to a well-experienced mechanic or any other person whom you have been there regularly. Check the battery’s volt using a volt meter. Some experts suggest that checking the battery regularly and refilling the oil won’t lead the car to this condition.

2. Check the battery and its condition

Check-the-battery-and-its-circumstances

While snooping out the battery problem, check whether the battery cables have corrosion with the other cables, and the corrosion will disconnect the power supply. Thus, you won’t be able to start your car.

Since your car battery can produce more power under warm condition. Cover the battery with a battery foil which will stabilize the battery from cold to normal. Keep your car inside the garage to safeguard the battery.

There’s another way to get rid of the frozen car battery. Plug the battery with the block heater and battery blanket for at least 2 hours. Then your car will obviously start. However, the battery should not have any problem and must be within two years.

Sometimes if you just plug out the battery and place it in the car after two days keeping inside will also give a good result in working.


3. Jump Start the battery

my car's battery is frozen

Photo Credit: https://mods-n-hacks.gadgethacks.com/how-to/use-your-dead-car-battery-power-emergency-fans-lighting-and-more-0139442/

If you find that your battery is not working completely, then you can give a jump start try. For this, you need a jumper cable and another car to ignite your car’s battery. Connect the two ends of one side of the jumper cable to your battery and the other end to the working battery in a car.

The positive plates are connected as well as the negative plate. To identify positive plate, the battery has a symbol “+” and the negative with the symbol “-“

Connect them to the working battery which is fixed with a car. Start the car and run it for 2000 rotation per minute. If this doesn’t properly, then double check with the cables which you have connected.

Give another try with the same process. If not, then your battery needs a replacementMany mechanics and battery retailers say that battery is a crazy thing. You can never judge a battery by its performance. Because today it might perform, tomorrow it might fail to perform.

Since the battery is a chemical based substance, you can never judge what reaction it will give.

Thus a very common advice given is to keep the battery warm and maintain a full charge in the battery. General precautions to avoid frozen car battery. Then turn on the headlights, if it works the batter came normal or else it has to be charged.

You can also start the car and hold the key for ten seconds. Then you can give the accelerator. If that doesn’t work try it out for another time and your car will start.

  • Usage of thin oil

During the cold season, thick oil won’t flow due to the density in it. If you use thin oil, then the oil can flow easily.

When it comes to battery though we have many trail and error methods, only one option is left. You have to replace the old battery.

With a frozen car battery, we can only try with some arbitrary methods or with some attempts. Prevention is better than cure. So it is advisable that you replace your car battery.

Best Blow-Off Valve: Your Guide in Making the Right Choice


Best-Blow-Off-Valve

If you have a car with a turbo-charged engine, you will most probably need the best blow-off valve, also known as a diverter or pop-off valve, among other names. It is the one that creates a powerful sound, which is easily associated with turbo cars. More than this, it is also responsible for protecting the engine and making sure that the car retains its tip-top performance.

In the rest of this guide, we will help you find a blow-off valve that will be perfect for your needs. We will identify some of the most important factors to consider, as well as five of the best products that can provide the best value for money.


What is a Blow Off Valve?

To begin with, let me tell you one thing – a blow-off valve is not necessary for all cars. It will be a waste of money if you buy one, and in the end, you realize that this is not actually required by your vehicle. A blow-off valve is essential for turbocharged and supercharged cars. The following are some of the reasons why you need to have blow-off valves:

  • Create a Loud Sound: This might seem pretentious or annoying, but when you have a turbocharged engine, you will need a blow-off valve. The whoosh noise that is created by this device will make it easy for your car to be noticed on the road, making many envious of what you are driving.
  • Prolong the Life of your Turbocharger: Another good thing about using the best blow-off valve is that it aids in the prevention of surge loading, which can be instrumental in extending the lifespan of both the engine and the turbocharger.
  • Improve Performance: Your turbo car will surely demonstrate optimal performance with the best blow-off valve. It is effective in the maintenance of turbine speeds in between shifts. In turn, this enhances the speed and overall performance of your car.
  • Prevent Expensive Repairs: Prevention is better than cure. This holds true even in the case of your car. A blow-off valve is one of the things that will help in the prevention of suffering from costly repairs in the future.

Types of Blow-Off Valves

It is important to decide on the specific type of blow-off valve that is perfect for your needs. In this case, the following are two of the options that are available in the market:

  • Vented Blow-off Valve: In the case of this blow-off valve, the air will be released into the atmosphere. One of its greatest advantages over its counterpart is that its installation is easier.
  • Recirculated Blow-off Valve: With this blow-off valve, on the other hand, there will be recirculation of air back to the system. If you have a Mass Air Flow sensor, this is the perfect choice for you.

Top Picks for the Best Blow-Off Valve

Product (Amazon Links)Description  

BILLFARO Blow Off Valve Plug,Car UPR VTA Blow Off Valve Mod Plug 2.7 3.5 Fuel System Parts Replacement For F150 2013-2021 for Ecoboost Expedition Engines 2015‑2022 (Black)

Review

DEWHEL Billet Blow off valve mod plug Turbo Hiss Black compatible With ford 13-21 F150 Ecoboost 3.5l 2.7l VTA

Review

HYXUAN Solenoid Valve AA5E9U465AD Compatible with Expedition Flex MKS MKT 2010-2018 Turbo Turbocharger Intercooler-Valve Pressure Relief Valve

Review

NewYall Turbocharger Diverter Valve Turbo Cut-Off

Review

Ford Expedition Flex Lincoln MKS MKT 10-18 Turbo Turbocharger Intercooler-Valve Pressure Relief Valve

Review

If you have no idea what to purchase, below are five products that you should include in your list of choices.


Essential Factors to Consider

As you try to narrow down the possibilities and make the right decision, here are some of the things that should be taken into account:

  • Reviews: The first thing that you have to do is to seek the opinions of other people. A lot of them are generous enough to go online and write about their experiences. You can learn a lot from what they are saying, which will also make it easy to weigh the good and the bad for each option.
  • Compatibility: Blow-off valves do not offer universal compatibility. With this, avoid wasting your money by doing your research to know which one is compatible with your vehicle.
  • Size: 40mm is perhaps the most popular diameter for a blow-off valve. However, there are some cars that may require a different size. With this, you should know how much space is available for installation to choose a valve that is compatible with your car.
  • Noise Rating: Earlier, we noted that a blow-off valve would add a whoosh to your car, making it produce a noise that will turn heads. The level of noise that it produces, however, will differ from one product to another.
  • Installation: Ideally, you should find one that is user-friendly, which means that its installation can be accomplished in a snap. You do not need the help of the pros to accomplish this task. It is important that there are detailed instructions to guide you through the process.
  • Maintenance: Through the years, your blow-off valve will be prone to wear and tear. Leaking is a common problem that will significantly weaken its performance. With this, you should choose one that is easy to maintain, which can be tantamount to an extended lifespan.
  • Price: Yes, it is tempting to choose a blow-off valve that comes with a cheap price. However, this is one thing that you can possibly regret in the future. It should be seen as an essential investment. Even if the valve is expensive, if the performance is unmatched, it will be a good product to purchase.

Conclusion

Now that you are done reading, I hope that you already know how to choose the best blow-off valve. It can be a lot more complicated than what you think, especially because of the abundance of the options that are available in the market. To make things easier, keep an eye on the five brands and models mentioned above.

A blow-off valve is just one of the essentials for your car. To know more about the other things that you might need, click here.

Best Spray-On Bedliner: A Concise Buying Guide


Best-Spray-On-Bedliner

A bedliner is one of the most important for a pickup, which acts like a sock to a foot or a case to a cellphone. For many people, they would probably end up being confused when buying the best spray-on bedliner. There are many choices that are available, making it difficult to come up with the right choice. Also, for someone who lacks technical knowledge, it is easy to get intimidated.

If you need help in choosing a spray-on bed liner, keep on reading the rest of this guide and I will help you to make the right choice. Learn more about the factors that should be looked at, as well as five of the best models you might want to take into account.

Product (Amazon Links)Image (Amazon Links) 

Herculiner HCL1B8 Brush On Bed Liner Kit

Our Detail Review

U-Pol Tintable Truck Bed Liner Spray Coating

Our Detail Review

LinerXtreeme Spray-on Bedliner Kit 3-gallon Black with Gun

Our Detail Review

Al’s Liner ALS-BL Black Premium DIY Polyurethan​​e Liner Kit

Our Detail Review

T-Rex Black Bed Liner, 2K Urethane

Our Detail Review


What is a Spray-On Bedliner?

Some of you might have not yet heard of spray-on bed liner. I cannot blame you, especially if you do not have a pickup. This is one thing that you think you do not need until someone talks about its benefits. Right there and then, you will have a change of mind and consider a bed liner as a priority.

Simply put, this is a liquid that is applied on the surface of the pickup through spraying. It forms a protective and seamless coating. It is made from polyurethane, which is the same material that is used in sealants. It is important as it protects the surface from scratches and other visible damages. It can be effective but only if you make sure that it is applied properly and you pick the right product.


Types of Spray-On Bedliners

Generally speaking, they can be categorized into two:

  • Aliphatic: This is a type of polyurethane coating that is made from compounds that have better pigments. This is often preferred by many because this means that fading will be quite longer compared to its counterpart.
  • Aromatic: If you are looking for a budget-friendly alternative, on the other hand, this is the right option for you. The only problem with this product is that it will most likely fade easily, which means that you will have to reapply.

Reviews of the Best Spray-On Bedliner

If you still have no idea which product will make a great choice, in this section, we will discuss more about five of the best choices that are available in the market. We will identify some of their notable features, as well as a few of their pros and cons.

1. Herculiner HCL1B8 Brush On Bed Liner Kit

AD

With this spray-on bed liner, you will basically have everything that you will need to get started. Aside from the one gallon of coating that is ready to be applied on the surface, brush and rollers are already included. There is also an applicator brush, which will make it easy to work in tight corners.

Ease of use is one reason why you might want to choose this above other models you can find in the market. It is designed to be as user-friendly as possible. There is no need to have technical knowledge or advance tools. Even without a helping hand, you can do the job on your own. You can treat it as a normal paint.

The versatility of this bed liner is one more thing that deserves to be given emphasis. This means that it can also be multipurpose. You can use it in other applications aside from the bed liner of your pickup truck. It will hold strong even in wood.

Once it is applied, it results to  creating a skid-free surface. Even through the years, you will be happy that it won’t easily fade. It is not also easily prone to cracks and dents. Also, it can resist gasoline and other external elements but not the sun’s UV rays

Pros:

  • Installation can be easily accomplished
  • Coating lasts long
  • Inclusive of everything you will need

Cons:

  • Lacks UV-resistance
  • Gallon can be prone to leaking

2. U-Pol Tintable Truck Bed Liner Spray Coating

AD

You will realize that it can provide excellent value for money. It has the tools that you will need, including a user-friendly and lightweight spray gun.

Also, one thing that you will love about this is that the coating is tintable. This means that you will have the option to customize the color depending on how light or dark you want the output to be.

The durability of this bed liner is also exceptional. After spraying and once the surface has dried, you can be confident that it will take long before it scraps or fades. It is also UV-resistant. Stain, mechanical damages, corrosion, rust, and temperatures will not also easily damage the surface.

Aside from acting as a protective coating on the surface of your truck, this can also effectively function for sound deadening. It can effectively minimize noise and vibration.

Lastly, and perhaps most importantly, it is user-friendly. Even if you are not a pro, it will be easy to figure out how to use this bed liner. It is also a good thing that it dries quickly.

Pros:

  • Creates even and consistent sprays
  • Easy to use
  • Lasts long

Cons:

  • Bottle provided for mixing is quite small

3. LinerXtreeme Spray-on Bedliner Kit 3-gallon Black with Gun

AD

As you search for the best spray bedliner, do not forget to include this in your choices. It is also inclusive of the materials you will need to get started, including an applicator gun. The manufacturer also provides concise and easy-to-follow instructions to let you know how to achieve the intended output.

This package already includes a three-gallon kit of spray-on bed liner, which should be more than enough for 100 square feet. It is also inclusive of two can of reducer.

It has a semi-gloss finish, which is sure to be appealing. More than the way it looks, it has also been praised because of its toughness. This will make it resist external elements and will retain its tip-top condition even after several years.

If you are still hesitant about buying this product, it might help to know that this is made by a company that has been in the business for more than two decades. The latter can make you more confident about its quality.

Pros:

  • Easy to use
  • Creates a professional look
  • Comes with a free gun

Cons:

  • Can be prone to over-spraying
  • Sprayer can be easily clogged

4. Al’s Liner ALS-BL Black Premium DIY Polyurethane Liner Kit

AD

Simplicity is one of the things that might convince you to choose this product above other alternatives. Its application is pretty much straightforward. Also, it is a good thing that it can be multipurpose, making it offer the best bang for the buck.

It is also tintable. This means that you have the option to add more tint until you are able to achieve the color that is required.

When it comes to quality, this does not also fail to impress. Appearance-wise, it is indeed exceptional. Better yet, it is also long-lasting and durable. The coating will be thick enough to offer the necessary protection, and making sure that it won’t easily chip, even in demanding conditions.

The product is composed of three parts, each with its respective purpose. You also have complete control on the color of the output. You can mix in smaller quantity if you intend to have it sprayed only in a small area.

Pros:

  • Easy to apply
  • Looks great

Cons:

  • Can create mess when applied
  • Sprayer is a bit firm

5. T-Rex Black Bed Liner, 2K Urethane

AD

One of its greatest assets of this kit is the how well your car or truck will look after the application. Thinking about whether to buy or not, consider the reviews and compare how it stacks up to the other brands. 

The quality of the output, on the other hand, does not seem bad at all. The thickness is commendable, but even made better by the ability to resist stain and abrasion. This means that it can stay in the surface longer and not easily prone to chipping.

Also, this will not only effectively protect the bed of your truck, but can also be good for deadening sound and vibration. This must already give you an idea on how thick the coating can be.

It is made from 2K urethane, which is known for its impressive adhesive properties. The latter simply means that it will attach easily on  the surface, especially when preparation is done the right way. Before its application, make sure that the surface is free from oil, dust, and dirt so that the bed liner will cling powerfully.

Pros:

  • User-friendly
  • Can resist stain and abrasion

Cons:

  • Not as popular as others
  • Easily flows out

Essential Factors to Consider

If you are having a hard time deciding which one to choose, in this section, we will identify some of the most important factors that you must consider.

AD

  • Reviews: One of the first things that you must do is to read the reviews shared by other people. Their feedback will be helpful in differentiating the possibilities. This will make it easy for you to determine how one product is better compared to its competitors. Pay attention to what they are saying about the quality of the bed liner so that you will have an idea on what to expect from it.
  • Ease of Use: The good thing about many of the bed liners in the market today is that they can be applied on your own. It is a DIY task that can be easy, provided that you know the steps. With this, you should pay attention to how user-friendly the product is. It must come with all the necessary tools that you need. The manufacturer must also provide detailed instructions on how it can be used, which will increase the possibility of achieving the intended outcomes.
  • Durability: When it comes to spray-on bed liners, being durable means that they must stay on the surface of the truck for an extended period. It must take a while to fade. Even if it is exposed to the heat of the sun and other external elements, it must not easily crack or peel. Otherwise, you will end up wasting your money. It must also be able to resist stains and dust.
  • Color Compatibility: Before choosing which spray-on bed liner should be purchased, consider the color of your truck. With this, pick a color that will perfectly match. Nonetheless, keep in mind that color can also change depending on the way that it is applied. In most cases, over-application will lead to making the color darker than its actual shade.
  • Quantity: You need to determine how much will be needed, which will obviously depend on the size of the pickup where the bedliner will be applied. Avoid buying more than what you will need so that you won’t waste money.
  • Inclusions: You should also pay attention to what is included in the product. In some cases, they are sold only as the bed liner itself. In other instances, meanwhile, they are already inclusive of everything that you will need, such as a gritting paper and an applicator. The latter is the better option because you no longer have to buy the required tools, which means that you can start right away.

Conclusion

The best spray-on bedliner is an essential investment for all pickup owners. This will be helpful in the prevention of scratches and external damages. Also, this can be helpful in the prevention of rusting and corrosion. It can be beneficial in more ways than one, but only if you make the right choice. With this, you should exert effort and find time to take a close look at the possibilities before you decide which one to purchase.

How To Lower Your Car? Learn It In 2 Easy Methods!


how-to-lower-your-car

Today most car owners love to have their car modified. Well, you wouldn’t be surprised to know that lowering your car is the latest trend. This post explains to you the Nitty-gritty on how to lower your car. We are talking about lowering a car’s suspension. The cars’ suspension is usually lowered to heighten the attractiveness of a car plus the possible increase in improving the capability it might offer.

There are quite a few ways to lower a car’s suspension. The two easiest methods are: use a replacement spring kit for models with coil spring, use blocks with a lowering kit for cars that require leaf spring.

Utilize the steps that follow to know how to lower your car, for the two types of springs. Here the tools that we need are the precise lowering kits, some special tools, and ordinary hand tools.


Method 1

Lower a leaf spring suspension using a universal lowering kit.

Predominantly the older trucks and cars have leaf spring suspensions rather than spring suspensions of the coils. Leaf spring suspension needs long metal leaf springs, fixed to the axle through the U-bolts. The leaf spring is the primary suspension element that suspends the car over the ground.

Things Required

  • Universal Lowering Block Kit
  • Jack stands, and jack
  • Wood blocks or tire chocks
  • Ordinary hand tools set
lower your car in 4 easy steps

Photo Credit: https://www.prettymotors.com/vehicle-lowering-effects-on-wheel-alignment/

1. Raise your Car

  • Raise the car and fit a jack stand below the frame, closest to the side of the car you are working on.
  • Now, add tire chocks or blocks of wood below any opposite of the adjacent cars that you are working on. These blocks help the car from rolling.

2. Remove the Bolts from the Suspension Spring

After your car is raised, time to find the two U-bolts of the leaf springs. These have shaped like a U, having threads on the ends. The thread wraps over the axle and bolts up to the lower side of the leaf springs and secures them together.

  • Remove each U-bolt, by using the ratchet and the right socket.

3. Heighten the Axle

After you have removed the two U-bolts, get the jack. Now keep it below the axle adjacent to that side you are working upon. Begin to raise the axle.

Heighten the axle till there is proper room for the block to fit in the space between the axle and the leaf springs. For instance, there is a 3-inch lowering block, for which you might require heightening the axle till there is a 3-inch space in between the spring and the axle to arrive at the right fit.

4. Add Fresh U-Bolts

After the block is lowered, hold the fresh, extended U-bolts inside the lowering kit and install them into the cars’ axle. The fresh U-bolts should be lightly lengthy, to make up for the more space lost from the lowered block.

Scrutinize for any defects, and later install the nuts over the U-joints and torque them in their places.

Do the same steps for the opposite side. Now, you will notice that one side of the car is lower. Place the tire back, before lowering the car, and take the jack stand away. Repeat the steps from 1 to 4, for lowering the other side and then repeat the same at suspension in the rear. Consult an expert mechanic to ensure whether you can use car carriers smoothly after lowering your car.


Method 2

Use lowering springs for lowering the coil spring suspension.

Most cars like the compact cars need coil spring suspension, and to lower them one has to replace the stock-coil springs with smaller ones that place the car at a low height. The smaller springs are mostly tuned to become stiff as opposed to the stock ones. The springs give the suspension an added responsive and sporty appeal.

how to lower your car

Photo Credit: https://www.lifehacker.com.au/2016/06/is-it-legal-to-raise-or-lower-your-car/

Things Required

  • Impact Air Gun
  • Tool for compressed air
  • Ordinary hand tool set
  • Jack stand and Jacks
  • Group of Sockets
  • Set of Tire chock or Wood block
  • Lowering spring set
  • Compressor for Strut springs

1. Heighten the front part of the car.

Heighten the front part of the car from the floor, and fix it over the jack stands. Add the tire chocks or wood blocks, on the back wheels, and prepare the brake for parking to help the car not to roll.

2. Take off the lug nuts.

After the car is raised using the impact gun and the right size socket, take off the nut at the lugs. Soon after that, you may take off the wheel.

3. Take away the car’s front strut network.

Take away the first strut network, by releasing the bolt that fixes it above and below through wrenches, or the drum and the precise socket. After that take off the whole strut assembly away.

4. The struts spring compression.

After the struts network is taken off, use the compressor of the strut’s spring, and start compressing the spring to take away the tension from the strut mount above and the spring.

You may notice that the spring has to be repeatedly compressed in short increments, interchanging in-between dual sides. Do this till the right tension is put over the strut mount above while removing.

The-struts-spring-compression.

5. Take away the compressed coil springs.

Once the coil springs are accurately compressed, use the air that is compressed. Now with the use the help of the air impact gun and the right socket. Next, take away the top nut that fixes the struts mount on the struts network. After this top nut is taken off, grab away the top struts mount, and take away the compressed coil springs from the struts network.

6. Add the fresh coil spring over the strut network.

Most lowering springs lie on the porch of the strut in a particular manner, so check that you place the spring precisely while installing it over the strut network. Add any of the springs rubber seat too.

7. Replace the strut mount above.

Replace the strut mount above, on the spring network, over the fresh coil spring. Now the spring needs to be compressed back before replacing the nut. That step depends on how low the fresh new coil springs are. In that situation, just try compressing the spring till you can add the nut, rotate it for some threads, and then secure it using the impact air gun.

8. Place the strut assembly again in the car.

After the struts network is reassembled using the fresh lowering spring, place the struts network again in the car. Note that order is now in the opposite direction to the removing steps.

Added Tip – Add bolts of the bottoms first to help the struts and later add the remaining hardware after fixing the struts to the car.

9. Bring the reverse side lower.

After the strut is installed in the car, torque the lugs nut and replace the wheel. Begin to bring the other side down by redoing the steps at the other strut assembly.

10. Reintroduce the back coil spring set.

After the forward spring groups are replaced, go to the front and see that the backward coil spring groups are replaced too, through the same steps.

For most cars, the back coil spring set shall usually be similar, to replace compared to the fronts. All you need is to do is raise the car fair enough to let go of the tension and grab the spring with your hands.

Lowering a car’s suspension along with installing amplifiers and sub-woofers is one of the most common modifications done today, and doing so can not only add visual appeal but may even have performance benefits if done correctly. Now you know how to lower your car. It might need the skill of special tools. Do check if everything is in order. Go to a qualified mechanic if required.

Your Guide in Choosing the Best Socket Organizer


Best-Socket-Organizer

Whether you are into DIY car repair tasks or you are a professional mechanic, you will often find yourself having to deal with tons of tools. It is easy to organize the big ones, like your wrenches and screwdrivers. However, in the case of the smaller tools, like a socket, keeping them organized can be a bit difficult. To make things easier, you need to invest in the best socket organizer.

If you are unsure about how to find the right product or which one will make the best choice, keep on reading the rest of this post. We will help you to come up with a well-informed decision, making sure that you will be provided with the best value for your money.


What is a Socket Organizer

What exactly is a socket organizer? Do you really need one? Will it not be just an additional expense? Can’t you just keep your socket in a small container?

As the name implies, it is a handy tool that can be used for organizing sockets. It will make it easy for your sockets to get sorted so that you can easily find them when needed. They are available in various forms, such as tray containers, drawer inserts, rail system, and magnetic holder. Having an organizer will lessen the likelihood that you will lose your sockets!


Top Picks for the Best Socket Organizer

Product (Amazon Links)SizeEditor Rating

Hansen Global 9200 SAE and Metric Socket Storage Trays – 6-piece Set

1/2-Inch, 3/8-Inch & 1/4-Inch drive


Olsa Tools 3 Pieces Kit Aluminum Socket Holder

1/2-Inch, 3/8-Inch & 1/4-Inch drive


Ernst Man​​ufacturing 8451 Socket Boss Tray

19-Inch


TEKTON 1885 Drive Socket Holder

1/4-Inch, 3/8-Inch, 1/2-Inch Drive


Tooluxe 03966L Universal Socket Holders in Organizer Tray

1/4”, 3/8” and 1/2” Multi-Drive


In this section, we will have a rundown of some of the best brands and models available in the market. We will also have a rundown of their notable features, as well as a few of their pros and cons.

1. Hansen Global 9200 SAE and Metric Socket Storage Trays – 6-piece Set

AD

Among other things, the durable construction of this product is one thing that gives it an edge above many others. It is made from ABS plastic, which is lightweight but long-lasting. It is also a good thing that it has the ability to resist oil and gas, which is one of the reasons why it is not easily prone to wear and tear.

If you are confused about the sizes of your sockets, there is no need to worry. This tray comes with visible markings on the surface. This makes it easy to determine where to put your sockets and which one you should get when you need it.

This is popular option you might think is reasonable, especially given the quality that you can expect from the product.

With the use of this product, it will be easy to get away with clutter in your tool box. You’ll never know that you needed one unless you give it a shot and see what it can do to organize your sockets.

Pros:

  • User-friendly
  • Has a durable construction
  • Makes it easy to find your sockets

Cons:

  • Some spools are too fat for the size of socket
  • Can be tall for some tool boxes

2. Olsa Tools 3 Pieces Kit Aluminum Socket Holder

AD

If design is an important consideration in your search for the best socket holder, this is an option you might want to consider. 

When it comes to its capacity, this can also be an impressive choice. In each rail, you can keep 16 sockets because the set includes three rails, it is good for up to 48 sockets. Because of its sleek design, on the other hand, you can easily keep it in the tool box.

Looking for a socket organizer that is durable? You have another good reason to pick this model. It is made from high-quality materials, which will give you the confidence that it will withstand the test of time. Even through the years, you can expect optimal functionality for this organizer.

You can be assured that your sockets will stay in place, unlike in the case of others where they are easy to lose. This is made possible by the ball-bearing clips with spring, which will keep the sockets in a secured position.

Pros:

  • User-friendly design
  • Has sliding rail clips

Cons:

  • No other color option
  • Rails are thin

3. Ernst Manufacturing 8451 Socket Boss Tray

AD

One of the things that will make you love this product is the fact that it is versatile. You can have it customized based on your personal preferences. You can add or remove the rails based on how many sockets you intend to keep.

In terms of capacity, this tray comes with three rails. Each rail comes with 15 clips that can accommodate ½, ¼, and 3/8 drive sockets. For sure, there will be a plenty of room for the sockets that you would like to keep.

For personalization, there are also stickers that are included. This will make it easy to label the rail based on the size of the sockets that it holds. This means that there will be no guesswork and you can easily organize the sockets based on their sizes.

Design-wise, we also loved how there are handles on the opposite sides of the organizer. This makes it easy for you to hold it and lift it from the tool box of from the cabinet, depending on where you will keep the organizer.

Pros:

  • Keeps sockets secured
  • Universal compatibility
  • Compact size but with generous capacity

Cons:

  • Plastic may be flimsy
  • Spaces seem to be tight

4. TEKTON 1885 Drive Socket Holder

AD

This is another option that is perfect for many buyers. It is one product that you might like to help you organize, since it is also one of the most popular within the product category.

The organizer is made from nickel-plated steel. This may not be the best when it comes to durability, but it can get the job done. It also has spring-loaded clips, which will make it easy to put the sockets in their right place.

Versatility is another good reason for you to consider buying this product. We love how you have the option to easily fit it inside the tool box or hang it in the wall. You can also install it in your workbench.

Each rail is capable of holding 16 sockets. It can accommodate ½, ¼, and 3/8-inch drive socket.

Pros:

  • Space-efficient design
  • Easy to use

Cons:

  • Does not stay flat
  • Sockets are not too secured

5. Tooluxe 03966L Universal Socket Holders in Organizer Tray

AD

This socket organizer is made from nickel-plated steel. The tray is also powder-coated, which makes it better than those that are made from flimsy plastic.

It is also a good choice if you are looking for a product that can offer versatility. You can put it in the tool box or you can hang it in the wall, depending on which one is easier for you.

This socket organizer can also be an impressive choice when it comes to its capacity. It can keep up to 80 sockets in its 4 rails.

Pros:

  • Can hold a lot of sockets
  • Versatile

Cons:

  • Sockets can be prone to falling
  • Durability issues

Essential Factors to Consider

Having a hard time evaluating the options for the best socket organizer? In this section, we will identify some of the most important things that should be given careful thought:

  • Feedbacks: One of the first things you should do is to consider the reviews shared by other people, which you can find online. Their experiences will make it easier for you to narrow down the possibilities. You can also ask around from your friends who have bought a socket organizer before.
  • Price: A lot of you may be tempted to choose one product only because it comes with a low price. However, this is something that can prove to be a wrong decision. At the end of the day, you should see this as a valuable investment. Therefore, you should not hesitate to spend for such product if this means being able to enjoy a product that delivers exceptional quality.
  • Capacity: You should also consider how many sockets the organizer will be able to hold. If you are a pro, you need to invest in one that can hold a lot. On the other hand, if you are only a DIYer, you will most probably be more than good with a compact socket organizer.
  • Size: Generally, a socket organizer with a high capacity will be larger. It can be bulky and heavy. It will be good to choose one that is small and portable. It must also be able to fit inside the toolbox easily.
  • Ability to Hold Sockets: This simply means that the organizer must secure the sockets in their right places. In the case of some models, the sockets will be easily displaced from their position because of poor design.
  • Durability: If you want the best bang for the buck, you should choose one that comes with durable construction. It should be made from excellent materials that will ensure its ability to withstand the test of time.
  • Versatility: In this case, we are referring to the versatile ways of using a socket organizer, most of which can be kept inside the toolbox. However, there are also some that are designed in such a way that you can install them on the wall or hang in the pegboard.

Types of Socket Organizer

As it has been mentioned earlier, the following are the types of socket organizers you can find in the market:

AD

  • Pouch Organizer: This is portable and available in a wide array of designs. It is also simple since there is no installation required. The problem, however, is that they do not offer as much organization as what you can find in other types.
  • Magnetic Holder: This can be a perfect alternative if you are looking for an option that is budget-friendly. Some have pre-drilled holes with magnets, making it easier for you to determine exactly where the sockets will be placed. Others are just flat bars that can easily attach to any magnetic surface. However, it requires more maintenance and can also attract metal shavings.
  • Rail System: In this system, the socket drive is used. There is a clip that slides on the side, which will be the one holding the socket in place. It is easy to maintain and has a generous storage capacity. The problem, however, is that it might require installation, and it can also be expensive.
  • Tray Container: This is one of the best choices for a socket organizer. It efficiently arranges the sockets, making it easy to find it when you need them. You can also have them arranged based on their sizes. Trays can easily fit even in compact toolboxes.
  • Drawer Insert: They are available in different types, such as plastic, metal, and padded foam. They are usually bulky and heavy. It has a large capacity, which makes it perfect for the pros who have to keep a lot of sockets.

Conclusion

The best socket organizer is one of the essentials in your tool box. It will help to keep the sockets in their proper places, lessening the likelihood that they will be lost. With the abundance of the options in the market, however, making the right choice may not be as easy as it seems. With this, consider the tips mentioned above and narrow down your choices to the five products we have briefly reviewed.