Home

Recent Posts

Tools To Change A Tire [Change Tire Effectively]


Tools To Change A Tire

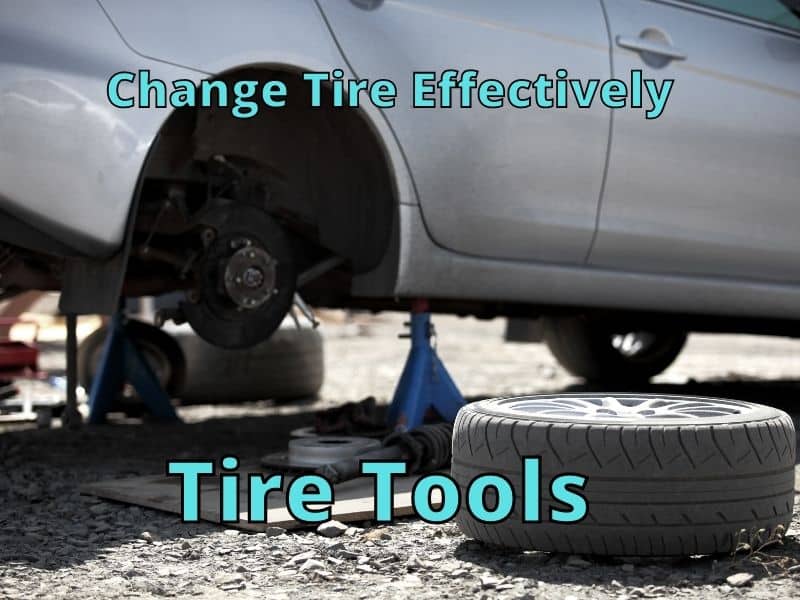
Do you know how to change the tires on your car? If you don’t know how to do so, it’s a good idea to learn. Flat tires may happen anytime. If this happens to you, make sure you have the tools and knowledge necessary to replace your flat with a spare.

Flat tires can result from a variety of factors, including tire age, wear, and damage. It’s important to always be ready in case of an emergency. These are the essential tools that should include with your vehicle:

  • Car Jack
  • Lug Wrench
  • Spare Tire
  • Vehicle Owner’s Manual

Changing a tire is something that we should know how to do. To help our readers, we’ve compiled a list of basic tools to make changing a tire quick, easy, and painless. This step-by-step instruction will guide you in everything you need to know about replacing a flat tire.


The Basic Tools You’ll Need When Changing A Tire

The Basic Tools

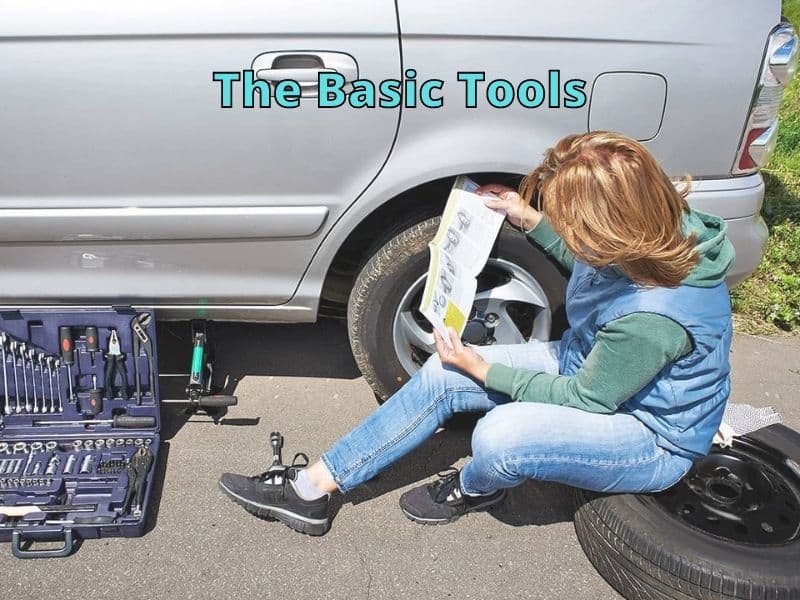
These are the essential tools you’ll need to change a tire effectively:

Car Jack

It allows someone to lift a car off the ground to make repairs to a tire. Finding the appropriate position for your jack may take some time, and if you’re unsure, you can consult the user’s manual.


Lug Wrench

A lug wrench is used to release the lug nuts to remove the tire. A lug wrench isn’t compatible with all hubcaps. You may need to do some research before purchasing a new lug wrench to ensure that it is the correct size for your vehicle’s hubcaps and lug nuts.


Spare Tire

Spare car tires should always keep inflated. When you check the air pressure in your other tires, make sure to check the spare as well. Remember to check your pressure once a month and before any long travels or loads.


Vehicle Owner’s Manual

It contains information on where the spare wheel keeps and how to replace the wheel. For example, Is a lug wrench incompatible with your vehicle? You can find the recommended options in the manual.

If you have misplaced any of these items, take steps to replace them.


Extra Items To Have In Your Trunk To Change A Tire

Here are some things you should keep in your car’s trunk. Keep these extra goods in your trunk at all times in case of emergency.

  • Gloves – Preferably leather because they are suitable for all types of weather conditions
  • Torches with additional batteries
  • Wheel wedges 
  • Repairing Kit for Flattened Tire

How To Change A Flat Tire?

Now that you have all the tools, it’s time to change your tire. I’ve listed below the quick tips on how to change the tire of your automobile.

Effective Tire Change

1. Finding a Suitable Place

If your car has a flat tire and needs replacement, choose an even surface for the tire-changing exercise; as a result of doing so, the vehicle will prevent from rolling. Take your car away from traffic and ensure the hazard lights are on. Soft surfaces and hilly areas are unsuitable – you should avoid these junctions.


2. Engage Parking Brake

After the car is parked in a safe area, the parking brake should be applied. For vehicles with a standard transmission, the car should be put in the first or reverse gear.

Now, remove the spare wheel from the trunk. Also, place the flares at the vehicle’s rear end if replacing the wheel alongside the road.


3. Placement of Wheel Wedges

The next step involves placing the wheel wedges on the tires on the opposite side of the flat tire.


4. Remove the Jack and Spare Tire

replace flat tire
Photo Credit: http://survival-mastery.com/diy/useful-tools/how-to-fix-a-flat-tire.html

It would help refer to the owner’s manual to know where to place the jack when changing the tire. It should be positioned underneath the frame of the tire that needs replacement. The jack should remain in contact with the metal-based part of the vehicle’s frame.


5. Adjusting the Jack

It is important to adjust the jack to support the car properly and not lift the vehicle. Ensure that it is fitted in a perpendicular position against the ground and towards the automobile’s underside.


6. Removal of the Hubcap

The hubcap or wheel car should be removed with the help of a lug wrench. Additionally, the nuts should only loosen using the wrench in the counterclockwise direction. Use the flat end of the lug wrench to lift the cover from its position.


7. Pumping the Jack

Pumping the Jack

Raise the jack to a convenient level for removing the flattened tire and replacing it with a spare one. At all times you must make sure that the car is in a stable position. Reposition the jack if you feel any instability. It is advised to keep a small-sized jack in your vehicle.

These tools are mechanical and can fail to perform their functions. To be on the safer side, I suggest using both the normal and small jacks.


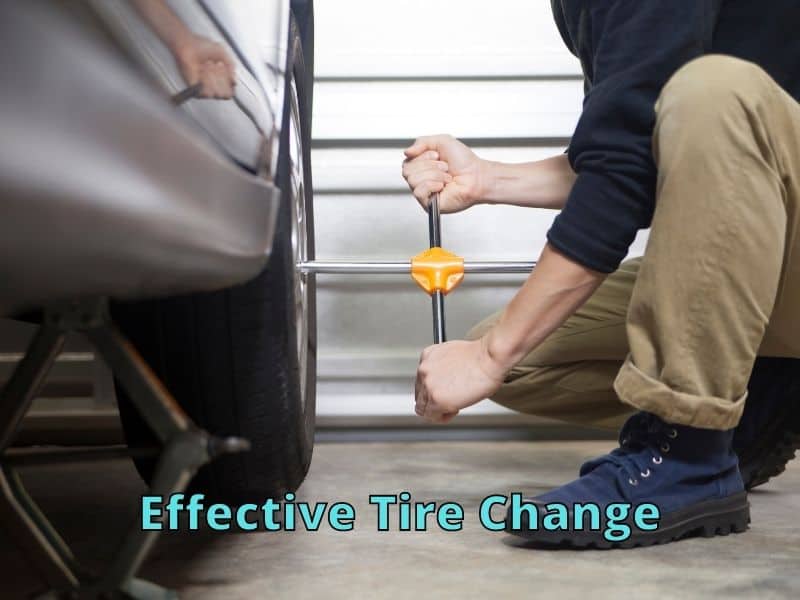
8. Loosening the Nuts

The lug nuts should be completely removed and kept in a safe place; they will require for securing the spare. The nuts should be rotated in the counterclockwise direction to loosen them; after all the lug nuts have been loosened, they must be removed entirely. Use the lug wrench when unscrewing the lug nuts.


9. Removing the Tire

Use both hands when removing the flat wheel from the hub. Ensure that you pull the tire towards yourself. Please keep it in a secured place.

Alternatively, the flattened wheel may keep underneath the vehicle; the car’s weight falls upon the old tire during a jack failure, preventing injuries. However, placing the jack on a uniform plane helps avoid these problems.

It may also be helpful to remember that tires tend to stick due to rust formation; in such circumstances, with the help of a rubber mallet, you should try beating the inside part of the wheel to facilitate its removal.


10. Using the Spare Wheel

flat tire replacement
Photo Credit: http://www.newsmyrnaexpressservice.com/category/flat-tire/

The spare tire is now ready to be mounted. During the process, align the edges with the tire bolts. Please give it a push to put it in place. Followed by inserting the lug nuts.


11. Tightening the Lug Nuts

The following step is to tighten the nuts with hands. It is not advised to use the wrench until the vehicle has lowered.


12. Lowering the Jack

The jack should be lowered carefully; the spare should reach the ground. Then, the jack may be removed.


13. Use the Wrench

After the car is at ground level, the lug nuts should be tightened with the help of a wrench. You may need to put your body weight for their tightening. To balance your car tires, it is advised to fit the lug nuts in a star pattern around the wheel.

The nuts that are diagonally situated across each other must be fitted one after the other. Give the nuts a complete turn until they are evenly tight.


14. Replacement of the Hub Cap

The subsequent step is to replace the hubcap after the vehicle has been brought to the ground.


15. Checking Air Pressure

Checking Air Pressure

If you have a gauge, check the air pressure of the replaced tire. Otherwise, drive the vehicle to a service station for the same. Also, the flat tire should give for repairs. After repairing the wheel, place it in the trunk of your car.

Sometimes, the wheel cannot repair; in such cases, the repair shops can dispose of the tire and help you purchase a new one. It is essential to remember that the flat wheel should repair at the earliest; it is not advisable to travel long distances at fast speeds without having a spare in your vehicle’s trunk.

Replacing your car tire is a cost-saving exercise if your vehicle’s insurance policy does not cover emergencies. However, you must always take safety precautions when making a choice between Do-It-Yourself or opting for help.

You must consider the condition of the roads and traffic before removing the tools. Additionally, the state of the weather must also ponder upon; if it is snowing, raining, or the climate is sweltering – it may be wise to order a tow for your vehicle. Moreover, if several people are traveling with you, take steps to ensure their safety.

When traveling long distances, you must make sure that the tools are in good condition. If the conditions are favorable for a tire change, you must go ahead; otherwise, calling a towing truck is recommended.


Conclusion

When you have all of the necessary tools, changing a car tire is simple. Make sure to prioritize your safety first. 

All of these procedures can help your tires last longer and lessen the chances of a flat tire. While there is no way to avoid flat tires, good maintenance can help them perform better and last longer.

Thanks for visiting Drivinglife.net


References

https://www.motorbiscuit.com

Is Parallel Parking Hard?


Parallel Parking

As a newbie driver, parking is one of the most challenging skills to learn, especially in the case of parallel parking. The latter can be pretty intimidating at first. Many people will be nervous, thinking that you might hit the car next to you. The narrow space between two vehicles may make you jittery, and in the end, you might just end up looking for another parking space.

Parallel parking is a very easy skill to learn as long as you have enough space to carry learn it. Difficulty learning to parallel parking occurs when there’s little space, when driving an unfamiliar vehicle, when there’s traffic, and when we feel nervous.

There are numerous factors that can make the easy task of parallel parking hard for most individuals. We’ll discuss different factors that can contribute to making parallel parking hard for you. We’ll look at ways you can avoid these difficulties.


Factors Making Parallel Parking Difficult

Why Parallel Parking Difficult

Many individuals struggle to parallel park. Here are some reasons why.

  • One of the reasons why you may be having difficulty parallel parking is that there is not enough space to maneuver your car. Some drivers can be so annoyed when they cannot park their vehicles properly.
  • Another factor that is making you feel like it is impossible to parallel parking is that you are always nervous when parallel parking. Learn to relax and believe in yourself.
  • The next reason why you may not be able to parallel park properly is that you are not practicing enough. Practice makes perfect, and a lack of practice in parallel parking is one of the reasons why you still find it so difficult to do.
  • The next reason would be poor instruction, whether it is from your driving instructor or someone who is assisting you while you are maneuvering.

If you have been driving for quite some time now and still do not know how to parallel park, it means that you can start learning. An easy-to-understand step-by-step guide would be pretty helpful for this.


Is Parallel Parking Important To Learn?

Learning To Parallel Parking

Many might think that it is not necessary to learn how to parallel park. You may always try to find another parking spot that is easy to park in, and that way, you never have to worry about getting anxious when parking.

Do you also get anxious when parking? What you may not know is that people who learned to do parallel parking are considered the best drivers. Learning to do the parallel park can help with eye-hand-feet coordination, so drivers will get better and better at parallel parking and driving in general.

So, the individuals that have been practicing coordination get better at parallel parking. In my opinion, eye-hand-feet coordination is important in becoming a great driver. Driving instructors even use parallel parking as a test to see how competent a driver is.

Therefore, learning parallel parking is not only mastering the art of parking your vehicle in between two vehicles, but it can help you improve your skills as a driver.

To help you know how to improve your parallel parking, continue reading the rest of this post. We will provide you with a detailed guide on how you can get your car into a space that you might have previously thought of impossible to park. By the time you are finished reading, you will realize that it is actually easier than you have initially thought.


Step-by-Step Guide On How To Parallel Park

Before I provide you with detailed instructions on how to parallel park, here is a short video that will help you better understand the steps mentioned below:


1. Find A Good Spot For Your Car

The first thing that you have to do is to find the spot where you will park. If there are only a few cars, consider yourself lucky that you do not have to parallel park.

On the other hand, when it is quite full, at least find a place where your car will fit. Are you driving a sedan, 4×4, or a pickup truck? Think about how big your vehicle is to find a spot where you will fit.

While finding a spot, make sure to turn on your blinker or signal light. To indicate that you are parking, let other vehicles know that you are slowing down and will be parking.

As you try to find a place where you will park, see to it that it is a legal space. You can be issued a ticket, or your car will be towed if you park in a place where you are not allowed to. More than being legal, see to it as well that the parking space is safe.

Remember not to park next to a fire hydrant, or you may get a ticket or block the fire department if they need the fire hydrant. Do not also park in places with a risk of falling objects.


2. Position Your Car Properly To Park

After finding the spot, position your car so that you will be ready to finally occupy the vacant space. Pull forward in line with the car that you can find in front of your parking spot. If your car is not the same length as the one that is parked in front, your seat should be directly across the seat of the car next to you.


3. Start Backing Up Your Car Into The Parking Space

Backing Up

Now that the two cars are aligned begin to back up. Before doing so, the first thing you have to do is roll down the windows, providing you with a better sight of the parking spot.

Begin backing up and continue doing so until your rear tires are even with the back of the other car’s bumper. By doing this, if you crank the wheel to the curb, you won’t end up hitting the vehicle. Back up slowly with your eyes checking the inside and side mirror, and turning to look back over your shoulder behind you out the window(s) will ensure there won’t be any unwanted contact.


4. Make Sure To Center Your Vehicle

Once you have finally pulled in, the next thing to do is to center your car. Adjust the vehicle so that it will be in the same line (parallel) as the ones in your front and back. Again, it would be best if you did it slowly so that you could check everything.

See to it that you are at least 12 inches away from the curb. Be sure to leave room in front and in the back of your vehicle, so you have enough room to maneuver out from your parking space if someone parks too close to you.


Parking Tips And Tricks To Know

Parallel parking is not the only thing that you should learn. To master the art of parking, here are some of the most important things that you have to keep in mind:

  • Take it slowly. Regardless of you are in a hurry, parking needs time. If there are cars behind you, do not give in to the pressure. You need to concentrate and to think of how you will occupy the vacant space. The slower you go, the more time you have to think about what to do.
  • Do not just think of how to get in. Think as well of how you will go out. You need to be a forward-thinker. No one would want to be in a situation wherein it is almost impossible to get out of the parking spot.
  • Invest in technologies that will make your life a lot easier. The initial cost can be high, but when you think of the long-term benefits, it will be worth your money. Parking sensors, for instance, will provide you with an immediate warning if you are about to collide with another car. It will make parking a lot easier to accomplish.
  • If you do not have the technologies for parking, at least, ask for a helping hand from your passenger or from anyone. It will be good to have an eye on your back to give you hand signals on what you have to do to finally fit in a parking space.
  • Be courteous. Think about the other people when you are parking your car. Leave enough space for other cars to move. See to it that they will still be able to open their door properly.
    • Also, make sure that you are parking in a legal space. Take only the space that you need. Do not park in spaces that are reserved for handicapped if you are not one.
  • At the end of the day, the most important thing is to practice. As they say, practice makes perfect, which holds true even when it comes to parking. Practice in an empty area and use markers to mimic cars parked. After hours of practice, you will be able to park your car without the need to sweat.

Conclusion

Knowing how to parallel park is important for anyone who is learning to drive. You will find this skill helpful when parking in most places, such as within your neighborhood. Doing it right will make parking easier, and best of all, there is less likely that you will be damaging the cars around you.

Thanks for visiting Drivinglife.net


References:

https://www.wsj.com

https://www.wallacedrivingschool.com

How Bad Is Push Starting A Motorcycle?


push start motorcycle

Push-starting a motorcycle is one of the ways to get your bike going again if it suddenly stops. It is also referred to as clutch starting or crash starting. However, a lot of motorcycle owners are afraid to push-start their motorcycle even if it is necessary.

Contrary to what most people think, push starting a motorcycle is not bad at all as long as you do it correctly. Both the clutch and transmission should be in good condition if you want to push-start your motorcycle. However, address known issues first and establish if you can handle the motorcycle weight before push starting.

So, if you find yourself in the middle of the road and your engine won’t start, then do not hesitate to push start your bike if you can handle the weight safely. Let us talk about some reasons why it is not bad to push-start your motorcycle for you to have peace of mind in case you are still skeptical about doing it.


Why Push Starting Your Motorcycle Isn’t Bad

Photo Credits: https://unsplash.com/photos/TgsvjMCkI0Y

Just like what was mentioned earlier, push starting a motorcycle is not bad at all as long as it is done properly. One important thing to remember when you do push start is to set your motorcycle on second gear. If you do this, it will limit the drivetrain shock that is felt in the motorcycle as compared to using first gear.

Most people think that push-starting creates a gear clash that can be very damaging to your transmission. This is why it is important to set the transmission to second gear to avoid any clashing that can damage your transmission.

However, this action can still put tension on the transmission’s gear, but healthy transmissions will never get damaged even with the slightest scratch.

When it comes to the clutch, push-starting a motorcycle will wear out the clutch but only a little bit. You will never even notice this tiny wear which means that it does not do significant damages to both your transmission and clutch as long as you follow the proper guide in push starting a motorcycle.

Also, when you own a motorcycle, it is very important to keep note of various things like washing your motorcycle once a week so that it stays clean and avoids any malfunction. Moreover, it is also important to have the best motorcycle chains so that the vehicle does not stop in the middle of the road.

In the blog below, you will learn how to push start a motorcycle like a pro:


Step 1: Check What Causes Your Motorbike To Stop

jump start your motorcycle
Photo Credit: https://www.youtube.com/watch?v=QGWVGA4_ZBA

To help you save time, you must check for things that might stop your motorbike from running in the first place. In addition to saving your precious time, it also helps you check the things that are either not working or in poor condition.

For example, it will take you only two seconds to check if your vehicle has gas or not. What you will have to do is to check the gas gauge to know your gas level. After checking for your gas, there are more things that you have to check that might cause your bike to stop running.

  • Do you still have gas?
  • Is the petcock turned ‘ON’?
  • Check if the kill switch is set to ‘RUN’
  • Check if the kickstand is up
  • Is your bike in neutral?

It is better to check the things mentioned above before you push start your vehicle to know the main reason why your bike stopped running.


Step 2: Push Start Motorcycle Only In 2nd Gear Or 3rd Gear

To push start your motorbike like a pro, you should remember to put your bike in 2nd or 3rd gear. Do not use the 1st gear! If you engage the 1st gear to start your bike, you can risk locking up the rear tires, which can cause a crash.

So, you’ve got the motorbike ready to roll down a hill or on a flat surface. Always remember to use the second or third gear and not the first. And now we will move on to the next step, so be ready for the fun part!


Step 3: Hold The Clutch And Push To Start Motorcycle

Most of the guides that come along with the bike recommend getting the bike at a speed of at least five mph initially. It will help you in the successful push start of the bike. To do this, you need open space in front of you, so it is recommended to clear the space ahead of the bike before you start the vehicle.

Also, it is recommended to clear the space on either side of the bike so that if you lose your control over the bike after it starts, nothing gets damaged.

It is very easy to reach the push starting speed of the bike. Just ride the bike downhill, and you will reach that particular speed. For this, you do not have to either push the bike or run beside the bike. It is very important to take care of your control over the bike when you are riding the bike downhill to reach the jump start speed.

Another option for you to do is to ask a friend to push the bike while you are riding it. Tell your friend not to stop pushing the bike until the engine starts.


Step 4: Release The Clutch and Hit The Motorcycle Starter

When you finally reach the jump start speed for the bike, you must release the clutch and hit the starter button at the same time. It is important to note that when you hit the start button, you have to hit it in a smooth motion as the bike is already rolling. If you do not hit it smoothly, there is a chance that you might lose control over the bike.

Now, when the bike finally starts, it is very important to engage the clutch once more to make sure that the bike does not go away from you, leaving you behind, which might result in some fatal accident.


Step 5: Rev Motorcycle Engine To Prevent It From Stalling

Keep Your Bike Running

When your bike finally starts, you do not want it to stop again. If this happens, you will have to redo the steps from one to four which can be very inconvenient. So to make sure that the engine does not die, you have to rev up your engine at a very moderate speed. By doing this, you can be assured that your bike will not die soon.

Also, when you rev the engine of the vehicle, it charges the battery of the vehicle, given that your charging system is not faulty.


Step 6: Start Riding Your Bike To Keep It On

Once your bike starts perfectly, you want it to keep working. It is important to note that if the battery of the vehicle does not have enough charge, revving the engine or riding your bike alone will charge the battery of the vehicle.

Also, before you turn off the bike and start it again, it is advisable to inspect it to know what was the reason why the engine died in the first place. It is also important to note that when you have to push start the bike, it is sometimes an indication that there is a problem with either the battery or the fuel of the bike.

It is a whole different feeling when you get your first bike. When you start riding your bike for the first time, it is important to note vital things about the bike. Also, it is essential to keep the bike always clean and maintain the chains of the bike properly. And most importantly, you have to know how to start the bike in the correct manner.

There are various ways on how you can start the bike, but when all the simple ways fail, you have to resort to push starting your bike. This is why it is crucial for you to learn how to push start your bike.


What Not To Do When Push-Starting A Motorcycle

Now that you already know how to properly push start a motorcycle, it is also vital that you know the things that should not be done when you try to push-start your bike.

The most common mistake done by many bikers when push-starting a motorcycle is a misdiagnosed battery. For example, if your motorcycle suddenly stops in the middle of the road and you decide to push-start your bike because you thought it has a faulty battery, but in fact, the culprit is your empty gas tank.

In this scenario, your battery will be damaged if you continue push-starting your bike without gas. And additionally, push-starting will never help you if you are out of gas. What you will need is to fill your gas tank, start your bike like you normally do, and your problem is solved.

Next time, make sure that you diagnose the real problem first before you jump to conclusions. Another thing to watch out for when push-starting your bike is to do it in a place that has enough space for you to push the bike and ride on it. For instance, a long empty road can be a great place for push-starting a motorcycle.

Thanks for visiting Drivinglife.net


References:

https://motorcyclehabit.com

https://www.ellaspede.com

Windshield Chip Repair Vs Replace


Windshield Chip How To Repair

A cracked or chipped windshield is one of the many things that can be frustrating for car owners. It may appear small, but if it is not given attention as soon as possible, it will grow bigger and can cause the windshield to shatter. With this, at the first sight of the problem, you should act immediately. Otherwise, it can lead to costlier repairs.

In general, repairing a chip in a windshield is more cost-effective and just as helpful than replacing an entire windshield. However, replacing a windshield may be more beneficial in some circumstances. You might want to consider one option over the other based on the type of crack or chip you have.

Let us further investigate and see when you should consider a repair and a replacement. This way, you can weigh each option better before deciding.


When should You Repair A Windshield Chip?

Chip Repair Is Best when...

Repairing your chipped windshield is the cheapest way to address the issue. So, you might want to consider repairing your chipped windshield first before you resort to replacing it. However, you might be wondering when repairing a windshield chip is best to fix the damage.

Here are some tips on how you can figure out that repairing your windshield versus replacing it would be enough.

  • When the chips on your windshield have a diameter measuring 2.5 centimeters or less.
  • Cracks that do not reach 8 centimeters long.
  • When windshield chips are shallow.
  • If the chip or the crack won’t hinder the driver’s visibility.

When You Should Consider Replacing A Windshield?

Windshield Replacement Is Best when...

What you must also know is that there are circumstances that a simple repair job won’t do the trick. For you to be able to figure out if a repair is not enough to fix your chipped windshield problem and replacing it is the better option, you might want to consider these circumstances below.

  • When your windshield glass is tempered (older vehicles) and not laminated.
  • Once the chip or the crack on your windshield is more than the recommended size for repairs. When your windshield chips are over 2.5 cm with cracks that are more than 8 cm, it is advised that you should replace your windshield.
  • When you notice damages in more than three areas in your windshield.
  • If the chips or cracks are near or extend up to the edges of your windshield even if the damage is still within the recommended size for repair. This is because it will make the structure of the windshield weaker, which is why a simple repair may no longer be sufficient.
  • If the damage reduces the visibility of the driver.
  • It is recommended to replace an old and damaged windshield, especially if it already has extensive dents and scratches on the surface.

When deciding whether to repair or replace your windshield, it is best that you use the information given to help you weigh your options. If you come to the decision that you think replacing it is better, contact your nearest auto glass specialist to discuss the replacement.

Many people think that going to the nearest glass shop or mechanic is a viable option when repairing their windshield. Nonetheless, this can be too costly. Some people might want to fix cracks or

Many people think that going to the nearest glass shop or mechanic is a viable option when repairing their windshield. Nonetheless, this can be too costly. Some people might want to fix cracks or chips in their windshield on their own.

The good news is that it can be an easy task. You can purchase a DIY repair kit, which is easy on the wallet. No special skills or technical expertise is needed for the task.


Needed Items To Repair A Windshield

To successfully complete this task, you will need only two things:

  • A windshield repair kit
  • Clean towel

Step-by-Step Guide On How To Repair A Windshield Chip Or Crack

Below are the specific steps that are sure to be easy for anyone to follow. Before you proceed, watch this short video below:


1. Prepare The Kit

A chipped and cracked windshield is a common problem, which is why many companies are offering DIY kits that you can use at home. There is no need for a professional intervention by a mechanic as the steps are pretty much simple.

The kit that will be purchased in this guide contains an instruction booklet, suction cup mount, razor blade, resin, resin pump, and curing strips. The materials will depend on what is included in the repair kit that you will be using.


2. Park Your Car In The Shade And Then The Sun

As you prepare to work, find a shaded area where you can fix the problem. Later on, you will have to remove the car from that place and transfer it to a location where the windshield is in the sun.


3. Repairing A Windshield With A Kit

Again, the instructions will be different based on the kit that you have. The steps mentioned in this post are specific to those that you can see from the video above.

To start off, take out the razor blade from its cover. Use the razor to clean the area surrounding the crack. All that you have to do is to lay it flat on the surface and move it front to back. Apply enough pressure to clean the area. After this, with the use of the end of the razor, clean out any debris on the crack.

When you are done cleaning the problem area, the next thing that needs to be done is to affix the suction cup mount. The middle part should fall exactly on where the crack is. Press hard in such a way that the suction cups will attach. However, avoid applying too much pressure as the damaged glass is already fragile, and you might end up cracking it.

Once the suction cup is in position, prepare the plunger. Screw it in and see to it that the rubber surface on the end will meet exactly on the part of the glass with chip or crack. Remove the resin and open the top part. Put six drops of resin in the tube. Screw the plunger so that resin will be pushed in. Tap around the crack to get rid of air and to let the resin fill the chip.

If there is still space of air that you can see from the crack, all that you have to do is to add more drops of resin.


4. Remove The Suction Cup

Once you are done filling the crack with resin, you have to remove the suction cup. Spin the plunger counterclockwise and pull it out. Clean any excess resin with a towel since the plunger is reusable. Remove the suction cups.


5. Use The Curing Strip

At this point, you have to add one drop of resin exactly on where the crack is. Place a curing strip on the top. Use your razor and run it lightly on the top of the curing strip, which is important to push out any excess air. Park the car in a place where it will be hit by the sun and wait for about five to ten minutes.

Remove the strip and use a razor to take out any excess resin. Wipe it with a clean towel. By now, you have successfully repaired the problem at a low cost!


Pro Tips

Repair a Windshield Chip
Credit: https://www.youtube.com/watch?v=0mHCsCRnQsE

Here are other important things that you also have to keep in mind:

  • Consult a professional first before moving forward to replace your windshield. This way you can understand what to expect and what steps you should take next.
  • Before you start working, see to it that the area where the resin will be applied is completely dry and clean. If it is wet or if there is dust, the resin will not cling strongly to the surface and hence, you will not successfully treat the problem area.
  • To avoid having windshield chips and cracks, proper repair and maintenance are important. One thing to remember is to close the door gently because too much pressure may dislogde the windshield over time or crates problems if the resin isn’t fully dry.
  • Regular inspection of the wiper is also important to be sure that no dirt or debris can possibly scratch the glass and cause visible damage to the surface. Replace the wiper regularly to be sure that they are working perfectly.

Conclusion

In sum, knowing what is the best option for you will provide you with a better result. Having additional information on how to repair a windshield chip or crack on your own can save you a lot of money! After reading this article, I hope you can make a decision about which choice is best for you.

Did you enjoy reading this guide? Click the link below to read more articles about ways to improve and fix your vehicle.

Thanks for visiting Drivinglife.net


References:

https://anthonyvolkglass.com/

https://www.allstate.com/tr/

https://www.bemac.ca/

Equipment Needed To Wash Car Engine


Wash Car Engine Equipment Needed

Are you considering giving your engine a much-needed cleaning? Do you need better equipment? Cleaning your car’s engine and using the right tools has some advantages: it helps your car run better and look well-maintained. It is easier to do repairs and maintenance on a clean engine and rust can be avoided by cleaning it on a regular basis.

To clean a car’s engine, the essential equipment you’ll need are:

  • An automotive soap cleaner, a brush, and a bucket
  • Gloves and eye protection
  • A clean cloth
  • A spray bottle
  • A degreaser for the engine
  • A hose or pressure washer

Keeping it clean and using the proper materials means your car can perform at its best.

Any car’s engine bay needs to be cleaned consistently. If I get super dirty, it always feels good to get cleaned up. Our cars need similar attention. We’ll explain step-by-step instructions and the equipment and products needed for the best engine cleaning results. 


What Can You Use To Clean Your Car’s Engine?

Items Needed to wash engine

It’s critical to take care when cleaning your engine bay and to use the right materials in the right way. Before we start, here’s what you should prepare to clean your car’s engine area:

  • Bucket
  • Scrubbing brush
  • Engine degreaser
  • Plastic bags
  • Spray bottle
  • Water

While you’re going through the process, make sure you’re wearing protective clothing. This should keep you safe from the potentially harmful chemicals you’ll come across when cleaning your engine bay.

  • Rubber Gloves
  • Eye protection
  • Face mask

After you’ve gathered all of the necessary supplies, start cleaning your car’s engine using water. Take note of the dos and don’ts to ensure that you don’t have any problems during the process.


Is It Safe To Wash A Car’s Engine?

It is possible to wash a car engine, but it must be done in a safe manner. Cover the battery contacts and the air filter, you can use a bag or rag to cover the alternator. Be sure there is no overspray on your vehicle. Check to see if the engine is hot to the touch.

We recommend starting and warming up your car for 1-2 minutes before turning it off, as this helps to shift the more concentrated dirt build up faster.

Don’t worry, we will make sure it’s safe and you just follow the step-by-step instructions carefully!


Step-by-step Guide On How To Wash The Car Engine Area

Step To Clean Engine

This is a very simple and easy procedure. You’ve already gotten a head start if you’ve decided that your engine bay is safe to get wet and take the necessary measures. Here’s what you should follow when washing your car’s engine area:

  1. First, make sure that the engine has cooled down, as this task should never be done with the engine still running or is still warm from a recent drive. The last thing you need is to have cold water introduced to the hot parts of your engine. You may pop the car’s hood and let it cool for about an hour.
  2. Put the drip pans down, as well as the absorbent pads, to prevent the harmful chemicals from going to the gutters.
  3. You might want to have your car parked in a shaded area, which would help in reducing the possibility of the shampoo or soap quickly drying.
  4. You also need to cover up the high-risk parts using a plastic bag. These would include the fuse panel, distributor, the alternator and the coil pack.
  5. The next thing that you should do is to hose down the engine area. A very quick pre-rinse will be able to accomplish several things. It would knock off any loose dirt and dust, making it a lot easier for you to use spread the engine degreaser around. Also, it prevents spots that come from the soap that dries out quickly.
  6. Then, disconnect the negative terminal of the battery first or you may just cover it up using a plastic bag. As you may already know, water conducts electricity. With this, you would not want them to connect and make temporary circuits.
  7. If you have a classic engine model, you need to cover up the alternator, distributor, as well as the carburetor using plastic bags. On a modern one, on the over hand, you only need to cover up the alternator and be cautious with the water, especially around the fuse box and the coil packs.
  8. You may now apply the engine degreaser. While a regular or traditional car soap does the job, an engine degreaser does a more effective job in removing grime and oil. You may opt to go heavy on the engine degreaser, especially on the oiliest and nastiest parts of your engine area. This would include the oil pan, as well as the starter.
  9. You must diligently follow the instructions specified in the engine degreaser bottle. Normally, you need to let it sit for a couple of minutes to achieve the most grime and oil-lifting action.
  10. You may opt using a wash brush, especially for the seriously nasty areas of your engine. This would be very safe to use, as it has soft bristles that will never scratch or cause any damage to the plastic or paint.
  11. Start rinsing with low-pressure water. You may need to reapply the engine degreaser for vehicle engines that were never cleaned in 300,000 miles.
  12. You may now use the automotive soap to complete the engine area cleaning in the same process you do in cleaning the exterior. You may want to use a wash mitt, get it soaped up in the bucket of formula, and then scrub the engine area and rinse after.
  13. After rinsing, you may now remove the plastic bags that you use to cover up the sensitive parts of your vehicle’s engine. Keep in mind that professional detailers will simply remove the fuse box cover or the distributor cap, especially if they need cleaning. This process would never affect the electronics.
  14. Bolt these parts back on once you are sure that they are dry and clean.
  15. You may need to use a designated plastic cleaner to be able to polish tiny scratches, as well as restore the shine to the engine area plastics.
  16. Apply some to a cloth and then wipe it off using a clean and dry microfiber cloth.
  17. For the metal pieces, on the other hand, try using a metal polish. There might be a lot of metal polishes to choose from but generally, you only to need to use a little amount on the metal surface until the polish becomes darker.
  18. Lastly, you may now wipe them off using a clean and dry cloth.

Tips On Washing Your Car’s Engine Area

Tips on Washing Your Car’s Engine Area
Credit: https://www.youtube.com/watch?v=ettzyNnNG5s
  • As the improper disposal of used pads and oil is extremely discouraged, you may need to find a recycling center within your area that accepts them.
  • If you have a power washer, you may need to only use the low-pressure setting. This setting has been proven to effectively clean and get rid of the crud without blasting it into the small gaps in between the engine’s components.
  • You may also use compressed air to be able to blow away water residue, which effectively helps in getting the engine dry as quickly as possible.
  • After cleaning, you may also leave the hood open and park your vehicle under the sun. This would allow your engine to dry and you may now start driving your car again (read more driving tips).

Conclusion

Your car engine will look brand new after being washed. Keep in mind that, what matters is what’s inside the engine. Washing your vehicle’s engine area would guarantee more smooth drives in the years to come. This can save you time, effort, and money.

We hope that you will be able to apply this new knowledge to get the best out of your engine and help you to learn more about your car maintenance.

Thanks for visiting DrivingLife.net


References

How to clean an engine (carwash.com)

Manual vs Automatic Transmission [Which is More Reliable?]


Automatic vs Manual more reliable

Most of us know the basic difference between a manual and an automatic transmission. I have an automatic transmission in my truck, but I have also used to have a manual transmission. My manual transmission seemed reliable, but I didn’t have it for too long.

In general, an automatic transmission is more reliable than a manual transmission. Automatic transmissions last longer and tend to break down less than manual transmissions, but there are always exceptions to this rule.

The reliability of your vehicle can be thought of in terms of:

  • Repair Costs
  • How Quickly The Engine And Transmission Wear Down
  • Necessary Maintenance Over Time
  • Fuel Costs Over Time

I think a manual transmission is fun to use and can cost less in fuel, but having an automatic transmission gives me a lot of comfort knowing it will last a long time with only normal maintenance costs. We will explore why an automatic transmission is reliable, and a manual transmission is good for other reasons.


Is an Automatic as Reliable as a Manual?

A manual transmission uses a clutch and stick-shift to manually change gears, whereas an automatic transmission shifts gears automatically. Although the difference between a Manual and automatic transmission can be complicated, an automatic transmission tends to be more reliable.

Manual transmissions tend to break down sooner than automatic transmissions because of human interaction with shifting gears. Automatic transmissions can effectively change gears using a computer to reduce wear and improve efficiency.

Manual transmissions cost less to fix, so some people believe they are more reliable when comes to how much money they need to spend. This is true in some cases. Although, if a manual transmission breaks down due to hard shifting and human interaction, it can cost more than an automatic transmission.

Using a stick shift (manual transmission) can be fun, and these types of cars can last a long time, but it all depends on how someone drives. An automatic doesn’t often shift hard, even when the driver is aggressive with the gas pedal.

In the end, it depends on a lot of factors, but in general, an automatic is more reliable.


Automatic Transmission Reliability

Automatic Transmission
  • Advantages of Automatic cars: These cars use a computer to help change gears. The advantage of having an automatic car is that you can drive it comfortably in the heavy traffic without the need to change gears manually.
    • You need not worry about shifting gears and this can save wear and tear on the engine. Automatics provide reliable shifting when stopping and starting at each intersection they come to. In short we can say that this technology is perfect for urban driving, especially when the driver is new and inexperienced.
  • Disadvantages of Automatic cars: The basic disadvantage of having an automatic is that it may cost you much more than the manual transmission.

In terms of how much money they use on gas. Automatics are reliable with their consistent gas consumption. They are heavier but efficient. You may need to spend more than a manual transmission, but you know how much you will need to fill up each time.

These days’ fuel prices are touching the skies. An automatic may require more fuel in order to operate. Some automatics aren’t very fuel-efficient. Yet, more and more automatic transmissions are on the road now, and many are becoming very fuel-efficient.


Manual Transmission Reliability

Manual Transmission

Advantages of the Manual Cars

Now let’s talk about manual transmissions. Are they reliable? Let’s look at what they offer.

  • Manual transmission technology provides much more control over the gear system of the car. This is ideal when you are driving on a poor road and in poor weather conditions.
  • In case, you have a flat tire or some sort of technical problem for which the car needs to be towed or in case you need to tow any other car; the manual transmission system will help you in these circumstances.
  • Manual transmission maintenance is usually much cheaper than automatic cars. The repair cost is comparatively less and easy. With a little knowledge, one might be able to repair some parts by themselves.
  • Maybe the most important advantage of the manual is that it provides you many people with a fun driving experience.

Disadvantage of Manual Cars

  • The manual transmission is not for those who feels uncomfortable changing gears.
  • Many sports cars are manual transmissions, but can have reliability problems due to racing the engine and hard shifts.
  • They are less reliable with how long parts last.
  • The manual transmission cars are not even ideal for those who get distracted easily while driving.
  • They are less reliable with gas costs, and can flucuate a lot depending on your driving style. Although in general they tend to save money on gas.
  • If you do not like to deal with a clutch and gear while driving then these cars are not made for you, and it may be less reliable because of shifting incorrectly and causing wear and tear.

Maintenance For Automatic And Manual Transmissions

When comparing an automatic and manual transmission for reliability and maintenance costs, you need to consider several factors.

  • Is the manual transmission a sports car?
  • Is the manual transmission used by a new driver?
  • Is the manual transmission being used in the city most of the time?
  • Is the manual transmission being used for fun?

  • Is the automatic transmission regularly maintained?
  • Is the automatic transmission used mostly on the freeway?
  • Is the automatic transmission in used by an experienced driver?

These factors will play into the cost you will pay for maintenance over time. Each car and driver will help determine the type of cost that will occur.

If you want a reliable car, then figuring out how you drive and where can make a big difference.


Changing Gears In an Automatic and Manual Transmission

With automatic transmissions, at various stoppages, your foot must rest on the brake pedals so that it will not roll forward. This may be easy for some and hard for others. While most people get used to the pedals, it does impact reliability over time.

Manual transmission cars require practice to drive them. You need to practice again and again for a gradual transition of the gears for a smooth start. If the clutch pedal is released all of the sudden, then the car will start with a bump.

It is always important to learn to use the clutch pedal properly, and once you perfect it, you will love to drive manuals.

Automatic transmissions also have a torque converter. It is used to separate the transmission from the engine and works automatically. The driver doesn’t need to do anything.

These two systems of shifting can determine how reliable your car is. A lot will come down to the car’s quality and the driver’s care when driving. Reading reviews for cars can help a lot.


Conclusion

Although there has been a debate for a long about which one is the best and most of the factors revolved around fuel economy and driver control. There are several other aspects to consider, that how certain type of transmission structure affects the engine performance and driving experience.

It’s not always easy to determine that which of them is suitable for you, but a manual transmission and an automatic transmission vehicle can both be reliable cars.

If we are looking at statistics, you will want to get an automatic transmission for the best reliability, keeping in mind all the other factors that make a reliable car.


References

https://blog.openbay.com

https://www.motorbiscuit.com

https://www.edmunds.com