I know it’s important for me to regularly replace the motor oil in my truck. My Toyota Tundra now has 120,000 miles and is still running strong. I use synthetic motor oil, just like Royal Purple Motor Oil, because I like to give my engine the extra protection it needs as an older engine.
Royal Purple Motor Oil is worth buying for old engines, engines that run hot, racing engines, and engines that need extra protection. It’s compatible with other ethanol engine oils if mixing oils and it is 100% synthetic so it lasts longer than conventional motor oil.
Changing motor oil is an important routine maintenance that we need to perform on our vehicles. Royal Purple Motor Oil can be beneficial in many ways for your car or truck. Will your car run better with this motor oil? I explain some of the main benefits your car can obtain when using this oil.
Is Royal Purple Motor Oil Worth Buying?
AD
Most synthetic motor oils will be worth buying if you are in one of these three circumstances.
You car has 100,000 miles – Older cars have engines that are starting to wear down. Using a synthetic engine oil can better protect your car’s engine in the various circumstances it might be in.
Hot Engines – Cars or trucks that have engine that get hot because of heavy loads or high RPMs will need an oil that can get hot and not create deposites. Synthetic oils burn cleaner and cause less friction, so less heat.
Get Engines To Last Longer – If you are a commuter that travels a lot, changing your oil less often can save you money. Most sythetic oils like Royal Purple, last longer than conventional oil with normal engine use. This can cut your number of oil changes and save money.
I have been using synthetic oil in my truck for the last year or two. Although I haven’t noticed a difference in engine performance when using this type of oil, I know it helps protect my engine better than conventional oil.
“Synthetic oil is by far better for performance. It protects the engine due to lower levels of friction. Additives help clean the engine of deposits. And, fewer impurities mean it burns cleaner, thickens far more slowly, and has fewer deposits to start.” (idrivesafely.com)
What Do People Think About Royal Purple Motor Oil?
Each person’s experience is different when using oil. Most vehicles can benefit from synthetic motor oil although most people don’t want to pay for the extra cost. Most people choose to use regular motor oil for their cars and this works just fine. It’s when cars engines are old or hotter that synthetic oil helps a lot.
Many people say that synthetic engine oil helps their car run smoother. They might hear and feel the engine running better with synthetic oil.
For those who step on the pedal often and rev up their engines or race their cars fast, a synthetic oil can is best because it handles the heat better with less burn-off and less build-up of grime in the engine.
While Royal Purple is a great oil as seen in this video, although it may not be the best. As with most synthetic motor oils, it does much better than standard oil, and most people are happy with it.
Synthetic motor oil (also called engine oil or engine lubricant) was first synthesized or man-made before the Second World War (the 1930s). This was through the initiative of German scientists primarily for military use.
Today, one of the most popular kinds among vehicle owners, mechanics, and automotive engineers is the Royal Purple API-Licensed SAE 5W-30 Synthetic Motor Oil which is great for both gasoline and diesel engines.
To understand more of the “5W-30” grade, which some users do not understand clearly, the suffix W means “winter” and not “watt” or “weight” as some have perceived. The reference for winter denotes cold temperature on which the oil has certain maximum viscosity at low temperature.
The number “30” on the other hand means that the oil has to fall within a certain viscosity limit at 100C. To understand clearly the salient features of this oil, we are inviting you to read more!
Royal Purple Motor Oil Features
1. Meets ILSAC GF-5 And Dexos1 Certifications
This synthetic base oil meets the standards set by ILSAC G-5 and Dexos1. The ILSAC GF-5 is a performance upgrade specifications which improve mostly passenger car’s reliability, great performance from combustion to the tailpipe and clean engine interior surfaces.
The Dexos1 licensed oil on the other hand is the new specifications for engine lubricants for General Motors (GM) vehicles. This oil could be used for GM vehicles if applicable or if it calls for it, so, better check your owner’s manual for verification.
2. Made In USA
This oil is 95% made in the USA meaning the remaining 5% are raw materials not available at home. The oil is blended and formulated using advanced technology and manpower that is composed of brilliant engineers and highly skilled personnel.
3. For Diesel And Gasoline Engines
The beauty of this synthetic base oil is that it could be utilized in engines powered by either gas or diesel. The versatility gives you the edge over other oil not compatible with two different fuels. Again, as we are saying to those who are still not aware, keep reading your vehicle’s owner’s manual so that you will be knowledgeable about what oil grade to use.
4. Highly Rated Oil
The Royal Purple SAE 5W-30 currently usually ranks high with many online reviews given by its customers for automotive oils. Its satisfaction rating is high. This synthetic base oil has many satisfied customers
5. Best For Upgrades
Since Royal Purple has several viscosity grades on its arsenal, especially of API-licensed motor oils, the manufacturer recommends that it is best to wait for the first 2,000 miles for a gasoline engine, to upgrade to this oil. For diesel engines, the company’s recommendation is to allow 8,000 to 10,000 miles of run before upgrading.
Conclusion
Motor oils have different properties that make them work well in different cars. Sometimes users with the same car will have different results with the same oil. In general, the better the quality of the oil the better your car will perform and run smoothly.
The Royal Purple API-Licensed SAE 5W-30 Synthetic Motor Oil is an engine lubricant for use in both for gasoline and diesel engines. An older model of vehicles, where compatible, will benefit from an upgrade to prolong the life of the engine. Brand new ones do not pose a problem as this oil is also best for initial use.
Cars, nowadays, are getting more and more difficult to repair. Maintenance and repair of motorcycles, on the other hand, is something that you can do on your own, as long as you have the right tools. While some motorcycle repair jobs require professional assistance, you might be surprised that there are also jobs that you can handle, even if you are just a beginner.
When repairing a motorcycle you will need about 10 essential tools (listed below) and a few others for safety. Most of the tools are common tools all motorcycles need to do repairs. A close inspection of your motorcycle can help you see why these tools are needed.
In this post, we will be talking about the beginner’s guide to tool basics for motorcycle repair. Getting the job done will be a lot easier for you if you get ahold of the necessary tools. Whether you are doing modifications or just replacing the battery, having these tools on hand would certainly make the process go as smoothly as possible. Read on if you want to know more.
Motorcycle Repair Safety Tools
1. Safety glasses
Getting yourself a pair of safety glasses is important, as a large percentage of workplace injuries are eye-related. In reality, these injuries can easily be avoided if you consider taking preventive measures such as wearing safety glasses. Injuries that result in blindness and expensive medical expenses can be prevented if you have one of these.
2. Hearing protection
Wearing protection for your ears is also very important to help protect you from work-related hearing loss. This may come in handy, especially if you are consistently exposed to excessive sound levels. Earmuff types generally provide adequate protection for your ears. In addition, you can also use this safety tool for hunting, sports events, studying, or any construction work.
3. Fire suppression system
If you are not yet familiar, fire suppression systems terminate or prevent the spread of fire. These systems normally use a combination of wet agents, as well as dry chemicals, to suppress fires originating from equipment. This would be a very handy safety tool to add to your garage or workplace, as it’s always better to be safe than sorry.
Motorcycle Repair Tools
1. Flashlight
You might find it extremely difficult to repair a motorcycle in the dark, which is why having a flashlight that lets you see a little bit more is very important. This tool comes in handy, especially if you are repairing or customizing small and intricate parts of your motorcycle. Pro tip: keep a stock of batteries in your toolbox, this would save you a lot of time.
2. Hammer
No, you would not use this to hit your motorcycle. The hammer can be used to get parts and pieces in place, which get easily damaged or marred. It would be advisable that you start with a ball-peen hammer and then move up when the need arises. In addition, you may want to start using a hammer that is not more than 16oz in weight.
As you would be working on stubborn screws and your elbow grease simply will not work, you would definitely need an impact wrench or an impact driver. With the help of an impact driver, the fastener will loosen up without the application of a massive twisting force as a breaker bar does. After all, screws made of steel lock onto the threads in your motorcycle’s crankcases.
A word of advice, you must use the impact tips, or you would severely damage the fastener head. It should also be noted that standard or regular driver bits are too soft and have the potential to lose their form due to the impact.
You may not know yet what kind of maintenance or repair your motorcycle needs but you can safely assume you will be needing a set of pliers eventually. While regular pliers are great, you must also have differently-sized pliers to suit every application. You may end up not using a certain pair of pliers but it’s better to have it with you when you need it.
We would recommend a set of needle-nose pliers, as it is deemed very useful for pulling, pinching, and getting into the smallest spaces. It would also be recommended that you get one that comes with snips that are built for zip-ties and wires.
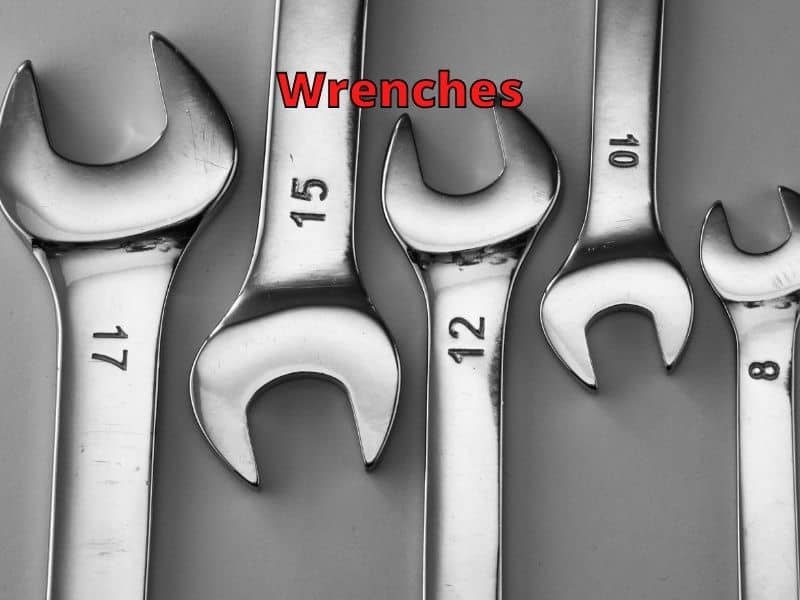
5. Wrenches
Just like pliers, wrenches should also be an important addition to your toolbox. We do recommend that you buy a full set that already comes in a variety of sizes. To add, it would also be wise to buy the same wrenches that come in different lengths, just because you will never know when you will need to use a longer, or shorter, or two of the same size.
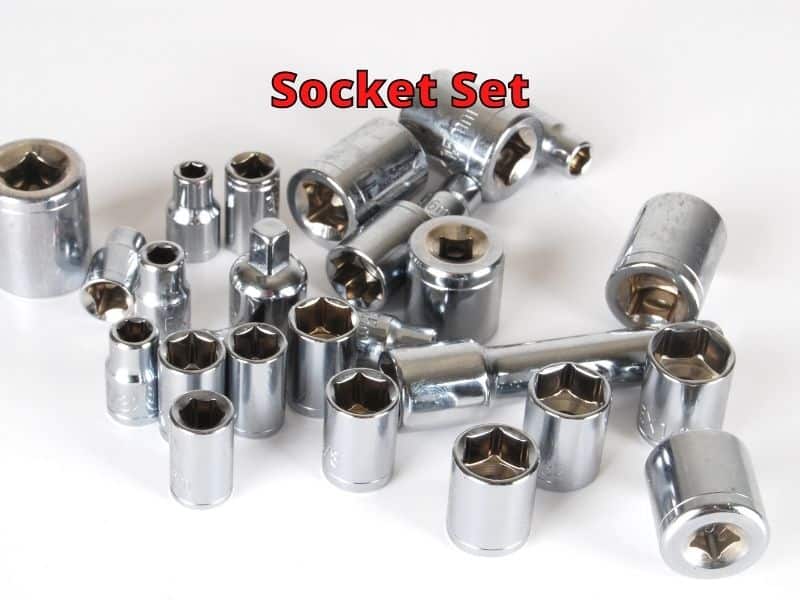
6. Sockets
Having a full set of 1/4 -inch and 3/8-inch sockets could be very helpful for your motorcycle repair job. You could also add in deep or universal sockets and a set of hex keys intended for a 3/8-inch ratchet. The more options to have, the easier it will be to complete the job.
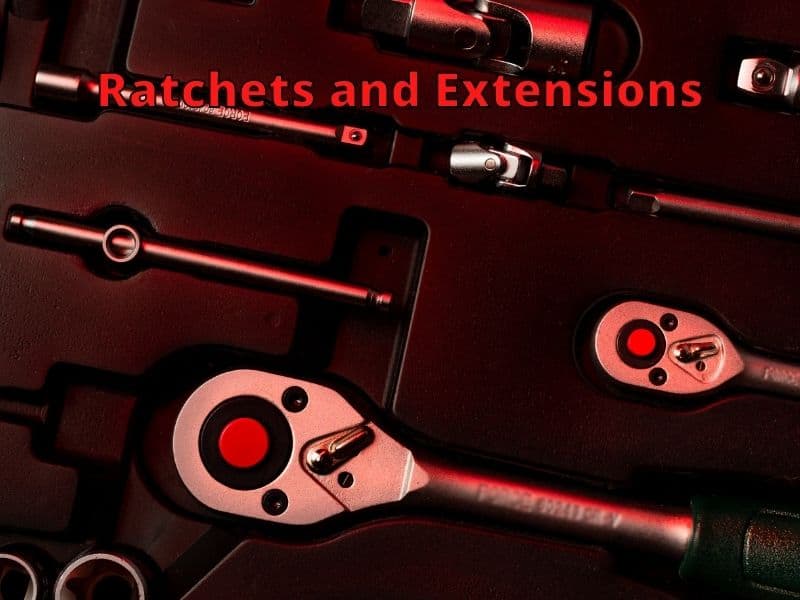
Socket handles vary in shape and size. While T-handles are incredibly useful, you might also consider using ratchet handles and extensions. It can also come in handy if you get yourself several extension lengths, as well as universal joints. You may want to check what your standard sockets are and just get what you need.
7. Screwdrivers
When it comes to screwdrivers, it might be better if you already invest in a high-quality one. Great screwdrivers normally have hardened tips and are made of strong metal. These components are very helpful in removing or tightening stubborn screws without damaging them or the screwdriver itself.
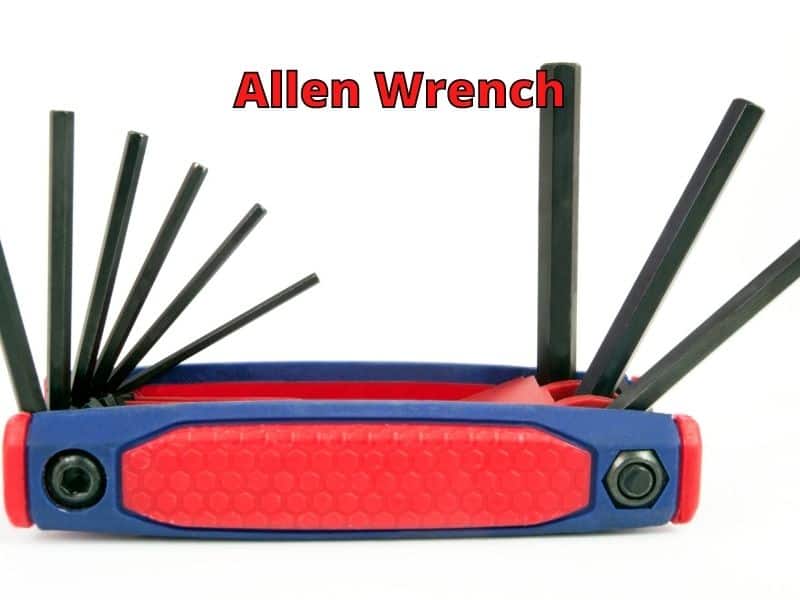
8. Allen Or Hex Bit Sockets
You need hex heads in almost every application, which is why these are essential when you’re working on your motorcycle. It should be noted, however, that L-shaped hex keys probably would not do the job like the hex-head sockets. So, just buy one of these hex-head sockets, which you can easily snap onto your T-handles or ratchets.
Given that tire pressure is a critical component of your motorcycle, one of the most important tools that you must have is the tire pressure gauge. It is wise that you check the pressure of your tires every time you ride your bike but it is an absolute must to check the pressure, especially when you are performing maintenance. Lastly, it might also be of great use to your other vehicles.
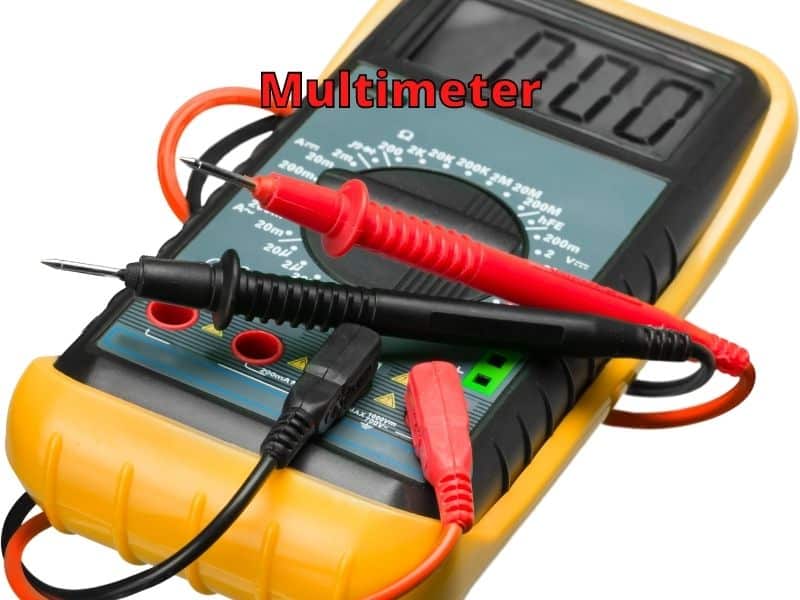
10. Multi-meter
You would be able to find different kinds of multi-meters with varying prices. However, even the cheapest ones would be able to provide you with measurements on the current, resistance, and voltage. In addition, if you one of these, you would be able to perform checks on your battery,(video) as well as the condition of the ignition coils. Overall, it works great for diagnosing electrical problems.
Conclusion
Now that we reach the end of this post, we do hope that you now know the mandatory tools your toolbox must-have. As a beginner, these tools would come in handy, especially when you are doing basic repairs and routine maintenance on your motorcycle. As a general rule of thumb, you can just buy the best tool that your budget allows, as even the cheap ones still get the job done.
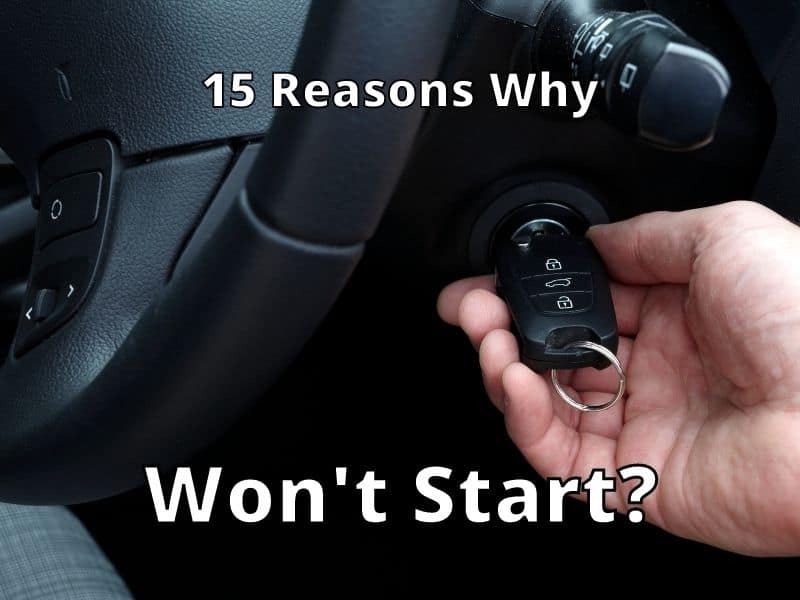
Starting your car and not having it turn on can be very frustrating. I have accidentally left my lights on, and come to find the next morning that the battery is drained and the car won’t start. Luckily many newer cars help you avoid this mistake, but they may be other reasons your car won’t start.
Your car may not start because of human error, wear and tear, and common service needed for your car. Turning the key and listening may help you figure out the problem. If dashboard lights turn on you know there’s usually a problem. First, check the battery, gas levels, and human error. Then continue if needed.
I know I can tell if my battery is going to die when things like starting the engine become difficult. Your attention to past days can give you a clue as to what might be the problem. Think of what happened and any sounds that are different. If needed you can tell a friend or mechanic that can help you find the problem.
Below we’ll discuss the many reasons that cause cars not to start.
1. The Gas is Low
If you’ve ever tried to start your car and the engine turns over and over without starting, then it’s time to check the gas level on your dashboard. While this might not happen to you, chances are you have been low on gas a few times. If one of those times when you were low on gas, you parked on an incline, there’s a possibility that the gas might not make it to your engine.
If you suspect that you have a bit of gas left and the gas station is very close, you may be able to move your car to a level area and try starting the car again.
Make sure to consider all the safety precautions before any such move. Moving a car without the engine on can be difficult. Some situations will not be safe to move your car, especially since most cars need to be running in order for the brakes to work effectively on all four wheels.
When on level ground there’s no need to press the gas pedal, just turn the key and wait a bit for the gas to reach the engine.
A safe way to get gas is to call a roadside assistance company. They can bring you enough gas to get to a gas station.
2. The Battery is Dead
The battery is one main reason cars don’t start. Most people will know right away if the battery is the culprit when the engine either doesn’t turn over or it turns over slowly and stops.
You can turn on the light to check how they are operating and if your dashboard is dim. If you forgot to turn off the overhead cabin light, the alarm went off for a long period, or you left a radio on all night, then you know the battery is probably drained a bit.
Even when the battery is drained you can sometimes start the car. If you left something on, turn it off and remove the key from the ignition switch. Wait about five minutes and then try starting the car. The battery can recover a bit of power to help turn over the engine after it has has a chance to sit for a while without any load on it.
If that doesn’t work you can try again in an hour, or get some help. Some people like to carry a portable jump starter in their car in case this problem occurs. Others will call a service like AAA to help them jumpstart their car or ask a friend for help. Just make sure to connect the batteries on both cars properly.
Sometimes leaving a cabin light on for a couple of hours is perfectly fine, but if the battery has corrosion on the terminals and it needs to be cleaned off so proper contact with the cable is made. Check the battery terminals for any type of corrosion.
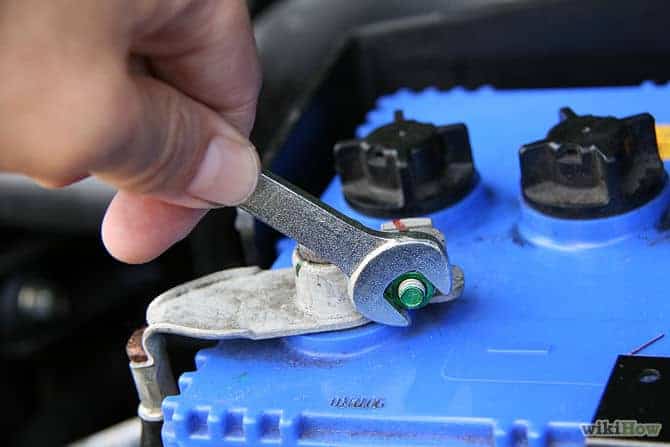
If you have corrosion, having a small tool kit in your car can be handy. You’ll usually need a wrench, socket, or pliers to loosen the bolt or nut and detach the cable.
For modern cars, you can use an OBD2 memory saver (amazon link) to prevent your car’s computer memory from resetting. (see video)
To clean the terminals, first remove the negative or black wire from the battery first, for safety reasons. Then remove the red cable. Try to keep them from touching any metal.
Use a wire brush, or if you’re at your house use some diluted baking soda to help neutralize the corrosive acid that is on the battery cables and battery terminals. Scrub them until they’re clean and then make sure they are dry before replacing the battery cables and tightening them.
Use a dielectric grease to coat the terminals or WD40 to help protect from corrosion occurring in the future. Be sure to replace the positive cable first, then connect the negative terminal. You can then remove the OBD2 memory saver if you used one.
Check to see if your car starts. If it does then you’ll need to make sure you charge the battery and continue to monitor it over the next few days. You can either charge the battery by driving the car for 30 minutes or you can use a battery charger (amazon link). Some battery chargers can help repair some damage done to batteries.
If the battery still seems low the next time you start it, the battery may need to be replaced or the alternator may not be working effectively.
3. The Wiring is Loose
Loose wiring can occur on many cars. Older cars, cars with lots of mileage, and cars that operate in bumpy conditions tend to have items that become loose. Wiring can loosen from weathering, vibrations, work done by mechanics, heat, and natural aging.
After you’ve turned off the engine, you can check under the hood for loose wiring. A flashlight can be helpful, as well as a pair of gloves. The wiring around the battery and alternator should be checked for a solid connection. If you see corrosion in the wires, check to see how bad it is and replace the wiring if needed.
Reconnect any loose wiring, ensuring that when you pull it, no slipping occurs. Any wires that are not in their correct place should be moved and secured (amazon link) to be free of any heat and moving parts.
4. The Belts are Damaged
Every car needs a belt to operate the engine and the electrical systems of car. If a belt is damaged or loose, some systems of the car cannot operate effectively or at all. The alternator is one of these components the requires a belt.
When a belt is loose it will not grip the pulley and turn the parts of the engine that operate the car, like the alternator. Look and see if the belt has cracks, feels like you can move more than an inch when pulled on, or shows signs of rubbing against something.
You can also check the pulleys are secure and not wobbling. If something is wrong with the belt, check to see if it needs replacement or tightening.
A loose belt or pulley could cause the alternator to charge the battery ineffectively. You may lose battery power over time.
5. The Starter
If the car does not start at all, the starter or battery could be non-functional. It’s always important to check the wiring before coming to any conclusions, and see if any electrical components are working. If you have an OBD2 scanner, this would be a good time to use it to check for problems, especially when you see the check engine light is on.
After your inspection, consider any other ideas of why the car might not start, taking into consideration the past performance of the car and any strange noises that you may have heard. If you are not sure what to do next get some help from a friend or mechanic.
6. The Car hasn’t Been Serviced
Sometimes the problem with a car can be the engine. An old engine that is ready to retire or that hasn’t been maintained well may have difficulty turning over. There could be a number of reasons for this, so it’s best to go get all of your fluids changed if it’s been a while and has someone takes a closer look at your car.
All cars have problems with parts wearing out as they age. If there’s an internal problem with your engine that is causing the car not to start, then you may hear more noise than normal.
Getting an inspection of the car by a mechanic may reveal other issues with cars that haven’t been serviced for a while. Try to keep a regular schedule of maintenance and your car can last for a very long time.
7. Clogged Fuel Filter
AD
If the fuel is not getting to your engine for some reason the car doesn’t have enough fuel to start. It will likely turn over just fine but you won’t hear it firing. This is an easy fix on most cars. You just need to replace the fuel filter which shouldn’t cost too much.
If you are wondering why the fuel filter got clogged in the first place, it may be that your car is old and the filter hasn’t been changed in a long time. Particles start to accumulate over time and clog the filter. Another common reason the fuel filter gets clogged is low-quality gas.
If you need to change your filter anyways, then you can get them for cheap and see if the problem gets betters.
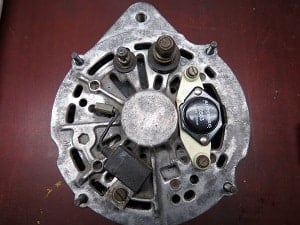
8. The Alternator
Your alternator controls how much power is being produced to charge your battery and provides electricity for your car to run properly. An alternator with faulty wiring or a belt that is loose can make it difficult for the car to start.
See if you can see if the belt is worn or broken. Check that the wires are connected and there aren’t any problems. Sometimes securing or replacing a wire can help. Likely it is a belt that will need to be replaced.
Sometimes an alternator starts to go bad but it’s not likely to completely stop working, but that might happen once in a while.
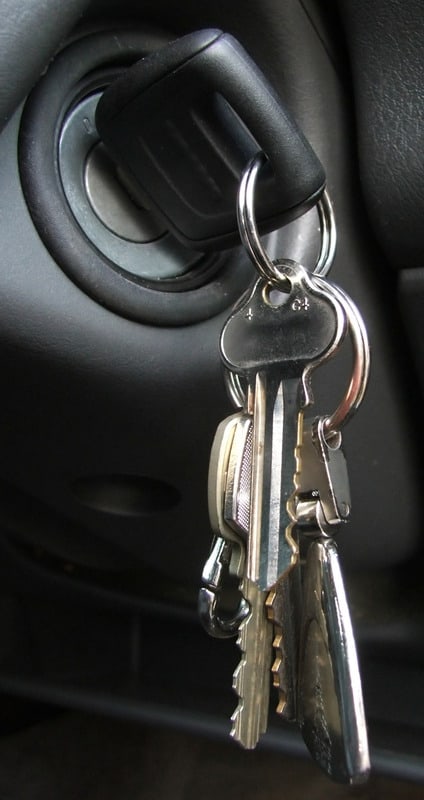
9. The Ignition Switch
Your ignition switch can have problems from lots of keys and accessories on your keychain, a recent accident, and if something on your steering column has been worked on recently.
The heavier your keys, the more pressure is exerted on the ignition switch. After a while, this can cause the mechanism to break. You will likely need a new ignition switch installed to help you turn the switch easily.
If your car has been in an accident recently and you haven’t checked out what repairs might be needed, your ignition switch could be damaged or need adjusting.
Sometimes the wires leading to the ignition switch can get disconnected from an accident or recent work around the steering column. Getting the wires checked out can help.
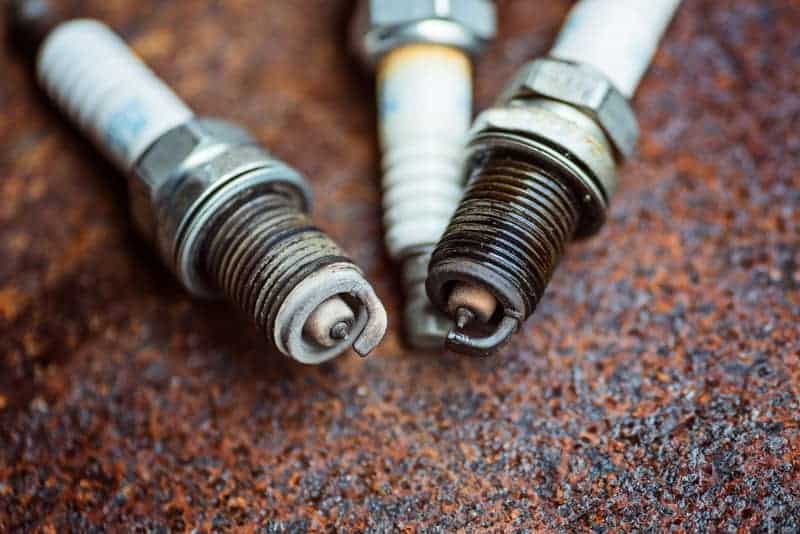
10. The Spark Plugs
Your sparkplugs are essential to helping ignite the gas in your engine. If the wiring to the sparkplugs is starting to fail or the sparkplugs are getting old, your car may not start as well.
Regularly replace sparkplugs and sparkplug wires according to your car’s maintenance schedule to ensure you have a clean spark in the combustion chamber to ignite the gasoline. Then your car will start much easier.
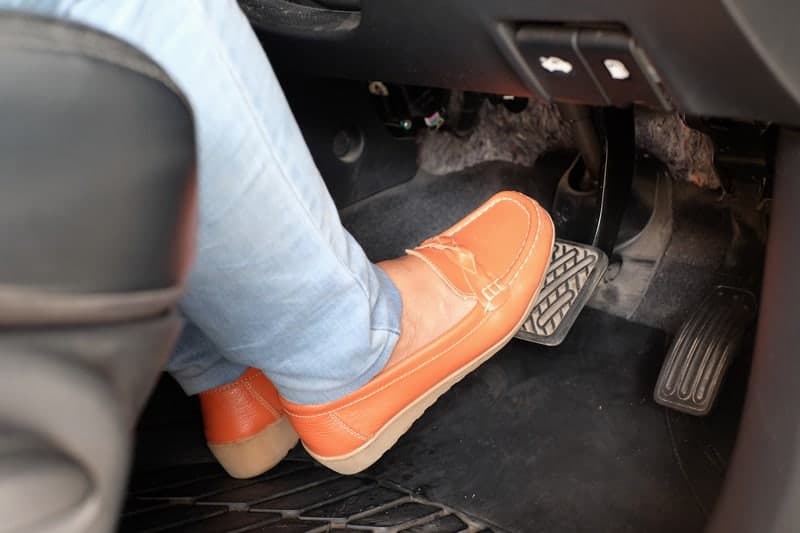
11. Forgot A Step Before Starting Your Car?
Sometimes we are in a rush and forget to go through the normal procedures of starting the car for some reason.
Ensure you’re placing the correct key in the ignition switch.
Ensure the gear is in the park.
Ensure you step on the break.
Ensure the steering wheel is turned a bit before turning the key in the ignition. When the steering wheel is locked you may need to turn it just a little, then you will be able to turn the key.
These rules apply to most cars and forgetting one of these steps may cause the car to prevent you from starting it.
12. The Air Filter
Similar to the gas filter, the air filter can get clogged from time to time. Of all the fixes for your car not being able to start, this one is probably the easiest. The reason for this is because most air filters are easy to remove and replace.
Open the air filter under the hood and check to see how dirty it is and if there is lots of debris or dirt in the filters. If the engine doesn’t have enough air flow the engine won’t be able to start.
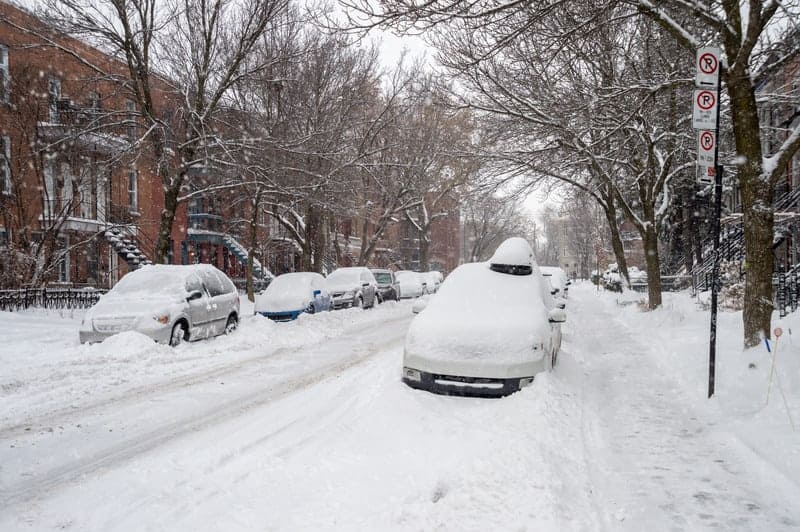
13. The Temperature
Cars covered in snow during snowstorm in Montreal, December 2016.
Ensure that the car isn’t too cold. Sometimes a battery or fuel line can freeze. When this happens the battery can’t produce enough electricity for the starter to crank. If the fuel line is frozen gas can’t get into the engine for combustion to start the car.
Keep the car warm in a garage or other shelter to help prevent freezing. Sometimes you’ll need to wait til the temperature rises to try to start your car again.
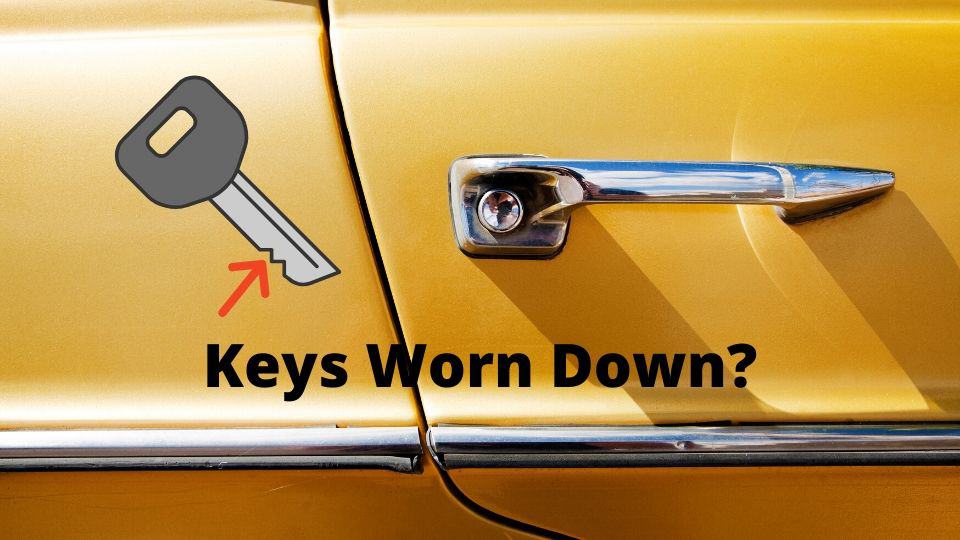
14. Bad Keys
Sometimes keys can get worn down. Sometimes keyless car transmitters lose battery power. When these things occur you might not be able to start your car.
If you have been using the same key for a while and it’s worn down, try to find that spare key you have for your car and see if it works. If it works well, make a copy and retire your old key.
For your electronic key, you may need to replace the battery. Your owner’s manual should let you know.
A fuel pump helps pump gas to your engine. Then your cylinders can fire to help start your car. If the fuel pump is failing or not working, your car may not start.
In some cars, you may even hear the fuel pump make noise when you turn your key to the accessory position, but it’s likely you won’t. Get someone to help you find and test your fuel pump and decide if you need to replace it.
Conclusion
When making a guess at what is causing your car not to start, doing some basic investigation or diagnosis can be very effective. Look for: gas levels, battery condition, wire connections, belt damage, starter issues, and consider when your car was last serviced.
Start inside the cars bychecking the dashboard, lights, and starting the car to find problems. Then move to look under the hood, and visually checking different parts that may be causing the car to not start. You may need to use gloves to inspect other areas under the hood.
Finally, get some help if needed to resolve the issue. I hope you can get your car to start and have a safe drive. Try this article to learn more about do it yourself tune-up –DYI Tune-Up Guide.
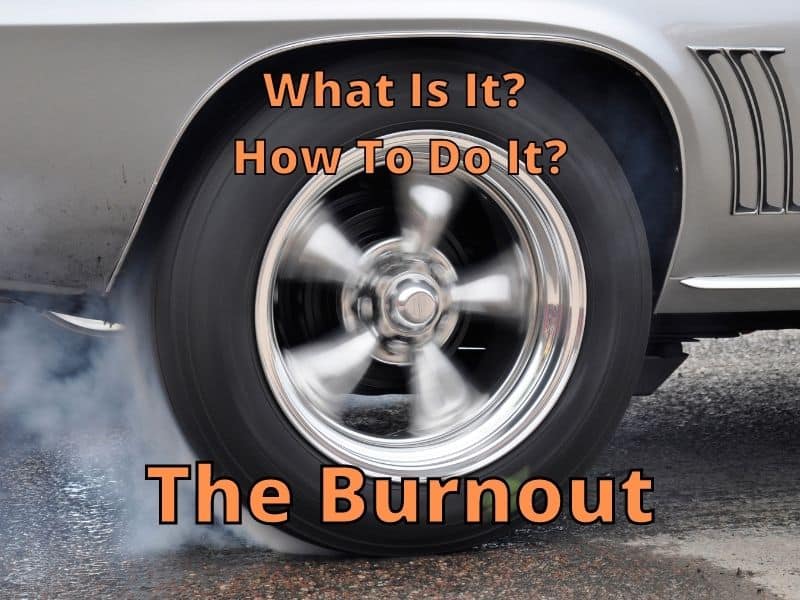
Burnouts are utilized to warm up a vehicle’s tires before a race. They are also a way used to parade a car. Burnouts can be an exciting show of power and capability. I have chirped my tires from time to time taking off from a stop, but never with a surge of white smoke.
A burnout is when a car spins its tires while the car stays still. Smokeusually appears as tires rub against the road. Rear-wheel drives tend to do burnouts easier than front-wheel drives. Yet, both manual and automatic transmissions can do a burnout, although the techniques can differ.
When I was a teenager I tried doing a burnout a couple of times for a fraction of a second. Not really a true burnout where your tires smoke. It was fun, but later I realized it wasn’t so great for the tires and possibly the engine, so I stopped.
We’ll go over the ways to do a burnout with a manual and automatic transmission. This article is for informational purposes only. Burnouts are safest done by professional race car drivers on race tracks.
In manual transmissions, you can rev your engine before engaging the clutch. This helps your engine gain power to transfer to your tires once 1st gear is engaged. If you smoothly engage your clutch while your pressing on the gas peddle the right amount then your tires will spin.
How To Do A Burnout
Make sure you are on a race track or safe area with no other vehicles. There should be plenty of room infront of your vehicle to go foward.
Turn your car on.
Engage your clutch and shift to 1st gear.
Keep the clutch engaged and press on the gas peddle until the RPM needle is up the best position (each car or truck is different. See video above.)
Release the clutch slowly for less chance of damage to transmission. Too slow or too fast may start to stress your car in differnt ways. Make sure you are very familiar with how to engage the clutch on your car, otherwise you could cause damage to your car.
After your tires are spinning, take pressure off the gas peddle slowly to allow the tires to grip the road again.
Some people may want to put on their parking brake during a burnout. Put on the parking brake only if your car has front parking brakes so your car won’t move. Most cars have rear parking brakes so this won’t work for most cars.
Burnouts In An Automatic Transmissions
An automatic transmission that has lots of power can easily do a burnout from a stop. These cars may only be able to sustain a burnout for a short amount of time. Cars with less powerful engines may also be able to burnout from a stop but only under certain conditions. Here’s what can help any automatic transmission do a burnout.
How To Do A Burnout
Make sure you are on a race track or safe area with no other vehicles. There should be plenty of room infront of your vehicle to go foward.
Place water on the ground where the spinning tires will be.
Move your car tires so they is over the area of water. Pour water over the tires that will be spinning.
Turn your car on.
Place you foot on the brake and shift the car into drive.
Take your foot off the brake peddle and press down fully on the gas peddle.
Your tires should start to spin if you have a powerful enough engine.
After your tires are spinning, take pressure off the gas peddle slowly to allow the tires to grip the road again.
An alternative method that may be tricky for some, is to press down on the brake with your left foot and shift into drive. Then press down on the gas pedal while holding the brake pedal for a moment. Then release the brake pedal and continue pressing fully down on the gas pedal.
This can work for some people but if you press the brake and gas pedal at the same time for too long the load on the engine may cause damage to the torque converter.
Sometimes you may notice after it starts to rain the road can become very slippery when you take off from a stop. This can occur if it just started raining and the oil buildup hasn’t had time to wash away from the streets.
Some people suggest putting some oil on your tires to help them spin, but to prevent oil from going into the storm drains I think water is a better alternative.
Altered Transmissions
Among a specific bit of auto devotees, their vehicles are viewed as an extension of their own self. To these drivers, it just is insufficient to modify their vehicle and race it at nearby tracks.
Therefore, certain drivers may trick out their vehicles, testing how far they can push their cars. In any case, certain moves, particularly the burnout, may seem alluring in motion pictures or on network shows, yet remain unsafe to the driver and others if not done properly and in a safe area.
A burnout is viewed as one of the authoritative auto tricks in a car racers collection. These tricks allow dragsters and other racing cars to warm up their tires so they stick to the ground during a race. Then again, burnouts are broadly utilized among hot rods, to warm their tires to enhance their velocities.
Permitting the wheels to turn at high speeds while stationary can bring about monstrous rubbing and wear out the tread on tires. At a certain point burning out removes so much tire material that it can become unsafe to drive on the road. It’s best to check your tire tread often and make sure you have enough to get around safely.
Despite the fact that drivers trust that they know their vehicles and their own abilities, safety is an important factor to consider. If a burnout strips one tire too far the tire could have a blowout.
Now, the harm to the tire can turn into a significant risk for those who are in the area. Double and triple-checking your tires is the best way to avoid situations where a crash can occur and avoid the chance of someone getting hurt.
Should I Do A Burnout In Public?
It’s key to acknowledge what is burnout before you make sense of how to approach doing the burnout. Burnout is about sending torque to the tires. Once your wheels turn at a high speed, your control of the vehicle starts to lessen.
With the huge amount of smoke, some drivers can get distracted. To stay focused you need to take your burnout seriously to prevent anyone including yourself from getting hurt.
A track with safe areas for the public is the only area you should do burnouts in public. Even the best drivers have bad days where something goes wrong. It’s not worth hurting yourself or anyone else just to do a burnout.
Clearly know how to do a burnout, make sure your car and tires are in great condition. Make sure safety procedures are in place for you and the public.
Then doing a burnout can be an inspiring event for everyone. That is the reason burnout can regularly be seen in many movies.
It is a positively cool thing to do but should be done under the right conditions.
Whether you have a manual or automatic transmission, you can do a burnout adequately with the right conditions.
What Vehicles Can Do A Burnout?
You can do a burnout in most cars or trucks if your engine has high torque. For example, a Chevrolet Impala, a Chevrolet Colorado 4WD Crew Cab, and Subaru Impreza WRX Sti can all do a burnout.
If your car has a small motor, a burnout might not be advisable. To test out your car, go to an area where there are no other cars, people, or anything to hit. Place your car in drive and press all the way down on the gas pedal from a stop.
Did your tires slip a bit? If not, it’s likely that your car should not do a burnout. Bigger cars and stronger engines are usually made to handle more abuse than smaller ones. Always be aware that some cars can get damaged just after a couple of burnouts.
Use a car that is meant for more torque and power to be more confident that you won’t end up damaging the engine or transmission of your car.
Tips For Doing Burnouts
Whether you using an automatic or a manual, timing your burnout will ensure you don’t remove too much tread from your tires. 5 seconds may work for some racers and if you’re using your own car you might want to aim for less. It all depends on how sticky you want your tires.
By keeping safe and knowing what to do you can ensure that your burnout gets the best results.
When you are doing a burnout, also be aware of the temperature of the engine. Watch the temperature gages and take a break after your burnout if needed.
You can hold the brake down when doing a burnout in a manual transmission, by shifting your foot off the clutch and over to the brake. Just make sure the tires are spinning while holding the brake or the car may stall.
I have spent money on routine repairs keeping up my 2006 Toyota Tundra. It’s been a good investment, yet I have made several mistakes on preventable repairs, including neglecting to fill my tires with air. Everyone usually makes some mistakes with their cars to costs extra.
You can avoid car repairs by finding out more about your car and how often it needs to be serviced for different parts. Once you learn when you can also learn how to inspect your car and even make some of the repairs yourself.
Almost 50% of the vehicle owners have spent, at least, $500 a year on auto services. This is according to Brian Hafer, Marketing Vice President for AutoMD.com. “The age of vehicles on the roads today is at a record high, more and more consumers are driving electric/hybrid vehicle models, Here are some ways to avoid expensive repairs in the future.
1. Chech Your Vehicle’s Fluid Levels
If you fail to give adequate attention to your vehicle’s fluid levels, then it could result in major engine complications, which can cost you more than a thousand dollars in repairing the damage. The same thing happens when your car doesn’t undergo basic preventive maintenance, such as regular checkups and change oil, regularly.
Vehicle owners should also regularly check the levels of brake fluid, engine coolant, power fluid, transmission fluid, as well as, windshield washer fluid.
This should be done on both gas and diesel-powered engines, electric and hybrid vehicle models, and on vehicles that have a mileage over 100K miles/10 plus years. If you a hybrid vehicle, then make sure to check its Power Control Unit coolant and fill it with the right amount of long-life coolant if it’s at a low level.
2. Check Unusual Vehicle Noises
It may not seem like anything, but when your car makes unusual noises, that’s a sign there may be something wrong. It could be poor vehicular performance, which needs immediate attention.
If you decide to ignore the noise it might be nothing or it might be an expensive fix the longer you avoid checking it out.
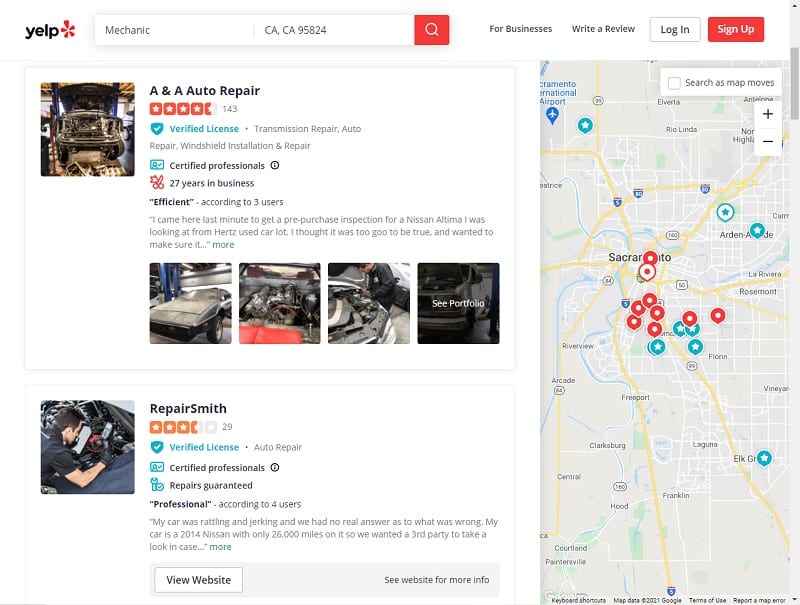
Some people ignore their vehicles because they can’t find a good mechanic. I suggest taking it to a dealership mechanic if possible. It may cost a little more but they have a reputation to uphold so they usually do OK in my experience.
If not you can always search Yelp or other online reviews.
Car noises like clicking, grinding, knocking, or squealing are symptoms of vehicular problems that, if left unattended, could cause worse issues and more expensive – at least a thousand dollars – costs for the necessary repairs.
The noises may also be a safety issue, which should never be disregarded. You may get an accident because you didn’t do anything with the noises. Remember, there is no monetary value for one’s life, so make sure that your vehicle keeps you safe while driving on the road.
The bottom line is: whatever the make and model of your car are, if you hear odd noises, then don’t ever ignore them.
If you are a do-it-yourself kind of person, I suggest trying the YouTube channel ChrisFix. Otherwise, take it directly to an auto repair shop and have the noises analyze by a car mechanic.
Remember you don’t have to let them repair your car, especially if you feel uncomfortable. Just say, I’m going to think about it, and you can decide later.
3. Check Your Vehicle’s Belts And Hoses
Another expensive auto service that you should avoid is failing to check the belts and hoses of your car. If you are not into the technical details, then drive belts and hoses make the vehicle’s engine run efficiently when in use.
Apparently, car experts suggest that these engine parts should be thoroughly checked every 30,000 miles or every after two years. If you neglect to do the needed inspection, then they will greatly affect the engine performance, and you may lose a lot of money for the repairs.
Drive belts, when overused, can slip and break eventually, while old hoses will result in fluid and vacuum leaks. If for instance, a drive belt or a coolant hose becomes futile, then your vehicle will not work properly and may severely damage the car engine.
A very good example is the timing belt, which needs to be replaced at the interval suggested by your manufacturer. For vehicles with high mileage, be sure to have the belts and hose inspected more often than they should.
4. Check Your Vehicle’s Tires
When you drive on underinflated tires, you shorten the life of the tires, increase the incidence of tire wear, and have damaged tires caused by various road hazards like heat and potholes.
If the tires suddenly break while you are driving, then you can no longer the vehicle properly, or worse, you end up hurting yourself. Meanwhile, driving on bald tires is more dangerous since it decreases vehicle traction, leading to a road accident.
To avoid putting yourself in danger, always find time to have your car’s tires checked regularly. If possible, have a tire rotation to ensure the tire’s proper alignment and the issues are immediately addressed. It is advisable to have them rotated every 7,000 to 10,000 miles. Don’t worry, a tire rotation service is fairly affordable.
Furthermore, it is ideal for car owners to set the tire’s pressure according to the specifications of the manual. If your vehicle has a tire pressure monitoring system or TPMS, then program the system after you have set the pressure.
For those who have hybrid vehicles, you can improve the gas mileage at a maximum of 3.3% if you consistently inflate your tires to their proper pressure.
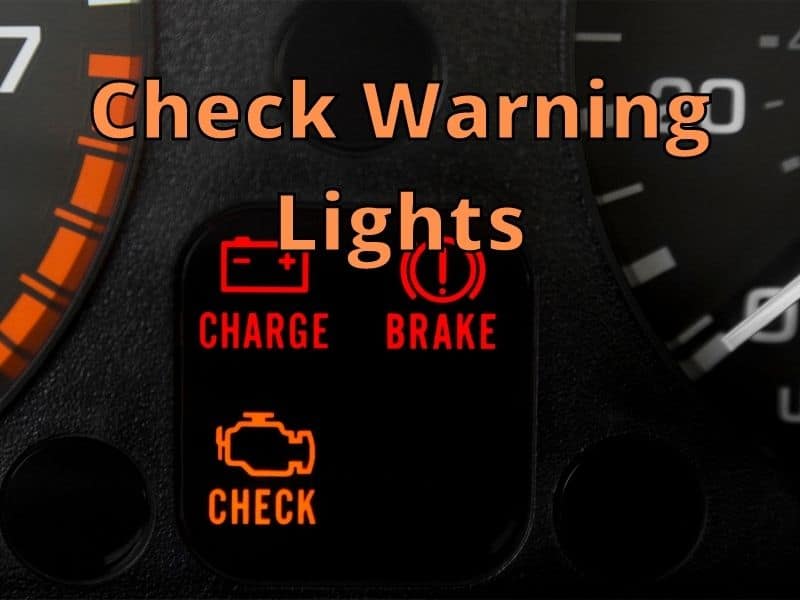
5. Check Your Dashboard Warning Lights
The last on this list is failing to inspect the warning lights. If they are not thoroughly checked or fixed right away, then it’s going to cost you a big amount of money for the repairs and maintenance.
It would be helpful to read the manual and be aware of the different warning lights on the dashboard of your vehicle. Watch out for the Brake Light, Check Engine Light, Oil Light, and Temperature Light, and know what you can do to keep them functioning well.
For electric and hybrid vehicle owners, you don’t have to worry about the warning lights. They come with a system that informs you whenever the warning lights have issues. However, don’t be too complacent. You still need to take your car to a maintenance center to ensure that there is nothing wrong with the dashboard warning lights.
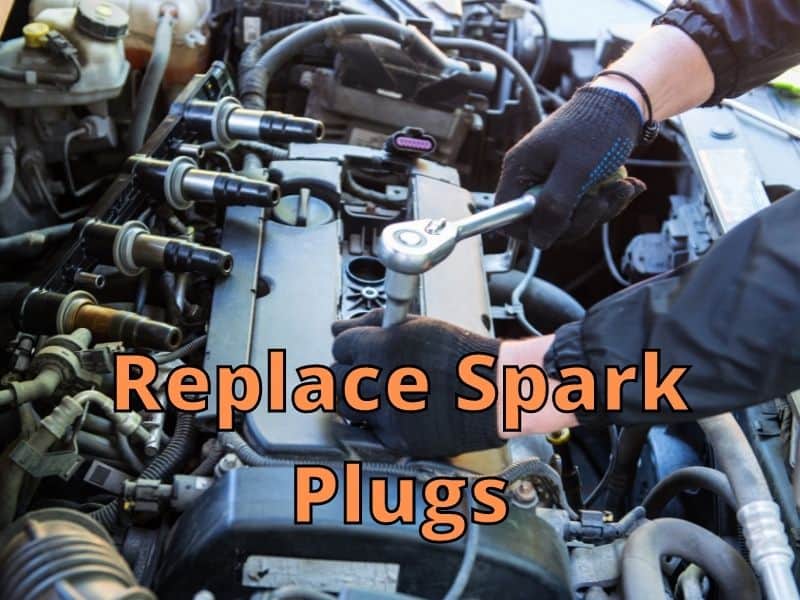
6. Replace Your Spark Plugs
There is a good reason to replace your spark plugs. Your engine can only run as well as the sum of its parts. Bad sparkplugs can cause your engine to perform badly.
In some instances, bad sparkplugs can cause major problems if you ignore the signs and don’t replace them. Make sure to follow your maintenance schedule when it says to replace them, even if your car seems fine.
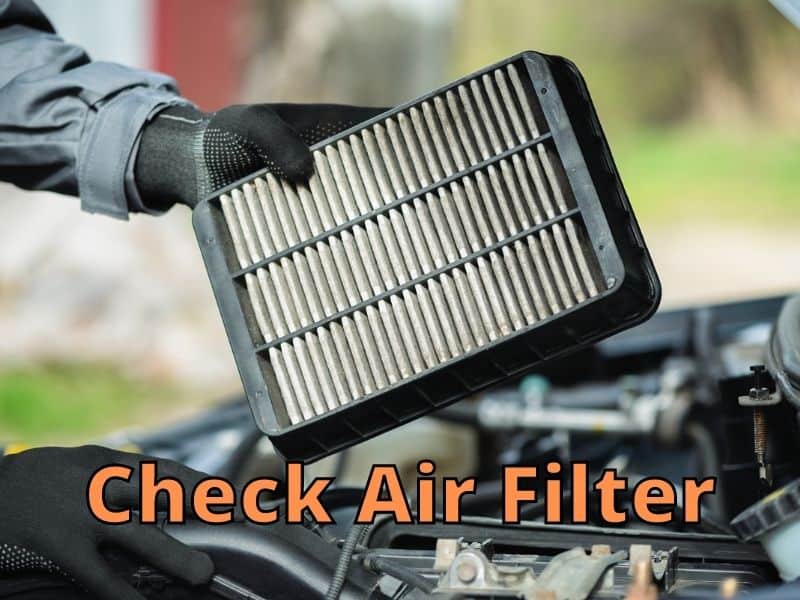
7. Check Your Air Filter
A clogged air filter means your engine isn’t getting enough air and it will start performing badly. If you ignore the problem particles could get through the air filter and start to get into your engine causing all sorts of problems.
The air filter on most cars is very easy to replace. Take it out when you get to the auto store and show them if you are not sure about the model of your car. They will get you the right kind to replace it and it will only take a minute.
The other option is to go online to Amazon or another parts store. Once in a while, I get my air filter changed with my oil but I know that I’m spending a lot more than I need to because changing it myself is so easy, just a bit inconvenient at times.
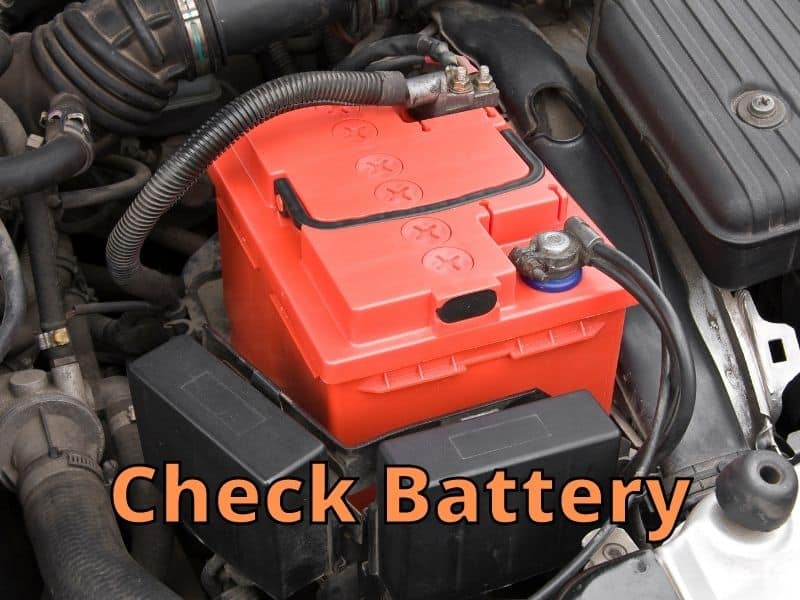
8. Check Your Battery
Another fairly easy task is to take a good look at your battery. Look at the terminal on the battery to see if there is any corrosion. Check that the cables are tight and the battery is in good condition and secure.
Lots of problems can occur with the battery over time. Checking it thoroughly once every couple of months is easy and will save you the cost of a new one.
9. Park Car Carefully
I tend to park my truck without paying as much attention to the curb as I should. This has cost me a bit of money when I found out there was a crack in the frame assembly of my car. In addition one of my shocks was leaking oil.
Now I am extra careful when parking even if it takes me longer, it worth it to be patient.
10. Keep A Regular Maintence Schedule
One of the reasons cars and trucks last so long is because their owners are religious about maintenance. They always take the car in when the maintenance schedule tells them to. They do everything like clockwork and their car runs well and lasts longer.
If you’re on a budget and are skipping maintenance, try remembering that it will cost you more the longer you fail to maintain your car.
Try using DIY methods for things you’re good at and if you’re not experienced don’t try it because that usually ends up costing more as well.
Ask friends for help and ask to borrow tools if needed. Get all the information you need first and see if it makes sense to try it yourself. Then you might end up saving a lot for certain repairs.
Conclusion
“Nearly half of consumers saying they spend $500 or more on auto repairs a year (with 1 in 6 spending $1,000 plus),” Hafer said(AutoMD.com). You can be above the curve as you check your car for problems and maintain it regularly.
If you make it a part of your weekly routine and check one thing each time, you’ll be sure to have a great running car that will last for a long time and you will likely have very few unexpected additional costs.
As you may already know, the car battery is an important part of your car. I had to change my battery last year and worked on figuring out if the battery needed to be maintained or replaced. After working on several techniques to maintain it, I found that some of the battery cells were not working properly.
To maintain your battery you need to check it at least twice a year so you can make sure it is performing at optimal levels. Here’s a list of 10 ways to check your battery:
Check and clean the terminals if needed
Check the battery for leaks
Fill the fluid levels on some batteries
Check the secureness of terminal and cable connections
Check the battery voltage output daily if needed with phone chager that shows car voltage display
Check your alternator with voltmeter if battery isn’t charging well
Check the hold-down cross bar is secure
Charge your battery if needed to prevent crystalization in the cells
Fix your radiator if your engine is overheating (Heat hurts batteries)
Check the date on the battery and replace if not working well and old (most only last 3-5 years)
Replacement of car batteries is very expensive, especially because there are ways on how to make the most out of them for years. In this post, we will be talking about everything you need to know on how to perform proper car battery maintenance, along with some tips. Doing this task correctly is guaranteed to add more years to your car battery. Read on if you want to know more.
What Steps To Take To Maintain Your Battery
(CAUTION – If you’re disconnecting the terminals on your car battery, disconnect the black/negative first, then the red/positive second. If you reconnecting your car battery connect the red/positive first, then the black/negative second.)
There are a few things you can do to ensure your battery lasts as long as it can. Most of these are simple and will only take a few minutes. Some can be done in several ways. Here’s the I would take when maintaining my battery.
1. Check The Terminals
Battery terminals almost always have some corrosion given enough time. Cleaning them to ensure a good connection to the battery. Clean them (see article) and use dielectric grease or WD40 on them to help prevent future corrosion.
2. Check The Battery For Leaks
A battery is prone to crack when under extreme conditions like an accident or overheating. Check for fine lines and openings in the battery case. If you see lots of corrosion on or under the battery tray or the battery terminal, check for leaks.
Replace a battery immediately if cracked. Leaking gases could explode.
Some batteries are liquid-filled and have battery cell covers. I usually notice them as two panels on top of the battery or as plugs over the six cells of the battery. Fill only if needed. (see video above)
If you see water levels are below the top of the metal sheets fill the cell so it covers the sheets.
4. Check Cable Terminal Connections
A cable terminal usually has a bolt that must be tightened onto the battery terminal. Ensure to tighten the bolt so that when you try to move the cable terminal it won’t budge. Try not to over-tighten.
If you can move the cable terminal a bit, it’s likely not tight enough or you may have the wrong terminal size for the battery.
5. Check The Battery Voltage
AD
This is one of the easiest and best ways to check your car battery is with a car phone charger that plugs into the cigarette lighter.
When you turn the car key to accessory position it should show 12.6 volts (a fully charged battery)
When you start the car it should usually show about 14.2-14.7 volts. It can also show in the 13-volt range for cars that have lots of accessories that need more energy.
6. Check Your Alternator is Charging The Battery Correctly
You can use a voltmeter to check if your alternator is working properly. (see video above) There are a couple of tests you can try to more accurately determine alternator performance.
Some of these are to check for bad wiring and others for correct charging.
7. Check The Hold-Down Cross Bar
If you have a truck like me, you know how bumpy it can get going down the road. Eventually, the battery crossbar may loosen allow the battery to move, and cause issues. Check and replace the crossbar if it is damaged or missing parts.
8. Charge Your battery To Prevent Crystalization In The Cells
If your battery is below 12 volts for more than a couple of days the cells could start to crysralize. If they do, it could cause the cell to stop functioning.
Batteries will naturally remove crystals when they are charged to the correct voltage of 12.6 on a routine basis.
Try to fix whatever problem is causing the low charge voltage (alternator, wiring, low water, bad connections, etc.)
Charge the battery if possible while waiting for the problems to get fixed.
9. Fix Your Radiator
A hot engine can ruin a battery. Check for radiator leaks or blockage. Check your fans to see if they are working properly. Make sure the engine isn’t overheating or getting overly hot regularly.
10. Check The Date On The battery
Every battery has a set lifespan. Most batteries will only last 3-5 years. One way to see if your battery is at the end of its life is to look at the date on the label on the top or side of the battery.
If it’s nearing its lifespan then it might be time to get a new battery.
*Be aware that for some cars when disconnecting the battery, your radio and ECU (or car’s computer) may lose information. You may need to reprogram radio stations and drive a couple of days more or less for the car’s computer to help your car run efficiently again.
How Do Car Batteries Work?
How car batteries work is that they store energy in chemical form and are released as electricity when you need it. This chemical energy is used by your vehicle’s ignition system to power the engine, lights, and other car accessories. Interestingly, once the alternator fails, your car can run using the battery but only for a short period of time.
Generally, the alternators do keep your battery recharged if your engine is running. In addition, if you are also using electrical appliances with the engine off, your car’s battery will slowly run out of juice. In addition, due to the chemical content of car batteries, you need to take serious precautions when handling it, including wearing safety goggles and a face shield.
How to Perform Battery Maintenance
Taking proper care and maintenance of your vehicle’s battery not only will prolong its lifespan but it will also ensure that your car will run as smoothly as possible. You don’t need to be a licensed professional to do this task. All you need is this guide to help you. Doing this job correctly will ensure that you can save up to $$$ cost entailed with a malfunctioning car battery.
The first thing to take note of is that you need to make sure that the water level is adequate, especially if your car battery is an older type. It is quite simple to determine which one you have. On unsealed batteries, you can find small vent caps situated on top, which you can also unscrew easily. If you notice that the water level is not at the bottom of the cup, you need to replenish it.
However, in areas wherein the tap water has a high mineral content, you need to use distilled water. This is your go-to water, especially if you are unsure if the water is soft or hard. In addition, heat will evaporate the water a lot quicker, so you need to check the water level regularly during the summer. If the water level is too low, the heat will only destroy your vehicle’s battery cells.
2. Terminals
The next thing that you must do is to check the terminals; one is marked negative (-), and the other one is marked positive (+). You need to disconnect the (-) terminal first before removing the battery and cleaning the connections. If you disconnect the (+) first, it might cause a spark and ignition, especially if you are using a tool made of metal.
If the terminals appear to have deposits on them, you need to clean them using a wire brush soaked in water and baking soda solution. In case you don’t know, these deposits block the electricity’s flow. Just make sure that you avoid splashing the solution onto the paint surfaces of your car. Lastly, check the cable ends. If it appears to be loose, you need to tighten it.
3. Brackets
Another thing to make sure of is that the brackets that hold your car’s battery in its position are tight. Having loose brackets might cause it to vibrate when you turn the engine on; thus, it will shorten the battery’s lifespan. It is also recommended that you check the battery tray to see if there is corrosion. After all, the effectiveness of the tray will be undermined if there’s corrosion.
If you see that there is minor corrosion, you just need to brush it off and coat it with acid-resistant paint. However, you need to replace the tray if it has been weakened due to corrosion. The overall condition of the brackets and the tray certainly will prevent further vibrations that are guaranteed to damage your vehicle’s battery.
4. Recharge
The best equipment for recharging your car’s battery is the trickle charger, which should be left on for a maximum of 10 hours. If your battery is the unsealed type, you need to first remove the vent caps and place a damp cloth on the openings. Next, you need to attach the alligator clips from the charger onto your car’s battery.
The red clip must be attached to the (+) terminal, while the green or black alligator clip must be attached to the (-) terminal. A different method is required if your battery is sealed, which has a charge indicator window found on top of it. It needs charging if you see that the window is dark or green, while you need to replace it at once if you see that the window is yellow or clear.
Your car’s battery has an average life of about 4 years. So, if you want to extend its life, you need to take proper care of it. Here are some tips that you might want to follow:
Using distilled water to fill the battery will reduce the accumulation of gas.
Placing a damp rag over the caps before you recharge your battery is necessary, as it can prevent a fire from getting into the battery in case there is shorting in the (+) and (-) terminals.
Avoid keeping inflammable liquid or gas near the car battery.
Never place metal objects over the battery to avoid shorting.
As mentioned above, it is very important that you disconnect the (-) terminal first.
Connect the charger to the AC socket once you have connected it to the battery terminals. Doing so will prevent a spark in the terminals.
Conclusion
The average life of a car battery is around 4 years. However, if you want to make the most out of your battery, it is necessary that you follow these simple and easy battery maintenance tips. As discussed, you need to check the water level, the bracket and tray condition, the terminals every 2 months and recharge it when needed.