Home

Recent Posts

How To Restore Headlights With Sandpaper


Clear Headlights

Through the years, your headlights can get hazy cloudy, and remain that way. You can make them temporarily look better by polishing them, but the haze will come back. If you want to remove haze long-term for years to come, you need to use sandpaper and a clear coat of spray paint.

To restore your headlights so they are clear, use sandpaper and a UV-clear coat. The steps are as follows:

  1. Sand with 600 grit, then 800 grit, and finally, if needed, 2000 grit.
  2. Wet sand the headlight in a circular pattern, then horizontally for each grit.
  3. Spray and clean the headlight and sandpaper with water as you sand.
  4. Dry and clean the headlight with rubbing alcohol.
  5. Add 2-3 layers of UV clear coat spray paint or some type of protectant over the headlights.

There are lots of steps and ways to go about getting your headlights clear again, but the only way to prevent oxidation long-term is to use clear coat paint over them. It’s a fairly cheap ($20+) and simple process but will take some time (30 minutes – 2 hours+). Read more to find out how involved it will be and all the details of how to do it.


Steps To Sand Your Headlights

The following are the steps I would take to sand and restore my headlights to like-new condition. Each person needs to consider the condition of their headlights and adjust accordingly to get the best results.

Ensure there is enough light outside or inside the garage to see clearly and get the job done right.

1. Headlight Haze
Headlight Haze

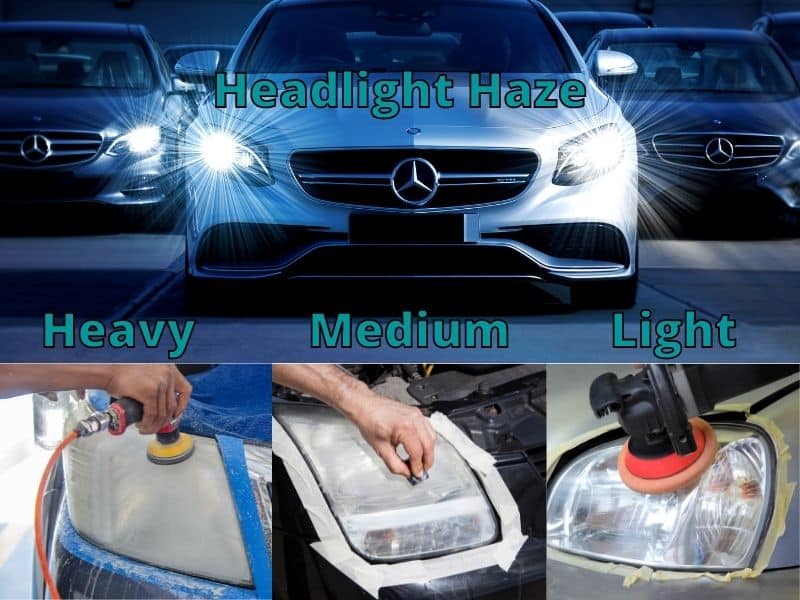
Determine if your headlights have light, medium, or heavy haze on them. Then start with the following grades of sandpaper for the following conditions:

  • Light Haze – You can start with 800-grit sandpaper
  • Medium Haze – You can start with 600-grit sandpaper
  • Heavy Have – You can start with 400-grit sandpaper

Headlights with lots of haze and yellowing will take a bit more time to sand, while those with a light haze should take half the time. You’ll know that you’re done with sanding once the residue from sanding is clear as you spray it with water.


2. Gather Your Materials

Gather Materials

There are many ways you can tackle sanding, so you can decide what is best for you and your circumstances, but if I were to sand my headlights today I would likely use these materials.

  • For A Light Haze – Use 800 grit, then 2000 grit sandpaper
  • For A Medium Haze – Use 600 grit, then 800 grit, and last 2000 grit
  • For A Heavy Have – Use 400 grit, then 600 grit, and last 2000 grit

If you want to use 3000-grit sandpaper, that might be helpful as well to create an extra smooth finish and more clarity, but it’s not necessary to get good results. In fact, it might be helpful to stop an 800 grit sandpaper to add a bit of rough surface for the paint to hold onto.

If you want extreme clarity, then using 3000-grit sanding may be helpful, especially if you are not going to spray paint a clear coat and only add another protectant to your headlight. For example, you could use a polisher to add compound and polishing cream to clarify the headlight and add a sealant manually to protect it.

The only problem with this is most sealants or protectants don’t last more than a year. That’s why using a UV clear coat is a great long-lasting solution.


Materials

  • Sandpaper – Various grits of wet/dry sandpaper
  • A Spray Bottle With Water – To clean during sanding
  • A Clean Microfiber Cloth – To clean during sanding

Optional Materials

Sanding sponges with various grits can be substituted for sandpaper. Those who have a drill or polisher may be able to attach a sanding pad to their tools.

Polishing compounds can be purchased to buff out haze on the headlight. Then you would use a polishing cream and some sort of protectant at the end. These usually come as a part of a headlight restoration kit and could be used to add to or substitute some of the steps in the process of removing the haze.


3. Start Sanding Your Headlights

Heavy Grit Sandpaper

The goal during this step is to remove the haze from the oxidation of the UV coating on the headlight. While sanding, you will remove the haze but also create a haze by sanding.

How much time it takes depends on the haze level. Start by sanding lightly for about 1-2 minutes over the entire surface. For wet sanding, you may need an additional 1-2 minutes of sanding. Take the time to check the edges of the headlight to ensure the entire headlight is sanded.

What you need to watch for is the time at which the UV coating haze has been removed. You may need to look closely and see if the yellowish haze is gone; that’s when you stop.

For wet sanding, you will notice a “milky color running down” as you wet sand the headlight. (youtube.com) Once the yellowish haze is gone and the milky color turns more clear, you stop.

Dry Sanding – This means using the sandpaper without any lubricant.

Wet Sanding – This means wetting the sandpaper and the headlight thoroughly before and during sanding.

SandingStage 1

  • A. Before sanding, it’s a good idea to either remove the headlight if it is easy to do so and you know how to do it or tape around the headlight to prevent accidental sanding of the paint around the headlight.
  • B. I would use dry sanding for heavy hazing to remove more haze a bit faster and wet sanding for medium or light hazing to prevent deeper scratches.
  • C. I would determine the correct grit. For example, I would start sanding with 600 grit sandpaper if I had medium haze.
  • D. You should not use a drill or polisher with a sandpaper pad. I may create deep scratches.
  • E. Don’t push hard. Push lightly and create a consistent scratch pattern over the entire headlight.
  • F. Use a horizontal sanding pattern.
  • For dry sanding, use horizontal sanding across the headlight.
  • For wet sanding, use water on the sandpaper and headlight. Start buffing the surface in a circular pattern to create a consistent scratch pattern over the entire headlight, and then sand horizontally across the headlight to achieve a horizontal pattern.
  • G. Sand for 1-2 minutes or until the yellow haze has been removed.
  • H. Spray the headlight with water and wipe it off with your microfiber cloth. Check that the entire surface is clean and sanded uniformly.

Sanding Stage 2

  • A. Determine the correct grit to use next. For example, if I started with 600 grit, then I would switch to 800 grit sandpaper.
  • B. Use wet sanding from now on.
  • C. This time push harder. Push firmly and use a circular motion in order to get a uniform smooth surface throughout the headlight. This should make a consistent scratch pattern.
  • D. Use a horizontal sanding pattern to achieve a horizontal scratch pattern.
  • E. Sand for 1-2 minutes or until you only see a horizontal scratch pattern.
  • F. Spray the headlight with water often. When finished, wipe off the headlight with your microfiber cloth. Check that the entire surface is clean and sanded uniformly.

Sanding Stage 3

Although you might not need this stage, it’s probably a good idea just in case you missed some part of the headlight or didn’t quiet get the surface evenly sanded on the previous step.

  • A. Determine the next grit to use. For example, if I started with 600 grit, then I would end with a 2000 grit sandpaper, although you can choose up to 3000 if needed.
  • B. Use wet sanding.
  • C. Continue to push firmly and use a circular motion in order to get a uniform smooth surface throughout the headlight. This should make a consistent scratch pattern.
  • D. Then use a horizontal sanding pattern to achieve a horizontal scratch pattern.
  • E. Sand for 1-2 minutes or until you only see a horizontal scratch pattern.
  • F. Spray the headlight with water often. When finished, wipe off the headlight with your microfiber cloth. Check that the entire surface is clean and sanded uniformly. Ensure the area around the headlight is also clean and dry.

Spray Paint Your Headlights With A UV Clear Coat

Your headlight should now have a horizontal pattern scratch over the entire surface. The next step is to spray paint your headlight(s) with a UV-clear coat. Make sure you have plenty of light to see clearly as you paint.

1. Materials Needed For Spray Painting Headlights

Gather Materials Paint
  • Rubbing Alcohol – Use before you paint
  • Painters Tape – Tape around the headlight and trashbag when painting
  • Trash Bag – Place around headlight when painting
  • Scissor – To cut the trash bag
  • Clearcoat Spray Paint – To paint the headlight

2. Prepare The Headlights For Spray Painting
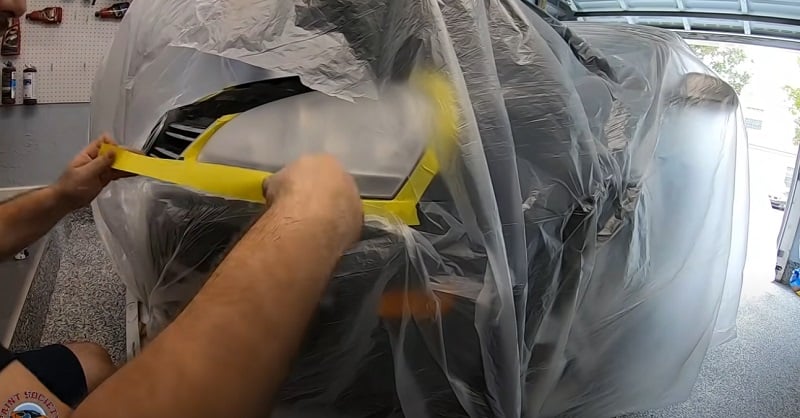
Taping around headlight
Credit – https://www.youtube.com/watch?v=Xubwpeuqm-E

This step involves creating a protected area around the headlight so clear coat doesn’t get on your car.

  • A. Cut a trash bag along the seams (if it has one), so it is cut in half or two equal flat sheets. (You can also use a plastic paint cover for the entire car)
  • B. Tape the trashbag over the headlight and the surrounding area so it pulled back snug.
  • C. Poke a hole in the trash bag directly over the headlight.
  • D. Cut the hole so it is a just a bit larger than the headlight, following the outline of the headlight.
  • E. Tape the plastic down all the way around the headlight so no paint is exposed.

3. Spray Paint The Headlights
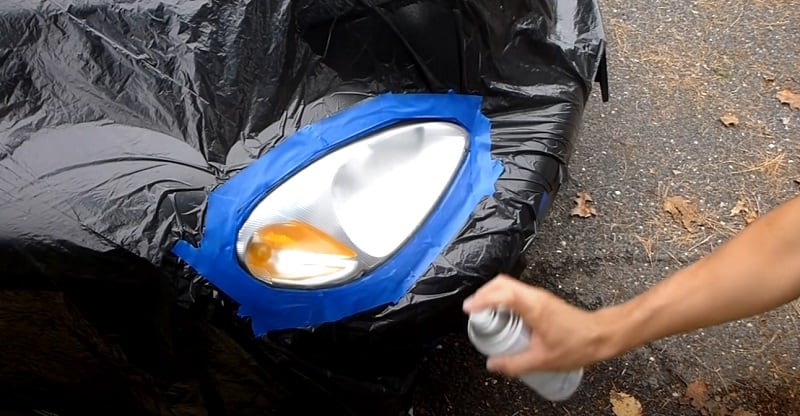
prepare headlight
Credit – https://www.youtube.com/watch?v=UEJbKLZ7RmM&t=10s

Choose a day that is not windy or rainy. Look on the spray paint container for specific instructions, as each paint will have slightly different instructions. Make sure it is UV clear coat that works on plastic.

Depending on where you paint and if wind is blowing, you may need to protect your car with more plastic bags.

Painting – Stage 1

  • A. Shake the paint can or follow instructions provided.
  • B. Clean the headlight with a clean microfiber cloth and rubbing alcohol.
  • C. Once clean and dry start spraying horizontally across the headlight at the specificied distance. (It’s a good idea to practice painting on a peice of cardboard first to ensure you get the hang of spray painting correctly. You don’t want to spray too much in any one area.)
  • D. Spray in short bursts at the correct distance. Alternatively, you can continously spray smoothly left to right in a snake like pattern if the area around the headlight is cover wide enough with plastic. Ensure there is an even thin coat over the entire headlight.
  • E. The headlight may seem hazy but as the layer of paint dries it will clear. Let the paint dry the specified time, usually 5 minutes. (If you sprayed a bit more than a thin layer you may want to wait a little longer.)

Painting – Stage 2

  • A. Shake the paint can again.
  • B. Apply the second coat. Apply a thin even coat as done previously.
  • C. Let the paint dry the specified time, usually 5 minutes. Check out how smooth the paint is. If it looks slightly rough (this is called orange peel effect) then a third coat can help smooth out this texture.
  • C. The headlight should be fine with two coats, but painting a third coat may help with smoothness and clarity.

Painting – Stage 3

  • A. Shake the paint can again.
  • B. Apply the third coat if desired. Apply a thin even coat as done previously.
  • C. Let the paint dry the specified time before removing the tape and plastic. Usually about two hours. Colder temperatures and humity will affect drying time.
  • D. Remove tape and plastic. Wait 24 hours to see what it looks like when fully dry.

At this point your headlight may look great but it may still have the orange peel effect where the surface isn’t smooth. You can either leave it alone and add some caranuba wax to protect it from dirt or do more sanding.

If you see the surface isn’t smooth even though it’s clear, you can wet or dry sand with 2000-3000 grit sandpaper to smooth out the surface and then use a electric buffer.

You’ll need a compound and polish or all in one, with the electric buffer to clarify the headlight. Then it will be both smooth and clear.


Benefits Of Sanding And Painting Your Headlights

The benefits of sanding and painting is the improvement of the look of your vehicle. Your lights will look new again, imporving the cosmetic appearance of the entire car.

It can also help improve overall visibility of the road while you’re driving your car at night.

When you sell your car, having clear headlights improves the overall price of saling of your car.


Why Headlights Get Hazy
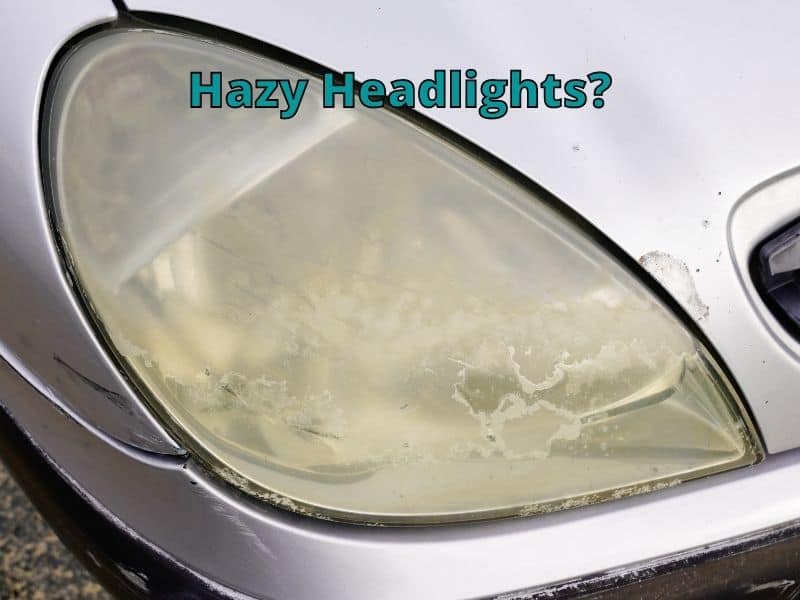
Hazy Headlights?

The UV rays from the sun are the reason almost all headlights get hazy. Plastic oxidizes when exposed to UV rays.

Most of the headlights that you can find in today’s cars are made from polycarbonate. Compared to glass, it is safer but more prone to damage from the sun, acid, and possibly humidity and rain. They can also get damaged from some cleaning products that have harsh chemicals.

Just like you’re car’s clear coat, adding some wax to them can temporarily add protection from oxidation and buff out so of the haze from your headlights. Yet, a couple of weeks later the headlights will probably be back to the way they were.

Discoloration and oxidation may affect the light output from your headlights as well. If you drive at night you might notice the effects more dramatically from one car to another.


Do You Need Sandpaper To Restore Your Headlights

AD

There are many headlight restoration kits available and some do a great job, but this can also depend on how oxidized your headlights are.

These kits are fairly easy to use, reasonably priced more or less, and don’t take too much time. That’s why many people opt for this solution rather than taking the time to sand and paint.

Yet, sanding will actually remove the oxidized layer of plastic that has hazed up on your headlights and make them truly clear instead of just polishing (which can remove oxidation) them and covering them with a protectant (doesn’t last long term).


Headlight Restoration Kits

Many headlight restoration kits can work well because they often come with the sandpaper or pads needed to remove oxidation, although they sometimes lack a clear coat. So you’ll need to make sure you get the right kit if that’s what you want to do.

One benefit of these kits, is they usually take less time than doing it yourself.

If you do choose a kit I would recommend the products below. These might work well depending on your situation. Headlights with heavy haze might not be best for all kits. The clear coat for these kits may also not last as long as painting it yourself.

AD

When choosing a type of headlight restoration kit, consider the following:

  • Feedback: What other people are saying. Some products will work in one situation but not another, so a little research will go a long way.
  • Cost: Price can be a factor in what you buy. Although a kit or doing it yourself can cost about the same price if you are smart about your purchases.
  • Warranty: Some products have a guaruntee, that can give you a little extra protection. The Carakote has a guaruntee for the life of the car if I understand correctly or they will give you a new kit if it doesn’t last.
  • Material: If the kit doesn’t have sand paper or something very similar, then it may not work on all headlamps because of heavy hazing.
  • Ease of Use: One of the products I looked at said it only took 30 minutes, while another said 40 minutes. Getting the job done quickly can be an important factor for some people.
  • Protection: Be careful that you are getting the protection you want. One product claimed to last 1 year, while other’s may not give a time period.

Helpful Resources

I have looked at a lot of videos and found the following three videos the most helpful for how to remove haze from your headlights by sanding them. Most of the information in this article was gathered from these three resources.


Conclusion

Sanding and painting your headlights can be a great idea. Make sure you have the time and resources needed to do it right, though. After a few rounds of sanding and spray painting, your headlights can look very clear.

You can expect to get great results with a little time and patience. You can go cheap, spending about $20 or end up spending a lot more if you decide to buy some polishing equipment.

Most anyone can restore their headlights with a little time, and some who take the extra time can restore them so they look great for a long time to come.

Thanks for visiting Drivinglife.net

What Oil Filter To Use? [Does It Matter?]


Which Oil Filter

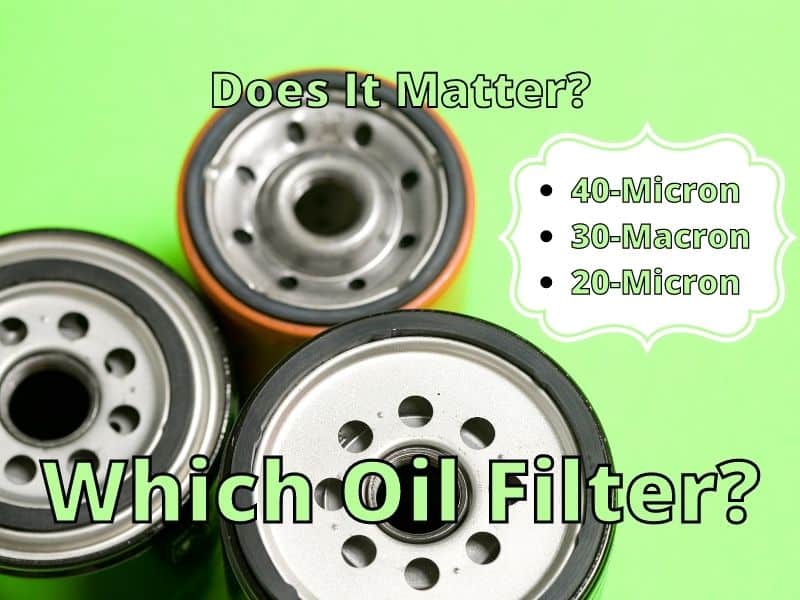
For most car owners, keeping their vehicles in their engine running well is important. Does it matter what oil filter you use? I’ve always believed that it doesn’t matter much, but from recent evidence, I now feel different.

Getting a quality synthetic 99% efficiency 20-micron oil filter is likely best for your Vehicle. Only the correct model number will work for your specific vehicle. The build quality and regular changing of your oil filter plays an important role in helping your engine last longer. (see video below)

When changing your oil at a shop or at home you can specify the type of filter you want most of the time. Getting a good filter can help your car stay in top condition. We’ll discuss ways to decide on the right filter for your can and which ones to avoid.


Choosing Your Oil Filter

There are many oil filters to choose from. After doing my own research I have found that quality oil filters can make a difference. Yet, if you just need a filter quick I would look for a 20-micron synthetic filter. If you have the time to research, then you can find videos and articles that may help you narrow down the field.

I’ll share videos and information from articles about what I’ve learned so you can find a good filter for your vehicle.


1. Recognize Oil Filter Limitations

To get the best oil filter you need to also recognize the limitations of oil filters as well. Even if an oil filter claims it can last 15K miles, changing your oils every 15k miles could harm your engine. And reusing an oil filter with new oil can also harm your car.

Filters and oil give you the maximum limits, so they can help you recognize how well they are designed to do their job, not as a recommendation of how long to use them.

If you were chased by a lion, you could probably run a lot further than without that motivation, but eventually, you would fail and damage to your body would likely occur along the way from running so far. It’s the same with filters and oil. It’s always best to change them as recommended by the manufacturers, usually 3-5k miles. (We’ll talk more about this later.)


2. Which Model Of Oil Filter To Get?

Which Model

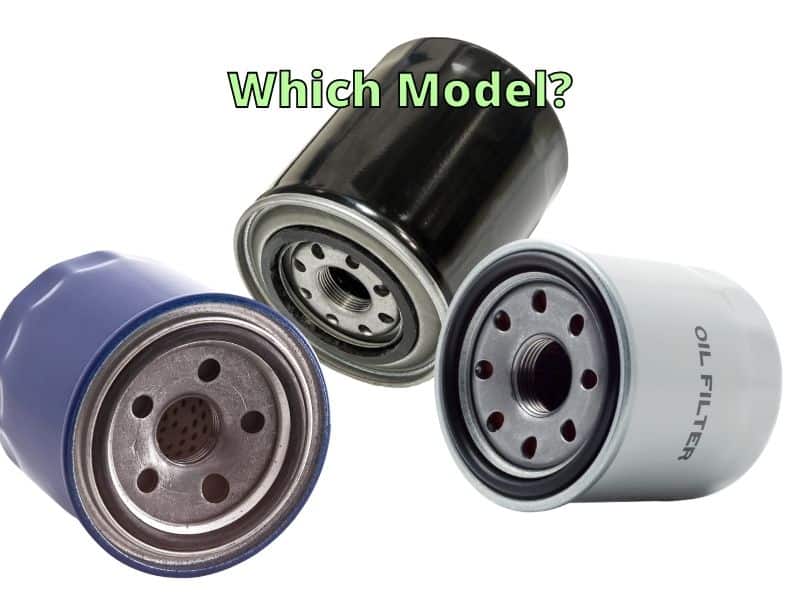
One of the first things that you should do is to be familiar with is that different vehicles require specific models of filters. If you see a filter that doesn’t say it’s for a specific type of car, you’ll need to look at the model number and find out if it will fit your car.

Luckily, most places that sell oil filters will let you enter the model of your vehicle and show you oil filters that are compatible with your car. You’ll likely get a list of filters to choose from and then you can select one that meets your criteria.

There may be other features that play a role in helping protect your engine as well, but the best choice is to find the right model and my choice would be to use synthetic media. Let’s find out why.


3. Which Oil Filter Media To Choose?

The cheapest filters are made of “cellulose” or wood pulp and the more expensive synthetic oil filters are made with “micro-glass” which is fiberglass or it may say “synthetic media” which can be made from resin.

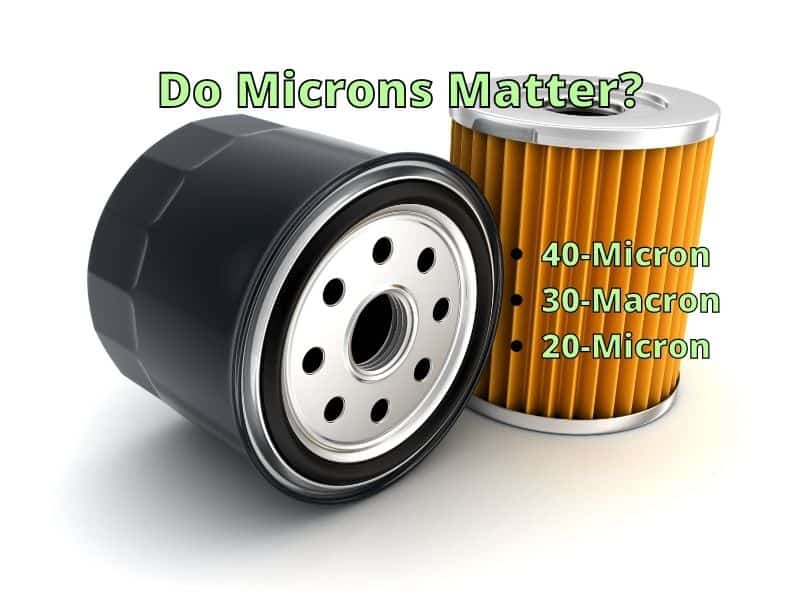
One of the most important parts of the oil filter is the filter media. The media captures the dirt, metal, and particles in your engine. A cellulose media filter might capture 40-micron sized particles, but a typical synthetic media filter can capture up to 20-microns. So, synthetic media can capture smaller particles.

Synthetic media can also capture more particles. Being able to capture smaller particles and more particles makes a synthetic filter likely your best choice for the best filter to get.

According to pgfilters.com “switching from a 40-micron oil filter to a 30-micron oil filter can reduce engine wear by as much as 50%.”


4. Which Micron Oil Filter Number Should I Choose?

Do-Microns-Matter

The best filters are synthetic filters. Many of these filters state they filter up to 20-micron. The smaller the micron filter the better it likely will filter particles. As mentioned previously a small decrease from 40 to 30 makes a big difference, so choosing 20 over 25 could also make a big difference.

More Interesting Information

In addition, if you could find (I couldn’t) a filter that is longer than another oil filter this can also have a significant impact on filtering ability. According to machinerylubrication.com if you “Double the size of the filter and you can triple the service life (dirt-holding capacity)

To go along with this, it’s generally better to have more pleats because it means more surface area to trap more particles. In addition, a thicker filter can filter more particles as well.

You might see mileage numbers on the boxes of oil filters ranging from 3,000 to 20,000 miles. Some 20-micron oil filters claim they can last 20,000 miles. While the smaller the microns the more it can filter, changing filters and oil should be done based on factors discussed later.


5. Find Out The Oil Filter Efficiency

Once you find out how many microns the filter is the next number to look for is the percentage efficiency that the filter states. For example, most filters will say 99% efficiency while others may state a lower percentage.

Sometimes it can be difficult to find the efficiency rating. When looking for the efficiency rating for the K&N oil filter, I went to Amazon.com, then K&N’s website, and finally found a number on a random website.

If you find two filters that have 20-micron media, just make sure to get the one that has a higher efficiency rating. That way it will capture more particles.


6. Do the Materials In The Oil Filter Matter?

I love this video because it shows that a more expensive filter isn’t always better quality. The video is a bit long, so if you just want the short advice video for his top picks you can check out his other video. (youtube.com)

Oil filter manufacturers make thousand of oil filters at a time. They mass produce products at the cheapest price within a certain level of quality. It makes sense that the internal parts of oil filters may be the same or similar from brand to brand. The goal is to find the ones with the best quality parts.

There are two important parts of the oil filter, which should be made from high-quality materials. The first one is the shell, which refers to the outer cover or the housing of the filter. It should be made from a material that can resist rust and corrosion.

The second is the filter itself. The material of the filter is important and how solid the frame is. The filter should be able to hold up over thousands of miles without breaking down.

Here’s a list of things to consider when considering which filter you should buy next.

  • It should have a tight gaskets.
  • The housing should be made of metal to avoid particals of cardboard from coming off.
  • It shoud have plenty of inlet holes that are large enough.
  • It should have an effective bypass valve.
  • The number of pleats may contrilbute to overall filtering ability.
  • It should not be contaminated with oil, rust, scratches, or glue from the factory. Good quality control.

7. Should I Change The Oil And The Filter At The Same Time?

Change Oil & Filter

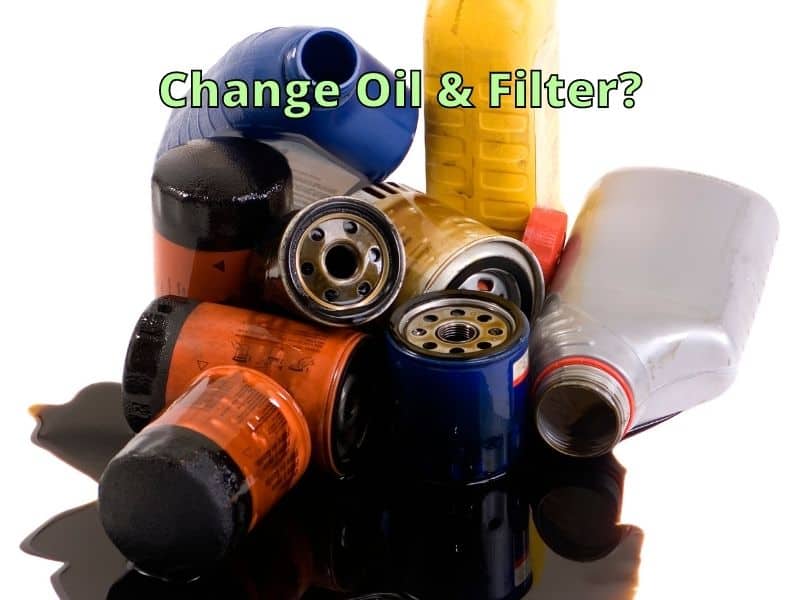
The simple answer is that you should change the oil and the filter at the same time as recommended by your vehicle manufacturer. Synthetic oil and synthetic filters can last longer than the standard oil and standard filters, but the properties of the oil and the filter have changed enough after 3-5K miles to necessitate changing them.

The great thing about synthetic oil and synthetic filters is they can provide great protection for your engine.


Can I use regular or synthetic oil with a synthetic oil filter?

You can use either type of oil with a synthetic oil filter. The synthetic part of the oil filter means the fibers of the filter are not wood pulp but fiberglass or resin, so they will accept any type of oil made for your car.


Why do I need to change the oil and filter at 5k if they can last longer?

Oil not only lubricates and carries particles to the filter, but it also carries “combustion by-products” (familyhandyman.com) and helps with other chemical processes. After a few thousand miles the oil has changed, and is no longer as capable as it was at the beginning.

The same can be said for the oil filter. Sure, it can hold a certain amount of particles, but there is a certain amount of guesswork involved. Each engine is different and you just can’t be sure how much wearing has occurred or how full of particles the filter is.

Sometimes the oil can bypass the filter when pressure is high. Then all of those particles will continue to accumulate in the oil and cause wear, especially if the filter is full.

And your fuel efficiency will also be affected. “It takes energy and power from the engine to push oil through an overly restricted oil filter.” (machinerylubrication.com)

It’s best to change the oil and filter at regular intervals to get the most out of your engine and car’s performance.


Do I need to change the oil and filter at the same time?

AD

The filter to the right claims to be able to last 1 year or 20,000 miles. While learning about different oil filters this one seems to be a good one in my opinion, and it probably can last 20,000 miles.

Yet, I wouldn’t push any filter past 5k miles because the oil and the filter have changed as mentioned before.

If you change the oil and not the filter, you push new oil through a dirty filter, and not only will the oil flow be impacted, it may also pick up particles from the filter and reintroduce them into the engine.

If you change the filter and not the oil, the oil won’t be as effective at neutralizing acids and protecting the engine from oxidation.

It’s best to change your oil and filter at the same time and at regular 3-5k intervals or as suggested by the car manufacturer, so you get the best cleaning and engine performance.


8. Should I Buy A Filter That Is Easy To get off?

An oil filter does not require professional installation. Most are easy to do by yourself if you are willing to get a little messy. Make sure to read the manufacturer’s instructions for specific installation details.

Some filters come with a textured grip or a special area for a wrench when uninstalling. This will make it easy to take the filter off when it needs to be removed. Abrasive surfaces will allow you to unscrew a filter if it is oily under your car or oil gets on the filter.

Unsure which one will make the best choice for an oil filter? If you have a good oil wrench you should be fine with any oil filter, so you can focus on getting a filter that is high quality instead of which is easiest to uninstall.


9. Does An Oil Filter Warranty Matter?

What happens if the oil filter becomes defective? What if it was not able to deliver the performance that the manufacturer promised?

Most warranties only cover the replacement of the oil filter if you see there is a problem after opening it.

It might be difficult to prove that an oil filter caused problems for your car. Yet, if you take the car to a mechanic and document everything that happened after you got the filter installed, you will be more likely to get compensation if a filter is faulty.

Although most products will have a one-year warranty, don’t expect anything other than a free replacement of the filter if you are not satisfied with the product.


My Choice For Oil Filters To Use

After learning about the internal parts of oil filters, I am both impressed and distressed. Oil filters need to be low priced to stay competitive. They are generally built well enough to do their job although sometimes quality control can be an issue.

It’s best to get an oil filter that has a solid metal construction on the inside so the filter functions properly, the media stays in place, and so it doesn’t lose structural integrity over time.

If you have a high-performance car, then the internal construction may matter more, since the oil may get hotter than normal and may start to degrade parts of the oil filter that aren’t metal construction.


It seems the best oil filters available for most cars are ones that can filter oil at 99% efficiency at 20-microns. With that in mind and considering how well made the oil filters are made, here are my top three choices for oil filters if I had to choose one today.


1. FRAM Ultra Synthetic Oil Filter

AD

Although this filter claims to have a longer life span than a conventional oil filter I still would change it at 5k miles for the best protection of my engine.

This filter beats a lot of other filters because it can hold particles up to 20-microns at 99% efficiency. Other filters at 25-microns or more are going to wear down the engine parts much quicker.

I was looking at the Bosch extra life filter and hoping to put it on this list because it has some great features until I found out it filters at 40-microns. That would wear down your engine much faster.

The Fram filter uses synthetic media so it can hold a lot of particles. It doesn’t have as many pleats as other filters but is the media super thick, so that should allow it to capture just as many or more particles.

The metal construction on the ends and in the middle make this filter one that can stand up to harsher conditions or like the product states can last longer.

The one downside may be the cellulose and glass blended media. Cellulose is a paper product and has been known to fall apart under extreme conditions, but it may be that the cellulose is contained within the glass so it can’t escape. The positive thing about cellulose is if there happens to be any water in the oil it can absorb it.

Features

  • 99%+ dirt removal efficiency at greater than 20 microns
  • Solid metal interanal construction around filter media
  • Dual layered, synthetic media traps 
  • Silicone anti-drainback valve 
  • Cellulose and glass blended media
AD

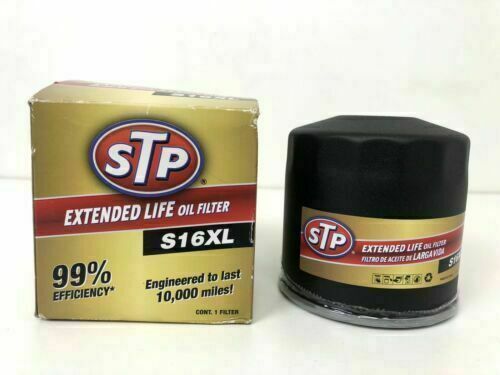
2. STP Extended Life Oil Filter

STP extended life oil filter

You can find this filter at autozone.com for $10 currently.

Although this filter claims to have a 10k mile life span, I would still change it to 5k miles for the best protection of my engine.

This filter works well because it can filter at 20 microns at 99% efficiency, just like the previous filter. Other filters at 25 microns or more are going to wear down the engine parts much quicker.

This filter has a solid metal construction inside and has a densely packed pleated media filter.

While researching different filters, I’ve found many well-constructed filters, but the problem with them was that although people gave them good reviews, they couldn’t filter well. They ranged from 25-50 microns.

The STP filter uses synthetic resin media, so it can hold a lot of particles. It has lots of pleats, but the media is thinner than the Fram filter. However, it should capture particles fairly well.

The metal construction on the ends and in the middle make this filter one that can stand up to harsher conditions or, like the product states, can last longer.

Features

  • 99%+ dirt removal efficiency at greater than 20 microns
  • Solid metal interanal construction around filter media
  • Silicone anti-drainback valve 
  • Synthetic resin media

3. Bosch Premium FILTECH Oil Filter

AD

Although I could not find the information for the micron levels on the Bosch website or Amazon.com, there are several websites that claim this filter is 20-microns, so I decided to add it to my list.

This filter claims to be 42 percent larger than conventional filters and 30 percent thicker.

This filter should work well for most people because it can filter at 20-microns at 99% efficiency like the other filters on this list.

This filter has a solid metal construction inside, which says that it can hold up to 14 grams of dirt.

The end caps for the filter look like they are made of plastic, but one customer opened it up after using it and found that it was well constructed.

The STP filter uses “natural and synthetic materials” for the media. This seems a lot like the Fram filter, so the cellulose may help absorb any water in the oil, or it may be there to reduce product costs.

Features

  • 99.9% dirt removal efficiency at greater than 20 microns
  • Solid metal center tube
  • Holds 14 grams of dirt
  • Silicone anti-drainback valve 
  • Synthetic glass and natural media

Conclusion

In summary, choosing an oil filter can be a bit tricky because you aren’t given all the details about all aspects of the product, even from the manufacturer’s website sometimes.

I have found that most products that claim to be long-life products are manufactured better than the standard oil filter and usually have a good micron level, but not always.

Look for a 99% efficiency rating at 20-microns and this will likely give you the best filter for the reduction of wear in your engine.

Thanks for visiting Drivinglife.net

References

machinerylubrication.com

bobistheoilguy.com

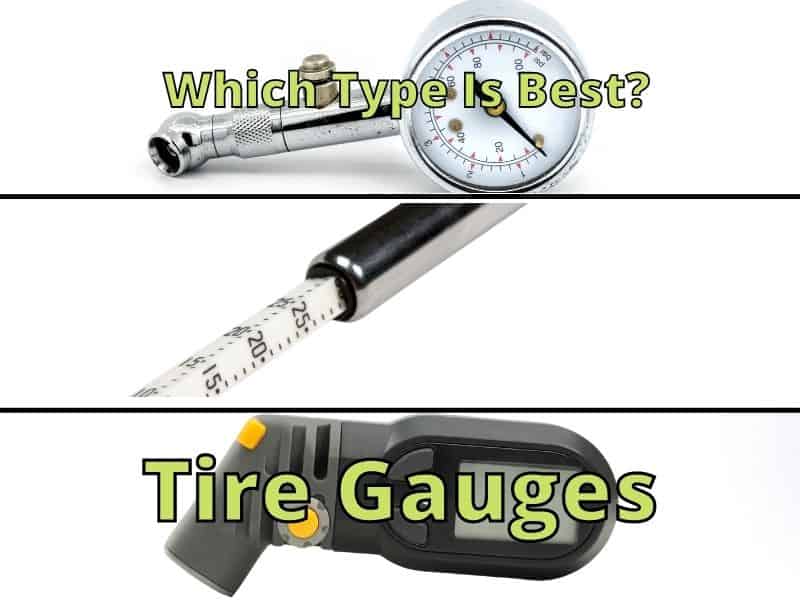
The Three Types Of Tire Pressure Gauges [Which Is Best?]


Tire Pressure Gauges

In my truck, I have a stick tire pressure gauge and a dial tire pressure gauge. My stick tire pressure gauge does tend to stick after a while, but it is small and easy to use. The dial gauge is accurate each time and fairly easy to use. I think that there are advantages to having both types of gauges.

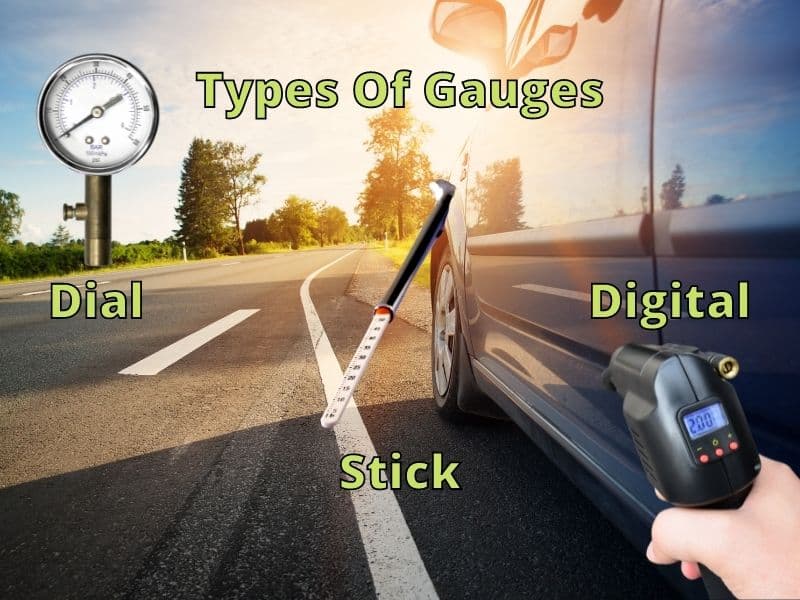
The three types of tire pressure gauges are digital, stick, and dial. Each can accurately determine tire pressure. Each has advantages and disadvantages. Each is portable, fairly easy to use, and fairly small.

The best type of gauge comes down to quality. The gauges that are built with quality materials and are designed well can last much longer than cheaper built ones. So which one should you get? We’ll talk about each type of gauge and the pro and cons of each so you can choose the best one for you.


Types of Tire Pressure Gauges

Types Of Gauges

Before you decide on which one to buy, it is important to have an understanding of the different types of tire gauges that are available in the market. You need to evaluate their pros and cons to determine which one is best suited for your needs.

  • Stick Type: This type of gauge would look like a regular ballpoint pen. They are compact, simple, and very cheap. On the downside, they are a little difficult to read with all the little mark on the white stick part that extends when reading tire pressure.
    • These tire pressure gauges use a spring and piston to allow tire pressure and atmospheric pressure to push against each other. Once the gauge is remove from the tire the white measuring stick stays out so you can read the pressure.
  • Digital Type: The digital tire pressure gauges would look like a pocket calculator. They have electronic LCD or LED display that makes them easier to read than the stick type. However, they are bulkier and require batteries for you to use them. While batteries are rechargeable, digital tire pressure gauges can wear down in years.
    • The use a digital sensor to read the air pressure. This ensures an accurant reading every time, unless the seal gets damaged (not likely unless you drop the gauge a lot) or too much dust get inside the guage.
  • Dial Type: Dial gauges would look like a clock’s face but has a needle that indicates the air pressure. Some of them have features that include bleeder valve, extension hose, and dual-scale dial. They are very easy to read but may take two hands to operate unlike the others.
    • These may be bulkier than other guages but remain accurate for long periods if the guage is made well.

In this section, we are going to discuss the top five recommendations for the best tire pressure gauge available right now. We will provide you with each product’s features, pros, and cons so you can make a better evaluation before buying.


1. Digital Tire Pressure Gauges

AD

The above tire pressure gauge is an all-in-one device that measures tire pressure and shows it on a digital display. Most digital tire pressure gauges can read up to 100 psi and this one goes to 150 psi. Helpful for high-pressure bike tires.

Digital tire pressure gauges almost all have a handheld to use so you can easily hold and measure your tire pressure. This can be helpful for those who want to quickly check their tire pressure without having to hold two parts such as with dial tire pressure gauges.

They are usually fairly durable, although they are digital so batteries are required, and dropping them from too high could break something.

The nice thing about these types of gauges is how easier they are to read and some also double as a multitool. Many have lights and some have other tools.

For example, the tire pressure gauge above has a built-in LED flashlight that helps maintain visibility even when it’s dark. a belt cutter, and a window breaker in case you’re stuck during an accident.

In addition, some digital tire pressure gauges are compatible with different types of measurements, such as PSI, KPA, BAR, and KG/CM2.

Pros

  • Easy Read Display
  • Light
  • Easy To Hold
  • Measure High Pressures
  • Displays Different Types Of Measurements

Cons

  • Needs Battery
  • May Break If Dropped Too Hard
  • Slightly Bulky

2. Stick Tire Pressure Gauges

AD

Stick tire pressure gauges are one of the easiest to use. They are almost the size of a pen (between 5-6 inches) and easy to hold in your hand. The only drawback to its size is you might lose it if you don’t place it back in its place after you are done.

These stick gauges can read many types of air pressure just like a digital tire gauge, you only need to turn the gauge to see the various pressure measurements.

People buy these because they are easy to operate and store. It’s a fast convenient way to measure your tire pressure. In addition, these are cheap. Even if it stops working after a while, you might still choose this type of gauge because it’s so small and easy.

Most of these gauges have pocket clips for easy access and storage. Most also come with a deflation point on the back of the head of the gauge in case you overinflated your tire.

These are usually made of stainless steel so you can drop them and drop without problems.

Unfortunately, these types of tire pressure gauges can stop reading tire pressure accurately over time. Like a bike pump, you can get various types of quality gauges. Some will last a long time, but others lose pressure because of seals or low-quality parts.

A stick gauge in my opinion the most likely of the three types of gauges to fail at reading tire pressure over time. This is because they are so cheap to make, many are not made of great quality materials.

Pros

  • Can Display Many Type of Measurements
  • Convienent – Small Enough To Store in Pocket and Glove Box
  • Easy To Hold
  • Can Drop Without Breaking
  • Cheap To Purchase

Cons

  • Difficult To Read – Small numbers
  • May Get Lost More Easily
  • May Lose Accuracy Over Time
  • Usually Only measures Up To 60 PSI

3. Dial Tire Pressure Gauges

AD

Another type of pressure gauge is the dial type. This type of gauge uses a needle that points to the air pressure measurement. Depending on the product you get these can be a solid product that will last a long time with good accuracy.

These work well over time if they are built well and have a one-piece construction. Some come with a long rubber hose. This can be handy when you need to get into tight spots, but hoses tend to fail faster in my experience than solid metal construction.

When it comes to tire pressure gauges the one seen above is a budget option but seems to perform just as well as other much higher priced options. So, some research would be helpful before you purchase a dial tire gauge.

Like the stick gauge, this one requires no battery and is easy to operate. But like the stick it usually has a spring inside that may lose accuracy over time or if it is dropped too much. Again, quality construction matters.

This type of gauge is good for those who want an easy-to-read display that is fairly accurate.

Pros

  • Some Are Small Enough To Store in The Glove Box
  • Easy To Hold And Read
  • May Resist Breaking If Dropped
  • Usually Accurate

Cons

  • Display Only One or Two Measurements
  • Can Be Bulky
  • May Lose Accuracy Over Time
  • Usually Only measures Up To 60 PSI
  • May Require Two Hands

Understanding Tire Pressure Gauges

AD

A tire pressure gauge is a device that checks the air pressure of your vehicle’s tires. It will not fix or repair any problems on the tires, but it can prevent problems from occurring. They can help you with:

  • Increasing your gas milage – Tires at optimal pressure will give you better gas milage.
  • Decreasing how often you need to change your tires – Tires at the right pressure will last longer because tread will be evenly worn on the tire, along with regular tire rotations.
  • Prevent accidents from under or over inflation – Tires lose grip when under and over inflated. This may cause more slipping on the road in different conditions. Over inflation may also lead to a tire bursting in certain conditions.
  • Tire naturally lose pressure – Checking your tires once a month can help you know when it’s time to fill your tires so they have the right amount of air.

A gauge may not be present in everyone’s glove compartments, but it is a helpful tool for vehicle owners. It can keep you safe by ensuring your tires are in their best condition at all times.

It will also save you a lot of time and money for maintenance and reparation. Low tire pressure can significantly lessen your car’s overall fuel economy and can impact your vehicle’s braking and handling.

Tire pressure gauges have a lot of benefits. In addition, over and under-inflated tires are going to change the road handling properties of your car. This is the reason why it is also recommended that you regularly check your tire’s air pressure.


Essential Factors to Consider when Choosing the Best Tire Pressure Gauge

Before we conclude, first let’s talk about the essential factors to consider when choosing one. This is vital because not every model possesses the desired properties that make the best tire pressure gauge.

  • Easy to Use: A tire pressure gauge must be easy to use. This means that you have to choose one that you can operate using only one hand. As mentioned in the above section, dial gauges take two hands to use. However, stick and digital tire pressure gauges only require one.
  • Easy to Read: Stick and dial gauges are analog and may be difficult to read accurately, especially during nighttime. However, digital tire pressure gauges have backlit LCD or LED display that allows faster, easier and more accurate readings. You have to choose one that you will be able to read even in low light conditions.
  • Durable: Digital and dial gauges are more wear resistant, depending on the build quality and material, unlike stick gauges. With proper care, tire pressure gauges can last a while. It should be noted that experts have advised not to trust a reading that came from a roughly treated gauge. You have to choose a tire pressure gauge that can endure any weather and can last a long time.
  • Price: You should not purchase really cheap tire pressure gauges you can find at a dollar store or gas stations. Keep in mind that with a few dollar additions, you can get a better one that clearly has more features. In evaluating the top picks, make sure to relate each product’s features, pros and cons with their individual prices.
  • Accuracy: The ones mentioned above would be useless if the readings are not at all accurate, right? The newer models of digital tire pressure gauges can give almost the same accuracy as the stick types. Make sure you choose one that gives you correct readings.
  • Features: Individual features are important as you weigh them in contrast to the other models. They may be small features but may not be offered to other models. Make sure you choose one that gives you the most advantages and benefits.

When choosing the best tire pressure gauge, it’s important to review the above to help you narrow down your search. It may also save you a lot of time and effort if you already know what you are looking for.


Keeping Tires Inflated At Their Optimal Pressure

Keeping your vehicle tires properly inflated is a quick maintenance task that is very important for your safety. If you have an air compressor you can do easily add air pressure to your car tires at home.

To do this, you need a tire pressure gauge to check tire pressure and fill the tires to the correct level.

I like to check the tire pressure before I go on a long trip. What will you use your tire pressure gauge for?


Conclusion

Choosing the best tire pressure gauge may come down to personal preference but it should also include research from reviews about durability and quality. Consumer Reports has done research on tire pressure gauges if you have a subscription you can find out more.

I think the best tire pressure gauge is the digital type. They tend to give accurate readings over their lifetime, even though they need batteries and care so as not to drop them.

Which is the type you would choose?

Thanks for visiting Drivinglife.net

Dash Cam Laws For Each State [Which States Allow Window Mounting]


Dash Cams Laws

Most insurance companies agree that having a dash cam is incredibly helpful when an accident occurs. All states should allow you to have a dashcam in your car, although most states don’t specifically mention them. They mention having an unobscured view.

You can mount your dash cam on the front window in 23 of the 50 States. All states require you to have a clear view while driving and some states specify how to mount your dash cam and the size it must be. Other states say that nothing should be on the front window, so dashboard mounting is an option.

It’s best to look up the specific laws for your state and find out what is required where you live. In the picture below I show all the states where you can mount your dash cam on your window and other pertinent information. You can even mount your own dash cam fairly easily if you are getting a single


States That Allow Window Dash Cam Mounting

While this list of states that allow dash cams on the front window may not be exactly correct, it is the best I could do with the information I had about what each state allows. Interpretations of the same law may differ from state to state, so this is a general idea of what should be allowed.

The chart below shows the name of each state and whether they allow front window mounting of dash cams. All states should allow you to mount your dash cam on your dashboard unless it obscures your view.

For example, Texas doesn’t allow objects on the window that may obscure vision or reduce the view, but it is legal to have a dash cam. So, to follow the law you would need to secure the dash cam to the dashboard.

YES (23)NO (27)
Alaska(Washington DC)
ArizonaAlabama
ArkansasConnecticut
CaliforniaDelaware
ColoradaFlorida
HawaiiGeorgia
IllinoisIdaho
IndianaMassachusetts
IowaMichigan
KansasMississippi
KentuckyMontana
LouisianaNebraska
MaineNew Hampshire
MarylandNew Jersey
MinnesotaNew Mexico
MissouriNew York
NevadaNorth Dakota
North CarolinaOhio
OregonOklahoma
UtahPennsylvania
VermontRhode Island
WashingtonSouth Carolina
WisconsinSouth Dakota
Tennesse
Texas
Virginia
West Virginia
Wyoming

The states that allow dash cams usually have restrictions about where you need to place your dash cam. Most say that the dash cam should be in the lower left or right bottom corner of the window. Some say that you can place the dash cam behind the mirror.

There are also size limitations for the dash cams on windows. Most states say that if your place the dash cam on the lower left side then it should be less than a 5″ square and on the right side less than a 7″ square, but there are all sorts of variations. Check your state to make sure which you need. (see article – freightwaves.com)


In addition to where you should put your dash cam, some states want you to inform any passengers if you will be recording using your dash cam.

If you carry passengers regularly then you may want to have a sign stating the vehicle is equipped with a dash cam that records audio and video for security purposes and entering the vehicle gives consent to use the dash cam. This can help avoid any legal issues that might occur.


The states that do not allow dash cams on the window may in the future clarify that dash cams are legal, but until they clarify the law you can be safe by only attaching the dash cam on the dashboard in a way that doesn’t obscure your view of the road.

I haven’t seen any state forbidding the use of dash cams, although most are clear about not placing anything on the windshield or in any area that can cause the driver to restrict their view outside.

While using a dash cam is legal, the size, placement, or other factor might make it illegal to use. It’s best find your states legal requirement just to be sure. The website (dashcamcar.com) has links to each states codes so you can check it out yourself.


Find Out More About Dash Cams

Record all those rogue drivers who cut you away for an illegal U-turn; celebrity’s Lamborghini that was in front of you; or the ghost that stood to wave its hand and upload it on YouTube. Welcome the dash cam, the gadget which exactly means – a cam for your car’s dashboard. This gadget is infamous for winning court cases with video evidence.

Wait, you can’t install this dash camera straight onto the dashboard. Dashboard cams are easily mountable over the windshield using a suction cup tilted downward to keep the hood visible. This method avoids washed-out pictures while steering with the sun in front.

The power cable is a crucial issue in dash cam installation. You can fix it easily with possible methods because the majority of dash cams have low battery time. Many dash cams need to get plugged into the car’s 12-volt system to function while driving. Most cars come with one or more 12-volt sockets. Simple dash cam installation needs just a 12-volt socket.


Hardwiring A 12 Volt Dash Cam

You might need to add a dash cam to your car forever. Ask the local car gadget installation agent to add it. This kind of work needs a seasoned worker. The cut cable of the Dash Cam must be wired into the car’s available power circuits. The cable must be hidden within the insides of the car.


1. Best Place For Your Dash Cam

The driver needs to try various positions for the dash cam to be safe and and get a good view in front of you; however, don’t mount the dash cam in an area that impedes your perspective of the street ahead.


2. Find the Fusebox

We have to know where the wire box remains because towards the circuit box a force link runs from the dash cam. Most cars possess a breaker box on the lower side of the dashboard near the driver’s or traveler’s seat. In this scenario, at the back of the removable board, the fuse box is efficiently open below the direct unit.


3. Use the force link

From the dash cam, spread the force link at a place it may run after fixing it at the back of the inside boards. The problem is the amount of slack to leave in transit down to the circuit box and the place to course the link.


4. Begin to tuck the force link inside the primary event.

Begin to tuck the force link inside the primary event.
Photo Credit: http://windowsreport.com/360-degree-dash-cameras/

Pulling over the elastic trim across the A-column reveals the hole on which the force link might run beginning at the headliner till the circuit box. Rarely, it calls for the evacuation of the A-column spread. This is because it allows full access to the area of the vehicle to direct the force link.

Several A-column spreads may be removed; use the car manual; speak to a specialist to help you with the uprooting. Uprooting an A-column is not entirely necessary.


5. Tuck the force link beside the wires on the A-column.

Put the force link circling the sides and back of whatever is left of the inside boards below the circuit box.


6. Locate a wire that is hot

Well, vehicle breakers usually contain power every time. It is hot to touch, and it should be added to the circuit unit. Use a circuit analyzer to find out which wire is heated.


7. Circuit analyzer and add the created unit

You must utilize the circuit analyzer to guarantee there is no force at the breaker while the ignition key is not operating. A force is seen as a light whenever you put the ignition key in the run position.

Check if the key expels after ignition. Use a pincer or the breaker puller accurately to remove the circuit that you identified. Add the circuit inside the establishment. Pack the one you removed, including the breaker circuit. Ensure to plug in the A-circuit inside the void spots.


8. Power up the Introduce

Store your large-size force wire using the zip attached. Secure the mounting point beneath the kickboard and dashboard; utilize as many zip ties as possible.


9. Test the Dash Cam

Test the Dash Cam
Photo Credit: https://www.t3.com/news/best-dash-cam

Turn the dash cam to run position using your embed key with the ignition. Make sure everything is installed well and introduced efficiently. Once turned ON, start recording your stuff using the dash cam.


10. Some Moisture Holds the Seal

Place some water over the dry area. This enables the suction cup to protect the seal. Use some water along with Vaseline to make it more strong.


11. Give Strong Pressure and Grip

Find your target on the windshield, and give pressure over the middle of the mount. This pushes all the trapped air in the mount alongside the parts of the windshield away from the mount. Place direct pressure for a minute to protect the mount from falling:

  • Fix cam using glue strips.
  • Level the feature and check to see if cam perspective does not have obstacles.
  • Be super cautious about a number of glue strips.
  • Once the cam is precisely lined, fix it using the strips.
  • Utilize glue tape to hide the wires.
  • Or use semi-perpetual plastic snares.
  • Use the method to hold the links up, and easily uproot it whenever the need arises.

Importance of Installing Dash Cams

Surveillance and security are at the peak requirement these days wherein dash cams play a vital role in providing utmost security to your cars. Installing dash cams is as important as installing the GPS tracker in your car these days.

High-quality digital cameras can get highly expensive for you; thereby, dash cams in such cases can fit perfectly into your set pockets. Also, the in-built in-car recorders of the dash cams can assist you in recording top-notch voice that adds up to your car’s safety.


Conclusion

Use the best dash cam for cars that are available in the marketplace to ensure that you achieve outstanding results. This is the easy way to install a dash cam using only simple tools and methods.

Thanks for visiting Drivinglife.net


References

www.motorbiscuit.com

www.ratedradardetector.org

dashcamcar.com

ratings.freightwaves.com

How Does A Parking Sensor Work?


Parking Sensors

When I park my truck, I often look in the side and rearview mirror to make sure I’m not going to hit anything. If I’m not careful, I can back up too far or rub my tire against the curb. Now, many cars come with sensors or the option to install them later. I know this could be a lifesaver for me.

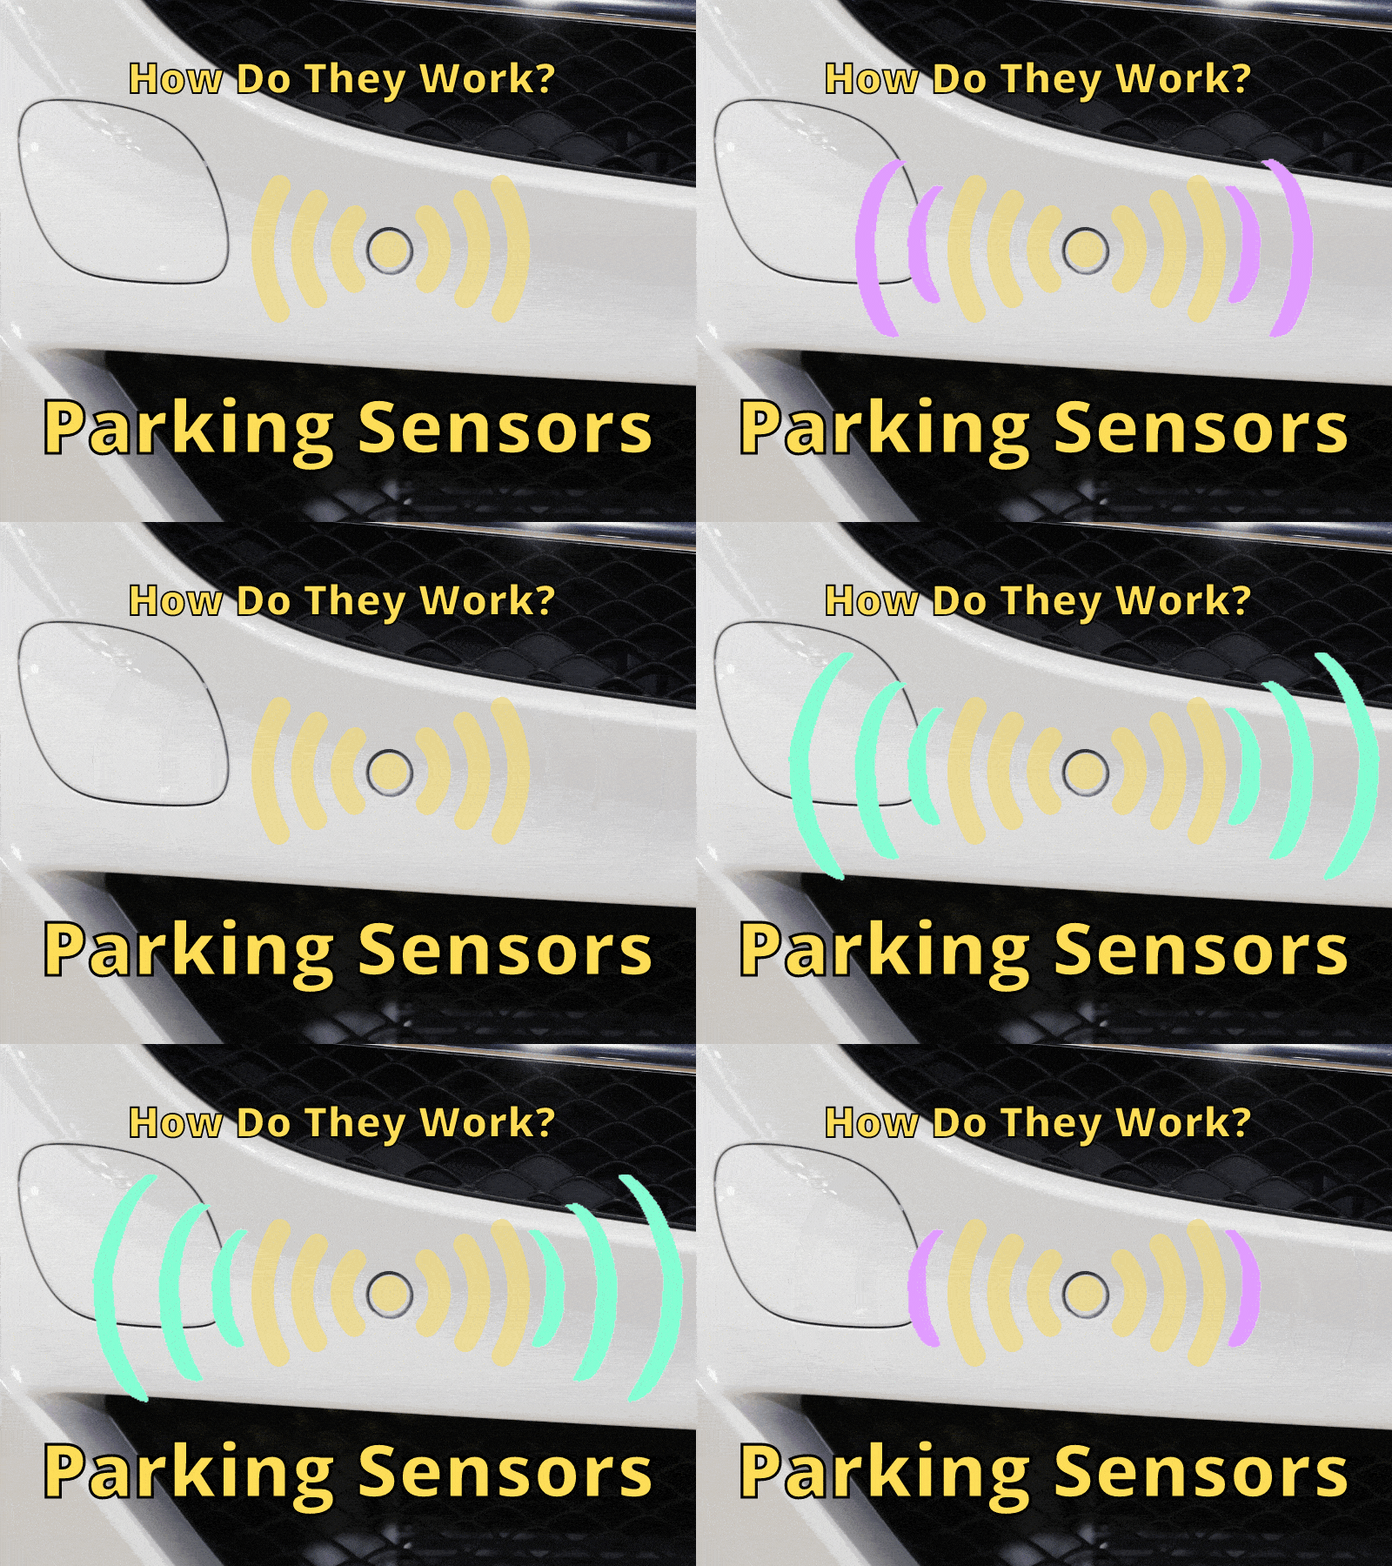
Car parking sensors use ultrasonic sound waves or electromagnetic fields to measure distance. They usually come with a visual display with audio sounds that indicate how close you are to objects. When you park, you will be able to tell how close things are to the bumper so you can avoid hitting them.

When signals reflect off objects and back to parking sensors, you can get a good idea if something is in your way most of the time. If you’re ready to stop bumping into objects as I do from time to time, then parking sensors might be a good investment. We’ll talk more about how sensors work and which ones you might want to choose for your vehicle.


Types of Parking Sensor Systems

Ultrasonic and Electromagnetic

The two types of sensors you will find for cars are ultrasonic and electromagnetic sensors. If you have a car that has little round circles on your bumper, then I would first see if there are specific sensors for your car.


Ultrasonic sensors –

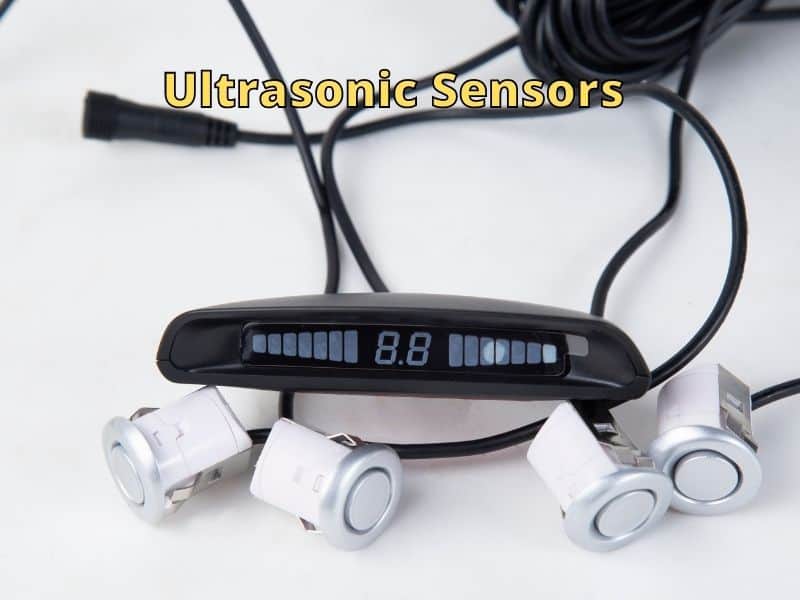
Ultrasonic Sensors

These sensors send out unheard sound waves that can bounce off objects. Similar to sonar, sound signals are sent out and bounce back so the sensor can tell if something is there. The time it takes for the sound wave to come back to the sensor, lets the sensor system know how close an object is so it can show the driver.

Some sensors work up to 30″ long and about 12″ wide. That’s why most sensors come in groups of four to give you a wider area of sensing what might be behind or in front of you.

Know problems – These sensors aren’t great at distinguishing objects that are very thin in width or depth. The sound waves don’t bounce off of these objects well. In addition, they can usually only distinguish objects directly behind them and not higher or lower than the bumper.


Electromagnetic Sensors

These sensors create an electromagnetic field using radio waves that can be disrupted when it comes in contact with objects. Similar to radar, radio signals are sent out and bounce back with a different signal if they hit an object and the sensor system knows how close an object is.

Some sensors can work up to 36″ long and some are longer. Their horizontal sensing is limited so prevents sensing anything too low or high.

Know problems – These sensors might not be as sensitive as ultrasonic sensors, but some may be depending on the type you get. If there are other electronic devices near, it may disrupt the signal that the sensor receives.


If your car doesn’t have holes meant for sensors, most sensor kits come with a drill attachment to make holes in plastic bumpers. If you have a metal bumper you can get an electromagnetic sensor strip that attaches to the inside of the bumper.


Parking Sensor Choices

To make a good choice for the sensor you want from your car it is important to consider the different types of sensors and how they are different from each other.

  • Wired Parking Sensor System: This is the traditional option and also the one that is often cheaper. Its installation can be tricky since it involves the need to route the wires under the vehicle
  • Wireless Parking Sensor System: This is almost the same as a wired system but has a display receiver that can be plugged into your dashboard. This is a good choice for large vehicles, such as trucks and RVs. The installation will be simpler but you still need to wire up the bumper area.

More so, they are also different in terms of the sensors that they are equipped with:

  • Ultrasonic Parking Sensor: Between the two, this is the older technology and often includes four to six sensors. The sensors are placed on the bumper of the car. You may need to drill holes in order to create a seamless look.
  • Electromagnetic Parking Sensor: If you want a sensor that can be installed without the need to drill, this is the perfect option for you. They rely on an electromagnetic field to function. They can also be more expensive if they are barrel-type sensors.

Factors to Consider Before Buying A Parking Sensor

While these backup sensors can assist you in parking, there are differences between types of sensors.

To make the most out of it, you need to carefully evaluate the choices. Here are some of the most important considerations:

AD
  • Reviews: The easiest way to list down the best products available in the market is to rely on the feedback of other users. Their real-life experiences can provide you with insights into how one product can be a better option compared to its competitors.
  • Installation: You do not have to rely on the services of the pros to complete the assembly of the unit. Pick a product that comes with a detailed manual so that you will easily know how to install it.
  • Ease of Use: Aside from being easy to install, the parking sensor system must also be easy to use. It must be effortless to operate. Even the maintenance must not require too much effort on your end.
  • Durability: To be provided with the best value for money, make sure to choose a product that will withstand the test of time. Choose one that is waterproof. It will also be good if it has an anti-freeze feature.
  • Sensors: As you try to evaluate the options, take a look at the number of sensors. Ideally, choose one with more sensors. They can be more expensive, but they are usually more reliable.
  • Visual Display: There should be an LED or LCD screen that is included in the kit. This will provide a visual representation that can assist you in parking, making it easier to be notified if there are obstacles.
  • Audio Feedback: Aside from visual feedback, the parking sensor system must also be able to provide clear audio feedback. The audio must be loud enough but never annoying. A sound-based warning system will help you to be notified of obstacles.
  • Compatibility: It is also important to think about the type of vehicle where the parking sensor will be installed. Not all models will offer universal compatibility. There are some that cannot fit large vehicles, such as trucks and RVs. To avoid wasting your money, see to it that the sensor will be suitable for the vehicle where you intend to use it.
  • Warranty: The standard warranty offered by manufacturers is one year. This means that within such a period, they can offer free repair and services. Some also provide a money-back guarantee, which means that you will be refunded within a specific duration if you are unhappy in any way with your purchase.

My Top Picks For Parking Sensor

To make it easier for you to decide, here are five products that should be on the top of your list. We will also tackle their main features, as well as the pros and cons, to help you narrow down the possibilities.

1. Striker Adjustable Garage Parking Sensor (Ultrasonic Sensor)

AD

Simplicity – this is one of the reasons why this is a product that is highly recommended. As you drive going to the sensor, there is a green light, which is a signal that you should keep ongoing. It will turn yellow to tell you to slow down, and finally, red when you have to stop.

It is also a good thing that it comes with walkway lighting as an add-on feature. This will provide the illumination that you will need in a dark garage.

In terms of installation, the manufacturer provides double-sided tape and Velcro to make it easy. There is also a set distance button, which will allow you to specify the stop zone.

For versatility, the stop zone can be set anywhere from 6 inches to 6 feet. You will have the freedom to choose which distance suits your needs.

Lastly, this sensor comes with range-finding technology, making it the perfect option for buyers who would like to have a sense of where they are in relation to their garage wall.

Features:

  • Delivers a wide range of detection capabilities
  • Installation can be accomplished in a snap
  • Has an innovative range finding technology
  • Has bright LED signal lighting
  • Can be easily mounted on the wall

Overall

This parking sensor system is easy to install and effortless to use. It has an adjustable stop zone and comes with Velcro and double-sided tapes that will be used for its installation.


2. 4 Parking Sensors With Display (Ultrasonic Sensor)

AD

This is another nice option for the best parking sensor systems. The package is inclusive of all the things that you will need. Aside from the four parking sensors, there is a LED display indicator, main control box, hole saw, and power cable.

The four sensors are exceptional in terms of their functionality. They are shockproof and waterproof. To add, they also have an anti-freeze feature. With the universal hole saw, the sensors will easily fit in any car.

The digital display is also a plus for this model. It is easy to see, regardless of it is day or night. The display has three colors and will show you the exact distance that exists between an obstacle and your car.

Lastly, there is an audible sound that will let you know if you are getting near an obstacle. The sound is loud enough to be easily heard. For some people, however, the loudness of the beep can be quite annoying.

Features:

  • The manufacturer offers a 30-day money-back guarantee
  • Made from premium materials to ensure durability
  • Effectively provides enhanced safety
  • Has four parking sensors
  • Comes complete with everything that you will need

Overall

The functions are one of the leading reasons why this product is a top-notch option. It even comes with a bright display that shows the exact distance.


3. Tiemahun Car Backup System (Ultrasonic Sensor)

AD

Even if you are a beginner, there is no need to be worried about using this parking sensor system. It is intuitive, which lessens the effort that is required in its installation and use. The system also automatically engages as soon as you reverse.

With a four-sensor system, it can offer a high level of reliability, specifically in terms of detection and coverage. It is even made better by the advanced chipset and double CPU incorporated in the system, allowing it to function intelligently.

The sensor system also offers a universal fit. You can use it not only for cars but also for trucks and RVs.

To give you peace of mind, the manufacturer is offering a money-back guarantee for 30 days, which will be an assurance of your satisfaction. To add, they also extend a one-year warranty.

Features:

  • 4 sensor
  • Universal compatibility
  • Delivers intelligent functionality
  • Has a screen with a generous size

Overall

This is another parking sensor system that offers intuitive operation. It has a fully-functional LED screen.


4. Car Parking Sensor System (Electromagnetic Sensor)

AD

For effective collision avoidance, this product is sure to provide you with peace of mind. The innovative sensors and microcomputer system will provide you with the assurance that you can park your car safely without hitting possible obstacles.

Among its features, one worth noting is the electromagnetic sensor. This allows the sensor to sense even small objects as you back up.

Also, it comes with a digital display, which will be easy to see even during the night. The audible beep is also a good thing, which provides immediate notification if there is an obstacle.

It also comes louder and faster beeping as you get closer to objects, even when backing into curbs.

Features:

  • User-friendly in terms of operation and installation
  • Comes with a clear display
  • Has reliability when sensing objects throughout your bumper.
  • Has beeping sounds when getting close to objects.

Overall

In terms of the intelligent functionality that it can offer, it provides you with differentiated beeping to assist you when parking close to objects.


5. LETihebeyan Car Parking Sensor System (Electromagnetic Sensor)

AD

The installation of this parking sensor system is quite easy. All that you need is to install it on the inside of the bumper. There is no need to worry as there is a comprehensive manual to provide you with a detailed guide.

The product is invisible once the installation is done.

The package is inclusive of one long strip that creates a radio signal along the length of the bumper for a consistent signal from one side of the bumper to the other. It delivers a reliable sensor to avoid collisions and obstacles. The sensors can resist various external environmental conditions since it is inside the bumper, so it should last a long time.

Features:

  • 3-foot range of detection of objects near the bumper.
  • The kit includes everything that you will need
  • Compatible with most all vehicles
  • Comes with a speaker that indicates proximity to objects.

Overall

This may not be the most popular option, but it promises to provide value for money. It is a sensor that can detect radio signals when an object gets close and makes a sound so you know.


Conclusion

Since I have a metal bumper on my truck, I would get an electromagnetic parking sensor system for my truck. That way I can install it and not need to drill holes into my bumper. Which sensor would you get?

Thanks for visiting Drivinglife.net


References

https://www.torque.com.sg

How Many Ohms For Starters [Diagnosing Starter Problems]


How Many Ohms For Starters

How can you tell if your starter is failing? What can you do about it? Knowing the basics of how an engine starts is the first step in diagnosing starter problems. A car starter is an important part of the vehicle. It’s a motor that controls other components, which must function properly for the engine to start.

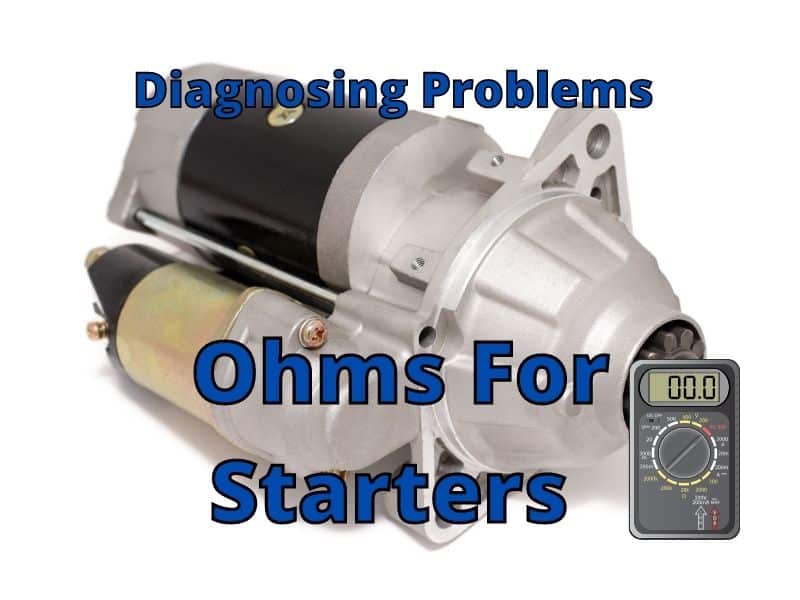
The starter’s resistance should be 0.1 ohms and if it is over 0.3 then you may have a problem with your starter. A good starter for a V-4 engine draws 125A to 150A. The three starter terminals should be checked for good connections to get accurate readings and prevent possible car battery power draw.

Our car won’t tell us that I cannot start for some time, have a starter problem, or guide us to fix the starter problem. So, we will show you how a starter works and the step-by-step instructions that can make you diagnose your car and replace the starter in it.


How Does A Starter Work?

How Does It Work

Before you figure out the issue with your starter, it is best to understand how it works.

When you switch the ignition to “run,” the engine turns over, allowing it to take in air. A flexplate/flywheel is attached to the end of the engine’s crankshaft, with a ring gear around the edge. On the starter, there’s a gear that fits into the ring gear’s grooves.

The starter motor is powered, and the magnets inside the body engage when the ignition switch is turned on. The pinion gear (starter gear) is attached to a rod that is pushed out by this. The starter revolves as the equipment meets the flywheel.

The starter disengages, and the electromagnet ceases as the engine spins over. If the pinion gear remained in contact with the flywheel, the engine might destroy the starter by spinning it too fast.

Return springs on the rod help turn the starter motor off so it doesn’t turn more than necessary to start the engine because it takes a lot of electricity, which could drain the battery.


Step-by-step Guide To Replacing Your Starter

A few years ago, I faced this critical issue in my car. Of course, it is a common issue faced by car users around the world.

Thus, let us get into the step-by-step methods to diagnose and replace your car starter effectively.

A bad starter can also stand as a hurdle for your car to start. So, let us diagnose the starter then we shall move on to the next steps.


Diagnosing A Starter

First of all, disconnect the car battery from your car. To disconnect your car battery, utilize a suitable dimensioned socket wrench or hand to untie the nut, which protects the cable of the negative side of the battery.

Diagnosing the Starter
Photo Credit: https://www.youtube.com/watch?v=fwdtfOAwGcQ

One more thing is that you need not remove the nut entirely out of the battery terminal. Importantly, make sure that the cables do not get in touch with the battery while working. It is highly advisable to disconnect your battery while working with the electrical stuff in your car.

For a comfortable working position with the starter in your car, you can jack up your vehicle. The jack-up can provide you with the necessary safety regarding the damage you cause while working on your car starter. Ensure that your car has a good elevation from the ground level.

After setting all your necessary positions, search for the locator in your car. The starter is easy to locate. It runs near the wire that is running from the fuse or the battery box. It looks like a large cylinder devoted to a small cylinder.


If you couldn’t find your starter, the best way to find it is your user manual given while purchasing your car. The smaller cylinder combined with the start is called the solenoid.

Now you should disconnect the wire that runs from the solenoid. To disconnect the solenoid, you need to clip off your wires in some vehicles. In some cars, either you need to untie the screw, or you should loosen the bolts.

The maximum number of starters holds two retentive bolts, which grip the starter and lie near the transmission. To remove the bolts, use the appropriate removers, such as accurate-sized bolt removers. Make sure that you use the exact size while removing the bolts. While removing the bold, you may need to pull the starter with some force.

The procedure that I am instructing covers your safety as well as a good accuracy in results. Now we shall get into the next step. Our next step is to replace the starter from your car. Let’s join the step-by-step instructions to install the new starter in your vehicle.


Installing A New Starter

You should first follow while installing the new starter to compare the new starter with the old starter. This procedure ensures the size of the bolts with the previous starter and the new starter.

Comparing the previous starter and the new starter should be conducted because the starters are not identical; the new starter won’t fit in your car. The bolts, and the retainer bolts should exactly be the same. If not, then you have to get a new starter for your vehicle.

The next step you should take is to move the new starter to where we had the old starter. In some vehicles, you have to place it above the engine. In some vehicles, you have to put your new starter below the engine. So, it depends on the car you have.


To fix it, you need some support. Ask your friend to hold the new starter in the same position, while in the meantime, you can screw up the bolts for the starter for firm fixation. When you are about to fix it, you have to adjust the cables around or near the engine.

After adjusting the cables around the engine, place the starter where you should fix the new starter. As said before, you will need some person’s assistance. Confirm that you have a firm fixation over the bolts with regard to your new starter.

Due to the vibration of the engine, your bolts may get loose out. So, carefully tighten the bolts that act as vibrant proof. The next step you should take is to reconnect all the disconnected wires that we previously disconnected to remove the previous starter.

If you come across any queries to connect the starter solenoid, don’t worry. Just refer to your user manual. Once you have connected the solenoid starter with the proper wiring and everything needed, you have connected the battery wires back to their original position.

Installing a New Starter
Photo Credit: https://www.carhelpout.com/how-to-change-and-replace-honda-civic-car-parts-video-guide/

After connecting everything and finding that your vehicle didn’t start, I will give you another solution. Check the battery’s charge level. Sometimes, the car cannot start if it doesn’t have a sufficient charge. Thus, recharge your car battery and give it a try.

Though you charge your battery, you still can’t find your car engine to start. Then shook around the cables that you have connected all the wires correctly and plugged. Once checked, attempt to start your engine. If that doesn’t work, take a brush and clean all the dirt near your machine, and have a clean car engine.

Clean the battery area, then give it a try. If that idea doesn’t work, try checking the connections and battery. Hopefully, you can hear the sweet sound of the car engine starting.


What Are The Causes Of Starter Problems?

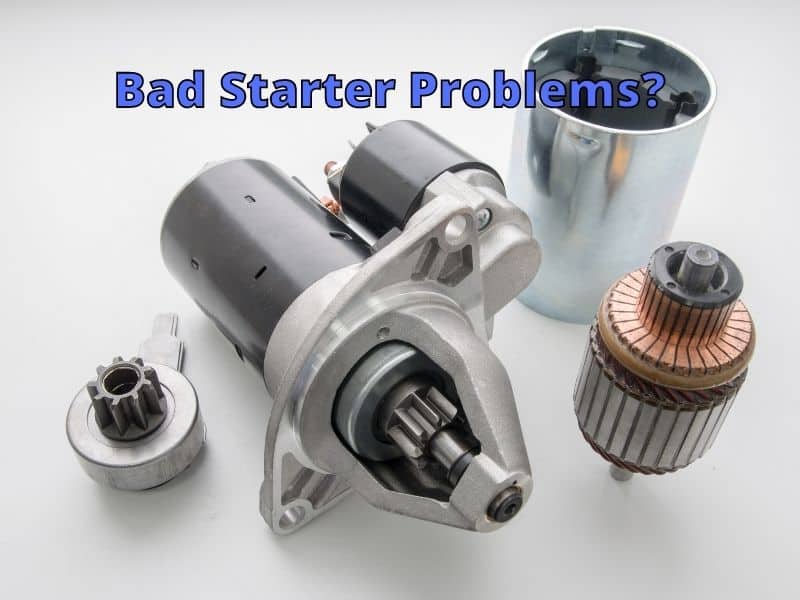
Bad Starter

A bad starter has several issues including:

  • Starter connections that are dirty or corroded
  • Fuse or relay failure
  • Parts of the starting system that are damaged or worn out
  • Loose electrical connections

Conclusion

So, once you’ve determined what problem you’re dealing with, you may begin to address it. Always start with the battery.

There isn’t a specified or advised replacement by the car manufacturer; problems with the starter are practically impossible to avoid. Contact a competent mechanic as soon as you observe freewheeling, grinding noises, or smoke, or your vehicle won’t start at all.

Thank you for visiting Drivinglife.net


Reference

Checking a starter circuit | How a Car Works

https://electronics.stackexchange.com

https://findanyanswer.com – Update: Website unavailable

.