Home

Recent Posts

Best Synthetic Oil: A Quick Guide For Buyers


Best Synthetic Oil

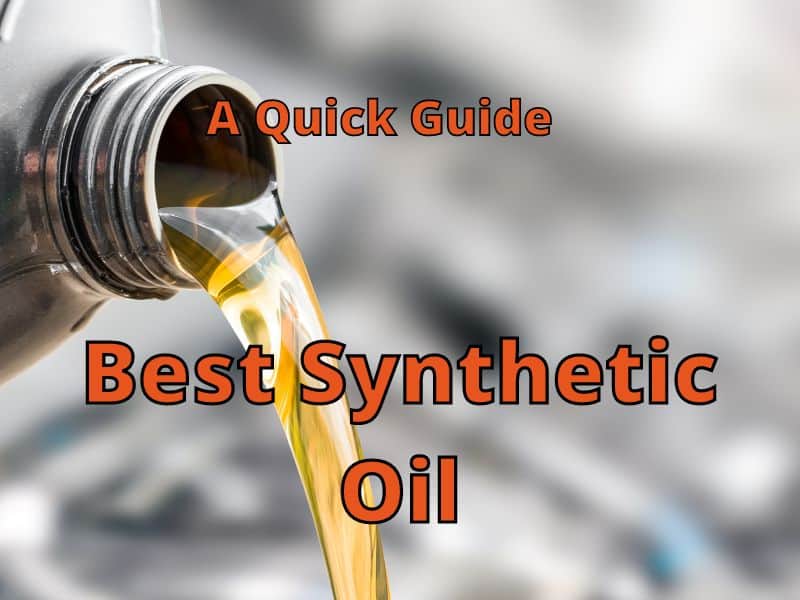
Are you concerned about the health of your car? Do you want to increase your car’s mileage? Or are you sick of your old conventional oil for lubrication? Changing your engine oil is an essential part of keeping your car’s engine working at top performance. Therefore, you should pick the oil that will make your vehicle run smoothly and keep it in good condition.

While buying the best synthetic oil for your car, do some research and read your owner’s manual to pick the one that suits your vehicle. Here are a few tips you should follow to buy the best synthetic oil:

  • Consider the needs of your car.
  • Consider the type of synthetic oil.
  • Go beyond the price.
  • Read the customer’s reviews.

When it comes to buying lubricant for your engine, there are two options available: Synthetic oil and Conventional oil. You should know that conventional oil is simply a crude oil or by-product of crude oil, while synthetic oil is a chemically modified petroleum product.

Vehicle owners are more inclined to choose synthetic oil after the car’s breaking-in period. In the automotive market, there are plenty of brands available, and many claim to be the best option. Do the research and read your owner’s manual to pick the one that suits your vehicle.


Top 5 Best Synthetic Oil

To choose the right synthetic oil, use one that is recommended by your owner’s manual and has good reviews from customers. Based on our research, we have selected the top five synthetic oils, which will certainly prove to be a good choice for your car’s engine.

Have a look at the top five best picks of synthetic oil.

Product (Amazon Links)Image (Amazon Links) 

Mobil 1 Extended Performance 5W-30 Motor Oil

Our Detail Review

Rotella T6 5W-40 Full Synthet​​ic Oil (Diesel)

Our Detail Review

Castrol GTX ULTRACLEAN 5W-30 Motor Oil (Non-synthetic)

Our Detail Review

Royal Purple SAE 5W-30 High Performance

Synth​​etic Oil

Our Detail Review

Castrol POWER 1 4T 10W-50 Sy​​nthetic Oil (Motorcycle)

Our Detail Review

ADS

Benefits of Synthetic Oil

Most people prefer synthetic oil. Many car manufacturers include it in their new cars. Why is this the case? It has many benefits over regular oil and will help your vehicle last longer.

AD
  • Cheaper Cost: The economic benefit of synthetic oil is one reason for its popularity. When it comes to standard oil, it needs to be changed after the vehicle has run for 3,000 miles. Synthetic oil, on the other hand, can last for up to 7,000 miles. The initial price may be high, but when you calculate its long-term costs, you will realize that synthetic is a more economical choice.
  • Better for your Car: More than just its economic advantages, synthetic oil can generally be better for your car than conventional oil. For instance, it has been asserted that it can provide better lubrication, which can result in maximizing your engine’s horsepower, improving your gas mileage, and extending the life of your engine. It can also ensure the reliable functioning of the engine even in a cold environment.
  • Resistance to Harmful Conditions: It is also worth noting that this oil can resist various external conditions. This includes oil sludge, thermal breakdown, and oxidation. Evaporative loss will also be decreased, perhaps one reason why it can be long-lasting.

Is It Right For Your Car?

Given the benefits of synthetic oil, you may be interested in switching from standard to synthetic oil. Be aware that some ideas about synthetic oils are just myths.

Myth: For instance, synthetic oil is not recommended if your car is new and is under the breaking-in period. 

Truth: No car manufacturer that I know of has made this recommendation, and many include synthetic oil in their new cars. 

Myth: If you have a high-mileage car, you have a good reason to stay away from synthetic oil. Instead, you will need a thin and free-flowing oil.

Fact: Synthetic oil, although thinner than some conventional oils, will protect older engines just as well or better than conventional oil. 

Myth: Synthetic oils are the best for cars that are integrated with high-performance engines.

Truth: All car engines can benefit from heat protection, wear protection, and better fuel economy.

Myth: You can’t change to standard oil once you’ve started using synthetic oil.

Truth: Changing oils may affect how your engine runs, but there’s no reason you can’t change back and forth between the two. You can even mix the two types if you want. They will both protect your engine and should interact well with each other. (Just make sure it is the correct kind for your engine – see “Understanding Your Oil Numbers“)  If you use the wrong type of oil for your engine, its performance can be negatively affected.


Tips for Buying Synthetic Oil

Before purchasing synthetic oil for your engine, here are a few things you should keep in mind which will increase the likelihood of making the right choice:

  • Consider the Needs of your Car:  Different types of cars (and engines) require different oils for proper function. Read the label from the oil container and see if it matches the owner’s manual for your vehicle.
  • Type of Synthetic Oil: There are two types. The first is a synthetic blend oil, which simply means that it is a combination of synthetic stocks and conventional oil. The other is a fully synthetic oil where a synthetic base stock is used, and it is combined with various additives known for improving the oil’s performance.
  • Go Beyond the Price: While it may be tempting to choose the cheapest synthetic oil, this is the one thing that you may end up regretting. You should not hesitate to spend more if the oil is going to be better for your car, especially in the long run; excellent oil will actually save you money.
  • Read Reviews: At the end of the day, it would be best to read reviews or ask for the opinions of people you personally know. It’s helpful to weigh the pros and cons of available alternatives. 

Understanding Your Oil Numbers

Motor oils have a viscosity or rate of flow or thickness at different temperatures. If you have a motor oil that says SAE 10W-40, it stands for its ability to flow at different temperatures. SAE stands for Society of Automotive Engineers.

The 10W means that its viscosity is 10 in (W = Winter) winter temperatures of 32°F / 0°C. The lower the number, the thinner the oil is at 32°F / 0°C. Thinner oil will perform better on engine start-ups.  

The 40 means at 212°F / 100°C (the normal engine operating temperature), the viscosity is at a level of 40. The higher the number, the thicker the oil is at 212°F / 100°C. A thicker oil will perform better when the engine gets hotter than the normal operating temperature. 

So, oil changes its viscosity depending on the temperature. Each engine has specific needs. Check your car owner’s manual to make sure you’re getting the correct oil for your car.


Top Picks for the Best Synthetic Oil

**Below, you’ll see more detailed reviews, but you can also click the links above to see current prices and read customer reviews on Amazon.


1. Mobil 1 Extended Performance 5W-30 Motor Oil

AD

When you talk about synthetic oils, one of the most popular brands out there is Mobil 1. It is one of the most trusted within the product category. Even high-end vehicles and racing cars use this oil brand, and this is a testament to its impressive quality.

Aside from its brand name, another thing that makes this an excellent choice is the fact that it is fully synthetic oil, meaning that there is no crude or additives combined with it. With this feature, its mechanical performance and increased mileage will surely be amongst the most recognizable benefits. It is dexos 1 approved.

This is an SAE 5W-30 oil. Its viscosity rating in cold temperatures is 5 and 30 when it is used in normal operating temperatures. 

Generally speaking, this product can be excellent for multi-valve fuel-injected engines. However, it should not be used in aviation or 2-cycle engines.

Pros:

  • Made by a reputable brand
  • 15,000 Miles of Protection

2. Shell Rotella T6 5W-40 Full Synthetic Oil (Diesel)

AD

This is another synthetic oil that is highly recommended because of its wide array of impressive features. Among others, it is preferred because of its low ash technology. This feature is basically responsible for controlling the blockage of the exhaust, making the oil fuel-efficient and emission-compliant.

It is also worth noting that the base of this product is free-flowing synthetic base oil. This means various benefits, with one of the most significant being its ability to provide protection even in extreme climates. Even under high temperatures, the right level of viscosity can be retained.

In addition, it also has many different performance benefits. For instance, it is known for being able to deliver improved fuel economy. With the right choice of oil, the engine functionality can be maximized, which is exactly the reason why it can save fuel in the long run.

This oil has also been praised because of its impressive wear performance. It can provide a high level of protection against the normal wear and tear of the engine and hence plays a vital role in the improvement of the functional life of the hardware.

Pros:

  • Lessons engine friction
  • Maintains optimal engine pressure

3. Castrol  GTX ULTRACLEAN 5W-30 Motor Oil (Non-Synthetic)

AD

Since some people would rather have non-synthetic oil, we included this one. One of the most notable things about this oil is that it is a great cleaner. This means that it helps clean the sludge in your engine very well. It also works well with high engine temperatures.

It claims to be 50% cleaner than the industry standard, so your car engine can be clean and perform at its best. 

As your engine gets cleaner, the oil can protect the parts better. 

By taking a look at the reviews shared by other people, it can be easily concluded that most people like the price and performance. 

Pros:

  • Performs well for a majority of people

4. Royal Purple SAE 5W-30 Synthetic Oil

AD

This may not be a fully synthetic oil, but the manufacturer takes pride in using proprietary additive technologies that are combined with premium base oils. This guarantees that the performance of the engine is going to be unmatched.

It is also worth noting that it is fully compatible with other oils. If you are switching from some other oil to this brand, there is no need to undergo complicated procedures. It is Dexos 1 approved.

The wear protection that this product presents is also worth mentioning since it will lessen friction in the engine and contribute to extending its functional life. In relation to this, it also provides excellent protection against corrosion.

Words of praise were also expressed with regard to its increased fuel efficiency, which will make your car more economical as the engine will not be fuel-hungry.

Pros:

  • Excellent customer support
  • Long-lasting

5. Castrol Power1 10W-50 Synthetic 4T (Motorcycle)

AD

When you talk about synthetic oils, one of the most popular brands is perhaps Castrol Power 1. This is one of the reasons why it is amongst the most trusted within the product category. Even high-end motorcycles and those that are used in racing events use this kind of oil. This is a testament to its impressive quality.

Aside from its brand name, it is also an excellent choice because it is fully synthetic oil. It means that no crude or additives are combined with the oil. With this, its mechanical performance and increased mileage will surely be amongst the most recognizable benefits.

This is an SAE 10W-50 oil. So, it can operate at a wide range of temperatures. It will protect the engine and cover the parts with oil in cold or hot temperatures.

Pros:

  • Reduces noise
  • Lasts long

Conclusion

Without a doubt, searching for the best synthetic oil is not going to be an easy task. Nonetheless, this does not mean that you can just choose any brand or pick the cheapest option that is available. Make sure that it is made by a trusted brand, given a high rating by other users, and, more importantly, appropriate for your car’s engine.

Stop guessing which one to choose! Keep an eye on the five options mentioned above, and you will not regret them.

See Also:​

What Happens When Too Much Transmission Fluid Is Added


Too Much Transmission Fluid Is Added

Your transmission fluid is of great importance for the smooth running of your vehicle’s engine. The transmission generates a lot of heat due to friction, and to prevent this heat from damaging your vehicle, you have to add transmission fluid to the engine.

When you add too much transmission fluid, damage to your vehicle can occur. Here are a few things that might happen: oil starvation, erratic shifting, transmission damage, and excessive pressure resulting in immediate or long-term damage. 

A majority of people seldom replace the fluid and even those who do often leave the replacement in a service garage. You can change the transmission fluid yourself using only a few tools. However, the level of fluid is important to the smooth functioning of the engine.

TIP: Ensure you only use the recommended transmission fluid for your engine because using the wrong one can end up damaging some parts of your vehicle. Go through your owner’s manual to see if you need a specific type of transmission fluid for the vehicle. The most affected auto engines in this situation are the latest ones that usually come equipped with electronically controlled transmissions.


How Much Transmission Fluid Should You Add?

How-Much-Transmission-Fluid-Should-You-Add

You should only put in fluid about half a quart at a time. The dip-stick might show full, even when it is really not. Start the engine and leave it running for about five minutes, then recheck the level after the engine is warm. Put in as much fluid as needed until the dipstick reads full.

The transmission fluid level ought to be at the upper end of the cold mark when the engine is cool, whereas in a hot engine, it should be at the upper end of the hot mark. Ensure the level of the fluid is in the safe zone between the two marks in a warm engine.

Most transmissions usually take about 9 to 13 quarts to fill completely. The amount of transmission fluid you put in will vary depending on whether you are just topping it up or draining and replacing it all. Again, put in a little fluid at a time to avoid adding too much. That said, let’s look at what really happens when you add in too much transmission fluid.


Overfilling and What It Does To Your Vehicle?

Overfilling-and-What-It-Means-It-Does-To-Your-Vehicle

If you add too much transmission fluid, you will notice that it may foam, and that can bring about erratic gear shifting. Some other problems that may arise include oil starvation and transmission damage.

In an engine or a transmission, foaming occurs when rotating parts (rotating gears in a tranny, crank-shaft weights in an engine) splash in the overfilled fluid/oil crankcase or reservoir. This splashing results in excessive fluid temps, the transmission ends up failing, and the tranny fluid as well degrades very quickly.

When an automatic transmission is overfilled, the fluid foams, leading to gear-shifting problems, oil starvation, and transmission damage. On the other hand, an overfilled manual transmission results in a fluid leak from the vent, and shifting the gear becomes a problem when the clutch is depressed. All transmissions, auto or manual, have some ways to relieve excess pressure.

Adding too much transmission fluid can also cause early failure and damage to parts as a result of excess pressure. The pressure shifts from low to maximum in this condition, making some parts of your vehicle unstable. A pressure jump from very low to 300 PSI gauges or more is what we are talking about in this situation.

When you try to change the gears more so on the 3-4 and 2-3 as well as the reverse gears, this condition can become even worse. You can easily guess how that could do a lot of damage to your transmission. The pressure would result in friction and easily push out snap rings, brake parts, etc. Causing sudden failures and/or serious damage.

Modern vehicles have transmissions, including a pressure valve regulating pressure after the pump. However, as previously mentioned, excess pressure can result in premature wearing out of some parts – the valve included, thus causing it to fail. Failure of the valve can, in turn, create pressure-related problems in other engine components.

Inspection-Of-The-Drive

So yes, adding too much transmission fluid can lead to premature failure of the car’s system over time and may most likely void any warranty you may be having if the reason for the failure is found to be the presence of excess fluid.

However, there are vehicles that are equipped with transmissions that cannot be overfilled due to their design. They may have a hole on the side to allow any extra fluid to flow out.


How to Fix Too Much Transmission Fluid?

If you overfill your transmission, you can fix the problem by draining it yourself or going to your service garage. The solution is simply to drain off the excess transmission fluid by using a pump to siphon it out (Amazon Link), draining off by taking out the pan drain plug (for cars that are equipped with it), or removing the cooler line.

You might have thought about siphoning it by mouth. It will take time to suck out the fluid, and you may accidentally get some in your mouth if you are not careful. It’s not recommended, but if you do, use your thumb on the top of the tube to prevent the oil from draining out, and use a suitable container to drain it off into.

You can also make use of one of those affordable extraction pumps you find in most auto parts stores. Once you are done draining, you will need to replace the fluid to the appropriate level if the fluid is not in good condition.


Check the Dip Stick

This is an oil dipstick. My truck has a sealed transmission, so there is no dipstick. 

You may see a reddish-colored dipstick handle. If the only handle you see is the yellow oil dipstick, you may have a sealed transmission. Wipe the dipstick on a white wipe or cloth, and check the color. It should be pink.

If it is brownish or you find some black spots in the fluid, you must change the transmission fluid immediately. Thickening the transmission fluid due to friction/metal particles, temp degradation, or even pure dirt can clog the drains and cause foaming.

If the oil is black and smells burned, then you may have already damaged your transmission, and getting new fluid will likely create problems because of the damage and clogs that have occurred with the old fluid.

TIP:  When the oil is black, and you flush your transmission fluid and replace it with new fluid, your gears may start to slip because the clutch packs have started to wear out. In addition, your valve body may start to clog, causing poor shifting also. It’s likely that you’ll need some expensive repairs. (More info from ChrisFix Video)


Should I Replace My Transmission Fluid?

If you are fond of driving your car in stressful conditions where the transmission gets hotter than normal, you should regularly check the fluid for wearing out and burning.

Some people will tell you that it is not really necessary to replace the transmission fluid, but it does eventually wear out. The heat generated when driving can, at times, become so hot that it begins to lose its lubricating capabilities, and the seals will begin to harden, resulting in leaks and pressure losses. Eventually, the transmission will wear out under these conditions.

Look at your owner’s manual to find out how often and what type of transmission fluid you’ll need. If you have a sealed transmission, you have to change your fluid less often but get it inspected at recommended time period or before if you’ve run your engine hard.

Keep an eye on the condition and the amount of transmission fluid you have, and save yourself a huge repair bill in the long run.


Additional Questions

How can I check my fluid in a sealed transmission?

If you’re a DYI kind of person, then you can remove the bolt that holds the transmission fluid in or the check-level bolt. You may need to research where the bolt is located at the bottom of your vehicle and how it operates. Most owner manuals don’t have that information, so you may need to ask a mechanic if you can’t find it online.

Getting a mechanic to help you check the fluid might be the easiest way without causing more problems caused by incorrectly checking a sealed transmission. 

What should my transmission fluid look like?

When wiped on a white paper towel, your transmission fluid should be pink. If it is brown, it’s time to change it. It should also appear very similar to motor oil in viscosity. If it seems too thick, that may be an indication of a problem.

Why Is My Car Making A Whining Noise When Accelerating?


A Whining Noise

Why your car is making noise while idling or while you’re driving is certainly a good question. I’ve certainly had a car with a whining noise under the hood. Sometimes it’s an easy fix, and sometimes it can be a puzzle.  

Whining noise while accelerating can be caused by several things, including low levels of steering fluid, the steering pump, a leak in the pump, the alternator, wheel bearings, loose or worn belts, the transmission, brakes, and the exhaust.

With regular use of your car over time, wear and tear on various components will occur, affecting the engine’s proper functioning.

At times this could all be because of a small part that needs to be replaced. Other times your engine can have a major issue that may cost thousands. If you notice strange sounds from your car, it’s important to do a simple auditory and visual inspection to identify problems. 


Visual Inspections

If theirs a major problem with your car, with load sounds, irregular functioning, burning smells, or smoke, pull over as soon as possible to avoid engine failure and the possible crashing of your car. Get help, and don’t drive your car.

If your car is operating normally, but you notice a repetitive or consistent irregular sound, find a safe spot away from traffic to do an inspection. 

A good place to inspect is at your house, in the driveway, to ensure safety. Having an assistant can be helpful. Using gloves (Amazon Link) and wearing an old shirt and pants can help because inspecting a car can get dirty. 

Here are some areas to check during your visual inspection:

  • Check around the tires and tire wells to ensure nothing is stuck and creating noise. 
  • Look under the car and see if anything is lodged under the car and scraping the ground or other car parts. 
  • With the engine off, check under the hood for anything that seems out of the ordinary. (I once had a coat hanger wire under my hood, probably from a service center while a mechanic was working on my car)
  • With the engine off and cool, feel around the engine for anything that might be loose, including belts, hoses, compartments, fans, and any other parts. Check for wear on belts, especially other moving parts. 
  • Place the car in park and put the emergency brake on. Start the engine and listen and look for anything out of the ordinary. 
  • Have a partner press the gas pedal for a few seconds to see if you hear or see anything different. 
  • Last, close the hood and ask your partner to drive the car up and down the street slowly and listen closely for sounds and any visual cue that may indicate a problem.

After your inspection, write down any issues that you saw and heard that were out of the ordinary. You can check online for solutions or contact a mechanic. Contact a friend for a second opinion if you are still unsure about what you heard, felt, or saw. 


A Whining Noise

Whining-Noise-When-Accelerating

Sometimes, a car makes a whining noise when accelerating, and there could be several reasons for this. Let us dig a bit deeper into the causes and also discuss the various treatments for fixing this problem. 

This is a common problem for many people because cars have so many moving parts. Your neighbors might recognize your car as you drive up and down the street. Some people will ignore this sound, but many people wonder, “Why is my car making a whining noise?

You may have noticed this noise as you start your car or drive down the street. Here are some reasons that might cause noises from your car. 

  • One reason could be low levels of steering fluid. (Amazon Link)  As you turn your car steering wheel, a whining noise can occur. Check your car manual for the correct type of steering fluid for your car. 
  • Another common factor that leads to the various noises in your car is the wheel bearings. Although not necessarily a whining noise, as you drive down the road, you’ll hear noises that aren’t quite normal. The wheel bearings could be tapered and cause noises while you accelerate your car.
  • Belts that drive different parts in your car could be loose or worn. Check the belts for wearing and feel if any of them seem loose. Sometimes a belt with some slack is normal, but most belts should be fairly tight. An owner’s manual or a mechanic should be able to help. 

Transmission Issues

Transmission-Issues

  • Another reason for noises could be from the transmission. The fluid could be low and cause more of a scraping or grinding noise. If the transmission fluids could is old, this can also result in a noisy car ride because of worn-down parts in the transmission. 
  • This is one of the major reasons that lead to the rising noises in your car once you speed up. If the gears wear down or the oil is low, it could cost thousands of dollars in repairs.
  • We highly recommend a thorough transmission check-up to determine the precise cause.
  • Self-test your transmission and check the fluid level if possible. Is it low or color dark brown, or black? If that’s not possible, slowly drive it and listen and feel as the transmissions shifts gears. Do you hear or feel anything out of the ordinary? Make sure you drive on a smooth road so as to not mistake road noise for transmission issues. 
  • In addition, you can accelerate quickly and safely through the gears and listen and feel again. Don’t forget to pay attention as you bring your car to a halt. Write down the exact moments your car is making the noises.

As you experience whining noises when accelerating your car, remember it could be caused by a number of factors that even a mechanic may have some difficulty diagnosing.

To save money, try to determine where the sound is coming from and see if you can find a mechanic that specializes in that area of the car.

Don’t be afraid to call several mechanics and explain the noises and conditions as clearly as possible.  Ask them what might be causing the problem. Ask if they’ve ever dealt with this issue and how much it might cost to fix. Make sure you are comfortable before you sign anything. 

No matter how expert or experienced a mechanic might be, finding out the accurate cause or the exact part at fault could be a bit tricky. So, let’s explore some more reasons that might result in a whining sound you hear in your car.

Other Possible Issues:

Car Making A Whining Noise When Accelerating
Photo Credit: https://axleaddict.com/auto-repair/What-is-a-wheel-bearing

As your drive, try to listen to the sounds from your car. Notice sounds and vibrations, start and stop times, repetitiveness, and pitch. Since each engine is different, these noises may be different in each car. So check yourself and get an expert to help; maybe your best solution.

These whining noises when accelerating your car could be located in these areas:


Conclusion

There may not be an easy way to diagnose your car’s noises, but with time and help, you can get a good idea of what’s going on and what it will take to fix the problems. Remember to record the various noises and determine as much as possible the exact location the noise is coming from. A mechanic has the experience and many diagnostic tools to help check your engine

Don’t forget to treat the problem as soon as possible to avoid expensive repairs later on. Sometimes it’s something you can fix by yourself or with a friend.

It makes sense to get regular maintenance done and correct any issues, regardless of whether you do it yourself or use a mechanic. You’ll be ensuring your safety and the healthy performance of your car, so you can avoid problems down the road.


Additional Questions

What if I hear a whooshing noise coming from my car?

Check the hoses in the vacuum system of your car. It’s likely a leak from one of the hoses that help different power systems of your car. You’ll likely notice that something isn’t working properly as well. 

What if I hear a screeching noise coming from my car?

The most common reason is when you put on the brakes and hear this noise. This is the warning indicator on your brakes, letting you know it’s time to change them. If the brakes are fine, checking the belts would be my next move.


Washing Your RV – Easy Step-By-Step Guide


Washing Your RV

Washing your RV can seem like a daunting task, but with a few steps, it can be done before you know it. I remember washing an RV for a neighbor when I was a teenager. The thing I learned quickly is to take one step at a time. 

To wash your RV effectively, wash one section of the RV at a time. Taking the time to wash your RV one step at a time will make the job simple and effective. Start on the top of the RV, then proceed to the sides and the front and back. Finish with the tires and windows if desired. Here are a few steps you should follow:

  1. Pre-wash
  2. Choose a Method – Soft Brush, Dry Wax, or Washing Service.
  3. Start at the Top of the RV
  4. Wash the Sides
  5. Wash the Front and Back
  6. Clean the Tires
  7. Clean the Windows

If your RV has been sitting a while or hasn’t gotten washed in a long time, your job might be a bit more difficult. I’ll share some tips for getting off the grim, so you can more easily wash your RV within the time limits and in the way you want to.


1. Pre-wash

If your RV has baked on dirt and grime, it’s helpful to use a pre-wash. Normal washing with soap and water will not remove all bugs, tar, and stuck-on particles. A pre-wash (Amazon Link) can loosen up stuck particles and help clean the surface without harming your paint, fiberglass, or metal surface. Just check to see if the one you choose can be used on your type of RV surface.   

Use the pre-wash soap or spray and wait the time period indicated, usually 2 minutes. Then wipe off with a microfiber towel or soft scrubbing towel to remove bugs, tar, and grime. 

If you have a heavy accumulation of grime, you may need to go over the area once more with the pre-wash or see how things turn out after you wash the RV.

TIP

If you’re not interested in using a pre-wash product, pre-soaking is another alternative you can use to help lift off some of the more stubborn stuck-on particles. Just use water or soapy water (Amazon Link) and spray or quickly apply it over the entire area to be clean. 

Let the water sit for a couple of minutes or more before scrubbing with a brush, soap, and water. Working in the shade will help the water penetrate longer to remove grime for an easier job. 


2. Choose a Method – Soft Brush, Dry Wax, or Washing Service.

  1. a) An easy method for cleaning your RV is to use a soft brush with an extension pole, soap, and water. With an extension pole (Amazon Link) for your brush, you can cover large areas in a short amount of time. 
  2. b) If your RV is dirty but not full of grime, choosing dry wax can save you time and water. Just spray (Amazon Link) on or apply the wax (Amazon Link) to the surface of the RV and wipe it. It’s easy and convenient when you don’t want to deal with all the steps involved when using water. (1. Mixing soap and water 2. Rinse down RV 3. Wash and scrub RV 4. Rinse off soap 5. Wiping down RV with a dry towel.) Be aware that a dry wax will only clean light dirt but will leave your RV with a nice shine for a couple of weeks. 

  3. c) Washing services are available for a cost at some RV parks. They can wash all the areas of your RV, including the top, sides, wheels, etc. This might be a good option for you if you have the money. Expect to pay $200+ depending on the size of your RV.  

Which is Best for You?

All three methods have their benefits. To help you decide, think about how much time and money you are willing to spend on your RV, and you’ll likely know which is the best option for you. Here are some things to things to think about before choosing.

  • Soft Brush – Water and soap can be cost-effective when using water efficiently.
  • Dry Wax– A spray-on wax takes only one step and uses a microfiber cloth and spay, so no extra equipment is needed.
  • Washing Services – Helpful when you need some extra help or just convenience. 

Make sure you have everything you need before you start, and set aside enough time. Some people like to tackle one section at a time to avoid frustration and do a thorough job of cleaning. How much will you do?

TopSidesFront & backwheelsWindows

20% 

40%60%

80%

100%


3. Get Started – Start at the Top

A lot of people like to start by cleaning the top of the RV. This is a good idea if you are planning to use soap and water. The dirt, soap, and water will need to drip down, so cleaning the top first means you won’t need to clean the sides twice. 

Start by making sure you have the correct cleaner for your RV.

RV Type

Product to use

Products on Amazon

Painted – Metal or Fiberglass

Wash the RV with soap and water or use dry wax. 

Wash/Wax (Amazon Link)

Dry Wax (Amazon Link)

Fiberglass

Wash the fiberglass-safe soap and water or use dry wax. 

Wash/Wax (Amazon Link)

Dry Wax (Amazon Link)

Rubber Roof

For Rubber Roof RVs, find a good rubber cleaner and conditioner. Choose one for your specific rubber top. EPDM  or TPO 

EPDM Roof (Amazon Link)

TPO Roof (Amazon Link)

Metal

Most mild cleaners will work. If you want to remove oxidation, get an aluminum car wash.

Wash/Wax (Amazon Link)

Dry Wax (Amazon Link)

Aluminum (Amazon Link)

Using a backpack to carry items would be helpful when climbing on the roof. Use extreme caution if cleaning on the roof and using a ladder. Secure ladders well to the ground, and using a 75-degree angle is usually the safest. Check any ladder that is bolted to the back of the RV is fastened securely. 

TIP

Rinsing with a power washer is not advised. If you do decide to use one, use it from the ground level. Power washers can cause water to enter the rivets, seams, and hatches. RV design decals can peel off with power washers. A garden water hose with a nozzle will usually work fine in most circumstances. 

If you do have a power washer, a safe way to use it on your RV is for applying soap. Attach a soap dispenser (Amazon Link) and foam down the area to be washed. This will help keep the area moist and lubricated for effective cleaning.

You may need a ladder and a helper to hold the ladder. Some RVs have a ladder added to gain access to the top of the RV. Not all RVs have a top that can be walked on. Check your owner’s manual. 

Make sure to check labels well to ensure your RV surface can be cleaned with the product you’re looking for. Also, use car wash soap because some dish soaps can harm the clear coat of painted surfaces.  

After you’ve finished cleaning the top of your RV, check that you have all your materials, place them in your backpack and carefully climb down the ladder using both hands.


4. Sides

A soft brush on a pole can come in very handy when washing the sides of your RV. If using a dry wax, a step ladder (Amazon Link) or collapsing ladder (Amazon Link) will be needed for hard-to-reach areas. 

Be cautious of areas that shouldn’t be sprayed directly with force. Check to see if everything is closed tight. Sliding windows, Vents, and seals for slide-outs should be carefully sprayed around lightly.  Check to see if your slideouts and awnings need to be cleaned. 

To clean the awning, try not to scrub or power wash. Soap and water can be applied and sprayed off gently. Some awning arms can detach, allowing the fabric to lay flat against the RV. This will help you clean it more effectively.

TIP

After cleaning the sides, check your rubber seals and decide if you want to use a rubber conditioner (Amazon Link) to make sure they are in good working order. 


5. Front and back

Cleaning the front and back should be similar to cleaning the sides. Check to see if the windows and other compartments are fully closed. Wash or clean in your RV until you are satisfied.  

Check to see if you need to remove any items stored in the back. Washing or cleaning may be more difficult around tight areas, and water or spray may get into areas you may want to avoid.

 TIP

This is a good time to inspect how secure things are tied down. Check cargo on the back of the RV, hatches, vents, ladders, doors, and other ground-level items. 


6. Tires

Washing one’s tire rims can get a bit dirty. If using a dry wax, it helps to wear gloves and have a stool to sit on when cleaning. When cleaning with soap and water, it is helpful to have a tire brush (Amazon Link). The grim will rinse off a brush but stick to a rag, although rags clean better in my experience. 

Tires can get dry and cracked if RV owner doesn’t use their RV often. A good practice is to use tire covers, tire conditioner spray (Amazon Link), or regularly use your RV. 

TIP

Check to see if your rims are securely fastened and tire lug nuts look fastened well, and do a visual inspection of the tire tread depth. Lots of problems can be solved when checking for problems before they happen. 


7. Windows

The nice thing about some wax sprays is they can be used on windows as well. Some people just skip this step since windows wipe or dry fairly clean most of the time. 

If you are serious about making sure your windows are clean and spot-free, invest in a good window cleaner (Amazon Link). 

It’s helpful to wipe down the windshield wipers and ensure they are cleaned well. Checking for small cracks in the windshield can help prevent the costly replacement of the entire windshield. Some cracks and chips and be patched before the crack spreads.

TIP

Check the area where the hood meets the front window and clear any debris so the window cleaner can spray from the nozzles effectively. Check the windshield wipers and see if they need to be replaced. 


Shopping Tips 


Addition Questions

Should I use a microfiber towel to clean my vehicle?

Yes. A microfiber towel can clean surfaces on your vehicle effectively. It can be thick for soaking up water or thin for finer detail work. They are inexpensive and made of polyester, polyamides, and polypropylene. It is usually safe for vehicles, but get ones designed for them to be safe. 

What’s another way to remove bugs from my vehicle?

You can try a dryer sheet for bug removal. Wet the dryer sheet and rub the affected area. The bugs should start to loosen. Additionally, you can use a spray bottle with half a cup of water and shake well.  When your finished, clean the area with soap and water.  

Helpful Tips For Staying Safe While Driving Long Distances


Stay Safe While Driving

Hitting the open road in search of adventure is something everyone loves to do. Whether you have a specific destination in mind for your road trip or you are flying by the seat of your pants, properly planning your excursion is a must.

In order to stay safe while driving long distances, you’ll need to plan out your travel, eat properly, rest enough, and remember to follow safe driving practices. Listening to your body and giving yourself enough time to make it an enjoyable and safe journey will help you stay safe. Here are a few tips to keep you safe while driving long distances:

  1. Plot out the course you will take in detail.
  2. Don’t get distracted while behind the wheel.
  3. Sleep at regular intervals​.
  4. Take advantage of technology.

Some people get so wrapped up in the excitement of going on a long road trip that they fail to realize just how taxing driving long distances can be on their physical and mental health. Adding danger lurking around on the roadways in America, and you have the potential for disastrous situations arising.


Trip Preparation Starts the Night Before You Leave

Some people think that the preparation for a road trip begins the moment they crank up their car. In actuality, you need to start preparing for this trip the night before by getting a good night’s rest. While you may be a bit anxious to get your trip started, you will need to avoid staying up too late.

You will also need to focus on getting a good meal before hitting the road. Not only will this allow you to avoid stopping down the road, but it will also give you a great burst of energy. Try to avoid consuming highly-caffeinated beverages with your meal. While these beverages will give you a momentary boost of energy, you will have to deal with the accompanying sugar crash a few hours later.


Plot Out the Course You Will Take in Detail

Plot Out the Course You Will Take in Detail

In the weeks leading up to a long trip, you need to spend some time plotting out the course you will take. With the help of online publications like The Ultimate Guide for Drivers! DMV & More | DrivingGuide.com, you can get the information needed to plot out your route with ease.

Failing to make a plan can lead to you getting lost or missing out on some great roadside attractions. If you don’t already have a GPS unit in your car, you may want to think about investing in one. These devices will help you find things like restaurants, hotels, and even attractions with the push of a button.


Don’t Get Distracted While Behind the Wheel

Don’t Get Distracted While Behind the Wheel
Via: https://www.youtube.com/watch?v=KSPMH1D_Yss

In the modern age of technology, almost everyone has a cell phone and other mobile devices on them at all times. These gadgets are a great way to stay connected with the world around you, but they can also be distracting if you are behind the wheel.

Distracted driving has become one of the leading causes of car wrecks in the United States. Instead of being just another victim of distracted driving, you need to invest in some hands-free accessories. By investing in a Bluetooth headset, you can field phone calls without having to take your eyes off the road.

There are over 3 million car wreck-related injuries in this country every year. Rather than putting yourself and your passengers in danger, you need to adequately prepare for driving long distances.


Sleep at Regular Intervals

While driving over several days to your destination, regularly stop to rest before continuing. You need the rest to be fully aware of what’s going on with road conditions and traffic around you. Driving sleepy is similar to drunk driving, and that’s when people notice less and react slower.

You might feel the need to get to the destination tonight! Be willing to listen to your body and notice if you are dozing off. In these conditions, it is critical to pull over at the next stop or exit and switch drivers or take a rest, even if it’s just for 20 minutes.  

Try to take rest stops every about every 2 hours for about 15 minutes. You may think you seem fine, but your body needs rest because of the sustained effort the body undergoes while driving. Try to keep to a routine and stop after you’ve been driving for about 8 hours.    

Read below to find out more about how to stay safe while behind the wheel on a road trip.


Take Advantage of Technology.

Listening to music and making hands-free calls can help you keep your eyes on the road and have an enjoyable trip. Set up your car so you can keep your hands off the phone and drive safely.

Many modern vehicles feature Bluetooth technology that allows you to play phone calls out of your speakers. With a bit of research, you should have no problem finding the right accessories to help you avoid driving while distracted.

While driving from Southern California to the Sacramento  Area, I used a Bluetooth device that enabled hands-free use of my cell phone. (Amazon Link) It helped us stay safe while driving and keep our eyes on the road. 

Some drivers have a false sense of security when it comes to driving on major roadways. Realizing the dangers of driving and working to avoid them will serve you well as you venture out into the world.


Additional Questions

Should I buy a Bluetooth radio?

Having a Bluetooth radio for hands-free calling and for playing music is a great idea, but it may cost more than you intended if you haven’t had any experience installing radios. Each car and radio are different, and there are many problems that can occur during installation. The good thing is radios are getting less expensive, but installation costs may range from $100-$300. 

Can I use coffee to keep me awake for a long-distance drive?

Coffee can keep you alert for longer, but hold on to the sugar. Research suggests that caffeine helps drivers reduce their risk of driving unsafely. So, if you get a strong coffee, it will provide some alertness when you start to feel drowsy. But the body still needs just as much rest as normal, so don’t push to the limit for your health and safety’s sake.

Common Problems on Older Motorcycles And Quick Fixes


Older Motorcycles

An old motorcycle is a treasure! However, it can also give you a headache, especially because it can be prone to a number of problems, including those that are briefly mentioned in the rest of this post. Aside from identifying the most common issues that will confront you, we will also have a quick look at some of the best and easy ways to have them fixed.

Here are some of the most common problems with older motorcycles:

  1. Rust Forming in the Fuel Tank
  2. Vacuum Leaks
  3. Carburetor Issues
  4. Fork Oil Leaks
  5. Old Tires
  6. Oil Leaks
  7. Electrical Systems Issues
  8. Problems with Brakes

More often than not, the problems in older motorcycles can be fixed on your own using basic tools. However, if you are unsure whether you can do it, it would be best to ask for help from a professional mechanic.


1. Rust Forming in the Fuel Tank

If you find rust in the fuel tank, this is one problem that needs immediate attention. Otherwise, it can break down the components. They will also become smaller pieces that can infiltrate the fuel system. The result is that it can clog the fuel filters and the carburetors.

All that you have to do is to perform a quick visual inspection of the tank. Open the tank and pay close attention to all sides to see if there is rust present. From the first sign of the problem, it should be quickly dealt with.

There are many products commercially available that will help you to get rid of rust. You can use abrasives, such as nuts and bolts, to scrap the rust. Using hydrochloric or muriatic acid is also a promising solution. When you do this, however, be sure to have the proper protective gear.

When it comes to rust, prevention is better than cure. One of the best ways to prevent rust from forming is to make sure that the fuel is always fresh and that the fuel tank is kept full. This will help to get rid of moisture, which will also lessen the likelihood that rust will form.


2. Vacuum Leaks

Vacuum Leaks
Via: https://www.youtube.com/watch?v=oKVHqCJN2LU

The main cause of the vacuum leak in a motorcycle is the introduction of extra air in the fuel and air mix that is produced by the carburetor. As a result, the motorcycle will end up running lean. This is a problem that is often apparent around rubber boots. The surrounding rubber will eventually suffer from degradation. The rubber can also become dry and brittle. The throttle shaft seals can also be the cause of the leak. Replacing the latter can be quite a difficult task.

Pay attention to the most common symptoms which indicate that your motorcycle is suffering from a vacuum leak, such as a decrease in the performance of the engine.

When it comes to dealing with vacuum leaks, the best solution is to replace the carb holders or the vacuum leaks.


3. Carburetor Issues

If you have an old motorcycle, another part that requires your attention is the carburetor. Chances are, it will need cleaning or rebuilding to maintain the performance of your motorbike. The small fuel passages can be clogged over time, which will cause damage to the carburetors. This is definitely the case if your motorcycle has been unused for quite some time.

To know if there is a problem with the carburetor, pay attention to the engine. If it runs with the choke either fully or partially on, take this as a sure sign that you have an issue with the carburetor. A fuel that is leaking on the ground or the airbox will also signify a problem with your carburetor.

If you think that the carburetor is the issue, the easy solution is to have it removed from the motorcycle. After which, have it fully disassembled and expected the individual components to be sure that it is free of problems. Once it is cleaned and reassembled, a vacuum synchronization procedure should follow.


4. Fork Oil Leaks

While fork oil leaks are common, when they are already severe, they need immediate attention. It can leak down all the way to the brake pads, which is one thing that you surely would not want as it can have a negative effect on the braking mechanism. The continuous leak of the oil can also be potentially damaging to the front suspension as the damping capabilities will be lost, and in turn, this will compromise your safety.

If there are fork oil leaks, the easy solutions include the replacement of the bushings and the fork oil seal. You might also need to replace the fork oil.


5. Old Tires

Old Tires
Via: https://www.revzilla.com/common-tread/how-to-change-motorcycle-tires

If you have an old motorcycle, chances are it will also have issues with the tires. This is important to be resolved as soon as possible since tires will impact the motorcycle’s overall performance, as well as your comfort and safety. The tires can degrade and crack over time.

It is advisable that you determine the age of the tire. All that you have to do is to look at the sidewall. If the tires were manufactured before 2000, there are three digits on the sidewall. The first two digits will identify the week of the manufacturing, while the last digit corresponds to the year. For newer tires, there are four digits. The first two digits show the week of production, and the last two digits show the year.

If the tires are already old, the safest thing to do is replace them with new ones. Choose only premium quality tires to be confident of your safety on the road.


6. Oil Leaks

A leaking oil on the road with your tires rolling over is never good! It can put your life at risk. Your engine can also be starved of oil when there is a leak, which will have a negative effect on its performance. The good thing about this problem is that it is easy to spot. Some spots you have to check are the oil pan seal, cylinder head gasket, oil filter, hoses, and tubes.

An easy fix to an oil leak is to disassemble all the parts and have them cleaned. Use a scraper to get rid of the old gasket and replace it with a new one.


7. Electrical Systems Issues

The electrical system can also be problematic in the case of old bikes, and it requires immediate attention. Using a multimeter is the best way to test the electrical charging system to be sure that it is operating the way it should be. Attach the multimeter to the battery and look at the reading when the engine is not running. Next, turn the engine and record the voltage. After this, rev up and record the voltage once again. Consult with the manual to see the ideal voltage.

When there is a huge discrepancy between the manual and the voltage you have recorded, you need to fix the electrical systems or have it replaced by a pro.


8. Problems with Brakes

If you have an old motorcycle, it is also no longer surprising to learn that there is a problem with the braking system. Test the brakes, and if it is not as strong as they should be, perform quick fixes to maintain road worthiness of the motorcycle.

As it has been recommended by most motorcycle manufacturers, you will have to replace the brake fluids at least once every two or three years. When the brake fluid is new, it is amber or clear. If it is dark, this is a sign that a replacement is warranted. See to it as well that there are no visible damages on the rubber brake lines. The master cylinder seal will also need an inspection as it is the one that applies pressure to the brakes.

There you have it, folks! Before you start driving an old motorcycle and to ensure its optimal performance and safety on the road, pay attention to the problems that have been mentioned above.