Home

Recent Posts

10 Driving Hacks For Driving On The Freeway


Driving on the Freeway

We all have to start off learning how to drive on the freeway by first driving on the streets.  If you’re a new driver you can check out this article.

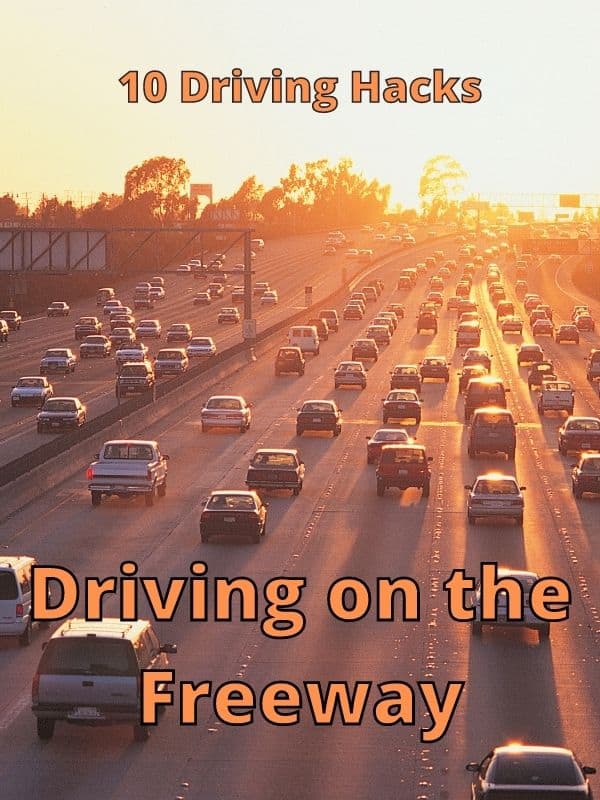
For those who are already starting to drive on the freeway, you can look at the hacks below to help with some areas that you might not have thought about before when driving on the freeway.

The more I drove my car as a beginner, the more inspiration I got to hone my driving skills. After persistent practice, I found techniques that helped me drive well on the freeway. Below will share my advice.


1. Be Aware

Don’t keep your eyes fixed on vehicles moving ahead of you. When you focus on the movement of the front vehicle or the action of its driver, you are more likely to do what that driver does.

Look behind and at the sides. If you find many vehicles going in front of you, look at the spaces between them. If you look far ahead, your brain gets important information earlier.

Basically, you are more aware of your surroundings so you have sufficient time to respond to any potential threat. Thus, your hands and feet get ready in time to avoid problems. 

Viewing the Front & Back
Photo Credit: https://www.travelers.com/resources/auto/safe-driving/spring-driving-tips.aspx


2. Proper Hand Position

Considering the steering wheel like a clock; put your hands at the 9 and 3 o’clock positions for more control. Some people like to use the 12 and 6 o’clock positions but this can become problematic if a quick response is needed.

Put your hands at the 10 and 2 o’clock positions for quicker response time and when changing lanes.

Decide if you need increased stability or better handling. You can keep your hands at these positions on the freeway but practice on the street first.

Sometimes your steering wheel may not allow for the best possible position. Find a place to practice different hand positions and see what works best before going on the freeway. 


3. Prioritize Safety 

If you are increasing the speed of your car to save time, you have the wrong notion. It is better to be late than never.

Use your cruise control to help you stay at a consistent speed. Practice taking 3 deep breaths when you feel anxious to speed. Listen to calming/slow-tempo music to help set a good mood for driving safely.  

Reach your destination by going a little slower, rather than never. You should go with the flow of traffic generally unless it is unsafe. 

keep everyone’s safety in mind and the potential consequences of fast driving. You will then never feel the need to exceed the recommended speed.


4. Electro-stimulation of Your Tongue

Many densely-packed nerve endings merge in your tongue. If you activate those nerve endings, they send electric signals to the area of your brain which is responsible for balancing. 

I may be possible to use this balancing signal to help you sense if your car is doing what you intended it to do. If you push your tongue against the roof of your mouth, you may become hypersensitive to the loss of control of your car.

You may be able can react at the right moment and keep things under your control during those moments that seem like they might get out of control. 


5. Braking Precognition

Have you ever thought something is going to happen with a car up the road? You can tell the situation isn’t right and you hover your foot above the brake pedal. 

You’re using your precognitive powers. We can all predict the future to a degree. If you are very alert to the behavior of the cars on the road and the road conditions, you can predict what might happen.

By hovering your foot over the brake pedal when you sense a possible problem you are reducing the time it takes to slow down your car in an emergency. If you are on a highway, you may need to stop 50 ft. faster during an accident.


6. Do One At a Time

If you want your car to do what you want, consider it as an attractive dance partner, you wish to impress. Be gentle and smooth.

Sometimes it’s best to swerve if a car suddenly stops in front of you instead of putting on the brakes. If you’re tense and try to do both at the same time you could end up doing neither well.  

You can accelerate, you can put the breaks, or you may steer, but only do one action at a time to avoid mistakes. Sometimes a rapid succession of actions is necessary. 

At the same time, you need to be steady, careful, and smooth in your actions. A little practice somewhere safe couldn’t hurt.

If you put your brake heavily while turning, you cannot take the turn as well as you want and your car may spin.

Avoid Slamming of Brake
Photo Credit: https://www.cnet.com/news/uber-drivers-can-now-accept-tips-electronically-without-ubers-help/


7. Avoid Slamming On The Brakes

When you slam on the gas, the car throws its weight around. Each car is a bit different. Placing a large load on the tires can make the car difficult to steer.

We need to steer in some situations to avoid a car and in other situations slamming on the brakes means losing control of the car, such as during rain or snow.

When the brake hurls the car’s weight forward it can mean the front tires maneuver differently and the driver needs to know that letting off the brakes for a moment can help them avoid an accident.


8. Ditch Distractions

You know that texting while driving is against the law and is extremely dangerous. Place your phone on mute or airplane mode. Place your phone in the glove box if you are really tempted.

If you have an urgent call, make sure you can use the speakerphone so you don’t have to touch or hold your phone. Know how to connect your phone to your car audio system to receive and make calls easier. 

There are a lot of other issues that may cause a distraction while you are driving; such as; eating while driving, fiddling with the radio, and having a very talkative passenger beside you.

There may be situations where you don’t know where you are or how you can get to where you are going. Panicking over where to turn can get you into a fender bender and take hours to days away from your life.  

Therefore, plan and GPS your route as clearly as possible before the start of your journey.


9. Pull Down When Turning 

We have two types of muscle fibers; namely slow twitch and fast twitch. Slow twitch is used when endurance is required and fast twitch is for shorter bursts of energy.

Your arm has about 60% fast twitch muscles in your biceps and triceps. So when you turn the wheel you are using some of these muscles to steer your car.

Your triceps are generally bigger. So if you need to turn, pulling down left or right will activate the triceps muscles and can be more efficient than pulling the steering wheel up and over and using the biceps.

You also have an advantage because your muscles may have to do less work when pulling down since they are going from high to low. 

Therefore, when you are taking a left turn, instead of pushing up too much with your right hand, pulling down on the steering with your left hand can give you more dexterity or control over the car and your arms will likely tire less over time


10. A Smooth Ride For Better Handling

Treat Your Car with Delicacy
Photo Credit: http://fennellseeds.com/stop-backseat-driver-marriage-improvement-ideas/

When you slam on the gas, the weight of your car is thrown to the rear, thus reducing pressure on the front tires. If you suddenly brake, the weight of your car hurls forward.

If you drive like this on the freeway, you may find it difficult to maneuver well in different situations.

You maintain control better, smooth shifting and stead accelerating and braking are required. Consider the shift knob like an egg. Hard shifting can be fun, but it can get messy.

Delicate driving can make your drive seamless and squeeze more miles out of the gas tank, including saving your tires and brakes service over time.

Tips; Short-distance Trips

  • Do not take up a trip when you are tired. Take proper rest before you start.
  • Get your tires properly inflated.
  • Avoid warming up the car in an enclosed area.
  • Do not mix radial tires with other types of tires.
  • At least, half fill your gas tank to avoid any freeze-up of the gas line…
  • Do not use your parking brake in cold or snowy weather
  • Avoid using cruise control while you are driving on a surface slippery, because of being wet, icy or sandy.
  • Focus on looking and steering where you intend to go.
  • Use your seat belt.

Long-distance Winter Trips

  • Watch the weather reports and take special care if you are visiting isolated areas. If you find any adverse indication, you should delay the trip. Be sure to let others know all about your proposed trip such as route, destination, and expected time of returning
  • Ensure that your car is in peak operating condition for which you should get it thoroughly inspected by a reputed auto repair facility.
  • Keep your gasoline tank full when you start and half-full, all the time.
  • Carry your cellular phone, blankets, hats, gloves, warm coats, sweaters, food, water, and first-aid and prescribed medications.
  • If you are required to dig your car out of the snow, then avoid ever-exerting yourself, physically and mentally.
  • In the case of any distress, tie a brightly colored cloth to the antenna.
  • See that the exhaust pipe is not clogged with snow, mud, or ice. If clogged, the exhaust may cause the hazardous carbon monoxide gas, to leak into the passenger compartment, while your engine is running.
  • Accelerate and decelerate slowly for regaining traction and avoiding any skids.
  • Believe in the adage ‘slow and steady wins the rest’ so that you get time to maneuver at stopping and turning.
  • Do not try to power up uphill.

Reminders for New Drivers

  • Put your eyes as far down as possible on the road to uncover important traffic-related information for taking proper decisions.
  • Maintain a safe distance while following another vehicle.
  • Instead of staring at the traffic, shift your eyes constantly to keep up with changing traffic conditions
  • Use your horn, signals, and lights to establish eye contact with pedestrians and motorists and communicate with them, about your action.
  • Escape conflict if confronted.

I grew up in Minneapolis and then moved to Boston. Having passed through different rough and tough conditions, I like to drive more slowly and with proper attention, while I am driving in the weather.

There is a host of challenges that you have to face while driving in winter. Snow, slush, and icy roads are the main constraints for drivers to see, slow, and stop. I like to share with you the following driving tips for winter. These can make your next winter trip easier and more enjoyable.

Essential Dirt Bike Gear [5 Tips]


Essential Dirt Bike Gear

We have seen several changes in products over the years. Some old players are still going strong and some new players are coming out with effective and unique gear for protection when riding your dirt bike.

There are three pieces of gear, that in my opinion are essential when riding a dirt bike. The helmet, the boots, and the knee braces. I chose these three pieces of gear because they protect the three places that commonly get injured when riding.    

There are other common injuries that these pieces of gear don’t protect, but if I were to get only three pieces of gear I feel these are the most important for common injuries.

We’ll talk about tips you can use for choosing gear and what these types of gear can help you with. With an assortment of materials, fabrics, prices, and styles, everyone can find the type of gear they need. 


Tip 1 – Helmet 1st, Boots 2nd, Knee Brace 3rd

Helmet, Boots, & Knee Brace Dirt Bike Gear

1. Get a Helmet

While everyone is different and each person may face different dangers when riding, the number one reason people get hurt when riding an off-road motorcycle is not using a helmet. 

People often fall off their dirt bikes. It happens to almost everyone. Those with helmets are far less likely to have a head injury than those who wear them. 

Evidence has shown that helmets save lives more than any other equipment you can buy. So this should be a top priority before buying any other equipment for your off-road dirt bike. 

Along with your helmet, you may want to get one or more of the following items:

  • Goggles – Most off-road motorcycles are open-face, so you need to buy goggles with them. 
  • Neck Brace – To ensure your spine is protected if you fall from your bike you’ll want a neck brace.
  • Back Armor – This usually comes with an armored jacket or chest protector. It helps protect at least part of your spin from impacts.

2. Get some Boots

A common injury among riders is the ankle. People often twist or break their ankle bones. Having a riding boot will protect your ankle from impacts and twisting. 

Boots are great to have for protection from plants, shrubs, and branches that often hit riders’ legs while on a trail.

Boots will ensure your feet and shins are protected from the heat of the engine/exhaust, injuries, and things hitting your legs.  

Along with your boots, you may want to get one or more of the following items:

  • Dirt Bike Pants – Most off-road riders scrape their legs on one thing or another. Pants may protect from heat, scrapes, and impacts if they are lined with armor inside.  
  • Armored Shorts – Worn under your dirt bike pants, armored shorts ensure your lower body from the waist to the knees has some impact protection. 

3. Get a Knee Brace

Another common injury for riders is the tearing of the ACL. Riders need something to prevent their knees from hyper-extension and side-to-side movement. 

Some riders will buy knee guards which can be good at impact protection but don’t help with stabilizing the knee. A knee brace will keep the knee joint from twisting too much so it won’t get injured.

They can start at about $100 and go up from there. Deciding on which one to get may be difficult because there are many options to choose from, but I would get the ones that are most comfortable and fit the best. 

Check out our article about knee braces to find out which one you would like the most. 

Along with your knee brace, you may want to get one or more of the following items:

  • Knee pads – If you already have a knee brace without any protective armor on it, you might want to wear it under your dirt pants and wear knee pads on top of your pants. This will ensure your knees stay safe and help you save money.  

Tip 2 – Buy The Best You Can 

AD

There are multiple options available for buying professional-grade dirt bike gear. This gear is created with different people in mind.

  • Those who are just trying out dirt bike riding.
  • Those who have been riding for years.
  • Professionals who need the best gear available.

Whichever category you are in getting the most for your money can come down to buying from a trusted brand, and looking for discounts when they are available.

Some people will buy brands that are less well-known and have mixed results as far as quality. Depending on the gear you are buying, you will find most equipment has several brands that are good to buy at a reasonable price. 

I would probably look at these brands first if I were just beginning to ride a motorcycle or have been riding for some time before going to a discount brand or something more expensive: 

  • O’Neal
  • Fox Racing
  • Alpinestar
  • Thor
  • Fly Racing

These brands usually have both less expensive and more expensive gear so that you can find a range of gear with various levels of quality. This way the beginner can get good gear at a less expensive price and more experienced riders can get better quality gear that will last longer. 

Then those who have more money and professional riders can buy more expensive equipment that has “better” features. Sometimes price doesn’t always translate to better quality, but they do usually have better quality material in them.

Look for brands such as these for equipment made with more premium materials:

  • Leatt
  • Alpinestar
  • KTM
  • Sidi
  • Fox Racing
  • Gaerne
  • Klim 
  • Asterisk

Each brand has its pros and cons and may have special features that make it unique. Sometimes you need equipment that has one characteristic that is most important to you, and you may find it is best in only one brand.

The key is to buy the best equipment you can for the budget you have. Best meaning, equipment that protects well, fits well, and won’t fall apart right away. 

Beginner Set of Off-Road Gear I Would Buy

AD


Intermediate Set of Off-Road Gear I Would Buy

AD


Professional Set of Off-Road Gear I Would Buy

AD


Tip 3 – Get the Right Fit

Get the Right Fit

Sometimes you buy equipment without having the chance to try it on first. It doesn’t quite fit right, but we go riding in it anyways. Then we complain that it’s not very good at doing its job or breaks easily.

Well, taking the time to properly size your gear can make all the difference. It should protect you well and stay in place. It should fit comfortably like a glove, not too tight and too loose. 

If you can, go to an off-road motorcycle gear store and try on your gear first. They will likely have higher prices than online, but you will get a much better fit and feel for the equipment. Then if you really need to save money you can just buy the same gear online for a cheaper price than at the store.

But, buying local is always a good idea. You are supporting the local economy. You get to know the people at the store, get their expertise, and build relationships that can help you with the problems you will likely encounter as you continue to ride off the road with your dirt bike.

Then, they will likely see you as more than a customer and more like someone they want to help out. This can be helpful when you need to get your gear fitting just right. 

 After you get the right fit, your gear will work better and last longer. You’ll feel more comfortable, and when you eventually fall off your bike as most riders do, you will be glad you had properly fitting gear. 

Good-fitting gear will likely prevent more injuries than improperly fitting gear. So if you are not sure how your gear should fit make sure to ask someone who has experience or watch a video for advice. 


Tip 4 – Practice With Your Gear

Buying protective gear is one thing and riding with it is something very different. You should get used to it before going out for a long ride. Ride for a couple of minutes to give it a test for fit, and comfort, and to see if it will function as intended. 

You’ll want to ride in all the positions and ways that you normally would but for a shorter time.

If you are new to riding, you can take a course in off-road dirt bike riding to get more familiar with the riding and how to best secure gear the right way, and what mistakes to avoid. 

Each person will have their own personal preferences when it comes to gear. If you are only riding on flat trails and rarely run into obstacles you may decide you don’t need some of the extra gear that more technical riders need because they fall off their bikes more often.

Once your gear fits right and is secure, you will be better protected and know how to operate your motorcycle more effectively with the gear on. 

If your gear doesn’t fit well, it’s time to return it and get something that fits properly. Loose gear can’t protect you well and may end up causing problems riding if it starts to limit your mobility or vision. 

Check to see what the return policy is for new gear that you purchase and make sure you can return it, at least for credit, if it’s not working out for you.  


Tip 5 – Take it Slow

Take It Slow Dirt Bike Gear

Essential protective gear can save you from injury and months of pain. If you have new gear and feel invincible, that’s not going to work to your advantage in the long run. 

Take it slow when learning new skills and riding in new areas. Sure, it can be fun to go fast and take some risks, but chances are you’ll fall off your bike, and even the best protective gear can only help so much. 

With any new gear or bike, you want to stay within your own abilities. Practice and then practice some more before taking on more challenging riding skills. 

Ride through an area slowly first and then speed up once you’re sure about how to handle it and if you can handle the track or trail you’re riding on. 

Don’t worry about other riders and how they feel. You are taking risks not them. Get the skills and confidence you need, slow and steady. So, when you are ready, you can skillfully tackle the next challenge that you’re looking forward to overcoming.

The body needs time to gain muscle memory, strength, and agility. As you work on your riding and techniques you will get better at these and be able to handle your motorcycle in more challenging situations.


Final Thoughts

Getting your protective gear will keep you protected and provide a level of security as you ride off-road. Remember to get as much protective gear as you can, but if you are limited by money at least get a helmet, boots, and knee braces.

Get good properly fitted gear so it can protect you well and practice with your gear until you know it fits right and you know how to ride with it properly. If you take time to improve your skills, you’re less likely to have falls and ride better with the gear you have. 

Thanks for visiting Drivinglife.com

References

www.motoshark.com

www.rideexpeditions.com


RV Surge Protector [When to Get a 30 or 50 Amp Protector]


RV Surge Protector

Do you have a surge protector for your RV? Is it good enough? Traveling in RV means you have to plug into various sources of power and believe hope that the power source is smooth without any surges. Although, power can fluctuate, so having a surge protector helps.  

In general, get a 30 amp surge protector if your RV devices and power cord sets are rated 30 amp and a 50 amp surge protector if they’re rated 50 amps. Later, when you want to get power from a 30 amp or 50 amp outlet, you may need an adapter that will help you get power to your RV. 

You will need a 30 amp or a 50 amp surge protector for your RV when you plug it into a power source to ensure nothing overloads in the RV. Sometimes called an electrical management system, a surge protector can be a great way to endure your safety and that of your RV.

An RV surge protector is something you could carry with you in your RV toolbox for protection whenever you need it.


Is it necessary?

Yes, it can be very necessary; you can use it to plug in your TV and laptop. You can find different types of RV surge protectors. Those people who have to face power issues and unstable weather conditions should go for it. This is like an electric device or guard to your RV. This is helpful in keeping many destructive types of electrical issues caused by fluctuating voltage.

It comes with high-end units that help monitor every aspect of power. Sometimes our power requirements increase but power infrastructure doesn’t. It may be the main cause of damage to electronic and electrical components, so you need to be well aware of the working and necessity of an RV surge protector. You should know how the different units can protect your RV.

surge protector on your RV power
Photo Credit: http://wheelarea.com/best-rv-surge-protector-2016-top-5-best-rv-surge-protector-reviews/

Sometimes when RV parks become full, the electrical power quality tends to diminish. It may damage your appliances like AC units and refrigerators, so you need an RV surge protector unit. It can cut the electrical power until the changed conditions improve.

There are many devices in an RV, and you may have to pay a lot to replace or repair these expensive devices. They may be damaged due to power spikes, so you need to use an RV surge protector to protect these expensive and sensitive electronics.


What is a surge protector?

This is a device or appliance that is used to protect electrical or electronic components from damage due to voltage spikes. This is an important device that is used to limit the voltage supply to any device. It can be done by shorting or blocking voltage (unwanted or above safe threshold) supplied to the ground.


How does an RV surge protector work?

How does an RV surge protector work
Photo Credit: http://learntorv.com/what-surge-protector-is-best-for-my-rv/

The wording is similar to other electronics that you use at home. The only difference is you can plug it into a power pedestal at your RV site. It comes in the kit in 50/30 amp models. You can direct the wire to the main power feed. It is very easy to plug the power cord of the RV into the RV surge protector. You can plug it in and flip the breaker on.

It checks all the factors or circumstances such as reverse polarity, neutral condition, grounding, frequency, proper voltage, and much more within a few minutes. RV surge protector monitors all power conditions consistently and works accordingly. The unit can cut power to the RV when something changes. It may help protect expensive electrical components in your RV.

Many electrical items can be ruined due to improper supply of electrical power. These items may be TV, RV refrigerators, AC units, and much more. You should also carry the Best RV humidifier along with all these things.


What are the different types of RV surge protectors?

There are three different types of RV surge protectors including:

What are the different types of RV surge protector
Photo Credit: http://www.trucktrend.com/how-to/interior-electrical/1107rv-protecting-rv-electrical-systems-surge-spike/
  • Basic surge protector: This is designed to prevent electronics from big surges. It does not protect devices against low/high voltage. It is not capable of detecting faulty wiring if any. It helps with an only electrical problem that is caused by lightning strikes. These are available with 30/50 amp models.
  • Basic surge protector with faulty wiring indicator: This can be better than the first one as it can detect faulty wiring. It comes with indicator lights that prevent you from plugging RV power into the pedestal if it has been wrongly wired. Again they are not capable of preventing you from low/high voltage conditions. They are also available with 30/50 amp models.
  • Complete RV power protector: This is the perfect option to look into. It helps prevent damage from high voltage or low voltage conditions. It can also detect faulty wiring. Many electrical appliances get damaged due to voltage spikes, so you need to get them. A complete RV power protector can be more expensive than the other two options, but it is worth buying. It can detect and prevent any damage caused by an electrical surge, low line frequency, high line frequency, low voltage, high voltage, open ground, reverse polarity, and much more.

How to determine the right RV surge protector?

Well, it is quite easy to determine it. You need to match it with the RV power requirements. You should determine whether it’s 30 amp or 50 amps. You should have proper knowledge about what features your RV requires. If you are looking for a surge protector system only to protect electronics from lighting or direct strike, then you should choose the units that are specially designed for it. You need to check the RV electrical system to determine the right RV surge protector for you.

If you are looking for the best solution to protect your electrical or electronic devices from surges, then a surge protector system can be very helpful. A transient voltage or power surge is a voltage increase above the safe or designated level. The standard voltage for normal office wiring or household is 120 V in the USA, but if there are voltage spikes, a surge protector prevents electronics from being damaged.

You can go for a surge protector to avoid any problems. Hope you find this guide informative and useful. Do comment if you have any queries.

How to Test Drive a Car Before You Buy?


How To Test Drive

(Updated 2/21) I’ve purchased several new and used cars over the years and a test drive will tell you things you might not have expected before buying a car. If you’re not carefully looking for a specific thing you could have buyer remorse. 

A test drive will help you check for the proper mechanical functioning of the vehicle, the fit for your body type, the functions that you expect you will want and need, and how practical and enjoyable it is to drive on a daily basis.

As I drove my first car I was lucky that it functioned properly and lasted as long as it did since I didn’t pay much for it. There’s a lot of value in having a checklist of the things you are looking for in a car. Let’s find out what things are best to do when test driving.


1. Go to the Internet Before your Test Drive

In the past, you may have had to go to several dealers before getting the deal you wanted. Each dealership is willing to sell cars for discounts depending on inventory and a host of other conditions.

But… they always need to make money and will try to set you up with a deal that helps both you and them. 

Some dealers are open and honest from the start and others will try to nickle and dime you for as much as they can. It’s important to make a decision beforehand about what you want and are willing to accept both financially and with the type of salesperson and dealership you’re willing to deal with. 

Now we can go online and find fair prices for what a car should cost and then go to a dealership or private party and negotiate from there. If you go on the main car company website, it may have deals that are not readily shown at the dealership that you may still be able to get if you ask. 

Here are some websites to use when looking for a fair car price:

Here are some websites where you can compare car prices:

Here are some websites where you can compare used car prices:

On the internet, you can look up common issues with the type of car your looking to buy, and be sure to inspect used cars and ask about these issues during the test drive if it is pertinent. 

A little research, planning, and patience can be very helpful. Once you go to the dealership to buy a car, you should have already made the decision about what exactly you want and need in a car and what financial terms are available that you qualify for. 

Talking on the phone to ask questions is a good idea before going to a dealership as well. You can clarify any questions and not have to wait for a long period, as some dealerships like to do. 


2. Check your Credit

credit-card

This applies more when going to a dealership than a private party. We want to have a good credit score. 

Most lenders will use a FICO score to check your credit and decide how much to lend. FICO stands for Fair Isaac Corporation and they gave a way to check your credit score based on all your credit transactions. 

Before you test drive you may want to check your credit when you are going to a dealership. You can use this as a bargaining chip if you are trying to get the best deal. If you have good credit you may be able to lower your monthly payments and get a lower interest rate. 

One thing you’ll want to ensure you decide before any type of purchase is what you want the financial terms to be. If you have good credit, you’ll likely be able to purchase a car on your terms, rather than theirs.

There are ways to get a free credit report for yourself before you visit a dealership. Be aware that each website has its terms, so read carefully just to be sure. When you go to Google just type in Free credit report to get a list of some websites that offer free reports.  

Once you go to the dealership and are ready to buy a car they will check your credit. Companies like Experian and Equifax analyze your credit data and can report your scores to lenders.

The dealership will ask a credit reporting company for your credit score to determine what your score is and help them determine your financing options.

Each credit reporting company may have a slightly different score, but they are usually fairly close. 

You might think about raising your credit score a year before you buy a vehicle by starting to keep good credit habits. 

Make sure you pay on time, don’t max out your card, and use your card often to build up some history.

For a better credit score, consider the following:

  • Your payment history. Have you paid on time? A good way to increase credit score.
  • How long you’ve had credit? Have you continued to use revolving credit for long periods?
  • If you are getting new credit cards or lines of credit. Getting new cards can lower your score.
  • How much do you borrow? Are you borrowing the max on your credit cards?
  • Credit from different places. Are you able to pay all that you owe from a variety of lenders?

3. Check your Savings

checking account

If you have cash in the bank to cover the cost of the car, it may be to your advantage to pay for part of all of your car costs by purchasing it outright. It’s also important to keep 3 or more months of monthly expenses in the bank for rainy days. 

This usually doesn’t happen for most people because money is tight, but if you have savings in the bank with 3 months’ expenses to spare, it’s a good idea to at least put a down payment on the car, so your monthly payments and overall payments will be lower.

Having savings in the bank for a rainy day is also important when financing a car. Your total loans should be about 1/3 of your income or less. Some people like to go up to half their income going to loans, such as cars and houses, but that can get out of control for people quickly if there happen to be any extra expenses. 

You want to be able to pay your bills if difficult circumstances come up. For some, getting their car taken away because they can’t pay their bills has a dramatic impact on their life. Plan for what you’ll do beforehand if funds get low or for the possibility of not having a car.


4. Test Drive a Friends Car First

test driving

When you’re getting ideas of what you’re looking for in a car you may have made a checklist of what you want. A checklist is great to have, as well as some first-hand experience. 

You’ve driven cars before and you’re familiar with what your needs are, but if you haven’t driven a different car for a while, you may need the experience of driving a friend’s car before going on a test drive to buy a car.

This will help you recognize things you like and don’t like, and bring up questions that you hadn’t thought of before. You’ll be better prepared for the real test drive.

This way you’ll feel more confident in your preferences and be more prepared to gather all the information you need from your test drive. It will be a more constructive experience, rather than one that leaves you with more questions. 


5. Use a Checklist During the Test Drive

check list

The first car I purchased was a large 2-door Ford Elite. I gave very little thought about what I should look for, except that it should run well.

Using a list to check off what your expectations are and write down what you didn’t expect will allow you the space to make an informed decision instead of an impulse buy.

You can get a lot of valuable information during your test drive that can be used when comparing cars or making a decision. If you are careful, you’ll be able to get the car you want and one that meets your needs.

It’s a good idea to have a checklist with you before you go on your test drive so you can remember the things that are most important to you and not get too emotionally involved before you buy.

You can decide what are the top items you are looking for in a car and prioritize other items on your checklist as high, medium, or low. This way you will not be questioning what you should do and you will have a clear idea of what you want and what you won’t accept.

If you are purchasing a used car then your checklist will need to be more extensive so it can include all the parts of a car that regularly wear out and need to be replaced.

Use This Checklist For a Used Car

Here’s a great Checklist from ChrisFix.com that goes with the video above.


6. Test Driving a Private Party Car For Sale

road

The ideal setting for purchasing a car would be where you are 90% or more sure about what you want and need, and the person selling the car asks you lots of questions to understand what it is they can do for you.

But when you go to a private party to buy their car, a lot can be left unsaid, so it’s your job to investigate well to ensure you understand the pro and cons of buying the car.

You may want to inspect the car before driving it, to make sure it is actually what you were looking for when you saw the ad or posting.


Things to think about before the test drive:

  • Make sure you have car insurance. Accidents can happen and the sellers’ car insurance may not cover you driving their car. Make sure you have access to it in case the seller asks.
  • Bring your license.
  • Take your friend. They can make you feel a bit more comfortable and safer when driving and meeting the seller.
  • Take your phone. Feel free to text and call friends for support if needed. Take plenty of photos of the car when you visit and ask your friend to take a video as you drive. You’ll want to look at the pictures and video later when recalling all the details of the car. 

What to do during the test drive:

  • Listen to the car as you accelerate and stop, turn left and right, and go over bumps. Open the hood and have someone start the car and accelerate a bit. Listen and look for any signs of issues. You can also take a video of under the hood to analyze later. 
  • Try accelerating quickly and stopping quickly once or twice to see how things are operating.
  • Go over bumps to check the shocks and listen for issues.
  • Test all the controls for the car (signals, lights) all the electronic components (radio, heating, and AC), and accessories.
  • Check that you fit well in the seat and can adjust it and that all the seat belts work.
  • Check the mirrors are in good condition.
  • If you like the car, check everything else that moves, operates, or turns on to make sure it works.

The best way to get the most from your drive is to have a good idea of what you should be looking for in a good working car before you visit the seller. A friend and checklist can help you remember all the things you may have forgotten. 


7. Test Driving at a Dealership

The ideal setting for purchasing a car would be where you are more than 90% sure about what you want and need, and the salesperson asks you a lot of questions to understand what it is they can do for you to get your needs met. Unfortunately, some car salespeople are all about making the sale.

You’ll need to be sure about what needs and wants you to have and not get distracted by the sales representative. A key idea to remember is that they are here to serve you

There’s no need to be afraid when dealing with a salesperson. If things are getting uncomfortable it’s time to leave. Don’t worry that they might get offended. No matter how much they beg you to stay you just tell them you need to think about it.

I prefer to be clear with my price expectations from the beginning and expect my salesperson to do the same. 

When everyone is clear about what the expectations are and the dealership is fairly transparent, things should go quicker and with a lot less uncertainty.  

My opinion for interacting with someone selling a car is to state what you want and be as clear and confident as possible. If you’re unsure don’t buy it. Wait until you are 90% or more sure to make your purchase; you’ll be happy you did.

Sales occur all the time at dealerships and you might get lower levels of service from some salespeople. Go back as often as you need to get your questions answered and feel certain that you are getting a car and a financial arrangement that meets your needs. 

Yes, you might miss a sale, but you won’t make a bad deal or get the wrong car. Sales happen a lot.

Just remember, they’ll be a new sale soon or at a different dealership, maybe a better one, and that used car might not be there next week, but something else that can meet your needs should be.  


8. After the Test Drive

Once you’ve seen how the car operates, it is a very good idea to wait 48 hours before making a decision to purchase. Emotional buying is one of the worst ways to purchase a car and the cool-off period can help you put things into perspective.

You’ll be happy you did if you find something even better that suits you just the way you like. That’s why taking your time to research and test drive at least 2-3 cars will pay off in a better purchase for you, even if you choose the original car you test-drove. 

The other option is to take a period of time, maybe two weeks, to research, test drive, and compare vehicles. You’ll have gained a great deal of information without any need to feel pressure because you weren’t trying to buy anything, just learn. 

Then when it’s time to buy a car the only thing you’ll really need to focus on is how you want to purchase it.  


Conclusion

It’s important to give yourself as much of a chance to get the best car for yourself by test-driving a car before you buy it. You’ll find out what you like and don’t like as you test drive more than one car. You’ll have a better chance of finding the right car for you as you research and test out different cars. 

Don’t forget the value of bringing a friend to bounce thoughts and ideas off of your checklist. It can be a fun experience test driving new or used cars but don’t forget to focus on all the important details to get the most out of your experience so you can get the car that is best for you. 

Motorcycle Safety Course: [Tips to Ride Safely]


Motorcycle Safety Course

Without a doubt, riding a motorbike is an exhilarating experience! I used to ride a motorcycle during high school. I tried to stay safe yet crashed several times. I’m lucky I none of my crashes involved another car. 

Taking a motorcycle safety course is one of the best ways to commit to safety when getting a motorcycle. You learn skills and strategies on how to drive defensively and prevent an accident from happening.  

Despite the thrill, motorbikes are notorious for being accidents for some people. Statistics say that those who take a motorcycle safety course get into accidents less, but training courses help riders wear helmets more. (smarter-usa.org)

Whether you are a novice or an experienced rider, safety should be your priority and a driving course can help.


Why Take a Motorcycle Safety Course?

When you’re just starting out as a motorcycle rider, learning some of the basics in a safe area can be important. Far more important is repeated experience riding a motorcycle. 

A course can help you get some experience and teach you some concepts you may not have been clear about and how to execute them on your motorcycle. 

Maybe one of the most important lessons that most riders come away with and continue to do after a training class is to wear their helmet. This one idea of wearing a helmet has saved many people from fatal or serious injury. (www.iii.org


SAFETY TIPS


1. Choose the Right Bike

This simply means that you have to buy a bike that you can handle. For instance, if you are a newbie, you need to get a bike that is designed specifically with the needs of beginners in mind. The bike should fit your body as well. It is also important that the weight will match your physique.

If you are small, avoid big bikes as they can be tough to handle. It should be easy for you to get on and off the motorbike. The seat should be designed in a way that you are comfortable when you are riding to avoid compromising your safety.


2. Use Antilock Brakes

Use Antilock Brakes
Via: https://en.wikipedia.org/wiki/Anti-lock_braking_system

For your safety, you have to invest in innovative tools. A good example of the latter is an antilock brake. It can be a true lifesaver in case you are involved in a fatal accident.

Also known as ABS, these brakes will provide the rider with full control when steering the motorbike, preventing the possibility of skidding or rolling. While most of the expensive models now have this as a standard feature, in the case of most motorcycles, you have to purchase it as an add-on.


3. Wear a Helmet

This basic safety rule is one thing that is often ignored by many people. Take note that your head is one of the most vulnerable in case of a crash, which is why it is vital to make sure that it is protected all the time. A full-face helmet will be good if you want full coverage and protection.

The helmet should be made of durable materials that can withstand crashes while still making sure that it will be breathable and comfortable. Look for a helmet that is DOT-approved for your peace of mind. Even if it is just a short-distance ride, you must wear your helmet at all times.


4. Dress Properly

While a helmet can indeed be the most important protective equipment that you can wear during your ride, there are other things that you should not ignore. For instance, you need to wear the right shoes and even pants.

Your shoes should have non-skid soles. Wearing gloves will also be important, especially if you are riding during the cold season. If you are driving at night, you need to have reflective material in your clothing so that you can be easily seen on the road.


5. Respect the Laws

No one is above the law. Regardless of who you are, do not be entitled! You have to respect the laws when riding a bike. There is a reason why there are laws. The authorities would want the public to stay safe. For instance, if a speed limit is imposed, make sure that it is followed religiously.

If there is a sign that says you are not supposed to enter, respect it. Many accidents happen because drivers are reckless and ignore the law. Do not be one of those riders!


6. Be a Defensive Rider

Be a Defensive Rider
Via: http://knowhow.napaonline.com/top-6-motorcycle-safety-awareness-tips-new-riders/

Another important safety tip when riding a motorcycle is to be always on the defensive side. You need to be alert when you are on the road. Do not assume that you can be seen by everyone. As much as possible, you have to stay out of the blind spot.

Also, your headlight must be turned on all the time, especially at night. When you are changing lanes, do not forget to turn on the signal light. Look left and right before you swerve or turn.


7. Inspect your Ride

This is one more thing that you should do before you leave the house. Regardless of how excited and in a hurry you are, take the time to have a quick inspection of the motorbike. Check the tires, brakes, lights, fuel, and all other parts. 

See to it that they are in perfect condition, especially if you have to drive a long distance. See to it as well that you will have the tools that will be needed in case you experience a roadside emergency. If there is something that is wrong, do not bring it out for a ride and fix the problem as soon as possible.


8. Mind your Position

Once you are already riding your motorcycle, you need to be conscious of how you position yourself as this will greatly impact your safety. Your torso should be in line with your hips when you are driving. Your arms should not be over-extended, which will be crucial in the prevention of fatigue.

Do not slouch. Your head should be facing the road. Do not lean too much as this can lead to losing balance. Your body should be flexible enough to respond to the changes in direction based on how you will be moving the bike.


9. Research Before you Ride

While it is indeed exciting to drive towards an unfamiliar route, it can also put you at risk. With this, before you leave, it is important that you do quick research on your route. For instance, you should know the road conditions so that you will be prepared for whatever will confront you on your journey. 

You should also take a look at the weather predictions before a long ride so that you will be ready for any unfortunate situation. Research as well about possible rest stops, restaurants, and motels.


10. Practice Makes Perfect

Practice Makes Perfect
Via: https://www.northernontario.travel/motorcycle-touring/how-to-get-your-motorcycle-license-in-ontario

This might seem like a cliché, but the practice is actually one of the cardinal rules of riding a motorbike. You won’t be able to master the skills in just a day or two. In fact, the more experience you have, the less likely you generally are to get into accidents you are.

It takes long-term practice to hone your skills and become the best driver that you can be. Take as much time as possible to practice riding your bike in safe areas.

Ask for a helping hand from someone who is more experienced. If time and budget are not an issue, there are even training centers where you can enroll. Take a course that will provide you with an enhanced knowledge of motorcycle safety.

Once you have ridden a motorbike, you will easily understand why many people get hooked on it. It is more fuel-efficient compared to bringing a car and also allows you to prevent being stuck in traffic. At its size, you can easily maneuver between cars and take small alleys to reach your destination.

Nonetheless, despite the excitement that you can feel, the harsh reality is that accidents can happen at any time. It is important that you remain attentive at all times.

Do not leave the house without inspecting your motorbike. Always be sure to wear protection from head to toe. Take note of how you position your body. Most importantly, you should keep on practicing until you are able to gain mastery of the basic techniques for riding a motorcycle.

Thanks for visiting drivinglife.net

Jumper Cables [The Correct Order]


Select Jumper Cables

Jumper cables are the cables that anybody can make use of, especially while starting any road vehicle when the battery of the vehicle is dead. You can connect the jumper cables to either another battery or another source of power, which makes it easy to jump-start the vehicle.

The correct order when attaching the jumper cables is:

  1. Red clamp (positive) on the dead battery.
  2. Red clamp (positive) on the good battery.
  3. Black clamp (negative) on the good battery.
  4. Black clamp (negative) on the car frame of the dead battery.

There are many cases when the person who is driving a car faces situations when the battery of the vehicle does not start at any cost. To avoid any further problems, it is advisable for every person to know in detail how to use the jumper cables. Also, it is necessary to make use of the best jumper cables to avoid sparking or short-circuiting.

For people who have a lot of experience in driving cars, using jumper cables is no big deal. In the blog below, there are some top tips that you can refer to using jumper cables the right way.

The jumper cables are a blessing for people who have to drive a lot, as they help in recharging the dead batteries when there is no other help available. There are various steps that you have to follow for the same.


Step 1: Opening the Hood of the Vehicle Carefully

Opening the Hood of Vehicle Carefully

The first basic step that you have to follow is to check the location of the batteries of the car. Also, it is advisable to check the voltage measurement of the batteries, the donor, as well as the acceptor. Checking the voltage measurement is important because a higher voltage battery can damage the lower voltage battery after the interconnection.


Step 2: Checking the Length of Jumper Cables

The second important step is to check the length of the jumper cables. The length of the cables has to be long enough so that it connects both the batteries perfectly. If this is not the case, then consider adjusting the batteries again.


Step 3: Switching off the Cars

The third step involves switching off all the electrical components, such as the radio or the lights inside the car. In other words, turn off the car and pull out the keys from both cars if using two cars. If using a battery jumper check out this article.

Switching off the components is important, as it makes sure that you can make use of the entire charge of the battery for running the car and no amount of charge gets wasted in any of the electrical components.

jumper cables
Photo Credit: http://www.carbatterychargerscentral.com/how-to-jump-start-a-car-safely/

In some cases when the car gets stuck in some dangerous areas, it is always advisable to switch on the emergency flashlights for safety.


Step 4: Preparing your Car

The next step is to make sure that you engage the emergency brakes of the vehicle.


Step 5: Preparing the Jumper Cables

The next step that you have to perform is to separate the jumper cables in such a manner that the two clamps are not in contact with each other.


Step 6: Locating the Terminals

In the next step, you have to differentiate between the positive and the negative terminals of both batteries. Normally, the positive terminals have either a plus mark on them or a red plastic cover, while the negative terminals have either a minus mark on them or a black plastic cover. The color of the cover on wires is the indication of clamps on the jumper cables.

Locating the Terminals

While performing this step, it is advisable to have utmost care because if the identification goes wrong, then the connection of the wires will also go wrong, and ultimately there are chances of either sparking or short circuit or production of current.

Also, while inspecting the terminals on the wire, if you observe that the battery is cold enough then do not even attempt to connect the jumper cables to them. If you still do, so there is a high chance that the battery might explode.


Step 7: Attaching the Terminals

After you inspect the positive and the negative terminals follow the step below:

  1. First, attach the positive jumper cable to the positive terminal of the dead battery.
  2. Then attach the positive jumper cable to the positive terminal of the good battery.
  3. Next, attach the negative jumper cable to the negative terminal of the good battery.
  4. Last, attach the negative jumper cable to the car frame of the dead battery.

This video can give you some helpful tips to stay safe!


Step 8: Jump-Starting the Car

After all the successful connections, all you have to do is:

  1. Start the car with a good battery and wait for two to three minutes.
  2. After 2-3 minutes try starting the car with the dead battery. (If it doesn’t start but seems to have charged your battery some, try waiting another 3-5 minutes and try to start the car again.)
jumper cables
Photo Credit: http://awesomejelly.com/how-to-properly-attach-jumper-cables-and-jump-start-your-vehicle-the-right-way/

Step 9: Detaching the Jumper Cables 

After the car with the dead battery has been started you need to detach the cables as soon as possible. To stay safe, follow these procedures for detaching the jumper cables.

  1. First, detach the negative jumper cable from the car frame of the dead battery.
  2. Next, detach the positive jumper cable from the positive terminal of the dead battery. (Ensure the two cable clamps don’t touch each other as you place them away from the car.)
  3. Then detach the positive jumper cable from the positive terminal of the good battery.
  4. Last, detach the negative jumper cable from the negative terminal of the good battery.

Now that your car is started, you should let it run for at least 30 minutes to help charge the battery. Here are some additional important tips to help make the process easy and simple:

  • It is necessary to make sure that the jumper cables are long enough so that both the batteries can connect perfectly and also that the batteries do not get in touch with the jumper cables to avoid any mishap.
  • It is important to park the car manually and turn off all the electrical components and remember that there must not be anything in connection with the cigarette lighter inside the car.
  • It is always advisable to buy jumper cables of about 16 feet in length. Also, before buying the cables, you have to check the insulation on them, because naked wires can cause the generation of current.
  • It is advisable not to connect the jumper cables when the battery either has a crack in it or is leaking from any part because there are chances that it might explode.
  • Before you connect the jumper cables to the batteries, do not forget to wear your safety gloves for precaution.
  • Never connect the two batteries with the jumper cables if you are not sure of the terminals. Before you start connecting, make sure you know which are the positive as well as negative terminals on each battery so that there are no problems because it was connected the wrong way. 
  • Make sure that the jumper cables do not touch or go near any part of the car’s electrical system or moving parts of the car.
  • When you buy the jumper cables, make sure that you buy an emergency kit and place it inside the car along with the jumper cables.
  • It is advisable to wipe the cables before you connect them as it makes the clamp a better solid connection.
  • After the completion of the charging process, let the car run for about 30 minutes so the car battery can charge long enough to ensure you don’t need another jump start.
  • Drive safe!

There are various types of jumper cables and emergency kits for cars available on the market. It is necessary to pick up the best one as it will ensure safety. If you buy a cheap cable, then maybe a chance of a short circuit or overheating the cables.

The jumper cables play an important role in helping a person who is stuck in some areas because of a dead battery. Before you start driving alone, it is important to learn everything about the jumper cables, and how to jump-start the car using jumper cables.

Also, you have to learn all the steps of jump-starting a car properly so that you do not miss out on any step, and it is very much important to know that you perform all the steps very carefully. 

Thanks for visiting drivinglife.net