Home

Recent Posts

What is an Engine Cooling System?


Engine Coolant System

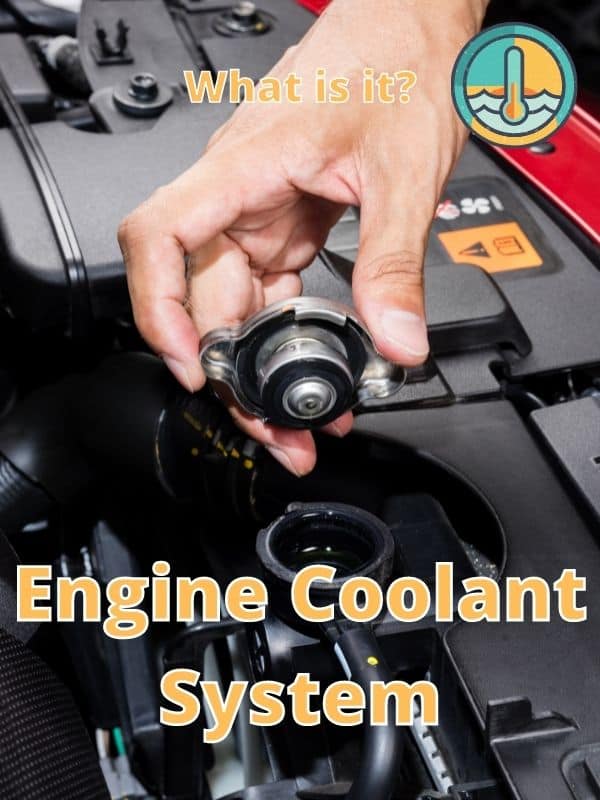
The engine is cooled by oil and coolant. I have been in a car several times when steam and smoke started to come from the engine. Then I know it’s time to pull over and figure out what is going on. 

An engine cooling system uses coolant to absorb heat from the engine block. This hot liquid is then pumped to the radiator by the water pump where it can cool down. Heat is released when air is passed over the radiator. Then the process starts over.   

The engine can maintain an optimum temperature for best operation when the right motor oil is used internally in the engine and then coolant can be pumped into the passages of the engine block efficiently. If all components in the system are in good condition the engine will work well and not overheat. 

Importance of the Cooling System

In a nutshell, a cooling system is important because it prevents extremely high temperatures that can cause the breakdown of the engine. If the temperature is not managed efficiently, this could lead to speeding up the damage to the components of the engine, compromising the overall performance of your car and even your safety.

For a better understanding of its importance, let us look at an example. Let us say that you have a car with a 4-cylinder engine. On average, it will generate 4,000 controlled explosions in a minute. These explosions will inevitably produce heat. To be able to control the high temperature, the engine cooling system will assume a significant role.


Types of Engine Cooling System

Before we tackle the different parts of the system, let us first have a look at the two types that are available and how they are different from each other.

Liquid Cooling System

This is what you can find in most modern vehicles, basically because it is assumed to be the better option of the two types. In this case, there is a fluid that passes through the pipes of the engine to absorb heat and provide a cooling effect.

Once the fluid is overheated, it will be transported to the radiator and the surplus of heat will be released into the air.

Air Cooling System

On the other hand, in the case of this type, there are aluminum fins that surround the engine. When there is too much heat in the engine, there is a fan that will blow air into the fins, directing air away from the cylinder and cooling it down.


How Engine Cooling Systems Work

Below are some of the most important components of the engine cooling system, as well as their individual functions. To start with, watch the short video below for a primer of what will be further discussed in the rest of this post:

Water Pump

This is considered the heart of the engine cooling system. As long as the engine runs, the water pump will keep the constant movement of the coolant. There are several ways by which it can be driven by the engine, such as through a timing belt, serpentine belt, or fan belt.

The water pump is made of housing, usually cast aluminum or cast iron. It also has a pulley and an impeller. More so, to keep the fluid inside and to prevent leaking, the water pump comes with sealed construction. Through the use of a centrifugal force, the impeller will make the coolant circulate.


Radiator

This heat exchanger has the main function of transferring the excess heat that is produced by the engine. It has different parts, which include an inlet port, outlet port, drain plug, and radiator pressure cap. From the water pump, the antifreeze will be circulated all the way to the radiator.

The radiator can have different designs and can be made of varying materials. The tubes can run either horizontally or vertically. In the case of older car models, the radiator has a copper core and brass tank. On the other hand, in the case of newer cars, the system is made from a combination of aluminum and plastic, which are known for having better efficiency.

The radiator is equipped with fans, which can have different designs. The fans can be one or two. They are designed with a cover to prevent injuring the finger and to also direct airflow in the direction where it is needed the most. Once the fan stops spinning, the temperature of the engine will start to rise.


Thermostat

https://youtu.be/e6GGBGAa2Hg

This valve has the function of regulating the amount of coolant that flows and maintains the right operating temperature. As shown in the video above, the main parts of the thermostat include a frame, charge cylinder, main valve, main spring, bypass valve, and secondary spring.

The thermostat will open only once the running temperature is achieved. It is at this point that the antifreeze will circulate in the cooling system of the engine.

It comes with a sealed copper cup with wax and a metal pellet. When the thermostat registers a higher temperature, the wax will expand. The piston will be pushed into the spring, the valve will open, and the coolant will enter.


Coolant Temperature Sensor

Coolant Temperature Sensor
Credit: https://www.2carpros.com/articles/coolant-temperature-sensor-cts-replacement

This is the part of the cooling system that is responsible for detecting the temperature of the engine. The data provided by the sensor will be used by the engine’s computer to determine ignition time and fuel injection, as well as for the control of the radiator fan. There can be one or more sensors in an engine.


Coolant

Technically speaking, this is not a part of the entire cooling system. Rather, this is what makes cooling possible. It exists in the form of liquid or gas. This is what passes through the components that have been mentioned above, making it possible to regulate the temperature of the engine and prevent overheating.


Conclusion

Now that you are done reading this post, it is assumed that you are already knowledgeable of how the engine cooling system works. As discussed above, there are different components that are involved.

They work collectively to process the coolant and allow it to lessen the engine’s temperature to maintain the peak performance of your car.

RV Carport [Installation and Cost]


RV Carport

When I washed someone else’s RV on time, it took a long time to scrub off all the dirt, grime, and bird droppings that had accumulated over the past several months. An RV carport could have helped this RV stay much cleaner and avoid some weathering issues. 

In general, a permanent RV carport will cost you $2000 to $6000 to purchase and will take about 2 or more days to set up. It takes two people to set up and you will need to lift some heavy items. A concrete pad or holes for concrete and anchors will be needed.

There are many choices to choose from and different ways to install the carport, so prices and timelines may vary a bit. RVs that are not used frequently tend to have issues if left out in the elements. It’s helpful to have an RV carport. A garage may cost too much; therefore, many people opt for a carport to protect their RV.


Which RV Carport Should I Get?

Which RV Carport

You will need to measure how tall, wide, and how long your RV is. This will help you decide on which RV carport will fit your RV best.

You will also need to consider if you want to park your RV and car both under the same carport. Then you need to make sure you have a couple of feet of clearance on either side of the RV so you can open doors and or park both vehicles if needed. 

  • RV Height. When choosing the carport for your RV, height is likely the first thing to consider. A 10-foot tall travel trailer can fit under a low-cost carport, while a Class A motorhome will need a taller and costlier carport.  
  • RV Width. The width is important for parking and your ability to enter and exit the RV without hitting the doors on the carport. Measure the width of the RV with both passenger and driver-side doors open. Then you’ll know how wide you’ll need your RV carport to be.
    • If you plan on parking your RV and your car under the carport, make sure to add the width of the car and the RV with doors open. Check how wide the doors swing open on the car as well to get an idea if both will fit under a certain carport.  
  • RV Length. To get full coverage for your RV, ensure the roof extends beyond the RV in the front and back. 
  • Weather Conditions. If there is frequent snowfall or rain, you may need a concrete pad and a sloped metal roof. In case of frequent winds, you may need to have a deeper foundation and more secure screws for the roof panels. 
  • Carport Color. You may want to match the color of the exterior of your home or garage where the carport is near. You may customize the texture and design of your carport so that it complements the exteriors of your house.

RV Carport Installation Preparation 

Installing RV Carport
Photo Credit: http://www.carolinametalcarports.com/carports-metal-steel-portable-metal-steel-carports.html

Once you have finalized the type of carport you want, find out as much as you can about the steps needed to install it. Decide what type of pad you will need. You can install an RV carport onto a surface in several ways. 

  • Using a concrete pad
  • Digging holes for concrete anchor points
  • Place the carport on the ground using a rebar anchor
  • Place the carport on the ground without any tie downs

Then you can select the surface you want your RV to drive on. The more solid the ground the better. RVs weigh a considerable amount and will sink into the ground as time goes by and as water penetrates the ground. 


Selection of the type of ground 

Select a level surface for best results. There are several types of surfaces that most people choose when using a carport:

  • Gravel Pad: For a cheaper option you can lay a layer of gravel on the ground. According to nodakangler.com, you should use .75 to 1.5 inches of crushed rock when laying a gravel pad for your RV.  
  • Concrete floor: These floors are great when it rains frequently. A concrete floor is helpful when installing and securing a carport.
    • A carport will stay in place better with a firm base. The bare ground on the other hand doesn’t always handle rainy conditions well. 
  • Pavers: When installed with proper dirt compaction and a layer of gravel, pavers can work well as a solid surface for an RV. 

In most cases, where a concrete slab is required, its width is recommended to be almost 0.75 inches, and its width should be equal to the metallic frame of the carport; ideally, if your carport is more than 24’ wide.


Level the ground

It’s best to make double sure your ground is firm and flat before starting installation. A dirt compacting tool can help you ensure a solid surface before installing your pad. Sometimes you’ll need to level the ground a bit. Try to ensure it’s as flat as it can be, so puddles don’t occur. 


Use Gravel if Needed

In some cases, the bare ground will work. However, to avoid the ground from sinking in, use crushed granite as needed to prevent erosion and add traction.


Using Pre-fab Carport Kit

If you plan on doing the installation yourself, you can buy a carport and install it using a carport kit. You can watch the video above for step-by-step instructions that you can expect you will need to do so you can complete the installation of your RV carport.  

  • Determining the length of the frame – It is very important to determine the length of the frame correctly as it plays a great role in the stability of the entire Ideally, the length of the frame should be 1 foot less than the length of the roof of the carport.
  • Assemble the base rails – Once you get the appropriate ground for carport installation, the second step is to assemble the base rails. These act as the foundation of the carport.
  • Anchor the base rails
  • Assemble the trusses
  • Attach the trusses to the base
  • Attach sheet metal to the frame

Build A Custom Carport

Custom Carport

A custom RV carport can save you a lot of money but you can also end up spending more than an RV kit fairly easily. Check out the plan and the materials you will need. Remember the cost of lumber may be prohibitive, depending on how big the structure is. 


1. Building Foundation

  • Lay concrete with post anchors or dig the holes to place the posts and pore concrete in each hole.
  • Depending how long and how heavy the roof will determine how long your concrete pad is or how many holes you need to dig.
  • Equally spaced your posts holes. About 8 ft apart. (Check local regulations). You’ll likely need 8 or more posts depending on how thick your posts are and how long your carport is. Check for RV carport plans online
  • Set the post fasteners to the concrete. You might need to check your local city regulations to see if your plans meet the local regulations.

2. Placing the Beams

  • You might opt for 16 ft beams if you have a tall RV. These should be of the same height unless you plan to have the roof slant down on one side only. To provide a slant to the roof make one side of the carport post longer and the other side shorter.
  • Fasten the beams to the footing hardware. 
  • Ensure the beams are aligned correctly.

3. Building the roof

  • Fasten the rafters to the side beams: All the rafters should be equidistant from each other.
  • Fasten the plywood roof border boards to the rafters or use a steel roof: Fasten the plywood boards over the rafters in such a way that you have at least a 6-inch overhang on the front and back side of a carport.
  • Check the stability of the structure: Once the roof is in place, you need to check the stability of the structure and ensure that it is solid.

4. Finishing the job

 Finishing the job
Photo Credit: http://produits-naturels-sante.com/tag/carports-install/
  • Caulk the plywood roof seams: Cover the roof with synthetic paper to make it waterproof.
  • Fasten shingles on top of the plywood roof elements: Use three-pad shingles to add a protective layer to the carport roof.
  • Reinforce the joints with metal plates: You should use metal plates to attach rafters, beams, and plywood roofs. This will further strengthen the structure.
  • Stain the wooden elements: It is always good to paint the exposed wooden parts with a good quality stain. It increases its lifespan.

If you are not able to install an RV carport by yourself, you may contact any service provider that provides an RV carport installation.


Cost of an RV Carport

The price of your carport can vary greatly. A smaller RV carport can cost about $2500 (see link), while a large one can cost up to $5000 (see link). 

Shop around for the best deals. Some websites will have much higher prices and others will be much less (see link).

Look at all the features and if it’s the kind that will best suit your needs. Some RV kits will take more time, be better structurally sound, and come with better warranties.  

Check at least three places before making any decision. Then wait about a week before making a final decision to make sure you don’t have buyer’s remorse. Thoughts, plans, and new information can change your idea of what’s the best thing to do for you.  


Final Thoughts

Getting an RV carport can be an effective way to keep your vehicle in the best condition for years to come. Whether you choose to buy a kit or do it yourself, you can create a value-added area of your home that will save you time and money in the future with your RV.  

Having a good carport is important if you plan to use your RV in the long run. It helps protect your RV from harsh weather and falling objects. This also keeps the RV in good condition and increases its resale value. 

Installing an RV carport yourself or getting some help is a great idea for the longevity of your RV and for peace of mind.

Thanks for Visiting Drivinglife.net

Safely Jump Start Another Car [16 Safety Steps]


Safely Jump Start someone else's Car

Have you met someone who tried to turn their car on and nothing happened? They only heard a few clicks from the engine. The battery doesn’t have a charge. It could be low or dead. How can you help?

To jump-start another car safely you’ll need to ensure you follow these safety steps. 

  1. Ensure you can work safely away from any traffic.
  2. Ensure you are parked securely so the cars can’t move. 
  3. Ensure the either battery is not cracked or showing signs of a leak.
  4.  Ensure your batteries are both 12V. (Don’t jump-start a Semi-truck)
  5.  Ensure your jumper cables are not too thin. (Cheaply made jumper cables may not carry current well, some may get too hot.)
  6. Ensure both engines are off before you begin. 
  7. Untangle the cables and ensure the cable clamps don’t touch each other during connection to batteries.
  8. Attach the cables in the correct order and in the right location. (1. Red clamp (positive) on the dead battery. 2. Red clamp (positive) on the good battery. 3. Black clamp (negative) on the good battery. 4. Black clamp (negative) on the car frame of the dead battery.)
  9.  Ensure the cable clamps are firmly secure to the frame and battery posts. 
  10. Ensure the cable wires aren’t near any moving parts like fans.
  11. Ensure no one is near either engine when you turn on the car with a good battery.
  12. Start the car with a good battery and wait 2-5 minutes.
  13. Try starting the car with the dead battery. If begins to start but doesn’t wait another 2-5 minutes.
  14. Once the car with the dead battery starts immediately take off the jumper cables. (1. Detach negative clamp on dead battery car. 2. Detach the positive clamp on the dead battery. Lay on the ground ensuring they don’t touch each other. 3. Detach the positive clamp on the good battery. 4. Detach the negative clamp on the good battery.)
  15. If the car battery starts to smoke during the jumpstart, turn off the car and stay away from the battery, it may explode.
  16. If the jumper cables start smoking turn off the car and remove them when cool enough to touch.  

These are some basic safety procedures you can take to ensure safer results when jump-starting someone’s car.  


Get Good Cables for Safe Car Jump Starting

Start With Good Jumper Cables

When you or someone else needs a jump start you want to get back on the road as quickly as possible. The trick is to do it safely. It only takes a few extra minutes to be safe. 

You’ll need to have jumper cables in your car or a portable jump starter. Jumper cables or portable jump starters are both easy to store in your car and you’ll usually need them at some point.

Select a good pair of jumper cables (see the article about the best jumper cables). Longer cables are usually better because you better reach both batteries when jump-starting. Longer cables provide convenience.

But in my opinion, it’s the strength of the cable that matters the most. The gauge measures the strength of a cable. Thicker cables have a lower gauge resulting in more strength. I have a six-gauge cable that extends about 20 feet.

A few days back I faced a similar situation when the battery of my car become dead. But I had a jumper cable and a working car near me. So, I was able to get my car started.

To prevent yourself from similar circumstances always carry jumper cables in your roadside kit. 


More Safety Precautions before Jump Staring A Car

More Safety Precautions Jump Start
  • Keep all the people and children away from the engine.
  • Read the manual of your car.
  • Check to see if the engine has any oil or gas leaks and fix those first. 
  • Don’t touch the batteries or jumper cables during the jump start.
  • Don’t touch the metal clumps if they are too hot. Use gloves if needed.
  • Wear safety glasses to protect your eyes when the engine is on.
  • If there is any damage to either battery don’t jump-start your car or another car.
  • Remove ring or metal jewelry from your body.
  • Check the battery for any cracks, leaks, or smells.
  • If your battery is not a sealed one, don’t unscrew the caps if the battery is hot. Wait until it’s cool and the engine has been off for a while. 
  • Before getting a jump start you may want to check the water levels on older batteries. If there is not sufficient water, add distilled water. Use safety glasses and rubber gloves. 
  • Don’t jump-start your vehicle, if the battery is frozen or water levels are very low.
  • If you have a sealed modern battery, then the water level shouldn’t be a problem you need to worry about.

These are some things you can do to be extra safe. When a car is new and in good condition, you might need to worry less but these are good practices to follow for any car.


Prepare For A Safe Jump Start

Prepare For a Safe Jump Start
  • Park the cars facing each other if possible. This helps you prevent stretching the jumper cable too far and possibly causing safety problems.   
  • For automatic transmission cars, put the vehicle in park and for manual, put the vehicle on neutral.
  • Keep both cars’ parking brakes on.
  • Turn off both the cars and remove the keys
  • Open the hoods of both so they can’t fall down during the jump start. 
  • Locate the battery terminals and ensure which are positive and which are negative. (Black = negative, Red = positive)
  • Make sure to identify the positive and negative jumper cable clamps.
  • Clean any dirty terminals with a wire brush to ensure a good connection and prevent sparks or overheating jumper cables.
  • Ensure your jumper cable clamps are secure to prevent sparks and ensure good charging.  
  • Connect the negative clamp to the car frame on the dead battery car. This helps prevent sparks. Make sure the clamp is away from any gas lines and on an unpainted metal ground (like the car engine) away from the battery.  

Make sure that jumping cables are not mishandled while connecting them. Prevent the clamps from touching each other. Use jumper cables with great care.


Connect Jumper Cables

  • Do NOT smoke during the jump start of your car.
  • Hydrogen in the battery can get ignited from sparks or heat sources like cigarettes. If it gets ignited, it can explode.

Check the connection twice before proceeding as one wrong connection can cause an accident.


After the Jump Start

  • Don’t turn off the engines.
  • After the cables have been removed, let the car charge for 30 minutes. It’s best to drive around instead of letting the car sit and idle.
  • Check the battery performance the next time you start your car. If it’s sluggish on start, it may need some more driving to charge it, or something else could be wrong. 
  • Check the battery after the second or third start from the original jump start. If your battery just doesn’t seem to charge fully, consider you have a bad battery, the wires aren’t secure, or the alternator has issues.

Unsuccessful Jump Start

Unsuccessful Jump Start
  • In a few cases, it may happen that the jump start is not successful or if the car starts and dies again. That means that your car has some other issue.
  • Is your battery 4+ years old? Some batteries show the install date and years of service on the label.
  • Is your battery still under warranty? There’s a chance you can get a replacement battery for free. 
  • Is there corrosion on the battery?
  • Are the wire connections on the starter secure? 
  • Are the wire connections on the alternator secure? 
  • Have you inspected your battery with a multimeter? (see video below)
  • Do you need a professional battery diagnosis? 

If you need to diagnose your battery and the possible reason it might not be working you can watch this video for ideas. You’ll need a multimeter and a little bit of time. 


Final Thoughts

Having a dead battery when you urgently need your car is a pain. Getting your car back on track is usually not too difficult.

Once your car is jump-started you can do some diagnostics to find out if this is just because you left the lights on, your battery life is up, or other issues. 

Thanks for visiting Drivinglife.net

RV Surge Protection [Problems and Tips]


RV Surge Protection

Having an RV (Recreational Vehicle) is like having a home on wheels. These vehicles will have two electrical systems. One for the engine and things it powers and one for the RV living area. The living area system can have problems and sometimes needs troubleshooting.

Troubleshooting your electrical system and surge protection can help you find the answer to why something is going wrong. Sometimes you may need to maintain your RV electrical system and sometimes it might just be a loose wire.

Having the proper surge protection and adapter can help prevent some problems, but others can be caused by other 


Electrical Problems in RV

Electrical Problems in RV
Photo Credit: http://www.generalrv.com/complete-rvers-guide/content?bookid=96&chapterid=43232

It is the most integrated system of any RV as without a proper supply of electricity most of its devices won’t work properly. Just as we need to turn on the power at home, the same is the case with an RV. 

So, here in this guide, we would talk about how to secure our electricity supply system from sudden voltage surges or drops. It is really important to have the proper protection to prevent voltage and shock problems in an RV.


Voltage Surge Problems

Voltage Surge RV

One of the electrical problems could be a current leakage. In this situation, current may start flowing in the chassis on RV and any touching the metallic portions of the RV body, such as tire rims, experiences a mild or moderate shock.

If you are an RV owner, there could be several reasons that cause such problems in your motorhome.

A few of the reasons are:

  • Damaged wiring
  • Miswiring when plugged into an RV receptacle
  • Damaged receptacles
  • Plugging into 240V AC or too much power
  • Insufficient grid capacity
  • High power lines above the RV

Since Voltage surge/drop problems are very common and may cause serious damage to electric appliances in RV; therefore, you should try to prevent a surge from occurring. You can read this article about getting a 30amp or 50amp surge protector for more information about plugging in at an RV park. 


RV power

 Some RVs may have protection built into the electric system of your RV and others will require you to buy equipment. 

As you may know, these surge protection devices may have an automatic reset feature, but some may need you to check and reset it yourself. 

Portable units are meant to be plugged in at the pedestal (or power source of RV). These units may start to give you a warning signal if they detect any anomalies in the electrical system. These portable units start functioning even before RV is connected to any protective device.

This helps to fix problems solve issues unrelated to getting the wrong amount of power to your RV. These surge protectors can plug in when in use and then you can unplug them and keep them in the toolbox.

Hardwired units, on the other hand, are installed (mounted) permanently to your RV. They start working as soon as the RV is plugged in. Since these units are permanently attached to RV, they are protected from theft and weather. However, if they are damaged or faulty, they can be hard to repair or replace. 

These power surge protection devices are not used in conjunction with any other device, although you can use a power adapter cord to get the correct voltage at an outlet. 

Usually you’ll find two models for surge protectors, 50-amp and 30-amp. You should choose the model based on the amperage level specified by your devices and power cord.


Problems Associated with No Surge Protection

No Surge Protector

These surge protection devices not only provide surge protection but are also useful in preventing your RV from various other problems, such as:

  • Open ground
  • Reverse polarity
  • Accidental connection to 240V AC supply
  • Open neutral

These devices have two modes of mechanism – Detection and protection. The devices that are meant for detection only detect the problem and cannot protect the system by interrupting the power supply. However, the device that provides protection interrupts the power supply as soon as the problem is detected.


More Information About Surge Protectors

Some surge protectors require manual input to resume the power, and some of them perform this operation automatically.

If you are going to portable devices, you should ensure various features like:

  • Automatic Reset
  • Easy-pull handles
  • Guards and covers to protect from weather
  • Locking brackets to protect from theft

These protection devices come with different Joule ratings. The protection device with a higher joule rating will absorb more energy during a power surge.


TIP – Prevent Excessive Moisture

You may need an RV humidifier, to maintain the moisture level in your RV. Excessive moisture level results in the formation of water droplets on walls and various parts of RV, and it may cause current leakage or short circuit.

Excessive moisture may also lead to the growth of molds, mildew, and dust mites. These organisms may deteriorate the interiors of your RV. In some cases, they also damage the electrical wiring, and this can cause a short circuit or even severe incidents.

By taking proper care and using adequate protection devices, we can prevent the electrical system of the RV from getting damaged.


Final Thoughts

There are several devices available that protect RV from sudden voltage surge or drop. These protection devices are available in portable and hard-wired variants. 

If you need a surge protector read my article about RV surge protectors here. 

The use of RV humidifiers also helps in maintaining proper moisture levels and prevents any damage to the electrical system of the RV. Hope you find the above-mentioned tips relevant and useful, do comment if you have any queries.

DIY vs Auto Shop Cost to Replace the Brake Pads and Rotors


DIY vs Auto Shop Cost to Replace the Brake Pads and Rotors

If your car produces a squeaking sound when you apply the brakes, it is usually a warning sign from your brakes that you need to replace them. If you apply the brakes and it doesn’t stop as well as normal this could indicate the rotors are slightly warped. 

It may be time to replace your brake pads and rotors. How much will it cost?

The cost of replacing the brake pads and rotors is: 

  • About $150 per axle if you do it yourself plus tools and supplies you may not have. (It all depends on your car and the brakes and rotors you get. It could be $75 or $250 per axle.)
  • About $350 per axle at an auto shop. (It all depends on your car and the brakes and rotors you get. It could be $225 or $500 per axle.)

It’s usually best to replace the brakes and rotors together. Every time you get new brakes they need to be flush with the rotor surface and new brake pads aren’t. That means it would be unsafe to drive with them unless you grid down the rotor or get new ones.  


Brake Pads and Rotors

The brake rotor utilizes the pressure created by the system of brakes for stopping the car. For this, it uses heat and friction and generates momentum to stop power. The brake pads hold the rotor in place by riding on both sides of the rotor.

Rotors used in front wheels may wear down faster in the front depending on the type of car you have. So you may just replace one set of brakes and rotors on one axle.

If you want to try replacing them yourself you can try by following the next few steps. 


Replacing Your Brake Pads and Rotors Yourself

You can replace your brake pads and rotors yourself if you want to. Here’s a good video that gives you step-by-step instructions on how to do it. 


Getting to Know Your Rotors

Brake Rotors can last a long time but it’s a good practice to replace them with brake pads because thin rotors can warp or get too hot and prevent a car from stopping. 

If the thickness goes below the minimum, they should be replaced; otherwise, it may also cause shaking of the driving wheel while applying the brakes.

The rotor is designed to hold a certain amount of heat which goes down when the rotor wears down. The overheating of rotors may crystallize the metal part of the rotor, thus creating a rattling sound while applying the brakes.


Replacement of Rotors Basics

car rotor
Photo Credit: https://www.youtube.com/watch?v=Lpb3Zms1_eM

The bearing hub holds the brake rotors by means of mounting screws or clips, fitted on the stud of the wheel.

The first step is removing the screws with an impact screwdriver and the sheet metal screws with a cutter. If the rotor is stuck because of rusting, hammer it to loosen it a bit. 

After removing the existing rotor, match it with a new one and check the O.D, mounting offset, and the location of the wheel stud.

By using a soft towel, wipe off the grease and dirt from the mounting surface of the hub of the bearing.

After aligning the rotor mounting screws and the wheel studs, put the rotor on the bearing hub. It should sit perfectly on the bearing hub.

Tighten them for installation on the mounting screws. But don’t tighten it excessively.


Servicing of Caliper Slide Pins Basics

Caliper Pins

Because of these pins, the caliper floats, being bolted to the mounting bracket which in turn makes the brake pads wear evenly. If one caliper slide gets rusted, it may get stuck and may cause excessive wearing of the other pad.

Pull the pin outward by grasping the pin to make it come freely out of the bracket. If they are stuck, make use of a pair of pliers and vice. Make them move backward and forward to loosen and pull them out.

Clean all corrosion and dust from the pin by using a soft towel. You can also use a brush made of wire.

Then, lubricate both the pin with silicone lube and put them back to their original position on the same hole from which they have been pulled out.

Install the pin into the mounting bracket by twisting it so as to make them move freely, otherwise, they may wear out easily and cause grooves on them.

These grooves can make the caliper come to a hanging position. This will lead to uneven wearing of brake pads.


Installation of the New Brake Pads Basics

brake pads

Brake pad components may be semi-metallic, organic, or ceramic. They have different wearing characteristics.

Before installing a new pad, match it with the old one to ensure that the backing plate of the brake pad is identical.

Some original pads come with rattle clips. If the new pads do not have, transfer the older ones to the new ones. Otherwise, they will create a clicking or popping sound when the brake is applied.

Install the caliper slides over the brake pads. Ensure that the piston is entirely retracted into the caliper.

Push the slides into the mounting bracket and tighten the bolts, one after the other. After opening the hood, locate the master cylinder and add the best brake fluid to its full level.

After completing the brake service, recheck the operation of the brake pedal. Push the brake pedal downward, slowly and allow it to touch the floor, and allow it to come back up slowly.

Don’t pump the brake quickly. After performing this cycle five to seven times, ensure that the brake pedal has normal pressure.

To check that the brake pads have mated to the rotor, take your car for a test drive and apply the brake gently while making easy stops.

Release the pedal momentarily and apply it once again while stopping.


Brake Fluid?

You won’t need new brake fluid but if you do somehow need it make sure you get the right kind.  

According to the viscosity, the brake fluids are categorized by the Department of Transportation to three classes, namely DOT 3, DOT 4, and DOT 5.

  • DOT3 is Glycol Ether Based and can absorb water from the atmosphere. It is beneficial to use because it has a high boiling point and a lower molecular weight. It is most economical for meeting to government standards
  • DOT4 is glycol-ether-based and can also absorb water from the air and should, therefore, be least exposed to the air
  • DOT5 does not absorb water and has lower chances of corrosion

Final Thoughts

Replacing the brake pads and rotors is cheaper if you do it yourself (DIY). It’s a good idea to replace both pads and rotors at the same time. You can do a complete brake pad and rotor replacement yourself if you have the tools and confidence. 

Thanks for visiting Drivinglife.net

Hybrid vs Hybrid Plug-in Fuel-Efficiency [Top 3 for 2021]


Hybrid vs Hybrid Plug-in

A hybrid car uses two or more types of power, such as an electronic motor and a gas motor. It can run on both battery and fuel. The technology came into existence in the year of 1990, and the first car was introduced in the USA in the year 2009 by Ford, a car named Ford Fusion.

The most fuel-efficient hybrids today (2021) can travel up to 50+ miles per gallon. Depending on if you want a plug-in hybrid or not, the ranges can be about the same, but fuel costs may not be. Here are the top 3 Hybrids and Plug-in hybrids.

Top 3 Fuel-Efficient Hybrids

(The mpg is the combined city and highway)

Top 3 Fuel-Efficient Plug-in Hybrids 

(The mpg combines electric and gas)

Which car would you buy? Why? It usually makes sense to me to buy a hybrid or plug-in hybrid. You get a federal income tax credit and other rebates. The fuel cost is lower in the long run, eventually helping you save money.


Why Buy a Hybrid?

Hybrid cars enjoy the benefit of a gasoline engine and an electric engine. The electric motor helps give its great mpg. A plug-in hybrid uses a battery to get even better efficiency if using mostly electric. 

Hybrid cars usually have the following:

  • Regeneration of breaking: The gear chain can be used to transfer energy into electrical energy. The exact gear chain which holds out against it. This forced resistance from the electric motor stops the vehicle as well as charges the batteries.
  • Double power: Power can be obtained from the engine or motor or both depending on driving. Extra power can be provided by an electric motor which helps the vehicle to speed up or in climbing hills.
  • Auto On/Off: The vehicle automatically shuts down and starts when the accelerator is pressed. This automation is very easy in an electric

Hybrid cars are day by day achieving good fuel economy and lower fuel loss than normal internal firing engine vehicles. This happens because of three features normally found in hybrid cars.

  • It uses two motors (a gas & an electric) to get power and efficiency even in a smaller-sized engine.
  • It can store energy in a battery to help with efficiency during braking and accelerating. 
  • It can capture energy in the battery while braking.

What is MPGe?

MPGe gas evuivalent
U.S. Environmental Protection Agency, Public domain, via Wikimedia Commons

It is how fuel-efficient your car is when not using gas. So if your car uses the battery to power the electric motor in your car, the MPGe is the electric energy equivalent to one gallon of gas. 

Hybrids are so efficient because they use electric energy and that saves money and energy. Hybrids can save you hundreds of dollars a year, and hybrid plug-ins could save you thousands, depending on your driving habits.

It makes sense to get a hybrid when you want to save money over time. Each car is different, and the cost of ownership, fuel, and insurance are all a bit different. But if you want to keep your car for a while a hybrid can help you save money on fuel costs. 


Top 3 Hybrid Fuel Efficiency

1. 2021 Hyundai Ioniq Hybrid

MPG 59 / Range ~700/ Cost $23,400

Large21IONIQHybrid
Credit – Hyundai Motor America

The Hyundai Ioniq Hybrid is fuel-efficient because it: 

  • Uses only 59 mpg of combined city/highway driving.
  • Uses regenerative braking.
  • Used more electric power at lower speeds. 
  • Can save money by lowering the amount of gas you need to buy to around $1016 a year (at So. Cal. gas prices – $4) if traveling about 15,000 a year. 

2. 2021 Toyota Prius

MPG 56 / Range 633/ Cost $24,525

2021-Toyota Prius hybrid
 Credit – Toyota Motor Sales, U.S.A., Inc

The Toyota Prius is fuel-efficient because it: 

  • Uses only 56 mpg of combined city/highway driving.
  • Uses regenerative braking.
  • Used more electric power at lower speeds. 
  • Can save money by lowering the amount of gas you need to buy to around $1070 a year (at So. Cal. gas prices – $4) if traveling about 15,000 a year. 

3. 2021 Hyundai Elantra Hybrid

MPG 56 / Range 550/ Cost $23,550

2021ElantraHybrid

Credit – Hyundai Motor America

The Hyundai Elantra Hybrid is fuel-efficient because it: 

  • Uses only 54-56 mpg of combined city/highway driving.
  • Uses regenerative braking.
  • Used more electric power at lower speeds. 
  • Can save money by lowering the amount of gas you need to buy to around $1100 a year (at So. Cal. gas prices – $4) if traveling about 15,000 a year. 

Top 3 Hybrid Plug-in Fuel Efficiency

1. 2021 Toyota Prius Prime 

133 MPGe  / Range 640 / Cost $28,800

2021 Toyota Prius Prime
 Credit – Toyota Motor Sales, U.S.A., Inc

The Toyota Prius Prime is fuel-efficient because it: 

  • Uses only 54 mpg of combined city/highway driving.
  • Uses EV mode where you can go 25 miles without using gas. 
  • It qualifies for a federal tax credit (up to $4,502) which could help you purchase it to use less fuel vs a gas-powered car. 
  • Using regenerative braking.
  • Can save you around $766 in gas a year (at So. Cal. gas prices – $4) if I drove 2/3 of the time using EV mode, at 15,000 miles a year, or about 25 miles in EV mode for every 40 miles a day of driving. 

2. 2021 Hyundai Ioniq Plug-in

119 MPGe / Range 630 / Cost $26,700

2021 Hyundai Ioniq

Credit – American Honda Motor Co., Inc

The Hyundai Ioniq Plug-in is fuel-efficient because it: 

  • Uses only 52 mpg of combined city/highway driving.
  • Uses EV mode where you can go 29 miles without using gas. 
  • It qualifies for a federal tax credit (up to $4,543) which could help you purchase it to use less fuel vs a gas-powered car. 
  • Using regenerative braking.
  • Can save you around $850 in gas a year (at So. Cal. gas prices – $4) if I drove 3/4 of the time using EV mode, at 15,000 miles a year, or about 29 miles in EV mode for every 40 miles a day of driving. 

3. 2021 Honda Clarity Plug-in

110 MPGe / Range 340 / Cost $33,400

2021 Honda Clarity Plug-In Hybrid

2021 Honda Clarity Plug-In Hybrid

The Honda Clarity plug-in is fuel-efficient because it: 

  • Uses only 42 mpg of combined city/highway driving.
  • Uses EV mode where you can go 47 miles without using gas. 
  • It qualifies for a federal tax credit (up to $7,500) which could help you purchase it to use less fuel vs a gas-powered car. 
  • Using regenerative braking.
  • Can save you around $1,400 in gas a year (at So. Cal. gas prices – $4) if I drove mostly using EV mode, at 15,000 miles a year or about 40 miles a day. 

How Charging Works With a Plug-in?

charging-works-in-hybrid-car

To get the most fuel efficiency you’ll need to charge your car each day according to the manufacturers’ specifications. This can help your car battery last longer and give you greater efficiency. 

It may take hours to all night to charge your car, so plan ahead for how you want to handle charging and think about the distance you should expect to get after charging.  

The car batteries don’t need to be charged to full, but each manufacturer will help you find the optimum levels of charging and use so you can get better battery life and fuel efficiency. 


Hybrids, Plug-in Hybrids, and All-Electric

There are three main types of cars that have great fuel efficiency. These all have their benefits and drawbacks. 

  • Hybrids switch between gas and electric motors depending on which is most efficient.
  • Hybrids Plug-ins can also switch between gas and electric motors to improve efficiency but can use electric-only for about 20+ miles if the driver wants to save on gas.
  • All Electric cars can only use an electric motor. This greatly improves efficiency but comes with the disadvantage of not being able to use gas. These cars can go long distances on electric power only. 

With the United States planning on moving toward more electric cars and the population buying more electric cars, we could start seeing bigger jumps in efficiency and lower prices on these vehicles as time goes on.


Why Hybrids Are So Efficient

  • Hybrids use batteries and electric motors. Batteries and electric motors are more efficient than gas engines. This is the main reason hybrids are so efficient. 
  • Hybrid use of computer technology to determine when is the best time to use electric power or gas power. This makes them more efficient and generally able to go very long distances. 
  • Hybrids used regenerative braking to help with the recapture (5%-9%) of energy as well. When you stop the car stores some of the energy from breaking back in the battery. (fueleconomy.gov)
  • Hybrids stop the car from idling when they come to a stop. This saves gas and electrical energy, especially when driving in the city.
  • Newer technology.
    • Some of the parts of hybrid cars may use more efficient ways to save energy. The engines tend to use much less gas, and there’s a lot of technology that goes into keeping the engine efficient.
    • The air conditioning may use less energy.
    • The frame may be lighter.
    • The car may have special arrow dynamic features.  

Features People Like About Hybrid Cars

  • Hybrid cars are a generally less-polluting vehicle
  • A hybrid car has a low value of depreciation, so if you want a good payback value it is a car to invest in
  • Hybrid cars are usually very quiet and relaxing to drive. Being on the highway the car just acts like a fuel-powered one.
  • Hybrid cars will save you money in the long term. The fuel costs at the time may determine how much savings you receive.
  • Repair costs are similar or even less (greencarreports.com) to what you would pay for a normal car. Some parts are more expensive, but some parts will last a very long time like the electric motor. 

Additional Thoughts People Have That Steer Them Towards Hybrids

Prices of fuel may be shooting up in your area. Pollution is also a concern for many people. That’s why the Tesla all-electric vehicles have sold out recently (5/21). (electrek.co)

The whole globe is talking about global warming and other calamities. So, car makers are interested in making more and more fuel-efficient and nature-friendly cars. The sale of hybrid cars has ranged between 2 to 4 percent of the market.

When you want to sell your old car, hybrid car owners have been very happy to find that their cars have held a higher value than non-hybrid of the same car. Even if fuel prices have a drop for some time, we can still count on them going back up again in the future as we see higher oil supplies worldwide, So the real value of your hybrid car’s mileage will be the same.


Final Thoughts

Hybrid cars have gained a lot of popularity over the years. This is not only in the United States but also across the globe.

Along with electric cars, these cars are considered to be among the most fuel-efficient cars today. If you have a daily commute every day, then a hybrid might be worth it for you. 

What kind of hybrid would you choose? I think the Hyundai Ioniq plug-in would be an interesting option if I were choosing one today.

Thanks for visiting Drivinglife.net


References

autolist.com/

fueleconomy.gov

cars.com

motor1.com

cars.usnews.com/

greencarreports.com