Home

Recent Posts

Automotive Product Reviews: Why They Matter?


Automotive Product Reviews

Product reviews are a big part of the automotive industry. When people purchase cars, they almost always want to make their vehicle uniquely theirs right away. Not only do they look at reviews before they buy the car, but they also look at product reviews on everything from custom light packages to stereos and bike racks to rooftop carriers.

Automotive Product reviews come from a number of sources. Magazines and now websites like Consumer Reports test a number of products to see if they live up to their claims. Several smaller blogs like this one also test automotive products as well as reviewing vehicles. Many consumers who are into a specific brand (Jeep owners, for instance) launch their own blogs to review items specifically geared for their brand of vehicle. Automotive Product reviews matter for a number of reasons, such as:

  1. Product Reviews Keep Manufacturers Honest.
  2. Product Reviews Offer Different Points of View.
  3. Product Reviews Can Highlight Unusual Applications.
  4. Product Reviews Offer Real-World Tests.
  5. Product Reviews Can Point Out Issues for Correction.

Why would someone go to the trouble of purchasing a domain name, getting a host, designing a website, and blogging about various products? Does it really make that big of a difference? The answer is a resounding “yes.” Not only do we want to know if things will work for our own vehicles, but we also want to share that information with others as well. Here are some of the reasons automotive product reviews matter so much.


Product Reviews Keep Manufacturers Honest

Most product manufacturers really want to see customers satisfied with their products, but from time to time, one will come along that makes claims that are just untrue. They will say their product has features it does not, can withstand something it cannot, or will do something for the customer that it won’t.

They Keep Manufacturers Honest

Sometimes these claims are simply exaggerated, or there are flaws the manufacturer did not catch in testing but that are showing up under real-world usage. A solid product review, one that tests the item thoroughly, keeps the manufacturer honest. If it does not live up to claims, the reviewer will discover and share those shortcomings.


Product Reviews Offer Different Points of View

The thing is, everyone looks at things differently. What might be a flaw one user would never notice or would just put up with might be a deal breaker to another. A feature that is not showcased might also be the wow factor that causes another reviewer to rave about the product. This could even be something the manufacturer thought was no big deal.

This is why either multiple reviews are important or reviews written by multiple people. A blind spot for one person will be the other’s passion point. Most manufacturers give reviewers discounted merchandise or even offer it on a trial basis for free for that reason: they want to understand how different people see things, so they can cater to new customers and clients.

Product reviews are not only important to consumers, but they also help manufacturers see and understand the consumer’s viewpoint.


Product Reviews Can Highlight Unusual Applications

They Can Highlight Unusual Applications

Even the best manufacturers can’t anticipate everything. Once a product is out in the real world, users will find new ways to use it, things the manufacturer did not anticipate or even think of.

For instance, winches were first mounted primarily on the front of vehicles for various purposes in the four-wheel drive world. They could pull out others who were stuck, be used to retrieve people and things, and even be used for self-rescue. As ATVs became more popular, people mounted them on those as well.

But in the field, users mounted winches to the side of vehicles, to the rear, and even made winch mounts that could be relocated as the need arose. This allowed for even more applications and rescue-type scenarios, along with various utility uses. Manufacturers then began to make new mounts to work with these new applications.

This started in four-wheel drive forums, with product reviews, and with users designing their own applications. This is just one product that illustrates the importance of product reviews and why they matter. In this case, they created a new market and new products.


Product Reviews Offer Real-World Tests

Want to buy a hitch-style bike rack for your SUV? Want to take it on a long trip? Which is the best one? Which ones are the most reliable? Are the more expensive racks worth the money? All of this is hard to tell from a blurb on a website or a manufacturer’s description. However, through product reviews, you can learn which products meet and exceed expectations when truly put to the test.

Also, reviewers will test different situations. One user might have taken the bike rack off-road with mountain bikes on it that are heavier and had different results than another user with road bikes on the back that went back and forth to regional races. Do kids’ bikes work on the same rack? How easy is it to take on and off? How easy is it to open the back of your SUV with it still mounted?

The answer to all of these questions comes from the real world, and the same goes for other products as well. You won’t know how something really works until someone puts it to the test in the real world. Lab tests are helpful but are not really a substitute.


Product Reviews Can Point Out Issues for Correction

They Can Point Out Issues for Correction

Not only can reviews point out flaws or shortcomings, but often these are things that are easily fixed. A simple update or sending out a new part with the next batch of products and even to people who have already purchased it can mean the difference between good and bad reviews and future purchases.

It also can increase trust in the company. If they are willing to correct issues right away, it shows their commitment to customer service and to listening to product reviews. This is one of the many reasons product reviews matter.

Whether you review products and write reviews or you simply read them before you make a purchase, automotive product reviews matter. They inform us, make manufacturers better, and even show us how products can be used in different ways than what we initially imagined. Pay attention to product reviews. Manufacturers and other customers do, and that, above all, is why they matter.

An Informative Guide to Choosing the Best Motorcycle Jacks


Motorcycle Jacks

There’s no doubt that riding a motorcycle is fun and exciting, especially when you’re cruising down a highway. Therefore, there is a growing number of motorcycle riders around the world. Another major factor why people purchase bikes is their ease of maintenance. There are several tools that would help you maintain your bike, and one of them is a motorcycle jack.

Choosing the right motorcycle jack for you can be very challenging, especially because there are several great models to choose from. However, there are a few significant factors that you need to watch out for when selecting the best motorcycle jack, such as:

  1. Ease of Use
  2. Safety Features
  3. Type of Motorcycle Jack
  4. Size and Capacity
  5. Durability
  6. Price and Warranty

In this article, we will be discussing everything you need to know about this helpful tool. To add, we have provided you with a list of our top 5 picks for the best motorcycle jacks out on the market, as well as each of their pros and cons. With so many brands to choose from, how do you pick the right one? Worry not because we are here to help you. Read on if you want to know more.

Product

(Amazon Links)

Image

(Amazon Links)
 

Black Widow Steel Motorcycle Jack

Our Detail Review

PowerZone 380047 Hydraulic Motorcycle Jack

Our Detail Review

Extreme Max Motorcycle Scissor Jack

Our Detail Review

Dragway Tools Motorcycle Center S​​cissor Lift Jack

Our Detail Review

APlusLift Air Operated Motorcy​​cle Lift

Our Detail Review

ADS

What Is a Motorcycle Jack and Why Is It Important?

A motorcycle jack is equipment that you can use to elevate your motorcycle from its resting height to a lifted or upraised position. This tool can be used either with hydraulics or compressed air and, sometimes, a combination of these two. You will find later in this post that there are also several types of jacks designed to accommodate specific repairs, weights, and types of bikes.

Motorcycle jacks also come in different forms. Some can be maneuvered easily with their attached wheels, while others are already fixed in their position. However, modern versions of motorcycle jacks now come with a wheeled base, a flat platform that can move up and down, and a hydraulic system that you can use with a hand-powered lever.

A motorcycle jack can be very useful, especially if you are performing regular maintenance on your bike. It is used to service, repair, and store almost every type of motorcycle. If you have one in your garage, you will find it a lot easier to work on and maintain your motorcycle. Some, however, have wheels that allow you to store your bike easily in the garage.

You might have wondered why a lot of riders prefer to service their own bikes. The answer is very simple. You can save a lot of money if you do this task on your own. You will not have to pay a mechanic if you need to get the job done on your bike. To add, it does not matter whether you are just a beginner or an expert; getting a motorcycle jack is a must for every motorcycle rider.


Factors to Consider When Choosing a Motorcycle Jack

Choosing the right motorcycle jack for you can be very challenging, especially because there are several great models to choose from. In this section, we will discuss some of the most significant factors you need to watch out for when selecting the best motorcycle jack. Hopefully, we will shed some light to help you make an intelligent buying decision.

AD

1. Ease of Use

As with any other equipment or tool, ease of use is a very important factor to consider. Like all the other items that you may have in your garage, a motorcycle jack should be straightforward and easy to operate. In addition, make sure that the manufacturer provides detailed instructions on how you can make the most out of it.

When choosing a motorcycle jack, you should check whether it operates on a hydraulic system and if it has a foot-operated pedal. With these features, you only need to exert pressure on your foot to elevate your motorcycle to the target height.


2. Safety Features

Mishaps can happen while you are repairing your motorcycle. Improper use of this tool can cause serious injuries or death. It is very important that you pay attention to the jack’s safety features, as it will give you peace of mind. When choosing, it must be stable on the surface, and ensure secure straps will keep your bike in its place.


3. Type of Motorcycle Jack

You may choose between these two types of motorcycle jacks: hydraulic and scissors. A hydraulic motorcycle jack, proven to be a more popular choice because of its ease of use, can be operated using a foot pedal. On the other hand, a scissor motorcycle jack comes with a crisscross pattern, which supports the top when lifted.


4. Size and Capacity

When selecting a motorcycle jack, make sure that you also consider the size of the room where you will place it. To add, you must measure your bike to know if it’s the right fit. Lastly, check the weight of your motorcycle, and make sure that it is within the range of the jack’s weight capacity. Most of them range from 1,000 pounds to 2,000 pounds.


5. Durability

As with any other product, a motorcycle jack’s construction is another important factor to consider. Make sure that it is made of durable materials, which may vary from aluminum to steel. In addition, make sure it is lightweight, so it will be easy for you to move it around your garage. Lastly, it must be strong enough for you to make the most out of it for a long time.


6. Price and Warranty

Be wary of the motorcycle jack’s price, as it does not necessarily equate to its quality. One way to address this is to check the features that you will most benefit from and relate them to the price. It is highly recommended that you choose one that offers at least a year of warranty. With this, you can return the product when it becomes defective if it’s still within the warranty period.


Our Top Picks for The Best Motorcycle Jacks

Still clueless about which motorcycle jack to buy? Worry no more because, in this section, we will provide you with our top recommendations, with a detailed review of their best features, pros, and cons. We hope that you will be able to at least narrow down your choices to choose the best motorcycle jack on the market. Here are some of them:


1. Black Widow Steel Motorcycle Jack

AD

The Black Widow motorcycle jack is very easy to use and lets you accurately adjust it to your desired height. It can also be screwed onto the floor of your workshop or garage due to the holed base and 2 pre-drilled brackets on the base of each side. This design significantly enhances stability while allowing you to lift even the heaviest motorcycles.

Another great feature of the Black Widow motorcycle jack is that it has a slip-resistant platform, big enough to store big motorcycles such as touring motorbikes or choppers. It also comes with removable frame adapters that have rubberized pads. With this, you can lift your bike without accidental scratches.

While it only weighs 28 pounds, it has the capability to raise a motorcycle of up to 1,100 pounds. Its lifting range is from 3.75 inches to 16.25 inches, allowing you to access hard-to-reach areas of your bike, especially during replacement or repair. In addition, its frame adapters allow you to lift your bike for up to 19.5 inches.

Pros:

  • Durable and easy to use
  • Offers stability during maintenance or repair
  • Has a slip-resistant platform
  • Equipped with removable frame adapters
  • Can avoid unwanted scratches
  • Can lift bikes of up to 1,100 pounds
  • Can elevate bikes up to 19.5 inches
  • The brand offers a 1-year warranty.

Overall

While the weight capacity is limited to only 1,100 pounds of motorcycle weight, the Black Widow motorcycle jack still is a great bang for your buck due to its several features, including its non-slip platform and removable frame adapters.


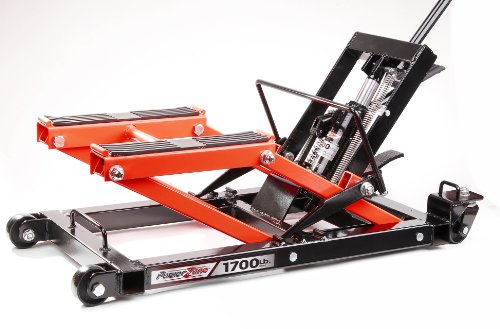
2. PowerZone 380047 Hydraulic Motorcycle Jack

AD

When maintaining or repairing a heavy bike, it is a requirement that your chosen motorcycle jack is able to handle the pressure and is strong and sturdy enough. This is where Milestone Tools’ PowerZone 380047 motorcycle jack can come in handy, with its 1,700-pound weight capacity. It is also a very powerful piece of equipment trusted by professionals.

When retracted, this motorcycle jack measures 4.5 inches tall and has the capability to be raised up to 14.5 inches in height. Now, many workspaces are available for you if you need to get under your motorcycle. Another great feature of this motorcycle jack is that it has a food-activated hydraulic pump, which means that using this tool will certainly be hands-free.

It is also equipped with a multi-positional safety lock that improves security and safety. In addition, its lifting pad is rubberized, which prevents your bike from incurring any unwanted damage.

Pros:

  • Has a 1,700-pound weight capacity
  • Made of durable materials
  • Features a foot-operated hydraulic pump
  • Easy and safe to use
  • Can prevent overloading

Overall

The PowerZone Hydraulic motorcycle jack, with its impressive 1,700-pound weight capacity, has also been proven valuable to many consumers because of its ease of use and durable construction.


3. Extreme Max Motorcycle Scissor Jack

AD

The Extreme Max motorcycle jack is one of the most reliable scissor jacks in terms of stability, strength, and durability. It can withstand varying temperatures and harsh weather conditions. It also has the capacity to lift 1,100 pounds of motorcycle weight. To add, its lifting range is from 3.37 inches up to 14 inches tall.

Pros:

  • Strong, stable, and durable
  • Can endure harsh weather conditions
  • Can accommodate 1,100 pounds of motorcycle weight
  • Can lift bikes up to 14 inches

Overall

As with similar products on this list, the Extreme Max motorcycle jack boasts its 1,100-pound weight capacity, durable construction, and lifting range of up to 14 inches.


4. Dragway Tools Motorcycle Center Scissor Lift Jack

AD

Another great scissor jack on this list is the Dragway Tool motorcycle jack, equipped with a wide and stable platform that measures 16×10 inches, suitable for any surface to work on, including concrete and sand. It can lift bikes of up to 1,100 pounds, and the lifting range is up to 13.25 inches. It also comes with rubberized pads, making it non-slippery and safe to use.

Pros:

  • Easy and safe to use
  • Equipped with rubberized pads
  • Can support up to 1,100 pounds of motorcycle weight
  • Can lift up to 13.25 inches
  • Offers a wide and stable platform

Overall

While you may encounter difficulty in finding replacement parts for this model, it still is a great buy because of its features, including rubberized pads and ease of use.


5. APlusLift Air Operated Motorcycle Lift

AD

The APlusLift motorcycle lift is another great choice, as it features a stable scissor frame that also comes with precise pivot shafts and durable gauge steel. To add, it has strong and durable paint that will be able to withstand extreme weather conditions. Lastly, it can accommodate up to 1,500 pounds of motorcycle weight.

Pros:

  • The brand offers a 2-year warranty on parts.
  • Offers stability
  • Comes with precise pivot shafts
  • Has durable paint
  • Can lift up to 1,500 pounds of motorcycle weight
  • Air-operated

Overall

Even though some find it too narrow on the sides, probably the best takeaway from the APlusLift motorcycle jack is the brand’s 2-year warranty on parts. With this, you can always return it to the manufacturer in case it becomes defective within the warranty period.


Conclusion

More and more motorcycle enthusiasts now realize the importance of having a motorcycle jack in their garage because of its benefits, especially during maintenance and repair. With this, we have provided you with everything there is to know about choosing the best motorcycle jack, and we hope that you can now make an intelligent buying decision.

How to Charge Your RV Battery While Driving?


RV Battery While Driving

A discharged Recreational Vehicle battery or any energy source that gets used up quickly can be a huge problem for RV owners. It can ruin the hassle-free experience that your RV promises and, at the same time, limit its functionality.

To charge your RV battery while driving, start off with the Voltage Controlled Relay or VCR. Organize the connections where the relay disconnects and parallels the start and auxiliary batteries instantly. Connect your RV battery to your vehicle’s power source, which is a battery too. Make sure you use high-quality plugs and cables when doing this process. Also, use rubber boots to slip on the breakers in order to insulate from any short circuits.

To help newbie RV owners overcome this issue, here is some information you need to know on how to charge your RV batteries while driving. But before we go there, you must familiarize yourself with some vital information about the battery of your camper or mobile home. You first need to know the important features and characteristics of your RV’s battery in order to unleash its maximum potential.


Features You Ought to Know About the Battery of Your RV

Your Recreational Vehicle house battery is a 12-volt power system. It generally supplies the energy that your mobile home needs. It is a deep-cycle battery that is designed to store huge amounts of energy, making it effective in providing the energy that your RV requires. It is the heart of your RV, pumping energy to your mobile rig and allowing all the electrical appliances and devices to work efficiently.

Features you ought to know about the battery of your RV

Without your 12-volt RV battery, your devices will not function, save for RVs with an alternative source like a solar panel and wind power source. But then, even those with alternative power sources will sometimes need a battery to quickly start or boost the energy need of your RVs. With the RV battery on the sideline, all the comfort and convenience that your RV promises will be eliminated.


How Do You Store Your RV Battery the Right Way?

To keep your RV battery always in tip-top shape, you must store it correctly and properly. When your mobile home is going to stay in your garage for a long time, normally, your RV battery will also be left unused for the entire, say, winter. It will sit there unused until such time you are ready to use your RV again. So, you must know how to keep your RV battery the right way.

RV batteries usually self-discharge when left idle and unused for a long period of time. This process, however, is dependent on the condition of the weather and the type or kind of battery you have. Thus, it is important to learn and know the right way to store your battery. This will keep your battery from being unresponsive, capable of storing huge amounts of energy, and at the same time, extend its battery life.

How do you store your RV battery the right way

Before you store your RV battery, charge it to 100 percent. Then, disconnect your battery from the vehicle to avoid any parasitic loads like watches, stereo, TV antenna power boosters, and alarms. After which, remove all grime, corrosion, and residues, and always wipe dry the top of your RV battery. This will eliminate the possibility of being discharged or remove discharge paths. Use a wire brush when the terminals are fully corroded.

Check the electrolyte levels and replenish the distilled fluids when needed. Keep the water level at 90 percent; otherwise, it will expand when charged and overflow. Store your battery in a cool, dry place, with a temperature not lower than 32°F (0°C) or higher than 80°F (27°C). When your RV battery gets frozen, never ever attempt to charge it – It will definitely explode. And not only do you need to get a new battery, but you may also end up getting hurt too. Make sure that the location you choose to store your RV battery does not get flooded too.

Remember, when you are going to store your RV battery for a long period of time, make sure to check it regularly and recharge it at least once a week.


How Do You Charge Your RV Battery While Driving?

After familiarizing yourself with your RV battery, you need to learn how to charge your RV battery while driving. You need to know the right approach and enjoy your road trip or camping more.

How do you charge your RV battery while driving

First off, start with the Voltage Controlled Relay or VCR. Organize the connections where the relay disconnects and parallels the start and auxiliary batteries instantly. VCRs automatically disconnect and parallel your auxiliary and start batteries. When your relay is closed, the two batteries are paralleled. When the truck starts, the relay opens. Then the trailer and truck batteries become disconnected when you turn the truck off, putting the voltage to a preset level.

Connect your RV battery to your vehicle’s power source, which is a battery too. It is strongly advised that you use high-quality plugs and cables when using this process. These high-end plugs and cables are capable of carrying a huge amount of energy, provide a more reliable and stable connection, and greatly reduce voltage drop while maximizing the charging process of your RV battery. Moreover, having a stable and secure connection will keep it from being disconnected while traversing a rough terrain when going to your destination. Make sure you have securely connected your RV battery to your truck’s battery; otherwise, you will end up having a depleted RV battery on your camping trip.

Consider also using rubber boots to slip on the breakers in order to insulate from any short circuits. A 50amp automatic reset circuit breaker which you can put on the positive side, can eliminate any possible fire hazards.

Do not overcharge the battery of your RV. When you accidentally overcharge your RV battery, always inspect the level of the electrolytes and add distilled water when needed. Check your batteries frequently, especially during extreme weather conditions.


Final Word

Charging the battery of your recreational vehicle is not a daunting task. Follow the basic steps, and you can now recharge the house battery while driving to your destination. You can also use this concept when your RV is being towed. You just make sure that you have completely comprehended the vital characteristics of charging your battery while driving.

And while you are at it, always remember to get yourself reliable, high-quality plugs and cables in order to have a more secure connection, full energy transfer, and reduce the incidence of voltage drop.

Things To Do To Maintain Your Own Car


Maintain Your Own Car

Automobiles have evolved from luxury to a necessity owned by the majority of individuals. In countries with a thriving economy, up to 88% of the population owns a car of some sort. Moreover, car possession has become extremely convenient because you can easily buy and sell cars online, in addition to the conventional methods, i.e., through dealerships and private transactions.

Amidst all the benefits of owning an automobile, it is imperative to maintain your car if you wish to enjoy it for a long time. Frequent automobile care extends the lifespan of the vehicle and keeps it running smoothly without any safety concerns. By keeping your vehicle in its prime condition through regular maintenance, you can also retain the optimal value when you wish to sell your car. Here is the list of X things to do to maintain your car:

  • Check the Tires
  • Change the Oil
  • Clean and Fix the Windshield, Mirrors, and Lights
  • Change the Air Filter
  • Keep the Interiors Clean
  • Check the Fluids
  • Keep Emissions Under Control
  • Check the Battery

We have compiled a list of comprehensive maintenance tips to keep the operational performance and aesthetic integrity of your car intact:


Check the Tires

You should regularly check the tire pressure as it not only affects the comfort, safety, and handling of the car but also influences fuel efficiency. Improper inflation of tires can hinder the ability of the wheels to stop correctly and increase the probability of a flat tire.

You can check the tire pressure every week, but experts recommend doing it every time you fill-up the gas. Frequent monitoring will allow you to catch any issues immediately, as tire pressure undergoes constant changes due to temperature fluctuation and mileage accumulation. The manufacturer’s manual specifies the recommended tire pressure.

In addition, you should rotate the tires every 5,000 to 10,000 miles. Regular rotation of the wheels ensures that all the tires have an equal wear pattern, extending the lifespan of the wheels.

Finally, replace your tires when they become worn beyond reasonable limits to avoid any accidents.


Change the Oil

When to Consider an Oil Change
Via: https://www.youtube.com/watch?v=O1hF25Cowv8

Oil is a vital component of your car, which ensures that your engine runs smoothly and soundlessly. Motor oil lubricates the moving parts of your engine to avoid grinding and friction.

Check the oil level regularly, at every other gas fill-up or once a week, and top up the quantity as required. You should also get your oil changed every 5000 miles or less to maximize engine efficiency, increase fuel economy, and reduce emissions.


Clean and Fix the Windshield, Mirrors, and Lights

A dirty windshield is a safety hazard as it can obscure your view while driving, and it looks unpleasant as well. Therefore, wipe your windshields clean with a sponge and cleaning fluid regularly, depending on how many miles you log in the day, what is your daily route, and where you park the car.

The windshield wipers need replacement once a year, as they become worn out with use. Torn wipers are unable to perform adequately during the rainy season and can pose a safety threat, especially if you are driving in a downpour. You can replace only the wiper blades or the entire assembly, depending on their condition.

In addition, you need to keep your front and rear view mirrors clean since they provide an essential all-encompassing view of the road necessary for safe driving. Fix any mirrors broken in an accident immediately and give them a regular wipe for an unobscured sight.

Finally, the light fixtures on your car have important jobs and should not be overlooked during regular maintenance. To ensure that they are all in perfect working condition, ask a friend to go around the car while you switch on each light. Replace any broken or faulty bulbs immediately, especially the headlights. You can do it yourself in a few simple steps.


Change the Air Filter

Air filters are equivalent to lungs for your car. They help filter any debris, particles, or other contaminants from the air entering the engine. Consequently, they can gather a lot of dirt with time. Regularly replacement of air filters improves fuel efficiency, increases the lifespan of your engine, improves acceleration, and reduces emissions. If you fail to replace the filters, you can cause your engine to fail and damage your combustion system.

Change your air filters every 12,000 miles, or better yet, assess the integrity and condition of the filters and replace them if they are too dirty, even if you have not met the recommended mileage.


Keep the Interiors Clean

use car vacuums
Via: http://rightandclean.com/car-interior-cleaning/

Dirty car interiors do not affect the functioning of the vehicle’s mechanism. However, it can significantly compromise the resale value. Remove any trash that may have been discarded in the car, vacuum the seats and interiors, and wash your floor mats. Wiping away the grime and debris will not only make the ride more enjoyable, but it will also save you from any embarrassment if you have to give a lift to unexpected passengers!


Check the Fluids

Your car employs the use of various fluids to provide you with a smooth, soundless ride. These include transmission, power steering, brake, windshield washer fluids, and coolants. Check these fluids once a week and replace or top up as needed.


Keep Emissions Under Control

The emission system runs the entire length of the car and helps in removing the exhaust away from the engines and the passenger cabin. Since it is situated at the bottom of the vehicle, it can accumulate a lot of dirt and scrapes. To ensure that your car runs efficiently and the emission levels are under control, get the system checked at least once every year.


Check the Battery

Assess the battery once a month to look for signs of corrosion or mineral buildup at the terminals. If you notice any accumulation, clean it with a brush designed specifically for this purpose or get it cleaned professionally. This helps prolong the battery life. However, batteries do eventually get old and require replacement.


Conclusion

Car maintenance is not a very cumbersome or time-consuming process, especially if conducted routinely. You can perform the necessary inspection yourself or take your car to a mechanic if you notice an issue that requires specialized tools and professional expertise to fix. Routine maintenance will keep your vehicle in prime operating condition and will also save you from spending thousands of pounds on a complete breakdown of your car.

Tips on Keeping Your Carpet Clean


Keeping Your Carpet Clean

Everyone knows how expensive a carpet is. So if you want to maximize your investment for a long time, you should know how to maintain your carpet and keep it clean. However, maintaining your carpet by keeping it clean can be a little more challenging, unlike tiled floors. Tiled floors can be cleaned easily with a broom, vacuum, and a map, while carpeted floors are more complicated to clean.

Whatever type of carpet you have, regular cleaning is always the best thing to do to extend its life. Take a look at these tips below on how to keep your carpet clean and smelling great.

  • Establish a “No Shoes Inside” Rule
  • Keep a Clean Rug by the Door
  • Use Baking Soda
  • Vacuum Well Regularly
  • Clean Spills and Stains Right Away
  • Treat Areas with High-Traffic More Often
  • Elevate Your Furniture

Establish a “No Shoes Inside” Rule

This rule may seem easy to establish in your family, but it can be a little awkward when it comes to visitors. If you find it awkward or a little rude to ask your visitors to keep their shoes outside, you can put a shelf by your door where visitors can leave their shoes and wear indoor slippers. Establishing a “no shoes inside” rule will help you decrease the amount of dirt, toxins, and germs that will stick to your carpet. You can also reduce the wear and tear on the carpet’s fibers.


Keep a Clean Rug by the Door

Sometimes, kids just love to hang out and play outside barefoot. However, the crucial part comes in when they enter the house and wipe their feet on your carpet. Can you imagine how your carpet would end up, especially if it’s wet outside and their feet are covered with mud? If you can’t stay on guard every time they enter the house from going barefoot outdoors, be sure that you always have a clean rug in and out at each exterior door of your house so they can wipe off their feet. This trick works with some visitors, too, if they are too stubborn to leave their shoes outside.


Use Baking Soda

Sprinkling a baking soda over your carpets before vacuuming will get rid of its foul odors. Put more baking soda over the areas with a strong scent that is sometimes caused by pets’ urine or poop.


Vacuum Well Regularly

Vacuuming regularly will help you keep the dirt from grounding in, which is harder to get rid of over time. Vacuum at least once or twice a week to get rid of the large particles, which can also stick to the pet’s coat and the child’s feet. By the time of your scheduled day to vacuum, the dirt from outside has already spread on your entire house. The more you vacuum, the better.

When it comes to the carpets inside your car, you can use car vacuums on the market as often as needed. If you have kids, you should use car vacuums more often than needed.

use car vacuums
Via: https://www.youtube.com/watch?v=2MaPT-cOagc


Clean Spills and Stains Right Away

The longer you leave spills on your carpet, the harder it gets to be removed. The stains caused by spills can become your permanent enemy if it’s left untreated. If you have food spills on your carpet, scrape it toward the middle and onto a towel or tissue to keep it from spreading further on your carpet. Once you get rid of the solids, treat the stain by spraying a mix of hot water with detergent on the stain. Let the mixture sit for 5 – 10 minutes before you remove it for good.

You can also buy stain removers on the market if you’re uncomfortable with using a DIY stain remover.


Treat Areas with High-Traffic More Often

Your kitchen and hallway are the areas of your house with the highest traffic. Thus, these areas tend to compile more dirt than other parts of your house. Instead of cleaning your carpet in these areas only once a week, clean it more often.


Elevate Your Furniture

Furniture often leaves rust or stains on damp carpets over time due to metal casters or paint, so keep it elevated. You can put wood blocks under each leg or even plastic film. Inserting rubber on each leg of your furniture can also work to avoid stains.


Conclusion

Whether you use a DIY carpet cleaner or not, regular cleaning will take care of the dirt on your carpet. Just be sure to use antibacterial solutions, too, so you and your kids are safe to roll on your carpet anytime they want. If you can’t make time to keep your carpets clean, you can always call the professionals and let them do the dirty work.

How to Repair Rust on Your Car Without Welding: An Easy Fix Anyone Can Do


Repair Rust on Your Car

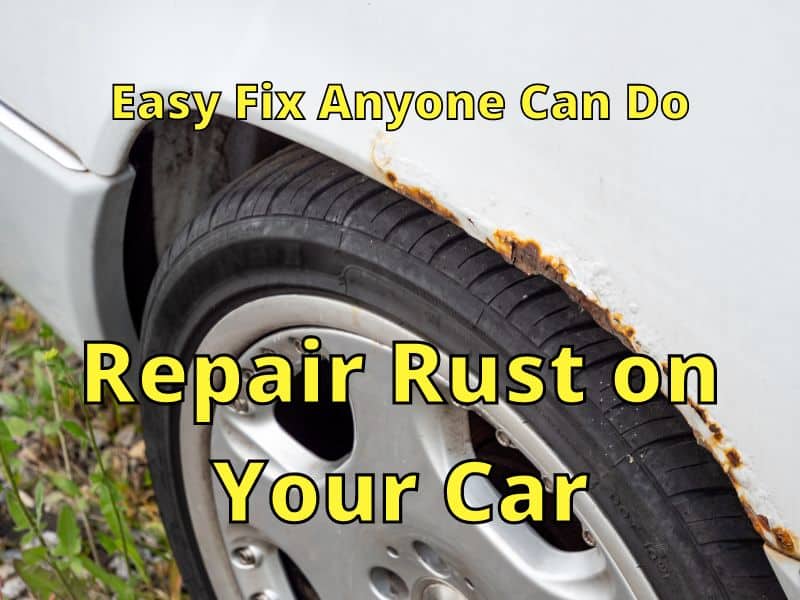
The contact between water and bare metal leads to the formation of rust. If you do not act as soon as possible, rust will consume the metal. This is not only unsightly, but it is also going to compromise structural integrity. In most cars, if the damage is too much, you need to replace the sheet that has been damaged. If the problem is not that severe, it can still be saved.

Repairing rust on your car without welding might seem like a tricky job that is reserved for experienced mechanics, but it is actually quite easy. All that you need is to have the right materials, as well as a little time and effort to spare for the task. Here are a few steps you need to follow to repair rust on your car without welding:

  1. Remove the rust using an adhesive remover spray.
  2. Fill the area using a body patch to fill the holes.
  3. Smooth out the filler with sandpaper.
  4. Start painting.

Things You Need to Follow this Tutorial

Before we start discussing the steps, get ready with the materials that you will need to complete the process of rust removal:

  • Sandpaper
  • Spray paint
  • Primer
  • Eye protection
  • Gloves
  • Dust mask
  • Filler
  • Hammer
  • Adhesive remover spray
  • Rust remover
  • Undercoating
  • Body patch

Step-by-Step Guide on How to Repair Rust on your Car Without Welding

As it will be shown in this section, there are four simple steps that you have to follow. They are pretty much basic and can be completed without the need to ask for a helping hand. It can help you save hundreds or even thousands of dollars!

Watch the short video below for a visual guide to the steps that you need to follow:


1. Remove the Rust

The first thing that you have to do is to take out the rust on the surface. To do this, use an adhesive remover spray. Apply liberally on the part that you have to treat. This will eliminate the wax dirt or oils on the surface, making sure that the metal underneath the rust will not be contaminated.

Now, grab your sandpaper and start working on the rust. Use 80-grit sandpaper. In case you do not know, if the grit number is smaller, this means that it is going to be more aggressive. If you want to apply more pressure, I also suggest that you use a sanding block. This is easier to hold. When doing this, see to it that you are wearing your dust mask.

If the rusted part is near a non-rusted portion, remove it first. You won’t want to touch any part that does not have a problem.

Remember, if there is rust on the outside, chances are, it is also rusted on the inside. Jack it up first and work on the inner part of the car to remove the rust as well.


2. Fill the Area

Once you are finished sanding, the next thing that needs to be done is to add a filler. But before doing this, hammer the area that you have sanded. This is going to flatten the surface, making it easy to be filled. This is also going to make the panel stronger.

Apply a rust reformer to deal with any rust that you might not have removed from sanding. It provides a chemical bonding that will make the surface paintable. Apply an undercoating afterward.

Use a body patch to fill the holes. As shown in the video above, for this guide, we have used a stainless steel mesh. Place it behind the body panel, which will provide the support needed by the filler. Apply an adhesive remover to clean the area.

Fill the Area
Via: https://www.learnautobodyandpaint.com/chemicals-rust-repair-how-to-fix-rust/

Now that the area is clean, you can proceed with applying body filler. Here, we are going to use a body filler that is infused with fiberglass. Gold body filler is also used. Mix filler and hardener. Follow the instructions from the manufacturer to be sure that you are doing this the right way. Apply a layer of filler on the surface. You do not need to make it perfect since the first filler is basically just for strength.

Apply the gold filler. Here, you need to be more careful to be sure that it is going to end up smoothly.


3. Smooth Out the Filler

Provide the filler with enough time to dry. Once it has dried, you can now proceed to sand. Sand not only the surface but also the edges. Start with 80-grit sandpaper and, eventually, transition to 180-grit sandpaper, which is finer and less aggressive. This is going to smoothen the surface and make it blend well with the other part.

Touch the surface that you have sanded. If you can feel bumps, this means that you still have to keep on sanding until it is finally smooth. Wipe it down and blow any dust before you proceed.


4. Paint

Once the surface is sanded and smooth, you can now go to the next step, which is painting. This is crucial as it is going to restore the original look of the part that was once damaged. Be sure to look for paint that matches the color of the rest of your car.

Start with the application of a primer. Let the primer dry and start painting. This can be quite challenging, which is why some people opt to bring their car to a paint shop. This won’t cost too much at all since you have already done the initial work. Once it is painted, your car will end up looking good without any sign of rust!


Pro Tips

Repair Rust on your Car Without Welding

Here are other important things that you have to keep in mind:

  • Treat the rust as soon as possible while it is still small. The longer you wait, the larger the damage will be and the more difficult it will be to treat.
  • Do not focus only on the front part of the car. Treat the back part as well. Otherwise, rust will just spread, and your effort will be wasted.
  • To prevent your vehicle from rusting, a regular wash is important. Use a pipe cleaner to clean rainwater. Salt, grime, and dirt can speed up the process of rusting, so get rid of them!
  • When the rust problem is severe, do not try to have it saved. Instead, opt for replacing the entire part, as this is a more viable solution.

Conclusion

By now, I hope that you are already aware of how to repair rust on your car without welding. As shown above, there are basically four steps – remove, fill, sand, and paint. It is an easy job that can be done by almost anyone. No need to spend a fortune to make your car look good!