Home

Recent Posts

How to Make a Motorcycle Seat Even if You’re Not a Pro


A Motorcycle Seat

Even though there are a lot of design schemes for motorcycle seats that you can purchase on the market, sometimes you just want to deal with the trouble yourself. What’s best about that is that you do not have to be a handyman to do this task. After all, making your own motorcycle seat is a lot easier and cheaper than you think.

Making a customized seat for your motorcycle is a simple and fun thing to do. Here are a few easy steps you need to follow to make a motorcycle seat, even if you’re not a pro:

  1. Take the Current Seat Off
  2. Take the Side Covers Off
  3. Take the Seat Off
  4. Get Your New Motorcycle Seat
  5. Create the Outline of the Frame
  6. Cut the Outline
  7. Add the Seat’s Padding
  8. Get Creative with Upholstery
  9. Mount the Seat

In this post, we are going to teach you how to make a motorcycle seat. It is important to note that when customizing your motorcycle, you don’t have to settle for standard seats. You may opt to use quality seats that come with dense foam padding, making your ride very comfortable even for long hours. Follow this tutorial to learn how to make a seat fitted to your bike.


Things You Need to Follow This Tutorial

Before we begin this tutorial, make sure that you have gathered all the materials that you will need to make a motorcycle seat, which includes the following:

  • Duct tape
  • Padding
  • Cardboard
  • Jigsaw
  • Periscope attachment
  • Plywood
  • Sharpie
  • Socket set and extension
  • Nails

Step-By-Step Guide On How To Make a Motorcycle Seat

Making a customized seat for your motorcycle is a simple and fun thing to do, and we are here to guide you through the process. Here’s what you should follow:

make a motorcycle seat
Via: https://www.bikebandit.com/blog/motorcycle-seat-buyers-guide


1. Take the Current Seat Off

Once you have prepared the socket set and extension, you may now begin the process of making your own motorcycle seat. It might also help you if you have a periscope attached to your neck. It is also important to note that the fasteners that you are going to use should be dependent on the model of the motorcycle you are customizing.

You may now get rid of the bolts that hold the seat of your motorcycle. Even though you may find it extremely difficult to do, you can do it. After that, you need to take out the bolts which hold the back fender. While not a requirement, it can be quite helpful at times.


2. Take the Side Covers Off

In order to get rid of the bolts holding onto your bike’s seat, you need to remove the side covers first. You may choose to permanently remove these covers, or you can reattach them once you have mounted the seat in its place. Just remember to keep your washers and bolts in a safe place while you are working on this step, so they would not get lost.


3. Take the Seat Off

Once you have completed the above steps, you are now ready to take the seat off. First, remove the mounting bolts and then apply pressure on the low part of the bike’s seat, which is usually near the front portion. Then, you need to take hold of your motorcycle seat’s tail and pull it back up. It is vital that you pin down the seat’s nose, especially if you are rotating the back portion.

After doing these steps, the motorcycle’s seat will finally come off. You might also notice that putting it back on is a lot easier than removing it.


4. Get Your New Motorcycle Seat

Get your new motorcycle seat
Via: https://www.youtube.com/watch?v=8nVyPiPvR2g

In choosing a new seat for your motorcycle, you first need to know where the best place is for your rear. Just because the seat that came with your bike is thicker than your new seat, knowing the most comfortable place is very important. To do this, you may want to take several laps while settling in a variety of positions, taking note of the place where your rear wants to sit naturally.


5. Create the Outline of the Frame

Position the cardboard on the frame and trace an outline onto the cardboard from underneath. You are going to need the plywood to support the base, but you might not get an accurate measurement using this material. You may not cut the sketch that matches the seat, and using a sharpie, mark the mounting holes and cut them out from underneath.

You might be wondering how you are going to mount the seat on your motorcycle. As the plywood is straight and your bike is not, there’s no doubt that the stock mounting holes will not work. What you can do is use the holes found at the tank and the ones found in the back near the fender. Doing this will provide you with two mounting points.


6. Cut the Outline

Using a woodcutting blade and a jigsaw, you may now trace the template onto the plywood and cut the outline. If you are not comfortable using these tools, we recommend that you find a friend to help you out.


7. Add the Seat’s Padding

You may use 2 whole layers of carpet for the bike seat’s padding. Using the template, you have created, cut the padding to fit your seat. Don’t forget to leave a little overhang on the sides! Stapling the foam to the plywood will hold it in its correct place. Also, you need to glue the second layer of carpet onto the first. After, cut 2 strips of padding, long enough to cover the corners and edges.


8. Get Creative with Upholstery

You can now use duct tape to hold the padding securely onto the base and make sure to cover all the padding. You may want to leave the black tape if you prefer the look. However, if you want to get professional help, you need to go to a motorcycle shop.


9. Mount the Seat

Place the seat onto the bike and sit on it, making sure that it feels right for you. Underneath the bike, you need to mark the locations where the pins are going in just by pressing the nails to the duct tape. This step is important as it makes sure that your seat can easily be installed and removed, as well.


Tips on Making a Motorcycle Seat

  • Precisely measure the length, depth, and width of your customized motorcycle seat and make sure that it feels right when you sit on it.
  • You may draw your design using a pencil and paper. You may also plan the design of your seat using the software. Doing this ensures that your desired seat suits the look of your bike.
  • If it suits your taste, you may choose to add leather upholstery.

Conclusion

Making your own seat for your motorcycle is a very simple and fun thing to do, especially on the weekend. And following this guide will surely help you do this task easier and with accuracy. You just need to remember to gather the materials before you begin, as it can also save you a lot of time.


How to Remove a Crankshaft Pulley in Your Car: The Easy Way to Do It


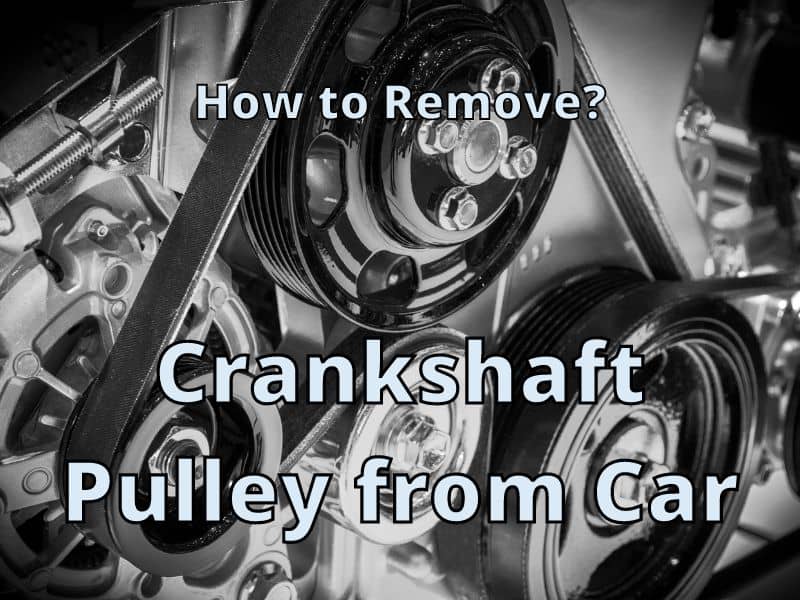
Crankshaft Pulley from Car

Your vehicle’s crankshaft pulley is a mechanical system responsible for power distribution in your car. It is a wheel-shaped device that is connected directly to your vehicle’s crankshaft and other car components through accessory belts. It transmits torque, as well as mechanical power, via the pulley system to your car’s alternator or steering pump.

Once you are determined to finally change your vehicle’s timing belt, you must first know how to remove a crankshaft pulley in your car. Here are the simple and easy steps that you should follow for the quick removal of the crankshaft pulley in your vehicle:

  1. Locate the vehicle’s crankshaft pulley.
  2. Get ready to disassemble your vehicle’s wheel.
  3. Disassemble the bolt.
  4. Disassemble the crankshaft pulley.

In this article, we are going to talk about the proper and easy way to do it. Read on if you want to successfully remove the crankshaft pullet in your vehicle.


Things You Need to Follow This Tutorial

First, gather all the tools and materials that you will need for the removal of the crankshaft pulley in your vehicle, which includes the following:

  • Impact wrench
  • Puller kit
  • Lug wrench
  • Car jack
  • Bolt remover tool

Step-By-Step Guide on How to Remove a Crankshaft Pulley in Your Car

Here are the simple and easy steps that you should follow for the quick removal of the crankshaft pulley in your vehicle:


1. Locate the Vehicle’s crankshaft Pulley

Obviously, the very first thing that you must do is to find the crankshaft pulley’s location in your engine to determine which component will be removed. Generally, it can be found on the engine compartment’s left side or the driver’s side. Other times, it may be hiding at the bottom front portion of the engine.


2. Get Ready to Disassemble Your Vehicle’s Wheel

disassemble your vehicle’s wheel
Via: https://www.dreamstime.com/stock-photo-man-holds-brake-disc-car-removed-wheel-image74018343

Using a lug wrench, you must slacken these lug nuts off the wheel that you wish to remove. This is a step that you should do before raising your car’s wheel over the floor’s surface. If you did not, the wheel is likely to just turn once you apply some pressure on your lug wrench.

If you have a standard transmission, you can leave it in gear, and it will be locked. However, for an automatic transmission, which most of you have, the engine might just keep spinning along. Thus, preventing you from getting rid of the bolt. In this case, you will need an impact wrench.

If you do not have an impact wrench, you would want to ask for a mechanic’s help to just loosen the bolt. They do make electric impact wrenches for getting these bolts off. However, while they do not work quite as well, this electric impact wrench usually gets the bolts off.

Place your car’s transmission lever to “park,” and with the use of a car jack, raise your car’s wheel. You would want to place the jack stand right under the car’s frame, which is situated close to the wheel that you will be removing. Lastly, lower your vehicle once it has settled into the stand. This way, removing the crankshaft pulley will be a lot more secure and safe.


3. Disassemble the Bolt

Once you have gotten rid of the bolt, you would want to get the pulley off. However, you will not be able to do that easily, as it is tight. You are going to need a puller kit, which does not cost that much. It can be bought for as low as $19, and it is very easy to use.

Get the rod, screw it repeatedly into the main puller part, and snap it into the end portion, so it pushes against it. The next step is to do the same thing on the other end, so it pushes against the crankshaft.

In a normal vehicle, you might notice 4 little holes that are threaded, which is an advantage so you can get bolts in them. Once the puller assembly has been prepared, put it over and get one nut bolt and screw it into the little hole. After this, screw another bolt into a hole found on the opposite side.

Now that you have both holes on snug get a socket and snug it up by hooking up a wrench and keep turning it until it comes off.


4. Disassemble the Crankshaft Pulley

Once you get the bolts off, you may now remove your car’s crankshaft pulley. To do this, remove the timing cover so you can do any of the work that you will need to do, such as changing the timing belt or seals.

You may also use a bolt-removing tool on the bolt’s head. You just have to place one end on the bolt-removing tool and slacken the bolt using an impact wrench. With the bolts included in your tool, you may now tighten the bolt remover tool. Keep doing this step until the crankshaft pulley is finally released.


Pro Tips

  • A half-inch drive impact gun might be a great tool for removing a stubborn crankshaft pulley bolt. A torque wrench has also been proven to be a helpful tool for correctly securing it.
  • You might want to follow the service manual when removing the crankshaft pulley. You must observe all the safety precautions before you raise and support the front portion of your vehicle.
  • You will realize how accessible and how easy it is to be removed when you take a right front wheel and the splash shield off.
  • You may place the tip of a large flathead screwdriver between the splash guard and its rivets. To remove the rivets from the splash guard, you may put pressure on the screwdriver handle. Once it is loose, you may now remove the splash guard.
  • Slippage can result in a misalignment between the central hub and the other drive ring. This slippage can cause the crankshaft pulley to wobble. It may cause a constant slip while appearing to be working properly. This can be prevented if you know how to disassemble the crankshaft pulley and replace it.
  • Never use a jaw-type puller to remove your car’s crankshaft pulley. Using this tool will only cause the rubber bonding ring to rip or tear through the pulling on the outer edge of the crankshaft pulley. You may use the correct pulley removal tool to eliminate the pressure concentrated on the rubber ring.

Conclusion

Now that we have discussed how to remove a crankshaft pulley in your car, we hope that you will now be able to do it successfully on your own. With the right tools, you can take anything apart. Just follow this step-by-step guide the next time you find yourself whining about the high cost of auto repair. Now, you do not have to call a mechanic to do this job for you.

How to Build a Bobber: Learn This Intricate Process the Easy Way


How to Build a Bobber

Among all custom-made motorcycles, the Bobber is one of the most loved choices. This is the reason why many motorcycle enthusiasts dedicate a lot of their time and effort to accomplishing their dream of building a bike just by themselves. So, if you are curious about the intricate process of how to build a Bobber, you would not want to miss this article.

A Bobber bike has a vintage, minimal, and simpler look. To build a bobber, you may either choose between a sporty look or a vintage older type. Whatever you choose, here are the steps you need to follow to build a Bobber on your own.

  1. Find a customizable bike.
  2. Do some initial modifications.
  3. Change the fender.
  4. Modify the seat.
  5. Change the exhaust system and remove the muffler.
  6. Modify the lights.

In this post, we will be talking about how easy it is to build a Bobber. We have provided you with a list of all the necessary materials you are going to need, as well as step-by-step instructions for assembling a Bobber. Not only that, but we also have some tips for you, which is essential for beginners and experienced motorcycle devotees alike. Read on if you want to know more.


Things You Need to Follow This Tutorial

Making a Bobber just by yourself will be a very complex process at first. However, it helps a lot if your materials are ready beforehand. So, before we begin this tutorial, you must first gather all the materials you will need to build a bobber, which includes the following:

  • A motorcycle
  • Bobber bike kit

Step-By-Step Guide on How to Build a Bobber

Compared to a regular motorcycle, a Bobber bike has a vintage, minimal, and simpler look. You would also notice that its front wheel looks a lot thicker. You may either choose between a sporty look or a vintage older type. Whatever you may end up choosing, here are the instructions on how to build a Bobber on your own.


1. Find a Customizable Bike

You may start by looking for the perfect motorcycle that you would want to customize. While this can be very confusing because you can find several bike models that fit the criteria, you might want to consider choosing a typical retro bike. This type of motorcycle is more suitable for transformation, as its parts can easily be removed. Here are some of your options:

a. Bobber Rolling Chassis

Getting a rolling chassis is an advantage if you already have an experience in metalworking or other modifications. After all, customizing a Bobber will certainly require alterations. This process is vital for components to fit in nicely with the engine. However, you should be informed that some rolling chassis already come with mounts that can accommodate certain engine types.

If you do not feel comfortable with the welding part of the process, don’t shy away from getting professional help. The manufacturer will be able to do the modifications if you ask them. You should be aware of the cost it may entail, which is somewhere between $900 to $3000. It may also cost you a lot more, which is dependent on the final look you are aiming for.

b. Get a Frame

What’s great about assembling a Bobber is that piece-by-piece parts can easily be purchased. With this, you will be able to build it at your own pace and within the pace your budget allows. You might also notice that a lot of customizable bikes are in soft tails. You will need to convert it into a hardtail Bobber in the process.

c. Invest in a Project Bike

If you don’t want to buy a frame or a chassis, you also have the option of investing in a project bike instead. This type of bike can easily be customized into a Bobber. However, you should be informed that certain motorcycle is a lot easier to disassemble than others. It is also advisable that you choose a popular bike, as it will not be difficult to look for the components of that motorcycle.


2. Initial Modifications

Build a Bobber
Via : https://www.youtube.com/watch?v=GsYwU-kA6ws

Start by disassembling the unnecessary components, such as the seat, which can be substituted or modified to be shorter or a little lighter. You may also shorten the front fenders, as well as the rear fenders. In some bikes, the stock handlebars are often removed and replaced with smaller and more compact handlebars, which can improve the visual of the bike.


3. Change the Fender

In this step, each fender will be shortened. You can also have them completely removed. This step is essential, especially if you want to reduce the overall weight of the bike. While these are not at all necessary, they might still be in use during street rides or if the law requires them.


4. Modify the Seat

The seats can be changed into a compact or lighter seat, or they can be replaced with a new one. In case you didn’t know, the seat resembles the board track racing motorcycles back in the 90s. A lot of motorcycle enthusiasts change the seat to make it feel like a Bobber’s, but you can always find fitting seats for Bobber online.


5. Change the Exhaust System and Remove the Muffler

This step is probably the establishing feature of the Bobber and what will set it apart from other motorcycles. While enhancing the sound output is a primary feature of your Bobber, it’s not in compliance with most US states’ ordinances. One thing to take note of is that if you remove the mufflers, it might create some issues with the general running state of the engine.


6. Modify the Lights

You can buy modified lights from a variety of sites, and interestingly, they are generally supplied for Bobber modifications. To add, you can avail of the lights, which are specifically designed just for Bobbers. However, do not shy away from getting customized lights, as they could become a top-notch selection, especially for Bobbers.


Tips on Building a Bobber

Tips on Building a Bobber
Via: https://www.pinterest.com/

  • Customs parts such as gas tanks can be expensive. You may take your old one to a shop to get an idea if the replacement fits.
  • For rear fenders, you should know that a lot of riders do fat tire conversions. With this, you make sure that you check online for cast-offs. If you don’t prefer that, you may also check for cheap bare metal reproduced ones, as well.
  • It isn’t advisable that you get secondhand handlebars unless you trust the person selling them to you. There is no easy way to see bends and twists on the handlebar, so make sure that you do before you buy it.

Conclusion

As long as you have the budget for it, building your own Bobber is very easy. You just need to follow the step-by-step guide, as well as prepare all the necessary materials to get started. If you want to save more money, you might want to consider reading the tips provided for you. Just make sure that you take extra caution when buying secondhand parts.

How to Remove Stubborn Toyota 20R-22R-22RE Crankshaft Pulley Bolt 1979-1995: A Guide on How to Do This Correctly


Toyota Crankshaft Pulley Bolt

Some crankshaft pulley bolts are so stubborn that they won’t come off even if you use a wrench. There could be several reasons why you need to do this, and if the crankshaft pulley bolts are giving you a hard time, it can be very frustrating. Now, let us teach you how to remove these stubborn bolts the easy and right way.

Here are the steps that you should follow to remove your stubborn Toyota crankshaft pulley bolt in your car.

  1. Using a power steering pulley, pull the 4 12mm bolts.
  2. Insert a 5/16” extension drift and bump it against the body of the oil pump. 
  3. Apply force to support the drift, as well as the breaker bar. 
  4. Once the nut loosened up, grab your drift out of there and then unscrew your crankshaft pulley bolt.

In this post, we are going to discuss how to remove stubborn Toyota 20R – 22R – 22RE crankshaft pulley bolts from 1997 – 1995. We also have rounded up the materials that you will need and some tips that will allow you to do this task right the first time. We are confident that by the end of this post, you will be able to remove your Toyota’s stubborn crankshaft pulley bolts.


Things You Need to Follow this Tutorial

First, you must gather all the materials and tools that you will need for the removal of these stubborn crankshaft pulley bolts on your Toyota 22R – 22R and 22RE series, which includes the following:

  • Pulley wheel holder
  • Half inch drive
  • 19mm bolt
  • Impact wrench
  • Breaker bar
  • Power steering pulley
  • 5/16” extension drift
  • Pulley puller
  • Rubber hammer

Step-by-Step Guide on How to Remove Stubborn Toyota 20R-22R-22RE Crankshaft Pulley Bolt 1979-1995

Before we begin, remember to do every step with caution, as you can mess up some parts of your engine by accident. There are at least 3 methods how to do this. Once you have gathered all that you need, here are the steps that you should follow to remove your stubborn Toyota crankshaft pulley bolt in your car.

Remove Stubborn Toyota

Method 1


1. Prepare to Remove the Crankshaft Pulley Bolt

It might be a lot easier for you to remove the stubborn crankshaft pulley bolt if you get things out of the way, such as the radiator. Doing this step will allow you to have a better view of what you are doing, as well as some space to do this task as accurately as possible.


2. Wrap a Pulley Wheel Holder Around the Crankshaft Pulley

Grab your pulley wheel holder, a piece of belt that runs through a metal bar, which allows you to wrap it around the crankshaft pulley. Pull it tight and apply pressure by holding it completely still. You may use a 19mm bolt and a half-inch drive. However, if you have a bigger drive, that would be great.


Method 2

Occasionally, using an impact wrench takes the stubborn crankshaft pulley right off. However, if it has been sitting there for a long time and nothing happens, you might want to try this second method. Here’s what you should follow when using a long breaker bar:


1. Roll a Long Breaker Bar on the Crankshaft Pulley Bolt

The crankshaft pulley spins clockwise when you are facing the engine. While everything is still hooked up, you may take a long breaker bar and roll it around the crankshaft pulley bolt, just between the leaf spring and the frame.


2. Have Somebody Bump the Starter

It is important that you get away from the setup to make sure that it has been assembled correctly. Then have somebody bump the starter, which will spin the engine while the breaker bar is holding on to the bolt, and effortlessly unscrew it for you.

It should be noted that this method can be a little bit dangerous. While it works well sometimes, proper caution should still be observed. To add, make sure that you have disconnected the coil from the distributor so the engine will not start. You would not want the engine to fire up, and it just flings the breaker bar, as well as the socket.


Method 3

If you have tried using an impact wrench and still nothing, you might want to try this third method. Here’s what you need to do:


1. Use a Power Steering Pulley

Using a power steering pulley, go ahead and pull the 4 12mm bolts. Remove the power steering pulley, and the bolts will come right off. Doing this exposes your crankshaft pulley, and you will notice that there are slots and a dust seal just behind it. Be careful when doing this method, as it can mess up your dust seal.


2. Fit a Drift into a Slot

Once the crankshaft pulley has been exposed, you may now insert a 5/16” extension drift and bump it against the body of the oil pump. Doing this step will stop it from moving when you try to roll the engine backward.


3. Apply Force

Once you have everything set up correctly, you need to support the drift a little bit, as well as the breaker bar. Apply force into it, and it should come right off. However, you might notice that it would not move that easily. The reason is that the drift is still in its place, preventing you from taking the crankshaft pulley completely.


4. Remove the Crankshaft Pulley

Once you get the nut loosened up, just back it and grab your drift out of there and then unscrew your crankshaft pulley bolt.

If you want to see a video on how to do these methods properly, click on the video link found below:


Pro Tips

  • When you can’t get the crankshaft pulley by hand, you may use a pulley puller. Just put the two bolts into the crankshaft pulley’s threaded holes and then crank down the main bolt, and then it forces the crankshaft pulley right off the crankshaft.
  • When you mess up the dust seal, you need to straighten it out before you put it back in. If you don’t, the deformed edge will just hit the outside part of the oil pump body, and it will make a metal-on-metal annoying sound. This might scare you when you fire the truck up for the first time.
  • You may also use a rubber hammer to put the crankshaft pulley back in. Once you have set it up, you can just shove it back in.
  • When removing the bolt with a wrench, make sure it is set up properly. Otherwise, the engine will just tighten the bolt, which can lead to it snapping off.

Conclusion

Now that you have finished reading this post, we hope that you will be able to do this task by yourself. Always remember that you take proper caution when doing these steps, as you may accidentally mess up some parts of the engine. If you are not confident enough to do this, you may always ask a mechanic or a car care professional to do this for you.

How to Fix Transmission Shifting Problems in your Car: Learn to Fix it on your Own


Transmission Shifting Problems

There could be several reasons why your car is experiencing transmission shifting problems. Your vehicle might be shifting poorly because of low or dark transmission fluid, you can hear loud grinding noises, your car is not shifting from one to another gear, or your car jerks while you are changing gears. Whatever the reason may be, we are here to help you.

Here are a few steps you can follow to fix transmission shifting problems in your car:

  1. Check the fluid.
  2. Drain the transmission fluid into a drain pan.
  3. Remove the whole pan.
  4. Check the transmission fluid in the drain pan.
  5. Replace the filter.
  6. Fill the transmission with the correct fluid.

In this post, we are going to teach you how to fix these problems. Not only that, but we have also rounded up all the materials you will need for you to be able to do this task properly. To add, we have some tips so you can do this job right the first time. By the end of this article, you might realize that you no longer should go to a repair shop anymore, as you can do this by yourself.


Things You Need to Follow This Tutorial

Before we start this tutorial, you must gather all the materials that you will need to fix the transmission shifting problems in your vehicle, which includes the following:

  • Transmission fluid
  • Transmission drain pan
  • Filter
  • Gasket

Step-by-Step Guide on How to Fix Transmission Shifting Problems in your Car

You might notice that on your dashboard, the check engine light is on. It could be because the shifting has reached its maximum adaptation and has now surpassed it, which is why it is shifting too late and poorly, for that matter. Here’s how to fix this problem:

Transmission Shifting Problems
Via: https://www.youtube.com/watch?v=0Gyjb7kj0S4


1. Check the Fluid

The first thing that you need to do is to check the fluid. To do that, pull off the dipstick. When you see that it has gone black instead of red, it should mean that it is now dirty, and you need to replace the filter and the transmission fluid. A lot of times, this method will fix the transmission problems in your car.


2. Drain the Transmission Fluid into a Drain Pan

To do the next step, you must get under your car and prepare the transmission drain pan. Just remember to be very careful when crawling under, as your head or other limbs might catch into something sharp. Now, you may take the bolts off.

Here’s a tip: some vehicles don’t use drain plugs anymore. So, if your vehicle does not have plugs in it, you can just jack at an angle wherein the fluid will flow on a lower end. Remove the bolts, and the transmission fluid starts to drip off. The fluid should go into your container instead of all over the place, making it very difficult to clean up afterward.

You might want to wait before the transmission fluid drips out fully before taking out another bolt. Doing so will prevent you from getting full of fluid.


3. Remove the Whole Pan

Once you have unscrewed the very last bolt, the whole pan comes right off. You need to tilt it to drain it. Other models’ filters just snap out of place, where you can find a hole that has a bushing that pops out.


4. Check the Transmission Fluid in the Drain Pan

When you have successfully drained out the transmission fluid, check if there are any metal pieces. If there are not, this may be a good sign. However, you might want to also check the magnet, where you may see a lot of blackened dirt. Since we do not really see what’s going in there, changing the transmission fluid might just be the solution we are looking for.

Now, let’s hope that it is indeed the dirt that is making your vehicle shift very poorly. It would be bad, however, if you see any metal filings in the fluid, as it would mean that there is something wrong and worn inside the transmission.


5. Replace the Filter

The filter will snap right back into the hole, and with a gasket, you just need to tap it, and it snaps right back in. Obviously, you need to clean the inside of the pan and put a new gasket on it before you put the pan back in. You may now put the bolt back by tightening it all the way around. You may also use a ratchet to get them sealed, thus, preventing leaks.


6. Fill the Transmission With the Correct Fluid

You may now fill the transmission with the right fluid, which you can refer to your owner’s manual to check the compatibility. Before you drive off, you might want to get down again to check if there is still leaking. If there is none, you can now take your car for a drive, and you will notice that it can now shift properly.

If you want to check a video on how to do this job right, click the video link below:


Pro Tips

  • When you notice that the transmission fades in and out of gear, this usually means that the transmission fluid is low. The reason is that the transmission loses hydraulic pressure, which makes your vehicle harder to shift.
  • You can check the transmission fluid while your car is parked on flat ground or even surface.
  • In most vehicles, the transmission is controlled by the powertrain control module or the PCM. With this, if the speed sensors fail, the PCM will not have an input, causing the computer to improperly shift the transmission.
  • When your transmission suddenly skips the second gear, you might want to scan the computer. It will help you locate the malfunctioning transmission control solenoid.
  • If you have now fixed the problem with the transmission, you can no longer ignore the strange or grinding noises you hear in your engine. You would not want to overload your car, as well as tow it beyond capacity, because it can be the reason for the transmission’s premature failure.
  • To prevent further damage to your transmission, never make a complete stop before you engage in park mode.
  • You might ask how often you need to change your transmission fluid. Well, you do need to consult your owner’s manual first if the manufacturer of your vehicle specifies a change interval. However, we recommend that you do this task every 25,000 to 30,000 miles.

Conclusion

Fixing your vehicle’s transmission shifting problems has never been this easy. It is a relief that you no longer need to pay dollars to have your car tested by a mechanic, as you can do it on your own. With this guide, we are confident that you will be able to do this correctly. You just need to follow this guide and prepare all the necessary equipment.

How to Clean Fuel Injectors in your Car: An Easy Guide to Do it by Yourself


Fuel Injectors in your Car

Over time, carbon tends to build up in the fuel injectors and in the engine, making your car use more gas and get worse gas mileage. Additives and detergents might help you reduce this problem, but they will not be able to eliminate the clog entirely. Cleaning your vehicle’s fuel injectors is necessary if you want to keep your engine running as smoothly as possible.

You have three options to clean the fuel injectors in your vehicle. First is by using a cleaning kit that you can connect to the fuel injector system. Second, you may remove the injectors entirely from the engine, which allows for a more thorough cleaning. Third, you can seek professional help. Using a fuel injector cleaning kit is the easiest and most effective way to clean the fuel injectors in your car. Here are a few steps to follow:

  1. Select the right fuel injector cleaning kit.
  2. Locate your vehicle’s fuel port and attach the cleaning kit.
  3. Disable the engine’s fuel pump.
  4. Disconnect the pressure regulator and turn the ignition on.
  5. Turn on the engine.

In this post, we are going to discuss how to clean fuel injectors in your car. While professional services are recommended, we are confident that you can do this task on your own if you have the right tools. This task can either be done manually with the injectors removed or by using a fuel injector cleaning kit. Read on to learn more about your options.


Things You Need to Follow this Tutorial

Before we start, you need to prepare all the materials that you are going to use to clean your car’s fuel injectors, which includes the following:

  • Fuel injector cleaning kit

Step-by-Step Guide on How to Clean Fuel Injectors in your Car

You have three options on how you can clean the fuel injectors in your vehicle. First is by using a cleaning kit that you can connect to the fuel injector system. Second, you may remove the injectors entirely from the engine, which allows for a more thorough cleaning. Third, you can seek professional help.

Using a fuel injector cleaning kit is considered an easy and effective way to clean the fuel injectors in your car. Here is how it is done:

Clean Fuel Injectors in your Car
Via: https://www.pelicanparts.com/BMW/techarticles/BMW-3-Series-E46/25-FUEL-Removing_and_Replacing_Your_Fuel_Injectors/25-FUEL-Removing_and_Replacing_Your_Fuel_Injectors.htm


1. Select the Right Fuel Injector Cleaning Kit

While these cleaning kits are generally applicable to all types of engines and fuel injectors, you still might want to check the owner’s manual to make sure about compatibility. At times, the cleaner kit you have purchased may still require you to make additional purchases for connectors and adapters.

The cleaning kit consists of the cleaning solvent, a hose, and a gauge. You may now fill the canister with the appropriate solvent. Again, it is wise to check the compatibility of the solvent with the fuel injectors by referring to the owner’s manual.


2. Locate Your Vehicle’s Fuel Port and Attach the Cleaning Kit

You will find the engine’s fuel injector system on the fuel rail. You may also check the manual to know the exact location of the fuel injectors. It usually contains more information on where these connections are located, as well as the steps on how to attach this specific cleaning kit.


3. Disable the Engine’s Fuel Pump

You can disable the fuel pump by using the fuse box or by removing the pump itself. Connect the return line, which will ensure that the fuel is returned to the tank. Always remember that the fuel can be under pressure, and the vehicle may show error codes once the pump has been disconnected, removed, or disabled.


4. Disconnect the Pressure Regulator and Turn the Ignition on

Now you must remove the fuel pressure regulator, as the cleaning kit will already be providing pressure. Next, you must turn the ignition to ensure that the fuel pump is already offline. Remember to remove the cap on your car’s gas tank, just as a safety precaution. Doing this step will avoid excessive pressure buildup in your vehicle’s fuel injector system.


5. Turn on the Engine

Before starting your car, make sure that you connect the cleaning kit first and adjust the pressure to appropriate levels. Now, you can start your car and let the kit use the cleaning solvent. This process may take up to 15 minutes. You will notice that the engine shuts off by itself once all the solvent has already been used up.

If you want to see how to do this procedure, refer to the video link found below:

As mentioned above, another way to clean the fuel injectors in your car is to manually take the engine apart. This procedure is not recommended for beginners, as it may cause more problems than solutions.

There are times when the entire fuel injector system needs a thorough cleaning. You might think that disassembling the parts and cleaning them will be enough. Unfortunately, it will not be. Professional services often result in a successful cleanup, while a low-tech DIY approach to clean fuel injectors has been proven to be unsuccessful.

When cleaning fuel injectors manually, you must check if there is a leak, if the injectors have the appropriate amount of fuel volume, if there is the atomization of fuel, and lastly, if the spray pattern of the fuel mixture is being distributed properly.

Lastly, you may visit a professional mechanic or an automotive repair shop to manually clean your car’s fuel injectors using professional tools. It is safe to say that these professionals will be able to get the job done. To add, they will be able to test the fuel injectors after it has been cleaned. However, the only downside is that it is a lot more expensive than the other two.


Pro Tips

  • Refrain from cleaning fuel injectors at home by soaking them with carb or brake cleaners. Do absolutely nothing.
  • Badly clogged injectors might be a hopeless case for cleaning solvents, which is why it is important that you clean your fuel injectors every 25,000 to 30,000 miles.
  • You may do additional testing, such as an injector drop test, to make sure that the fuel injectors have responded well to your cleaning efforts.
  • It is recommended that you take extra caution when dealing with gasoline and other cleaning solvents because of their flammability. Your engine needs to be running when you clean the fuel injectors, which is considered a risky part of the job.
  • As discussed, you would want to check for the compatibility of the cleaning solvent and your engine. You can refer to the owner’s manual to avoid getting the rubber and other plastic components in the fuel injector system to be attacked by strong solvents.
  • If your vehicle starts devouring gas more than it should, it might be the right time for you to clean the fuel injectors. In addition, when the check engine light illuminates, bring your vehicle over to an auto repair shop.

Conclusion

Knowing how to clean fuel injectors in your car may seem like a difficult task, especially if you do not know where to even begin. It is recommended that you read this guide as well as take extra precautions when dealing with flammable substances. If you are not confident that you can do this job by yourself, we always advise that you seek professional help.