Home

Recent Posts

How to Install a Short Throw Shifter: A Quick Guide for Beginners


Install a Short Throw Shifter

If you are thinking of upgrading your car without the need to spend a fortune, one of the things you might want to consider is the replacement of your stock shifter. With a short throw shifter, driving your car will be a more enjoyable experience. It will adjust the height and length of the shifter, allowing you to have it customized based on what you are most comfortable with.

Installing a short throw shifter can be quite challenging, but once you know the right steps, it will be a lot easier. Be patient, as this can take quite a while. Once you are done, you will have a rewarding feeling, knowing that you did it without asking for help from a trained mechanic. Here are the steps to follow:

  • Remove the factory shifter.
  • Remove the plastic bezel wrapped around the shifter. 
  • Remove the shifter handle and the bolts that secure the shifter.
  • Lift the shifter from its original position.
  • Now get ready to install the new short throw shifter.
  • Remove the old plastic bushing and the old gasket.
  • Insert the shifter into the plastic bushing.
  • Adjust the shift stops.
  • Bolt on the shifter handle.
  • Connect the cigarette lighter and use your new short-throw shifter.

Things You Need to Follow this Tutorial

Here are the materials that you need to prepare for the installation of a short throw shifter:

  • Ratchet
  • Breaker bar
  • Flathead screwdriver
  • Paper towel
  • Plastic scraper
  • Sponge
  • Ready-made gasket
  • Thread locker

Step-by-Step Guide on How to Install a Throw Shifter

After preparing the required materials, here are the steps that you have to follow. Before we discuss the steps, watch the short video below that shows the replacement of a stock shifter from a Mustang:


Remove the Old Shifter

  • Obviously, the first thing you need to do is to remove the factory shifter before having it replaced. The removal of the shifter will depend on the model of the car that you have. In the Mustang shown in the video above, the first thing to be removed is the shift knob. Simply turn it clockwise. Unscrew the bolt on the top.
  • After taking out the shift knob, remove the plastic bezel that wraps around the shifter. Simply lift it up. In the Mustang above, there is a cigarette lighter, so be sure to remove the wires that are connected to the bezel.
  • Next, remove the shifter handle. Use a ratchet to loosen the bolts that connect the handle. All that you need to do is to wiggle the handle, and it will be removed. Remove the shifter cover. Be sure to keep the bolts in a safe place since you will need this later on.
  • By this time, you already have access to the shifter. There are four bolts that secure it in place, so you have to remove these bolts. A breaker bar will be useful in this step.
  • Grab a flathead screwdriver to lift the shifter from its original position.

Install the New Short Throw Shifter

  • Now, you are ready to install the new short throw shifter. Remove the old plastic bushing, as it might have already deteriorated, which can sacrifice the performance of the shifter.
  • Clean the surface to remove the old gasket. Cover the other parts with a paper towel and use a plastic scraper to get rid of the gasket. Using a sponge will also help to make sure there is no debris or gasket.
  • At this point, you are ready to install the new short-throw shifter. Line a ready-made gasket on the bottom of the filter. Insert the shifter into the plastic bushing. Bolt it down with the bolts that are included in the package. Before doing this, apply a thread locker so that it can counter the vibration from the transmission.
  • Adjust the shift stops. To do this, shift to the fourth gear and adjust the bolt until it touches the handle of the shifter. Apply a thread locker and tighten the bolt. Put it into third gear and repeat the same thing.
  • Place the washer on the top of the shift stick and return to the shift booth. Tighten the bolts that you have earlier removed from the cover.
  • Bolt on the shifter handle. Place a rubber-insulated bushing in between, which will be provided by the manufacturer of the new short-throw shifter. This is going to help dampen the vibration. Tighten the bolts.
  • Connect the cigarette lighter, return the bezel, and you are now ready to test drive your car using your new short-throw shifter.

Pro Tips

In this section, you will learn more tips about short throw shifters, making sure that their installation will be a snap on your end.

Install a Short Throw Shifter
Via: https://www.youtube.com/watch?v=01yxvjWhEYE

  • From the steps mentioned above, one of the most important things is to make sure of bolting the shifter in the right direction, which should depend on the location of the bend. If not, the shifter will end up slamming the center of the console.
  • When putting the bolts back, do not over-tighten them. If they are too tight, they might make shifting problematic since you won’t be able to change gears smoothly. Using a torque wrench is a good idea so that you will be able to tighten the bolts just right.
  • Like your normal shifter, you can always personalize the look of your short throw shifter. Using a shift knob is a good idea. Do not only prioritize form but also function. This means that the knob should not only look good but should also feel good when gripped. This must help improve the overall driving experience.
  • As it has also been noted in the instructions above, you will benefit from installing a gasket under the plate of the shifter. This is going to reduce the possibility of oil leakage.
  • It is also important that you carefully choose the short throw shifter to buy. Take the time to read reviews from other users so that you will have an idea of how one product will perform. See to it that it is made of premium materials, which will guarantee longevity and value for money.
  • Follow the instructions from the manufacturer. The steps mentioned above will apply in a general sense. However, different manufacturers may have varying steps, which makes it important to consult the manual of the short throw shifter that you have purchased.

Conclusion

Now that you are done reading this guide, I hope that you were able to learn the basics of how to install a short throw shifter. Like other car DIY tasks, it might seem intimidating at first. To be honest, it does not sound easy, but once you are already doing it, you will realize that it is doable. No more need to pay someone to do the job for you!

Have you tried replacing a short throw shifter before? How did you do it? Feel free to share some tips below.

Best Motocross Helmets: A Quick Guide Before You Buy


Best Motocross Helmets

The motocross helmet is a very important piece of riding gear, protective equipment that you should never compromise on regarding its price and quality. With a helmet, you will protect yourself from countless injuries, especially if you are riding off-road. They are specifically designed to protect your head in a crash.

A motocross helmet is a protective gear used by motocross riders whose primary purpose is to protect your head during impact, prevent and reduce head injury, and save your life. Here are a few essential factors that you should look out for in a motocross helmet to make decision-making a lot easier on your part:

  1. DOT certification
  2. Lightweight
  3. Removable liners and pads
  4. Comfort
  5. Excellent ventilation
  6. Design and construction
  7. Price

Safety comes first. This post will discuss some of the best-rated motocross helmets on Amazon. But to cover everything there is to know about these protective gear, we must also discuss what it does, some of its types, and the top features you need to consider. We hope you can apply your newfound knowledge on motocross helmets after you have read this.

Product

(Amazon Links)

Image

(Amazon Links)
 

XFMT Youth Kids Motocross Helmet

Our Detail Review

O’Neal 0623-055 3 Series Helmet


Our Detail Review

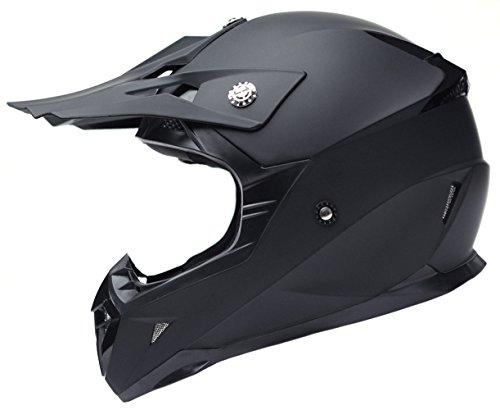
YEMA Motorcycle Motocross ATV Helmet

Our Detail Review

GLX GX623 DOT Youth Kids Moto​​cross Helmet

Our Detail Review

Dual Sport Helmet by NENKI Full Face Motocross & Motorcycle Helmets D​​ot Approved With Iridium Red Visor Attached Clear Visor NK-310

Our Detail Review


What Is a Motocross Helmet and Why Do You Need One?

A motocross helmet is a protective gear used by motocross riders, whose primary purpose is to protect the rider’s head during impact, prevent and reduce head injury, as well as save the rider’s life. Nothing could be as important as the helmet when you are racing around the track. While other protective gears are vital, you should never ever skip on the helmet.

Wearing protective equipment like a motocross helmet would protect your head from fatal injuries. Even if a crash happens between a car and a motorcycle, the rider will receive the most injuries, which could also result in death. Studies have also proven that head injuries often lead to fatalities, including long-term disabilities.

Wearing a motocross helmet with reflective trips will make you much more visible to other motorists, especially during nighttime. Wearing a helmet also will also prevent you from spending too much on insurance and medical bills. Lastly, it is an obligation to the law, as the government has made it mandatory that every rider wears a helmet whenever they are traveling.


Different Types of Helmets

To make decision-making a lot easier on your part, you should be knowledgeable of the common types of helmets, which include the following:

AD

1. Full-face Helmet

Full-face helmets will be able to protect all sides of your head, including your chin. It also comes with a sturdy face shield that also protects you from asphalt and bugs. While it is one of the visually appealing helmets, it also offers complete visibility of the road and everything that is happening around you.


2. Skull Caps

Unlike the full-face helmet that offers the most protection, skull caps only offer the bare minimum of protection. It only covers the top of your head, and visually, it looks very unprofessional.


3. Open-face Helmet

The open-face helmet protects the top and back of the head and the sides. It is as good as the full-face helmet, but the only things it does not protect are your eyes. If you choose this type of helmet, I would recommend getting goggles that go with it. While this does not offer the same protection as the full-face helmet, wearing it gives you more visibility.


4. Touring Motorcycle Helmets

These types of helmets help you survive a long-distance ride with the comfort they offer. We all know that comfort is important, especially when riding; noise, weight, and overall ventilation all play a part whenever you ride a motorcycle. You might want to consider looking for this type of helmet that comes with Bluetooth or speaker systems, which will come in handy when it’s too noisy.


5. Modular Motorcycle Helmets

Modular motorcycle helmets have become extremely popular, as riders are now looking for additional versatility when it comes to their daily helmet selection. You may see it as the best of both worlds; it has the configuration of a full-face helmet and an open-face helmet in one. This would mean that you can use it with or without the chin bar in place.


6. Dual Sport Motorcycle Helmets

This type of helmet features both off-road and aerodynamic, which help in terms of speed. They will be able to provide the versatility of several configurations depending on the condition. You can mix on and off-road preferences with the dual sport motorcycle helmet. It can also offer the same comfort that you want on a street helmet.


Choosing the Best Motocross Helmet

Before we finish this discussion, we should talk about the essential factors you should look out for in a motocross helmet. We recommend that you review this carefully, as it can narrow down your choices into making an informed buying decision.

  • DOT certification – If you are a resident of the United States, don’t ever ride a motorcycle with a helmet that is not DOT certified. When choosing a motocross helmet, make sure that the one you are buying is DOT-certified because safety is your number one concern.
  • Lightweight – While most motocross helmets are usually made from polycarbonate, fiberglass, and carbon fiber, you should always choose lightweight ones. Remember, the lightweight motocross helmets are the ones that are very comfortable to wear.
  • Removable liners and pads – It is a guarantee that you will sweat a lot while wearing your motocross helmet. Fortunately, the above models offer removable liners and pads, which you can wash after every use. It is also very hygienic, and you can wash it if it doesn’t smell good anymore.
  • Comfort – Besides getting the required protection, motocross helmets should also be very comfortable. In addition, it should fit your head perfectly. So, when trying on these motorcycle helmets, ensure you will not have difficulty putting them on and off your head.
  • Excellent ventilation – Ventilation is very important, keeping the helmet’s interior cool. This feature will be useful, especially when riding on a hot day. Additionally, it has proven to reduce fatigue even when riding on challenging dirt tracks.
  • Design and construction – Some of you might prefer aggressive styling for motocross helmets, while others don’t. Remember that the more eye-catching your helmet is, the more you are visible to other riders and motorists. You should also take note of the materials used for crafting the helmet and ensure that it is made from durable materials.
  • Price – While this is not the most important, it can also determine when you are already at the counter. Ensure you have read this section to relate the most important features to the helmet’s price. That way, you will know which offers you the most value.

Top Five Picks for the Best Motocross Helmets

In this section, we will be discussing the top five recommendations for the best motocross helmets. We will also be providing you with some of each product’s key features, pros, and cons, which will help you narrow down your choices.


1. XFMT Youth Kids Motocross Helmet

AD

The XFMT motocross helmet features a glossy UV protective finish and comes in three sizes: small, medium, and large. It is extremely lightweight and is equipped with a durable composite shell. What makes this helmet one of the best out there is that it has a heavily cushioned and comfortable interior, in which the padding can be removed and washed.

Once you wear this motocross helmet, you will notice that it is very well-vented for summer or winter riding and off-road riding. It has a sleek modular design and has been certified DOT-safe. Every purchase of this motocross helmet comes with a helmet, a pair of goggles, a pair of gloves, and a helmet bag.

Pros:

  • Durable and lightweight
  • Well-vented for summer and winter riding
  • UV protection is guaranteed
  • Comes with a complete package
  • Comfortable to use

Overall

Accessories such as gloves and goggles are almost adult-sized but work the way they should. Given all the features, it sure is still a great buy.


2. O’Neal 0623-055 3 Series Helmet

AD

The O’Neal model meets DOT, ECE 22-05, and AS/NZS safety standards and offers a removable, washable liner, venting system, and an adjustable visor design.

It is comfortable to wear and offers a thick liner that wicks away sweat. It is interesting to know that the helmet comes with a transportation bag. It has Dot protection but doesn’t say anything about being Snell certified.

This motocross helmet comes with ventilation ports on the chin bar, which can help keep things cool and comfortable even when riding on a hot summer day. The best thing, probably, about this helmet is its popularity. You can feel good about getting a helmet that lots of people enjoy. 

Pros:

  • Comes with a UV-protected finish
  • It is sleek, lightweight, and comfortable to use
  • It is well ventilated
  • Padding can be removed and washed

Overall

The TMS motocross helmet is one of the best-looking designs, I think. It is a trusted brand that people use again and again over time. That doesn’t mean it’s the best, but it has a reliable track record.


3. YEMA Motorcycle Motocross ATV Helmet

AD

The YEMA motocross helmet is a professional-grade helmet that not only meets but exceeds DOT standards. It has a fashionable design that also comes with a lot of innovative features. Overall, it can be exactly what you need for different applications such as motocross, ATV, dirt bike, MX, Adventure, and a lot more.

It is constructed from outstanding materials: an aerodynamic shell, multi-density EPS, a double D-ring buckle, and a reinforced chin strap. Its ventilation system is also top-notch, as it has fully adjustable intake and exhaust vents. Lastly, it offers comfortable liner and pads, which is also removable and, at the same time, washable.

Pros:

  • Comfortable to use
  • Exceeds DOT standards
  • Offers extra space for glasses and Bluetooth speakers
  • It can be used for multiple applications

Overall

The YEMA motocross helmet offers a lot of good features. It fits great and has multiple air vents.


4. GLX DOT Youth Kids Motocross Helmet

AD

The GLX motocross helmet is a lightweight helmet that only measures 2.8 pounds. It meets DOT safety standards and has at least 14 venting ports that allow superior airflow even on a hot day. It has sweat-absorbing liners that prevent your sweat from dripping into your eyes. Just like the previous models, it also has removable and washable liners.

What sets this helmet apart is that it is equipped with an adjustable sun shield and a convenient quick-release strap. Every purchase of this helmet comes with a helmet, a pair of gloves, a pair of goggles, and a separate bag for the helmet and the goggles.

Pros:

  • It comes with a gloves and goggles
  • Flexibility to select from four different sizes
  • Easy to put on
  • DOT certified safety
  • The liner prevents sweat from dripping

Overall

Good helmet for off-road use.


5. Dual Sport Helmet by NENKI Full Face Motocross & Motorcycle Helmets Dot Approved With Iridium Red Visor Attached Clear Visor NK-310

AD

The Nenki motocross helmet is loaded with advanced and innovative features, including removable lining, a comfortable liner, a ventilation system, and dual sport capability. 

You’ll get a clear iridium visor that you can flip up as needed. You will also get a removable snap-in liner if you need to wash it. Fortunately, it is DOT approved and helps keep you safe and comfortable while on or off the road. 

Pros:

  • Comes with a complete package
  • Offers improved visibility with a clear visor
  • Comfortable to use
  • Well ventilated
  • Has durable construction

Overall

The Nenki motocross helmet might be more suitable as a dual-sport option. Some features are very good, while some parts seem to be less durable. 


Conclusion

If you are getting serious about motocross, you should consider buying only the best motocross helmets available right now. It may seem confusing at first, but if you are armed with the right knowledge, choosing the best one will be much easier. Even if your decision comes down to the price, you should always consider all the advanced features that you will most benefit from.

Removing Flywheel Stretch Bolts without Damage: An Essential for Maintaining Diesel Engines


Remove Flywheel Stretch Bolts

Engine maintenance is one of the most important things that any car owner needs to learn. A lot of these tasks may seem complicated at first, but if you do your research, you will know that it is pretty much a straightforward task. In some cases, you will need the help of the pros. In other instances, you will be able to have it completed even on your own.

There are many things that you have to learn when it comes to maintaining your diesel engine. You need to be aware of the right steps to avoid ruining the stretch bolts once they are removed from their original position. Here are a few steps you need to follow to remove flywheel stretch bolts without damage.

  1. Have a Look at Flywheel and Stretch Bolts
  2. Use The Right Socket
  3. Do Not Use an Impact Wrench
  4. Grind the Stretch Bolts

A Look at Flywheel and Stretch Bolts

Before we proceed with the main discussion, allow me to give you a primer on the purpose of the flywheel. In a nutshell, this is the large and heavy metal disc that is attached to the crankshaft and the clutch. It makes the engine rotation smooth. To add, it also holds momentum for changing gears. It makes sure of the smooth movement of the different components of the engine.

If you want to remove the flywheel from a diesel engine, especially in the case of older Mercedes car models, there is a special bolt, which is known as the stretch bolt. One thing that makes them different is that they become elongated once they are fixed. They provide tension like springs.

One of its defining characteristics is that it comes with a shallow head, so there is not much of a socket. This is going to make the removal process a bit challenging. With a little surface area that is exposed from the top of the bolts, you might be wondering how it can be removed without damage. This is exactly the focus of the discussions in the rest of this post.

Stretch bolts are non-reusable. As noted, they become stretched upon installation, which is why they can no longer be reused after they are removed. Nonetheless, you should still be careful in removing them. When the heads are stripped or damaged, it becomes more difficult to take them out, which is why you need to be cautious when completing this task.

Before we proceed, watch the short video below, which will provide you with an easy-to-understand visual guide on the proper way of removing flywheel stretch bolts without damaging them:


Use The Right Socket

Removing flywheel stretch bolts without damage can be possible if you opt to choose the right socket. Normal sockets will not be enough because they won’t fit the heads of the bolt. The result is that you will not be able to turn it around. It will not be loosened, which is sure to be a frustrating situation for anyone.

Sockets have a bevel. When using a normal socket, when it is placed on the stretch bolt, you will be able to cover only 1/16 of an inch of the head. This means that you will not be able to remove the stretch bolt regardless of the force that is applied.

Instead, as shown in the video above, you should choose the right socket. That being said, we will use a 12-millimeter socket. It should be a 12-point socket with half an inch drive. This is not enough. You have to perform a quick modification. Grind at least 1/16 of an inch. This way, the edge will be sharp and will be secured when it is inserted into the stretch bolt.


Do Not Use an Impact Wrench

When it comes to power tools, an impact wrench is one that is most common. This socket wrench tool has the purpose of applying high torque output while requiring minimal effort from the user. It is traditionally used in bolts, but for stretch bolts, this is not one thing that you should use. The impact wrench hammers the heads of the stretch bolts, hence causing significant damage.

As an alternative to an impact wrench, you should use a breaker bar instead. Place the modified socket on the end of the breaker bar. You will also need a tapered long punch, which you should insert into the lower hole. This will prevent the flywheel from turning as you turn the stretch bolts.

Now, you are ready to remove the bolts. Rotate the stretch bolts counterclockwise. Push the head of the breaker bar and apply enough force as you turn. You can also ask someone to hold the engine while you complete this task. Go around until you are done loosening all the bolts on the washer ring. Once they are loose, use an electric ratchet or air tool to remove them completely.


Grind the Stretch Bolts

Grind the Stretch Bolts
Via: http://forums.vwvortex.com/showthread.php?5599266-DIY-02J-Output-Flange-Seal-Replacement-(02M-similar)&p=76108272&viewfull=1

In some cases, it is inevitable that the stretch bolt becomes damaged. In this case, you will have no choice but to grind the head. Otherwise, you will not be able to remove it, even with the use of your modified socket. When grinding, you also have to be as careful as possible so that you will not damage the washer.

Grinding, however, should be your last resort. This is a complicated task, especially because you have to focus only on the head and prevent being in contact with the washer ring.


Conclusion

Now that you are done reading this post, I hope that you were able to gain valuable insights on the right way of removing flywheel stretch bolts without damage. You need to be extra careful. Once they are damaged, it will be harder to take them out unless you resort to grinding, which can be more challenging.

As noted above, the best way to remove the stretch bolts without suffering from damage is to use a modified socket and to use a breaker bar in place of an impact wrench.

Problems Setting Proper Valve Clearances And Other Things About Diesel Engine Maintenance


Proper Valve Clearances

The engine is perhaps one of the most important parts of any vehicle. It provides the power and performance that you need from your car. That being said, it is vital that the engine is properly maintained. Take the time to have it regularly inspected so that you can spot possible problems and remedy the issue before it even gets worse.

Valve clearance is one of the most important things that should be emphasized in the maintenance of a diesel engine. If you cannot set the proper valve clearance, the problem is with the nuts. The nuts that connect the valve system might have slipped or are possibly damaged, which is why the right clearance cannot be set.

In the rest of this post, we will tackle some of the most important tips that you have to know about diesel engine maintenance. We will start with problems setting proper valve clearances, which is one thing that most new DIYers commonly complain about. We will also briefly tackle other issues that you may be confronted with when trying to do what it takes to maintain the peak performance of your engine.


Problems Setting Proper Valve Clearances

Valve clearance is one of the most important things that should be emphasized in the maintenance of a diesel engine. If the clearance is wrong, the vehicle can suffer from serious problems. It can cause damage to the valves and the other components. Problems with the valve clearance can also increase the smoke produced by the engine and lessen fuel efficiency.

If the valves are too loose, they will be hammered and can create a knocking sound. On the other hand, if they are too tight, the valves may no longer close at all. The result is that it can suffer from failure or too much heat.

If you cannot set the proper valve clearance, the problem is with the nuts. The nuts that connect the valve system might have slipped or are possibly damaged, which is why the right clearance cannot be set. Changing the nuts cannot be done without changing the head, making it possible to correct the clearance. It is not easy, so you need to have advanced DIY skills.

As a solution, you need to look for locking nuts that are made of high-quality metal so that they will never strip and hence, will lessen the likelihood that the valve clearances will have a problem.

Watch the short video below to better understand how the nuts affect the clearances of the valve.

How would you know if the valve clearance is right? You need to perform a quick check, which can be done by following the steps that will be mentioned below.

  • Turn off the engine and provide enough time for it to cool down. Also, you have to wait until the temperature of the coolant is less than 60 degrees Celsius.
  • Once it has cooled, remove the nuts that secure the valve cover.
  • Remove the window plate that covers the housing of the flywheel.
  • Rotate the engine, and based on the direction, you will be able to determine the clearance and see if there is a problem.
  • If the clearance does not meet the requirements, all that you have to do is to loosen the screw or the nuts. As mentioned earlier, the nut is the reason why the clearance has problems. After making the adjustment, check the clearance again and see to it that it already meets the requirement.

Other Tips for Maintaining Diesel Engines

Now that we have tackled the main point of this article, as a bonus, we will also provide you with insights on other things that can be done to maintain the peak performance of your diesel engine, not just adjusting the valves.

Maintaining Diesel Engines
Via: https://www.youtube.com/watch?v=qEyhsk0JTOo

  • Keep your coolant in check. Through time, it can be more acidic, which, in turn, can compromise its functionality. If there is too much acidity in the coolant, this can damage other components of the engine and may make them easily prone to wear. They should be flushed on a regular schedule and replaced with a suitable coolant.
  • Like the coolant, the fuel filter is also important to be changed based on a regular schedule. As much as possible, you have to replace it once after driving the vehicle for 10,000 to 15,000 miles.
  • Regular cleaning of the diesel engine using the right products will also be instrumental in maintaining its peak condition. Make sure that it is free of dirt and grime. Keep the components clean so that they can function at their best as a whole.
  • Using a diesel treatment can also prove to be an excellent idea. Add it when you are done filling the diesel tank. The treatment will be effective in getting rid of impurities, making sure that they will not negatively affect the performance of your engine.
  • You should also regularly monitor the gaskets, especially if you often drive on rough roads. They can suffer from vibration and hence, can loosen over time. You have to re-torque the bolts and nuts to make sure that all components are secured and working properly. This will also prevent leaks, among other problems.
  • Bleeding the fuel system is also essential when it comes to the regular maintenance of your diesel engine. There can be trapped air in the engine, which will prevent the supply of the right amount of fuel in the cylinder. One of the best ways to avoid this problem is through bleeding.
  • Pay attention to your dashboard. If the warning lights are on, you should act as soon as possible, although many problems may not be serious. By taking immediate action, you can solve the problem before it gets worse. Consult with your manual to perform a quick diagnosis so that you can quickly determine the problem.

Conclusion

In sum, if you are having problems adjusting valve clearance, the reason for this is probably the nuts that connect it to the engine. It might have slipped or can be damaged, which is why they need to be replaced. Aside from doing this, consider the other points that have been raised above to make it easy to keep the diesel engine running in its tip-top shape, even if you have an old car.

How to Change Transmission Lines: Do It Like a Pro


Transmission Lines

You might not realize it, but the transmission line is one of the most important and overlooked parts of your car. It serves as the connector between the radiator and the transmission of a vehicle. They are made of composite aluminum or metal and a rubber hose. They are essential in preventing the transmission from overheating, making sure that the hot fluid is directed away from the transmission.

If the transmission line is not working properly or if it is damaged, the performance of your car will be compromised. The most common thing that will happen is the overheating of the transmission. Here are the steps involved in removing your transmission line and replacing it with a new one.

  1. Raise the Vehicle
  2. Drain the Transmission Fluid
  3. Remove the Transmission Cooler Lines
  4. Drain More Fluid
  5. Spray Brake Cleaner
  6. Install the New Transmission Lines
  7. Replace the Transmission Fluid
  8. Lower and Start your Vehicle

In the rest of this post, we will tackle how to change transmission lines. It might seem like a difficult task at first, but once you are aware of the specific steps that are involved, you will realize that it is actually easy. You can do it even on your own, and there is no more need to pay for the services of a licensed mechanic to do the job.


Things You Need to Follow this Tutorial

Before we proceed with the rest of the discussion, here are the materials that you will need to prepare for changing the transmission line.

  • Jack stand
  • Oil pan
  • Brake cleaner
  • Wrench
  • New transmission lines

Step-by-Step Guide on How to Change Transmission Lines

This section will provide a quick discussion of the steps that are involved in removing your transmission line and replacing it with a new one. As you will see, it will only require a few minutes of your time, and there is no need to exert too much effort. For a visual guide on how to do these steps, refer to the video below:


1. Raise the Vehicle

The first thing that you have to do is to raise the vehicle so that you can access what is underneath. If you have a car ramp, this will be a lot easier. Make sure to do this on an even surface and use only high-quality jack stands to be confident that your safety is never compromised. It will also be better to do this in an area that has sufficient lighting.


2. Drain the Transmission Fluid

Now that the vehicle is in a stable position, you have to drain the transmission fluid. Disconnect the clip that holds the transmission line in place. Do not forget to place an oil pan underneath so that it will be able to catch the liquid dripping from the transmission line. Otherwise, you will end up with an annoying mess.


3. Remove the Transmission Cooler Lines

When the oil is finally drained, the next thing that you have to do is to take off the old transmission line. You will need a wrench to do this. Loosen the nut that connects the transmission line. It may be hard to pull the line from where it is linked. With this, wiggle it with more than enough force to make it less tight. Pull and remove.


4. Drain More Fluid

Now that the transmission line is fully removed expect that there will still be fluid dripping from its original position. Do not remove the oil pan and wait for a few minutes until there is no more drip.


5. Spray Brake Cleaner

Before you proceed with the installation of the new transmission lines, do not forget to spray a bit of brake cleaner on the end where they will be connected. Allow the fluid to drip before you proceed to the next step.


6. Install the New Transmission Lines

Attach the new transmission line by connecting one end to the radiator and the other end to the transmission. Make sure that you are working on the right side. Use the wrench to tighten the nuts, seeing to it that they are in a secured position. Try pulling the new line to see if it has properly attached to where it should be positioned.


7. Replace the Transmission Fluid

Earlier, we emptied the transmission fluid. Now that you are done connecting the new lines, you have to fill it with a new transmission fluid. Choose the right fluid based on the type of your vehicle and replace the amount that is recommended by the manufacturer. Otherwise, it won’t do an effective job of cooling the transmission.


8. Lower and Start your Vehicle

At this point, you are almost done. All that you need to do is to lower the vehicle from the stand and start to see if everything is working fine. Inspect for specific problems, especially for leaks. If there is a leak, this means that the transmission lines may not have been properly connected or secured.


Pro Tips

In this section, we will also provide you with some tips about transmission lines.

Change Transmission Lines
Via: https://www.cherokeeforum.com/f2/how-change-transmission-fluid-filter-196831/


How to Spot Problems with Transmission Lines?

Do you actually need a replacement for the transmission lines? You have to take the time to evaluate its current condition and pay attention to some symptoms, which include the following:

  • The most obvious sign would be leaking. You can see fluid dripping from under the hood, and your transmission fluid will be drained soon.
  • If you are having a problem when shifting gear, this is another indication that there is a possible problem. Your gears may slip or take quite a while before it responds.
  • The overheating of the transmission is another sign. This is because there is no fluid that is supposed to cool it down. If your Service Engine Soon light is up, it can be indicative of many problems, one of which would be your transmission line.
  • If the car stalls out of nowhere or if you are having a hard time starting the engine of the car, the transmission can be problematic, which can be because of the poor transmission lines.
  • It would be best to perform a regular inspection of what is under the hood, especially the transmission line. See to it that there are no cracks, leaks, or any visible external problems. If there is any, it is time to have it replaced as soon as possible.

Conclusion

In sum, knowing how to change transmission lines can help you to save a lot of money since you can do the work on your own rather than leaving it in the hands of a mechanic. After all, the materials needed are pretty much basic, and so are the steps that are involved. It does not take a lot to do it without the helping hand of the pros.

How to Replace an Oil Cooler Line: A Quick Guide for Beginners


Replace an Oil Cooler Line

As you use your vehicle every day, it is subjected to stress, which causes wear and tears to its components. While there are many parts that can be damaged over time, one worth noting is the oil cooler line. When it fails, it won’t be able to regulate oil temperature. This can cause the oil to break down and will negatively impact the way your vehicle performs.

An oil cooler line connects the oil filter to the radiator. It can be prone to various external problems, such as dents and corrosion. At one point, you need to have it changed to keep it working at its best. Here are a few steps you should follow to replace an oil cooler line:

  1. Jack up your Vehicle
  2. Remove the Oil Cooler Line
  3. Drain Excess Oil
  4. Compare the Oil Cooler Line
  5. Check the Seals
  6. Install the New Oil Cooler Line

That being said, if you want to learn these steps in detail, keep on reading the rest of this post and learn from the insights that I will be sharing.


Things You Need to Follow this Tutorial

Before you start, prepare the materials that will be needed for the task. The good news is that these materials are pretty much basic and available in your toolbox, except for the replacement oil cooler line, which you will remove.

  • New oil cooler line
  • Jack stand
  • Wheel chock
  • Ratchet/wrench
  • Oil pan

Step-by-Step Guide on How to Replace an Oil Cooler Line

Once you have gathered the materials that are needed, follow the steps that will be mentioned below. As you will realize, the instructions are pretty much basic and easy for everyone to follow. Before you keep on reading, watch the short video below for a visual guide to what needs to be done:


1. Jack up your Vehicle

The first thing that you have to do is to park the car on an even surface and jack it up. You need to access the hood when removing and replacing the oil cooler line. Make sure to find a place where the surface is stable, which is important for your safety. It should also have the lighting that you need to be able to work properly.

If you want to be safer, it will be best to also use wheel chocks. This will lock the wheel and prevent it from rolling while you are working underneath.


2. Remove the Oil Cooler Line

Once the vehicle is already in a set position, you should locate the oil cooler lines in the hood. After it is located, start having it removed. Take it out from the point where it is connected to the engine. Use a ratchet or a wrench to remove the bolts that serve as the connector of the oil cooler line. Loosen and unplug.

After removing it from under the car, remove the one from the top. Loosen the bolts that connect the line. Wiggle and pull it out slowly.


3. Drain Excess Oil

After you have removed the oil cooler line, the next thing that you have to do is to remove any excess oil. It will drip from underneath, so do not forget to place an oil pan to catch the drippings. You might end up with a mess if you do not have a pan to catch the excess oil.


4. Compare the Oil Cooler Line

Before placing the new oil cooler line, have it compared with the old one? Make sure that they have the same shape and length. It is important to have the same design so that you can mount it in its original position. It must also have the required bends to have the clearance that is necessary to complete its assembly.


5. Check the Seals

Seals are important because they will prevent leaking and make sure that the lines are tight and secured. The seals can exist in different forms, such as gaskets and O-rings, among others. If they are not included in the replacement oil cooler lines, you will have to purchase them separately.


6. Install the New Oil Cooler Line

At this point, you should be ready for the installation of the replacement oil cooler line. First, install the new line on the side of the oil cooler. Once you are done, install it on the engine side. See to it that the nuts or bolts will be tight. Otherwise, you might end up suffering from leaks. Reinstall all of the mounting brackets.


Pro Tips

Replace an Oil Cooler Line
Via: https://www.pelicanparts.com/techarticles/BMW-E60/74-ENGINE-N54_Engine_Oil_Cooler_Replacing/74-ENGINE-N54_Engine_Oil_Cooler_Replacing.htm

In this section, we will provide you with some insightful tips on anything that is related to the oil cooler line. One thing that most of you would be concerned about is when to have it replaced. After all, no one would want to spend money replacing something that is not problematic in the first place.

  • If your oil level is lower than normal, it can be indicative of a number of things, one of which is a failing oil cooler line. There is possibly a leak or crack, which is the reason why the oil drains more quickly.
  • You may also want to perform a quick inspection of the oil cooler line. Look for signs of wear and tear, including crimps and bends. If there are visible surface damages, take this as a sign that you have to replace the oil cooler lines.
  • If you notice that there is a puddle of oil underneath the car from where it is parked, this also goes to show that the oil cooler line can be problematic, which is why oil is dripping.

Meanwhile, when you are looking for a new cooler line that will be used as a replacement for the old one, here are some of the things to keep in mind:

  • As noted earlier, one of the most important is to make sure that they are the same shape, design, and length to have the perfect fit. Take a look at the OEM specifications to be sure that you will end up with the right aftermarket part.
  • Evaluate the materials that are used. See to it that it is made of high-quality materials that are free from rust and corrosion, among other external damages.
  • The connectors and the seals are equally important as the line or the hose itself. They must be tight enough to prevent leaking and to provide a secured connection.

Conclusion

After reading this short guide, I hope that you already know how to replace the oil cooler line. A lot of you might think that this is a task that is reserved for the pros. The truth is, you do not have to be a licensed mechanic to complete the task successfully. Just follow the steps that have been mentioned above, and you do not have to spend a lot to get the job done!