Home

Recent Posts

This is How Airbags are Fixed After an Accident


How Airbags are Fixed After an Accident

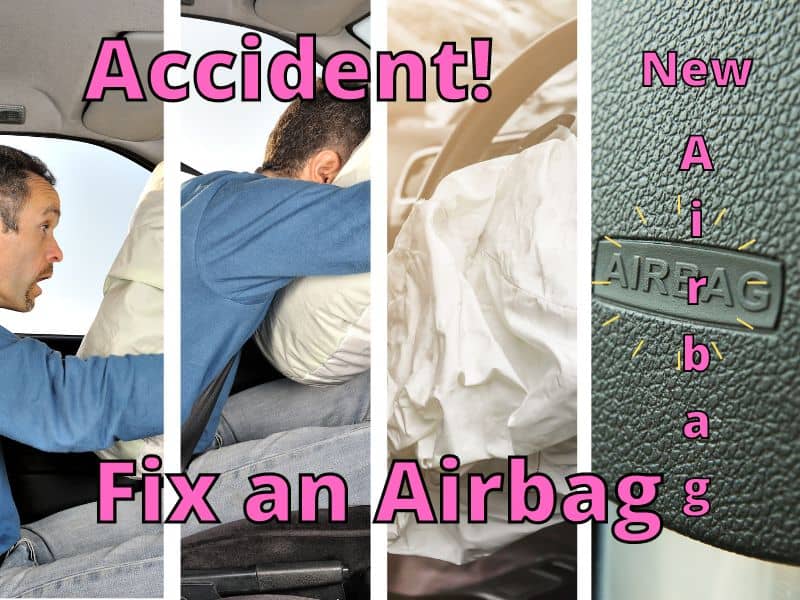
Airbags are an incredibly important safety feature in your car to keep you safe in the event of a collision. You’ve likely seen videos of an airbag being deployed during an accident, protecting the driver and front passenger. While many are familiar with airbags and their ability to deploy, you may also be wondering what happens to them after the accident occurs. 

After an accident occurs, airbags are fixed by resetting the sensors and replacing the airbag unit. Most modern vehicles will not allow you to reset an airbag for safety precautions; instead, you must replace it entirely. This requires removing the old airbag from the driver or passenger side and installing a new one.

Replacing an airbag after it is deployed in an accident is incredibly important before attempting to drive your vehicle again. This will ensure that the airbag will work properly if another accident occurs. We will look at the best ways to fix an airbag after an accident so you can safely return to the road.  


Why Airbags Cannot Be Reused After an Accident?

Technology in older cars allowed you to reuse airbags but place them back into their compartments. This could be incredibly dangerous and not redeployed properly when another accident occurs. To avoid these dangers, almost all newer cars will require an airbag to be replaced entirely. 

The technology used in today’s airbags is the primary reason they cannot be reused after an accident. It’s important to understand how an airbag works to explain this principle. Airbags are condensed into small compartments in the car and are released by the triggering of sensors based on collision force. The bags inflate quickly through a chemical reaction

Sodium azide and potassium nitrate react to form nitrogen gas, which is responsible for inflating the airbags quickly. Because these compounds are all used up after the airbag deploys, you can’t reuse the same bags. You will need to get new ones that have these chemicals ready to react when triggered in a future accident. 

Car manufacturers do this intentionally so that you have to replace the bags to ensure the highest safety standards. Even if bags could be reused, there are risks associated with being reset improperly or a lack of sensor triggering. If the entire mechanism needs to be replaced, you don’t run into as many safety risks, knowing the new airbag will do its job if needed. 


How to Fix Airbags After an Accident?

It is necessary to get your airbags fixed before attempting to drive your vehicle. Without airbags, you leave yourself and others in the vehicle defenseless in a collision. The steps to fixing an airbag will vary slightly based on their location, but they all apply similar principles. 

These are the steps to fixing an airbag after an accident: 

  1. Seek Professional Help for Replacement 
  2. Detach Battery Cable 
  3. Remove Bolts and Paneling
  4. Disconnect Airbag Wiring 
  5. Take Out Used Airbag
  6. Replace with Identical Airbag
  7. Reattach Wires and Screws 
  8. Reset Airbag Sensors

If you have been in an accident and are looking to fix your airbags, we recommend step #1 on your own and then letting the pros take care of the rest. Making sure the airbags are removed and installed correctly is incredibly important to avoid future malfunctions. While you may want to do it yourself because of expenses, professional replacement is the safest option. 

We have detailed all the steps to fix an airbag after an accident so you can understand how it works and the detail that is necessary to return your vehicle to safe and running conditions. 


Seek Professional Help for Replacement

machanic airbag

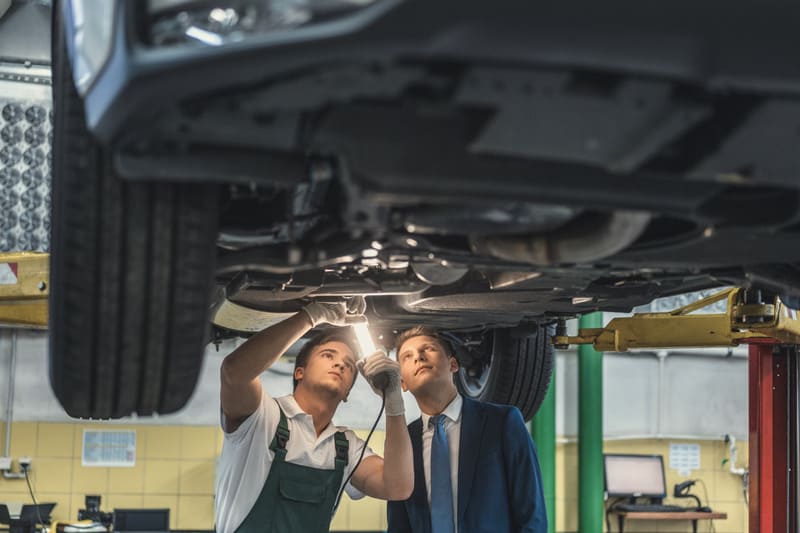
It is recommended that a vehicle is taken to a body shop or auto repair immediately after an accident occurs. You will want to have your airbags replaced before you drive your car again to ensure you are prepared for any future collisions. An auto repair will be able to give you an estimate on the cost of the repair. 

If you are unsatisfied with the quote, you can get a quote from multiple auto repairs. Look for companies that have good reviews so you know that the work they will be doing is of high quality. Unlike cosmetic issues with a car, replacing the airbags safely and correctly is absolutely necessary. 

Attempting to replace an airbag yourself can be very dangerous, especially if you do not have any prior experience doing so. Airbags have successfully saved thousands of lives, and those are all due to proper installation. The National Highway Traffic Safety Administration encourages car owners to only work with authorized service centers to fix airbags. 


Detach Battery Cable

battery cable

Before any attempts at removing the airbag occur, it is necessary to unplug the negative terminal on the car battery. The airbag is connected through electrical wiring, and any interference with a car plugged in could result in injury or electrocution. By detaching the negative battery cable, power is no longer flowing through the car. 

After unplugging, the battery needs to train (rest) for at least one hour. This will ensure that there is no backup power that could still be surging through the vehicle. It is best to wait a couple of hours to avoid any unnecessary accidents with unwanted battery power. 


Remove Bolts and Paneling

The type and locations of bolts that hold your airbag will vary on the make and model of the car. User manuals will contain this information, and service centers will be familiar with this replacement knowledge. Airbags are required to be located in the front of all car models made after 1999.  Airbags can be found in a wide variety of locations, including: 

  • Steering wheel: In some airbag deployments, you may need to replace the entire steering wheel or column. This will require more detailed installments, often best completed by a professional. Bolts are located on the backside of the steering wheel base. 
  • Passenger glove compartment: Removal of the glove compartment is needed to access the airbag underneath. These will deploy to protect the front seat passenger. Access to the bag is found inside the compartment with screws. 
  • Side doors: While not always required, many manufacturers are putting in side airbags for extra support and protection. 
  • Upper curtains: These are found on the roof paneling, where the rubberized door framing will need to be removed for access. 
  • Seat belts: Newer car models are experimenting with small airbags that deploy from the seatbelt, providing protection for all passengers throughout the car. 
  • Seats: Airbags will also deploy from the side of the seats to protect collisions coming from the side and to prevent passengers from colliding with one another. These bags often break through the seating material and will need to be completely replaced. 

For the driver-side airbag, the keys will need to be placed in the ignition with the steering wheel turned so you can access the bolts behind. This will allow the front of the steering wheel to pop off and reveal the airbag underneath. Passenger airbags are found behind the glove compartment, which will need to be removed with the screws found inside. 

The side airbags and those located in the roofing area will also have screws and bolts to remove the fabric or paneling that covers these interiors. Knowing where all these bolts are located is important for access as well as to not damage the panels upon removal. 

Removing these bolts and screws gives the repair person access to the airbag connectors so they can remove the airbag safely. 


Disconnect Airbag Wiring

The wiring that is connected to the airbag is very fragile and must be carefully removed for replacement. There are two connections on the driver’s side; you will need to carefully remove them, being aware that different car manufacturers will design these slightly differently. It is necessary to understand the specific model’s connector system before interfering. 

These connectors are taken off with small tools or gently removed by pressing small teeth. Wiggling the connectors is not recommended, as this can damage the small pieces. Instead, the connectors should be removed by pulling away in a straight motion.  

The wires need to be safely removed from the old airbag in order to replace it with a new one. If the wire connectors are damaged in the process, it will not be possible to safely reconnect a new unit. Both the teeth on the connector and the outlets on the airbag itself are made of fragile parts. Ensuring that these components are not damaged is incredibly important. 

The wires will be kept out of the way so as not to interfere with them as the used airbag is being removed from the vehicle. Removing the connectors from the airbag must be done with extreme caution, especially if the airbag is never deployed. You should treat the device as a bomb that could easily explode or deploy if you are not very careful. 


Take Out Used Airbag

used airbag

Once the wires have been disconnected, the old airbag will be taken out of the vehicle. After an accident, it may also be required to remove airbags that were not deployed because they were faulty or did not engage as they should have. You have to be increasingly cautious in working with these airbags as they still have the possibility of deploying. 

Remove all airbags carefully, separating those that have been deployed from those that have not. Follow these precautions when working with an undeployed airbag: 

  • Keep head and body away: If you can, try not to be in the direct line of contact with the airbag so that if it does deploy, you will avoid head and bodily injury.
  • Face trim covering away from you: When carrying the airbag, make sure the trim cushion or covering is not facing you so it will deploy away from your body. 
  • Avoid high temperatures: Keep the airbag out of direct heat, which may trigger combustion. 

These undeployed airbags cannot be disposed of as trash and must be handled carefully. When they are disposed of, they could explode or expose others to chemicals that are dangerous in isolation. Deployed airbags do not have any special instructions for disposal as they are harmless. 

Undeployed airbags that are replaced will be sent to recycling centers that can safely dispose of the unit and its reactive materials. 


Replace with Identical Airbag

Once the old airbag has been removed, the new airbag needs to be installed following the principles used to remove the old one. It is important that the new airbags are an identical match to the old ones, preferably using those made by the manufacturer, also known as OEM. This is the safest way to ensure that the parts will fit properly and work in the future. 

Replacement airbags should be new and not used. This will ensure that they are properly equipped and will deploy when needed in the event of a future accident. Ensuring the airbag is new is a primary reason it is recommended to work with authorized service centers. These businesses are vetted and can be trusted to find proper replacement parts. 

Airbags should be carefully put into their proper spots and facing the correct direction before any securing is done. It is important that the airbag is installed in the exact same manner as the original to make sure it will deploy correctly. 


Reattach Wires and Screws

Now it is time to return the car back to its original working condition. Once the airbag is in place, you will start to work backward from the steps we just laid out. This means that the airbag will need to be reconnected to the wires, carefully making sure the teeth and fragile plastic pieces are secured tightly. 

Once properly reconnected, paneling and screws can be replaced in their original locations. Once everything looks back to normal, you will want to look at resetting the airbag sensors. Properly securing all paneling is important for both the aesthetics of the vehicle, but also so the airbags can deploy properly in the future. 

Airbags hit a specific part of the paneling and trim in a car, allowing the airbag to reach the passengers upon impact. If the parts are not replaced where they should be, the airbag may struggle to break through the material and do its job effectively. 


Reset Airbag Sensors

Resetting the airbag sensors is crucial as it is responsible for allowing the airbags to deploy at all. When the car comes in contact with a foreign object, the sensors are triggered by the force of the impact. This allows the airbags to deploy and protect the passengers inside. After an accident, these sensors are no longer in position. 

Once the airbags are properly replaced and the battery is turned back on, your sensors will be reset. Every car will have a different location for the airbag sensors. The user manual of a car will detail exactly where this sensor is located. Most cars will display a light showing that the airbag sensors need to be checked. If replaced properly, there should be no light. 

Sometimes this airbag light will turn on even when there hasn’t been an accident. If this happens to you, try these steps before servicing the vehicle: 

  • Turn off battery: Similar to the process of replacement, you can unplug the car battery for a few minutes and then check once you replace the cables. 
  • Start and restart the car: If the light turns on and then off, turn the car off and wait a couple of seconds before restarting the car. Do this 2-3 times, and the light may go away completely. 
  • Service scanners: Many cars require that scanners are used by a manufacturer or service center to reset or fix airbag sensor problems. This is to prevent people from driving with potentially faulty airbags. 

If none of these tips work, you may need to replace the airbag sensor entirely. You want it to work in the event that the airbags are faulty and need replacement before an accident occurs. Once these sensors have been put back into place with the replacement of the airbag, the battery will be reconnected, and the car can be driven again. 


New Airbags After an Accident

When it comes to car safety, being overly prepared is critical. When airbags deploy after an accident, they prove how effective they are in keeping passengers safe. Fixing the airbags should be handled with the same amount of precaution, so they would be able to perform the same action again. 

While no one wants airbags to have to deploy again (signifying a new accident), knowing that they will, if necessary, is imperative for user safety. Airbags should be fixed by authorized service centers and professionals to make sure that all of the proper steps are followed so that you can depend on them in the future! 

The Causes of Bubbles in Car Tires and 7 Fixes


Bubbles in Car Tires

A tire bubble may seem like an oversight to the untrained eye, but it can be detrimental in the long run. Tire bubbles require instant solutions; otherwise, they can cause car tires to pop, leading to road accidents, casualties, and fatalities (in extreme cases). 

Bubbles can be caused on the tire tread and the tire sidewalls. Here are the ten major causes of bubbles in car tires:

  1. Poor Road Condition
  2. Excessive Weight
  3. Railroad Crossing
  4. Driving with a Flat Tire
  5. Under-Inflated Tire
  6. Manufacturing Errors
  7. Detached Sidewall Layers
  8. Low Temperature
  9. Worn Out Tire Cover
  10. Impact with Curb

According to the National Highway Traffic Safety Administration (NHTSA), around 11,000 car accidents in the United States are caused by tire failures every year. Many of them were the result of tire bubbles. The remainder of this article will discuss bubbles in car tires, their causes, and preventive measures that can be taken to prevent them and future tire failures.  


Types of Tire Bubbles

Bubbles on sidewall and tread

There are two types of tire bubbles: bubbles on the tire’s sidewall and bubbles on the tire tread.

  • Bubbles on Tire Sidewalls – A car tire bubble on the sidewall is a protrusion from the tire’s sidewall that is the result of leaking air from within the tire into the tire’s body.
  • Bubbles on Tire Treads – A car tire bubble on a tire tread is a protrusion on the tire tread, which occurs when one of the steel belts that go around the tire’s circumference ends up underneath and/or outside the tire tread. When a tire tread bulge forms, a noticeable “bumping” happens while driving.

Bubbles on tire sidewalls and bubbles on tire tread have one difference: a tire bubble on the sidewall is not evident while driving except for when you inspect your tires. In contrast, bubbles on tire treads become noticeable due to a particular rhythmic “bumping” while driving.

Many individuals come across tire bubbles daily, and they take them lightly without realizing how dangerous these things can be. In fact, it would be better to have a flat tire than to have a bubble on it.


10 Causes Of Bubbles in Car Tires

You may notice bubbles in your car tire sidewall if you check for protrusions or mismatched bumps on the sidewalls of your tire. However, the little bulge on the tire is the earliest stage of a tire bubble. Over time the bubble becomes larger, making it more visible.

There are many reasons why these little bulges—which eventually become bubbles—appear in car tires. The following are the ten main causes of car tire bubbles:


1. Poor Road Condition

Potholes On A Paved Road

Driving on roads with speed bumps, potholes, and any other obstructions or irregularities causes damage to the plies of a car’s tire. These irregularities eventually lead to the separation of the tire layers. Most drivers aggressively approach potholes and speed bumps, especially when driving on the road they are not used to and do not know where the cracks and bad spots are. 

Constant encounters with these speed bumps and potholes eventually lead to tire bubble formations. If you end up traveling down roads in poor conditions, it is highly recommended that you check your car tires for small bulges after taking such routes.


2. Excessive Weight

excessive weight

If your vehicle ends up carrying more weight than it should, it could lead to the development of bubbles on your tire, especially when this occurs repeatedly. If your car is used to transport goods, it is important to be mindful of your vehicle’s payload per trip; otherwise, your tires bear the consequences.


3. Railroad Crossing

Railroad crossing

Sometimes, motorists travel via roads with railway tracks across them. If a driver takes the “railway” path daily, maybe on his way to and from work, for example, over time, the tires of his car would undoubtedly develop bumps, which would then grow into bubbles. 


4. Driving With a Flat Tire

Flat tire

Flat tires may occur at unexpected times. Some motorists often make it a goal to fix flat tires by heading to the nearest car shop to get it vulcanized. In contrast, others drive their vehicle to their desired destination regardless of the tire’s condition, making promises to get it repaired at a later time as long as the tire is not quickly losing significant amounts of air. 

However, driving with a flat tire gives room for tires to come in contact with foreign objects, which results in the tire being pressed against its rim, damaging the internal liner and forcing air leakage into the tire’s body and eventually resulting in the development of bubbles.


5. Under-Inflated Tire

under inflated tire

Under-inflated tires develop excess heat, which causes the collapse of the tire’s intermediate bonding adhesive and the eventual emergence of bubbles. 


6. Manufacturing Errors

Car Tires Rack

Not all tire bubbles come from impact and collision; on rare occasions, bubbles may form because of internal defects in the tire, which are usually from the tire’s manufacturer. In this case, it can be taken back to them depending on your warranty and their policies.


7. Detached Sidewall Layers

tire sidewall detached

Tires are built by fastening several polyester cords with steel wires and rubber beds using an adhesive. The tire will bubble when the layers get disconnected from the tire sidewall. Several things can cause the layers to detach, like the inappropriate hardening of layers and the use of weak adhesives to fix layers.


8. Low Temperatures

road with snow and mountain background in winter low temperature

Motorists in certain countries regularly experience bubbling of tires as a result of a temperature drop. Countries like Estonia, Canada, Finland, and Russia have low temperatures, which reduce the pressure inside car tires. If the reduced pressure in the tire is ignored, it will eventually cause the tire to bubble.


9. Worn Out Tire Cover

Damaged tire after tire explosion

A worn-out rubber cover of a tire makes the tire susceptible to fracture whenever an impact occurs. This means that the tire’s metal skeleton is likely to dislocate. When the tire’s metal skeleton dislocates, this would eventually lead to bubbling.


10. Impact With Curb

Vehicle Wheel and Tire

When your car tire collides with a curb, the curb and the tire wheel compress your tire, causing it to develop a bubble. Curb collision is one of the most common causes of tire bubbles.


Can Bubbles in Car Tires Be Fixed?

The emergence of bubbles in car tires is no minor issue; it should be taken seriously and instantly addressed. However, unfortunately, bubbles in car tires are unfixable. The only solution for a tire bubble is the immediate replacement of the affected tire. 

It is a good idea to replace all four tires while replacing an affected tire. This will make sure any irregularities are delineated.


How Much Does it Cost to Replace a Bubbled Tire?

Damage caused by bubbles is unfixable due to the failure of the tire’s internal structure. Replacing a bubbled tire depends on the car tire you require. It can cost around $200 to $650 per tire.

If you would like to cut costs, it would be beneficial for you to purchase road hazard insurance. Road hazard warranties cover flat tire damages caused by several things like nails and bulges; this becomes very useful if you reside near construction zones. 

The warranty will allow you to receive a free replacement for the affected tire(s). The extra bucks you end up spending would certainly be worth your while and save you unnecessary expenses in the future.


Do Tire Warranties Cover Tire Bubbles?

The price of getting a bubbled tire replaced is dependent on the tire’s warranty. If a bubble on your car tire is developed due to the manufacturer’s errors, then the manufacturer would likely replace it for you cost-free. 

Having your tire manufacturer replace your tire is dependent on your tire’s lifespan with your car because several warranties do not go beyond four to six years. 

Initially, when a tire bubble occurs, you may impulsively hold the manufacturer responsible. However, road damage is discernible due to rubber shavings within the tire. You still have the option of getting assistance from a purchased road hazard warranty if the bubble is caused by inadequate maintenance or road hazards. 


Can You Replace Just One Tire?

It is advisable to replace all four tires in the case of a bubble. But, if you cannot afford to replace all four, the replacement should be paired alongside the tire with the second-most tread depth. Both adjacent tires should be fixed on your car. Nevertheless, it is still best to replace all four tires or at least two. Replacing all four will ensure your tires are rotated on schedule. 

Replacing all four tires while replacing a bubbled car tire also saves unavoidable future costs. This is because it is very likely that the “unaffected tires” have little bulges that may not be visible at the time, so a stitch in time will save in the long run. 

Some tires come with warranties that allow you to take your tire back for replacements in the case of damages sustained on the road or a manufacturing error. However, terms and conditions apply.


How Can Car Tire Bubbles Be Prevented?

Car tire on black with rain

Since the bubbles that emerge in car tires cannot be fixed, the next best thing you can do is prevent them from happening in the first place. 

As a car owner, you are required to check your car regularly, especially before you drive. While going through your regular car checkups, look for any bubbles on the sidewall of your car tire(s). A bubble discovery may leave you perplexed and worried, although having a bubble on your car tire is not a cause for too much worry, as there are several ways to handle and prevent them.

Let’s discuss seven ways bubbles in car tires can be prevented:


1. Drive With Caution

Winter Driving - Caution Snow

This is the foremost preventive measure against car bubbles. Although it may be obvious, it cannot be overlooked as several causes of bubbled tires are due to the driver’s driving style. Do not approach speed bumps at high speed, avoid colliding with curbs while parking, and endeavor to keep your vehicle going while making a hard turn.


2. Frequently Check Your Tires

Man checking car tire

Before using your car daily, it is important that you check your car to ascertain if everything is in order. Check your tires constantly, especially if you go through rough routes daily. Frequent tire checkups allow you to notice bubbles in their early stages. Additionally, checking your tires helps you acknowledge avoidable areas that pose damage to them.


3. Update Tire Pressure

Checking pressure tires

Motorists in countries with low temperatures tend to have their tires lose pressure due to the weather. If you live and drive in such regions, endeavor to update your tire pressure whenever you notice some semblance of deflation. Aside from living in cold regions, some folks have a nonchalant habit of driving with deflated tires; if you are guilty of this, change that lest you spend unnecessary money on tire replacements.


4. Regularly Service Your Car

service your car

Having your car serviced regularly is a great preventive measure. This checks your suspension and other parts, making sure that your tires encounter evenly distributed impacts across your vehicle while you drive. 


5. Avoid Potholes

Pot holes in tarmac road surface

Potholes are one of the major causes of bubbles in car tires. While driving, endeavor to steer your way around potholes. If you can avoid driving through routes with potholes, then you should do so by all means. If you are caught in a fix where you cannot seem to avoid potholes, then drive over them very carefully.


6. Do Not Drive With a Flat Tire

Suspension car and Spare tire

Most motorists carry on driving their vehicles when they have a flat tire. Flat tires should not be driven with, no matter how minor they may seem, as this would cause the tire rims to pinch the tires, leaving them with bulges. As soon as you notice a flat tire on your vehicle, park and replace them with your spare tires, or if a car shop is close by, you can have them inflated and/or patched.


7. Weight Control

Boxes of tomatoes in the back of the truck.

Motorists who utilize their cars for the conveyance of goods and services do not realize the damage it causes to the tires. When a vehicle is constantly loaded, it compresses the rim against the tires; this could lead to a number of issues for your tires aside from bubbles.

If you use your car for the transportation of goods, endeavor to keep the weight limit per trip at a considerable level. This will save you a lot of money.


Frequently Asked Questions (FAQs) About Car Tire Bubbles

Tire Bulge Defect

The following are some of the most common questions drivers have about car tire bubbles:


Can You Drive a Car With a Tire Bubble?

Although bubbles on car tires do not inhibit your car from driving, it is very dangerous. A bubbled tire is literally a ticking time bomb. The only thing holding bubbled tires from blowing out are some layers of nylon, sidewall rubber, and polyester. Yes, you can drive a car with a bubble, but you shouldn’t unless you want a blown-out tire, which can lead to fatal accidents.


Is It Safe to Drive with Bubbles In Your Car Tires?

Driving for long distances with a bubbled tire is very risky as the tire is susceptible to blowing out at any point in time. Your major concern should be replacing the affected tire as soon as possible. It is possible to drive for a short distance to have the tire replaced but very unsafe for everyday usage.


How Long Can You Drive With a Bubble On Your Tire?

Several times in this article, it has been stated that when you have a bubbled tire, the most reasonable course of action is to have it immediately replaced. However, if you must drive regardless of the tire’s condition, you must not go beyond 35 miles per hour (MPH). In addition, while driving, avoid hard braking and acceleration, or else you add stress to your tire. 


Is a Sidewall Bubble Dangerous?

Yes. If you notice a sidewall bulge while you are at home or while your car is parked, then it is not dangerous.

However, sidewall bubbles cannot be considered safe because your tire is no longer protected from popping from road pressure. So, a sidewall bubble is not dangerous when your car is stationary, but the minute you decide to start driving with it, that is an entirely different situation.


Conclusion

Bulges and protrusions on car tires are recurrent in vehicles daily. Most people notice these little bubbles in their tires but do not take them seriously because they are unaware of the danger it poses to them, their vehicles, and everyone around them (especially on the road).

Take the causes of tire bubbles in car tires into consideration to avoid them from occurring again, and if you have yet to experience any bubbles on your tires, make sure you take preventive measures to save your life and money.

References:

https://wheelzine.com/what-causes-bubble-in-automobile-tire

https://www.carbibles.com/tire-bulge/ – Update: website unavailable

https://www.tires-easy.com/blog/pop-dont-blow-the-tire-bubble/ – Update: page unavailable

https://www.nhtsa.gov/

https://www.nexentireusa.com/files/documents/Tire_Bubble_Q_A1.pdf

https://www.actiongatortire.com/what-to-do-if-you-have-a-bubble-in-your-tire/

https://www.tireamerica.com/resource/side-bubble-in-tire

https://www.pitstoparabia.com/en/news/tire-bubbles

What if Your Steering Wheel Came Off?


Steering Wheel Comes Off

Steering wheels are an essential driving component. You need your steering wheel to make turns and steady your car. You use your steering wheel each time you get in your vehicle and drive somewhere. However, have you ever wondered what you would do if your steering wheel stopped working?

That creates a severe problem. If you notice that your steering wheel is getting loose, you can take steps to remedy that problem. 

If your steering wheel comes off while you are driving, you’ll need to maintain tight control of the car until you can slow down and pull over at the nearest stop. There are two types of steering failure that can occur while you are driving: 

  • Total failure
  • Loss of power steering

Since there isn’t much information available on the Internet today about steering wheels coming off while you are driving, we created this article to help you out.

Below we’ll discuss what you can do if your steering wheel comes off while you are driving, the causes of a loose steering wheel, and how you can approach this issue and prevent it from happening in the future. 


Can a steering wheel come off?

Yes, unfortunately, your steering wheel can come off while you are driving and while you may least expect it. To understand how this happens, we need to explain the two types of steering failure you can experience. Those are:

  • Total failure
  • Loss of power steering

Loss of Power Steering

Steering fluid leak

Experience a loss in power steering is more common than complete steering wheel failure. If your vehicle has power steering, you can experience failure because of a few reasons. The first is known as a slow leak in your hydraulic system.

If you have a slow leak, your steering wheel will still function as normal. However, you’ll start hearing a whining noise coming from your steering column. Along with this, you’ll experience a slow stiffening of the steering.

If you notice a leak in your power steering, you must take your car to a qualified mechanic. Have the problem fixed before you experience total steering failure, or your steering wheel may ultimately come off of the column. 


Fast Leaks

If you are experiencing a fast leak, however, then you could wind up losing the ability to control your car. The loss of control occurs very quickly, unfortunately. If you experience a fast leak, you’ll know something is wrong fairly quickly.

For instance, the steering wheel will become stiff and heavy, and you’ll have a hard time turning the wheel. If you continue to turn the wheel too hard or too often, you could lose the steering wheel of your car.

If your vehicle becomes too difficult to turn or the steering wheel starts to come off, you need to keep a tight hold on it to keep your car controlled. If the steering wheel is still connected, you can slightly control your vehicle. Don’t brake too quickly in a panic.

Instead, slowly come to a stop. Remember, however, that steering your car becomes more difficult when you slow down. 

So that’s why you’ll need to slow down gradually instead of performing a hard brake. You should also turn on your emergency lights. Once you’ve brought your car to a stop, you should call a towing company to seek some help. Keep in mind that if your hydraulic system fails, your brake system may also have issues. So, you may also feel some stiff brakes when you are trying to stop the car. 


What to Do If Your Steering Wheel Falls Off?

Steering wheel came off

If your steering wheel falls off, you’re experiencing a substantial mechanical failure. While this is rare, you will lose all ability to steer when the wheel comes unhinged. If you find yourself in this type of situation:

  • Hit your hazards
  • Bring your car to a slow, gradual stop
  • Call for assistance

Once your car is stopped, you may need to call for assistance or seek assistance pushing the vehicle somewhere safe. Since you won’t be able to steer your vehicle off well to the side, you’ll need to get your vehicle out of harm’s way as soon as you are out of harm’s way. Call a towing company. 

If your steering wheel falls off and you don’t have much traffic to deal with, then you can brake harder and faster. However, you’ll need to pump your brakes if the road has conditions such as:

  • Wet
  • Snow
  • Ice

Remember, without your steering wheel, you won’t be able to control your car if you start sliding. 

If your steering wheel comes off and you are surrounded by a lot of traffic, like when you drive on a freeway, first turn on your hazard lights and start honking.

Also, make gestures with your hands. If it happens while you are driving at night, start turning your high beams on and off. After you’ve warned the other drivers around you, slow down as slowly as you possibly can so that the drivers around you don’t wind up crashing into you.

While doing that, perform the following:

  • Downshift and brake as gradually as possible.
  • Plan to bring your car to rest on the shoulder or by a divider.
  • Wherever you can safely stop your vehicle at this point is where you should be braking. 
  • Move your car out of traffic and call a tow truck for help.

What Makes a Steering Wheel Come Loose?

One of the significant causes of steering system failure is over-turning, also referred to among mechanics as “free play.” If a steering wheel undergoes too much over-turning over time, that can make it very difficult to control your car. Eventually, the steering will feel loose, and then you may need to correct it consistently so the vehicle will drive straight. 


A Loose Steering Component

You may also have a loose steering component causing your inability to turn. If that’s the case, you’ll:

  • Hear a knocking noise whenever you go across a bump. 
  • Experience a loose feeling
  • You may feel a shimmy in your wheel 
  • Your vehicle may tend to go from side to side 

If you notice any of these issues, then you should get your steering checked out right away to avoid any significant problems. Ignoring these issues can create a tremendous amount of wear and tear on your car, including a lot of tire wear.

That means you’ll need to replace your tires, and ignoring the problem will cost you more in the long run. You may even wind up experiencing an accident that you could have avoided by simply handling the problem initially. 


Reasons for Over-Turning

There are a few reasons why some drivers excessively over-turn their steering wheels when they drive. Two of the most common causes include:

  • The steering wheel or gear itself is already loose, or
  • There is looseness in a steering linkage socket

While there are many different kinds of vehicles today with a wide variety of steering system designs, most of them can be fit into one of three categories. Some of them include the following: 

  • A steering box or rack and pinion are attached to your steering wheel using the steering column.
  • Linkages connect your steering box to your front wheels. 
  • Front suspension parts are used so the wheel assemblies can pivot while the joints hold the tires and help guide them while you drive.

The front end of your steering system connects to your steering box or rack and pinion, depending on the type of vehicle you drive, using several linkages. Those linkages are attached to both the steering box and the wheel assemblies.

So, your wheels will move whenever you move your steering wheel. However, if the linkages holding everything together start to wear down, they become weak. That means the steering will start feeling odd. 

Wear and tear typically occur because of tooth contact. This problem occurs inside your steering gearbox, or rack and pinion, and can wear down and age or misalign as your car becomes older. Regardless, if that occurs, you’ll still wind up with loose steering.

Sometimes all you need is a simple steering adjustment to keep your car going. However, if your vehicle has a lot of miles on it, then you may need to replace the gearbox or rack and pinion. 

Visual inspection by a mechanic can often help you resolve the following types of problems with your steering:

  • Your chassis components or rack and pinion are worn.
  • Your tie rod ends are worn out.
  • Your control arm bushings need to be replaced.
  • You need new ball joints or steering gear

How Can You Tell if You Have a Steering Wheel Problem?

When it comes to steering wheel problems, there are several things you’ll notice before your steering wheel falls off or stops working. You should pay attention to the following warning signs. If you don’t, you may wind up getting into a car accident that your car insurance may not help you with, unfortunately. So, if you notice any of the below-listed warning signs, you should take your car to a mechanic to get it fixed. 

  1. The Steering Wheel is Hard to Turn
  2. Slipping Steering Wheel
  3. Steering Wheel Vibrates
  4. Your Car Moves to One Side
  5. Screeching Noise
  6. Discolored or Foamy Power Steering Fluid
  7. Loose Steering Wheel
  8. Excessive Play on Steering Wheel
  9. Excessive Vibration on Steering Wheel While Turning

#1 The Steering Wheel is Hard to Turn

 f your car has power steering (and most cars nowadays utilize this feature), then you more than likely have a problem with your vehicle. You can use the steps below to check on your power steering:

  • Check your power steering fluid and make sure your fluid reservoir is as full as possible.
  • If it currently isn’t full, then fill it up to the top.

Check your car’s power steering fluid again within another day or two after driving the vehicle. If you notice that your power steering fluid level has decreased, then you should start looking under your car to see if you have a fluid leak. There may be a leak in one of the following:

  • Your hose
  • Your steering pump
  • Your steering rack

If you do have a leak, then take your car to a mechanic immediately. 


#2: Slipping Steering Wheel

If your steering wheel slips when you try to turn it or hold it so it is in a turned position, then you probably have a deeper issue with your power steering. If your car isn’t leaking, and you are experiencing this, then you may have one of the problems below:

  • Loose or worn steering belt
  • Faulty pumps 
  • A worn-out steering rack mount
  • Loose steering belts

If you suspect that your car is experiencing any one of these issues, take it to a mechanic.


#3 Steering Wheel Vibrates

If your steering wheel is often vibrating, then you may have another issue. You could have a wheel alignment concern, but a vibrating steering wheel also means that you probably have something wrong with your power steering.

This problem usually occurs when contaminants build up in your power steering system. When contaminants build up, they’ll start making the wheel vibrate when you turn the wheel.

To fix this problem, you’ll need to take your car to a mechanic and have them perform a power steering flush. 


#4 Your Car Moves to One Side Often

If your car feels like it’s pulling to one side while you are driving, then you will most likely need to take your vehicle to a mechanic. If your car is doing that, you most likely have a problem with your steering gear.

That’s due to wear and tear. You can experience premature steering gear wear if your power steering fluid isn’t being maintained properly because then your car is lacking lubrication.


#5 Screeching Noise When Wheel Turns

Another common problem that many people experience when having power steering issues is a screeching noise whenever the wheel is turned. When this occurs, you typically have a worn-out power steering belt. Your power steering belt attaches to your engine and your power steering pump. 

Sometimes your screeching noise is a sign that your power fluid steering levels are low. If they are, remember to refill them and check in a day or two to see if your power steering fluid has gone down again. If it has, then you’ll need to check around for power steering fluid leaks. 


#6 Discolored or Foamy Power Steering Fluid

We’ve mentioned a few times to check and fill your power steering fluid. However, if you look at your power steering fluid and you notice that it is foamy or discolored, then you have another problem.

When the power steering fluid looks foamy or discolored, then you either have water or air in your power steering system. That means your fluid can’t lubricate your power steering correctly.

So, if that’s the case, you most likely need to take your car to a mechanic to undergo a power steering flush. 


#7 Loose Steering Wheel

When you notice you have a loose steering wheel, then your steering racks and tie rods are most likely worn out. It’s not a good idea to keep driving your car with a loose steering wheel, however. Even if the steering wheel still works, you should take your vehicle to a mechanic to prevent any future problems or possible accidents. 

If you don’t immediately address a loose steering wheel issue and take your car to a mechanic, you increase your chances of having your steering wheel fall off while you are driving, and that’s what we are trying to avoid here. 


#8 Excessive Play on Steering Wheel

If you are experiencing excessive play with your steering wheel, then you probably have worn out your steering gear. Check to see how far you need to turn your steering wheel before your wheels turn.

If you have to turn your steering wheel over an inch before you notice your wheels turning, then you need to take your car to a mechanic to get your steering gear replaced. 


#9 Excessive Vibration in Steering Wheel While Turning or Accelerating

If you are experiencing excessive vibration in your steering wheel while turning or accelerating, then you probably have to replace your tie rods. If you decide to ignore the problem and you keep driving the car regardless, eventually, your entire car will vibrate. That can create a total loss of steering or complete steering failure. 

So, if you are having problems with excessive vibration in your steering wheel while turning or accelerating, you should take your car to a mechanic immediately. 

Ignoring any one of these signs and continuing to drive your car will only create more problems for your vehicle later, like worn-out tires, for instance. 

Headlights vs. Taillights: What’s the difference?


Headlights vs. Taillights

You can find headlights on nearly everything on or near the road. It is a part of your vehicle that you cannot go without. These sets of lights help you see at night in areas that are not well-lighted or lighted at all. You can even find headlights on some lawnmowers if cutting grass takes longer than you expected. 

Headlights and taillights are not only different in use but also bulb shape, size, and function. It depends on the type of car or vehicle you have, but most work the same way.

While headlights and taillights are typically associated with motor vehicles, you may also find headlights and taillights on off-road or other kinds of vehicles. They make things a bit easier to see, and they make you easier to see. However, in some cases and in some places, you can get tickets if one is ever out in the vehicle you drive.


Headlights

White Mercedes Benz Car headlights

In the front of your vehicle, there are two lights. In some areas, they are called headlamps; other areas call them headlights. No matter where you are from, they are meant to make the night brighter and safer for you to see in front of you. They also let the cars in front of you know you’re there.


Types of Headlights

There are several types of headlights. Depending on the make of your vehicle and what type of headlights it may have, or it may be able to be interchanged with, there are different types of headlights that need to be taken into consideration. This can include cost, installation, brightness, and more. 

Projector

AD

Projector lights are high-performance lights originally found and available only on luxury vehicles. They are meant to make the roads brighter at greater distances. They use high-intensity discharge (HID) and Light-emitting diode (LED). With this combination, it is unsafe to use traditional reflector housing as the traditional reflectors have no specific direction on where the light goes. This can cause a loss of sight to other drivers on the road, which can pose a serious safety issue for you and the other drivers. 


Halo

AD

Halo lights are one of the highest sought headlights due to their appealing looks and excellent visibility that it provides on the roads. It allows a vehicle to have that slick custom look. Generally, projector headlights include Halo and LED capabilities. There are several types of Halo headlights, so be sure to do your research before purchasing them outright. 


HID

AD

HID (high-intensity discharge) lights are also known as Xenon lights, known after the gasses that are inside the bulb. These headlights give off a “cool” or blue tint. The HID headlights are typically three times brighter than halogen. However, due to it creating gases inside the bulb, it does not take a lot of voltage to keep running. This makes it easier on your battery system. They are created to be able to be focused and prevent glare on oncoming traffic. 


LED 

AD

LED (light-emitting diode) lights are most known for their 90% more energy efficiency. LEDs convert electric power into the light but do not create a whole bunch of heat.  They also come in different shapes besides just the standard headlight bulb shape. It is known to be used for headlights and taillights. This allows a cool, uniform look from front to back on nearly any vehicle. With the way LED lights work, they are typically known to last longer and are brighter and clearer. In the case of the headlights, this allows you to be able to see longer and clearer. 


Laser

AD

When we think of a “laser light”, it is not usually in combination with a headlight. Laser lights are legal in Europe but not in the US. I found one light on Amazon.com that could be laser but for an off-road vehicle.

With the combination of lasers, a set of mirrors, and a bit of focus, you can get a bright white light for a headlight. The laser lights also allow different shapes and designs while performing well. “Laser lights can produce 1,000 times the intensity of LEDs, but consume only half as much power.” (blog.theretrofitsource.com)


Standard

AD

Standard headlights consist of a forward-facing bulb in a reflective case. Earlier vehicles had standard headlights that looked similar to your normal house light bulb. They are just like the normal bulb as they are heated and run by electricity. These types of bulbs are being replaced by energy-efficient bulbs. The standard headlights are not as bright or durable. 


Be Aware

Always be conscious of your lights and whether they are on high or low beams. This can affect other drivers on the road as well as yourself. If your bright lights are on, you may be able to see quite well; the individual in the other lane may not be able to see due to the brightness of your lights.

Also, make sure the position of your headlights is where they need to be as well. This can also affect other people who are sharing the road with you. Your safety is as important as their safety. Putting others at risk also potentially puts yourself at risk as well. 


The History of the Headlights

The headlight history came in the most obvious of ways with carriage lamps. The first horseless carriage actually used carriage lamps as well. Carriage lamps typically consisted of candles or even lanterns. Headlamps were originally fueled by acetylene or oil from around the eighteen hundreds.

These lamps were very popular as they were able to be resistant to wind and rain, which allowed not only more but also safer travel at night. However, the first electric ones were introduced in 1898 in a Columbia Electric car. 

The use of these lamps did not stick as some conditions and challenges posed against the continuous use and manufacturing of these electric lamps. In 1908 electrical headlamps became standard; then 1912, Cadillac (GM) integrated their vehicles with an electrical ignition and lighting system. It was not until 1940 that a sealed version came to be. Then in 1957, the ability to have different-shaped headlights came to be. 


Taillights

Taillights are located at the rear of any vehicle. They are there to indicate where you are as opposed to other drivers. It is hard and nearly impossible to see another vehicle when it is very dark. However, taillights help locate you and help others not to hit you. They also help in the case of weather and passing. Make sure all of your taillights are in proper order. In some places, you can get a ticket for not having working lights. 


Types of Taillights

Taillights are mostly standard, other than the few that are involved with LED, HID, and Halogen lights. It is important to know which bulbs properly fit your vehicle. You also still have to ensure that the voltage is the right fit. 

LED

AD

LED taillights give approximately three times more brightness than standard taillights. This helps it to be brighter for other drivers to see. Especially when it comes to harsh weather where visibility tends to falter, they can also help you be seen from further distances at night by other drivers. Many emergency vehicles run off of LED and smaller vehicles such as motorcycles. They are more durable, safer, and brighter. 

HID

AD

HID, again also called Xenon, taillights are used on many vehicles to catch the attention of drivers even during the day. They also have a very intense, stronger light than the standard lights. These are also used by motorcyclists as well to capture one’s attention when on the roads both day and night. 

Halogen

AD

Halogen taillight bulbs again use less energy, which allows them to burn cooler, making it easier on your vehicle battery. They are bright and able to be seen from a good distance. Typically, most taillights come with Halogen taillights and often come with most vehicles. 


The History of the Taillights 

Taillights, along with brake lights, were brought in around 1915. However, it was not until 1993 that the LED taillights were installed. However, the specific reason why they are red actually came from the way they ran trains throughout our history. In a time of carriages, most lamps were white and yellow. So, “go” started as white, green meant “caution,” and red meant “stop.” However, a lens dropped a light one night, causing the light to be white, and the train went on instead of stopping. Therefore, we now have green, yellow, and red, which is why a warning is set in our taillights as a red light. 


Taillights VS Brake Lights 

Do not confuse your taillights with your brake lights. Brake lights are a completely different system and only come on when the brake pedal is pushed. Brake lights being out can also cause you to get a ticket in some areas. Taillights should come on automatically when the headlights come on. If your headlights are automatic, then your taillights are also automatic; if they are manual, they will come on when you turn them on. 


Maintenance

Car mechanic checking a car

Maintenance is important in every vehicle. It will help your vehicle last longer and strong. Everything needs to be frequently checked from top to bottom, front to back. All lights (headlights, taillights, and blinkers) need to be checked along with fluids (oil, transmission, brake (or clutch), and any other fluids that may be involved with your vehicle. Proper maintenance ensures that you are able to catch things that start going wrong early to prevent much larger things from happening. 


Cleaning

microfiber clean headlight

Clean your headlights regularly. They can get extremely dirty with dirt, oil from the road, insects, and chemicals that can come from other vehicles. It is recommended that you use a microfiber cloth and do not use anything harsh that could scratch the cover of your headlights. 


Clouding

Damaged and blurred headlight

Clouding or yellowing can cause a headlight not to shine as brightly and can cause safety issues. The smallest things, such as oil and chemicals from your own car and other cars, can cause this to happen to headlights. Typically, the sunlight bears down on the plastics of the headlights. If cleaning and detailing do not help solve the problem, replacing them may need to be done. 


Check Brightness

check headlight brightness

Typically if a headlight starts dimming, it is because it is close to going out or not getting enough power to shine as bright as it should. You can do this as a walk around your vehicle or shine your lights onto the side of a building, your home, or even your garage. 


Position

Check It is important that you check the position of your headlights. It is easy for headlights to be bobbled out of place. If they are not positioned correctly, they can cause safety and vision issues. Again, you can shine your lights onto the side of a building, home, or garage.

Typically, if they are aligned correctly, they are even, and in some cases, in a “v” or “check mark” shape. You do not want a large dark spot between your headlights. Low beams at approximately twenty feet should be thigh-high. High beams at approximately fifty feet should be thigh-high. Always seek a professional if you do not know what you are doing. 


Bulb Replacement

When replacing a bulb, it is recommended to replace both of them, not just the dead one. If one bulb has gone out, it is a rule of thumb that the other one is sure to follow shortly after. It is difficult to just drive with one functioning headlight. Again, if you do not know what you are doing, it is suggested that you see a professional. Check with your local part store. They may be willing to change your bulb if you don’t know what you are doing. 


A Hint from a Mechanic

When handling bulbs, wear gloves (latex is fine) and wipe the bulb when taking it out of the package. This way, the oils from your hands do not stick to the bulb; this can cause premature failure. 

Be sure to get the correct bulb. Most stores have a series of letters and numbers per bulb that fit the vehicle’s make and model. This also is helpful so that you do not get the wrong size bulb for your vehicle. Also, check the voltage and other information to ensure that you are getting the right one. You do not want to get a high overheating bulb for a casing that may cause damage. 


Saving Money

If you keep up with proper maintenance and stick with what is meant for your vehicle, you will save money. Maintenance is often not kept up, and it leaks into larger problems that cost more money. If your headlights start blowing frequently or lights begin to malfunction frequently, there may be an electrical problem. If that electrical problem is not cared for, then it could cause an electrical fire or cause a surge in the car. This can also put a strain on your battery and your alternator. 


Customization

There are many ways to customize your headlights and taillights. However, use caution when shopping around and gathering information. There are some things you need to be aware of. Not only do you need to be knowledgeable of your voltage and electrical side of things, but also what fits your vehicle. Also, some use tinted covers and lights. However, some of them can be tinted too dark. This can cause an issue as other drivers may have a difficult time seeing you if your tint is too dark. It is better to be safe than cool. 


Safety

It is important to be aware of the safety importance of fully functioning lights, headlights, and taillights. In some areas, there is a specific time before sunset and after sunrise; between these times, your headlights are to be on. These lights help you to travel at night safely.

Wildlife travel roads all the time, including inside city limits. Some people travel at night. For others to see you and you to see them, your headlights must be fully functioning and in working order. 

Your taillights show where you are. They are used as a depth perception of other drivers behind you. This way, they know where you are, but they can keep from hitting you if they travel faster than you.

They can also help if someone is trying to pass another driver behind you to see if they have enough room to slide between you and the driver behind you. 


Remember Who It Affects

No matter where you come in, whether you came in with headlamps or you are coming in with lasers, it is important to know that the lighting of vehicles is constantly changing. With lights being able to be integrated throughout an entire vehicle, there is really no end to the constant growth. We find ways to add more light to our lives. Always put safety first, as it could affect you, your family, another driver, or their family. 

Do All Four Car Tires Need to Match? What you Must Know.


All Four Tires Need to Match

Car tires are something we tend not to think much about until something goes wrong. And when that day comes, the culprit is often a single tire. However, nobody wants to buy four tires when only one has failed. 

Usually, tires on front-wheel-drive systems wear down faster. Therefore the tires on all/4-wheel drive systems need to match so that the tires wear evenly. Ideally, all your tires would match regardless of the driving system of your car.

While the short answer to this question is—yes, all four of your car tires need to match—it is more complicated than that. Considering that, according to the National Highway Traffic Safety Association (NHTSA), approximately 78,000 accidents occur annually due to flat tires and blow-outs, it is important to thoroughly understand your options when replacing old or dysfunctional tires.


What are the Dangers of Car Tires that Don’t Match?

car tires don't match

Driving with faulty tires is no joke. The NHTSA reports that around 10,000 serious injuries and 400 deaths result from tire blow-outs and flat tires each year. What might save you money today could cost you your life tomorrow. The most common dangers of car tires that don’t match are:

  • Increased risk of hydroplaning
  • Increased intensity of hydroplaning
  • Increased control issues in snow and rain
  • Altered acceleration
  • Negative effects on braking and stopping power
  • Negative effects on cornering
  • Negative effects on suspension
  • Uneven pressure on a tire that may cause a burst or leak
  • The decreased lifespan of tires

The risk of these dangers occurring depends on how dramatically your tires differ in quality, brand, size, tread depth, wear, and age. And as mentioned previously, special attention should be given to tire matching on all-wheel drive and four-wheel drive vehicles.


When and How Often Should I Replace my Tires?

Car tire replace tires

Ideally, you should not wait until your tire bursts on the highway, or you wake up one morning to find that it’s flat and you have to replace it. Being proactive and checking your tires regularly will mitigate the danger of blow-outs, save you money, and help keep your vehicle in good health. 

There are two important factors to consider when determining whether or not it is time to get new tires: tread depth and tire age. 


Tread-Depth

First, let’s talk about tread. The treads of your tires are the network of grooves that dissipate water and help your car grip the road. You want these grooves to be deep. Think of the treads on the soles of your shoes. If you try to walk on an icy surface in smooth-soled dress shoes, you are going to slip much easier than if you are wearing snowshoes with deep tread.

So how can you check tread depth? Easy. All you need is a penny and a quarter. 

After you fish some change out of your piggy bank, make sure to grab some gloves. You don’t want your hands to get covered in tire residue. Also, be sure your vehicle is parked somewhere safe where other cars won’t be passing by on the side of the car that you are checking. And finally, make sure the area is well-lit, or bring a flashlight. 

To check your tread depth, kneel next to the tire you would like to examine. Next, take your quarter and place it down into a groove of the tread. Make sure that George Washington’s head goes into the tread wig first. His neck should be pointing upwards. 

From George’s head to the edge of a quarter is about 4/32 of an inch. If the top of George’s head is not visible, then your tread is probably safe. However, if the top of his head is clearly visible, then it’s time to start shopping for a new tire. 

If you noticed that George’s head was visible, then it’s time to use your penny. From Abe’s head to the edge of a penny is about 2/32 of an inch. Take the penny and place it in the tread as you did with the quarter—this time with Abe’s neck upward. 

If you can see the top of Abe’s head, this means that it is time to purchase a new tire immediately. In most states, 2/32 of an inch is considered legally worn out. Consumer Reports has a great video demonstration of how to check tread depth with a penny and a quarter here. 

Here is a chart to simplify things:

Penny

Quarter

Length from head to the edge

2/32 of an inch

4/32 of an ich

If the top of the head is clearly visible, then…

Replace the tire immediately

Begin shopping for a new tire


Tire Age

Even if each of your tires passes the quarter and penny test, the NHTSA reports that most tire manufacturers recommend replacing your tires every 6 to 10 years. 

You can check the manufacture date on your tire by reading the last four digits of the DOT Tire Identification Number, or TIN, on the tire wall. The first two of these numbers indicate the week of the year your tire was manufactured, while the last two numbers indicate the year. 

For example, if the last four digits of the tire’s TIN number are 1107, that means the tire was manufactured in the 11th week of 2007, and you should get it replaced!  

While the manufacture date is a decent indicator of when you should consider a replacement, there are other factors to consider. Tires, like people, live different lives. Some live fast, so they will wear out faster. 

Here are some factors that will generally speed up the rate at which your tire ages:

  • Exposure to sunlight
  • Warmer climate
  • Poor maintenance
  • Improper storage  
  • Drifting
  • Brake slamming
  • Fast driving (heats tires)
  • Consistently heavy loads (increase pressure)
  • Improper tire alignment

Living in a Sun Belt city like San Diego means your tires will get doused with loads of UV light if they are not stored properly. Therefore, you should always be mindful of the rubber on your tires drying and cracking. 

Even if you have a low-mileage vehicle that you infrequently drive, like an RV or passenger van, your tires are still at risk of deteriorating with age and exposure to the elements. 

6 to 10 years is a wide range, so you should check the recommendations of your particular tire manufacturer and be sure to take your driving style and the local climate into account. In addition, check your tires regularly.


What Can I Do to Increase the Life of my Tires?

There are a few simple, easy, and cost-effective ways to maintain your tire and increase its longevity. 


Tire Pressure Maintenance

Checking your tire pressure often and making sure that all of your tires are properly inflated is probably the easiest and cheapest way to get more mileage out of each tire. In fact, the NHTSA reports:

“Properly inflating your tires can save you as much as 11 cents per gallon on fuel. Yet only 19 percent of consumers properly inflate their tires. That means four out of five consumers are wasting money because of underinflated tires.” (Credit NHTSA website.)

In addition to saving you money on fuel costs, properly inflated tires may increase the life of a tire by 4,700 miles!

If you want to save money and increase the mileage of your tires, you can check your tire pressure with a tire pressure gauge. Tire pressure gauges are easy to find, and you can buy a decent one for around $5. 

Tire pressure is measured in pounds per inch (PSI) or kilopascals (kPA). You need to check the proper PSI for your vehicle. The easiest way to check is to look in the manual that came with your vehicle. If you don’t have the manual, the PSI is usually posted on the driver’s side door edge or the B-pillar (driver’s side doorjamb) on newer cars. 

Note that your vehicle may require different PSIs for front and back tires, and it is important not to inflate your tire past the maximum inflation pressure listed on the tire wall. 

Now that you have your pressure gauge and you know your proper PSI, it is time to check the tire pressure. Here are the steps.

  • Make sure the tires are about the same temperature as the outside air. Do not check your tires right after you’ve driven. Hot tires expand, so the reading would be higher.
  • Find the valve cap. It looks just like a valve cap on a bicycle tire. Unscrew the cap, revealing the valve stem.
  • Connect the pressure gauge to the exposed valve stem. It shouldn’t hiss! If you do hear a hiss, reposition the pressure gauge so that it is secure.
  • Check the needle on your pressure gauge to read the PSI.
  • Make sure to replace the valve cap!

If the PSI is lower than the recommended PSI for your car, you should inflate your tire. Most gas stations have air dispensers. Connect the air dispenser tube to the valve stem like you did with the pressure gauge, and feed air into the tire in short bursts. Check the PSI after each burst, and don’t forget to bring your pressure gauge with you!

The NHTSA reported that in 2017, 738 people died front tire-related crashes. Maintaining proper tire pressure is not just about saving money; it’s also about safety.


Balancing your Tires

Now that your tires are all nice and plump, it’s important to make sure they are rolling smoothly. We’ve all struggled to push a shopping cart with one funky wheel down the grocery store aisle. Making sure your tires and balanced and aligned helps ensure that your tires roll smoothly and evenly. 

Unbalanced tires cause your tires to wobble, which causes the sidewalls of your tires to wear more quickly. The extra wearing also increases the risk of a blowout. 

If a front tire is out of balance, you will probably start to feel a little vibration in the steering wheel, like the handle of a wacky shopping cart in your hand. For the back tires? You’ll feel a vibration on the seat floor.

Balancing tires is a common tune-up. The technician adds weights in different areas around the tire so that the weight is evenly distributed. The average tire balance runs about $40 and should always be done when replacing a tire. 


Tire Alignment

Tire alignment is about more than just your car’s tires. It concerns the suspension of your vehicle system and the angle at which your tires are set against the road. 

If you have ever momentarily let go of your steering wheel and felt your car veer into the next lane, then you have had a tire alignment issue. Another clue to poorly aligned tires is uneven tread—if the tires are angled poorly, the tread begins to wear differently on opposite tires. 

When you take your car in for an alignment, the technician will check three things.

  • Camber: Camber issues occur when your wheels are angled excessively inward (negative camber) or outward (positive camber). You do not want an outward-angled tire despite it being called ‘positive’. 

To get a better sense of positive and negative camber, imagine you are standing in front of a car looking at the driver. If the tops of both tires lean outward further than the bottoms, forming a ‘V’ shape, this is positive camber. The opposite is negative camber.

  • Toe: This is when your tires are duck-footed (toe-out) or pigeon-toed (toe-in). Imagine trying to run a long distance while maintaining a duck-footed or pigeon-toed foot posture. It’s probably not great on the knees, and it’s also not great for your car’s tires or your car in general. 
  • Caster: If you’re the type of person who loves drifting around corners, you are going to want to pay attention to caster issues. The caster angle aids balance and stability. When the steering axis is tilted too much toward the driver, it is called a positive caster, and if it’s tilted too much away from the driver, it is called a negative caster.

Each of these factors can cut valuable mileage out of your wheels. Making sure your car is properly aligned is an investment. An average wheel alignment will run you about $98.


Rotation

It is a good rule of thumb to have your tires rotated with the same frequency that you get your oil changed. That’s around 5,000 miles unless otherwise instructed by your car manufacturer. If you can start off getting both services accomplished at the same time and always get them done together after that, you’ll save yourself a lot of trips to the mechanic. 

For some cars, you need to make sure to get your tires rotated regularly in order to keep the vehicle under warranty. Taking your car in for tire rotation is a great time to get your tires checked out for things like tread wear, alignment, and tire pressure.

Different tire rotating patterns depend on whether your car is four-wheel drive, all-wheel drive, or front-wheel drive. The size of the tire and the directionality of the tire is also important. Your technician should be able to advise which pattern is best suited for your vehicle. However, if you would like to learn more about tire patterns, there is an in-depth article about them on Bridgestone’s website.


Choosing the Right Tire

Your tires will eventually blow out, flatten, or simply age out. When you are ready to buy new tires, you should consider your local climate, the size of the tire, the tire rating, and the age of the tire. 


Type

First, let’s take a look at what type of tire you are going to need. While there are more than four types of tires, the most commonly used tires are those shown below. 

  • All-season tires: These tires come with speed ratings of S (112mph) and T (118mph). They are designed to perform in any season and climate (considering that the weather is not particularly extreme—heavy snow). They are not quite as good as winter tires in the snow, but they offer versatility, and they perform well in slush and rain. You can use these tires on mainstream cars, SUVs, and pickup-up trucks.
  • Winter tires: Also known as snow tires, you can identify these tires by a mountain and snowflake symbol stamped on the tire wall. Their tread patterns increase grip, and their softer rubber build means that these tires are designed for superior control on ice and in snow. It’s best to buy these tires as a set of four. You don’t want any issues when you are driving on ice and in snow.
  • Summer tires: These tires are great if you live in a hot, sunny region with a lot of hot asphalt. They also perform well on wet roads. Summer tires are known for providing that extra bit of control to high-performance vehicles like sports cars. Don’t buy these tires if you live in the Colorado mountains or any other place that gets a lot of snow. 
  • All-terrain tires: If you like to take your car off-road, then these are your tires. These tires will make the ride a little less smooth than all-season tires, but they are great for switching between the road and more rugged terrain in a four-wheel-drive vehicle.

If you want to learn more about less common tires, like high-performance tires, check out this great Consumer Reports article.


Rating

The United States government rates tires based on several factors. This rating system is called the Uniform Tire Quality Grading Standards or UTQGS. You can find the rating on the sidewall of passenger vehicle tires in the United States. 

Traction and temperature grades are rated A (highest) to C (lowest), with traction having an extra category, AA (higher than A). A number represents the rate at which the tire is expected to wear out. Let’s break it down:

  • Treadwear: This is how long the tread on your tire is expected to last. Treadwear is represented by a number, with 100 being the standard government-mandated treadwear. The higher the treadwear number, the longer it takes for the tread to wear down.

For example, a tire with a grade of 600 would be expected to have tread that takes up to 6 times longer to wear down than the tread on a tire with a rating of 100. A tire with a treadwear grade of 200 would have tread that would wear down twice as slowly as a tire with a treadwear grade of 100. 

  • Traction: This represents the tire’s efficacy on wet roads. For example, a tire with the highest grade of AA has the ability to stop more quickly on wet pavement than a tire with a grade of C. 
  • Temperature: This represents the tire’s ability to resist heat, with A representing a tire that is optimized to resist heat and C representing a tire that is less resistant to heat. 

The UTQGS tire rating on the tire wall will look something like this: 400AB. This means that the treadwear will theoretically wear out four times as slowly as a tire rated 100, the traction is rated A (second best after AA), and the temperature is rated B (second best after A). Therefore, the numbers and letters represent, from left to right: treadwear, traction, and temperature.


Size

The size of the tire you need depends on your vehicle. Simply check your owner’s manual. If you don’t have the manual, you can find the tire size on the driver’s side door edge or post—the same place you checked for the tire’s PSI.


Tire Age

It is not recommended to buy used tires. They may have defects that are not immediately noticeable, and you may end up paying more in the long run if it blows out on you. However, you usually are not going to buy a tire that has been manufactured on the day of purchase.

For this reason, it is important to always check the manufacture date of the tire (mentioned earlier). Recall the TIN number on your tire wall represents the manufacture date. The first two numbers are the week the tire was manufactured and the final two numbers are the year it was manufactured.


Where Can I Buy a New Tire?

There are plenty of well-known and large tire chains like Discount Tire and Big O Tires. But did you know that you can also buy tires from Amazon? And that means that if you have Amazon, Prime you may be able to get two-day shipping. Also, Amazon has the advantage of having thousands of reviews on its products.

Another great place to buy tires is at Costco. Of course, you will need a Costco membership card. One great thing about buying tires from Costco is that they have an annual “buy four tire,s” deal which offers $70 off any set of four tires with 1 cent installation per tire! Check out the deal on their website.


What if I Can’t Afford to Replace my Tires at the Same Time?

Now, maybe you’ve made it through this entire article, but you are still thinking, “Well, all of this information is great, but I’m still broke right now. I simply can’t afford to buy all four tires at the same time.”

You are not alone. If your only option is to replace a single tire, there are some things that you can do to make it as safe and effective as possible. 


Be Safe

First, make sure that your newer tires are placed in the rear. It’s safer to have newer tires on the back because deeper-treaded tires hold up better to hydroplaning. 

While your front tires may still hydroplane, it is better that your front wheels hydroplane than your back tires because it is easier to control. This is called understeering.

Oversteering is more dangerous and happens when your back wheels begin to hydroplane before your front wheels. Your back wheels are not attached to your steering wheel, so it is harder to regain control front-wheel drive car; the gas pedal does not control the speed of the back tires. 

Your replacement tire should be paired with the tire that has the best tread depth or the newest of your old tires. It’s important to have tires paired with others that have similar wear. 


Save Money

Of course, the best way to save money on tires is proper tire maintenance. However, if your tire is already blown-out, maintenance advice won’t cut it. 

Besides carefully researching and comparing tire prices, becoming buddies with your local tire dealer or auto shop mechanic, or waiting for a sale, you could look for tire rebates. 

Many tire dealers offer rebates. A rebate is a discount that you receive after purchase. You send in a form and, your receipt and a few weeks later, a rebate card will be sent. Most rebate cards can be used like cash in various stores. 

While there are always deals to be found or ways to skimp on paying for a full set of tires, if you can buy a full set, it will end up saving you money in the long run. 

Practicing proactive tire maintenance is still the most effective way to save money on tires. 

Drive safe! 

Clutch Fluid vs. Transmission Fluid: Is There a Difference?


Clutch vs Transmission Fluid

The main systems of a vehicle include the clutch system, the brake system, and the engine. These systems are composed of steel components that are set in motion when the vehicle is operating. They are, therefore, predisposed to friction and overheating. For that reason, vehicles depend on many fluids to be able to function, including clutch and transmission fluid. 

 Clutch fluid and transmission fluid are both fluids used in an automobile. They are similar in some aspects, such as they both possess lubricating properties and have the same constituting components, such as anti-rust and anti-oxidation compounds. However, Clutch fluid and transmission fluid are different from each other on the basis of their: 

  1. Area of Operation
  2. Composition and Classification
  3. Durability 
  4. Corrosion 
  5. Service and Maintenance
  6. Viscosity

Beyond this, they are quite different in a lot of ways. In this article, we shall systematically explore those dissimilarities.


Differences Between Clutch Fluid & Transmission Fluid

Regular transmission fluid is widely known for its red hue. On the other hand, clutch fluid usually appears amber in color when newly purchased. And yet both are used interchangeably. 

Why? The confusion stems from the fact that there are two types of auto transmission systems. And each type has unique lubrication/hydraulic needs. Let us take a look at the significant distinctions.


Area of Operation


Clutch Fluid

Brake master cylinder clutch fluid

Clutch fluid is the same as brake fluid. Typically found in the master cylinder, which controls the slave cylinder when the pressure gets applied to it from the clutch pedal. The clutch fluid flows into the slave cylinder, and this operates the clutch fork leading to a clutch execution. When the clutch pedal is released, the clutch fluid simply flows back to the master cylinder.

Overall, the clutch fluid serves as a hydraulic to facilitate this rather weighty movement. Clutch fluid resides in the master cylinder and flows into the slave cylinder when the clutch pedal is pushed but never comes into direct contact with the gearbox cavity where the transmission fluid resides.


Transmission Fluid

Cross-section of a car gearbox. mechanic work in the garage

Transmission fluid remains in the gearbox, where it submerges the steel components, ensuring smooth mechanical motions and optimal performance. It saves the entire steel component from wear, which is a significant issue. It also prevents overheating and works to keep the transmission system from going out of order.

Transmission simply refers to the system of gears and other components which constitute the gearbox of a car. They coordinate the rotational speed and torque of the car engine. There are two types of transmission: manual transmission and automatic transmission.

Subtypes

Transmission fluids, unlike clutch fluids, are basically of two types. There is the automatic transmission fluid (ATF) for the automatic transmission system, as the name implies. As you can guess correctly, there is also the manual transmission fluid (MTF) for the manual transmission system. MTF may be ordinary motor oil, ATF, or Hypoid gear oil.

The manufacturer will determine the type of MTF needed for your car. You can find this out by looking in the User’s Guide. Common examples of transmission fluid include Synthetic fluid, Type-F, motor oil, High-Frequency Modified (HFM) fluid, Dexron/Mercon, Hypoid gear oil, etc.


Composition and Classification

oil composition

Clutch Fluid

Most clutch oil in today’s market is glycol-ether based. There are mineral oil, castor oil, and silicone-based fluids also. In the United States, based on the composition, they are classified by the department of transportation based on specific ratings as DOT 3, DOT 4, DOT5, and DOT 5.1. The silicone-based fluid is rated as DOT 5 and usually contains Di-2-Ethylhexyl sebacate, Dimethylpolysiloxane, or Tributyl phosphate. 

The glycol-based fluid, which is rated DOT 3, 4, and 5.1, usually contain the following: 

  • Alkyl ester
  • Aliphatic amine
  • Diethylene glycol
  • Diethylene glycol monoethyl ether
  • Diethylene glycol monomethyl ether
  • Dimethyl dipropylene glycol
  • Polyethylene glycol monobutyl ether
  • Polyethylene oxide

DOT 3 and DOT 4, unlike DOT 5, absorb moisture, a distinctive dissimilarity. Thus, you will need to prevent exposure of the fluid to air because it causes depression in the boiling point over time and makes clutch application difficult. This boiling point depression is very significant because clutch oil functions primarily as a hydraulic. 

A reduction in the boiling point could cause the vaporization of the fluid. This vaporization is undesirable because gases can compress. Liquids (hydraulic fluid) have value because they don’t compress. This characteristic of hydraulics allows them to exert the needed force in a clutch or brake system. 

Silicone-based based fluid, DOT 5, although nonabsorbent to moisture, should also not be left uncovered because the moisture not absorbed collects into a pocket of water and will erode the clutch system. DOT 5.1 is an upgrade from DOT 5. It contains 70 percent less silicone and is more temperature-resistant.  Different classes of clutch fluids should not mix because they may react badly and corrode the brake system. 

This classification harmonizes with the Society of Automotive Engineers (SAE) specifications while also taking into consideration the local peculiarities. These peculiarities include the extreme climatic conditions of temperature and humidity in certain regions, for example, Russia. These conditions affect the quality of the fluid.

Some other countries have also adopted the SAE classification. The SAE standards include J1703, J1704, and 1705 and this represents the increasing performance of the clutch oil.


Transmission Fluid

ATFs are composed of a base fluid plus a complex additive formulation intended to meet all of the physical and performance properties required of an ATF. The base fluid is usually a petroleum-based or synthetic hydrocarbon mixture with a viscosity of between 3.0 and 4.5 CST at 100°C. Viscosity at low temperatures, volatility, and oxidation stability are essential criteria in the selection of base fluid.

ATF Specification 

ATF specifications, to a considerable extent, have been determined by the manufacturing companies. There are many specifications for ATF. MERCON series for Ford company and DEXRON for the General Motors company. Below is the ATF specification for DEXRON.


General Motors ATF Specification

Type AThe first automatic transmission specification was released in 1949
Type A Suffix A Models 1957. An outdated specification, but still in use. Suffix A means improved oxidation properties.
DEXRON BModels 1967
DEXRON IIModels 1973. The most used specification. It includes special requirements for a low static coefficient of friction, high oxidation stability, and good corrosion protection in the wet chamber.
DEXRON II DModels 1981
DEXRON II EModels 1991. Includes, in addition to laboratory tests of physical and chemical properties, some special requirements for low static coefficient of friction, high oxidation stability, flash point, and fire point, anti-foaming agents, good corrosion protection in the wet chamber, and seal compatibility requirements.
DEXRON III FModels 1994. The specification contains upgraded characteristics to the previous, and primarily higher flash points and fire points and lover flash and fire tendency. A successor of DEXRON II D and DEXRON Il E.
DEXRON III GThis is the successor of DEXRON III (F) automatic transmission fluids. According to specification, a fluid similar to DEXRON Il E, however, with upgraded anti-oxidation and anti-wear properties. It was launched in 1997.
DEXRON III HDEXRON III H was launched in June 2003 to replace DEXRON III G fluids. They contain base oils of very high oxidation stability (groups 2 and 3). Fluids from this group have excellent friction and anti-wear properties, better flash and fire control, and longer service interval.
DEXRON VIThis specification was released in 2005 to replace DEXRON III H fluids. The specification provides higher fluid slipping stability, good oxidation stability, and good anti-foaming properties. Fluids that satisfy this specification can be used in an extended service interval and provide significant energy savings.
(Source: Lubricating oils for modern automatic transmissions of motor vehicles.) 

Durability 


Clutch Fluid

The clutch fluid absorbs moisture from the atmosphere and is said to be hygroscopic. According to the society of automotive engineers (SAE), it must be changed annually or after 10,000 miles of usage. It degrades on exposure to moisture and oxygen and could damage the clutch system if not replaced.


Transmission Fluid

Most automatic transmission fluids will last for a very long time if they have the gearbox hermetically sealed. Some cars have lifetime transmission fluid. This transmission fluid, the manufacturers claim, will last throughout the lifetime of the vehicle. A lifetime means 180,000 km or 112,000 miles as the lifetime of a car or transmission.  However, two areas provide opportunities for the entry of air: the transmission vent and the dipstick tube.

A dipstick is a rod used to inspect the level of transmission fluid in the transmission system because the gearbox is usually inaccessible. Using the traditional dipstick, however, creates a problem because it provides an entry point for air to access the transmission system leading to oxidation of the transmission fluid.

Dirt may find its way into the transmission as well. This situation worsens when the dipstick is not fully seated in the dipstick tube or the dipstick tube plug is not fully seated. 

Many modern transmission manufacturers have removed the traditional dipstick in favor of a sealed transmission. And so, as expected, the transmission fluid in the sealed tube has more excellent durability than the traditional non-sealed transmission.

transmission vent balances the fluctuating pressure changes that occur with changes in transmission fluid volumes and transmission fluid temperatures. Resultant gasket and seal leaks would arise if these pressure changes go unchecked and are allowed to build.

Traditional transmission breather vents use Transmission Air Breathing Suppressor (TABS) valve to stop air and moisture from accessing the transmission. 

Modern transmission manufacturers now use a unique breather vent, which is much smaller and can shut out moisture but allows entry of small amounts of air as needed to balance the fluctuating pressure inside the transmission. 

To ensure the durability of automatic transmission fluid, use sealed containers, and buy only new fluid. A non-sealed container would expose the fluid to air and moisture and its resultant effects.

Never reuse transmission fluid. Always use clean fluid whenever you are performing a repair or refilling the transmission.


Corrosion 

iron gears, rust, corrosion.

Clutch Fluid

Clutch fluid is made corrosion-resistant and noncorrosive to the clutch or brake system during production. Otherwise, the components of the clutch system, like the master cylinder and slave cylinder, can become severely damaged. Corrosion inhibitors are usually incorporated into the mix when manufacturing clutch fluids. DOT 3 and DOT 4 are corrosive to paintwork and should not be allowed to come in contact with painted surfaces. 


Transmission Fluid

Rust and corrosion inhibitors constitute the makeup of all transmission fluids.


Service and Maintenance

View of the car's clutch basket during the repair of a car lifted on a lift in a vehicle maintenance workshop. Industry in the auto service.

Clutch Fluid

The corrosion inhibitors in the clutch fluid are subject to degradation. There is corrosion in the clutch system as the fluid degrades along with the presence of excess moisture. Two years after service, the moisture content in the master cylinder reservoir may be as high as 8 percent. This phenomenon of high moisture content can lead to vapor lock and cause a complete failure of the clutch system. Therefore, routinely check your clutch fluid level.

A clutch fluid replacement usually starts with the opening of the master cylinder reservoir and monitoring the condition of the fluid. Scrutinize for any leak in the hydraulic system. And last, top off the master cylinder if there is a need. Clutch fluid replacement is a routine maintenance check and should be carried out every two years or 40,000km. 

Here are some signs that could help decide if a clutch fluid replacement is necessary. 

  1. The clutch is challenging to engage after driving aggressively.
  2. Grinding gears when the clutch pedal is fully pressed.
  3. The clutch fluid is black or dark brown.
  4. The clutch gives a gritty feel in between the fingers when rubbed.

Clutch fluid with different DOT ratings should not be mixed. DOT 5 should not be combined with any other lass because the mixing of a silicone-based fluid and glycol can cause corrosion because of trapped moisture. DOT 3, DOT 4, and DOT 5.1 can be mixed since they are all based on glycol esters. DOT 2 fluid should not be mixed with any of the others. It is highly recommended to change existing fluids with new ones to obtain the ideal performance.


Transmission Fluid 

Manual

Many manufacturers will recommend that manual transmission fluid be changed every 30,000 to 60,000 miles. Under heavy-duty use, some manufacturers suggest changing the fluid every 15,000 miles. 

Fluid contamination is a much bigger problem than fluid degradation for manual transmission. Majorly because the mass of metal debris floating in the fluid increases as the components of the transmission, such as gears, bearings, and synchronizes, wear out. The result of this is that over time the fluid gradually loses its lubricating quality. Naturally, the solution to this is to drain out the fluid with its impurities to lengthen the lifespan of the transmission. 

Checking the transmission fluid level is usually done using the dipstick. It can be a little difficult, and so, consequently, it is best to ask your mechanic to do this whenever you have a fluid replacement.

Automatic

An automatic transmission does not have a clearly defined service interval, mostly because it is usually designed to last throughout the lifetime of the car without any service need. However, some authorities recommend between 30,000 miles and 100,000 miles.

More heat is generated compared to a manual transmission, and so there is a breakdown and degradation of ATF with use. There is contamination with metal debris, like in manual transmission. Therefore there is a need for a drain out and replacement of ATF. Failure to do so may result in a shortening of the lifespan of the transmission and increased financial expenses. The dipstick can be used to check the ATF level for most automatic transmission cars.

Transmission oil doesn’t dry out like regular engine oil. A reduction in the level of fluid always suggests a possible leak.


Viscosity

Viscosity is a measure of the resistance of a fluid (liquid or gas) to flow. It fluctuates in value with changes in temperature. Viscosity is measured in pascal-second (Pa-s) or dynes, which is the force needed to move a body one square centimeter in the area through a parallel body at a speed of one centimeter per second.


Clutch Fluid

Viscosity is an essential factor for the roadworthiness of cars because it affects the way the clutch or even the brake system functions and changes their behavior as well as their mode of operation.  Clutch fluid must function optimally within a temperature range of between -40°C and +100°C. 

They must operate even in extreme temperatures.  Clutch fluid used for military operations must function optimally at a more acute temperature range of -55°C and +100°C. 

The need for clutch fluid to function optimally becomes even more critical in cars with stability control, anti-lock braking system, and traction control. Some manufacturers state their viscosity as a single value, such as +40°C, while also stating it alongside the viscosity index.

DOT 4 and DOT 5.1 clutch fluids can have low viscosity, which fulfills the maximum viscosity of 750 mm²/s at a temperature of -40°C. Not all cars installed with an anti-lock braking system or stability control approve of DOT 5.1 clutch fluid, even though they come specified at a wide temperature range at a low viscosity.


Transmission Fluid

Viscosity is a crucial physical property in transmission fluid design. ATFs are usually less viscous than clutch fluid. Viscosity grades in ATFs are generally not subject to approval or recommendation by the SAE or other regulatory bodies. The manufacturer determines their standard, such as General Motors’ DEXRON and Ford’s MERCON ATF viscosity specifications.

Viscosity Table – Measurement Data

ATF III  – Mineral Automatic Transmission Fluid
Temp. [°C]Dyn. Viscosity [mPa.s]Kin. Viscosity [mm²/s]Density [g/cm³]
0217.29247.390.8783
10118.06135.420.8718
2070.0480.930.8655
3044.7052.040.8591
4030.3135.550.8527
5021.5325.440.8462
6015.9318.970.8398
7012.1814.620.8333
809.5711.580.8269
907.719.390.8205
1006.327.770.8140
(Source: Anton-Parar Wiki)   

Conclusion

In conclusion, clutch and transmission fluids are different from one another. Clutch fluid is used mainly as a hydraulic to facilitate a clutch execution, while Transmission fluid keeps the gearbox lubricated. Clutch oil is composed mainly of glycol-ether or silicone, while transmission fluid is composed of a petroleum-based or synthetic base fluid. Clutch fluid is usually changed routinely, but transmission fluid can last throughout the lifetime of a vehicle.

References 

https://wiki.anton-paar.com/en/automatic-transmission-fluid-atf/   

https://www.autopartspro.co.uk/tips-advice/how-to-change-gearbox-oil-637  

https://www.researchgate.net/publication/311677822_Lubricating_oils_for_modern_automatic_transmissions_of_motor_vehicles  

https://en.m.wikipedia.org/wiki/Brake_fluid#Components  

https://auto.howstuffworks.com/auto-parts/brakes/brake-parts/types-of-brake-fluid.html – Update: page unavailable

https://www.researchgate.net/publication/311677822