Home

Recent Posts

Sound of a Healthy Engine: Read This Guide and Find Out


Sound of a Healthy Engine

Do you want to know if your car has a problem? Sure, you can take it out to a mechanic for a diagnosis, but this can be costly and time-consuming. The good news is that even on your own, you will be able to determine if there is an existing problem by simply listening to the sound that is made by an engine.

All engines obviously make a sound. To know if it is healthy, there should be nothing unusual. Most of the engines will sound like jets and will be louder when you are revving. There can also be humming or clicking noise. Do not be afraid. All of these things are normal. If it sounds perfect, there is nothing to be worried about.

In the rest of this post, we will discuss some practical tips on how to determine if the engine is problematic. Your ears can help you to determine if there is an issue that needs to be addressed the soonest. Nonetheless, keep in mind that these sounds are inconclusive.


The Sound of a Healthy Engine

Before we proceed with the discussions in this post, take the time to watch the short video below. The car, as an example, is an old model of a Mercedes. This will explain the sound that will be made by an engine if it is in good condition. It may not be perfect, but with these sounds, you can be confident that there is no problem that warrants your immediate attention.

Before you start, park the car in a place where there is no noise. Do it in the garage or in any other place where you can hear the engine clearly. Start the car and open the hood. Allow the engine to run for about a minute. This will be more than enough for the car to be warmed up. At this point, you can now lend your ears to hear the engine’s sound.

It is also important to take note of the fact that you have to change positions as you listen to the engine. Start at the front of the car. After this, move to the left, then move to the right side of the engine compartment. It won’t be too much to take notes on what you can hear from the three sides so that it will be easier for you to remember.

All engines obviously make a sound. To know if it is healthy, there should be nothing unusual. Most of the engines will sound like jets and will be louder when you are revving. There can also be humming or clicking noise. Do not be afraid. All of these things are normal. If it sounds perfect, there is nothing to be worried about.

The engine is also healthy when you hear a regular and constant sound, like music, in your ears. The rhythm remains constant all throughout unless you are revving. When the accelerator is applied, it will still sound good and will not make a sudden change of sound.


When The Engine is Unhealthy?

Now that we have tackled the sound of a healthy engine let us now briefly discuss when it is unhealthy. Lean on the side of the compartment so that your ear will be nearer the engine. Do not wear loose items of clothing, and tie your hair if it is long. If there is a squeaking noise or if it seems like there are two metal parts rubbing each other, this is an indication of a possible problem.

An unhealthy engine can be compared to a person who is singing but is out of tune. In many instances, this is one thing that will be easy for you to tell. You can hear tapping, knocking, and grinding if the engine is in a condition that needs a remedy.

The whirring of the engine is one indication that it is unhealthy. As the speed increases, the whirring gets worse. A loud exhaust noise can also be indicative of a problem, as well as a backfiring of the engine.


How to Fix Weird Engine Sounds?

How to Fix Weird Engine Sounds
Via: https://blog.gaadizo.com/cars-engine-making-weird-sounds/

There are different solutions that you might want to consider, but this will depend on the specific problem. Therefore, once you hear an unusual sound that is indicative of the bad state of the health of engine, proceed to further diagnosis to identify the real cause of the problem.

In most cases, one of the simplest solutions that could work would be lubrication. As we all know, a lubricant will prevent the components from touching each other; This will make sure that the components will be running smoothly instead of touching each other and making a weird sound that can make you alarmed.

It is also possible that there are loose engine components. Check the screws, nuts, and bolts. See to it that they are tight or positioned based on the recommended torque. The connectors may have also been damaged, and hence, could be possibly asking for a replacement.

On the other hand, if the noise increases or decreases as the RPM becomes higher, a possible problem could be having low steering fluid, and having it replaced can be an instant remedy. Replacing the alternator, water pump, power steering pump, and air conditioner compressor can also provide an effective solution.

If the engine is backfiring, one of the parts that you might need to replace is the trimming belt or chain, as it could have possibly slipped. You also have to take time to check the spark plug wires and see to it that they are connected to the right spark plugs. It is also possible that you only have to make an adjustment to the ignition timing.

Meanwhile, if the sound is coming from the exhaust, the problem may not be directly related to the engine. Replacing the exhaust manifold and the muffler can be a good thing to do.


Conclusion

In this post, we have tackled not only the sound of a healthy engine but also the sound of an unhealthy one, as well as some of the easy solutions that you might want to do. Trust your ears; it can save you a lot of trouble and money. When something does not sound right, listen to your instincts. If you are unsure, ask a licensed mechanic for help.

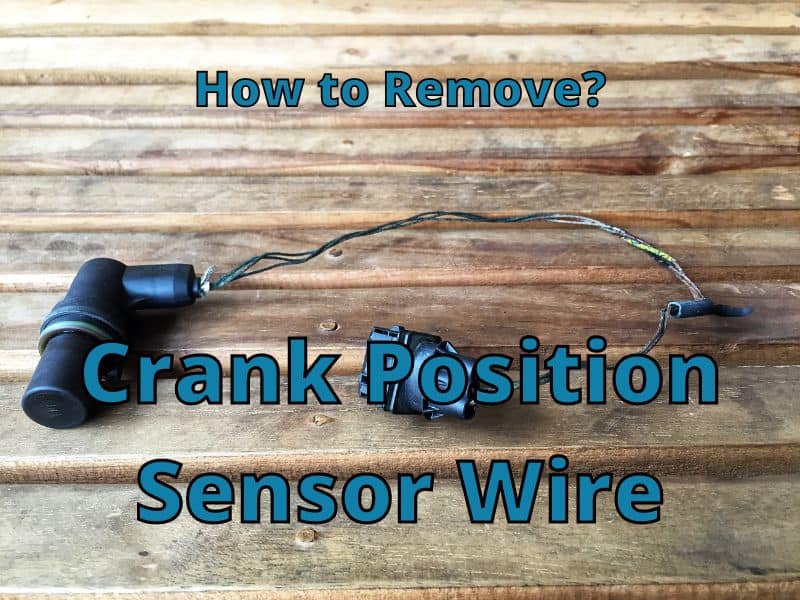
Your Quick and Easy Guide to How to Remove Crank Position Sensor Wire


Crank Position Sensor Wire

In the rest of this post, we will let you know the best way to remove the crank position sensor wire. This is an easy task that can be completed without the need to visit a trusted mechanic within the neighborhood. You might be intimidated at first if you are not experienced in DIY tasks. However, once you read this post, you will realize this is an easy task.

The crank position sensor is mounted in a bracket. There is a small nut, which serves as the connection between the bracket and the plate. It is difficult to access the nut because of the parts that surround it. There are two ways to remove the crank position sensor wire.

The first one is more difficult as some pulleys and accessories are still installed on the front. The second one will remove these accessories so that you can access what you need to remove easier.

The crank position sensor wire provides the connection to link two parts together. When the wire has been damaged the performance of your engine can be compromised. This makes it important to inspect it regularly and determine if it needs a replacement. When the latter is the case, the discussions in the rest of this post can prove to be handy.


Things You Need to Follow this Tutorial

The materials needed to complete this task are very much basic. You won’t need a lot, and chances are, the tools are already available in your garage.

  • 8-millimeter socket
  • Extension bar
  • Ratchet/wrench

Step-by-Step Guide on How to Change Crank Position Sensor Wire

Now that you have the necessary materials, this section will tackle the specific instructions involved. In this case, the instructions will be divided into two parts. The first one is quite more difficult as some pulleys and accessories are still installed on the front. The second one will remove these accessories so that you can access what you need to remove easier.

First, watch the short video below so that you can see how it is actually done, which will make the entire job a whole lot easier.


Without Removing the Pulleys and Accessories

The crank position sensor is mounted in a bracket. There is a small nut, which serves as the connection between the bracket and the plate. It is difficult to access the nut because of the parts that surround it. This will limit your movement. The wrench won’t be able to fit, and your movement will be limited.

  • You will need a long extension with a length of at least 12 inches, which should have a quarter-inch drive universal joint.
  • Try to move the joint. If it is wobbly, it is best to wrap it with electrical tape to keep it more stable.
  • Connect an 8-millimeter socket at the end of the universal joint.
  • Position the socket on the end of the nut underneath the vacuum pump.
  • Bend the extension. Place the ratchet on the other end of the extension and turn it around. The nut will already be loose at this point, and you can unplug the crank position sensor wire.

Removing the Pulleys and Accessories

This is going to be an easier task. Once you have removed the pulleys and the accessories, you will have unobstructed access to the nut, which will make its removal a snap.

  • Start by removing the pulleys and the vacuum pump. You can now have a more detailed view of the nut, and it will be easier to figure out how it can be removed.
  • Use an 8-millimeter socket to remove the nut. Rotate the wrench until the nut is loosened.
  • Once the nut is loose, you can turn it around by hand. Remove the wire, and at this point, you are already done.

Pro Tips

Knowing the steps in removing the crank position wire is important, but it would be better if you also keep in mind the things that will be mentioned in this section.

Change Crank Position Sensor Wire
Via: https://www.pelicanparts.com/techarticles/BMW-E60/105-FUEL-6_Cylinder_Crankshaft_Sensor_Replacement/105-FUEL-6_Cylinder_Crankshaft_Sensor_Replacement.htm


When To Replace a Crank Position Sensor Wire?

One of the first things you must be familiar with is when a replacement is warranted. This is not simple guesswork. You need to pay attention to the symptoms that this component is already failing. That being said, here are some of the signs that you should be watching out for.

  • The wiring and the connectors can be deformed. Pay attention to its physical appearance. The wire can already be stripped, and the connectors can be corroded or rusted.
  • If your tachometer is not working properly, this could be a sign that the crank position sensor wire needs to be replaced. However, this is only one of the many reasons. A proper diagnosis is required to ensure the problem with the wire is true.
  • A misfiring and stalling engine can also be an indication that there is a problem with the crankshaft position sensor and wire, although it can also be caused by a number of other factors.

Choosing a New Crank Position Sensor

When you are looking for a replacement for the crank position sensor that will be removed, here are some of the most important factors you must consider.

  • Be aware of the different types that are available. Choose one that is suitable for the vehicle that you have.
  • There should be high-heat resistance, and it must be made of durable materials, especially wire. This will provide an assurance that it won’t ask for a replacement for a long time.
  • It will be good if the kit is already inclusive of O-rings.

Installation of New Crank Position Sensor Wire

Once it is removed, the next step is to install a new one. This can be accomplished by following these simple steps:

  • Install the new crank position sensor in the same place where you have removed the old one. You will need an O-ring or a mechanical gasket to ensure it stays in its position.
  • Once the sensor is in place, connect the wire. Install the nut and the bolt based on the torque that has been specified.
  • Connect the other end of the wire. See to it that the sensor is engaged with the use of the connector clip that is provided. If not, it will be prone to be unplugged while the engine is running.
  • Reconnect your battery, lower the car, and you are now ready to run the vehicle. Pay attention to the dashboard and make sure there is no warning indicative of a problem.

Conclusion

At this point, I hope you already know how to change the crank position sensor wire without asking the pros for assistance. As noted, it will be easier if you remove the pulleys and the accessories first. Nonetheless, even without doing so, you can remove the wire by using an extension wire and the right-sized socket.

Best Driveway Alarms: A Must-Read Before You Buy


Best Driveway Alarms

Safety is an important concern in many households. With this, it is easy to understand why many people are willing to invest in technologies that can provide them with peace of mind. A driveway alarm is one of the perfect examples of this. Whether in your bedroom, kitchen, garden, or anywhere inside the house, the alarm will provide an audible alert once an intruder enters your property.

To help you buy the best driveway alarms and make the right decision, these are some of the most important things that you have to keep in mind:

  • Reviews: Pros and Cons
  • Range: The range between the sensor and the receiver.
  • Ease of Installation: Comprehensive instructions are available.
  • Durability: Weatherproof and long-lasting.
  • Accuracy: It should perform well in the dark and snow.
  • Price: Provides excellent value for money.
  • Warranty: It should have a full refund policy or at least one to two years’ lasting warranty.

In the rest of this post, we will briefly look at some of the top picks for the best driveway alarms. The options are abundant, but this should not be an excuse to decide in haste. We will also tackle some of the most important considerations that will make it possible to narrow down the choices and arrive at the right decision.

Product

(Amazon Links)

Image

(Amazon Links)
 

Guardline Wireless Driveway Alarm

Our Detail Review

Chamberlain CWA2000 Motion Alarm

Our Detail Review

Mighty Mule FM231 Wireless Driveway Alarm

Our Detail Review

Driveway Informer Wireless Driveway Alarm

Our Detail Review

Safeguard Supply Wireless Driveway Alarm

Our Detail Review

ADS

Benefits of Installing a Driveway Alarm

Here are some of the things that can convince you that a driveway alarm is indeed a must-have in every household:

  • Prevent Theft: With an alarm installed, you will be alerted as soon as someone enters the driveway. This will prevent the possibility of theft. It is like having an eye that keeps watching the driveway.
  • Protect Children: Children are naturally playful and can be in the driveway when they are not supposed to be there. The alarm can send a warning that your children are playing outside.
  • Ease of Installation: Another good thing about driveway alarms is that they are effortless to install. You do not need a helping hand. They are also wireless; in most products, they already include everything you will need.

Types of Driveway Alarms

One of the first things you must do is decide on the type of alarm you will buy. In this case, these are the choices that you have:

  • Wired Driveway Alarm: It comes with a sensor and receiver, but a wire connects the two. The installation may take quite some time because you need to configure the wires. It can also be challenging how to keep the wires out of sight.
  • Wireless Driveway Alarm: This is the more popular option of the two. It also has a receiver and a sensor, but the signal is transmitted wirelessly. There is no hassle of setting up the wires, making the installation less complicated.

They can also be different on the type of sensor that is used. Here are some of the options that you will have:

  • Infrared Sensor: It makes use of heat for the detection of the movement of people and objects. It is wireless.
  • Magnetic Probe Sensor: This type can be either wired or wireless. It is for the detection of metal objects only.
  • Rubber Hose Sensor: As the name implies, the sensor is housed in a rubber hose. A car, object, or person passing over the hose will trigger the alarm.
  • Photo Beam Sensor: They are equipped with two or more sensors. They are on opposite ends, and the alarm is activated only when both are able to detect something. This is good as it makes false alarms almost impossible.

Essential Factors to Consider

To help in narrowing down the possibilities and making the right decision, these are some of the most important things that you have to keep in mind:

  • Reviews: To start with, you have to read online reviews to help you weigh the pros and cons of the possibilities. You can learn a lot from the real-life experiences of other people, such as the reliability and longevity of the sensor.
  • Range: The sensor and receiver range is also an important consideration. To add, you also have to consider the sensor’s range and the object it can detect. As always, the farther it can detect, the better the driveway alarm is.
  • Ease of Installation: When evaluating the choices for the best driveway alarms, ensure they are user-friendly. The installation must be a snap to accomplish. There should be comprehensive instructions, and all the things that you need for its assembly must already be part of the kit.
  • Durability: You also have to take time to evaluate the materials and construction of the driveway alarm. It is better if the alarm is weatherproof, especially because you can use it outdoors. If it is long-lasting, it can provide excellent value for money.
  • Accuracy: The accuracy of the alarm should be at the top of the list of things you must consider. Will it perform well even in the dark or when there is snow? Is the manufacturer truthful with the range of motion detection that it claims? These are some of the most important questions to ask to help you trim down the choices.
  • Price: I suggest you not consider buying only one product because it is cheap. If I were you, I am not going to hesitate to spend my money on a product that delivers better quality. Even if it is expensive, it should not matter if it can provide superior functionality.
  • Warranty: Most of the products you can find on the market will have a warranty lasting from one to two years. It will be better if they offer not only repair but also a full refund of what you have paid if in case you are unhappy with how the product works.

Reviews of the Best Driveway Alarms

To make your search a lot easier, here are five of the brands and models that can offer the best bang for the buck. We’ll also give you a peek at their notable features to be convinced that they are indeed amongst the best.


1. Guardline Wireless Driveway Alarm

AD

A high-end option for a driveway alarm, this is one product that can definitely provide excellent value for money. Among others, one thing that makes this impressive is the simplicity of its set-up, which can be completed even on your own.

In terms of range, this is also exceptional. You can have peace of mind since it can detect motion from a distance of up to 40 feet.

Another thing that makes it great is its overall construction. Indeed, it is built to last. It is made of long-lasting materials, including industrial-grade PVC housing. It also has a rubberized seal that is weather resistant.

To guarantee its exceptional performance, the alarm has undergone thorough testing. It has been tested in environments with gusty winds and storms, among others, to ensure it performs at its best, even in extreme conditions.

Lastly, for you to have peace of mind, it is also a good thing that the manufacturer offers a warranty that lasts for two years. They also provide reliable customer support.

Pros:

  • Installation is easy to accomplish
  • Tones can be customized
  • Comes with a two-year warranty

Overall

Despite being expensive, this is an option worth considering. It has a long motion detection range, durable construction, and good warranty coverage.


2. Chamberlain CWA2000 Motion Alarm

AD

For an adorable driveway alarm, this is one option that should be on the top of the list. More than its price, its detection range is also impressive. The receiver will be able to receive the signal from a range of half a mile. Meanwhile, the sensor will be able to detect motion from a distance of up to 30 feet.

In terms of installation, there is no need to ask for a helping hand from a pro. You can easily do it even on your own. There are no wires that need to be connected, which will make the assembly easy to accomplish.

Also, it is worth noting that the Passive Infrared Sensor has a weatherproof construction. You can put it outdoors without worrying that it will be easily damaged by rain or the sun’s heat. However, in environments that are too cold, the sensitivity of the alarm can be negatively affected.

Pros:

  • Has a long-range detection
  • Affordable
  • Sensitivity can be customized

Overall

This is the right choice if you are looking for a budget-friendly alternative. It has a good detection range and weatherproof construction, but it may have problems during winter.


3. Mighty Mule FM231 Wireless Driveway Alarm

AD

Another affordable option for a driveway alarm, it has up to 400 feet in the range between the indoor receiver and the sensor that is installed outdoors. This should be more than enough to provide you with peace of mind round-the-clock.

Like most of the products we have identified in this post, its installation is also something you can accomplish without complication. One thing that makes this possible is the electromagnetic sensor wand. The latter also effectively detects motion within a 3 to 12 feet radius.

It is also good that it comes with a low battery indicator so that you will know when to replace the AA batteries.

Lastly, the manufacturer is offering a one-year warranty and technical support.

Pros:

  • Impressive detection accuracy
  • Easy to install
  • Low battery indicator

Overall

This affordable driveway sensor has a 400-foot range between the sensor and the receiver. It comes with a low-battery indicator and a 12-month warranty.


4. Driveway Informer Wireless Driveway Alarm

AD

With a 1,000-foot range, this is one of the alarms with the longest range that you can find on the market. It is possible to buy more sensors and receivers as you can connect them with each other.

When it comes to construction, you will also love how it comes with an all-weather body, which will make it possible to have it installed even outdoors.

The installation will also be almost effortless on your end, especially because the manufacturer provides comprehensive instructions on completing its assembly. The bracket and screws are already included in the kit.

Lastly, purchasing this driveway alarm is sure to be risk-free. The manufacturer is offering a one-year warranty. If you are unhappy with how it works, you can contact the manufacturer, and they will extend an unconditional refund.

Pros:

  • Durable construction
  • Easy to operate
  • Risk-free purchase

Overall

This expensive driveway alarm comes with an extensive detection range, a one-year guarantee of satisfaction, and weatherproof construction.


5. Safeguard Supply Wireless Driveway Alarm

AD

For a budget-friendly alternative, it is worth considering this driveway alarm. It comes with a 1,000-foot range, which makes it one of the best you can find on the market, especially within its price range.

The receiver comes with a flashing light indicator and a knob that will make it easy to adjust the volume as preferred. It is also a good thing that you can choose how you will be alerted when the sensor is able to detect something. You can choose from a chime, flashing strobe, or a combination of chime and strobe.

Lastly, it has a two-year warranty from the manufacturer. If you are dissatisfied with the alarm within two years, return it to the manufacturer, and they will issue a replacement or a full refund. No matter what happens, your satisfaction is guaranteed.

Pros:

  • Easy to operate
  • Weatherproof construction
  • Comes with a money-back guarantee

Overall

Although this is not as popular as its leading competitors, this can still be a good choice as it is easy to operate, has a long detection range, and comes with a two-year warranty.


Conclusion

Indeed, the best driveway alarms will provide you with peace of mind. You can keep an eye on your property even without always having to be by the gate. You can be easily notified when there is an intruder. For the best product, keep an eye on the options that have been mentioned above, and we guarantee that you will not have regrets.

A Quick Guide on How Engine Oil Cooler Works


How Engine Oil Cooler Works

When your car engine is running, especially during the peak of summer and when you are driving long distances, it can be prone to overheating. To prevent this problem, there is a need for the engine to be cooled continuously. This is where the engine oil cooler enters the picture, which is responsible for regulating temperature and maintaining the engine’s peak performance, and, consequently, your car.

An oil cooler is a component that looks like a small cross-flow heat exchanger. The oil inside the cooler helps to keep the optimal temperature range of the engine and its parts. The oil enters the oil cooler while its temperature is still high.

Inside the cooler, it will go around tubes equipped with fins that release heat. Once the oil is processed, it will exit at a temperature that is already colder. At this point, it is ready for circulation and will once again go through the same process.

In the rest of this post, we will discuss how an engine oil cooler works. This is one of the most important oils for the engine system, although its importance is frequently overlooked, especially for those who are not car enthusiasts. Keep on reading, and we’ll let you know what exactly it does and why it is an important component of an engine that runs at its best.


What is an Engine Oil Cooler?

To give you an idea of how it works, let us first define what it actually is. In its simplest sense, an engine cooler is a component of the radiator system. It moves around a maze of pipes in an engine to provide a cooling effect. It can lessen the temperature by as much as 30 degrees, which is why it can prevent the engine from being too hot.

Engine oil cooler also helps in maintaining the right level of viscosity. If there is too much heat, the viscosity will be less. In turn, this means that the oil may have a hard time clinging to the components. With the oil cooler, such a problem can be less likely.


How Engine Oil Cooler Works?

If you have limited time, watch the short video below to understand engine oil coolers and what they do quickly:

From all of the fluids found in your car, there is no doubt that oil plays the most important role. The moving parts will create friction, and external conditions can also cause the components to heat up. Oil will provide the lubrication needed to ensure that these parts will not be easily prone to wear and tear.

A heat exchanger is important for every engine, which has the main function of getting rid of the energy that is created by the engine as it works. If your vehicle has a water-cooling system, it will rely on the function of a radiator. On the other hand, if you have an oil system, an oil cooler is necessary, which is the focus of this post.

An oil cooler is a component that looks like a small cross-flow heat exchanger. To make it more efficient, it can be positioned in varying places in the engine depending on where it is deemed to be suitable. The oil inside the cooler will help to keep the optimal temperature range of the engine and its parts.

The oil will enter the oil cooler while its temperature is still high. Inside the cooler, it will go around tubes that are equipped with fins that release heat. Once the oil is processed, it will exit at a temperature that is already colder. At this point, it is ready for circulation and will once again go through the same process.


Pros and Cons of Engine Oil Coolers

Engine Oil Cooler
Via: http://www.enginebasics.com/Engine%20Basics%20Root%20Folder/oil%20cooler%20basics.html

To have a better understanding of how engine oil coolers work, it is also important that you are aware of the benefits and drawbacks.


The Good

The most exceptional benefit of using an engine oil cooler is that it cools the components; hence, this can be a great way to extend the functional life of an engine. This is because the lower temperature protects the engine components from quickly deteriorating.


The Bad

The main disadvantage of an engine oil cooler is that the placement can be quite a challenge, especially if you plan to do it on your own. The attachment will depend on the type of vehicle that you have. To be sure, it would be best to ask the help of a pro to do it for you.


Choosing an Engine Oil Cooler

By this time, you must already know that an engine oil cooler can indeed be beneficial, despite its drawback. However, this does not mean that any product will do the job. You have to be a responsible buyer and take the time to evaluate the possibilities, which will increase the likelihood of you making the right decision.

The first thing that you have to do is to decide on the type of engine oil cooler that you have to purchase. The first type is an oil-to-water engine cooler with a heat exchanger. On the other hand, the oil-to-air engine cooler has a small radiator that makes use of the ambient air to deliver a cooling effect.

You also have to think about the heat you need to get rid of, which will depend on the car’s horsepower. The more powerful it is, the more heat will be produced. You need to choose an engine oil cooler that will be suitable for such requirements. If not, it won’t be able to regulate the high temperature that is produced by the engine.

You also have to consider ease of installation, which can be determined by looking at other users’ reviews. Ensure there is sufficient airflow where it will be installed, increasing its cooling capacity. As it has been mentioned earlier, if installation is too complicated for you, it would be better to ask for the help of the pros.


Conclusion

This article discussed how engine oil cooler works. In a nutshell, it allows the engine to maintain its peak performance and prolong its functional life through the cooling that it provides. The placement can be quite difficult, but you can always rely on a pro’s help to ensure that it will be easy and function accordingly.

How to Replace a Fan Clutch: A Quick Guide for Beginners


Replace a Fan Clutch

The fan clutch is one of the most important components of your car. It is a critical part of the cooling system of your engine. It improves the efficiency of the engine. Therefore, when the fan clutch is damaged, the performance of the engine will most likely be compromised as well. You need to ensure that the fan clutch is in good condition. If not, it needs to be replaced as soon as possible.

If you do not know how to replace a fan clutch, there is no need to worry. A lot of other car owners surely do not know how to do so. These are the steps that you need to follow to successfully replace a fan clutch:

  1. Check for Fan Clutch Problems
  2. Remove the Fan Clutch
  3. Remove the Fan
  4. Install the Fan Clutch
  5. Install the Shroud and the Hose

In the rest of this post, we will let you know in detail the specific steps that you should follow. At the end of the day, you will realize that the task is easy and you can do it even without the help of a trained mechanic.


Things You Need to Follow this Tutorial

To start with, you need to prepare basic materials, which include the following:

  • New fan clutch
  • Screwdriver
  • Pliers
  • Wrench
  • Pulley locking tool

Step-by-Step Guide on How to Replace a Fan Clutch

Now that you are ready to take out the fan clutch, these are the steps that you need to follow to complete the task successfully:

Replace a Fan Clutch

Via: https://www.1aauto.com/


1. Check for Fan Clutch Problems

The first thing that needs to be done is to be sure that the problem is with the fan clutch. A quick visual inspection of the fan will give you an idea if it is already calling for a replacement. You also have to listen to the sound when the engine is turned on. If there is an annoying and loud sound, this is another indication that it needs a replacement.

Another indication that you have a problem with the clutch is when the engine experiences overheating. Remember, it controls the cooling fans. Therefore, when the fan clutch does not work, the fans will not also provide a cooling effect, and this is why the engine will suffer from heating.


2. Remove the Fan Clutch

Once you are sure that the fan clutch is problematic, proceed to have it removed. Before you can access the fan, you have to remove the air intake hose, fan shroud, and belt. Use the screwdriver to take off the intake hose. Once the screw is loose, take it off and wiggle the hose until it is completely moved out of its place.

After removing the air intake hose, you will now have easier access to the fan shroud. Remove the bolts on both sides.


3. Remove the Fan

After removing the shroud, you will now have easier access to the old fan, and you can have it removed. Use an open-ended wrench to remove the bolts that are attached to the fan. In the case of some designs, you will need to use a pulley locking tool. The latter has the main purpose of preventing the movement of the pulley while you are removing the nut.


4. Install the Fan Clutch

Once you are done with the removal of the old fan clutch, now is the time to have it replaced with a new one. Hold it in place while aligning the bolts. Fasten the bolts and see to it that it is secured. This is an important part of the process. If the fan is not properly positioned, it can loosen and can cause problems in the engine.


5. Install the Shroud and the Hose

After the installation of the new fan clutch, you have to return everything that you had earlier removed. This will include the fan shroud and the air intake hose. See to it that you will bring them back to their original position. As with the fan clutch, check the bolts and the screws to be sure that they are as tight as they should be.

For a more detailed guide on the steps that are involved in the removal and replacement of the fan clutch, this short video below will help:


Pro Tips

Aside from learning the way to properly install a fan clutch, the tips mentioned below will also be helpful, especially when it comes to making sure that the problem is with your fan clutch.


Testing your Fan Clutch

Earlier, we noted in this post that the first thing that you need to do is to determine if the problem is really the fan clutch. Aside from a quick visual inspection, there are certain tests that could confirm your initial theory.

To test a fan clutch, here are the things that you need to do.

  • Start the car. After starting the car, proceed to the front and open the hood, which should provide you with a good view of the engine and its components.
  • Provide time so that the engine will stabilize. After a few minutes, the fan should slow down. If there is no sign of slowing down, this is an indication that the clutch is frozen.
  • Another test is to attempt to stop the fan from running. Place a rolled paper and see if the fan will stop. If it stops easily, this means that the clutch needs a replacement.
  • Spinning the fan with your hand will also be another quick test that you can do. There should be some form of resistance as the fan spins. If it requires too much effort to spin or if it rotates easily, these are also signs that you need a new fan clutch.

Types of Fan Clutch

When looking for a replacement for the old fan clutch, keep in mind that there are two common types available, and they have differences in terms of how they work:

  • Thermal Fan Clutch: With high-speed operations, this type is able to provide maximum cooling. It also has disengaged operation, which is great for noise reduction and fuel efficiency.
  • Non-Thermal Fan Clutch: If you are looking for one that is more affordable, this is what you have to choose. Nonetheless, its life expectancy is typically shorter.

Conclusion

After reading this post, I hope that you already know how to replace a fan clutch. As you can see, it is a task that you can accomplish easily, even without seeking help from a trained mechanic. The materials needed are quite basic, and the steps are easy to follow. Basically, you just have to remove the air hose intake, fan shroud, and old fan clutch and replace them with a new one.

Best Cold Air Intake: A Definitive Guide for Buyers


Best Cold Air Intake

If you are an automotive novice, you might not have heard of cold air intake before, and you probably have no idea what it does or why it is important. For car enthusiasts, on the other hand, this is one of the most popular vehicle upgrades because of its ease of installation and economical price while being able to provide a significant improvement in performance.

These are some of the most important factors that you need to take into account to find the best cold air intake:

  • Installation: Easy to install, user friendly, have detailed instructions
  • Filter: It should have a reusable and washable filter
  • Durability: It should not be easily prone to wear and tear.
  • Size: The size of the cold air intake should be right for your vehicle
  • Warranty: Comes with a longer warranty,
  • Price: It should be worth the price
  • Reviews: It should have more positive reviews online.

In the rest of this post, we will briefly tackle five of the top picks for the best cold air intake, as well as the reasons why they are recognized as amongst the best in the marketplace. We will also discuss some of the most important considerations that will help you to weigh the pros and cons of the possibilities.


Benefits of Installing a Cold Air Intake

Do you really need to have a cold air intake? Below are some of its many benefits, which can convince you that you actually need to have one:

  • Improve Horsepower: One of the most obvious benefits would be increasing the power of your car. A cold air intake has oxygen and allows the air to cool, which is basically how it is able to deliver a positive impact on horsepower.
  • Increase Throttle: If you do not upgrade to a cold air intake, there is a tendency that your vehicle will have a slow response, especially when you are driving uphill. This is an upgrade to having more air that will be needed for combustion and to produce more throttle.
  • Affordable Price: This is one thing that will largely depend on the product that will be chosen. Generally speaking, the cost is more practical compared to other upgrades that can be executed to improve torque and horsepower.
  • Longer Engine Life: A cold air intake comes with a filter that will be basically responsible for sucking cold air. It is able to block contaminants that can get to the engine, and that can possibly shorten its functional life.
  • Ease of Installation: Generally speaking, cold air intakes do not require professional knowledge in terms of their installation. You can complete it even without a helping hand, provided that the manufacturer has clear instructions on how it can be done.
  • Increased Gas Mileage: One way by which you can enjoy long-term savings with a cold air intake would be through gas efficiency. The gas will be burned better and will last longer, making it offer significant benefits in your wallet.

Essential Factors to Consider

AD

To easily narrow down the choices and make an intelligent decision, these are some of the most important factors that you need to take into account:

  • Installation: You do not need to pay for the professional services of a trained mechanic to install a cold air intake. You can do it even on your own. Choose a product that is user-friendly. The manufacturer must also provide you with detailed instructions on how its assembly can be completed.
  • Filter: It is also important to evaluate the quality of the filter. It should be reusable and washable. This means that you will be able to save a lot of money as you can just clean the filter instead of buying a new one as a replacement.
  • Durability: Take the time to evaluate the overall construction and the materials that are used in the cold air intake. You can also read reviews to make sure that you will pick a product that is not easily prone to wear and tear.
  • Size: To determine the size that is right for your vehicle, you will have to look under the hood and see which size is best for your needs. The engine space will dictate what to buy. Luckily, smaller ones do not always equate to being inferior in terms of quality compared to their larger counterparts.
  • Warranty: Most of the options that you will find have a warranty that lasts for one year. If possible, look for one that comes with a longer warranty, possibly a lifetime. This will guarantee satisfaction with the purchase that you will make.
  • Price: It is surely tempting to buy the cheapest product that is available. Personally, I won’t decide on the sole basis of price. You should not be hesitant to spend more if this is tantamount to enjoying a product that can deliver superior functionality.
  • Reviews: At this point, if you still find it hard to decide which one to buy, go online and look for more reviews from other users. Their real-life experiences will provide valuable insights that will make it easier for you to weigh the good and the bad of the choices that you have in mind.

Top Picks for the Best Cold Air Intake

In this section, we will identify five of the best choices that should be under your radar as well as some of the things that make them exceptional.

Product

(Amazon Links)

Image

(Amazon Links)
 

Spectre Performance 9900 Cold Air Intake

Our Detail Review

K&N 57-3058 Performance Cold Air Intake

Our Detail Review

Airaid 352-210 Cold A​​ir Intake

NO LONGER AVAILABLE

Our Detail Review

S&B Filters 75-5062 Cold Air Intake Kit

Our Detail Review

Genuine Toyota Parts PTR03-34100 TRD Cold Air Intake

NO LONGER AVAILABLE

Our Detail Review


1. Spectre Performance 9900 Cold Air Intake

AD

Looking for an easy way to improve the torque and horsepower of your vehicle? This cold air intake has got your back. Once you experience its performance, it will be easy to realize that it can indeed provide the bang for the buck.

When it comes to installation, there is no need to worry. The manufacturer provides comprehensive instructions that will be almost effortless for you to follow. There is no complication associated with its assembly, even if you are not a trained automotive mechanic.

It is also worth highlighting that it comes with a high-flow design, which can also be regarded as one of its best assets. The latter will allow the engine to breathe a large volume of air, increasing the amount of usable power that is generated.

Lastly, there is a replacement filter that is provided to maintain the peak performance of the cold air intake. When the filter is done, however, you might have quite a hard time finding a replacement since it may not be easily available.

Pros:

  • Installation is easy to accomplish
  • Delivers the perfect fit
  • Significant improvement in throttle response

Overall

This model can improve gas mileage and throttle response significantly.


2. K&N 57-3058 Performance Cold Air Intake

AD

Looking at the features of this cold air intake, one that you can find to be most impressive is its technical specifications. Based on the details that have been provided by the manufacturer, it can deliver a horsepower gain of up to 17.55 HP at 4,917 RPM.

The installation of the cold air intake will be easy, even for beginners. The instructions provided lack clarity, but even without them, the assembly will be easy. It is believed that the entire process of its installation will take roughly only one and a half hours.

The lifetime air filter is also a plus for this model. In the case of some cold air intakes, the filter needs to be replaced every now and then, which can be an added cost on your end. The good thing with this model, the filter will work infinitely.

Aside from having a long-lasting filter, it should also be pointed out that the manufacturer states that it has a service life of 100,000 miles. This, however, will be dependent on the driving conditions.

Pros:

  • Fits in a wide array of vehicles
  • Results can be immediately noticed
  • Long service life

Overall

This cold air intake has a service life of 100,000 miles, and the filter will last a lifetime.


3. Airaid 352-210 Cold Air Intake

NO LONGER AVAILABLE

You will be able to enjoy an easy way to improve the torque and horsepower of your car with this cold air intake in the absence of making costly engine upgrades. With the cold air dam panels that are integrated into this product, there will be a stable supply of cool air that will allow the engine to maintain its peak performance.

One of the excellent features that set it apart from most of its competitors is the 360-degree air filter. It is less restrictive compared to most of the filters that are traditionally made of paper. This type of filter is also reusable, making it an economical choice.

Lastly, the manufacturer is offering a No Hassle Lifetime Warranty, which should be more than enough to provide you with peace of mind. Only the finest materials are used. If you are unhappy or if the product shows signs of defects, just let the manufacturer know, and they will do what it takes to remedy the situation.

Pros:

  • Installation can be done quickly
  • The filter is easy to clean.
  • Extensive warranty coverage

Overall

This high-end cold air intake comes with a washable and reusable filter. The lifetime warranty is also a plus to provides a guarantee of your satisfaction.


4. S&B Filters 75-5062 Cold Air Intake Kit

AD

The use of this product will significantly improve airflow and lower the temperature of the air that goes through your engine. One of its amazing features is the multi-layer filter that can effectively screen out contaminants.

It comes with a unified design, which is a significant improvement from the previous version of this cold air intake. Because all the components are combined, less complication will be experienced with its installation.

The premium silicone material that is used in the product is also a plus. The material is great in terms of durability and heat resistance, as well as for providing an air-tight seal.

Lastly, there are deeper and wider pleats compared to other models. There are also more pleats that you can find per filter, which improves the performance of the cold air intake.

Pros:

  • Has a unified body
  • Comes with clear instruction
  • Mounting hardware is already included

Overall

This cold air intake comes with a unified design for ease of installation. It also has multilayer filters and premium silicone construction for durability that is hard to rival.


5. Genuine Toyota Parts PTR03-34100 TRD Cold Air Intake

NO LONGER AVAILABLE

If you will base your decision on user reviews that are available online, this is also one of the least popular. If you look at its specifications and features, however, you will realize that it is also an impressive option.

It comes with an Intake Flow Accelerator, which is one feature that differentiates it from most of the options that you can find on the market. The latter is responsible for smoothing and accelerating airflow that gets to your engine.

There is also a high-flow conical air filter. It is reusable and washable, which extends its functional life and lowers the cost associated with the use of cold air intake. It also has a custom-calibrated gauge that will make it easy to determine when the filter is asking for a replacement.

Pros:

  • Easy to install
  • Makes the engine sound great
  • High-quality construction

Overall

This is a popular choice because of the Intake Flow Accelerator and reusable filter with a custom gauge to know if it already needs to be replaced.


Conclusion

In sum, the best cold air intake is one of the most practical upgrades that you might want to consider for your vehicle. It can significantly improve the horsepower and torque of your engine. Keep an eye on the five products mentioned above to make a decision that you will not regret in any way.