Home

Recent Posts

AC Compressor Failure [10 Things To Check & Solution Guides]


AC Compression Failure

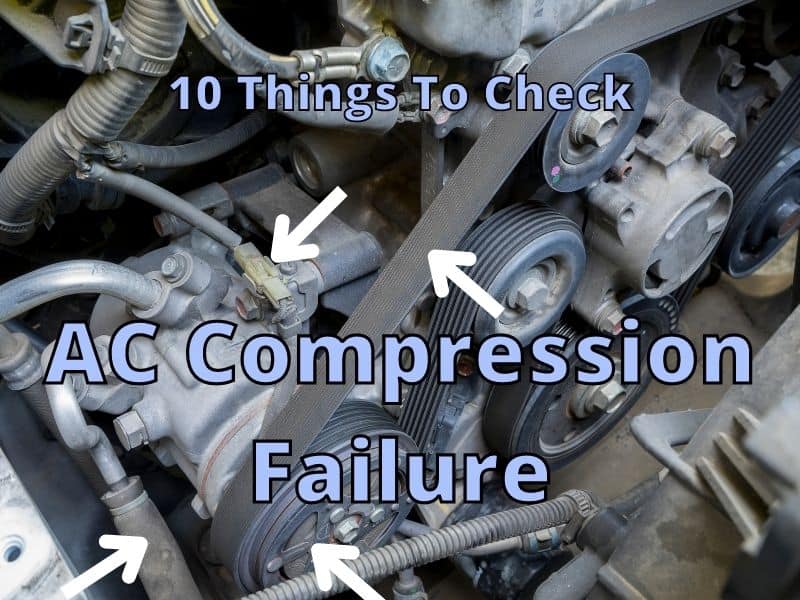
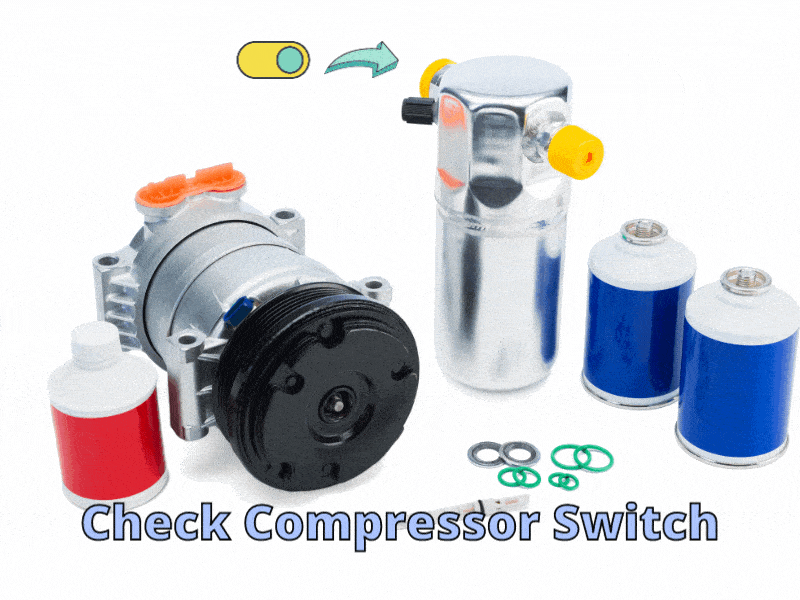
Your AC compressor can fail when it has low freon levels, a stuck valve, or if the compressor clutch is not working anymore. When your car air conditioner starts to act strange there could be a number of reasons why, but one common reason is the compressor.

Common areas to check to see if your AC compressor has failed or not:

  1. Check if the air temperature is warmer than normal. Usually, the first indication of a problem. Starting the car and pressing the peddle to 2000-3000 RPMs while the car is in Park. Feel if the air gets colder and colder as you continue to press the peddle at 2000-3000 RPMs. This likely means the AC compressor isn’t working as it should.
  2. Check if you smell something? According to some, you can smell a sweet smell if you have a freon leak. Be sure to check for an antifreeze leak, because both smell sweet.
  3. Listen for noises that occur when the AC is on. This could be a mechanical problem with the compressor.
  4. Check if the AC temperature is too warm or too cold from what is normal or it alternates between both. This could be a clogged or bad AC expansion valve. If you notice the AC compressor is always on, this could also mean an expansion valve issue or a damaged compressor clutch.
  5. Turn off the car and check under the hood for loose or damaged wire connections to the compressor. A loose or damaged wire could cause a short or sporadic compressor activity.
  6. Check the fuse box for blown fuses. Bad wiring or a bad compressor could cause a blown fuse.
  7. Check the compressor clutch – See video Supply 12V power to the compressor clutch wire. If you hear and see the clutch engaging, the clutch is likely fine; if not, the clutch could be the problem.
  8. Check freon levels – Check the sight glass in the receiver dryer or other areas of the AC system or use a manifold gauge. If it has lots of bubbles or little liquid flowing through it when AC is on, the freon is low. This can cause the clutch to freeze.
  9. Check for a freon leak. If you suspect a leak you can turn the AC on, wait a couple of minutes for pressure to build, turn off the car and check the entire AC system using an electronic detector, or by spraying a soap and water solution on all areas needed and looking for bubbles. An easier method might be using a dye that you add to the AC system and using a black light to check where the leak is occurring.
  10. Check the cooling fans. If the cooling fans on the “condenser or radiator” are not turning on when the AC is on, this could be the problem.

Your compressor could be bad, but it could be a number of other issues as shown in the article below. Use the troubleshooting guides and with a little luck, you can find the problem without a big expense at the mechanic. (Use caution whenever working on your AC system and avoid turning the AC on if possible to avoid AC compressor damage.)


First Steps To Diagnose A Bad AC Compressor

There are different AC systems that work a little differently for different cars, but the compressor clutch is basically the same for each car.

To start with you can do some quick checks to narrow down the problem. I would start with what I know already and check those areas or parts. If your check reveals trouble, plan to spend more time focused on that area to see if you can solve the problem.

Some parts to check first are the compressor/clutch, the serpentine belt, and the refrigerant. These are usually the first to go bad.

An older car will likely have worn-out parts, while a newer car can have malfunctioning parts.


For older cars, you may want to start by:

  • Listen for odd sounds from the compressor. If very noticeable, then it’s likely bad.
  • Look at the clutch when the AC is on. “If the clutch is engaging and disengaging once every few seconds, this is a sign of low refrigerant.” (autozone.com)
  • If you are not sure the clutch is working, you can test the compressor clutch with a circuit probe tester (Amazon Link) (See video below).
  • Check freon levels – Bubbles or no liquid flow in the sight glass means freon needs to be added.
  • Check the wiring. Look for loose connections and frayed areas.
  • Check to see if power is getting to your compressor using a multimeter.
  • Check the fuse box for a blown fuse.
  • Check for freon leaks.
  • Check the serpentine belt is not slipping or worn. (May hear a screeching noise.)

An older compressor clutch has seen a lot of use. It may go bad from lots of use, or a slow leak in your AC system. Low freon can cause excessive wear to your compressor, like an engine without oil. (See article – How Much Oil Should You Add Up In AC compressor?)

In addition, the wiring in your older car can become loose, damaged, replaced with the wrong type, or corroded. Wiring is another big issue with older compressors. Testing wiring and checking fuses will let you know if the wiring of the compressor is likely the problem.

Last, you want to check the entire AC system because the could be problems with other components or a leak in the system somewhere. This is where you will need a lot more time and patience. Sometimes this is the step when you need to go to a mechanic because it may take more time and expertise.


For a newer car, you may want to start with:

  • Newer cars are more likely to have a freon leak or loose wiring rather than a worn-out compressor.
  • Look at the clutch when the AC is on. If you see the clutch engaging and disengaging frequently, this could mean there’s not enough freon in the AC system. Your compressor is likely OK, but freon should be added to avoid damage to the compressor.
  • If you’ve had your car worked on recently or done some type of engine service, you should check the wiring and see if power is getting to your compressor using a multimeter or circuit probe tester (Amazon Link). I’ve noticed that mechanics or service technicians from time to time forget something when they are in a rush.
  • Check the fuse box for blown fuses.
  • Check for freon leaks. Use the sight glass if your car has one to see if levels are good as described earlier. If no sight glass, you can try a manifold gauge set (Amazon Link) to test pressure and even add refrigerant.

Newer cars will have more electrical problems before mechanical problems unless there’s a leak that is likely caused by damage or someone who worked on the engine or AC system. I would focus on seeing if power is getting to the AC compressor clutch and fuses that might be blown.

(Cost to buy an AC compressor generally ranges from $150 – $300. Labor can cost about $500 – $1500 for the average car. If you are sure the AC compressor is the problem, you replacing it for cheap enough. Although doing it yourself can be fairly difficult for the beginner.)


Steps To Check Your AC Compressor

1. How To Test An AC Compressor Clutch

In this video, they discuss how to test a compressor clutch and how to avoid paying for a testing tool using a simple hack.

You can look at the compressor clutch while the AC is running to see if is operating normally.

A normal clutch would:

  • Engage from time to time. Not always on or always off.
  • Generally, they engage for about 15 seconds and then disengage for 15 seconds, and will cycle on and off until the cabin temperature reaches the correct temperature. Then they will cycle on and off as needed to maintain cabin temperature. Always on is not usually normal.
  • It normally will spin with the pulley when it’s engaged, and remain still when not engaged.
  • Generally, will not make much noise. Noise can be a serious problem. Metallic noises could mean metal particles are breaking off in the AC compressor and they can get stuck in other areas of the AC system meaning a bigger cost to repair.
  • Spin smoothly without shaking or wobbling. Some vibrations are normal depending on the car but not excessive vibrations.

2. Look For Faulty/Loose Wiring On The AC Compressor

If you’ve checked your compressor and it looks fine and sounds fine, you’ll need to ensure power is getting to the different parts on your compressor.

The compressor clutch is the area to focus on first, as this part is one that most often has issues. As seen in the video above you can test to see if the clutch is working using a probe, but you’ll also need to check for loose or damaged wiring.


3. Check The Fuse Box For AC System Component Fuses

Check Fuses For Compressor Problems

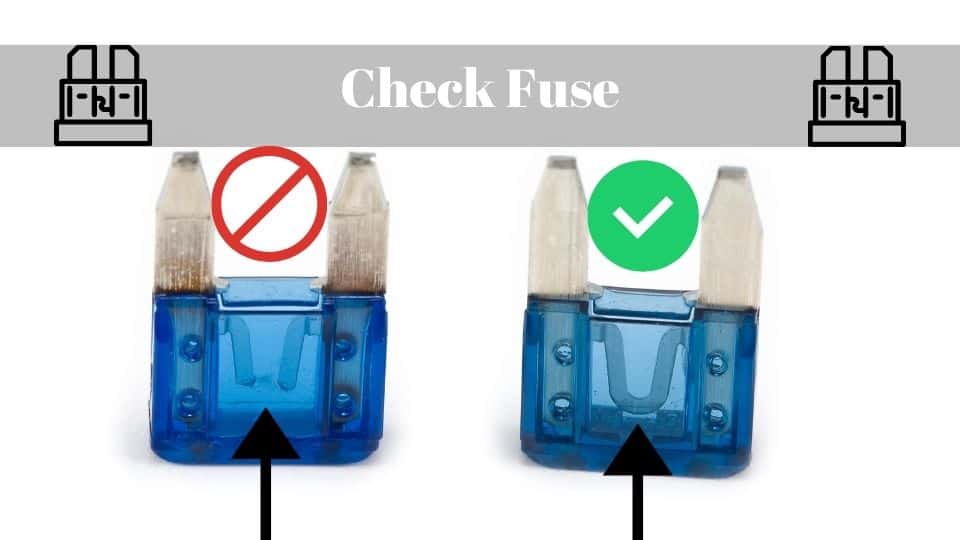
The fuse box is the next area to check. Check in your car’s service manual to find where the fuse for the compressor clutch is located. Check to see if the fuse is blown. If it looks fine then move on to other fuses that may be related to your AC system if any.


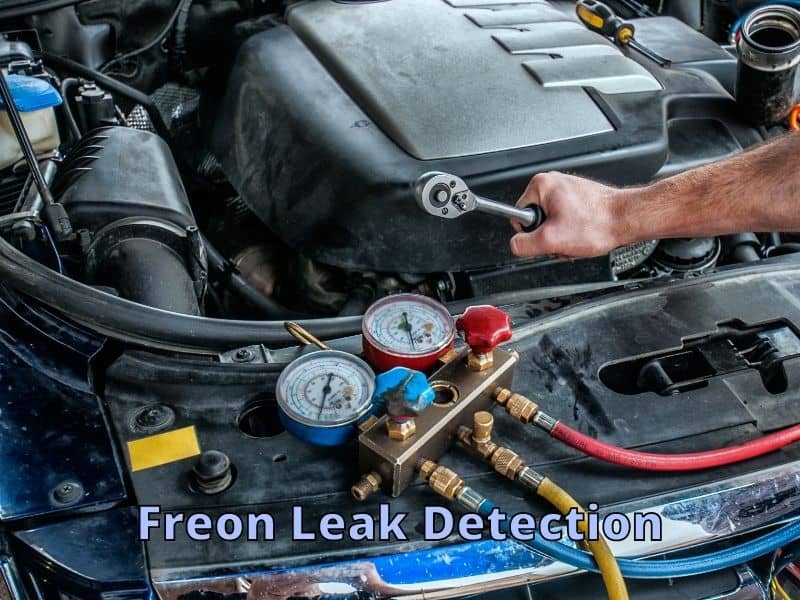
4. Check Freon Levels And Troubleshooting Using A Manifold Guage

If you have a sight glass to check freon level you can see if there’s any visible freon running through the line. It should look like liquid flowing through the glass. If you don’t see much, see bubbles, or nothing, make sure the AC is on and test the compressor first, and then you can better determine if the freon is low.

You can also use a manifold gauge set to check on the levels of freon. This instrument will help you check the pressure of your AC system and allow you to add freon if needed.

The manifold gauge can help you troubleshoot if your AC system has problems with:

Diagnosis – High and Low-Pressure Results (Credit Video Above)

  • Bad AC Compressor – If both sides of your AC system are at the same pressure and the AC compressor clutch is engaged, this usually means the AC compressor is bad.
  • Stuck Expansion Valve or AC Compressor Check Valve – If you see higher than normal pressure on the low-pressure side and lower than normal pressure on the high-pressure side, one of the valves could be stuck. It could also be the accumulator could be clogged.
  • Clogged Orifice Tube/Expansion Valve – When you first connect the gauge and the high-pressure side is higher than the low-pressure side, when the car is off, a clogged tube or valve is likely.
  • Low refrigerant/Freon – After you turn the car on and run the AC for a few minutes, look at the gauges and owner’s manual to find out if the pressure is correct. Low pressure on both sides is usually low freon.
  • Too much Refrigerant/Freon – If your gauges show higher than normal pressure on both sides, there’s either too much refrigerant or air has gotten into the system.
  • Fans Aren’t Working or Condenser Clogged – If you have high pressure on both sides this could also mean the refrigerant isn’t cooling enough. The fans could not work or the condenser grill could be clogged.
  • Receiver Dryer, Expansion Valve, or Orifice Tube Are Clogged – If you see higher than normal pressure on the high-pressure side and lower than normal pressure on the low side, something is likely clogged.

5. Check The Compressor Cycling Switch

Check Compressor Switch

Next, you may need to check the cycling switches for your compressor. They are located on the end of the wire that is attached to the accumulator and other areas of the AC system. You will likely see a three-wire plug inserted into the end of the cycling switches. (see the picture below for what it might look like on your car.)

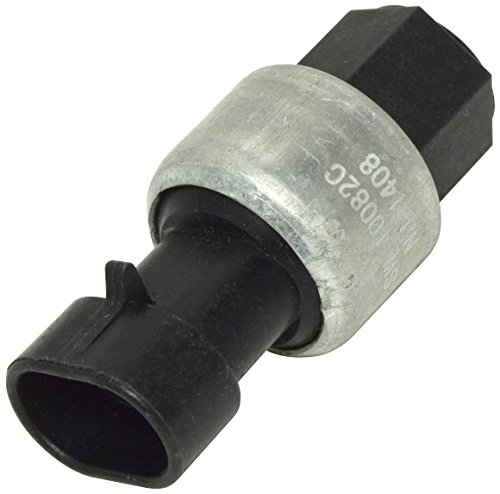
Normally these switches should be fine and will prevent excess pressure build-up in your AC system or excess low pressure by turning off the AC.


How do you know if the compressor cycling switch is bad?

  • If your AC starts to go on then off intermittently. You’ll get warm air while the air is on sometimes. You likely have a bad switch.
  • The switch can go bad because of age, and power surge, and can also get damaged fairly easily if something hits it. Check to see if wires are connected well and for any damage.
  • You may notice a clicking sound if the switch is trying to go on and off. If it is switching on and off a lot, this is a symptom is malfunctioning.
  • Feel the condenser tubes while the AC is on. The tubes come from the condenser and will be cold. If one or more is not, the switch could be bad.
  • An OBD2 scanner tool is a low-cost way to (see article) find codes for your car that may indicate a bad sensor.
  • You may also want to test the pressure (see article) in your AC system to see if you’re low on freon or have too much. This can help you determine if there’s a leak or if it’s normal and the sensor may be the problem.

In this video, the guy replaces his pressure cycling switch and shows how to bypass the switch to see if the AC is working properly as if the switch was on. (Caution! – If there is very high or low pressure in your AC system you don’t want to bypass the switch because the switch purposely turned off the AC to prevent damage.)


6. Checking For Freon Leaks To Determine If The Compressor Is OK or Damaged

Freon Leak Detection

Freon leaks can be common on older cars. The AC system is getting old and needs parts replaced and can have leaks. Even new cars can have leaks if they get into a fender bender or have had some work done on them recently.

Here are three ways to check for leaks in your AC system.

  1. Use an electronic freon sniffer. The advantage to using this method is you can detect the gas leaks inside the cabin of the car as well as areas inside the engine area.
  2. Use a UV refrigerant dye and or sealer. Using a UV dye that you inject inside the AC system can help you find leaks with a UV light. Then you can replace the part that is leaking.
  3. Use soap and water. If you are willing to take the time to spray all over the AC system with a solution of soap and water, you can find where gas is leaking out of the AC system.

In addition, you can use the method talked about previously, using an AC diagnostic gauge (Amazon Link) to determine the pressure of the AC system in your car, although it won’t show where the leaks are.


  • Electronic Sniffers are helpful in some ways when diagnosing a freon leak. They are fairly inexpensive and easy to use. This can be good for some situations, but not others. Consider watching the video to see if this applies to you.

You can get a sniffer anywhere from $20 -$200. They are fairly easy to use and most will detect the freon gas leak from car AC systems. The one below is one I found on Amazon.

Amazon Link


  • Refrigerant dyes are helpful when you need to detect and even seal refrigerant leaks. In the video below the guy goes over how he generally goes about detecting leaks.

These dyes are fairly inexpensive but may need some time, tools, and expertise to use. This is a good option for finding the exact location of a leak. Sniffers might come close but may not be exact in some situations. Consider watching the video to see if this applies to you.

You can get a dye kit from $25 -$100. They can be easy or complicated to use and most do a good job showing exactly where leaks are occurring. The one below is simple to use and is found on Amazon.

Amazon Link


  • A bottle of soap and water is the last method I’ll mention. This is particularly helpful when you are pretty sure you know where the leak is occurring. You’ll need to build up pressure in your AC system by running the AC for a few minutes.

You can then turn off the car, open the hood and start spraying your soap and water solution on the parts of the AC system that you suspect are leaking. You’ll see bubbles forming if you’ve hit the right place with the soap and water solution.

Common places where leaks occur are:

  • The Condenser
  • Soft lines in the AC system
  • Check high-pressure lines that are bolted to the compressor and the condenser. (Credit: gobdp.com)

Once you’ve found the leak you can replace the seal, line, or part that is broken or possibly use an injectable sealant dye to help seal small holes in the system.


Final Thoughts

Your AC compressor can go bad because of age, low freon that causes mechanical issues, a stuck valve, or the compressor clutch not working anymore.

Troubleshooting why the AC is not working properly will help you identify the exact problem so you can determine if fixing it yourself or taking it to the shop would be best.

Thanks for reading this article. If you are interested in other AC-related articles see the articles in these links. (Service A Car AC) and (Fix Your Car Vent) and (Why Does My Car Overheat When AC Is On?)


References

gomechanic.in

chapelhilltire.com

jdpower.com

cartreatments.com

mechanicbase.com

DIY Car Trash Can [17 Ideas]


DIY Car Trash Can

I use a trash can most every week when I drive my car. The trash in your vehicle can get out of hand quickly, which is why having a garbage can inside your car is very convenient. You will never have to worry again if you get a garbage can that helps your children and passengers dispose of their trash.

You can tidy up your car with a unique trash can that fits your style, size, and convenience needs. The right trash can make your car look and smell better, and offer you a way to customize your trash disposal needs.

In this article, we are going to review many options available for car garbage cans and why you might want one over another. Each one has features, advantages, and disadvantages. So, let’s take a look.


Choosing A Car Garbage Cans

Before you start looking for a product that will give you a good garbage can, below are some of the considerations that might be of great help:

  • User reviews and ratings: This might be the most important factor you might want to consider. User reviews come from actual buyers and you will want to know what they say about the product you are about to buy. The ratings, on the other hand, will give you a summary of what the buyers think about the product.
  • Features: Each product presented below has its own individual and unique features and it is entirely up to you to choose the one you can benefit from the most. Some have waterproof, leakproof, and oil-proof features and it will be dependent on your preferences.
  • Easy cleanup: Having a car garbage can’s purpose is to eliminate trash and keep them organized until it’s time to throw them out. If the one you choose cannot hold the litter you get rid of, it will not serve its purpose. You should buy the one that will be able to let you clean the entire mess up.
  • Ease of use and installation: A car garbage can should be very easy to install and use. Some products presented below are only to be placed on the floor of your car while others are to be hung on the headrest of the front seats.
  • Can hold its position: This factor would definitely come in handy especially if you are driving on uneven surfaces. The one you should buy should be able to stay still and in its original position. If you are driving on an uneven road, the garbage bin will move along with it and the trash might end up outside the bin itself.
  • Size: This factor is also considered one of the most important, as you don’t want a car garbage can that will take too much space or legroom inside your vehicle. Having a large car garbage can might also mean that there won’t be space for your other important things.
  • Price: When you review each product’s features, pros, and cons, you have to make an evaluation of which one you can benefit from. Then make sure that the price is reasonable enough for that product you are considering. You have to take note that not all expensive ones have the best features and not all the cheap ones are of low quality.

Top Picks For The Best Car Garbage Cans

Based on the factors presented in the earlier section, we will be providing you with the top five recommendations for the best car garbage cans that are available in the market right now.

1. Drive Auto Products Car Bin

The Drive Auto Products car garbage can features bonus 20-pack liners that include a 2-gallon litter receptacle for paper litter, empty cups, fast food, as well as small candy wrappers. It also has the ability to reduce smell and it is guaranteed that disposal is tidy and not at all messy. This is because the garbage can already comes with disposable plastic bags. In addition, an extra pouch on the side is included to store the plastic bags.

Major Features:

  • Comes with disposable plastic bags
  • A side pouch is included to store the plastic bags
  • Waterproof
  • Can be attached from the seat headrest
  • Big enough to hold clutter
  • Edges are hand-sewn
  • Color will match your vehicle’s interior
  • Item weight is 340g
  • Product dimensions are 25.5 x 15 x 22 cm

Pros:

  • Reduces smell
  • Proves to keep disposal tidy
  • User-friendly and convenient
  • Versatile container
  • Will keep your car clean and organized
  • Compact and portable

2. Cereal Container With Flip Lip


3. EPAuto Waterproof Car Trash Can

The EPAuto car garbage can is a versatile trash bin that can be used in many locations, as well as in cars. Its small size is already an advantage for getting rid of the garbage while you are driving in your car. One great feature of the EPAuto car garbage can is that it is easy to deposit trash quickly. The waterproof interior makes sure the mess stays inside.

Major Features:

  • Car or bathroom trash bin
  • Easy access lid with elastic opening
  • Waterproof interior for no spills
  • 2-gallon capacity
  • Top and bottom fasteners for a secure hold while the car is in motion
  • Dimensions are 8.25″L x 6.75″W x 10.5″H

Pros:

  • Versatile
  • Waterproof
  • Easy to use
  • Allows easy cleanup
  • Small in size and will not take too much room inside your car


4. Dollar Store Container And Duct Tape


5. Encell Auto Seat Litter Bag

The Encell car garbage bag is a versatile, rugged, and washable trash bin that will be able to provide its user’s durability and outstanding ease of use. It can be attached to the headrest and has space-saving qualities. It comes with a velcro bottom opening that makes the trash bag easy to empty. Another great feature of this trash bag is that it fits right in the headrest and it stays in its place.

Major Features:

  • Rugged and washable
  • Comes with ergonomic function features
  • Has space-saving qualities
  • Is adjustment
  • Portable and has a compact design
  • The bottom part has adhesive Velcro
  • Item weight is 41g
  • Dimensions are 19.6 x 14.2 x 0.6 cm

Pros:

  • Lightweight and compact
  • Stays in its place
  • Convenient
  • Adjustable according to your height preferences
  • Strong, durable, and long-lasting
  • Allows easy cleanup


6. Small Food Container


7. Spill-Proof Car Trash Can

The brand offers various colors of this trash bag, according to its buyers’ needs. It features waterproof and when turned inside out, it is proven that cleanup is very easy and tidy. It can be used on any vehicle and it is very easy to use and install into the headrest. Lastly, it will be able to keep your vehicle clean, it keeps trash hidden, and odors are minimized.

Major Features:

  • Features a waterproof design
  • Just turn inside out to clean
  • Can be used on any type of vehicle
  • It can hold about 2.5 gallons
  • Dimensions are 31.6 x 26.5 x 2 cm

Pros:

  • Allows easy cleanup
  • Suitable for universal car use
  • Easy to install and use
  • Keeps your car clean and tidy
  • Hides trash conveniently
  • Waterproof


8. Cleaning Wipes Trash Can


9. YIOVVOM Car Trash Can

Last but not least is the Yiovvom black car garbage can, which is made of sturdy plastic. This car garbage can is versatile, as it can serve as your car’s ashtray, trash bin, and garbage container. The plastic cover is removable and can retrofit plastic bags for easier cleanup. It can be used in your vehicle, at home, and in offices. It also provides convenience, as it can perfectly fit in your vehicle’s cup holder or door.

Major Features:

  • Can be used as an ashtray, and trash bin
  • Features removable plastic cover
  • Suitable for use inside the car, at home, or in the office
  • Perfect fit for your vehicle’s cup holder or door
  • Item weight is 118g
  • Dimensions are 17 x 9.8 x 9.5 cm

Pros:

  • Features compact design
  • It will not take up too much space if you use it in the car
  • Versatile
  • Allows easy cleanup
  • Made of strong plastic material


10. Hand Made Oilcloth or Laminated Trash Bags


11. Disinfecting Wipes Trash Can


12. Hand Made Trash Bags


13. Kleenex Box Trash Can


14. Pop-Up Leakproof Trash Can


15. Hook And Paper Bag


16. Cardboard Box With Liner or Trash Bag With Embroidery Hoop


17. Get A Car Organizer / Trash Bag


Different Types of Car Garbage Cans

The top five picks presented above might be a little overwhelming for you, especially if you are buying this product for the first time. In order for you to make a well-informed decision, it is vital that you familiarize yourself first with the different types of car garbage cans.

1. Floor-type Trash Bin

  • Can be used inside the car, as well as at home or in offices
  • Small in size but larger options are available if you wish to use it at home
  • Can be placed on the floor and might not stay in its place when your vehicle is in motion
  • Usually features a removable lid
  • Will be able to retrofit a garbage plastic bag for easier and tidy cleanup

2. Hanging-type Trash Bin

  • Can be hung using buckles at the headrests of the front seats
  • It will stay in its place even on uneven surfaces
  • Can also be used as an organizer
  • Turning this type of garbage bin inside out will allow tidy cleanup
  • Just tighten its opening to make sure that litter inside will be kept in its place
  • Usually made of sturdy and waterproof material
  • Very easy to install and will not take too much space

Tips On Cleaning Up Your Vehicle Using Car Garbage Cans

Once you have bought the best car garbage cans, you might want to consider the following tips in order for you to take advantage of its maximum functionality.

  • Your vehicle can be a hot spot for water bottles, fast food, and gum wrappers. It can easily be overlooked but when it piles up, you would rather spend money on a car wash instead of incorporating a simpler solution, which is having a car garbage can inside your vehicle.
  • You pay valuable money to have your car washed, including vacuuming the interior. After a month, the shine will fade and it might already look like a dump inside your car. Getting your vehicle the best car garbage cans will get rid of unnecessary and unattractive trash.
  • The idea of having a garbage can inside your car might be a bit unappealing at first. You might ask yourself, “Will the garbage bin take too much legroom?” “Will the garbage smell inside the car?” What’s good about having this product is that you won’t have the time to clean your car every time you use it and it might be beneficial for you because you only have to take the trash out once it’s full.
  • The primary benefit of having a car garbage can is that it eliminates unwanted trash and will keep your car’s interior clean.

Conclusion

To summarize, the best car garbage cans should be able to get rid of the trash inside your vehicle, especially when you are on the road. As discussed above, having a trash bin plays a big role in order to maintain the cleanliness of your vehicle. With the top five recommendations provided, you have to evaluate each product carefully in order for you to come up with which one is your money’s worth.

Are you also looking for other products for your vehicle? Click here to find more products that are available in the market right now.

Car Ramps [How To Choose]


Car Ramp How To Choose

A car ramp is one of the best things to have in the garage if you regularly work on your car. When I was a teenager I use my Dad’s car ramps to change my car’s oil. I learned from experience about using a ramp safely.

To choose the right car ramp you need to know how much your car weighs, how much ground clearance your car has and how much you need, tire width, and which ramp is the most practical one for what you will be using it for. You should also be aware of how to safely use the ramp you choose.

Which car ramp will make the best choice for you? We’ll identify some of the essential considerations, and most importantly, five of the models that you might want to consider on your list.


Car Ramp Features To Look For

Car Ramp Features To Look For

As you try to evaluate the options for the best car ramps, below are some of the most important things that will help you to come up with the right decision.

1. What Are Other People Saying?

The best way to start your search is to go online and look at the reviews from other people. There should be hundreds of positive reviews. When others are highly-satisfied, chances are, you will be happy with your purchase as well. Their insights and experiences will make it easier for you to narrow down the possibilities.

However, you have to be careful with the proliferation of fake and paid reviews. You have to be discerning enough to determine which ones are genuine.


2. What is the Weight Limit?

The manufacturer will express the weight limit of their car ramps in kilos or pounds. To start with, think about the car that you have and make sure that it can be handled by the ramp that you will choose. As much as possible, choose a high weight limit, which means that it can accommodate more types of cars without worrying that it will break.


3. What are the Safety Features?

AD

Do not also forget to take a look at the features that will guarantee safety. One of the most important is to have grooves on the surface or anything else that will allow the tires to have a strong grip. This will prevent your vehicle from sliding accidentally as you work. To add, it is also necessary that the ramp comes with a non-slip bottom. This means that it will not slide.


4. What are the Materials Used?

It is also necessary to evaluate the materials used as this is going to have a direct impact on the overall quality of the ramp. Plastic, resin, and metal are three of the most common. Plastic and resin may be quite flimsy, but they are good since they are lightweight. The metal, on the other hand, is the opposite. It is durable, but it is heavy.


5. What is your Vehicle?

To help you decide on which ramp will be the best for your needs, you also need to consider the vehicle that you have. Earlier, we mentioned that if you have a large and heavy vehicle, make sure that the ramp will be able to support its weight. This is important to make sure that the material will not crack as a result of too much pressure.

More so, if your vehicle is low profile, you need to choose a ramp that will be perfect for it. In this ramp, the incline is usually longer and more gradual. This will allow you to work underneath the car without worrying that its parts will be touching the surface.


6. Is it Lightweight and Portable?

If you intend to install your car ramp permanently in the garage, this should not be too much of a concern for you. Nonetheless, this will be a critical consideration if you will use the ramp only now and then, such as when you are performing diagnostics or routine maintenance. It should be lightweight enough, making it easy for you to move the ramps.


7. What is the Size?

To determine what size is best for your needs, there are two things that you have to consider – the size of your car and the size of your garage or wherever you intend to use the ramp. Also, see to it that the ramp will be space-efficient when it comes to the time that you have to store them.

Some tires might not fit properly when using some ramps. Consider how wide your tires are compared to the ramp width.


8. Is It Easy to Use?

You should also take the time to go over the design elements and overall construction of the ramp to make sure that its use will be effortless. For instance, its assembly and disassembly should not waste too much of your time and should not require a lot of effort. It should also be easy to mount your car on the ramp.


9. What is the Incline of the Ramp?

The incline is one of the technical specifications that will need your attention. In the case of most car ramps, the incline is usually 17 degrees. If you have a low-profile car, on the other hand, you might want to choose one that comes with a lower incline as well.


10. What is the Warranty Offered by the Manufacturer?

The standard warranty coverage is one year. Some manufacturers, however, are confident about the quality of their products, and hence, they will offer an extensive warranty. Under the warranty coverage, the manufacturer will offer a free repair if the product becomes defective or they will replace it as a part of their quality promise.


Car Ramps For Purchase

In your search for a car ramp that will be a perfect addition to your garage, below are some of the top options in the market.

1. RhinoGear 11909ABMI Car Ramp

AD

With the abundance of positive feedback from other users, this is one option that should definitely be on your radar. This ramp seems to have the quality and functionality that will be hard to match.

A lot of people may be instantly put off by the fact that it is made from resin. Despite this, however, take note that the resin has excellent quality. It meets the Portable Automotive Lifting Device Standards, which can make you confident about its quality. It has a capacity of 12,000 pounds.

Another feature that deserves to be given emphasis is the Core-Trac surface, which is a patented technology that provides the product an edge above many others. This is constructed in a manner that the surface will be non-skid, regardless of the wheels of your vehicle. With this, you can be confident that it will be a secured ramp.

Lastly, it is also a good thing that it is space-efficient, especially when it is not used. It comes with a modular design, which allows ease of nesting.

Features:

  • Has lots of positive reviews
  • Excellent quality despite being made from resin
  • Impressive traction on different wheels
  • Space-efficient design

2. Race Ramps RR-XT-2 XT Race Ramp

AD

This may not be a practical choice for most people. However, for those with discerning preferences who do not care about how much they spend, this can be a good investment in the garage.

Among others, one feature that we loved the most about this product is that it is lightweight. When assembling the ramp and when taking it off, you do not need to exert too much effort.

The solid design of the ramp is another thing that makes it exceptional, which is just natural to expect for a ramp that comes with lightweight construction. It can accommodate vehicles with a weight of up to 3,000 pounds.

Safety is also a major reason why we are ranking this as one of the best options within the product category. It will hug the ground powerfully, and hence, there will be no risk that it will end up slipping.

With the use of this low-profile ramp, lifting your car off the ground will be easy. This will also make it a snap for you to see the car and detect any possible problem or work on basic repairs, such as changing the oil and routine maintenance.

Features:

  • Can lift cars high
  • Easy to remove and assemble
  • Lightweight construction
  • Excellent in terms of safety

3. Race Ramp RR-40 40″ Race Ramp

AD

In terms of its construction, one thing that I personally like is how it comes with a high edge to help since the end of the ramp. Made of a solid core that is durable and won’t slip or slide. 

The ramp can hold up to 1500 lbs each and works great for sports cars. 

The lightweight construction of the ramp is also a plus. This means that having it assembled when the work starts and disassembled when it is no longer needed will be a piece of cake. You do not need too much effort at all.

Features:

  • Solid core and durable
  • 1500 pounds load capacity
  • Lightweight construction (6 lbs per ramp)
  • Stop at the end of ramp

4. Solid Steel 3 Ton 6500 LBS Auto Ramp

AD

Before buying this car ramp set, keep in mind that this is not made for lower cars. The inclination can be too stiff for some models.

Taking a look at its features, one thing that I personally loved is its size. It is portable, yet it is versatile as it can accommodate different car sizes. With a length of 11 inches, it can fit tires with a maximum width of up to 9 inches. Also, the capacity is 6,500 pounds, which is good for a metal ramp.

It is also a good thing that it comes with raised safety ribs on both sides of the ramp. The latter helps to improve traction, making sure that the tires will have a powerful grip on the surface.

Features:

  • Made from durable materials
  • Portable

5. Discount Ramps Low Profile Ramps

AD

A budget should not be a hindrance to having a car ramp that will offer reliability. Such is exactly what you can expect from this product. You can be confident that it will be able to deliver impressive performance.

With the low cost of this ramp, there is not much to expect from its construction and design. It is made from lightweight plastic, which will make it portable. Durability can be a bit of an issue. To avoid damage and to make it last longer, be sure to follow the specified weight limit.

The plastic that is used in the construction of this ramp is a honeycomb. The latter is known for its ability to absorb the buildup of moisture.

Lastly, it also comes with grooves, which act as the tire stop. This will prevent the vehicle from sliding on the ramp, and hence, make it an excellent feature when it comes to safety.

Features:

  • Perfect even for a small space
  • Works great for displaying cars

Conclusion

The best car ramps will indeed be beneficial in more ways than one. However, this is only the case if you exercise caution to end up with the right decision. A lot of you may be blinded by a low price, but deciding on the basis of cost alone is never a good thing to do. This is probably one thing that you will regret in the future.

If there is one product that I can personally recommend, it would be RhinoGear 11909ABMI Car Ramp. With all the positive feedback from its users, it is easy to be convinced that this is indeed one product that can provide the best bang for the buck.

Is A Car Fire Extinguisher Safe? [How Much Are They?]


Is a fire extinguisher Safe for car

Fire can occur in any car, no fault of your own. Whether In your car or RV, a fire can occur. A fire extinguisher can help mitigate damage and put out flames. It is one of the best tools for unexpected emergencies that can sometimes occur.

A fire extinguisher is safe to put in your car, truck, or RV as long as it is secured down and not too hot or too cold. Keep your fire extinguisher from rattling around, and avoid temperatures above 120 °F and below -40 °F. Small-size fire extinguishers range from $15 to $50.

While you can keep a large fire extinguisher in your vehicle, a smaller and easier-to-use fire extinguisher is helpful to put in your vehicle. There are lots of options for small and large extinguishers. USE CAUTION! Although it may not be safe to put out a car fire, having a fire extinguisher may help in certain emergency situations.


Here are 5 fire extinguishers you can use for your car.

(AMAZON LINKS)

First Alert Kitchen Fire Extinguisher

First Alert EZ Fire Extinguisher

Jogoswall Automatic Fire Extinguisher

First Alert Fire Extinguisher

Kidde 2 lb BC Mariner 5 Extinguisher

What is a Fire Extinguisher?

There is perhaps no better and simpler way to define a fire extinguisher than being a handy piece of equipment that will allow you to extinguish the fire quickly. Most put out electrical and liquid fire types. We commonly see them in commercial establishments and at homes. In addition, they can be great for automobiles, including motorhomes and trucks.

Some Precautions To Think About (This Article Is For informational purposes only)

  • Don’t store your fire extinguisher in your car if you expect temperatures to reach over 120 degrees Fahrenheit.
  • Don’t put out a vehicle fire if it puts you or others in danger.
  • Usually it’s best to move far away to a safe place when it catches on fire and call the fire department.
  • “Attempt to put out the fire only if you have clear access to the source, have a suitable fire extinguisher, know how to use it correctly, and can maintain a safe distance away from the car.” (consumerreports.org)

Vehicle Fire Extinguishers

1. First Alert Kitchen Fire Extinguisher

AD

Despite its size, it can deliver exceptional performance. I personally liked how lightweight and compact it is, which makes it a perfect addition to your RV. Whether it is a fire that originates from trash or electrical equipment, you can be confident that it will help you to extinguish it quickly. Plus, this can also provide you with peace of mind since the manufacturer is offering good warranty coverage.

Main Product Features:

  • Rated 5 B:C
  • Uses sodium bicarbonate for liquid and electrical fires.
  • 10 Year Warrenty
  • For small fires

Pros:

  • Great size for use on the road
  • Has clear instructions

2. First Alert Fire Extinguisher

AD

This is another product that you might want to consider for a fire extinguisher. It is short in height and very easy to use. Nonetheless, it can discharge 4 times longer than a traditional fire extinguisher. Good on fires that involve paper, wood, grease, and electrical equipment. It is a good thing that it comes with a compact design, making it the perfect choice for the whole family. 

Main Product Features:

  • 22 oz Spray Can
  • 32 Seconds of Spray
  • Dimensions: 9.65 inches tall

Pros:

  • Lightweight and compact
  • Biodegradable and nontoxic
  • 3-yr warranty

3. Jogoswall Automatic Fire Extinguisher

AD

Although this device is not handheld, it can put out fires safely without the need for the driver to put themselves in harm’s way.

It can last up to 10 years in your car engine and is not under pressure, so you don’t have to worry about accidental explosions. Once the extinguisher is on fire, or the surrounding temperature reaches 170 degrees, the extinguisher will spray out a gas that extinguishes the fire.

Main Product Features:

  • Automatically puts out engine fires
  • Safe on enigine
  • Lasts up to 10 years
  • Easy installation

Pros:

  • Lightweight
  • Use in many places that you want to keep safe from fire
  • Puts out fires before they get out of control

4. First Alert Fire Extinguisher

AD

This one comes with a mounting bracket so you can secure it in place if needed. It has a compact design and can be used in any vehicle. First Alert claims that there are ” over 400,000 reported car fires each year.” Having some protection can give you some peace of mind.

Main Product Features:

  • Easy to see instructions
  • For liquid and electrical fires

Pros:

  • Size is perfect for automobiles
  • Small but effective
  • Has an excellent durable metal body and easy to use handle

5. Kidde Mariner 5 Marine Fire Extinguisher for Boats, 5-B:C

This is another compact designed fire extinguisher that is perfect for boats and automobile use. One thing that you might love about this product is the fact that it comes with a built-in pressure gauge, which will make it easy to monitor if there is still charge and if it’s ready to be used in case of an emergency.

It is also worth noting that the manufacturer is offering warranty for six years, which is one of the testaments of belief in the quality of their product.

Main Product Features:

  • Effectively fights Class B & C fires
  • Gauge to determine how full it is
  • Warranty: 12 years

Pros:

  • USGS approved
  • Comes with a strap bracket
  • Has clear instructions

What Are the Different Types of the Best Fire Extinguisher

Depending on the specific type of fire extinguisher, the cylinder is filled with a specific type of chemical. It can extinguish different types of fire depending on its classification. Some of the most common chemicals include carbon dioxide and potassium bicarbonate.

Before buying a fire extinguisher, one of the first things that you should do is to decide on what specific type is best for your needs. They can be categorized based on their class. With this, the following are the options that you will have.

  • Class A Fire Extinguisher: With this class, it means that the product can be used for fire that is caused by trash, wood, or paper. The main component of this fire extinguisher is mono-ammonium phosphate.
  • Class B Fire Extinguisher: This type, on the other hand, can be made from mono-ammonium phosphate or sodium bicarbonate. The latter engages a chemical reaction that will be effective in extinguishing fire that is caused by flammable liquids, such as gasoline, oil, and paint.
  • Class C Fire Extinguisher: Lastly, for fire that is due to live electrical equipment, this is the class that is ideal.

Aside from the class, they can also be categorized on the basis of the materials that they have and the mechanism by which they work:

  • Water and Foam: As the name implies, it makes use of water and foam to take out the heat element from the source of fire. This type is ideal only for Class A fire.
  • Carbon Dioxide: With this type, the oxygen and the heat will be taken away from the source of fire.
  • Dry Chemical: On the other hand, this works by altering the chemical reaction in the fire element causing it to be extinguished quickly.
  • Wet Chemical: The good thing about this type is that it does not only remove the heat from the source of fire, but it is also instrumental in the prevention of re-ignition.
  • Dry Powder: This works in almost the same way as dry chemical fire extinguisher.

What are the Benefits of a Fire Extinguisher

If you are not convinced that a fire extinguisher can prove to be a great investment, you might have a change of mind after learning about the benefits that it can deliver, which will include the following:

  • It Can Easily Eliminate Fire: This is perhaps the most significant benefit of having a fire extinguisher. When you are RV camping or when on the road, this can prove to be an easy way to extinguish fire, especially when water is not available.
  • It is Easy to Use: Most of the fire extinguishers in the market have clear instructions on the body. They are also designed with pin that is easy to pull and a handle that will be comfortable to hold.
  • It is Lightweight and Compact: You do not need to have a fire extinguisher that is as big as the one you have at home or those used in commercial establishments. Those that are for automobiles are sleek and lightweight, making them space-efficient.
  • It Lasts Long: Depending on the product that will be chosen, there is no need to worry even if they are not used within a short time after purchase. You can keep them for an extended period while being sure that they will still deliver optimal functionality.

How to Choose the Best Fire Extinguisher

To make it easier for you to make the right choice, the following are some of the most important things that you should consider:

  • Size: Remember, we are talking about fire extinguishers that are used exclusively for vehicles. With this, one of the most important is for such to be compact. With its sleek design, this means that it will be space-efficient, making it easy to keep even in a small car.
  • Weight: This is important when it comes to portability and being user-friendly. If the fire extinguisher is lightweight, it will be easy for you to hold it when the time comes that you have to use the unit.
  • Ease of Use: Aside from being lightweight, another thing that is important is for the manufacturer to provide comprehensive instructions on the label. Be sure that you are familiar with how to use the fire extinguisher to yield the highest level of effectiveness when it comes to putting off fire.
  • Handle: The design of the handle will have an impact on ease of use. See to it that it is ergonomic and that it will be easy to have it pulled. Also, it should not be flimsy. Otherwise, it will easily break.
  • Warranty: If you want the best bang for the buck and peace of mind, you have to choose a product that comes with extensive warranty coverage. The latter means that you will be able to rely on support from the manufacturer if the product proves to be defective.
  • Technical Specifications: Take a look at the technical details to easily determine how one is better than the other. Some of the most important include discharge rate, discharge range, and maximum temperature resistance. Discharge rate means how long it will take before the chemicals are discharged out of the unit to fight fire. Distance range, on the other hand, refers to how long it can reach. Lastly, maximum temperature resistance refers to the level of heat that the product can withstand. Be sure not to leave it inside the car during the summer months because of the risk of explosion.

Conclusion

While you might not need a fire extinguisher, the more time you spend in your car the more likely you may encounter an incident where a fire could occur. As long as you car cautious about storing and using a fire extinguisher, you can recieve peace of mind and the benefits of putting out a vehicle fire when it is safe to do so.

Thanks for visiting Drivinglife.net

Transfer Pumps For Gas [What Do They Do?]


Fuel Transfer Pump

A fuel transfer pump can come in handy in a number of situations. They come in a variety of options that help you transfer fuel from one source to another.

A gas transfer pump can siphon gas from a car or a container and pump it into another car or container. It uses two hoses or tubes with a pump in between them to pump the fuel. They can be operated with a power source such as a car 12V battery, AA batteries, and some are hand-operated.

These pumps are great to have when you are stuck without gas. When you find a person willing to give you some gas, you can pump enough fuel to get to the nearest gas station. It can come in handy for other gas-run machines as well.


Can I Use A Fuel Transfer Pump For Gas?

Can I Pump Gas?
Credit – https://www.youtube.com/watch?v=gE-II3D7FhQ

You can use a fuel transfer pump to draw fuel from one source, like a gas can, and transfer it to another source, such as a vehicle. In addition, you can remove bad gas from your lawnmower, or pump gas from a container to a gas tank.

They often can be used for other liquids as well, such as water, light oils, and diesel. These can work well if you have large 50-gallon emergency water containers.


When you’re storing your boat, RV, motorcycle, a fuel transfer pump can empty your gas tank, to help the tank, fuel lines, and carburetor from getting gummed when the gas goes bad.

Some people use them in an emergency when they need to fuel their vehicle, but they will likely use them more to maintain various gas-driven equipment and store it away.

If you have gas in equipment or a vehicle in storage the gas will go “bad” in about 3 to 6 months (jdpower.com). Anything stored away for a while should have a gas stabilized added to keep gas from going bad for 1 or more years.


Types Pumps For Fuel Transfer

Motor or Handpump
Credit – https://www.youtube.com/watch?v=KnvvA6OsCTQ

Before you buy one, it is important that you are familiar with the different types of fuel transfer pumps and the mechanism at which they work:

  • Engine-Powered Pumps: This type of pump is coupled to an engine. The impeller shaft is connected to the propeller shaft of the engine. Most of the models that fall under this category are equipped with a centrifugal pump.
  • Electric Pumps: These pumps can either be alternating current or direct current. One of their most common characteristics is the presence of a tough encasing that makes the pump explosion-proof.
  • Manual Pumps: This is usually the cheapest option, but since you have to operate it manually to transfer fuel, this is also the one that requires the most effort. It usually comes with a hand pump that you have to squeeze or rotate to draw fuel out of its source.

Fuel transfer pumps can also be classified based on their flow rate. That being said, here are the three types that you might find on the market:

  • Low-Speed: The slowest of the three types, it commonly has a flow rate of only 50 liters per minute. For most cars and small vehicles, this should be more than enough.
  • Medium-Speed: With this type, you will be able to enjoy a flow rate of up to 70 liters per minute, which is ideal for vans and most service vehicles.
  • High-Speed: This is the most advanced from the three and has the ability to pump up to 90 liters per minute. This is ideal for large vehicles like buses and heavy construction equipment.

Buying A Transfer Pump

If you need to transfer some fuel, there are a variety of pumps you can choose from. Depending on your circumstances, one of the following pumps might be best for you.

Car Fuel Emergency

Have you run out of gas? You can carry a small fuel pump to help you siphon gas from another car. This will help you get to the next gas station. Here’s one fuel pump that can work in this situation.

AD

Supplying Gas To A Vehicle Or Equipment

When you need to fuel your car or equipment this can help you do it without spilling gas.

This model also helps prevent overfilling your gas tank because it has an auto-shutoff sensor.

AD

Supplying Gas To A Vehicle Or Equipment

When you need to fuel your car or equipment this can help you do it without spilling gas.

This model also helps prevent overfilling your gas tank because it has an auto-shutoff sensor.

AD

Transfer Fuel From Large Containers

Whether it’s a large steel drum or a skid fuel tank, using a hand fuel pump like this has its advantages.

You can use if long into the future because it’s made of metal and it also needs no electricity.

AD

What To Look For When Buying A Fuel Transfer Pump

As you try to weigh the pros and cons of the options that will confront you, below are some of the most important things that you have to consider:

  • Intended Purpose: One of the first things that should be given careful thought would be the reason why you are buying a fuel transfer pump in the first place. If it is for standard applications, most models would suffice. For commercial and heavy-duty applications, on the other hand, you need one that delivers more power.
  • Type of Fuel: You also need to consider the fuel that will be transferred from the source to a destination. Some models can handle only diesel. For best value, look for one that is versatile enough that can be used for other types of fluids, such as kerosene, gasoline, and even oil.
  • Ease of Use: From the installation to operation, make sure that the fuel transfer tank is going to be user-friendly. It should have comprehensive instructions and should be inclusive of all the things that you will need to complete its assembly.
  • Durability: Take a look at the overall construction and the materials that are used to determine the longevity of the product. From the case to the nozzle to the pump, it must be made in such a way that it can withstand wear and tear.
  • Voltage: This is one of the most important technical specifications that you have to think about when you are buying electric fuel transfer pumps. It must match the voltage output of the engine. If not, there can be pump issues and the performance of the product can be compromised.
  • Safety: You also have to take a look at the features that will ensure the safe operations of the transfer pump. There are advanced models that are explosion-proof. They must have also passed stringent quality control to provide you with peace of mind.
  • Warranty: As with buying any other product, you need to take a look at the warranty that is offered by the manufacturer. The standard warranty is one year, but this can extend beyond such, depending on the policies of the manufacturer. Within the duration of the warranty, they can offer free repair and replacement of damaged parts.
  • Reviews: If you still cannot decide on which one will make the best choice, you have to consult with what other people have to say. The easiest way to do this is to go online and read reviews. The real-life experiences of other people will make it easier to weigh the good and the bad about the choices that you have.

Conclusion

With a fuel transfer pump, you can get the fuel from point A to B without having to go to the gas station. This can be helpful in a number is situations.

For your car or for your gas-driven equipment, having a fuel pump is one thing that can help you transfer fuel in whatever situation you need it for.

Thanks for visiting Drivinglife.net

References

bobvila.com

How Long Can You Continuously Run An RV Generator


RV Generator Run Time

An RV generator is an important item to have to charge your batteries and run electrical appliances in your RV. If you need to live out of your RV, you may need to run the generator a lot. But how long can you run it before it gets too hot or malfunctions?

Manufacturers state that RV generators should be turned off every 8 hours to check for oil levels. Most RV generators can run longer than 8 hours continuously. However, checking for safety issues such as oil levels, overloading, and overheating every 8 hours allows you to stay safe and gives you time to add fuel.

A generator can operate continuously when the temperatures are within acceptable levels and the oil is full. However, the oil will need to be checked about every 8 hours of use to ensure proper cooling, and gas needs to be replaced at regular intervals when the engine is cool.


How Long Should I Run My RV Generator?

Check generator Oil Every 8 Hours
Credit – https://www.youtube.com/watch?v=gFRjalnWU6k

Only run the generator for 8 hours or less for safety reasons. But, just like any engine, if everything is operating correctly, it can run for long periods. The problems start to occur when engine temperatures rise or if something happens to the oil.

Most gas generators need to be refueled every 4 to 36 hours of generator use. Refueling while a generator is in use is dangerous, so owners must wait until the engine cools before refueling.

While some gas generators may have the fuel to run longer than 8 hours, that doesn’t necessarily mean it should be run for that long.

Some propane generators can operate longer than 24 hours but should be stopped at least every 8 hours to inspect for problems; why? Below are 5 reasons.


5 Reasons To Stop A Gas Or Propane Generator Every 8 Hours

Every engine is made to specific specifications. A car engine should be checked every month to see the oil levels. Generators are different, though. All the generator manuals I’ve checked state that the oil should be checked every 8 hours or before each use.

  1. The Load – Generators can produce more power for short periods, and this increases engine heat. A generator that is trying to produce more electricity than it can handle will start to get hotter and hotter and damage the engine. Checking the engine temperature and load will prevent damage. (Some generators come with a load indicator)
    • If the load is above 90% of its capacity, then the engine will likely start getting hotter, and if kept above 90% for too long, it may start to damage the engine.
  2. The Oil – The oil level needs to be fairly accurate so the generator runs well. Not low or high. Checking that the generator is level is important, so if it’s on soft ground, you should check it regularly. Each generator is different, but here are some general guidelines. (Some generators come with low oil pressure shutoff or sensors.)
    • Your generator will have a break-in period where you will need to change the oil after the first 5 hours, sometimes up to 20 hours.
    • You will need to change the oil every 24 or 48 hours of use.
    • You will need to check the oil level every 8 hours (it seems to be standard) and before each use. (Some have low oil indicator lights)
  3. The Fuel – Check every 8 hours or as often as needed to know when it needs to be refilled (Each generator is a bit different). Make sure the engine is cool before adding fuel to prevent fire.
  4. A Level Area – Ground might shift a bit during an 8 hour period of running your generator or the generator may move a bit from vibration. Oil could leak. Finding a dry hard level area is important so that you can check correct oil levels and prevent oil from entering the wrong area of the engine. In addition, refueling is easier on level ground.
  5. The Weather – Check to see if the weather is effecting the operation of the generator.
    • Hot areas – If your in a hot area or your generator is near something hot, it may overheat. Checking it regularly can help prevent overheating.
    • Rainy areas – Your generator is producing electricity and can cause electrical problems with your RV if it is left out in the rain.

Run Times For 5 Different RV Generators

I took a look at the manuals for these five popular RV generators selling on Amazon.com. Most give very similar information about run times and how long to operate the generator before it needs to be stopped.

On all of the generators below, the instruction manuals state, you should check the engine oil levels every 8 hours. While the generators can each run longer than 8 hours depending on output levels, the standard time to stop the generator for safety is every 8 hours.

WEN 56380i
3800-Watt
iGen4500
4500-Watt
Campion 200954
4250-Watt
WGen3600DFv
3600-Watt
Champion 200986
4500-Watt
8.5 Hour Run Time18 Hour Run Time 22 Hour Run Time14 hours – gas /
16.5 hours – Propane
14 Hour Run Time
2.2 gallons 3.4 gallons 4 gallons 4 gallons 2.3 gallons
(at 50% load) (at ??% load) (at 25% load) (at ??% load) ( at 25% load)

1. WEN 56380i Super Quiet 3800-Watt Portable Inverter Generator 

AD

This 99 lb generator is one recommended by RV users because it is an inverter generator. Inverters tend to be quieter and safer in some ways. In addition, the inverter produces clean power, so if you’re plugging in your computer or phones into your RV outlets, there won’t be any spikes or surges, making it safer for some electronic devices.

Inverters are also better at fuel efficiency since they only produce as much power as needed by the appliances in operation in the RV.

HOURS OF OPERATION

Check OilChange OilAdd FuelDrain Carborator
Every 8 Hours or DailyEvery 25 Hours Every 8 Hours or Daily Every 8 Hours or Daily (auto shut off setting will drain carburetor for you)

Main Product Features:

  • Runtime: 8.5 hours at 50% load
  • Maximum AC Output: 3,400 watts (3,800 surge)
  • Parallel Ready: Yes
  • Engine: 212cc 4-stroke OHV engine
  • RV Ready: Yes. Has a 120V AC TT-30R Outlet
  • Fuel Tank Capacity: 2.2 gallons
  • Fuel Type: Gas
  • Loudness: 57 decibels
  • Safety: low oil pressure shutoff, auto shut off if overloaded
  • Weight: 99.2 lbs
  • Warranty: 2 year

2. Westinghouse Outdoor Power Equipment iGen4500

This 104 lb generator is another type of inverter generator. With its remote start, bigger gas take, and more watt handling power than the previous generator at the same weight, this might be a good one for your needs.

Because it’s fairly quiet and doesn’t produce spikes in power, you can rely on it to meet your RV needs without fear of damaging your electronic devices.

Inverters are nice because they speed up the engine as demand for electricity increases and then can slow down to a quiet, slow idle if power needs are low.

AD

HOURS OF OPERATION

Check OilChange OilAdd FuelBreak-In
Every 8 Hours or Before Each UseEvery 50 Hours (after 25 hours the first time)Add Daily First 5 Hours (Don’t exceed 50% running watts)

Main Product Features:

  • Runtime: Up to 18 hours
  • Maximum AC Output: 3,700 watts (4,500 surge)
  • Parallel Ready: Yes
  • Engine: 224cc 4-stroke OHV engine
  • RV Ready: Yes. Has a 120V AC TT-30R Outlet
  • Fuel Tank Capacity: 3.4 gallons
  • Fuel Type: Gas
  • Loudness: 57 decibels
  • Safety: low oil pressure shutoff, auto shut off if overloaded
  • Weight: 98 lbs
  • Warranty: 3 year limited

3. Champion Power Equipment 200954 4250-Watt

This 75 lb generator is another type of inverter generator. This one has the largest tank of the inverter looked at so far with the lowest weight.

It’s a little louder but rank in the middle for power from the previous two. Unlike a regular generator that runs at a constant speed and is quite a bit louder, this one runs reasonably quiet and gives you a smooth electrical output.

So what makes an inverter great? The internal electronics. “Inverter generators also use an alternator to produce AC power, but this current is converted into direct current (or DC) before a microprocessor inverts it back into cleaner AC power.” (coates.com.au)

AD

HOURS OF OPERATION

Check OilChange OilAdd FuelBreak-In
Every 8 Hours or Before Each UseEvery 100 Hours (after 5 hours the first time)Add Daily First 5 Hours (Don’t exceed 50% running watts)

Main Product Features:

  • Runtime: Up to 22 hours at 25% load
  • Maximum AC Output: 3,500 watts (4,250 surge)
  • Parallel Ready: Yes
  • Engine: 224cc 4-stroke OHV engine
  • RV Ready: Yes. Has a 120V AC TT-30R Outlet
  • Fuel Tank Capacity: 4 gallons
  • Fuel Type: Gas
  • Loudness: 64 decibels
  • Safety: low oil shutoff, auto shut off if overloaded
  • Weight: 75 lbs
  • Warranty: 3 year limited

4. Westinghouse Outdoor Power Equipment WGen3600DFv

This 104 lb dual fuel generator is not an inverter generator but can run on gas and propane. This option is great for those who carry propane tanks or plan to use the generator at home or at the park and don’t want to deal with all the problems that can occur with gas.

This unit can switch from gas to propane without stopping the engine. That means you can keep your generator running for longer without having to refill with either gas or propane.

If using two types of fuel is helpful for your situation, this might be the generator for you.

AD

HOURS OF OPERATION

Check OilChange OilAdd FuelBreak-In
Every 8 Hours or Before Each UseEvery 50 Hours (after 25 hours the first time)Add Daily First 25 Hours (Don’t exceed 50% running watts)

Main Product Features:

  • Runtime: Up to 14 hours gas / 16.5 hours (20 lb propane tank)
  • Maximum AC Output: 3,600 watts (4,650 surge) for gas / 3,240 watts (4,650 surge) for propane
  • Parallel Ready: No
  • Engine: 212cc 4-stroke OHV engine
  • RV Ready: Yes. Has a 120V AC TT-30R Outlet
  • Fuel Tank Capacity: 4 gallons
  • Fuel Type: Gas & Propane
  • Loudness: 64 decibels
  • Safety: low oil shutoff, auto shut off if overloaded
  • Weight: 75 lbs
  • Warranty: 3 year limited

5. Champion Power Equipment 200986 4500-Watt

This 95 lb generator is yet another inverter generator. This one has a small tank like the first inverter and is about average weight for an inverter this size.

It’s a little loud but not the loudest of all the inverters at 61 decibels. In addition, this one features a closed frame style of housing which helps keep the unit clean and mask generator noise.

With an inverter generator, you will save money on gas, produce fewer carbon emissions, and has a smaller-sized frame. This means they are fairly portable and can still power a lot of your RV devices.

AD

HOURS OF OPERATION

Check OilChange OilAdd FuelBreak-In
Every 8 Hours or Before Each UseEvery 100 Hours (after 5 hours the first time)Add Daily First 5 Hours (Don’t exceed 50% running watts)

Main Product Features:

  • Runtime: Up to 14 hours at 25% load
  • Maximum AC Output: 3,500 watts (4,500 surge)
  • Parallel Ready: Yes
  • Engine: 212cc 4-stroke OHV engine
  • RV Ready: Yes. Has a 120V AC TT-30R Outlet
  • Fuel Tank Capacity: 2.3 gallons
  • Fuel Type: Gas
  • Loudness: 61 decibels
  • Safety: low oil shutoff, auto shut off if overloaded
  • Weight: 95 lbs
  • Warranty: 3 year limited

What Are The Different Types Of RV Generators?

Before you shop for an RV generator, it is essential to be familiar with the different types and how one is better than the other.

  • Diesel RV Generator: This is the ideal choice if you already have an RV that runs on diesel. Compared to gasoline, it burns cleaner. On the other hand, it can produce more power compared to the performance of liquid propane.
  • Gasoline RV Generator: Because gas is cheap and easily accessible, this is preferred by many people. However, it is important to be extra cautious when using this type of generator since gas is highly-flammable. Also, it is not as cost-efficient as diesel since it tends to burn quicker.
  • Dual Fuel Liquid Propane RV Generator: Compared to the two other types that have been mentioned above, it generally produces 10% less power. Nonetheless, it is chosen by many because of its long shelf-life and the fact that it produces cleaner emissions, making it better for the environment.
  • Battery Power Stations: These are a good substitute for a generator. For example an 1800w (3300w peak) power station costs about $1100. It has regular AC outlets and usb ports that can power phones, computers, lights, refigerators, blenders, and lower power consuming items. People like these because they require no maintainance, you can keep it inside, theirs no gas or propane, no noise, and they are light weight.

How Much Power Will I need?

A larger generator will allow you to run more or larger appliances. After you check how many watts your appliances use, you can calculate what kind of generator you will be happy with.

For example, if you look at the chart below, you would want a generator with at least 4,200 peak/surge/starting watts and at least 3600 running watts. However, you would be running your generator at near 100% capacity, which isn’t good. It could overload and tax your generator, so getting one with higher watts or using 90% capacity or less would be much better.

watts needed
Credit – https://cdn.westinghouseoutdoorpower.com/owners_manuals/Westinghouse_WGen3600DFv_manual_web.pdf

So, once you write down how many watts each appliance uses, you can get a general idea of how many watts you need. The chart below can give a general idea of wattage use and starting apps for various appliances.

watts needed appliances
Credit – https://cdn.westinghouseoutdoorpower.com/owners_manuals/Westinghouse_WGen3600DFv_manual_web.pdf

What Are The Benefits Of having An RV Generator?

Benefits Of RV Generator

If you have been using an RV for a long time now and if you still do not have a portable generator, you are probably missing some comforts. Some people might think that it is an unnecessary expense, but it can come in handy for many reasons. Why? Here are some things to consider.

1. Generators Are Portable

One reason is that they are relatively lightweight and compact. Weights and sizes have gotten smaller. Many are about 100 lbs, so having one with wheels can save your back. They can be used even when tent camping or the home when the power goes out.

2. Generators Can Keep You Safe

An RV can go into almost any environment. Therefore, it’s a good idea to have power if you need it, especially in emergencies or for lights at night. This will make it easy to see any hazard when working on the RV at night or to recharge a battery, radio, or device if the RV battery is dead.

3. Generators Keep You Entertained

An RV generator will also be vital for entertainment wherever you go. You can set up an outdoor theater. You can play loud music and have a party, provided that such is allowed in your location. You can watch TV or charge your laptop.

4. Generators Make You Feel Comfortable

With an RV generator, you can provide yourself with the power that you need for AC or heating to regulate temperature. Feeling comfortable is important on long trips. From sleeping in your RV to keeping entertained, a generator can provide you with many of the comforts of home.

5. Generators Make Cooking Easy

Cooking at the campsite can make more possibilities available with an RV generator. You can plug in an induction cooker, microwave, or an electric oven and get power from your generator. You can also use electric kettles and grills.


How to Choose An RV Generator

With the abundance of available generators, here are some things to consider before buying a new one.

  • Budget: The first thing you have to do is to set a budget. As you look at the different brands and models, be sure to stick to your budget. By knowing how much you can realistically spend, it will be easier to not go overboard.
  • Portability: Since you are looking for an RV generator, it is important that it is as lightweight and compact as possible. It must perfectly fit in your RV and you must be able to bring it without difficulty. If possible, settle for a model that has a wheeled design so that you will not have too much difficulty in having it transferred from one place to another.
  • Warranty: This is important as it will provide you with peace of mind. Throughout the warranty coverage, the manufacturer will offer free repair or replacement of the parts that are defective. A better choice is an RV generator that comes with a longer warranty coverage.
  • Ease of Use: To be user-friendly, one of the essentials would be an electric start. This eliminates the need for pulling or recoil. All that you need is to press a single button and it will start on its own. There are even some with their own remote control.
  • Noise: One of the technical specifications that you should look at is the decibel. The higher the number is, the louder the generator will be. A good option is one that operates quietly, which means that it will not cause any disruption, especially when you are sleeping.
  • Fuel Tank: Do not also forget to look at the capacity of the fuel of the generator. A larger tank is always the better option since this means that it can provide continuous power for a longer time without the need to refill. However, this also means that the generator will most probably be large and heavy.
  • Power: There are different factors that will be indicative of the power of the generator. First, take a look at the engine that it has. Also, consider the horsepower and the wattage that it can deliver. Think about the appliances that will be used to determine the power that you need from a generator.

Conclusion

If I were getting a generator, I would want to check on it regularly, get used to how to operate it well, and ensure the oil levels are correct. Checking the oil every 8 hours seems excessive, but generators operate under many conditions, and that’s one reason manufacturers are concerned about checking it so often.

Making it a routine to check the oil can help you keep your generator running well for long periods because you’ll likely provide regular care for it and be faster at identifying problems when they come up.

Thanks for visiting Drivinglife.net


References

Title Image Credit – https://www.youtube.com/watch?v=gFRjalnWU6k