Are you terrified of getting scratches on your car, even when doing everything the right way? Good news and bad news. Most cars will get scratched, but there are ways to remove them. This guide will help you get rid of scratches you may see.
Car scratches can occur due to various situations, such as Accidents, Collisions while reversing your car, Small rocks flung by cars, Parking mishaps, etc. Here are a few steps you need to follow to get rid of car scratches:
- Step 1: Clean the Surface of the Scratch
- Step 2: Sanding Down to the Layer of Scratch
- Step 3: Use Rubbing Compound.
- Step 4: Polishing, Painting, and Waxing
Even a minor scratch on your car could ruin its overall appearance and make you disappointed. If you take it to a car body shop to apply a new coat of paint or a minimal touch-up, it could cost quite a bit.
We will give you options for using rubbing compounds to remove scratches all by yourself. This will bring back your car’s appeal.
Types of Scratches
| Lighter Scratches | Deeper Scratches |
|---|---|
| Use a rubbing compound. | Use sandpaper (Possibly 3000 & 5000 grit) |
| Compound by itself works on lighter scratches. | Sanding needed with deeper scratches |
| Removes swirls in paint and oxidation | Use a rubbing compound to remove swirls, scratches, and oxidation. |
| Easy to clean off | Should use wax as well to protect the sanded area. |
| Works quickly | You can use a touch-up kit or clear coat touch-up if the scratch has gone down to the paint or metal – although results may vary. |
| It may not remove medium or deep scratches. | More time needed |
| Different compounds remove different levels of scratches. | Caution is needed when sanding, so you don’t sand off too much clear coat. |
When you see a scratch in your paint, you’ll first need to evaluate the type of scratch it is. If the scratch is light, you shouldn’t be able to feel it grab as you move your fingernail over the scratch. This means you can use rubbing compound by itself.
A deeper scratch will grab your fingernail as you move it over the scratch. This usually means that some sanding may be required.
A deep scratch or chip that goes down to the paint surface or car body will need to be filled in with touch-up paint and or a touch-up clear coat. A dealer may be able to provide you with the correct paint touch-up color, or you can try to match the color with a touch-up kit.
Get Ready to Start!

Get the following items ready to use when removing a scratch from your car:
Light Scratch:
- A rubbing compound: It is an abrasive material that grinds the surface layers of dull and damaged paint. It creates a smooth surface and helps remove light scratches, as if by magic!
- Soft fabric cloths: You can use a microfiber cloth for applying compound and wax, cleaning the car, cleaning off surfaces when done with rubbing compound, and wiping off wax.
- Car wax: to give a final finish.
- Soapy water: to remove dirt completely.
Deep Scratch:
- Sandpaper: Get ultra-fine 3000 and 5000-grit wet/dry sandpaper.
- Orbital polisher or a buffing machine: This is optional. It may make sanding and wax a bit easier.
- Wool pad: to fix over the orbital polisher
- A rubbing compound: Same as above
- Soapy water: to remove dirt completely
- Car wax: to give a final finish. Get paste, as this works better after sanding.
- Soft fabric cloths: For cleaning and applying.
Below Clear Coat Scratch or chip:
- Use a touch-up kit or specific paint for your car.
- When using specific paint for your car, get putty to fill in the scratch or chip.
- Fine tip paint brush or paint tool
- Soft fabric cloths: For cleaning and applying.
- Soapy water: to remove dirt completely.
- Car wax: to give a final finish.
How to Remove Scratches from Your Car?
By keeping all the above necessary items ready, you are all set to remove the scratch by yourself. But of course, you need to follow certain techniques to use them efficiently. This guide will teach you how to use rubbing compounds to get rid of scratches.
Step 1: Clean the Surface of the Scratch
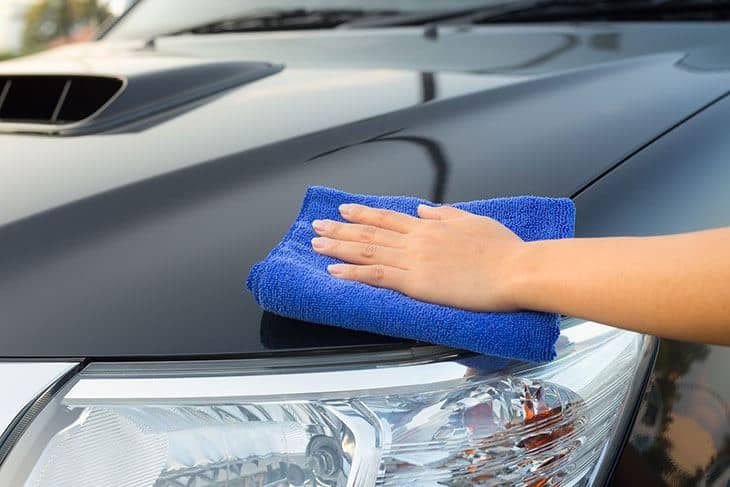
Before you apply the rubbing compound, you have to clean the area which has the scratch so that the rubbing compound can work well on the scratch. With a little extra effort, you can clean the entire car surface, which is similar to getting two things done in one shot.
- With soapy water, clean the entire car surface.
- Rinse the surface with plain water after cleaning with a soap solution.
- Clean it up with a dry cloth.
- Inspect the car as to which areas need to be worked on to remove scratches and determine the intensity of the scratch. (Look at types of scratches)
Step 2: Sanding Down to the Layer of Scratch
(If you have a light scratch or down to the metal scratch or chip, you can skip this step)
Some scratches won’t respond to rubbing compound until the scratch is sanded down. Our goal is to make the scratch invisible. To achieve this, we are going to remove part of the clear coat until we get to the scratch layer. Fine grit sandpaper will help you slowly remove a bit of the clear coat.
We should not sand below the scratch layer, or we may remove the clear coat. Some people use dark or light shoe polish to fill in the scratch. Then, as you sand, you can start to see the scratch go away.
- Place the 3000-grit sandpaper on a wooden block and generously apply water and soap solution to perform smooth sanding.
- Sand the scratch using light pressure at 90-degree angles to the scratch.
- Perform up and down motions about an inch above and below the scratch.
- Dip the sandpaper in water and soap solution frequently to make the process easier.
- Perform the above steps until the contrasting mark of the shoe polish disappears. (If the shoe polish washes away, periodically wipe away any water to see if the scratch is still there)
In order to get a better result on your finish, use 5000-grit sandpaper to help smooth out the scratches of the sandpaper and blend the area into the surrounding paint.
- Place the 5000 grit sandpaper on a wooden block and generously apply water and soap solution to perform smooth sanding.
- Sand using light pressure in a circular motion about an inch or two above, below, to the sides, and on the dull sanded area.
- Dip the sandpaper in water and soap solution frequently to make the process easier.
- Perform the above steps for a minute or two until the area looks the same wherever you sanded.
- Wash off and wipe clean.
Step 3: How to Use Rubbing Compound?
(If you have a down-to-the-metal scratch or chip, you can skip this step)
Let us see how to use rubbing compound after you have sanded (if needed) the area and everything is smooth.
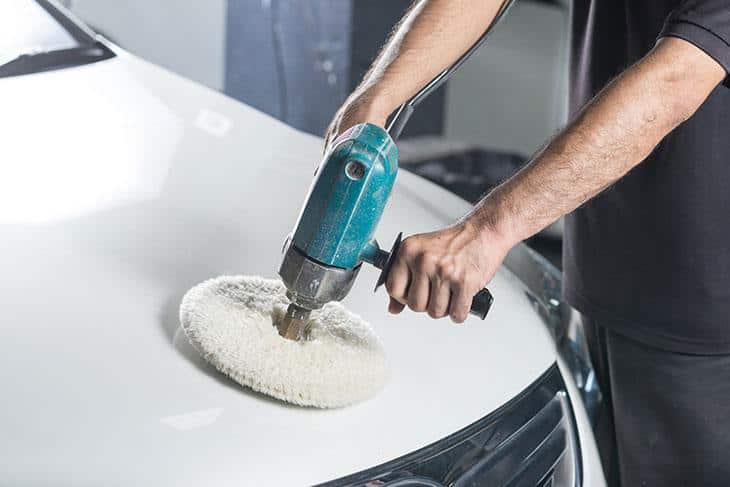
Using a buffing machine method:
- Fix the wool pad at the center of the orbital polisher.
- Apply a thin line of rubbing compound over the dull sanded area directly on the painted surface. You can find most rubbing compounds in a squeeze tube for ease of use. If it is in a can, scoop out a little compound using a paper towel and apply it over the dull paint.
- Set your orbital polisher into motion over scratch. This is the easiest method to spread the rubbing compound.
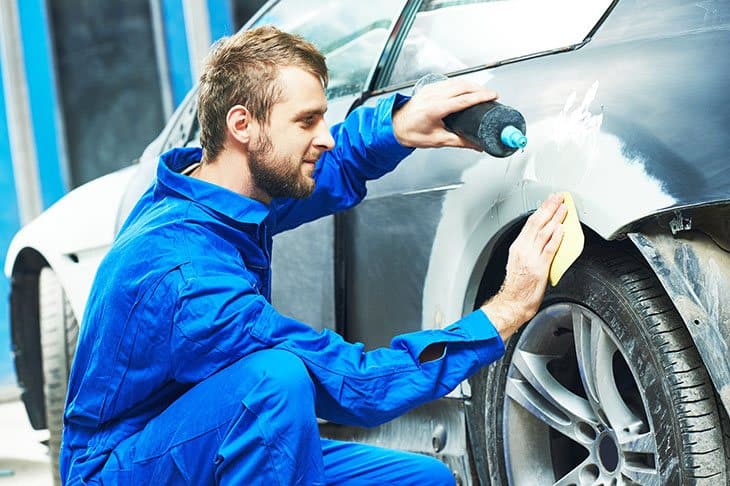
Using your hand:
- Apply enough rubbing compound over your microfiber towel to cover the dull area with a thin amount of compound.
- Apply the rubbing compound using firm pressure as you rub in a circular motion over the dull sanded area with a microfiber towel.
- Apply more rubbing compound until the area is no longer dull.
It’s important to use a separate wool pad when spreading the rubbing compound and use a separate one for waxing the car surface.
It is also necessary to remove the rubbing compound completely using a towel before going to the next step.
Step 4: Polishing, Painting, and Waxing
Polishing:
After cleaning off any rubbing compound, you can use another wool pad and polish the surface. This isn’t necessary but may help the overall shin.
Painting:
If you have a scratch that goes down to the metal, it is easiest to use a touch-up kit or putty and paint. A chip or scratch won’t respond to rubbing compound if it goes down to the paint or metal. Although if it goes down to the paint, you may be able to use just an application of a clear coat. Here’s a video with more information.
Wax:
It is important to protect the area you applied the rubbing compound. If you sanded, using a paste wax works best. If you had a light scratch, any wax should work fine. Now you can step back and enjoy your hard work!
Conclusion
The above steps will help you remove scratches if you have followed the steps properly. You can remove light scratches easily and deeper scratches with some time and patience.
As you learn, your experience will grow, and you can master the art of scratch removal. If you successfully follow the steps above, you can look confidently at the work you did by yourself and enjoy a beautiful paint finish. For more information on keeping your car in its best condition, use the search bar or go to the article posts.