When a headlight has moisture or water inside of it, there are ways to fix the leak and get rid of the water. If water is in the headlights, the bulb can still work, but it has an impact on the brightness of the lights.
If there is water in your headlights, you can replace the headlight or repair it. Although repairing your headlights is cheaper, replacing them can be faster. Replacement costs vary from $20 – $200+, and restoring it can cost less than $20 with the right tools. Fixing a headlight involves removal, evaporating all moisture, sealing, and replacement. In about an hour, you’ll have repaired or replaced it.
It may be a bit of extra work to repair a headlight, but it can be worth it to save some money. But regardless of which way you choose to fix the problem, it’s important to take action because the water in the headlight(s) can impair night driving visibility.
Diagnose if Water is in Headlights Assembly

To know if there is water in your headlight assembly (I’ll also be calling it headlight & housing), you will see a pool of water collecting in the headlight. It may also appear as moisture and water droplets on the inside of the headlight.
What if you notice water moisture one day, and then it is gone later? Then you may have seen moisture on the outside of the headlight, or the moisture has found a way to escape.
One way to make sure there is moisture in the headlight is to use a flashlight to check for any moisture or pooling water on the inside.
If your headlight is hazy, try to clear it off by using one haze removal method, or you can just place some water on a rag and apply it to the headlight to temporarily see clearly inside.
If you are still not sure, the next step would be to look carefully around the headlight for any cracks where water could enter and check the seal where the light bulb is inserted.
You will need to open the hood and may need to take out the headlight to thoroughly examine the headlight housing.
If Water is Found in the Headlight Assembly
What If you have not found any water or moisture in the headlight, but there is a crack? Then the seal for the bulb is likely letting moisture in. You will need to fix those problems by following the steps under the next heading.
If you have found water or moisture in the headlight, there are several steps you can take to remove it. Your headlights can be sealed up, so they don’t let in moisture anymore.
You may need one or more of the tools listed to help you with your job. A flat head and Philips head screwdriver may be needed, as a pair of needle noses or regular pliers, a socket set, and possibly rubber gloves if wanted. Don’t forget some sealant for any cracks if necessary.
| Gloves | Sealant | Pliers | Socket Set | Phillips and Flathead Screw Drivers |
|---|---|---|---|---|
 |  |  | 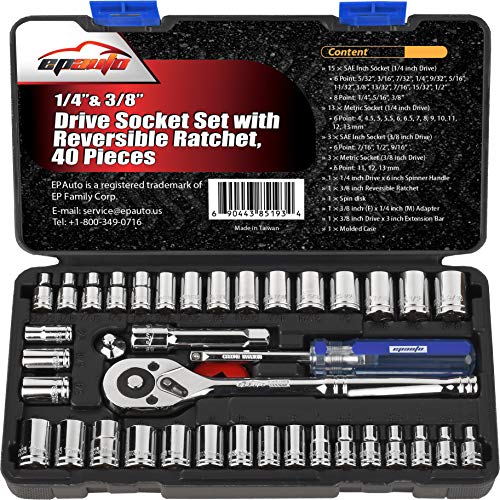 |  |
Steps to Take out the Headlight Assembly
If you have identified water in the headlight, a leak, or a crack, the next step would be to take out the headlight to fix it.
This involves removing any clips, any screws holding the headlight in place, pressing any tabs that might hold the headlight, and carefully taking out the headlight bulb or disconnecting the wire, depending on the headlight.
Step 1. Screws, Nuts, Tabs, and Clips

Remove any screws or clips holding the headlight in place. See if there are any tabs that need to be pressed in order to release the headlight assembly.
Use a repair manual or find out information online to understand the correct procedures. Some jobs may require you to take off the bumper, turn signal, or other items.
To take out the screws or bolts. Sometimes you will need to check for any tabs that may be holding the headlight in place.
You may need to wiggle it as you pull it out. If it doesn’t pull out, check and see if the wiring is preventing movement, tabs, or another hidden screw or bolt.
Other cars may have clips that hold the headlight assembly in place. So, look behind the light and see if you find any clips holding it in place. Some require pulling, and others pinching.
Pull on the assembly to see if it is free. Then you can go to the next step.
It’s a good idea to watch a couple of videos for your car make and model before trying to take out the headlight assembly. Sometimes it’s easy, but other times you may need an hour or more.
In this video, you can see how an entire headlight assembly is replaced. Sometimes a crack is too severe to easily fix, and it might be worth it to replace the headlight assembly altogether.
Step 2. Disconnect Electrical Connection and Bulb

Once the headlight assembly is free, disconnect the electrical connectors.
There may be tabs that require a flat-head screwdriver to help pry them tabs (this might also break the tab, so be careful). Most should come off by pushing on the tabs at the connection.
At this point, your assembly may be free or may require you to remove the bulb.
To remove the bulb, you can turn the bulb (usually counterclockwise) or pull it out by wiggling it back and forth slightly. My truck has a metal pin that holds the bulb in place that needs to be unlatched.
Since not all bulbs will twist or pull out, so be aware of locking rings, clips, or other parts that secure the bulb to the headlight assembly.
At this point, you might want to have some nitrile gloves, to help you avoid touching the light bulb with your fingers or hand. If the oil from your hands gets on the bulb, it will cause it to burn out faster.
Carefully remove the bulb and place it somewhere safe. Then, inspect the rubber gasket or rubber cover to see if it is allowing water or moisture to enter the headlight housing.
Check for breaks, particles, or creases in the gasket that might let water in.
Remember to remove plastic clips carefully so you don’t break any of the connectors or clips holding things together.
In this video, you can see how the electrical connection for a Honda Accord headlight assembly is disconnected.
Step 3. Check the Headlight Housing for Cracks and Leaks

Now that you have detached the headlight assembly, look around for any obvious cracks. Sealing the crack with sealant could work if the crack is on the lens. Determine the damage’s extent to decide if sealing or replacement is needed.
In the video below, you’ll see how you can fill the housing with water and determine exactly where the water is entering the headlight.
After you have determined where the leak is coming from, remember or mark the area. Later, you can apply a sealant to the correct area to prevent further entrance of water.
Now you need to evaporate all the water in the headlight. The video has a good idea: using a hair dryer or heat gun (AD).
If you don’t have either of these, placing the housing in the sun may help. However, you need a dry, warm environment to help the moisture evaporate.
Step 4. Seal the Headlight Housing

If you have gotten all the water and moisture out of the housing, you need to seal up the areas that let water in.
Use the correct sealant. One that dries clear works well with high temperatures and is waterproof.
Apply the sealant on the area that has a crack or opening. Make sure to pat it down into areas with indents or grooves.
Sometimes you may need to apply pressure if the headlight housing has split. Use a clamp after using the sealant in and on the crack(s). Wait about 2 hours to ensure it will stay closed.
Look at the product information to determine how long it takes to cure. It will be dry to the touch in about an hour. After that, the headlight can possibly be installed on your vehicle.
You may not want to go on any bumpy streets or roads if it hasn’t been cured, but if everything is smooth, you may be able to risk driving without a problem with the headlight before it cures.
It’s probably best to fix the headlight in the evening and wait until the next day to drive it.
Step 5. Replace the Headlight Assembly

When installing the headlight assembly, it’s usually best to reverse the process used when taking it out.
What if you use a new headlight assembly? Then you want to make sure to compare it with the old one to ensure it’s the correct match.
Just like taking removing the assembly, be sure not to force anything into place. Gentle wiggling and aligning parts correctly will give you the best results.
Try hand-tightening bolts and screws to ensure they are correctly threading, then use your ratchet to finish the job.
Step 6. Finishing Touches

Now that you are done replacing your headlight turn it on the headlights. In addition, test the turn signals if needed. Check that all the electrical connections are working.
Clean up any grease around the headlight that may have gotten on your paint.
If your lens seems hazy, that may be due to normal hazing that occurs over time from UV exposure.
After your headlight sealant has cured, you can use a bit of wax or another product to buff out the haze on your headlights if desired. This can help give you a bit more brightness when driving at night.
Conclusion
Clearing your headlights of water and sealing them up again may take an hour or more. However, you can save a lot of money. With some research and patience, your headlight will be fixed in short order.
If you have some basic tools, you’ll need some sealant to get the job done. Then you’ll have a headlight without moisture in it. It will shine brighter on the road at night and help you stay safe while going to all your destinations.