A cracked or chipped windshield is one of the many things that can be frustrating for car owners. It may appear small, but if it is not given attention as soon as possible, it will grow bigger and can cause the windshield to shatter. With this, at the first sight of the problem, you should act immediately. Otherwise, it can lead to costlier repairs.
In general, repairing a chip in a windshield is more cost-effective and just as helpful than replacing an entire windshield. However, replacing a windshield may be more beneficial in some circumstances. You might want to consider one option over the other based on the type of crack or chip you have.
Let us further investigate and see when you should consider a repair and a replacement. This way, you can weigh each option better before deciding.
When should You Repair A Windshield Chip?
Repairing your chipped windshield is the cheapest way to address the issue. So, you might want to consider repairing your chipped windshield first before you resort to replacing it. However, you might be wondering when repairing a windshield chip is best to fix the damage.
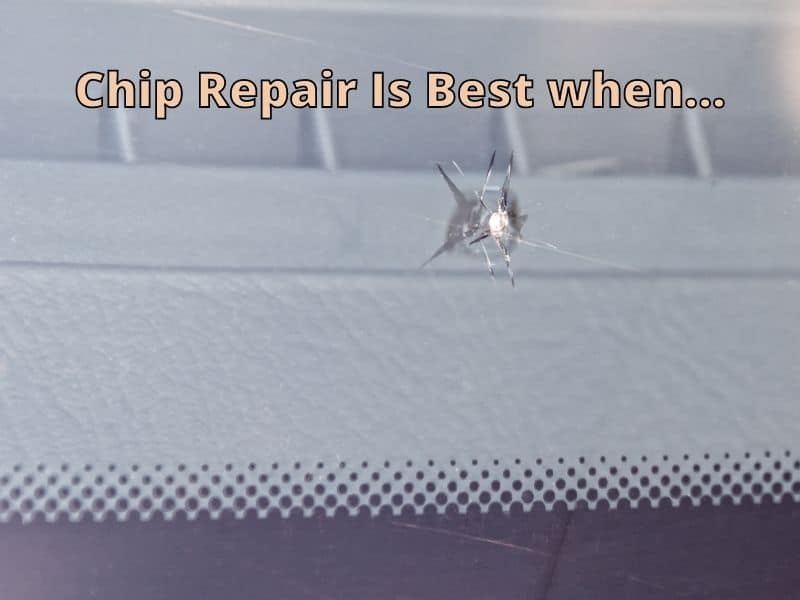
Here are some tips on how you can figure out that repairing your windshield versus replacing it would be enough.
- When the chips on your windshield have a diameter measuring 2.5 centimeters or less.
- Cracks that do not reach 8 centimeters long.
- When windshield chips are shallow.
- If the chip or the crack won’t hinder the driver’s visibility.
When You Should Consider Replacing A Windshield?

What you must also know is that there are circumstances that a simple repair job won’t do the trick. For you to be able to figure out if a repair is not enough to fix your chipped windshield problem and replacing it is the better option, you might want to consider these circumstances below.
- When your windshield glass is tempered (older vehicles) and not laminated.
- Once the chip or the crack on your windshield is more than the recommended size for repairs. When your windshield chips are over 2.5 cm with cracks that are more than 8 cm, it is advised that you should replace your windshield.
- When you notice damages in more than three areas in your windshield.
- If the chips or cracks are near or extend up to the edges of your windshield even if the damage is still within the recommended size for repair. This is because it will make the structure of the windshield weaker, which is why a simple repair may no longer be sufficient.
- If the damage reduces the visibility of the driver.
- It is recommended to replace an old and damaged windshield, especially if it already has extensive dents and scratches on the surface.
When deciding whether to repair or replace your windshield, it is best that you use the information given to help you weigh your options. If you come to the decision that you think replacing it is better, contact your nearest auto glass specialist to discuss the replacement.
Many people think that going to the nearest glass shop or mechanic is a viable option when repairing their windshield. Nonetheless, this can be too costly. Some people might want to fix cracks or
Many people think that going to the nearest glass shop or mechanic is a viable option when repairing their windshield. Nonetheless, this can be too costly. Some people might want to fix cracks or chips in their windshield on their own.
The good news is that it can be an easy task. You can purchase a DIY repair kit, which is easy on the wallet. No special skills or technical expertise is needed for the task.
Needed Items To Repair A Windshield
To successfully complete this task, you will need only two things:
- A windshield repair kit
- Clean towel
Step-by-Step Guide On How To Repair A Windshield Chip Or Crack
Below are the specific steps that are sure to be easy for anyone to follow. Before you proceed, watch this short video below:
1. Prepare The Kit
A chipped and cracked windshield is a common problem, which is why many companies are offering DIY kits that you can use at home. There is no need for a professional intervention by a mechanic as the steps are pretty much simple.
The kit that will be purchased in this guide contains an instruction booklet, suction cup mount, razor blade, resin, resin pump, and curing strips. The materials will depend on what is included in the repair kit that you will be using.
2. Park Your Car In The Shade And Then The Sun
As you prepare to work, find a shaded area where you can fix the problem. Later on, you will have to remove the car from that place and transfer it to a location where the windshield is in the sun.
3. Repairing A Windshield With A Kit
Again, the instructions will be different based on the kit that you have. The steps mentioned in this post are specific to those that you can see from the video above.
To start off, take out the razor blade from its cover. Use the razor to clean the area surrounding the crack. All that you have to do is to lay it flat on the surface and move it front to back. Apply enough pressure to clean the area. After this, with the use of the end of the razor, clean out any debris on the crack.
When you are done cleaning the problem area, the next thing that needs to be done is to affix the suction cup mount. The middle part should fall exactly on where the crack is. Press hard in such a way that the suction cups will attach. However, avoid applying too much pressure as the damaged glass is already fragile, and you might end up cracking it.
Once the suction cup is in position, prepare the plunger. Screw it in and see to it that the rubber surface on the end will meet exactly on the part of the glass with chip or crack. Remove the resin and open the top part. Put six drops of resin in the tube. Screw the plunger so that resin will be pushed in. Tap around the crack to get rid of air and to let the resin fill the chip.
If there is still space of air that you can see from the crack, all that you have to do is to add more drops of resin.
4. Remove The Suction Cup
Once you are done filling the crack with resin, you have to remove the suction cup. Spin the plunger counterclockwise and pull it out. Clean any excess resin with a towel since the plunger is reusable. Remove the suction cups.
5. Use The Curing Strip
At this point, you have to add one drop of resin exactly on where the crack is. Place a curing strip on the top. Use your razor and run it lightly on the top of the curing strip, which is important to push out any excess air. Park the car in a place where it will be hit by the sun and wait for about five to ten minutes.
Remove the strip and use a razor to take out any excess resin. Wipe it with a clean towel. By now, you have successfully repaired the problem at a low cost!
Pro Tips

Here are other important things that you also have to keep in mind:
- Consult a professional first before moving forward to replace your windshield. This way you can understand what to expect and what steps you should take next.
- Before you start working, see to it that the area where the resin will be applied is completely dry and clean. If it is wet or if there is dust, the resin will not cling strongly to the surface and hence, you will not successfully treat the problem area.
- To avoid having windshield chips and cracks, proper repair and maintenance are important. One thing to remember is to close the door gently because too much pressure may dislogde the windshield over time or crates problems if the resin isn’t fully dry.
- Regular inspection of the wiper is also important to be sure that no dirt or debris can possibly scratch the glass and cause visible damage to the surface. Replace the wiper regularly to be sure that they are working perfectly.
Conclusion
In sum, knowing what is the best option for you will provide you with a better result. Having additional information on how to repair a windshield chip or crack on your own can save you a lot of money! After reading this article, I hope you can make a decision about which choice is best for you.
Did you enjoy reading this guide? Click the link below to read more articles about ways to improve and fix your vehicle.
Thanks for visiting Drivinglife.net
References: