Having an RV and using it for road trips and camping can bring incomparable joy to anyone. It is one of the best ways to explore and enjoy the great outdoors on your own, with your significant other, or with family and friends. To make the most out of your RV, however, you need to make sure that it is well-maintained, which will minimize frustrations on the road.
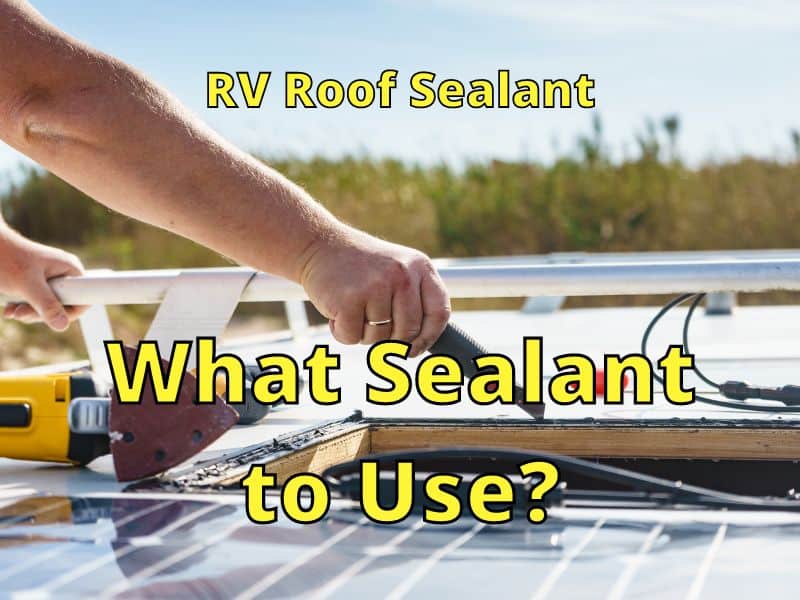
To repair your RV leak with a sealant, you need to determine how extensive the repair is and what type of roof your RV has. Here is a list of common repair methods.
- For a Simple Seam or Joint Repair – Use a bead of sealant.
- For Small irregular Areas – Use a fiberglass kit or wide sealant tape with a bead of sealant around it.
- For a Fiberglass RV Roof – Use a fiberglass repair kit or possibly sealant tape with a bead of sealant around it.
- For a Metal RV Roof – Use sealant tape with a bead of sealant around it.
- For a Rubber RV Roof – Use a Rubber repair kit or use sealant tape with a bead of sealant around it.
While there are many aspects of the RV that require your attention, one of the most important is the roof. That being said, in the rest of this post, you will learn the basics of RV roof leak repair. From the first sign of a problem, you need to act as soon as possible. If not, it will get worse and will most probably be costlier to repair.
What You Will Need to Follow this Tutorial?

Before you get started, here are the materials that you may need before starting:
- Utility Knife
- Drill
- Clean Cloth
- Gloves
- Sealant / Sealant Tape
- Brush / Roller
- Fiberglass Repair Tape
- Caulk
- Putty knife
- Paint or elastomer
Steps to Seal a Simple RV Roof Leak
Once you have gathered the needed materials, here are the steps you need to follow in fixing a leaking RV roof.

- The first thing that you have to do is to clean the roof. When it is free of dirt and dust, it will be easier for the sealant to cling to the surface. If there is a previous sealant, remove it using a knife. Use a clean cloth to wipe the surface. Allow it to dry before you proceed. A wet surface may resist the sealant, so be sure it is completely dry before applying it.
- Now that you are done cleaning the leak area, it is time to proceed with the main task – sealing. If the leak is small, the best solution is to use a sealant(ad) that is commercially available. Wear gloves and apply a sealant to the leak. Apply to make sure that the entire area is covered.
- If in case there is a bigger hole that cannot be fixed by the bead of sealant, you have to use a fiberglass repair tape kit or a wide tape sealant. For fiberglass, spread sealant on the hole, cover it with the fiberglass repair tape, and apply more sealant. For a wood or metal RV roof, use wide sealant tape.
- In some instances, caulking will be the best solution to fix the RV roof leak. This is especially an effective solution if the leak originates from a joint. Apply the caulk liberally on the crack and let it dry.
- Once you are done repairing the leak, you have to coat it. For extra protection and to improve the look of your roof, paint it. You can cover it with paint or an elastomer(ad) to achieve a consistent look. Choose a coating with the same color as your old roof so that you will be able to achieve a uniform look. The best way to ensure a uniform look is to paint an entire section across the roof.
In some cases, your might not work. You might be frustrated after repairing the roof several times and finding that leaking still occurs. If this is the case, it’s best to have the entire roof inspected (by you or a professional) and then replace any damaged areas.
This can be costly and complicated, but it will be the best solution if you plan on using your RV for a while in the future. When replacing roof sections, make sure you have done enough homework to ensure a good job and get someone to help.
Steps to Fix/Replace Large Areas of an RV Roof
Here’s a great video about repairing an RV roof. They removed everything, cut out the bad wood sections, replaced the bad wood sections, sealed them, and installed all the parts again.
This 21-minute video is a great place to start if you have intensive roof repairs. It will give you lots of information and ideas about how to go about your specific roof repairs.
If you watch the entire video, you will be able to get a good feel for how much time is involved, how labor-intensive it is, and what materials you might need to pay for.
It is also helpful to remember that mistakes will be made with any big job like this and that you may want as much help as possible before undertaking.
Tips to Repair Different RV Roofs
In this section, you will learn some practical tips for repairing a leaking RV roof and how to make sure that it is well-maintained to prevent problems in the future.

Different Materials, Different Methods
The steps mentioned above may generally apply to RV roof leak repair, but it is important to keep in mind that the approaches to fixing the problem will depend on the material used.
- Rubber is one of the most common materials that you will see in RV roofs. It is popular because of its durability. When repairing a rubber roof, make sure to stay away from petroleum-based products, as they can cause significant damage. There are repair kits that are specifically made for rubber roofs.
- On the other hand, if the RV roof is made of metal, you can use most roof coatings that are used in the household. Nonetheless, if you need to do more than sealing, such as when there is structural damage, seal tape will come in handy, which will work like duct tape.
- Meanwhile, for a fiberglass RV roof, repair can be quite complicated because the material is fragile. A small crack can instantly become bigger if it is not given immediate attention. You could try a patch kit(AD) which may work well for sealing but not for structure. You can also use a kit specifically made for fiberglass(AD) to create a strong repair. If getting your RV looks like there’s no damage, you’ll need to repair it with resin, sand, and paint. You may also need to use a gloss to make it look as good as new.
Here’s a video with more details about making larger repairs to a fiberglass RV.
Regardless of the material that is used, the sealant and the coating must be UV-resistant. If not, they can be easily prone to damage as a result of exposure to the harsh heat of the sun.
Prevention is Better than Cure
Similar to other problems that you can experience in your RV, it is important to point out that regular care and maintenance are important. If you take care of your roof in the first place, you can prevent leaks, and hence, there is no need for repair. The more vigilant and careful you are, the less likely that you will have to deal with leaks.
One of the things that you may not want to do is step on the roof unless you know it’s able to support you. Your weight may cause some roofs (older ones usually) to crack. This is especially true if the roof is made from a material that can easily crack.
Regular cleaning and UV protection are also important for your roof. Use cleaning products that are for RVs. Some may contain harsh ingredients that can damage the roof, so stay away from those. Again, consider the roof material to know the right cleaning products you can use.
Conclusion
This simple post can help you make an informed decision about what to do with your RV roof leak repair. Each RV is different, but simple repairs can be pretty straightforward.
No need to pay hefty fees for a simple patch job. The steps for repair kits are usually quite simple, but if the repair is complicated, make sure you get the help you need. Remember to repair the problem as soon as possible before the leak becomes worse.
Best wishes for a successful repair and getting your RV ready for your next adventure.