The undeniable fact that an automobile’s moving parts are sophisticated affects most of our thinking when it comes to repairing them. However, luckily, not all of a car’s body parts are complex and require a mechanic’s touch. For example, replacing a car starter is one of the more common, simpler fixes that can be done by the owner of a vehicle.
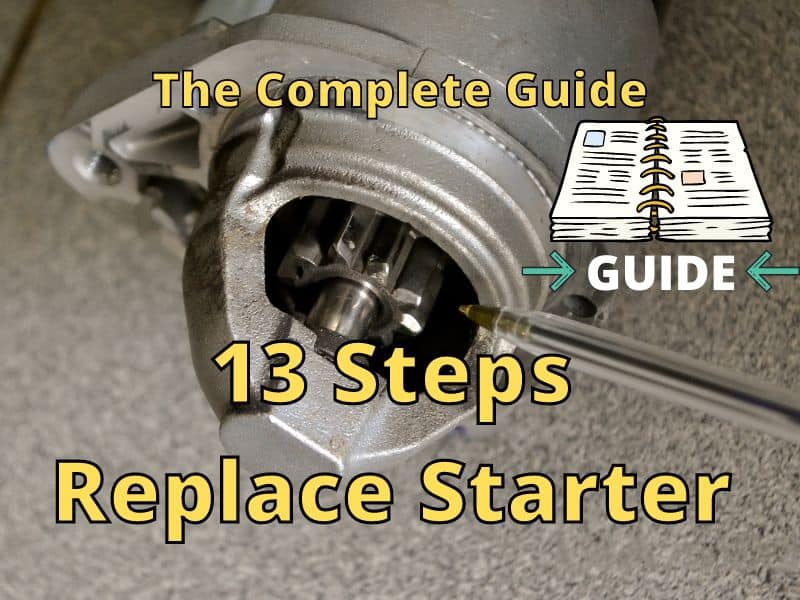
You can replace a car starter even while parked at home. However, it requires some basic tools and a little technical application. The only necessary things to know are how to locate the starter, solenoid, and car battery and loosen or tighten a bolt. Here are the 13 steps to replace a car starter:
- Turn off the ignition.
- Disconnect battery.
- Jack up the car (if necessary).
- Locate starter.
- Disconnect the solenoid wire.
- Loosen starter bolts.
- Remove starter.
- Compare old & new starters.
- Place new starter.
- Insert & tighten starter bolts.
- Connect the new starter’s wire to the solenoid.
- Reconnect battery.
- Start & test the car.
Replacing a car starter is not easy, but it is straightforward. It takes an average of two to four hours to complete the task. The remaining of the article will go over what car starters are, how they work within your vehicle, the symptoms of a bad starter, and how to replace and maintain them.
What is a Car Starter?
The name may sound technical, but the function is simple. A car starter is a motor, and it contains in-built gear that rotates on its own; thus, a car starter is also called a starter motor.
A starter is a cylindrical object with two different parts, each with various openings. The primary function of a starter is to stimulate the engine such that the engine can begin to work. There are three types of starters, each following the same working principle but differing in design and mode of operation.
|
Types of Starter |
Functions |
Mode of Operations |
|
Electrical |
Convert electrical energy to mechanical energy. |
Through interaction between the motor’s magnetic field. |
|
Pneumatic |
Convert compressed air to mechanical energy. |
Linear motion or rotary motion. |
|
Hydraulic |
Convert hydraulic pressure to mechanical energy. |
Working pressure. |
The Working Principle of a Car Starter
A starter works on the principle of a combustion engine. The combustion engine follows four cycles of operations: intake stroke, compression stroke, third stroke, and exhaust stroke.
For a car engine to work, the power to initiate the engine must come from an external source, which is supplied by a car starter. The first two steps of the combustion engine must come from a car starter; thus, the intake stroke and compression stroke are performed by the starter.
When the processes are completed and the car engine starts running, the function of the starter is no longer needed.
In summary, a starter is required to start a car engine, and without it, a car can’t get started.
5 Symptoms of a Bad Car Starter
The following five symptoms are signs that you may need to replace your car starter:
1. The car may sound weird.
A car owner usually recognizes the familiar sound of their car when the ignition button is pushed to start or the key is turned. The first sign your starter is bad is when you begin to notice a clicking noise as you try to start the vehicle.
It is worthy of note that the car may die without seeming to emit a sound at all or may die immediately as the power switch is turned. Try to listen carefully for that clicking sound if you don’t notice it the first few times around.
2. The light only turns on.
This is another means of identifying the starter as the cause of a car problem. If the car’s dashboard lights up, but the engine refuses to start, it could be a starter issue. However, note that many other technical malfunctions can lead to a dead engine, not just the starter.
3. The engine refuses to start even after a jump start.
If you noticed the previous symptom and applied direct jump start, but the engine still refuses to start, the problem is highly likely a damaged starter. If a jump start cannot light up the car, immediate attention to the starter is required.
4. A smoky car.
If a car refuses to start, it is likely that you will try to repeat your attempts to start it up. When you continuously turn the ignition key, there is a possibility that the car will begin to give off smoke due to the poor connections of the starter with the car’s electrical system.
When a car gives off smoke while you try to start it, it is highly possible that the error is due to a damaged starter.
5. An oil-drenched starter.
A starter can only be covered by engine oil if there is leaking, which is a very narrow possibility. Once the starter is soaked in oil, it can quickly go bad.
As you can see, a single symptom does not confirm that a car problem is the result of a bad starter. Because there are a lot of mechanical errors that can lead to a damaged starter or the other way around, further troubleshooting before you decide you want to try replacing your starter is the best course of action.
Can a Car Starter Be Replaced without Mechanic Support?
Yes! The owner of a car can replace a car starter even while parked at home. It requires some basic tools and a little technical application. The only necessary things to know are how to locate the starter, solenoid, the car battery, and how to loosen or tighten a bolt.
Once the car’s components can be identified, the rest is an easy do-it-yourself process. Although the process might be stressful and take a little time, changing a car starter is simple!
13 Steps to Replace a Car Starter
Replacing a car starter is similar to the process of changing a bulb in a lamp. The steps involved include identification, switching, and testing—just like a bulb replacement. Knowing how to identify each component is mandatory for a successful starter replacement.
Replacing a car starter requires some sets of tools and materials, which are:
- Socket sets
- Sets of spanner
- Screwdriver
- Torchlight
- Pliers
- Hammers
- Engine oil
- Rags
1. Turn off the ignition.
This first step might seem straightforward, but it is the most crucial part. The process of dealing with electromagnetic devices requires safety first! You do not want to mess around with an electrical component of your car while it is still running.
2. Disconnect the battery.
A socket wrench is required to loosen the tight connection of the battery. The main target is the negative terminal of the battery. An ideal starter replacement requires you to remove the cable and put it in a place that prevents it from touching the terminal again.
Always remove the terminal—at least the negative terminal—before working on the starter! It is highly important for your safety. Removing the positive cable is not mandatory, and once the negative terminal has been tucked away, it is safe for you to move on to the starter.
Safety measures to keep in mind:
- Do not touch the terminals with your bare hands.
- Do not hold the socket with a wet hand.
- Wear a glove if necessary.
- Place the cable in a safe place, away from the terminals.
- Do not remove the battery from the car.
3. Jack up the car if necessary.
There are different cars with various starter positions. Some vehicles require carjacking. In that case, carefully place the required jack under the correct area related to the starter position, and then jack the car up to access the starter from the ground level.
Make sure the jack is steadily engaged under the car at the appropriate height and the settings are firmly arranged.
Safety measures to keep in mind:
- Do not place the jack on a stone.
- Use a jack that is perfect in shape.
- If there is a need to go under the car, use safety kits.
4. Locate the car starter.
The starter is usually cylindrical, and there are two cylindrical-shaped devices attached: one is bigger than the other. The small cylinder is the starter solenoid. Another means of identifying the starter is the connection between the battery and the solenoid. In essence, a wire runs from the battery to the terminal of the solenoid, usually at the top of the solenoid.
The key point in identifying the starter is the connection. The starter is majorly connected to the battery or fuse box through some running wire.
There might be some difficulties in identifying the starter, as different cars are designed in several ways. At this point, the best option is to refer to your car’s user manual. If it is not present, a manual for your car may be accessed from the manufacturer’s website; you will only need the released year and model of the car to search for it.
5. Disconnect the solenoid wire.
Different electrical connectors that transfer electrical power from the power source to the starter are equipped in cars, depending on the manufacturer.
There are two types of connections to keep in mind: the clips and bolts. If your car is designed with the clip-type solenoid, it is simple: just remove the clip from the solenoid. On the other hand, if your car has a bolt connection, you may need to unscrew or loosen bolts.
Safety measures to keep in mind:
- Carefully draw the wires.
- Do not disconnect additional wires outside of the battery and solenoid.
- Loosen bolts with care; they are susceptible to damage.
- Remove clips with care; they might break.
- Place the solenoid wire away from the battery terminals.
6. Loosen the starter bolts.
Loosening the starter bolt is the beginning of the main process. A socket will be required at this point.
Considering the connections of the starter, solenoid, and battery, there are primarily two bolts that keep the starter in place to prevent falling or shifting to unfavorable sides. However, there may be more than two bolts in some car models. Your goal is to figure out which bolts are holding the starter in place.
The starter may be on the heavier side; therefore, you may need to use extra force to pull out the starter after removing all of the bolts or clips.
Safety measures to keep in mind:
- Keep the bolts in a safe place so you can put them back where they belong later.
- The bolts are susceptible to damage, so handle them with care.
- Hold the starter tight to prevent shifting while you loosen bolts or clips.
- Be mindful of the car parts surrounding the starter so as not to damage them.
- Use the correct socket size to remove the bolts.
7. Remove the starter from the car.
After the bolts have been removed, the next step is to remove the starter from the car. This measure requires additional care to avoid other car parts damage.
Place your hand on the right and left sides of the starter; be careful not to injure your hand. Carefully raise the starter (the starter might be heavy), and place it on the ground or a table. Make sure you stay aware of the terminal.
Safety measures to keep in mind:
- Carry the starter with care to avoid the starter falling on your foot or leg.
- The starter might be heavy, depending on the model of your car.
- Carefully place the bad starter on the floor, as it might still be useful.
- Do not make contact with the battery as you remove the starter.
8. Compare the old and the new starter.
This comparison is to check for similarities. The new starter must be identical to the old one in the number of holes, the placement of the holes, and the size of the starter. Although it is not compulsory for an ideal match, they must at least be similar in size. Note that the number of holes might be more than the one in the old starter because of the new model.
If by chance, the starter is not identical, it is highly possible that the new starter is not the fit choice for the starter replacement.
9. Place the new starter into space.
Place the new starter in the same position as the old starter; a little wiggling for perfect fitting into the space is necessary. This process might be done either from above or beneath the car engine, depending on the car model.
Safety measures to keep in mind:
- An additional hand might be required to replace the starter, depending on its location and weight.
- Make sure the starter is in good condition and is the right match for your vehicle.
- Place the new starter with care to avoid damage.
10. Insert and tighten the starter bolts.
Next, you will need to replace the two bolts that you loosened earlier. Carefully place them in the right position and then turn the bolts with your hand in a clockwise direction until they are tightened well enough that they can no longer be twisted by hand. At this point, use the right socket to tighten the bolts and make sure they are firmly in place.
Note: a car starter can loosen up through the vehicle’s vibration if it is not properly tightened. To avoid damage due to improper tightening, make sure your starter is firmly in place before trying to start up the car again.
Safety measures to keep in mind:
- A loose starter might lead to a road accident; make sure it is properly tightened.
- Use a proper socket to rotate the bolts.
- Do not use a wounded hand to turn the bolts.
- Make sure you tighten bolts in the right direction (clockwise) to prevent bolt damage. Wrong turning might damage the head.
11. Connect the starter’s wire to the solenoid.
The starter and the solenoid are two different components that are attached. So, do not forget to reconnect the two. There might be a little difference between the old and new solenoids because of newer models; for example, the new solenoid might come with four terminals instead of two.
When the perfect position of the starter and solenoid has been achieved, the next step is to reconnect the wires that were disconnected from the former starter. Make sure you connect them to the right terminals. If you are not sure of which terminals are negative or positive, check the car’s manual and confirm the correct ones to avoid damage.
Note: The solenoid might require a different number of bolts. If the new solenoid is designed with four bolts and the old solenoid has two bolts: connect the top and bottom bolts on the new solenoid to the car to ensure a balanced and secured connection. If the new solenoid has the same bolts as before, then the connection is direct—just tighten the bolts with respect to the bolts’ position.
Safety measures to keep in mind:
- Note the terminals and make sure they are connected to the right parts.
- Tighten the connections to prevent further complications.
12. Reconnect the battery.
Carefully take and reconnect the battery cables to the terminals. Use the proper socket to tighten the battery terminals’ cables.
Note: Make sure the connection is tightened to prevent future complications.
13. Start and test the car.
When all of the previous steps have been done correctly, start the car. The car should run properly. If not, listen to the sounds it makes and note any changes to the usual sound.
Check the battery and the starter connection if the car does not start; a proper connection should give a positive response.
3 Ways to Care for a Car Starter
There are various things you can do to care for a car starter; all require a little time and physical contact with the starter to become familiar with it.
1. Check and clean the battery-starter connections.
The starter is the main starting button that initiates the engine to start an action. If the starter is dirty or rusted, there will be little or no power supply. It is necessary to check for dirt and clean the battery and starter’s terminal. Try to avoid water spillage and keep the component clean and dry whenever possible.
2. Tighten loose bolts.
The bolts connect the starter to the car; it is important to always check the starter bolt and tighten the connections often. A loose connection might cause some strange sounds when the ignition key is turned, so there is also a need to be familiar with the sound of your car and notice any unusual noises.
3. Always check and clean the solenoid.
Just like the effect of dirt on the battery terminal, the solenoid can go bad if the connection is dirty or rusted. It is important to always clean and dry the terminal to prevent rusting.
4 Challenges of a Car Starter and Solutions
The following are some common challenges car owners face with faulty car starters and their replacement:
1. Price
You might be wondering about the reason it is necessary at all to change the starter by yourself when mechanics are nearby.
According to Angie’s List, the average price of a car starter (without considering the model) ranges from $344 to $562. This is the average price without the labor costs added in. According to the same source, the average price for labor for replacing a starter ranges from $128 to $163.
Following this trend, the total price of replacing a single starter, including the labor cost, has ranged from $472 to $725, depending on the car model and the mechanic you choose to go to. On the other hand, the same car starter replacement can cost a total price of $344 to $562 if the owner performs the technical procedure on their own, thus saving a total of $128 to $163.
The Cost of a Car Starter
Outside of paying hundreds to get a car starter replaced professionally, it is one of the most expensive parts of a car. Depending on the car model, the latest cars come with a very expensive starter, although some old cars have a relatively cheap starter in relation to the newest model.
The problem of the cost might not surface during the process of getting the car; the effect emerges when the car breaks down, due to the starter, in a bad economic period. Based on the model and price of the vehicle, some of these solutions might solve the challenge:
Insurance: Getting car insurance might sound odd for a car starter, but it’s not! You are not only getting insurance to protect you from paying damages for accidents but because of some enormous potential damage too, which might occur in the future. Insurance helps carry expenses when the cost of repairs is beyond the bearable level and the crisis has affected your savings. Staying on the safe side is the best option.
Savings: According to Five Cent Nickel, about $1,200 per year is enough as a “car maintenance budget.” Notwithstanding, Clark shows that the “car maintenance budget” varies depending on the car model and declares BMW and Mercedes-Benz as the leading model with a budget of approximately $5,500 per annum.
Geographic Location: The cost of a starter varies geographically as well. Even if it is ideal to order from a popular automotive part store, the shipping price may be high. The best solution is to check your options and try to find the lowest price with good quality.
2. Quality
The quality of a starter varies with the price. The confederation of economic strength arouses the ideal of building economic-friendly motor parts. Depending on the strength, you can choose the starters that fit your budget. The primary thing is to consider the quality and know if it will last for a more extended period.
3. Proper Maintenance
Many car users do not know how to care for their vehicles. Maintenance is the trickiest part of getting familiar with a car, as well as understanding how it and its parts work. It is highly recommended to inspect the car occasionally before embarking on a long trip.
4. Perfecting Technical Maintenance
The act of going to a mechanic shop seems to be the easiest thing to do when a problem develops in a car. However, it can be a nightmare when a freshly repaired car breaks down in the middle of the road or while you’re away from home.
If you decide to get a starter professionally repaired, make sure you talk to the mechanic who operated your vehicle to get a run-down of the process that took place. Becoming knowledgeable on the subject will also help you identify if a starter was installed incorrectly or if other damage took place during the replacement process.
In Summary
Starters are designed in different shapes and sizes, depending on the model of the car. However, their function is the same: they all work to power the car engine.
If you have a faulty starter, it is possible to successfully replace it yourself. They can easily be replaced with the right knowledge and equipment; you will only need to know how to identify the components and gather the necessary tools.
Many people may prefer to visit the mechanic to replace a bad starter, but sometimes, it is fun to try doing the repairs on your own. It also saves time and money, and although the process is not exactly simple, it is well worth the effort.
References
https://en.m.wikipedia.org/wiki/Starter_(engine)
https://www.popularmechanics.com/cars/how-to/a5837/how-to-replace-a-cars-starter-motor/
https://auto.howstuffworks.com/under-the-hood/vehicle-maintenance/how-to-replace-car-starter.htm