Whether you are a smoker, have a host of car accessories that you need to charge on the go, or simply just do not like having little things go wrong with your vehicle, there can be nothing more annoying than having a car cigarette lighter socket go out. The problem is that when it does, most people just write it off as broken and live with the inconvenience.
Roughly 90 percent of dead lighter sockets are due to a blown electrical fuse. However, you can easily repair a car cigarette lighter socket yourself. Here are the steps you need to follow:
- Locate Fuse Boxes
- Get Required Materials
- Pull the Burnt Fuse
- Inspect the Pulled Fuse
- Insert Replacement Fuse
- Check the Replacement Fuse
In most modern cars, the terms “cigarette lighter socket” and “electrical outlet” are interchangeable, and there are often multiple such ports at various points around the vehicle. It is important to know where all of these ports are located in your vehicle, as they can help you in the identification of the problem with the dead cigarette lighter socket.
Keep receptacles clean – not only does this ensure a strong connection between your device and the port, but it prevents the buildup of any corrosion that may occur over time.
Troubleshooting a Dead Car Cigarette Lighter Socket

In the age of portable devices, a dead electric outlet in your vehicle is one of the most easily identifiable problems you will encounter, as the need for juice after a long day out and about is a never-ending need in contemporary society.
While a dead socket is likely to cause frustration that may tempt you to take your car to a mechanic and “just get it fixed,” the repair can often be easily accomplished at home without the hassle and expense of taking your vehicle to a professional shop.
And while the likely cause of a blown fuse itself is a simple enough repair, there are a couple of items you will want to cross off your list before you start digging into your fuse box.
1. Make Sure Your Car is Turned On
For older vehicles that you have to remove the lighter to access the socket, you are likely to receive power whether or not the vehicle is turned on.
However, with newer vehicles that are highly electrical and have many computerized settings, some electric outlets will not function unless the car’s battery is engaged, so if the cigarette lighter socket is not working, make sure that the car is turned on.
While you do not have to start the car all the way, if the radio is playing and the fan is blowing, but there is still no power coming to the socket, then you will need to move on down the troubleshooting list.
2. Check the Other Electric Outlets in Your Vehicle
As mentioned, most modern vehicles come with a bevy of electric outlets located at various points in the vehicle.
In addition to the main cigarette lighter socket on the driver’s side dashboard, there is likely to be an additional outlet on the passenger’s side dashboard, as well as in the center console and any rear consoles, depending on the size of the vehicle.
If your main socket is not working, be sure to plug in your cord to the other ports and see if you get any power. If you do, then you are definitely dealing with a dead socket. If there is still no power when checking the other sockets, then you will have to do a little more research, as it is unlikely that all outlets are dealing with a blown fuse simultaneously.
3. Try Different Charging Cords
If your vehicle is on, but you are not receiving power to any of the electric outlets, then you are likely dealing with a bad charging cord.
Switch out your main car charging cord with a different one and see if this gives you any power. If it does, great–problem solved. If it does not, or the new cord works in all of the ports except the main socket where you initially experienced the issue, then you are likely looking at a blown fuse that needs to be replaced.
How to Repair a Blown Car Cigarette Lighter Socket Fuse?
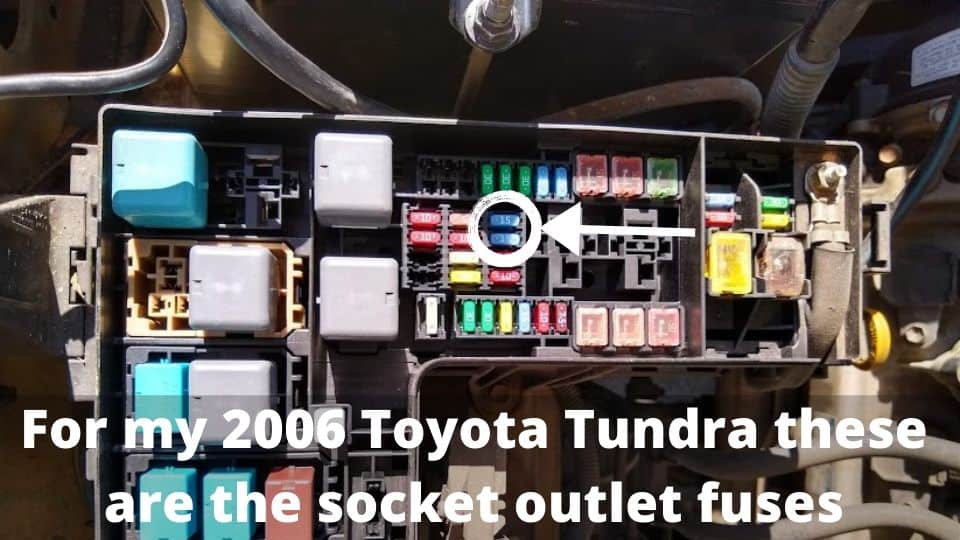
As mentioned in the introduction, roughly 90 percent of dead lighter sockets are due to a blown electrical fuse. While it is cheap and easy to replace a fuse yourself, you must be very meticulous in your approach to avoid damaging other fuses or doing more extensive electrical damage to your vehicle.
Locate Fuse Boxes
Depending on the make, model, and year of your vehicle, the fuse box is likely to be located in one of three places: under the hood, in the cabin on the driver’s side, or in the trunk. Some vehicles may have only one fuse box, while others may have two or three. The following are some general characteristics that you can expect from each:
- Under the hood – this fuse box will be black and plastic, roughly 12 x 9 inches. It can be found at the extreme edge of either the driver’s or passenger’s side and is usually nearer the windshield than the front of the hood. The lid will be held on with several plastic clips that must be detached to access the fuses.
- In the cabin – fuse boxes in the cabin will be on the driver’s side, often near the hood and trunk release, but typically tucked further under the dash. This box will usually have a latch that you can hook your fingers into and pull open.
- In the trunk – this fuse box will be located on either the driver’s or passenger’s side wall of the trunk. It will look like a small door camouflaged into the wall of the trunk, and you will notice a small latch where your fingers can be inserted to pull this door open and access the fuses.
While the majority of fuse boxes will be located in one of these three locations, or more than one of these locations, some vehicles may be designed differently, so it is important to consult your user’s manual to be certain of the location and number of fuse boxes in your vehicle.
After you locate each fuse box, you will want to pop the lid and check for a bay of spare fuses. This may not be present in older cars, but most modern vehicles come with spare fuses.
It is important to check all of your vehicle’s fuse boxes for spare fuses because even if the cigarette lighter socket’s fuse is located under the hood, its spare may be stowed in a bay in the vehicle’s trunk.
Get Required Materials
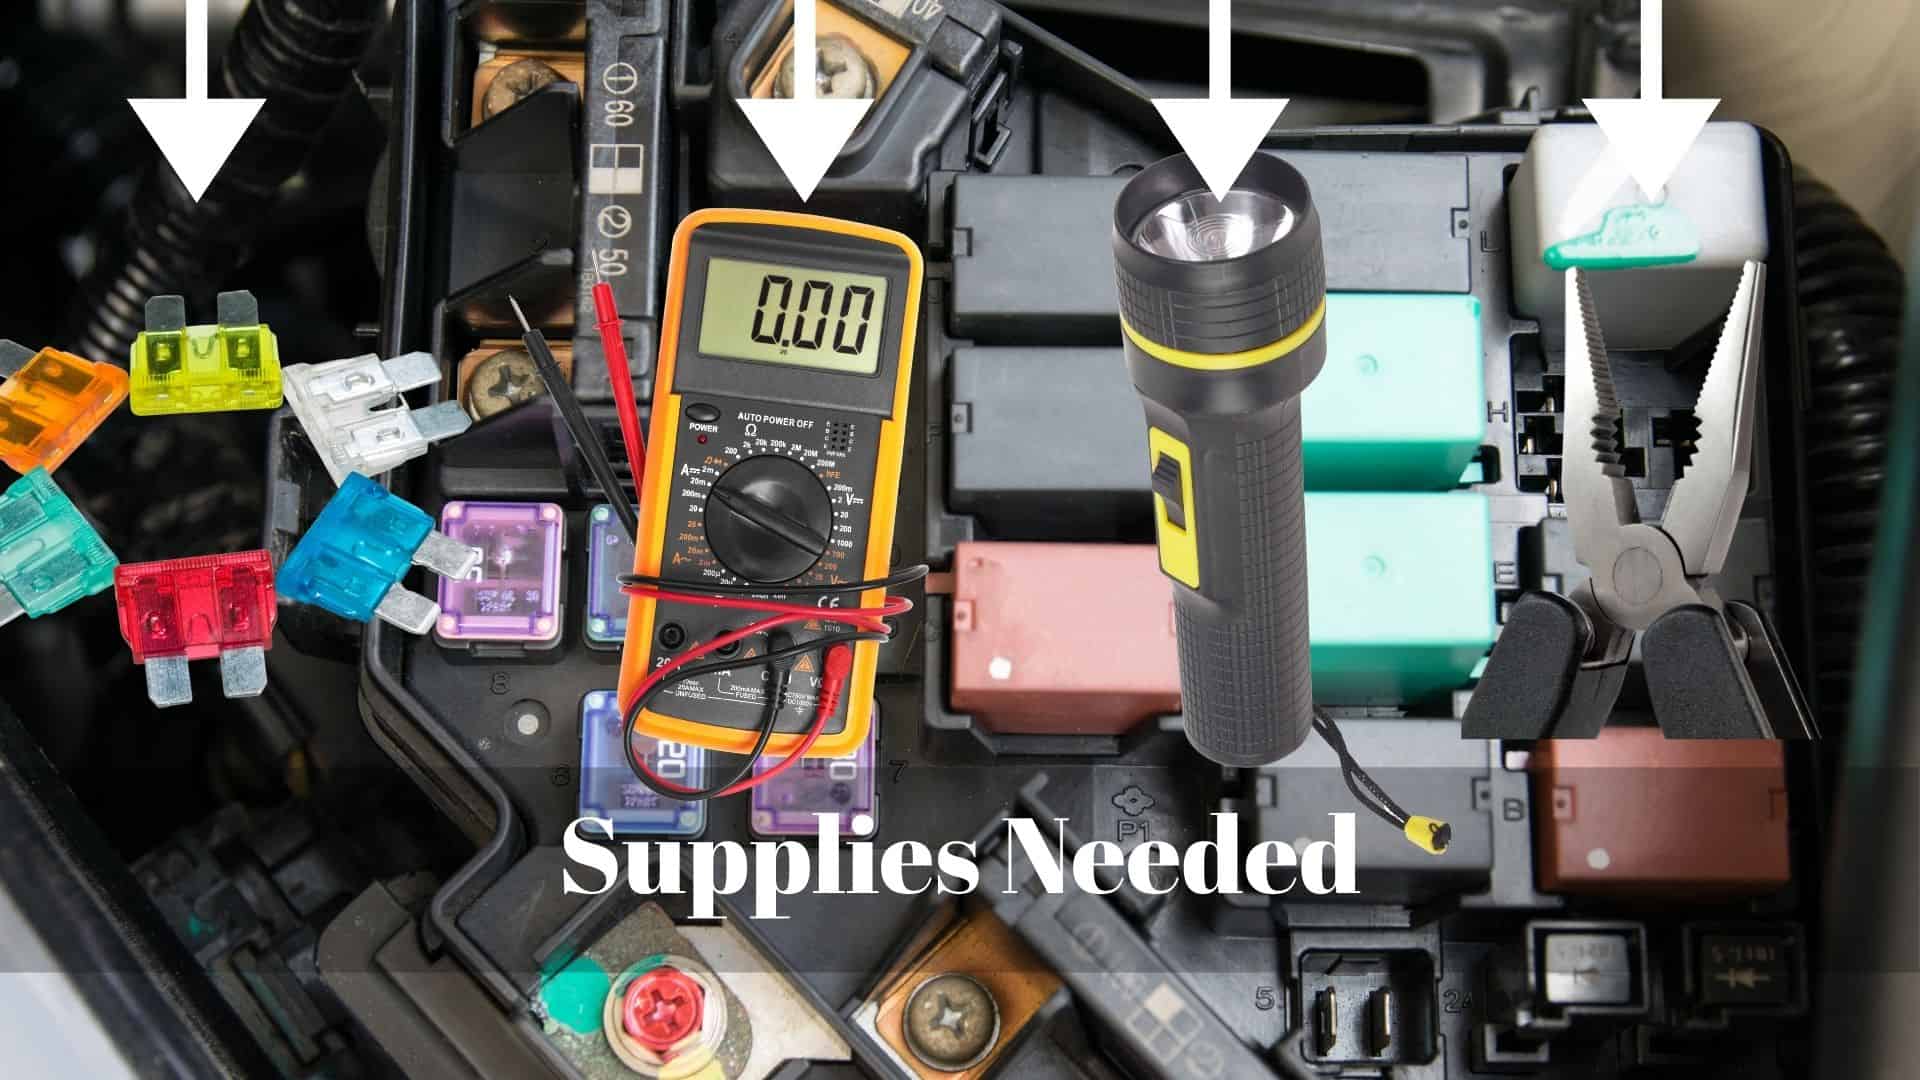
Now that you have located all of the fuse boxes in your vehicle and have checked for spare fuses, there are a few items you will want to gather before starting the replacement:
- Needle nose pliers – try to get the smallest, finest pair you can find, as your vehicle’s fuses are very fine and delicate.
- Flashlight – this may or may not be necessary, but it is a good idea to keep it handy, especially if you have a fuse box in the cabin that curls under the front dash. In addition, the many fuses in your vehicle are color-coded, so you will want to have a sharp light source in the event that any have faded and become indistinguishable.
- Multimeter (optional) – while fuse issues can certainly be reconciled without a multimeter, it is easier with one. A multimeter measures electric current and voltage at a given point, so attaching a multimeter to a fuse can easily let you know if any current is flowing. These devices can be purchased for as little as $10.
- Replacement fuse (if necessary) – if you have checked in all of your fuse boxes and there is no spare fuse bay, then you will need to get a replacement fuse. These are readily available at auto parts stores, but make sure you give an associate run the make, model, and year of your vehicle so they can ensure you get the right product.
Pull the Burnt Fuse
On the lid or door of your fuse box, there will be a map and legend that will help you pinpoint the cigarette lighter fuse. There are many different fuses that control a variety of electrical functions in your vehicle, so make sure that you are extra thorough during this process so as not to choose the wrong fuse.
Many times, the cigarette lighter fuse will be labeled “CIG,” but there are many exceptions across the various vehicle models, so be sure to cross-reference the legend. If you have an older vehicle that has seen the fuse map and legend fade or become unclear in any way, there should be a replica version that you can find in your user’s manual.
After you have pinpointed the cigarette lighter fuse, you will want to connect your multimeter to it, if available. If the fuse is functional, you will hear a “beep” indicating power. However, as it is likely burnt, nothing is likely to happen once the multimeter is attached.
If a dead fuse is confirmed, you need to pull it from the fuse bank. Most modern vehicles will have a fuse-pulling tool located in the fuse box. This is a small plastic tool that looks like a pair of tweezers. Take this tool and pinch it on the tip of your finger a couple of times to get a feel for how it works. It should conveniently grip the lip of your fuse, making for easy removal.
If you have an older vehicle or any other model that does not come with this special fuse-removing tool, this is where the needle nose pliers come in. They can serve the same function as the specialized plastic tool, but you must be very careful to grip only the lips of the fuse and avoid squeezing too hard, causing your pliers to slip and crush the fuse’s body.
Inspect the Pulled Fuse
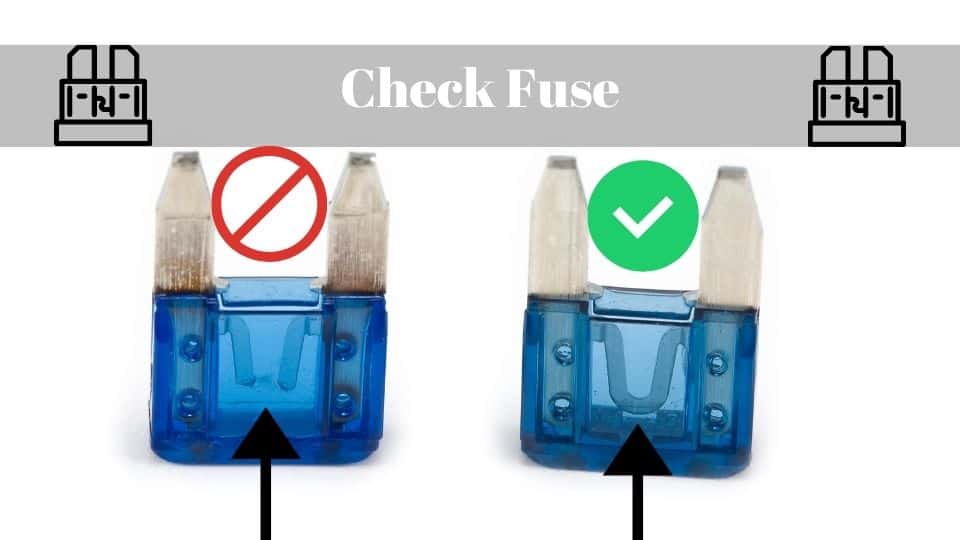
Your cigarette lighter fuse will look like a bigger version of your cell phone’s sim card tray when pulled open, with a wide head in front of a thin, delicate body.
If you have a multimeter at your disposal, you are probably already aware that the fuse is blown. However, if you are without a multimeter or simply want to confirm your multimeter’s reading, a blown lighter socket fuse will be easily identifiable by looking at the body of the fuse, with a couple of symptoms likely present:
- Broken or cracked wire – the body of a functional fuse will have a thin, plastic, see-through casing that protects a small electrical wire. This wire should be in a small, continuous hump, like the normal curve used in statistics. If this hump is cracked or broken, the fuse is no good.
- Burn marks – if the wire is charred or the plastic casing is charred with black tar, then the fuse has burned out and is no longer functional.
Insert Replacement Fuse
The various fuses in the fuse box will be colored differently and assigned a number based on the amount of current they can handle.
For example, either on the head of the fuse or on the legend on the fuse box lid and owner’s manual, the cigarette lighter fuse will be given a value of “20” or “20A” (note: not all lighter fuses have this value, but it is a common value for lighter fuses in many vehicles).
This means that this particular fuse is capable of handling 20 amps of current. Any other fuses with this capacity will be colored and labeled accordingly.
As such, when selecting a replacement fuse from the spare bay, you must be sure that it matches in value and color of the fuse you just pulled. If you got your replacement fuse from an auto parts store, you should already have the right fuse, but you will want to double-check to be sure.
When getting the replacement from the spare bay, you will need to use the same fuse-pulling tool or needle-nose pliers you used to remove the burnt fuse from the main fuse bank.
Put the old fuse and the replacement fuse side by side and compare. The difference should be noticeable, as the replacement should have a nice, clear body that displays a solid, bell curve-shaped electrical wire that forms a visible contrast to the old fuse.
You will not need the fuse-pulling tool or needle-nose pliers to set the replacement fuse. However, you should be very careful when inserting it into the fuse bank, ensuring proper alignment and no forceful actions that may cause the replacement fuse to crack or break.
Check the Replacement Fuse
Now that the new fuse has been properly inserted, your dead cigarette lighter socket should come back to life. Use your multimeter to check the new fuse, if available. You should now get a “deep” signaling flowing current.
Go back into the cabin of your car and test the electric outlet. If there is power flowing to your lighter or device, you are all set. Make sure that all fuse boxes are closed and all tools used for the repair are picked up and properly stowed, especially the fuse replacement tool if utilized.
What if the Lighter Socket Still Is Not Working?
While the vast majority of dead lighter sockets are remedied by replacing a blown fuse, there are a few rare instances in which a new fuse does not solve the problem.
The replacement Fuse Blows Immediately
There are cases, especially if a replacement fuse has been sitting in the replacement bay for many years, where the fuse components have deteriorated, and the sudden introduction of electricity can cause a replacement fuse to blow the first time the car is turned on.
This can be a tricky scenario to identify because when a fuse has just been replaced, the owner is highly unlikely to consider the fuse a second time.
However, it is the first place you should look if the socket is still not working after a fuse replacement. Using the same process described earlier, check the lighter socket fuse again to ensure that the replacement did not immediately blow upon being introduced to the electrical current.
Check the Receptacle
If the check on the replacement fuse comes back clean, there is a chance that you are dealing with a faulty receptacle.
Over time, the receptacle can accumulate food particles, dust, and other debris that may prevent a proper connection with your cord. Take a rag and thoroughly clean the port to ensure that there are no foreign particles interfering with the connection.
If you have cleaned the receptacle and everything is still dead, there is a chance that the receptacle itself needs to be replaced.
On the head of the lighter and/or cover of the electrical outlet, there will be a voltage rating for the socket, generally 12V (12 volts). If you attach a multimeter to the port and do not get a voltage output in this range, then you will need to order a new part and have the receptacle replaced.
One other thing to look for is the prongs that touch the adapters that you plug into the cigarette lighter. If they are bent, they may not have contact with the adapter. (see video)
Hard Computer Reset Needed
This is likely only a remote possibility in newer models of vehicles that can see glitches due to faulty computer codes.
However, computer issues have been known to cause power windows to malfunction, so there is a chance that other electrical systems in your car, like the lighter socket, may be influenced by a computer issue.
As slim as this possibility is, a computer reset could be necessary if the following steps have been taken to no avail:
- The car is turned on.
- No electric outlets are working.
- Different cords and devices have been tried.
- The lighter socket fuse has been replaced and confirmed to be in good shape.
- The receptacle has been cleaned thoroughly and/or replaced.
The first step to reset a vehicle’s computer is to simply start and restart the engine. This is not likely to resolve your problem because you have already turned your vehicle on once to ensure that power is being sent to all outlets. It is still worth trying, though, as killing and restarting your car is a simple step that may potentially reset any computer glitches.
Performing a Complete Drive Cycle
If starting and restarting the engine proves unsuccessful, the next step toward resetting your computer would be to put your vehicle through a complete drive cycle. This can be accomplished through the following steps:
- Let your vehicle sit overnight – make sure that it is parked in a place that is less than 90°F and that all fans are turned off, and connected devices are unplugged. Also, make sure that your keys are out of the ignition, as this will ensure that no onboard computers are still booted up while the car is resting.
- Warm it up – after letting your vehicle rest overnight, turn it on the next morning and let it run in the park or idle for about five minutes. During this time, you can check the cigarette lighter socket. If it is working, the problem is solved. If not, drive your vehicle slowly through a residential area for several minutes, stopping completely at stop signs and accelerating up to a safe speed.
- Take your car onto the highway – get your vehicle up to 60 miles per hour and drive it for at least five miles. After you have reached five miles, bring it back for another slow drive through the neighborhood.
- Park your vehicle and leave it sitting overnight – test your electrical outlet one more time. If it is still not working, turn your car off and let it sit, just like in step one. Start your vehicle and try the cigarette lighter socket again.
Disconnecting the Battery for Computer Reset
If the socket still is not working, then it may be time to disconnect the battery to ensure that the computer is fully reset and that no faulty codes are causing electrical glitches. While it is annoying that disconnecting the car battery will also reset any saved settings, such as the clock or radio preferences, it is guaranteed to reset the computer.
Your car battery can be disconnected and reset using the following steps:
- Pop the hood and locate your battery – for most vehicles, the battery will be located near the front center under the hood.
- Disconnect the terminals – you will most likely need a small wrench to get the terminals loose. Once loose enough to detach, pull them straight up, making sure not to get them confused with each other. Use a rag to make sure the terminals and terminal heads are clean.
- Reattach the terminals – making sure that the positive and negative terminals are placed back from where you removed them, ensure a firm connection and tighten them back in place.
After exhausting these steps, you can be assured that the computer either is or is not causing an electrical glitch that is causing your cigarette lighter socket to fail.
Why Do Car Cigarette Lighter Sockets Fail?
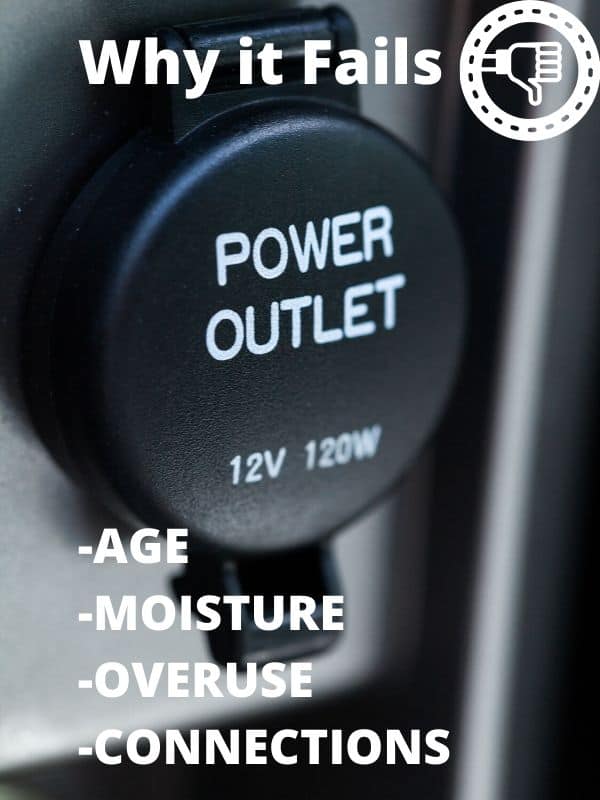
There are a number of reasons why your car cigarette socket may fail. Any one of the following combinations can lead to a blown fuse that results in a dead electrical outlet:
- Age – let’s face it: Dead lighter sockets are more likely in old vehicles than new ones. As with everything in life, the time has deteriorating effects, and years of exposure to heat can cause wiring and other electrical components to go bad.
- Moisture – while most fuse boxes are airtight with numerous layers of protection shielding the fuse wires from moisture, even the slightest introduction of moisture can cause a fuse to short out, breaking the electrical connection to your lighter socket.
- Overuse – as mentioned earlier in the article, the age of portable devices makes lighter sockets hot items in cars, with everything from phones to laptops to portable air compressors having adapters that allow for electric charging with lighter sockets. This heavy use expedites wear and tear.
- Non-compatible connections – as stated, most lighter socket ports are rated to handle 12V of electric potential, while most fuses can run 20 amps of current. If you try to charge a device that has greater power demands than what the fuse is rated to handle, you are at risk of blowing the fuse as it tries to force too much electricity through.
How Can You Keep a Car Cigarette Lighter Socket from Breaking?
While there is no way to guarantee that a lighter socket lasts for the life of your vehicle, there are several steps you can take to make sure that it lasts as long as possible:
- Check the power needs of your devices before connecting – this ensures that you are not trying to force more electricity through the system than it can handle.
- Unplug devices while not in use – by only using the lighter sockets to charge when necessary, you can minimize wear and tear on the components.
Thanks for visiting Drivinglife.net

